paddy
Full Member
   Nov '23 & Sept '24 Showcased Models Awarded
Member since: September 2023
Posts: 326
Sept 1, 2023 10:16:31 GMT -5
Sept 1, 2023 10:16:31 GMT -5
|
Post by paddy on Aug 19, 2024 16:17:59 GMT -5
Italeri 1/9 Triumph 3HW Some time (about 8 years ) ago I built the little Italeri Triumph 3HW, WWII despatch bike widely used by the British. At the time I thought one day I will build a civilian version of this and like all planned “things to do” its taken me all these years to have a go. The kit, much like Italeri s model classic cars started out as a metal and plastic Protar model in the 1960’s. Italeri bought Protar out and started producing their kits in all plastic. The problem here is component for component metal is obviously much stronger so some of their plastic parts are just to small to have the strength needed when originally designed in metal. The cars rely on a lot of screws, and these are self-tappers, designed to cut their own thread in alloy, screw that screw into the same part in plastic and it usually results in a burst hole with the plastic part cracked or in separate pieces. Anyway, the Italeri Triumph has no screws and although the original Protar frame was metal, the plastic one used now is well up to the job. These Triumph motorcycles were 350cc and produced just before the outbreak of war as a civilian machine, those already sold were requisitioned and all future production was to a military spec until 1941 when the Luftwaffe bombed the factory ending production. For this reason nearly all these bikes were in olive drab and after the war those that returned to civvy street remained like this so finding pictures of a civilian market model is not easy. Finding two the same is near impossible …. Fortunately in the early 70s after Protar finished, this kit was produced by ESCI for a short while as a civilian model and as such it still has the civilian parts in the Italeri Military boxing like the head lamp glass. As usual with motorcycle models smaller than 1:6 the limitations of plastic mouldings mean the spokes in the wheels are 1.1mm which scales up to about 10mm true size. Spokes are in reality 4-5mm so we need to start by re-spoking the wheels with 0.5mm rod. Having done one of these in 0.5mm piano wire and wrecked a load of wire cutters trying to cut the stuff I found my model shop had 0.43mm nickel silver rod which is perfect, still hard enough to be rigid but it cuts nicely. So here is my original attempt from years ago. This would have had large leather paniers but i cant paint leather so i scratch built the frames that would have carried them.  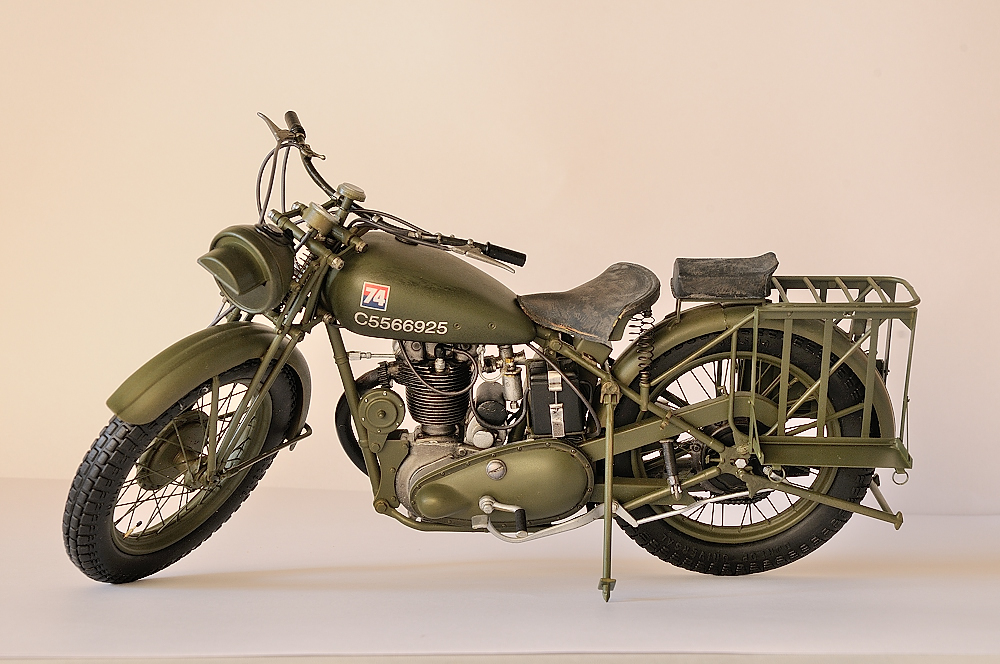
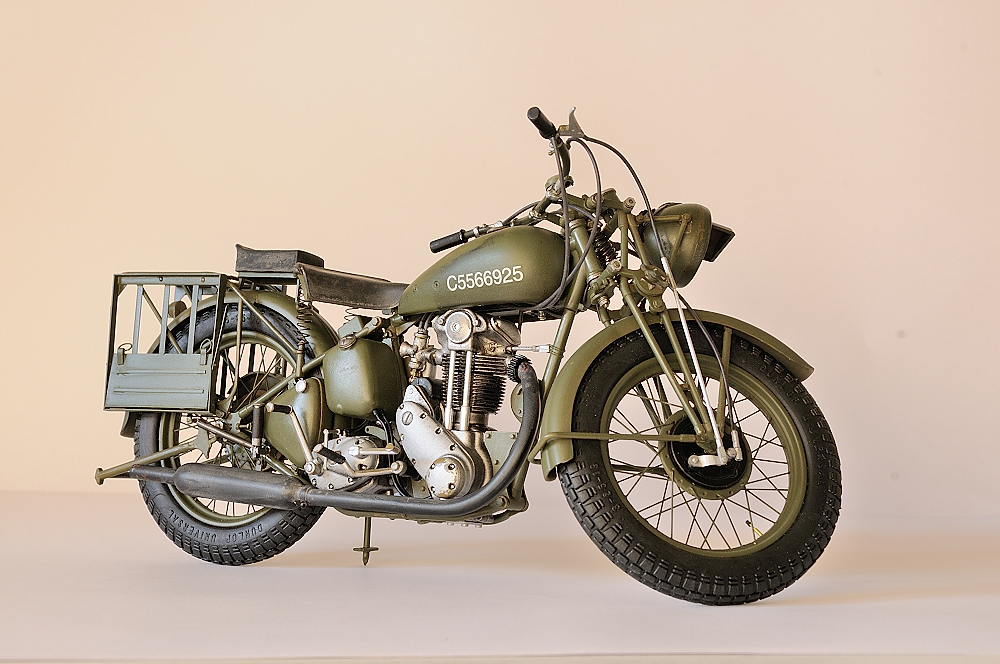 This also has the piano wire, impossible to work with spokes  So the new kit has arrived thanks Amazon , 25% cheaper than any online shop and ordered and delivered in just 7 hours....and they wonder why the shop is a dying relic. First thing is to do something with the wheels. Now the one above was my 1# attempt and now 8 years later attempt #2 having completely forgotten how i did the first... 
So these are the kit wheels. I'm sure most with any interest in this thread will know how to spoke wheels so unless i get a request i will skip this bit other than to say the larger the hub the easier the job. Unfortunately this bike has two very small flanges as above and as these are 40 spoke wheels you need to drill 20 holes in each  The first wheel i cut all the spokes out of one side which was a mistake and i had to use the other half to get the hub and rim position correct 
Second attempt and i just cut out half the spokes and then after fitting the new ones, cut the rest out   Long story short we now have the makings of a front wheel. at this stage the spoke nipples are lose on the spokes till i work out what to do with the rims ie: coloured, chrome alloy or black... 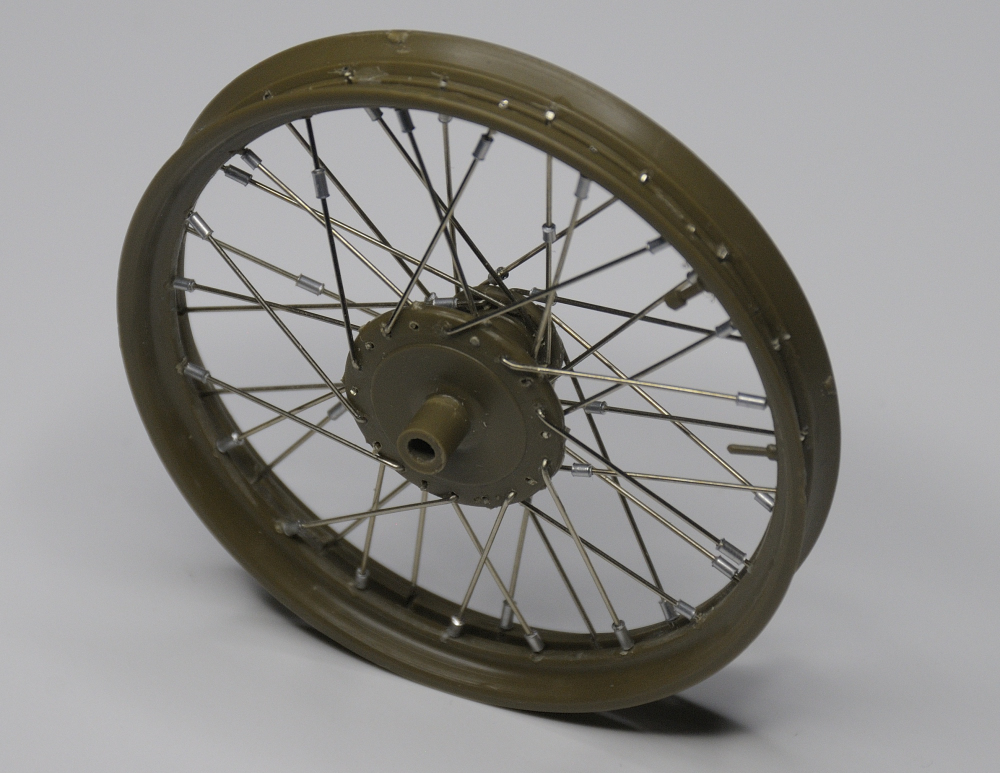 |
|
406 Silverado
Global Administrator     
Member since: November 2011
Posts: 10,228
Member is Online
MSC Staff
|
Post by 406 Silverado on Aug 19, 2024 16:24:05 GMT -5
The first one looked GREAT paddy but you're sure doing this second one in your typical "all out" style. Jeez man......you make this look waaaaaaaaaaaaaaaay too easy. This thread is now bookmarked.  |
|
|
|
Post by keavdog on Aug 19, 2024 16:33:21 GMT -5
Great job 8 years ago. Looking forward to what you do with this kit. That spoke work looks like a nightmare to do - you are a patient man.
|
|
406 Silverado
Global Administrator     
Member since: November 2011
Posts: 10,228
Member is Online
MSC Staff
|
Post by 406 Silverado on Aug 19, 2024 16:38:16 GMT -5
Great job 8 years ago. Looking forward to what you do with this kit. That spoke work looks like a nightmare to do - you are a patient man. There aint no way.....no way I'd be down for something like this. Just unbelievable work going on here. |
|
|
|
Post by kyledehart5 on Aug 19, 2024 18:10:27 GMT -5
Incredible!! What an undertaking and what a great upgrade.
|
|
handiabled
Administrator      Apr '23 Showcased Build Awarded
Member since: February 2023
Posts: 4,408 
MSC Staff
|
Post by handiabled on Aug 20, 2024 8:53:20 GMT -5
Bookmarked! That looks fantastic! Great idea using the existing spokes to get the new hubs centered.
|
|
paddy
Full Member
   Nov '23 & Sept '24 Showcased Models Awarded
Member since: September 2023
Posts: 326
Sept 1, 2023 10:16:31 GMT -5
Sept 1, 2023 10:16:31 GMT -5
|
Post by paddy on Aug 22, 2024 12:22:43 GMT -5
Well i got the hard work/foot slog done   As usual my planning is a bit adrift and not sure what to do now. some motorcycle wheels of this era 1937-39 are all black including black spokes, some are nickel plate with a black band round the spoke nipples , some have a body work colour band some have a black hub and shiny spokes with body colour rims and so on 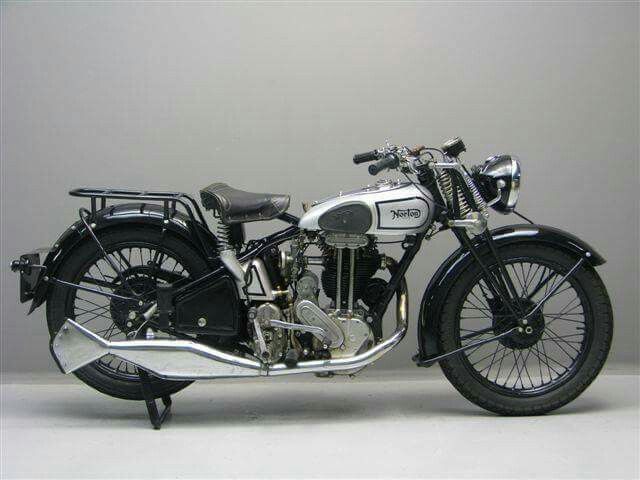  
I am leaning towards all black because i have backed myself down a blind alley by not painting the trims and hubs before i fitted the spokes. I cant honesty see a way to apply a stip round the centre of the rim now the spokes are fitted .... |
|
|
|
Post by project510 on Aug 22, 2024 12:55:50 GMT -5
I always liked the black wheels and spokes of my XS over the Chrome that came on my CB. Good luck! And lovely job on the wheels. Cant wait to see more of the build!
|
|
2whl
Full Member
   August '24 MoM Winner
Member since: September 2023
Posts: 445
Sept 10, 2023 12:21:52 GMT -5
Sept 10, 2023 12:21:52 GMT -5
|
Post by 2whl on Aug 22, 2024 13:02:48 GMT -5
I've thought about replacing the spokes on 1/9 and 1/6 scale several times, but have not been brave enough to try it yet. What are you using for spoke nipples, Paddy?
|
|
|
|
Post by kyledehart5 on Aug 23, 2024 0:02:52 GMT -5
Well those turned out just as amazing as I anticipated. Awesome stuff
|
|
handiabled
Administrator      Apr '23 Showcased Build Awarded
Member since: February 2023
Posts: 4,408 
MSC Staff
|
Post by handiabled on Aug 23, 2024 2:08:45 GMT -5
Your spoke replacement job looks magnificent!
|
|
paddy
Full Member
   Nov '23 & Sept '24 Showcased Models Awarded
Member since: September 2023
Posts: 326
Sept 1, 2023 10:16:31 GMT -5
Sept 1, 2023 10:16:31 GMT -5
|
Post by paddy on Aug 23, 2024 4:31:10 GMT -5
I've thought about replacing the spokes on 1/9 and 1/6 scale several times, but have not been brave enough to try it yet. What are you using for spoke nipples, Paddy? The spokes are .43mm nickel silver wire and the nipples are bits of 1mm od x 0.5 id mm alloy tube. the tube is really a bit oversize but smallest i could get in alloy but if you are going to paint them then brass tube comes in 0.8 x 0.4mm . Not all wheels lend themselves to this, you need to make sure the original hubs have a flange big enough to get a .5mm drill through so you can attach your spokes, I just about got away with these hubs but you need to be accurate with your drilling to get your 20 holes even. Most vintage bikes have a bigger hubs as they had drum brakes so providing the kit makers are accurate and give you a flange for spokes its more straight forward. I suppose what i am saying is, plan ahead before you get the cutters out   |
|
406 Silverado
Global Administrator     
Member since: November 2011
Posts: 10,228
Member is Online
MSC Staff
|
Post by 406 Silverado on Aug 23, 2024 5:27:58 GMT -5
Well i got the hard work/foot slog done 
I am leaning towards all black because i have backed myself down a blind alley by not painting the trims and hubs before i fitted the spokes. I cant honesty see a way to apply a stip round the centre of the rim now the spokes are fitted .... I can't tell you how many times I've done this type of thing in modeling by not planning ahead. I'm very certain that you will get through this but you're right......it can be frustrating to realize something after the fact. Hang in there paddy as I know that you'll overcome this obstacle. |
|
paddy
Full Member
   Nov '23 & Sept '24 Showcased Models Awarded
Member since: September 2023
Posts: 326
Sept 1, 2023 10:16:31 GMT -5
Sept 1, 2023 10:16:31 GMT -5
|
Post by paddy on Aug 24, 2024 5:32:55 GMT -5
Well i went with black rims and shinny spokes. Not the easiest option but its ok. I think i might need to give the spokes a semi gloss finish as maybe for a vintage bike they are a bit blingy. Again note to self .. "make a plan before you start" Before and after   My research for original colours has drawn a blank The best i have come up with is as Henry Ford said, you can have any colour as long as its black. The only option seems to have been a coloured petrol tank . Most pictures that look original seem to be ex military painted in various colour schemes after the war. like this 
this was not an option on the 350 single but has been copied from a factory option for the later twin cylinder shown below so this single is almost certainly ex military and painted after the war  |
|
handiabled
Administrator      Apr '23 Showcased Build Awarded
Member since: February 2023
Posts: 4,408 
MSC Staff
|
Post by handiabled on Aug 24, 2024 5:39:59 GMT -5
Great choice! They turned out awesome!
|
|
406 Silverado
Global Administrator     
Member since: November 2011
Posts: 10,228
Member is Online
MSC Staff
|
Post by 406 Silverado on Aug 24, 2024 6:18:21 GMT -5
Don't you just love it when all of the research leads you right back around to your original starting point paddy? lol Been there and done that many times and it looks like you are headed in a good direction given the material that you've come up with. Dude.......the difference between the before and after pictures that you took of those wheels is just off the charts. That is some fancy foot work there buddy.  |
|
|
|
Post by kyledehart5 on Aug 24, 2024 15:05:33 GMT -5
Wheels look incredible. And I love that paint scheme even if not factory correct for that bike.
|
|
buddho
Forum Moderator     
Member since: February 2019
Posts: 1,287 
MSC Staff
|
Post by buddho on Aug 24, 2024 16:18:52 GMT -5
Those rims are beautiful!
|
|
paddy
Full Member
   Nov '23 & Sept '24 Showcased Models Awarded
Member since: September 2023
Posts: 326
Sept 1, 2023 10:16:31 GMT -5
Sept 1, 2023 10:16:31 GMT -5
|
Post by paddy on Aug 25, 2024 5:53:41 GMT -5
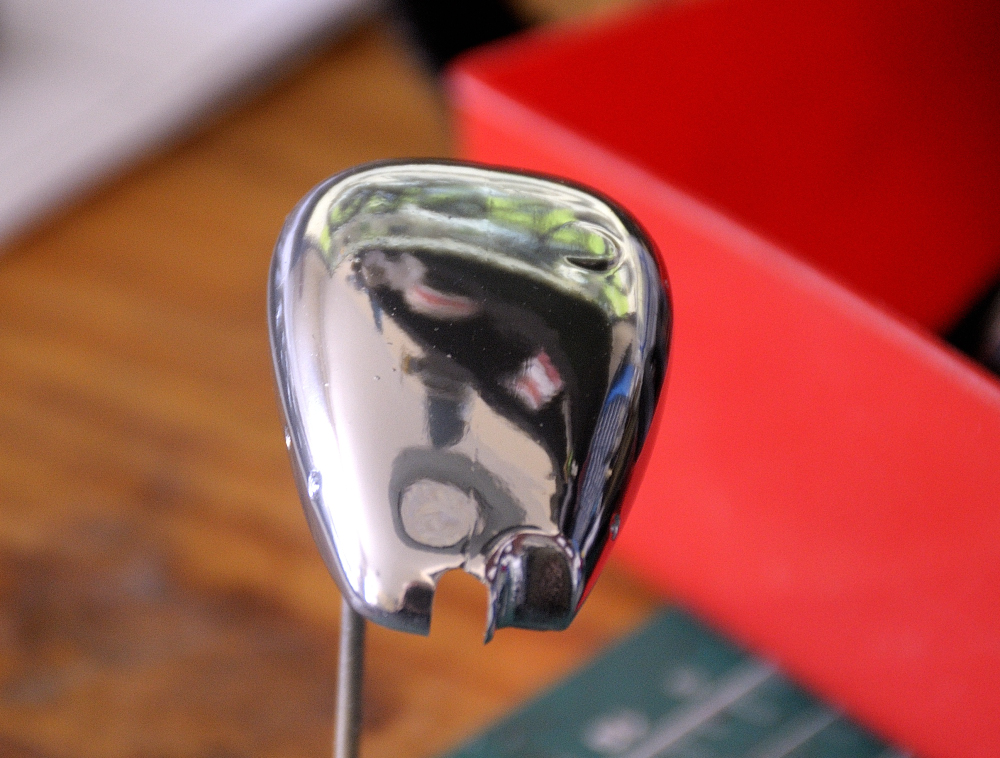
Fiddling about last night with a few ancillaries Carb is pretty good OTB given this kits origins are 60 years old  Kit headlight has a black out shield which incorporates the rim so i had to cut the middle out to salvage the rim. Luckily the kit still has the glass included but i will need to make a reflector   |
|
handiabled
Administrator      Apr '23 Showcased Build Awarded
Member since: February 2023
Posts: 4,408 
MSC Staff
|
Post by handiabled on Aug 25, 2024 7:54:48 GMT -5
That carburetor looks fantastic!
|
|
paddy
Full Member
   Nov '23 & Sept '24 Showcased Models Awarded
Member since: September 2023
Posts: 326
Sept 1, 2023 10:16:31 GMT -5
Sept 1, 2023 10:16:31 GMT -5
|
Post by paddy on Aug 26, 2024 13:59:10 GMT -5
Holiday here today so did a bit of painting  We have MRP chrome over gloss black on the larger covers which sort of works for polished alloy Molotow chrome via airbrush on small chrome parts and handlebars. Tamiya gloss aluminium on cast case which will get a matt coat when hard Semigloss MRP black on barrel and head which will also get a mat coat eventually. |
|
406 Silverado
Global Administrator     
Member since: November 2011
Posts: 10,228
Member is Online
MSC Staff
|
Post by 406 Silverado on Aug 26, 2024 14:20:29 GMT -5
Nice 'n smooth paint application on each of those parts and those headlights are looking great. I had no idea that this kit was that old and you're right......that carb looks great for a kit of this age.
|
|
moparman18064
Full Member
   Oct '24 Showcased Model Awarded
Member since: January 2024
Posts: 555
Jan 5, 2024 20:28:50 GMT -5
Jan 5, 2024 20:28:50 GMT -5
|
Post by moparman18064 on Aug 26, 2024 14:23:30 GMT -5
WOW WOW WOW! I am going to call my neighbor to pick my jaw up off the floor. Wheel work, just incredible. Love the carb details. Carry on!
|
|
406 Silverado
Global Administrator     
Member since: November 2011
Posts: 10,228
Member is Online
MSC Staff
|
Post by 406 Silverado on Aug 26, 2024 14:31:21 GMT -5
WOW WOW WOW! I am going to call my neighbor to pick my jaw up off the floor. Wheel work, just incredible. Love the carb details. Carry on! Right??!! |
|
|
|
Post by kyledehart5 on Aug 27, 2024 1:42:55 GMT -5
Beautiful and utterly convincing paint work!! Everything is looking incredible.
|
|
handiabled
Administrator      Apr '23 Showcased Build Awarded
Member since: February 2023
Posts: 4,408 
MSC Staff
|
Post by handiabled on Aug 27, 2024 2:06:13 GMT -5
Your metallic paint work is masterfully done. The textures and appearance of each engine component looks spot on and the chrome work is perfect!
|
|
paddy
Full Member
   Nov '23 & Sept '24 Showcased Models Awarded
Member since: September 2023
Posts: 326
Sept 1, 2023 10:16:31 GMT -5
Sept 1, 2023 10:16:31 GMT -5
|
Post by paddy on Aug 28, 2024 7:54:23 GMT -5
|
|
paddy
Full Member
   Nov '23 & Sept '24 Showcased Models Awarded
Member since: September 2023
Posts: 326
Sept 1, 2023 10:16:31 GMT -5
Sept 1, 2023 10:16:31 GMT -5
|
Post by paddy on Aug 31, 2024 12:16:52 GMT -5
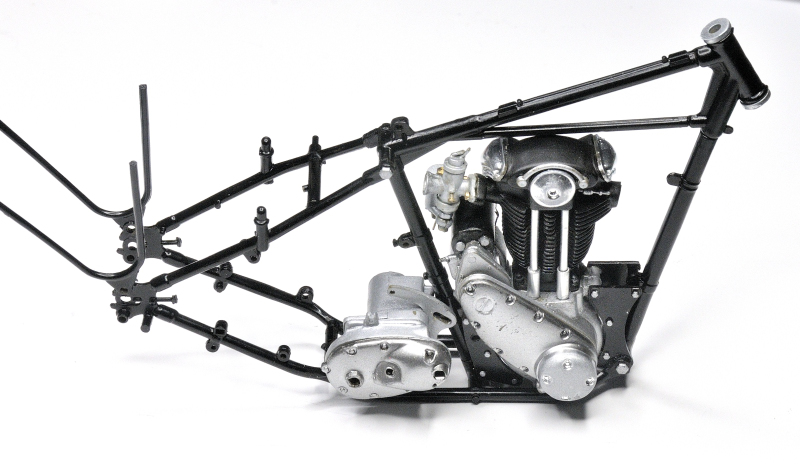 Everything seem to be fitting reasonably well, i had a delivery today of a can of Tamiya Burgundy TS11 . i will spray a test piece first and see if its anywhere near the colour i imagined. The lid looks a bit strange but often the lids can be misleading and Dark but a white base might help. |
|
|
|
Post by Steve Zuleski on Aug 31, 2024 13:26:42 GMT -5
Wow, another great adventure, sorry I missed the start, Paddy. The chrome work turned out great, but the spoke work is tops. I was under the impression you could get a kit for those, but using the right sized wire seems more practical and much easier to be specific for your needs. I've never monkeyed with spokes either, but you've proven the difference is blaring.
This would go along with picking up the correct tiny screws, bolts, and wires, etc. I need a good variety, but I prefer to have them in hand rather than try to figure out the best scale needed from a list. Alex De Leon is really good at spoking it, among other things, but he does the bikes incredibly well. That's the first thing I thought of when I saw you doing the spokes. Excellent conversion, Paddy!
Ruck On!
|
|
paddy
Full Member
   Nov '23 & Sept '24 Showcased Models Awarded
Member since: September 2023
Posts: 326
Sept 1, 2023 10:16:31 GMT -5
Sept 1, 2023 10:16:31 GMT -5
|
Post by paddy on Aug 31, 2024 16:01:47 GMT -5
Thanks Steve, had a few duff builds recently so wanted to get back to my comfort zone with a bike. A 1/9 bike is a 1000 times easier than a 1/32 aircraft :-) Alex is a real inspiration but he scratch builds and thats way above my league , i need the basics to build on  . |
|


