mz3
Full Member
  
Member since: October 2012
Posts: 649
Oct 14, 2012 21:09:43 GMT -5
Oct 14, 2012 21:09:43 GMT -5
|
Post by mz3 on Sept 29, 2024 21:09:35 GMT -5
|
|
|
|
MG Sinanju
Sept 30, 2024 14:53:13 GMT -5
via mobile
mz3 likes this
Post by kyledehart5 on Sept 30, 2024 14:53:13 GMT -5
Very cool! That is a neat looking unit. I am not in the know on that waist issue but looks like you’ve got that handled. Looking forward to seeing it come back together.
|
|
mz3
Full Member
  
Member since: October 2012
Posts: 649
Oct 14, 2012 21:09:43 GMT -5
Oct 14, 2012 21:09:43 GMT -5
|
Post by mz3 on Sept 30, 2024 18:28:07 GMT -5
The waist won't be an issue at all. If you read about it online it seems to be a big deal. But having more experience then a typical gunpla builder comes in handy. Anyway, fully built...      Right now the weapons are still dirty. I don't usually clean the nubs and seams on these until later in the build. These weapons are some of the best I've come across in Gundam. They can break down into different components and reconfigure in different ways. Now time to break it all down. |
|
|
|
MG Sinanju
Sept 30, 2024 22:30:36 GMT -5
via mobile
mz3 likes this
Post by kyledehart5 on Sept 30, 2024 22:30:36 GMT -5
This looks like a super cool kit and it looks awesome built up already. Really am looking forward to seeing where you go with it from here.
|
|
Real G
Full Member
  
Member since: April 2023
Posts: 880 
|
Post by Real G on Oct 1, 2024 12:03:32 GMT -5
I look forward to seeing this get built! Such a cool and iconic mobile suit!
|
|
|
|
Post by Medicman71 on Oct 1, 2024 12:49:33 GMT -5
Very cool! I'm gonna be following and taking notes.
|
|
mz3
Full Member
  
Member since: October 2012
Posts: 649
Oct 14, 2012 21:09:43 GMT -5
Oct 14, 2012 21:09:43 GMT -5
|
Post by mz3 on Oct 4, 2024 17:59:18 GMT -5
Neked robot....  Overts yer eye chit'rin |
|
|
|
Post by kyledehart5 on Oct 5, 2024 4:16:11 GMT -5
|
|
spook
Full Member
  
Member since: June 2024
Posts: 187 
|
Post by spook on Oct 5, 2024 12:30:06 GMT -5
Dude that's Narley !
|
|
mz3
Full Member
  
Member since: October 2012
Posts: 649
Oct 14, 2012 21:09:43 GMT -5
Oct 14, 2012 21:09:43 GMT -5
|
Post by mz3 on Oct 7, 2024 20:10:19 GMT -5
Ready for some frame stew...  Everything for the frame is sanded and cleaned. Time for seasoning. |
|
Real G
Full Member
  
Member since: April 2023
Posts: 880 
|
MG Sinanju
Oct 10, 2024 15:41:57 GMT -5
via mobile
mz3 likes this
Post by Real G on Oct 10, 2024 15:41:57 GMT -5
Some shoyu for the Shinanju? 😁
Un, shoppaku te, yappari umai!
|
|
mz3
Full Member
  
Member since: October 2012
Posts: 649
Oct 14, 2012 21:09:43 GMT -5
Oct 14, 2012 21:09:43 GMT -5
|
Post by mz3 on Oct 13, 2024 23:35:18 GMT -5
Tomato soup....  The plastic for the frame seems much softer then normal. I had 3 more small breaks. Nothing serious, I only had to pin this one.  There are 2 versions of this kit. The "Ver. Ka" version and the "OVA" version. The ver ka came out in 2008 and used ABS for the frame. Supposedly it was too stiff and kept breaking. The joints were too tight. This version, the OVA, uses polystyrene. But the joints are still pretty stiff. Obviously since I a few breaks. Edit- technically there are 3 versions of this kit. Technically, technically there are 6. Maybe 7, I'm not exactly sure at this point. |
|
mz3
Full Member
  
Member since: October 2012
Posts: 649
Oct 14, 2012 21:09:43 GMT -5
Oct 14, 2012 21:09:43 GMT -5
|
Post by mz3 on Oct 27, 2024 18:34:38 GMT -5
145ish paint sticks later...   Frame parts are primed. There are like 160ish parts just for the frame. Mr surfacer 1500 black. I'll go over each part again and check for flaws in them. I already found a handful that need more work. After that I plan on painting all of it mr color metalic black. |
|
|
|
MG Sinanju
Oct 27, 2024 19:41:58 GMT -5
via mobile
mz3 likes this
Post by dupes on Oct 27, 2024 19:41:58 GMT -5
That is a LOT of paint sticks. 😬
|
|
mz3
Full Member
  
Member since: October 2012
Posts: 649
Oct 14, 2012 21:09:43 GMT -5
Oct 14, 2012 21:09:43 GMT -5
|
MG Sinanju
Oct 27, 2024 20:31:47 GMT -5
via mobile
Post by mz3 on Oct 27, 2024 20:31:47 GMT -5
The joys of painting gunpla.
|
|
mz3
Full Member
  
Member since: October 2012
Posts: 649
Oct 14, 2012 21:09:43 GMT -5
Oct 14, 2012 21:09:43 GMT -5
|
Post by mz3 on Nov 3, 2024 16:55:26 GMT -5
Blah...   Small update. Everything got a thin shot of mr color metallic black. I pulled out all the joint and upper torso parts for detail painting. And there's alot.  It will be a mix of brush and spraying. |
|
Real G
Full Member
  
Member since: April 2023
Posts: 880 
|
Post by Real G on Nov 4, 2024 12:44:39 GMT -5
Great googly-moogly, that is a LOT of paint sticks!
Are you going to do the multi metallic color frame thing that seems to be in vogue nowadays?
|
|
mz3
Full Member
  
Member since: October 2012
Posts: 649
Oct 14, 2012 21:09:43 GMT -5
Oct 14, 2012 21:09:43 GMT -5
|
Post by mz3 on Nov 4, 2024 13:23:08 GMT -5
Honestly with the amount of parts, I think I'm just going to pick out details on the visible parts and not worry about anything else. I was always planning just a black frame. The metallic black was a spur of the moment decision.
|
|
|
|
Post by kyledehart5 on Nov 4, 2024 21:50:13 GMT -5
Man, that is a TON of parts. Wow.
|
|
mz3
Full Member
  
Member since: October 2012
Posts: 649
Oct 14, 2012 21:09:43 GMT -5
Oct 14, 2012 21:09:43 GMT -5
|
Post by mz3 on Nov 9, 2024 15:19:45 GMT -5
It is, honestly I didn't really understand how many parts there were until I took it apart. But enough of the boring stuff, time fo detail.paint...    I'm using AK real color markers for some of the painting. I was a little hesitant to tey these, bad experiences in the past with Gundam markers. But I think these are good. I'm only using aluminum and gunmetal. I also bought a liquid chrome marker from hobby lobby, using it very sparingly. The rest is being sprayed, mr color bunrt iron. There's a bunch of touch ups already, I did most of this after work when I was a little tired. Hopefully I'll do better today. |
|
mz3
Full Member
  
Member since: October 2012
Posts: 649
Oct 14, 2012 21:09:43 GMT -5
Oct 14, 2012 21:09:43 GMT -5
|
Post by mz3 on Nov 11, 2024 18:54:46 GMT -5
|
|
|
|
Post by 406 Silverado on Nov 11, 2024 19:01:05 GMT -5
Somehow I missed this thread when you started it MZ. I really enjoy watching you not only build these up but paint and weather them as well. You just keep putting layer after layer of wear and tear into your builds bud.
Bookmarked!!!
|
|
|
|
Post by kyledehart5 on Nov 12, 2024 5:48:51 GMT -5
My eyes bleed for you!! Nice work.
|
|
mz3
Full Member
  
Member since: October 2012
Posts: 649
Oct 14, 2012 21:09:43 GMT -5
Oct 14, 2012 21:09:43 GMT -5
|
Post by mz3 on Nov 14, 2024 17:43:31 GMT -5
I really enjoy watching you not only build these up but paint and weather them as well. You just keep putting layer after layer of wear and tear into your builds bud. This one is supposed to be glossy and shiny. It's taking everything I got to not start damaging it. It's very hard for me!!! LoL! Update... I have started to reassemble the frame. I'm going over ever part again and making sure anything that shows will look nice.  Some of the red and black parts are built into the frame, so I have to leave some of it apart for now. Some parts needed to be resanded and finished again...  The eye in the head was first painted with the liquid chrome marker then hit with tamiya clear green. It looks alot better irl....  The Neo Zeon symbol on the upper chest piece is like misshapen or not formed properly. I didn't even notice it until I was masking for the vents under it. It brush painted it and then hit it with black oil paint. It just looks weird. I'll try to paint it again with the gold after the oil dries...  And finally...  I thought I lost this part. It goes on the back and holds the tube and beads in place. I started tearing my desk apart for it. Luckily I found it in the small cup where I have all the thruster bells. Don't ask me how it got there. Mild heart attack avoided. |
|
mz3
Full Member
  
Member since: October 2012
Posts: 649
Oct 14, 2012 21:09:43 GMT -5
Oct 14, 2012 21:09:43 GMT -5
|
Post by mz3 on Nov 15, 2024 18:40:52 GMT -5
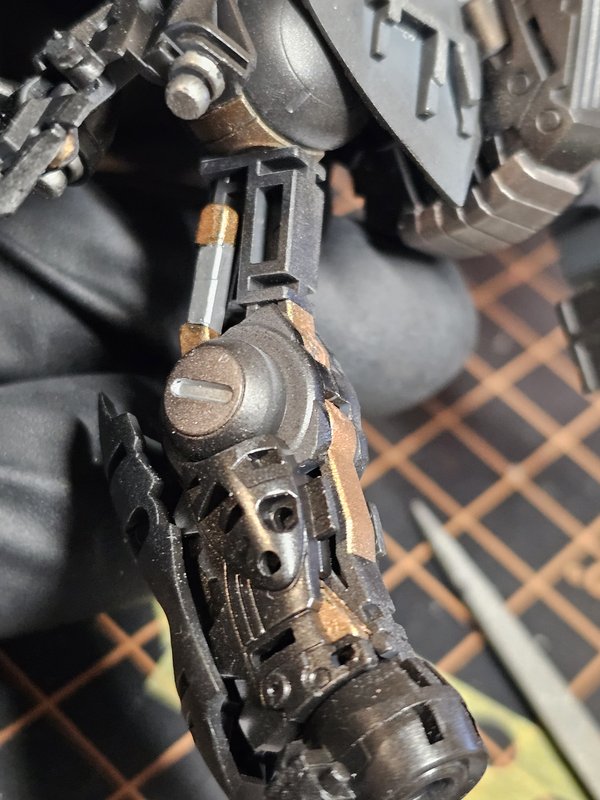
Update...     Most everything is together, I won't put the upper on to the waist until everything is done. I went over all the painted areas with a gloss lacquer to help protect the paint. It's was a waste of time on some of the parts.  The paint on the front of the joints on both elbows are rubbing somehow. I didn't anticipate this and I'm kind of stuck with it. I think the joint is flexing and causing the scratches. But, I had to glue the back of the elbows together to fix another problem. So there it is. Maybe I'll put a small amount of weathering on this to cover, there are some other small problems that are pissing me off right now. That gold part under the chin, posted about above, looks like crap! I tried to touch it up and all it do was make it look worse. I took a macro pic of it and there are lines going across it unevenly. So I'll probably try to sand it down a bit and see if I can atleast hide them better. A wash seems to make them more pronounced. Other than those, I'm really enjoying this build. I got Full Frontal (the pilot) painted and install, but you can only see his boots.  Lame! 😆 |
|
Real G
Full Member
  
Member since: April 2023
Posts: 880 
|
Post by Real G on Nov 15, 2024 22:17:59 GMT -5
That character sure had an odd name! I guess he doesn’t like company. I sure would not want to go around asking people if they know where I can find Full Frontal. 😳
The frame is coming along nicely! It looks like a functioning piece of hardware.
|
|
mz3
Full Member
  
Member since: October 2012
Posts: 649
Oct 14, 2012 21:09:43 GMT -5
Oct 14, 2012 21:09:43 GMT -5
|
Post by mz3 on Nov 16, 2024 15:03:26 GMT -5
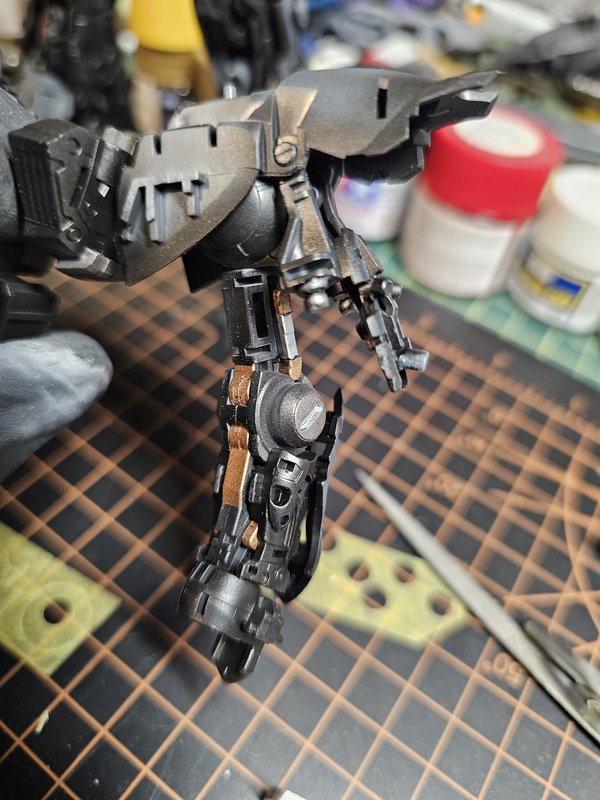
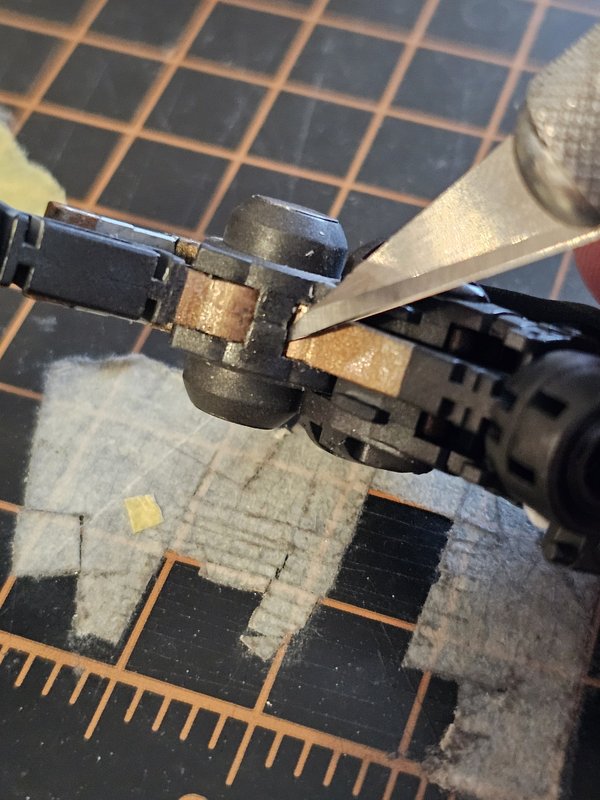
I always thought it was a weird name. Like something was translated wrong. So, I think I fixed the elbows. I'm putting alot of work in to this one and didn't want to get screwed over by small scratches. Last night I cemented the front of the elbows and clamped them forna few hours...  Then took a fresh exacto blade and carefully went into the gap between the joints and with the back of the blade started scrapping out material with the back of the blade...  I will have to sand the copper areas AGAIN and repaint them AGAIN. But I think I got enough of the plastic that was scratching out. I also sannded the emblem on the chest piece...  Not exactly sure what I'll do here, but I think it's smoothish now. Then I wasted an hour or so watching garbage...  |
|
|
|
MG Sinanju
Nov 18, 2024 18:17:54 GMT -5
via mobile
mz3 likes this
Post by kyledehart5 on Nov 18, 2024 18:17:54 GMT -5
Excellent work. Nice job getting through the issues. I like the canopy with the pilot, whatever his name might be. lol.
|
|
|
|
Post by project510 on Nov 21, 2024 0:54:12 GMT -5
Dammit this is cool.
|
|
mz3
Full Member
  
Member since: October 2012
Posts: 649
Oct 14, 2012 21:09:43 GMT -5
Oct 14, 2012 21:09:43 GMT -5
|
Post by mz3 on Nov 22, 2024 20:19:52 GMT -5
Small update.... I started working on the black armor parts. I went over each part with 2000 and 3000 sanding sponges to make sure they are smooth. Primed with mr surfacer 1500 grey.  Most of these parts will have gold accents on them, I'm still trying to figure out the best way to do this. I'm probably going to try a reverse wash. I'm not big on terms, it's basically just removing a top layer of paint on the raised areas. I also only had 1 color of red, Tamiya xf7, so I ordered a few different shades...  I don't want the red parts to be just one shade. Right now I'm leaning towards using the Italian and Wine reds. I want the red parts to be a little more flamboyant than what I normally paint. |
|