modelcarjr
Full Member
   July '24 Showcased Build Awarded
Member since: March 2023
Posts: 646
Mar 3, 2023 13:07:26 GMT -5
Mar 3, 2023 13:07:26 GMT -5
|
Post by modelcarjr on Sept 30, 2024 22:20:38 GMT -5
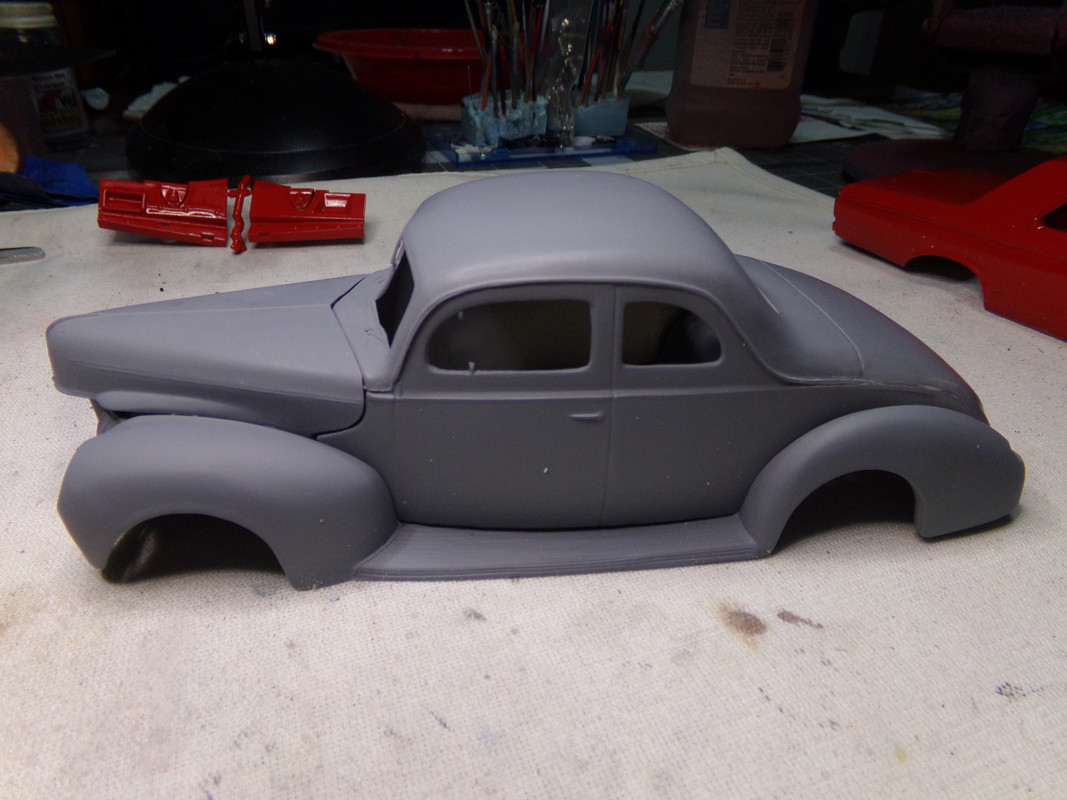
I am starting this Moebius kit by first painting the body and related parts. I used a dark gray primer under the Dupli=Color Bright Red for the body in order to get a darker red that might be considered Medium Red or even stretch to Ruby Red. In any event, I think it looks pretty good so I'll rub it out tomorrow. In the meantime, since the weather is nice here, I am going to get some more bodies painted. Here's one that needed a lot of prep work on the body - lots of flash and a nasty mold line on the both sides of the trunk, along the trim line tapering off at the rear of the trunk. Its a WalMart "Blue Light Special" from years ago with the Dodge L-700 truck and trailer. I'll paint it with my new favorite color tomorrow, Dupli-Color Royal Blue. I need to get some bodies painted while the weather is good to get ready for winter. Thanks for looking! 😎      |
|
kyledehart5
Forum Moderator      Dec '23 Showcased Model Awarded
Member since: July 2023
Posts: 7,245
Member is Online
MSC Staff
|
Post by kyledehart5 on Sept 30, 2024 22:35:53 GMT -5
Sweet!! This will be a cool build for sure. I hear you in getting some bodies painted for winter too. It’s going to be on us before we know it!
|
|
TJ
Senior Member
    June '23 Showcased Model Awarded
Member since: May 2023
Posts: 2,194
Member is Online
May 14, 2023 18:18:36 GMT -5
May 14, 2023 18:18:36 GMT -5
|
Post by TJ on Oct 1, 2024 4:22:19 GMT -5
What's this winter you people talk about? Winter here is about a week of 45 degrees. I love it.
|
|
|
|
Post by 406 Silverado on Oct 1, 2024 4:29:05 GMT -5
Off to a good start on this one John. Aside from painting issues, I'm looking forward to "winter" here in south Tx. It's more of an extended fall/ early spring type weather down here but it sure beats the dead middle of summer mid 90's with 1000% humidity blues.  |
|
handiabled
Administrator      Apr '23 Showcased Build Awarded
Member since: February 2023
Posts: 4,508 
MSC Staff
|
Post by handiabled on Oct 1, 2024 5:41:51 GMT -5
Winter? Here? I'm in no hurry!!! You have a busy bench! This should be a cool one to see come together.
|
|
modelcarjr
Full Member
   July '24 Showcased Build Awarded
Member since: March 2023
Posts: 646
Mar 3, 2023 13:07:26 GMT -5
Mar 3, 2023 13:07:26 GMT -5
|
Post by modelcarjr on Oct 2, 2024 21:20:41 GMT -5
Thanks, Kyle, TJ, Joe, and Handlabled! I appreciate your comments! I rubbed out the Belvedere and got it foiled. Now I just have to paint all the other parts. The 40 Ford is a different story. I noticed while I was rubbing it out that there were half circle thingys on the cowl. I can't imagine injector pin marks there and I missed them while prepping the body. There was also a flare of plastic on the lip of the hood that needed to be sanded out. So this Lindberg body was a mess out of the box. I sanded everything out and repainted it. So tomorrow I'll rub it out and hopefully can move on. I'll also try to get some more bodies painted while the weather here is good. Thanks for looking! 😎      |
|
handiabled
Administrator      Apr '23 Showcased Build Awarded
Member since: February 2023
Posts: 4,508 
MSC Staff
|
Post by handiabled on Oct 3, 2024 2:03:34 GMT -5
Great looking finish on the Belvedere! That's a shame about the Ford
|
|
kyledehart5
Forum Moderator      Dec '23 Showcased Model Awarded
Member since: July 2023
Posts: 7,245
Member is Online
MSC Staff
|
Post by kyledehart5 on Oct 3, 2024 7:14:49 GMT -5
Looking good!! And I absolutely love that Ford! What a fantastic color. I hope it turns out for you after those issues
|
|
modelcarjr
Full Member
   July '24 Showcased Build Awarded
Member since: March 2023
Posts: 646
Mar 3, 2023 13:07:26 GMT -5
Mar 3, 2023 13:07:26 GMT -5
|
Post by modelcarjr on Oct 5, 2024 18:29:53 GMT -5
Thanks, Handlabled and Kyle! I appreciate your comments! Well, I am still on my quest to paint a few bodies to store for when the weather gets bad. I bought this AMT 71 Mustang Mach 1 a few days ago and thought I would build it since it has the decals. I built the AMT 007 71 Mach 1 and bought the Revell 007 Mach 1 and thought I would build it as a performance 71 Mach 1. But there are a few parts missing in that kit as well as the decals. Then I remembered the review article in Model Car Magazine that indicated that the parts missing were the hood locks, rear spoiler, front air dam and the decals. Well, I looked at the Revell kit again and saw that the hood locks are still included on the chrome tree although not used in the 007 kit. Then I found a rear spoiler and an air cleaner that should work. I still have the silver decals from the Boss 351 that I built for the stripes and I can use the silver pin stripes and Mach I decals in the AMT kit while painting the hood silver. I still haven't found the perfect front air dam or "chin whiskers", if you prefer, but I have something that will substitute possibly. So I have a plan! paint the AMT kit white and use the black decals and paint the hood center and bottom trim black. By the way, the rear panel of the AMT kit is severely warped. I straightened it out with some hot water but it still isn't perfect. Then, I'll paint the Revell kit Light blue Metallic with the silver decals from the Boss 351 kit and the AMT kit with the hood painted silver in the center. I'll use these additional parts and I'll have a performance 71 Mach 1 instead of a 007 movie car. Oh, and I finished rubbing out the 40 Ford. I'll get back to the Belvedere in a bit. Thanks for looking! 😎       |
|
kyledehart5
Forum Moderator      Dec '23 Showcased Model Awarded
Member since: July 2023
Posts: 7,245
Member is Online
MSC Staff
|
Post by kyledehart5 on Oct 5, 2024 21:37:35 GMT -5
You have a busy bench going on right now!! Some great ideas
|
|
handiabled
Administrator      Apr '23 Showcased Build Awarded
Member since: February 2023
Posts: 4,508 
MSC Staff
|
Post by handiabled on Oct 6, 2024 4:42:26 GMT -5
That's quite the workload! I will be lucky to get ONE build off of my bench by the end of the year.
|
|
modelcarjr
Full Member
   July '24 Showcased Build Awarded
Member since: March 2023
Posts: 646
Mar 3, 2023 13:07:26 GMT -5
Mar 3, 2023 13:07:26 GMT -5
|
Post by modelcarjr on Oct 6, 2024 20:26:36 GMT -5
Thanks, guys! I am moving each to a separate wip since this one is getting too crowded. Thanks for looking!
|
|
modelcarjr
Full Member
   July '24 Showcased Build Awarded
Member since: March 2023
Posts: 646
Mar 3, 2023 13:07:26 GMT -5
Mar 3, 2023 13:07:26 GMT -5
|
Post by modelcarjr on Oct 17, 2024 19:18:07 GMT -5
So I am back on this one and will stay with it until completion, Today, I finished the engine. I can't believe I spent most of the day on it but I added plug wires and heater hoses and detailed some of the parts. This is the Commando 426 engine that I mixed up some paint for and painted turquoise. There are actually two engines in this kit with the Max Wedge being the other one. I'll save it for something else, I noticed by looking at photos on the internet that the heater hoses route over the intake on the left side of the engine on this one. So the left side is busy and its hard to see the plug wires but they are there. Interior is next. Thanks for looking! 😎   |
|
modelcarjr
Full Member
   July '24 Showcased Build Awarded
Member since: March 2023
Posts: 646
Mar 3, 2023 13:07:26 GMT -5
Mar 3, 2023 13:07:26 GMT -5
|
Post by modelcarjr on Oct 18, 2024 17:53:01 GMT -5
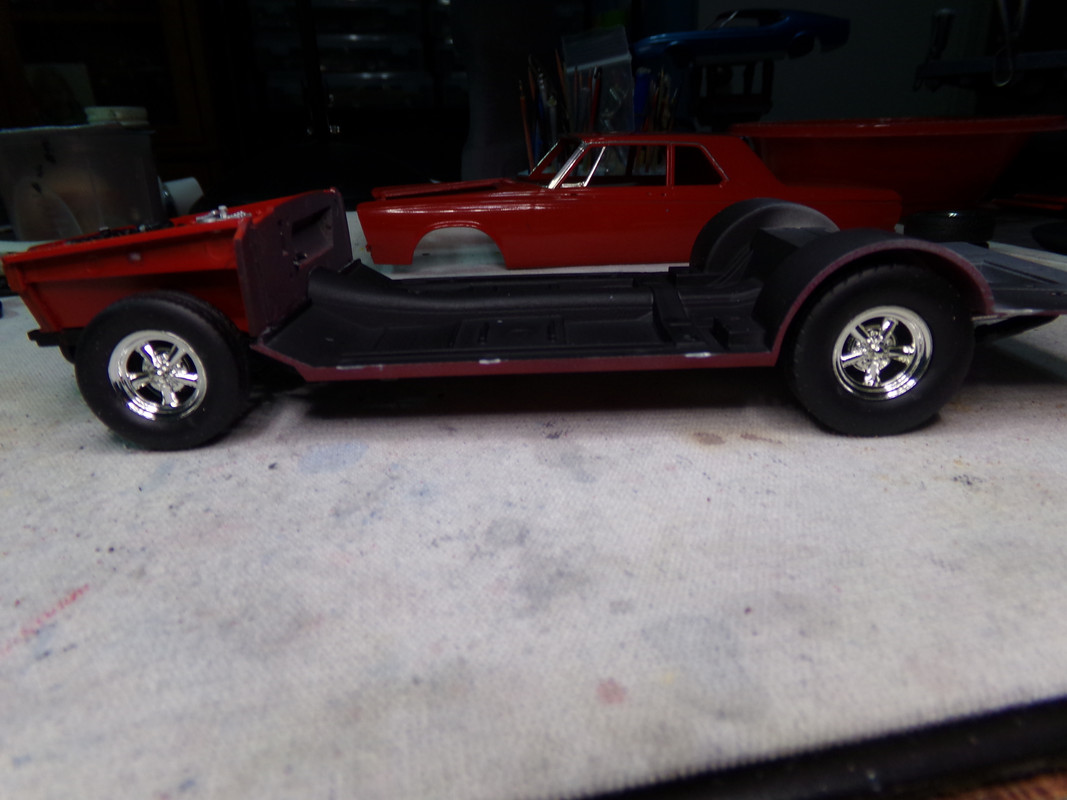
I forgot that this one was one of those kits that build the interior on the chassis so I had to complete the chassis first. I think I have the doghouse square, at least as square as i can get it. As usual, its not an easy assembly. A couple of issues with this Moebius kit; the steering box doesn't really fit. Its suppose to attach to the firewall and dangle while you put the engine in. It doesn't really connect to the tie rod so I just left it out. The other issue was that the main chassis platform is missing a drilled hole on the right side to attach the subframe. So that was easy to fix by drilling a hole for the mounting. Other than those two items it went together pretty well. I used the bigger wheels and tires (which are treaded) on the back. Tomorrow the interior! Thanks for looking! 😎    |
|
modelcarjr
Full Member
   July '24 Showcased Build Awarded
Member since: March 2023
Posts: 646
Mar 3, 2023 13:07:26 GMT -5
Mar 3, 2023 13:07:26 GMT -5
|
Post by modelcarjr on Oct 19, 2024 8:25:47 GMT -5
Here's a quick update: Follow the instructions when putting the body on the chassis. The rear of the chassis goes in first and then work your way to the front. The other way doesn't work!  |
|
brandonk
Full Member
   Jan '24 Showcased Model Awarded
Member since: May 2023
Posts: 1,310
May 14, 2023 13:45:45 GMT -5
May 14, 2023 13:45:45 GMT -5
|
Post by brandonk on Oct 19, 2024 10:16:36 GMT -5
That Belvedere is very cool. I'll have to get one. The 40 is SICK, I love that color.
|
|
kyledehart5
Forum Moderator      Dec '23 Showcased Model Awarded
Member since: July 2023
Posts: 7,245
Member is Online
MSC Staff
|
Post by kyledehart5 on Oct 19, 2024 11:47:10 GMT -5
Slick looking Belvedere!! That’s a great looking red.
|
|
modelcarjr
Full Member
   July '24 Showcased Build Awarded
Member since: March 2023
Posts: 646
Mar 3, 2023 13:07:26 GMT -5
Mar 3, 2023 13:07:26 GMT -5
|
Post by modelcarjr on Oct 19, 2024 18:24:58 GMT -5
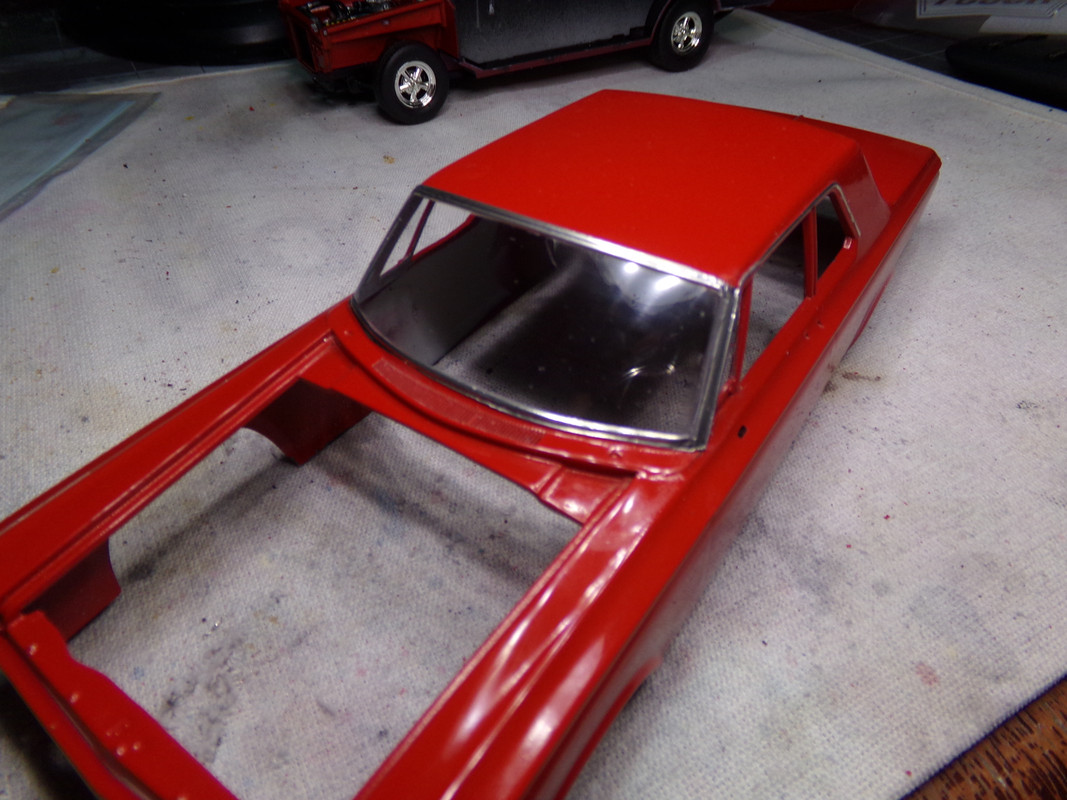
Thanks, Brandon and Kyle! I appreciate your comments! Well, I thought I would be finishing this one up today but the modeling gods and the instructions got me again. In this step, the windshield and back glass go in from the outside, Well, I already have the trim foiled and as many of you already know, glue on foil does not work. so I had to remove the foil from the front and back and while I was at it I removed the foil on the wing windows, The only original foil left is the piece on the roof and not all of it survived either. So while I was at it, I scraped off the paint from the "A" pillar so that I could address the mold indent or cut into the plastic on both pillars, I sanded them down with some sandpaper and a file to remove the ugly cut since the paint isn't really necessary as both are completely covered with foil. Once all that prep work was done, I glued the windows in as best I could. Neither fit well. Normally, when kit makers have windows that mount from the outside there is a groove inside the window that the window actually just fits in. But not on this one. So once the glue had dried I re-foiled the front and back windows. The windshield came out OK and the mold indents in the A pillars are gone and the foil went on OK. The back window on the left side looks a little ragged because some of the paint on the trim chipped off in the process and I wasn't going to remove the paint from all the trim on the back window. So I'll just have to live with some chips in the rear trim under the foil. I've been working on this a good part of the day and still have the wing windows and rear side windows to install. Makes me wonder if anyone at Moebius has ever built a model. I would call this kit a Moebius Manufacturing Fail! Thanks for looking! 😎     |
|
kyledehart5
Forum Moderator      Dec '23 Showcased Model Awarded
Member since: July 2023
Posts: 7,245
Member is Online
MSC Staff
|
Post by kyledehart5 on Oct 20, 2024 6:21:04 GMT -5
Interesting. And a shame you had to pull that foil. And good to know the issue. I’ve only built one Moebius kit and while it was a really nice kit, the instructions were odd in a few places. Think my glass fit though. Yours is still looking good!
|
|
modelcarjr
Full Member
   July '24 Showcased Build Awarded
Member since: March 2023
Posts: 646
Mar 3, 2023 13:07:26 GMT -5
Mar 3, 2023 13:07:26 GMT -5
|
Post by modelcarjr on Oct 21, 2024 6:23:24 GMT -5
|
|
kyledehart5
Forum Moderator      Dec '23 Showcased Model Awarded
Member since: July 2023
Posts: 7,245
Member is Online
MSC Staff
|
Post by kyledehart5 on Oct 22, 2024 15:46:43 GMT -5
Beautiful. The perfect look for this car. Love the red, the wheels and the engine. Great job!
|
|
spook
Full Member
  
Member since: June 2024
Posts: 190  Member is Online
|
Post by spook on Oct 24, 2024 15:03:53 GMT -5
Love the Belvedere !
I had a chance to buy a 64 with the 413 in it , but the guy that blew past me on the highway heading to where the car was got it . Didn't think much of it at the moment until I went to turn into the driveway and there sat the car that blew by me ! I was heartbroken .
|
|
modelcarjr
Full Member
   July '24 Showcased Build Awarded
Member since: March 2023
Posts: 646
Mar 3, 2023 13:07:26 GMT -5
Mar 3, 2023 13:07:26 GMT -5
|
Post by modelcarjr on Oct 27, 2024 6:47:25 GMT -5
Thanks, Kyle and Spook! I appreciate your comments!
|
|
|
|
Post by 406 Silverado on Oct 27, 2024 6:52:35 GMT -5
Such a good-looking car John and I always love to gawk at your paint and BMF work as you continuously kick out show quality work in both aspects. Having owned an older Mopar in my teens, I've had a lifelong love for the turquois color that Mopar used on their engines. Along with a little chrome for the rocker covers and a good-looking air cleaner, that color seems to give a unique look to an engine. Fantastic job on this bud.  |
|
modelcarjr
Full Member
   July '24 Showcased Build Awarded
Member since: March 2023
Posts: 646
Mar 3, 2023 13:07:26 GMT -5
Mar 3, 2023 13:07:26 GMT -5
|
Post by modelcarjr on Oct 27, 2024 22:23:53 GMT -5
Thanks, Joe! I appreciate your comments!
|
|