danb.
Reviews member     March 2013 MoM Winner
Member since: November 2011
Posts: 2,808
Nov 17, 2011 9:22:52 GMT -5
Nov 17, 2011 9:22:52 GMT -5
|
Post by danb. on Apr 21, 2012 7:10:06 GMT -5
For the last few months i have had an idea in mind of a small dio based in Normandy then i came across some pics of a Tiger I the pic was taken in 2 positions the 2nd made my mind up of what i wanted to do so i researched on this tank and found that it was commanded by Kurt Meyer his Tiger was in the 101st Heavy SS panzer division which saw a lot of action in Normandy in 1944. Pics for reference only: 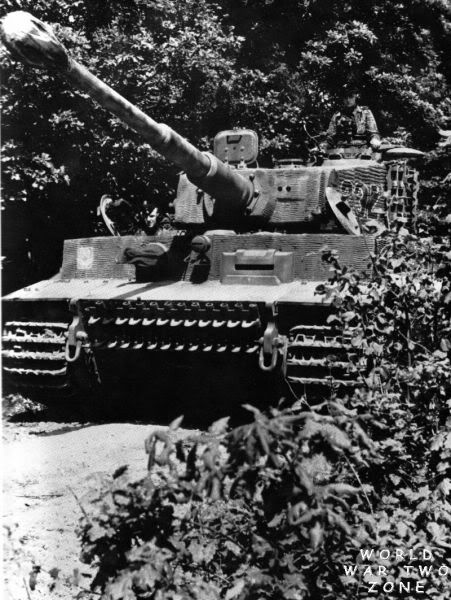 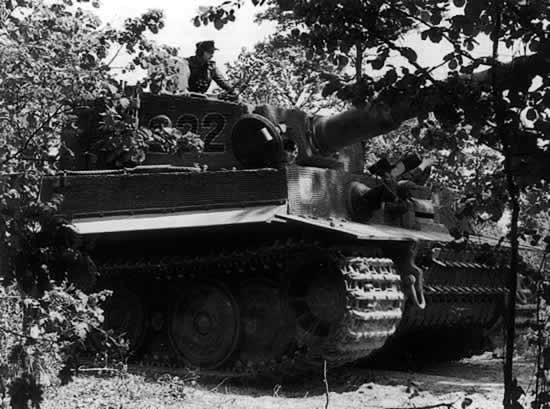 The base: I wanted something different and i wanted the base to be as important as the dio so i came up with the idea of replicating part of the front glacis plate, the base was made with mdf and i want it to look as if it had been cut from the tiger so im hoping to achieve a torch cut edge made with car filler also i have experimented with making zimmerit more on that soon. 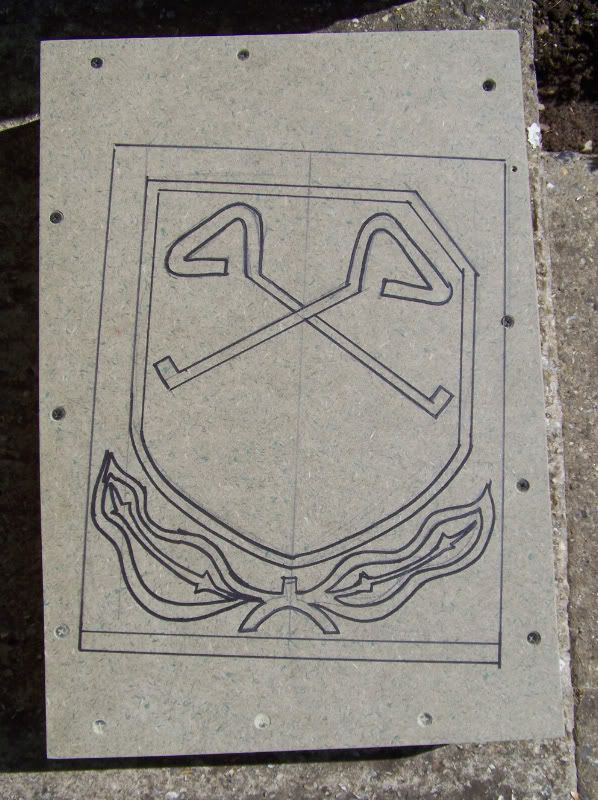  The dio: As im copying Kurt Mayers tiger i decided on making the base of the dio the same shape as the shield of the 101st insignia so i traced the shield onto a sheet of styrofoam and cut it out the bocage walls were made of the same material these were stuck on, then polyfiller took up and gaps and is the base for the static grass and hedges pics and more on this to come. The kit: Im planning on using a 1/35 Tamiya late production Tiger I and some nice after market pieces  More pics tonight Dan B |
|
|
|
Post by wouter on Apr 21, 2012 7:12:51 GMT -5
|
|
danb.
Reviews member     March 2013 MoM Winner
Member since: November 2011
Posts: 2,808
Nov 17, 2011 9:22:52 GMT -5
Nov 17, 2011 9:22:52 GMT -5
|
Post by danb. on Apr 21, 2012 7:19:21 GMT -5
Cheers Wout hope i dont dissapoint.
Dan B
|
|
|
|
Post by wouter on Apr 21, 2012 7:25:27 GMT -5
here's the one I was speaking of:  no, quite sure you won't mate, your work is great so pretty sure this one will turn out cool as well! Cheers |
|
|
|
Post by 406 Silverado on Apr 21, 2012 8:17:14 GMT -5
Looks to be a very cool project, love the base so far
|
|
danb.
Reviews member     March 2013 MoM Winner
Member since: November 2011
Posts: 2,808
Nov 17, 2011 9:22:52 GMT -5
Nov 17, 2011 9:22:52 GMT -5
|
Post by danb. on Apr 21, 2012 10:01:19 GMT -5
Thats the one i saw Wout hope mines as good as that his tigers are awesome.
Dan B
|
|
|
|
Post by 406 Silverado on Apr 21, 2012 10:19:45 GMT -5
Yeah when it comes to Tiger I's Phil is the man.
|
|
danb.
Reviews member     March 2013 MoM Winner
Member since: November 2011
Posts: 2,808
Nov 17, 2011 9:22:52 GMT -5
Nov 17, 2011 9:22:52 GMT -5
|
Post by danb. on Apr 21, 2012 10:32:01 GMT -5
This afternoon i have made a start on some small trees and the parts that will make up the bocage so far i have used Seamoss which i purchased at the last show after some help with how to straighten them from the master (bodge)  thanks mate i got on with the colour and foliage stage. The trees were cut to a medium height then i mixed up some Tamiya red brown and black and with the AB i sprayed them i left the coat of paint quite thin to allow the seamoss colour to show through as a highlight. Then i mixed up a 70/30 pva to water mix painted only the buds of the seamoss as this is were the leaves will be i used 50/50 mix of Parsley and oregano herb mix then this was sprinkled all over shake off any excess then once dry give the tree a good spray of hairspray.   The same process was used to make the bocage i used only the branches but this time i used 3-4 variations in herbs to get different bushes as this is the case in nature. the 1st set was using the same method as the tree but using 2 types of Oregano 1 has green leaves and the 2nd has more of a brownier dead leaf colour i mixed these 2 together. 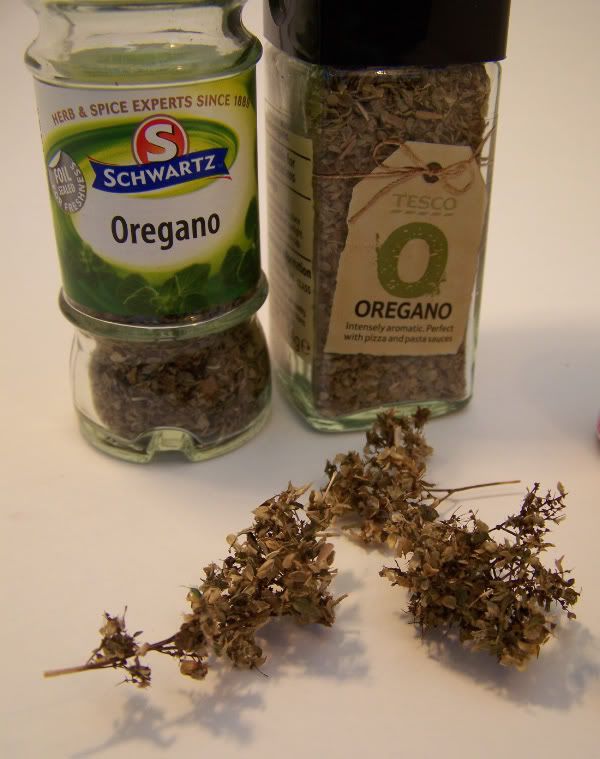 with the last set i used Parsley and both oreganos then added some static grass and some cut bristles from an old brush these will simulate brambles and thorns the same process was used as the above 2 best way i found is make lots of variations to get a more realistic look. 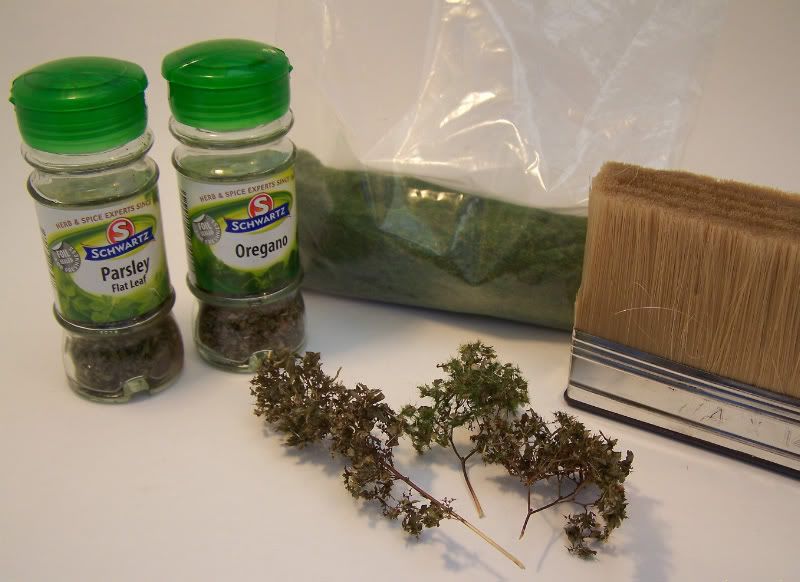 Dan B |
|
|
|
Post by robbo on Apr 21, 2012 10:42:45 GMT -5
Nice tips in here Dan  |
|
|
|
Post by wbill76 on Apr 21, 2012 13:58:20 GMT -5
Off to a great start with this one Dan, looking forward to seeing it come alive!
|
|
|
|
Post by eastrock on Apr 21, 2012 22:07:16 GMT -5
Thanks for the greenery tips, dan!!! the base is awesome.  |
|
danb.
Reviews member     March 2013 MoM Winner
Member since: November 2011
Posts: 2,808
Nov 17, 2011 9:22:52 GMT -5
Nov 17, 2011 9:22:52 GMT -5
|
Post by danb. on Apr 22, 2012 3:02:35 GMT -5
no worries chaps thats what this place is all about sharing ideas.
Dan B
|
|
danb.
Reviews member     March 2013 MoM Winner
Member since: November 2011
Posts: 2,808
Nov 17, 2011 9:22:52 GMT -5
Nov 17, 2011 9:22:52 GMT -5
|
Post by danb. on Apr 22, 2012 5:12:51 GMT -5
Next up on the base was the bocage walls these were stuck down with non solvent construction adhesive then i filled up the gaps and joins also i needed a solid base to stick the bocage to so i used polyfilla, 1st paint on pva glue on the areas were polyfilla will be put this acts a bonder between foam and filler then spread the filler round the base of the walls once this is done use an old brush and water go over the filler to make it smooth.  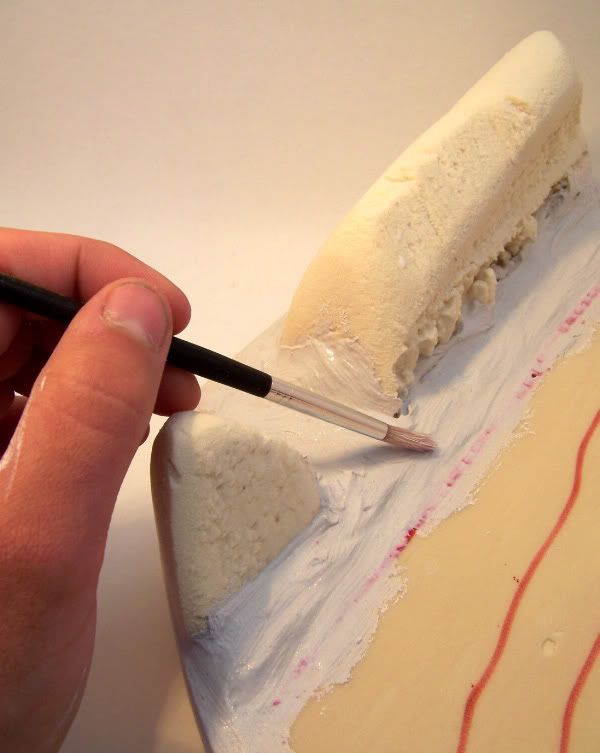 More on the next stage soon....... Dan B |
|
|
|
Post by dupes on Apr 22, 2012 7:42:53 GMT -5
Man, those trees look GREAT! Following this one for sure.  |
|
|
|
Post by 406 Silverado on Apr 22, 2012 11:54:49 GMT -5
Very cool Dan. They do look very real and perfect for the setting. How about doing a SBS for the Tips & Tricks category  It would and will be useful to many of us and easier to find there. |
|
danb.
Reviews member     March 2013 MoM Winner
Member since: November 2011
Posts: 2,808
Nov 17, 2011 9:22:52 GMT -5
Nov 17, 2011 9:22:52 GMT -5
|
Post by danb. on Apr 22, 2012 11:59:33 GMT -5
A bit more progress has been made today on the groundwork after the filler had set over night i mixed up a water and pva mix with some brown acrylic paint this was painted over the filler areas and cat litter was sprinkled on top once dry i cut up some small pieces of root from the garden this was then stuck with pva onto the brown areas as this will be the under growth of the bocage as this was drying static grass was sprinkle around the roots. 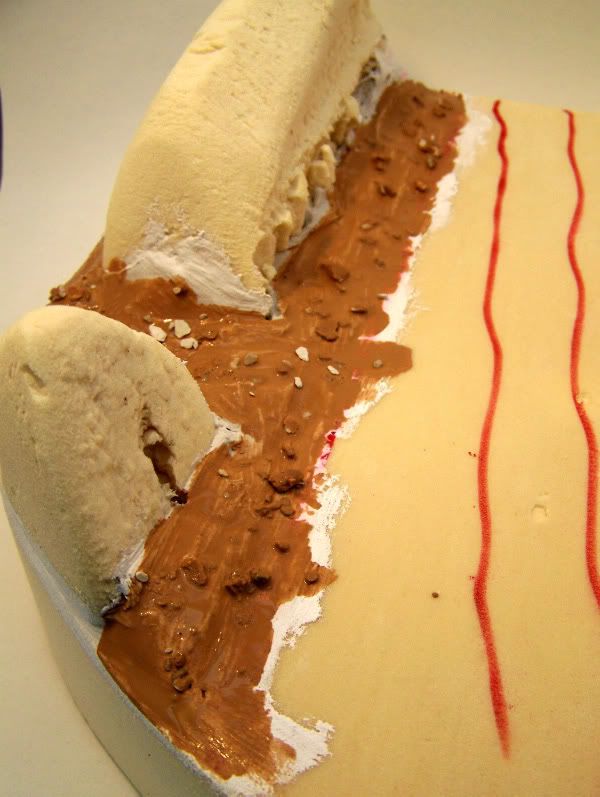 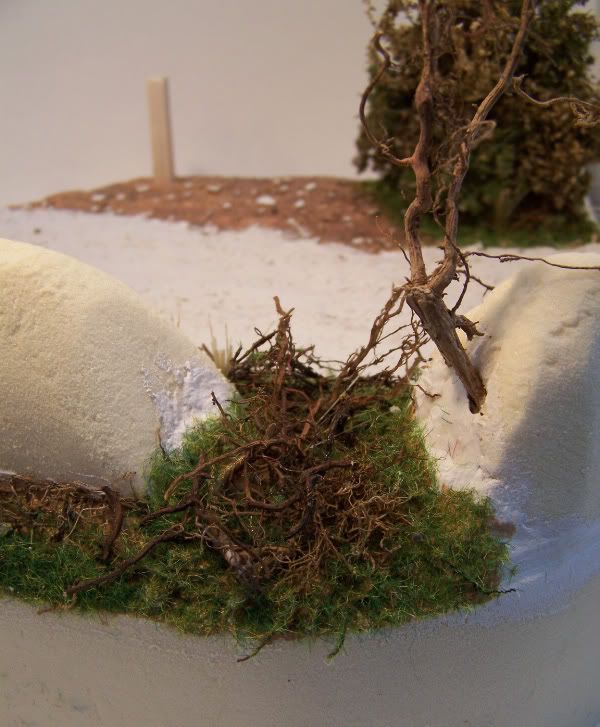 i made a start on a small piece of bocage the foam was painted with the pva and brown paint this acted as a shadow colour for the bushes then small pieces of my earlier made seamoss was pushed into the foam i was amazed at how much of the sea moss was used for this tiny piece of bocage then hairspray was used to stick the piece together. i am pleased with how this turned cant wait get the other done.  The final piece to get ready was making a sunken roadway i marked were i wanted road with a marker then used my craft knife to cut the road out it then recieved a coat of pva and finally i spread the polyfiller i mixed in some fine gravel this time it was all smoothed over with water and a brush.    more to come soon..... Dan B |
|
|
|
Post by wouter on Apr 22, 2012 12:18:44 GMT -5
very nice work mate. And lovely explanation and photos. I want to do something with bocages one day in the distant future and this sure comes in handy. Nice work!
Cheers
|
|
danb.
Reviews member     March 2013 MoM Winner
Member since: November 2011
Posts: 2,808
Nov 17, 2011 9:22:52 GMT -5
Nov 17, 2011 9:22:52 GMT -5
|
Post by danb. on Apr 22, 2012 13:46:04 GMT -5
Thanks Wouter for your positive comments and i will post up a how to soon for you Rob
Dan B
|
|
|
|
Post by spud on Apr 22, 2012 14:13:40 GMT -5
Wow Dan this is Epic
|
|
|
|
Post by 406 Silverado on Apr 22, 2012 14:24:47 GMT -5
That's some quick work Dan. Looking mighty fine so far dude.
|
|
|
|
Post by eastrock on Apr 22, 2012 22:39:52 GMT -5
Base looks great Dan, its coming to life!!!
|
|
|
|
Post by bullardino on Apr 23, 2012 0:48:24 GMT -5
It's always interesting to see a SBS build of a base. And yours is turning to be an excellent one. Those trees look like the real thing.
|
|
danb.
Reviews member     March 2013 MoM Winner
Member since: November 2011
Posts: 2,808
Nov 17, 2011 9:22:52 GMT -5
Nov 17, 2011 9:22:52 GMT -5
|
Post by danb. on Apr 23, 2012 1:09:04 GMT -5
Many thanks to all of your positive comments
Dan B
|
|
jackh.
Full Member
  
Member since: December 2011
Posts: 1,195
Dec 15, 2011 2:51:27 GMT -5
Dec 15, 2011 2:51:27 GMT -5
|
Post by jackh. on Apr 23, 2012 1:28:06 GMT -5
Well it's not my area of interest, but some great hints in here and like the idea of making it from a photo  . so count me in on this. |
|
rm6239.
Full Member
  
Member since: November 2011
Ross Moore
Posts: 252
Nov 19, 2011 5:04:13 GMT -5
Nov 19, 2011 5:04:13 GMT -5
|
Post by rm6239. on Apr 23, 2012 4:24:34 GMT -5
Dan, great idea mate  and a very good start. cheers Rossco |
|
bigjohn
Reviews member    
Member since: December 2011
John Hale
Posts: 3,438
Dec 21, 2011 2:17:45 GMT -5
Dec 21, 2011 2:17:45 GMT -5
|
Post by bigjohn on Apr 24, 2012 20:21:06 GMT -5
Great SBS Dan, Some really cool stuff there. I'll be using this as a referance when the time comes.
|
|
multicam
Senior Member
   
Member since: January 2012
Nate
Posts: 2,039
Jan 10, 2012 14:35:41 GMT -5
Jan 10, 2012 14:35:41 GMT -5
|
Post by multicam on Apr 24, 2012 22:25:57 GMT -5
Awesome Dan. AWESOME:) The trees/ shrubs are kick a$#!
|
|
danb.
Reviews member     March 2013 MoM Winner
Member since: November 2011
Posts: 2,808
Nov 17, 2011 9:22:52 GMT -5
Nov 17, 2011 9:22:52 GMT -5
|
Post by danb. on Apr 25, 2012 1:31:20 GMT -5
Last night saw the start of the tree and the other side of the bocage wall i will post up some pics tonight of the progress.
Dan B
|
|
danb.
Reviews member     March 2013 MoM Winner
Member since: November 2011
Posts: 2,808
Nov 17, 2011 9:22:52 GMT -5
Nov 17, 2011 9:22:52 GMT -5
|
Post by danb. on Apr 29, 2012 13:54:00 GMT -5
Right a quick update on the base sorry for not updating sooner as small pieces were done through the week and were not worthy of an update also the tree is taking longer then thought as im getting carried away with detail  heres what this week has produced. Static grass and grass clumps were added to the roadway there is still some more to do on this then using the AB i sprayed in the dirt track using Tamiya colours. 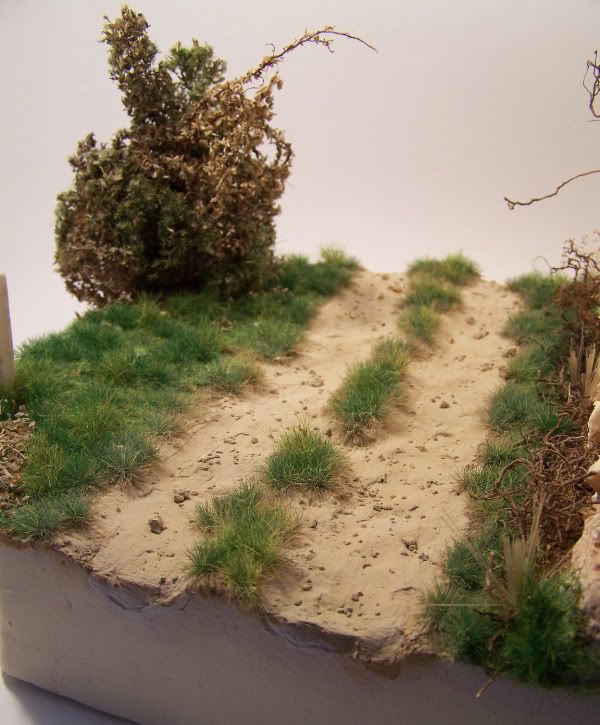  Then to get a perspective of how the Tiger will look along the narrow roadway i placed the JS2 on the base and took some pics the tiger will be slighty smaller so i think it will fit fine i was quite shocked at how good the JS2 looked if only the Russians were in Normandy i would call this one finished!!!!! ;D  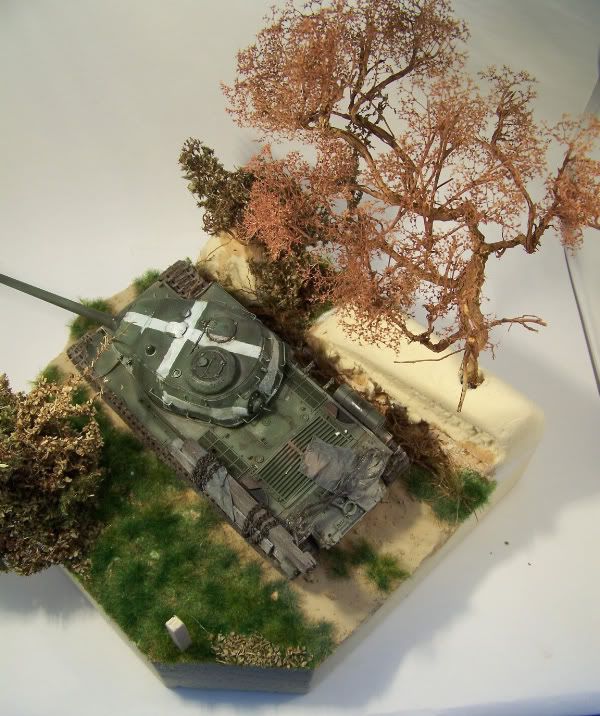 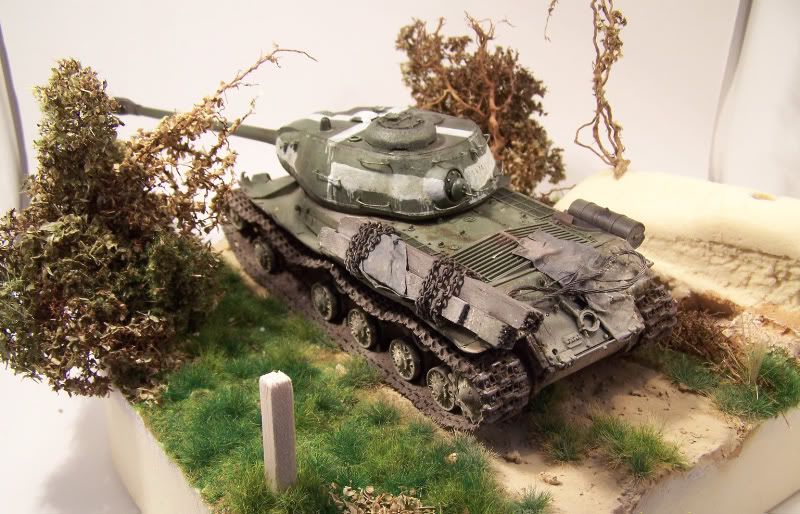 Also a lot of my time this week was taken up on the tree it was pulled out from a customers garden (not by me  ) then dried in the oven and seamoss attached with superglue im working on the trunk at the moment with some viney roots growing up the tree then i can cover in some herbs. 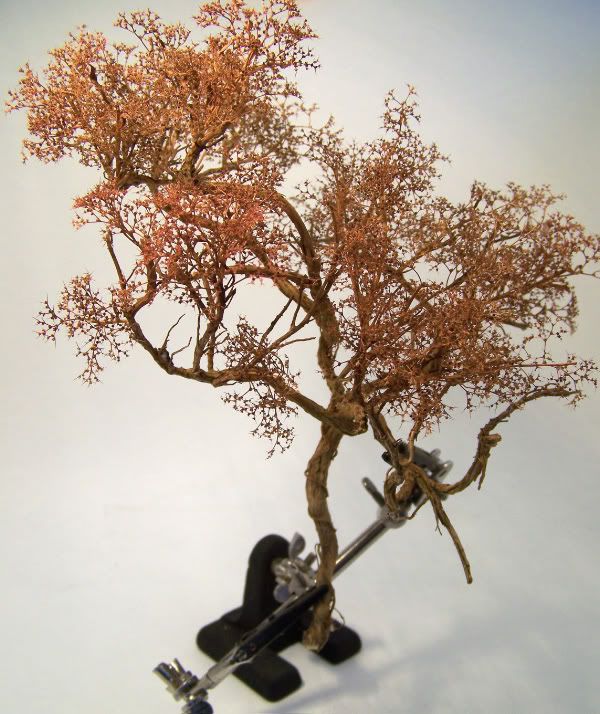 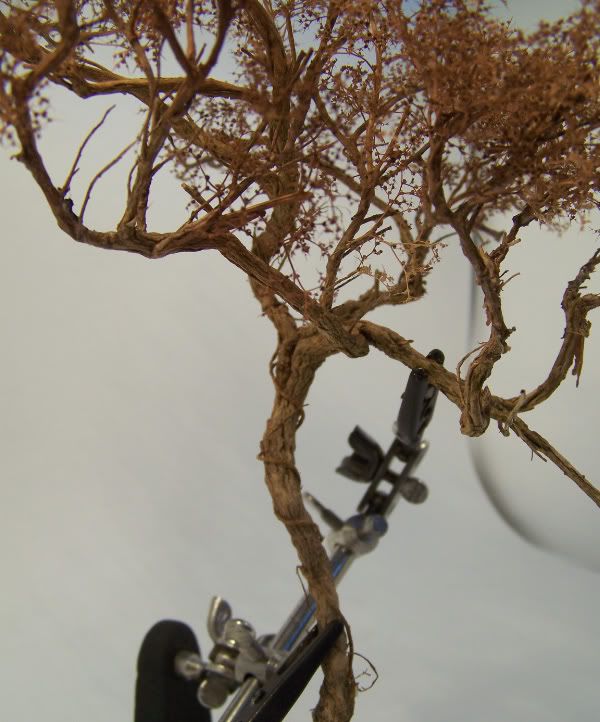 right im off to make some bloody Bocage!!!!  Dan B |
|
|
|
Post by wouter on Apr 29, 2012 14:15:52 GMT -5
although the JS is darn cool, I'm soooo glad the Russians weren't in France ;D ;D ;D The Tiger I will look even cooler in the Bocage  Cheers |
|