Deleted
Member since: January 1970
Posts: 0
Apr 28, 2024 18:04:06 GMT -5
Apr 28, 2024 18:04:06 GMT -5
|
Post by Deleted on Apr 3, 2012 12:15:43 GMT -5
I finally figured it out by accident; I was trying to use the image insert button on the tool bar and then placing the link between the "img" symbols when all that was needed was to past the "img" from photo bucket, duh. For me most things I learn involve accidents. Well here I am with several posts already and no progress. I am posting the picture of the current state of my build which has the sides of the vehicle 90% built and the turret with the texture added and also 90% complete. You can see I have the tires assembled and sanded ready for paint. I will be posting, now that I know how, pictures of things as I build them and hope you chaps will forgive my slow start. 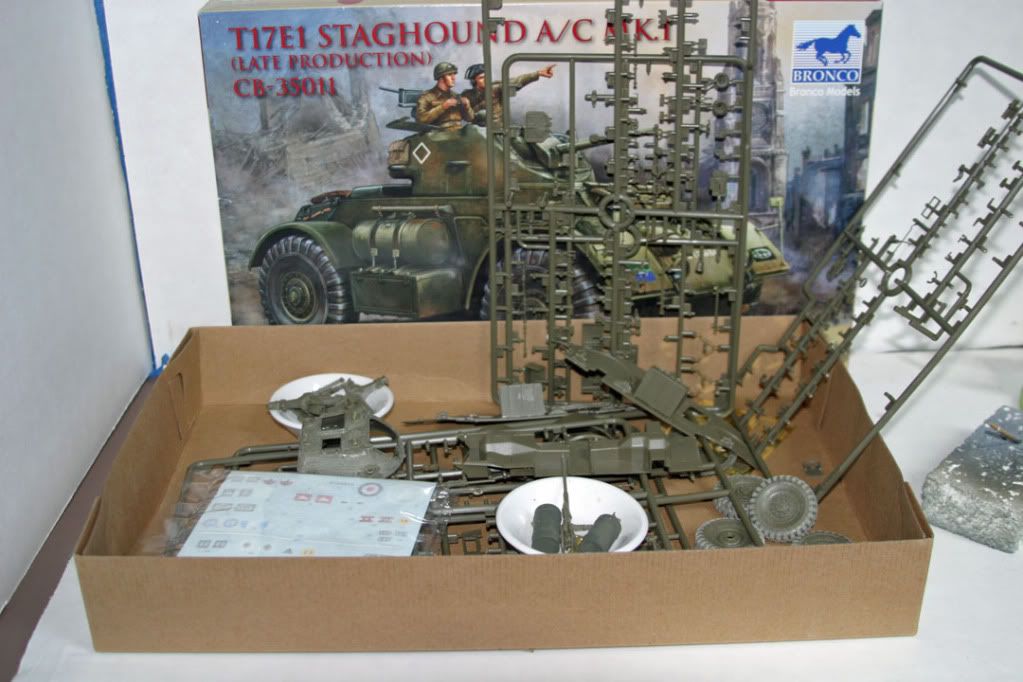 |
|
Deleted
Member since: January 1970
Posts: 0
Apr 28, 2024 18:04:06 GMT -5
Apr 28, 2024 18:04:06 GMT -5
|
Post by Deleted on Apr 3, 2012 15:13:59 GMT -5
Thanks for trying to get me straightened out on the postings.
Ed
|
|
|
|
Post by TRM on Apr 3, 2012 15:20:34 GMT -5
All straightened out then!! I went ahead and removed all the useless posts once you figured it out!!! Great thing about this site....no rushing at all!!! Take as much time as you need to post, build, whatever!!! Looking forward to following along with the build Ed...keep it coming!!!  |
|
|
|
Post by wbill76 on Apr 3, 2012 18:07:50 GMT -5
All builds have to start somewhere...looks like this one is well on its way!
|
|
|
|
Post by spud on Apr 3, 2012 18:15:39 GMT -5
wellcome to bloging  as they say no rush just build and post. |
|
|
|
Post by 406 Silverado on Apr 4, 2012 9:32:29 GMT -5
Glad to see the pic thing squared away. Thanks T for the help bud.
yep you have to start somewhere. I am sure many will be following this one as there doesn't seem to be many builds of this vehicle here. looking forward to the next update.
|
|
Deleted
Member since: January 1970
Posts: 0
Apr 28, 2024 18:04:06 GMT -5
Apr 28, 2024 18:04:06 GMT -5
|
Post by Deleted on Apr 4, 2012 12:40:37 GMT -5
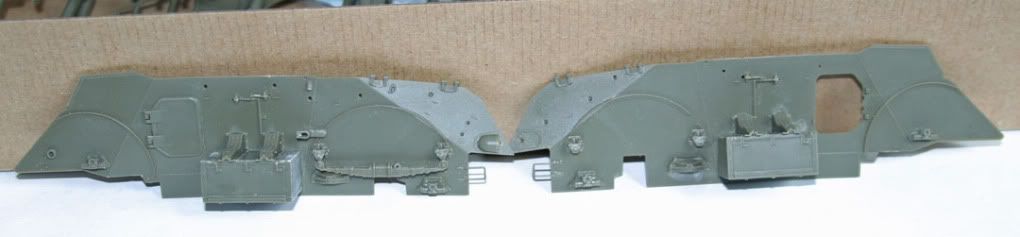 The sides as built up to today. 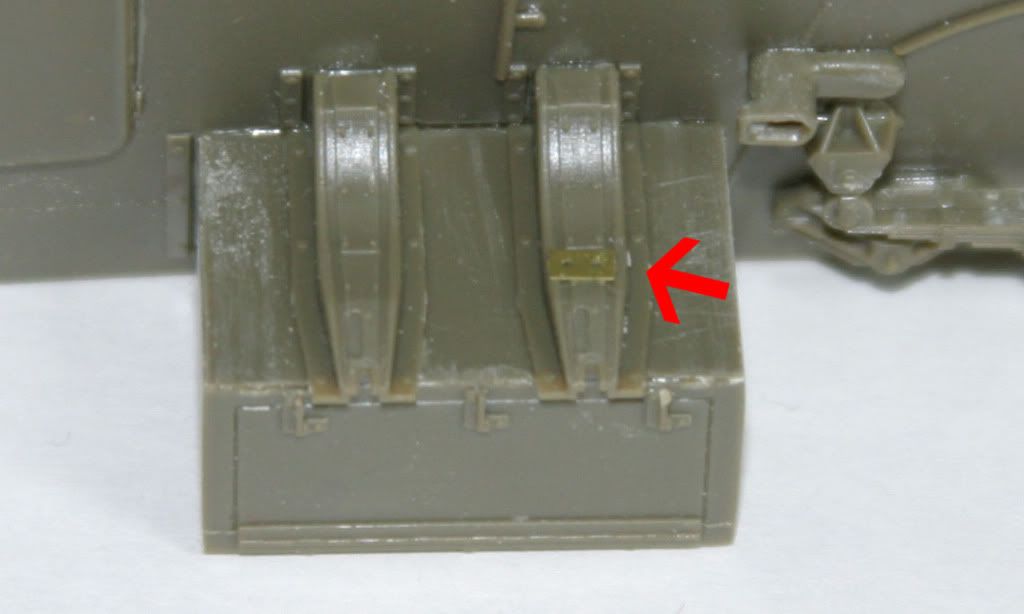 On the support for the fuel tank there are 4 small PE pads that get glued to each support that are not visible to anyone after the tank is set. I am not going to use them. Another add on part is an included aluminum barrel which I wont be using either. I do not use those barrels due to glue factors unless the barrel is included in the kit and over 90mm where the rifling can show. There are so many other AM items to spend the money on. 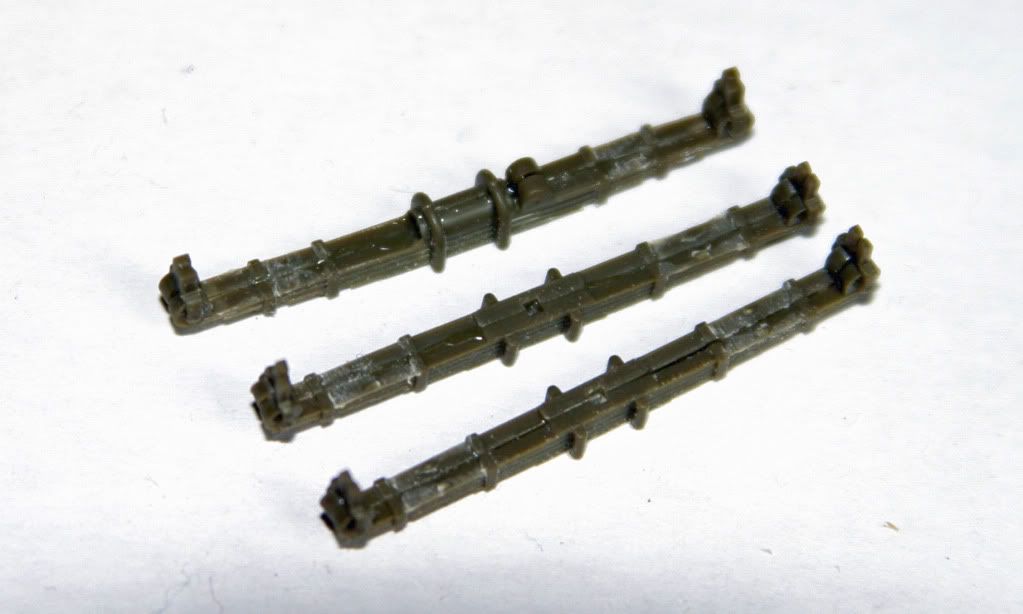 A bit of a disappointment were the leaf springs which come as two parts to be glued together. They are affected by the styrene’s tendency to sink a little along the edges which become the center of the springs, the also do not mate as well as the rest of the kit parts. |
|
Deleted
Member since: January 1970
Posts: 0
Apr 28, 2024 18:04:06 GMT -5
Apr 28, 2024 18:04:06 GMT -5
|
Post by Deleted on Apr 12, 2012 15:49:34 GMT -5
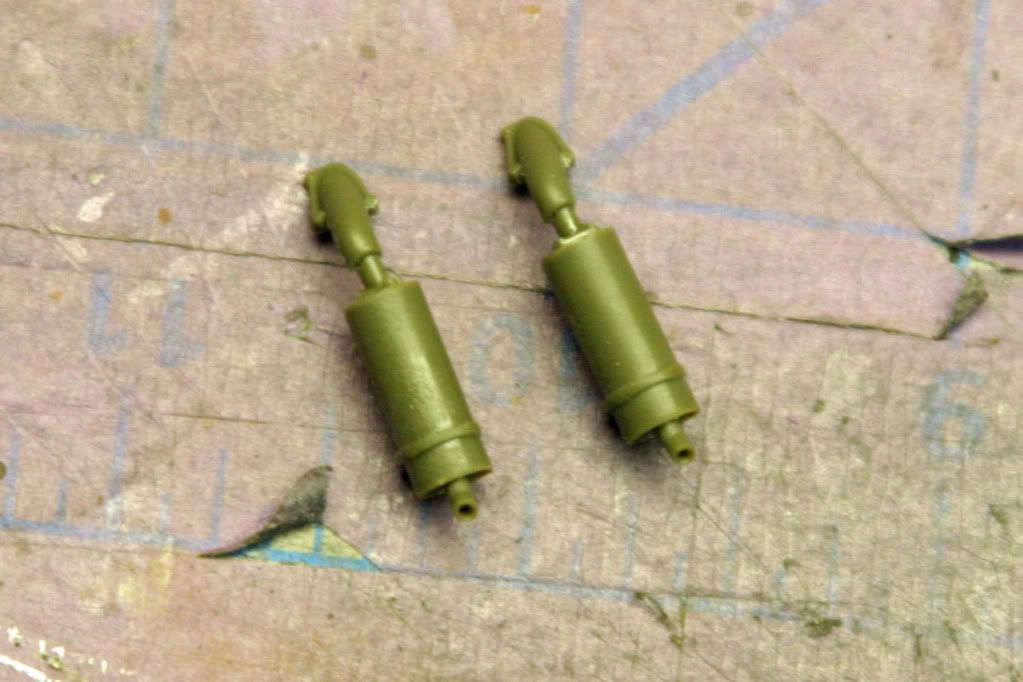 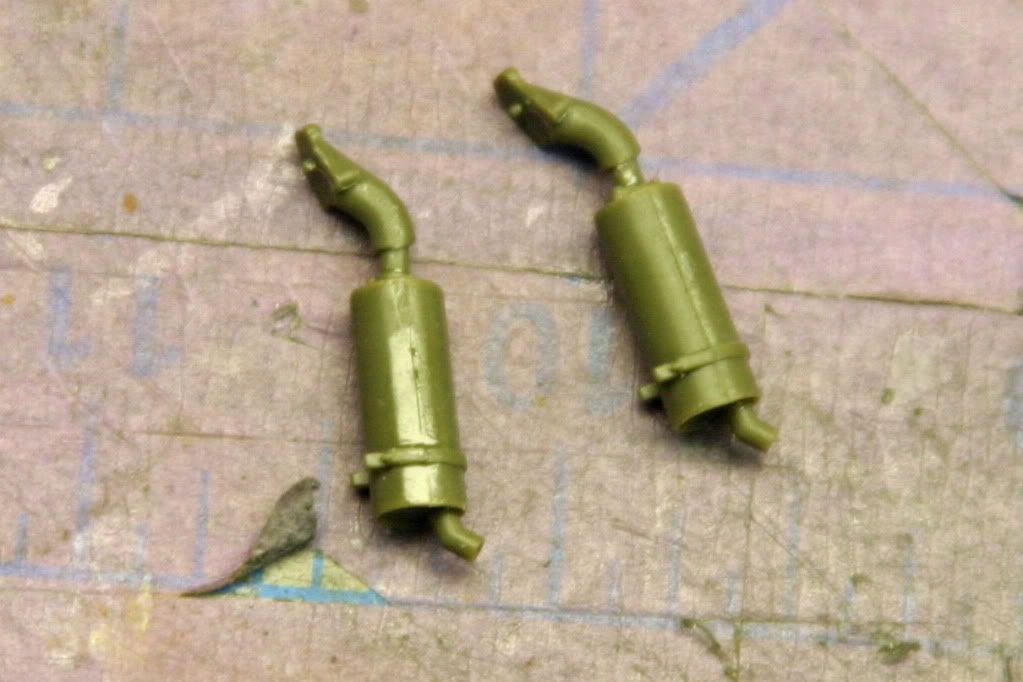 The above shows both mufflers from two angles, the kit has 5 parts to make each muffler. Some modelers have the ability to assemble the entire model and then paint the various parts. I do not have that ability and have to assemble the model in stages that depend on access, color and how the part may mount. In the case of mufflers have a certain amount of rust I have to place them last. If you place them last I would advise that you take the back plate and after the mufflers are glued up set the on the back plate to get the correct alignment as it is important when complete.  The above show the PE box that attaches to the rear of the Staghound. I assembled it for practice but am going to use the kit supplied styrene on since I much prefer to work with styrene because of the glues. You will note that there is some problem with the scale between the two parts with the styrene one being approximately 15% larger than the PE one. I have no reference with the dimensions so don't know which if either is correct. I need to add the 4 holes shown in the PE part. |
|
|
|
Post by wbill76 on Apr 12, 2012 17:54:00 GMT -5
Nice to see this one moving along IP, can't help you on the scale correctness issue PE vs. styrene...15% is a big discrepancy so it's not just an issue of in-scale thickness between the materials.
|
|
Deleted
Member since: January 1970
Posts: 0
Apr 28, 2024 18:04:06 GMT -5
Apr 28, 2024 18:04:06 GMT -5
|
Post by Deleted on Apr 13, 2012 12:28:40 GMT -5
jackwagon and Wbill76 Thanks for looking. Like you say the PE may not be right for dimension so I don’t let it worry me. 15% was jut a guess as to difference, the walls on the styrene box are quite thin by styrene model standards which is nice. Ed Below is front differential, nothing big here it is just too bad they did not engineer this a little different to allow positioning of the wheels turning. 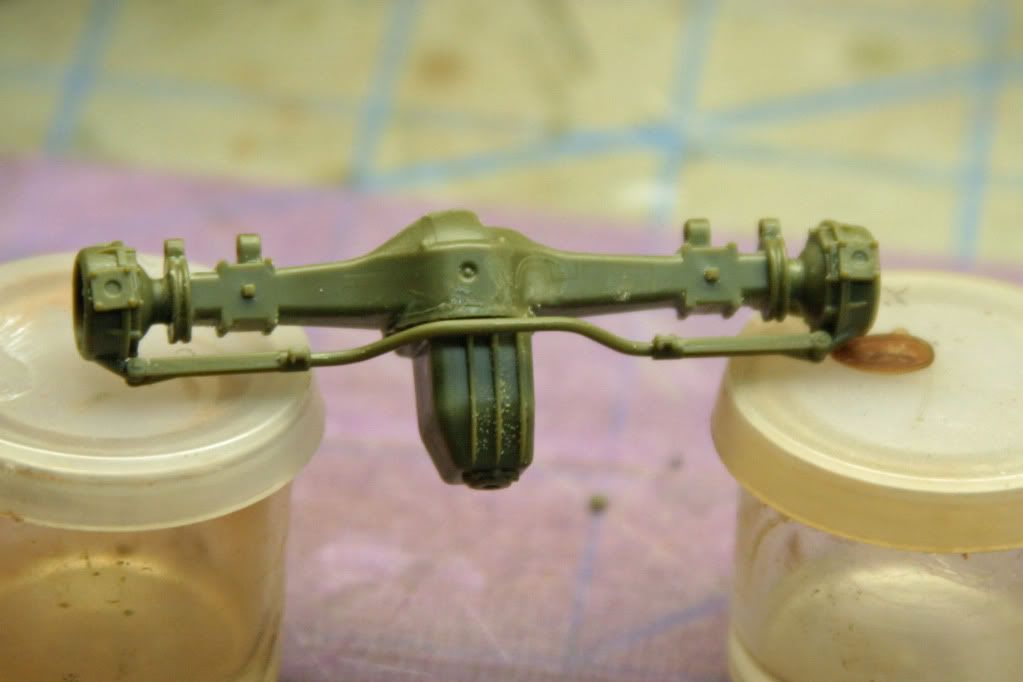 Below is the engine deck complete except for the pry bar which will be painted separately and added later.  |
|
Deleted
Member since: January 1970
Posts: 0
Apr 28, 2024 18:04:06 GMT -5
Apr 28, 2024 18:04:06 GMT -5
|
Post by Deleted on Apr 14, 2012 12:33:28 GMT -5
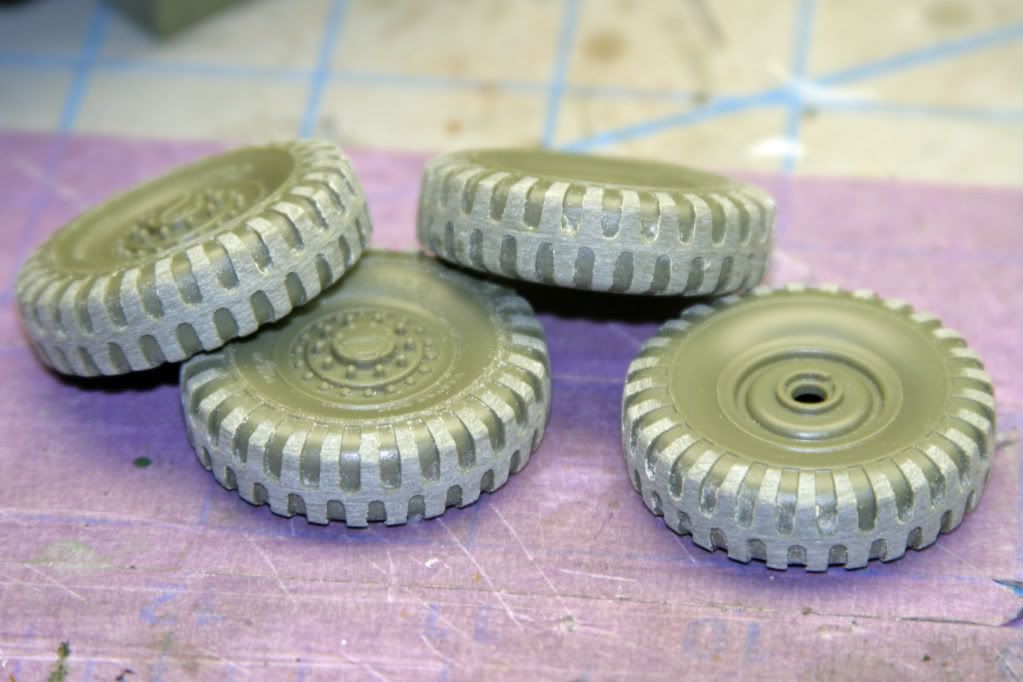 Tires that are finished waiting for paint. I like to finish the tires, sand the seam off and give them some worn on the ground look. 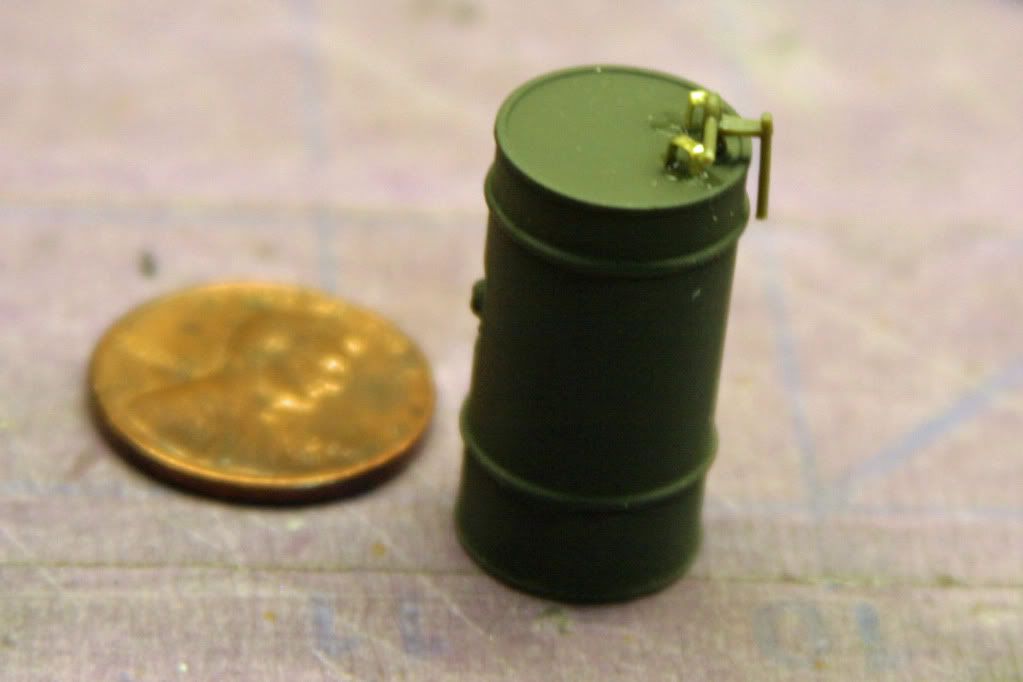 Finished tank with PE parts ready to set on mounts. The outlet plumbing is directional for left and right so be aware. 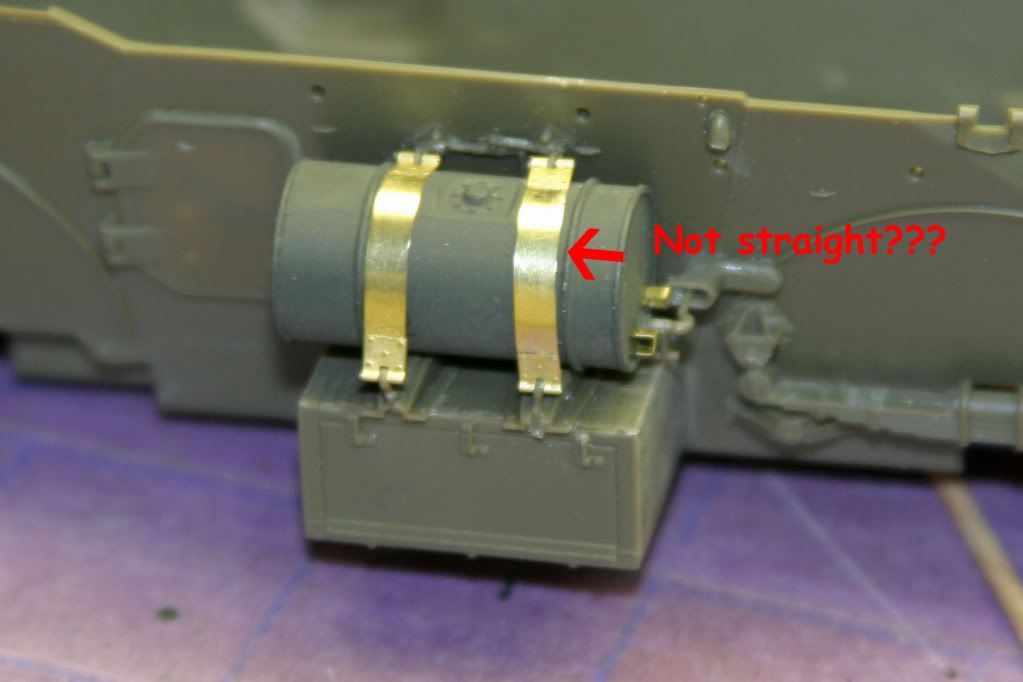 Fuel tank in place, note that the PE strap does not line up with the ridge on the tank. As the rack on which the tank sets is indexed by holes in the body and the outlet plumbing has a fixed point it inters the body I can not see any alternatives. Also the eye bolts for the straps at the top are in a fixed position and the rack prevents the tank from sliding anymore to the rear I believe the problem lays in the eye bolt position at the top that should have been designed to be further to the right as you look at it. 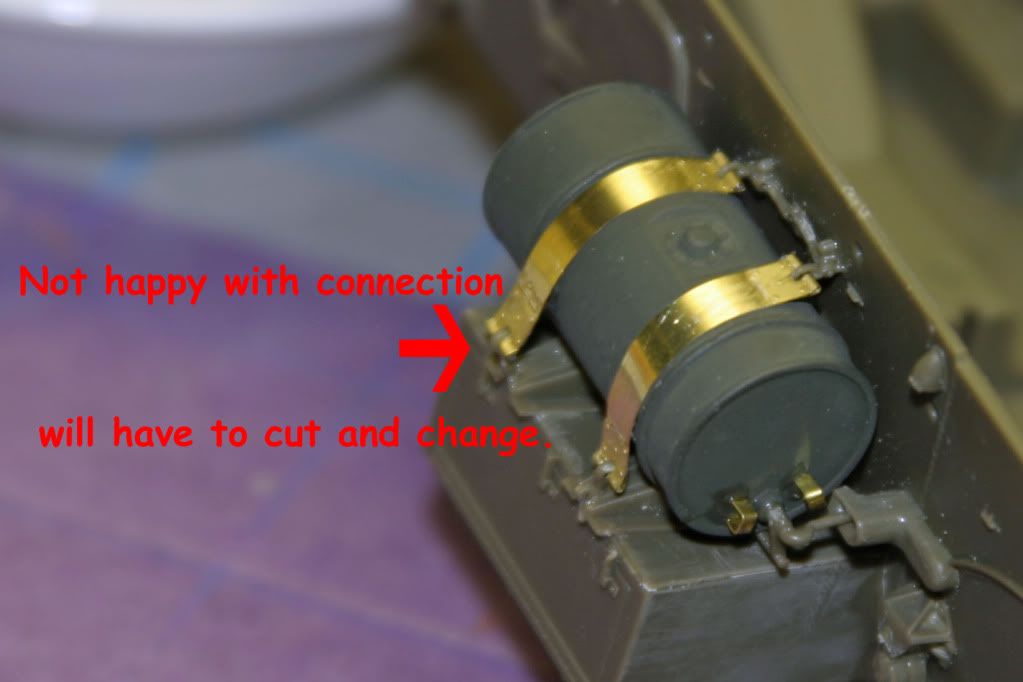 Am not happy with how I did the strap here and have since cut it and re-glued it so both match. The eye bolt at the bottom is a little long and needs to be adjusted for length when placing it. |
|
Deleted
Member since: January 1970
Posts: 0
Apr 28, 2024 18:04:06 GMT -5
Apr 28, 2024 18:04:06 GMT -5
|
Post by Deleted on Apr 16, 2012 18:04:52 GMT -5
 Windscreen openings ready to assemble.  Find that clear windscreen portion of kit is too small and falls through opening. I made new ones from clear styrene card stock which will show later.  Developed a gap when top was placed on bottom half. Filled it with .005 with 2 layers of card stock.  Windscreen covers will be painted later so I can mask the clear portion for painting the body. I have not lost a part for a looong time but this little cable holder spun away somewhere so I had to make a new one.  Cable that looks right is always a big challenge, my solution has been to use crochet thread of various sizes and it has work satisfactorily. The biggest headache it the size of the cable eyes which are never the same. On this kit the eyes are very small and it appears that the cable might have been only 1/2 inch or so or else the scale is wrong. I will finish this post tomorrow. |
|
|
|
Post by wbill76 on Apr 16, 2012 19:44:07 GMT -5
Keep up the good work beating this one into submission ironpig! I've found that crochet thread or "rope" as they call it sometimes is a perfect stand-in...glad to see I'm not the only one who sneaks over to that side of the hobby store to use stuff "off label!". |
|
Deleted
Member since: January 1970
Posts: 0
Apr 28, 2024 18:04:06 GMT -5
Apr 28, 2024 18:04:06 GMT -5
|
Post by Deleted on Apr 17, 2012 15:41:00 GMT -5
Looks to be a challenging build but you're pulling it into shape nicely with the improvements you've made
Steve
|
|
Deleted
Member since: January 1970
Posts: 0
Apr 28, 2024 18:04:06 GMT -5
Apr 28, 2024 18:04:06 GMT -5
|
Post by Deleted on Apr 17, 2012 16:31:03 GMT -5
Thank you for the kind words, I don't know if any of you noticed the new thing I learned about posting on photo-bucket and that is if you decide to clean up your posts on photo-bucket and move them to a new album they no long show here on the blog so I had to go back and make a quick posting of the new location. Always a new one to learn.
Crochet thread looks just fine in most places, I think nylon would be better but finding in the right sizes is difficult. Some times when painting it some fine hairs will rise and I found that by quickly running it through an alcohol flame the singe away. I find I am always taking my wife for cover into those sections of the store to examine threads, cloth and jewelry making stuff, you never know when something will grab you.
I would not classify the problems I have encountered other that the clear windscreen being to small as real kit problems as I am not always as careful how I place things which can cause problems down the road. I think the fuel tank strap alignment was my not taking the time to line everything up properly. The kit is actually an 8-1/2 or better compared to most Tamiya kits I have built which except for the Dragon Wagon I feel are a 5-1/5 or so.
As I approach paint I wonder if anyone has some good color reference for this. I am going to us "stone" as my base and a green to make a North Africa camo pattern but I do not have a good green reference. I believe it would be a lighter green that US OD.
|
|
Deleted
Member since: January 1970
Posts: 0
Apr 28, 2024 18:04:06 GMT -5
Apr 28, 2024 18:04:06 GMT -5
|
Post by Deleted on Apr 17, 2012 16:45:50 GMT -5
|
|
Deleted
Member since: January 1970
Posts: 0
Apr 28, 2024 18:04:06 GMT -5
Apr 28, 2024 18:04:06 GMT -5
|
Post by Deleted on Apr 18, 2012 12:52:11 GMT -5
Thanks, I try to explain what I have done and why because so often I will see neat idea or concept someone has posted and I can not understand what or why it was done which I think is one of the main purposes of following a blog.
|
|
|
|
Post by spud on Apr 18, 2012 13:46:50 GMT -5
totaly agree with dicky your doing a great job explaining things, and man it is turning out really nice
|
|
|
|
Post by Mence on Apr 18, 2012 13:53:36 GMT -5
always had a soft spot for these, enjoying watching this come together.
|
|
Deleted
Member since: January 1970
Posts: 0
Apr 28, 2024 18:04:06 GMT -5
Apr 28, 2024 18:04:06 GMT -5
|
Post by Deleted on Apr 19, 2012 11:35:25 GMT -5
Getting support from those who view is important also.
|
|
|
|
Post by 406 Silverado on Apr 21, 2012 8:23:09 GMT -5
wow, this is really shaping up. Nice PE work and the tow cables look great.
|
|
|
|
Post by robbo on Apr 21, 2012 9:32:43 GMT -5
Good progress on this build, always liked the look of the Staghound
|
|
|
|
Post by wouter on Apr 22, 2012 1:29:42 GMT -5
Nice build so far and love those photos with text added!
Cheers
|
|
|
|
Post by Mence on Apr 22, 2012 2:26:09 GMT -5
Good, informative blog this, look forward to more.
|
|


 as they say no rush just build and post.