panzerman75.
Full Member
  
Member since: February 2012
Posts: 292
Feb 19, 2012 1:07:13 GMT -5
Feb 19, 2012 1:07:13 GMT -5
|
Post by panzerman75. on Oct 27, 2012 20:14:54 GMT -5
Dennis looks great cant wait to see some more keep up the great work.  Phil |
|
|
|
Post by dupes on Oct 27, 2012 22:42:19 GMT -5
I've got this same kit with all kinds of aftermarket ready to roll...the one part that I always knew needed replacing was that turret. Awesome job pulling it off! Going to have to hope I can manage to do something nearly as good.
|
|
|
|
Post by wbill76 on Oct 28, 2012 10:35:52 GMT -5
Looks good with the primer on Dennis, now on to real fun!
|
|
|
|
Post by bullardino on Oct 29, 2012 5:51:39 GMT -5
Nice job, Dennis  |
|
DennisM
Full Member
  
Member since: January 2012
Posts: 214
Jan 24, 2012 8:18:54 GMT -5
Jan 24, 2012 8:18:54 GMT -5
|
Post by DennisM on Oct 29, 2012 10:13:16 GMT -5
I've got this same kit with all kinds of aftermarket ready to roll...the one part that I always knew needed replacing was that turret. Awesome job pulling it off! Going to have to hope I can manage to do something nearly as good. For the launcher parts I just made a CAD file and printed it out and taped the pattern onto white plastic card. I bought some 3/16 tubing that had very thin walls. I took a piece of the tubing and scored the end with an exacto blade to make sort of a hole saw. Very carefully turn the "saw" by hand and cut out the pattern on the card. The first few are easy but the card gets fragile as you cut more out of it and it may break. It was very time consuming but I think worth it if you look at the really sad kit parts. The launcher is the focal point of the kit and you do not want it to look as clunky as it is. Even the very expensive Bronco kit doesn't look as good as it should IMO. I have since lost the PDF file that I made but since it took about 5 minutes to create I will do it again and somehow get the PDF to whoever wants it. It looks like a couple of people are interested in building this kit so I could have it ready in a day or so. I dont know, is there is a way to link a PDF to the thread? Dennis |
|
|
|
Post by wing_nut on Oct 29, 2012 11:07:43 GMT -5
Damn that looks crazy good.
|
|
DennisM
Full Member
  
Member since: January 2012
Posts: 214
Jan 24, 2012 8:18:54 GMT -5
Jan 24, 2012 8:18:54 GMT -5
|
Post by DennisM on Jul 16, 2014 21:05:14 GMT -5
Bump
Update coming very soon.
|
|
|
|
Post by deafpanzer on Jul 16, 2014 23:19:02 GMT -5
WOW! Never saw this because I joined MSC in June 2013. LOL Amazing work on the tubes and wirings... can't wait to see your update.
|
|
DennisM
Full Member
  
Member since: January 2012
Posts: 214
Jan 24, 2012 8:18:54 GMT -5
Jan 24, 2012 8:18:54 GMT -5
|
Post by DennisM on Jul 17, 2014 5:09:24 GMT -5
I just wanted to get this off the shelf and finish it up. I tried a new brand of paint (Lifecolor) since I have heard great things about it. Maybe it is the humidity in Florida but I wasn't very happy with the finish. It is kind of rough, dry and powdery. I guess I just prefer Vallejo paint. Oh well lesson learned and it is not so bad that the project is scrapped. Anyway, I did manage to get all of the paint on and started post-highlighting, which I prefer to pre-shading. Don't worry it all gets toned down with the weathering. I am going to let this dry for another day or two and clear coat it for some weathering. This picture was taken in bad light so it may or may not represent how it really looks. 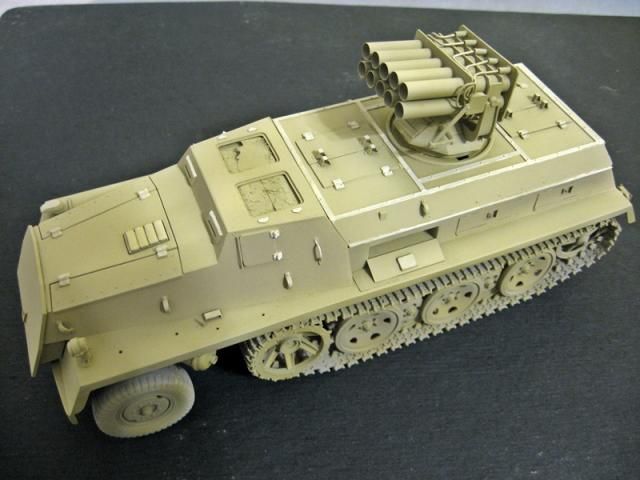 You will notice that I only took a picture from the left side. That is because I broke the right wheel off  |
|
elco
Full Member
   July & Oct 2014 MoM Winner
Member since: May 2013
MOY 2014 Winner
Posts: 660 
|
Post by elco on Jul 17, 2014 5:45:28 GMT -5
Looking good, love the highlights. This is something i like to build once  |
|
|
|
Post by wbill76 on Jul 17, 2014 10:57:42 GMT -5
Nice to see this one come back around again Dennis. Nice start to the paint work and we promise to keep your secret on the right side wheel...  |
|
|
|
Post by deafpanzer on Jul 17, 2014 14:04:32 GMT -5
It looks great... really like the highlights on the edges and corners!
|
|
DennisM
Full Member
  
Member since: January 2012
Posts: 214
Jan 24, 2012 8:18:54 GMT -5
Jan 24, 2012 8:18:54 GMT -5
|
Post by DennisM on Jul 19, 2014 16:32:03 GMT -5
Going forward with reckless abandon on this one as I really want to see it finished. I went ahead and did what I was least looking forward to, the tracks. Since I had to glue the tracks in place the painting was incredibly difficult. Luckily I had one of the plastic bendy brushes to get behind the road wheels. Right now the tracks and tires are in show room floor condition, a condition I will soon remedy  . You will also notice that the right wheel is fixed and back in place. Next I need to get the tools painted and attached. 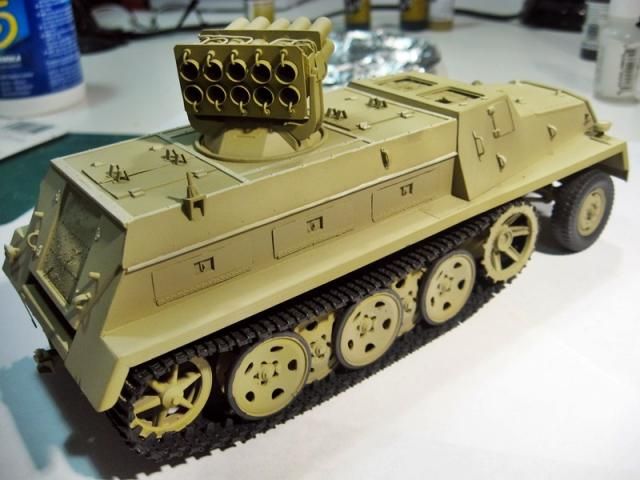 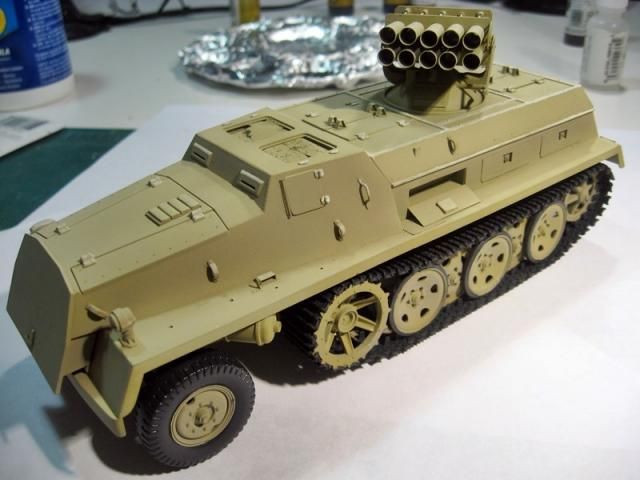 [/a] 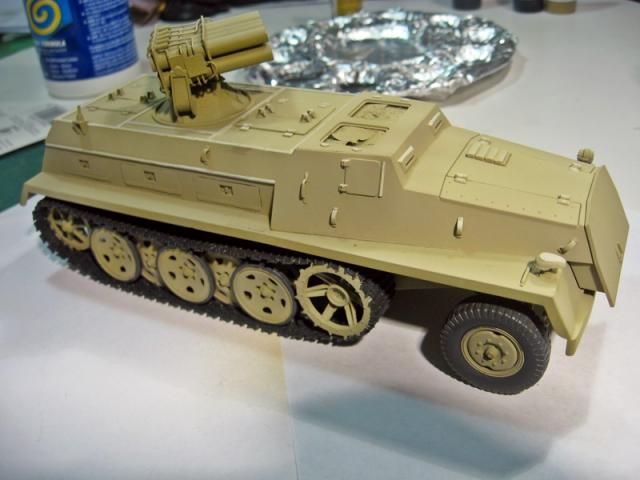 Still working on getting my camera settings right so bear with me. |
|
|
|
Post by dupes on Jul 20, 2014 7:49:43 GMT -5
It's back! Missed your post about the PDF template - still have that? Would live to give that a shot.
|
|
DennisM
Full Member
  
Member since: January 2012
Posts: 214
Jan 24, 2012 8:18:54 GMT -5
Jan 24, 2012 8:18:54 GMT -5
|
Post by DennisM on Jul 21, 2014 5:08:04 GMT -5
It's back! Missed your post about the PDF template - still have that? Would live to give that a shot. If I don't have it anymore I can easily make up a new one. Well folks I am now street legal! Don't have to worry about the fuzz pulling me over anymore! They are the Eduard PE license plates which I painted white then spread black paint with retarder in it on some paper and pushed the plate on. That worked okay but I was impatient and didn't let the paint dry enough between steps. It came out okay but could have been less aggravating. 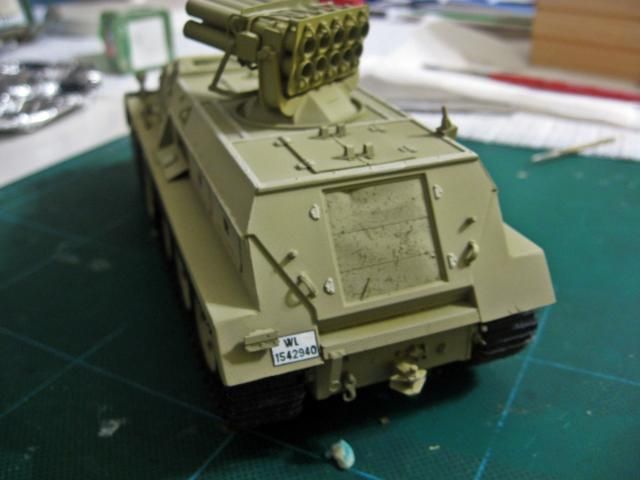 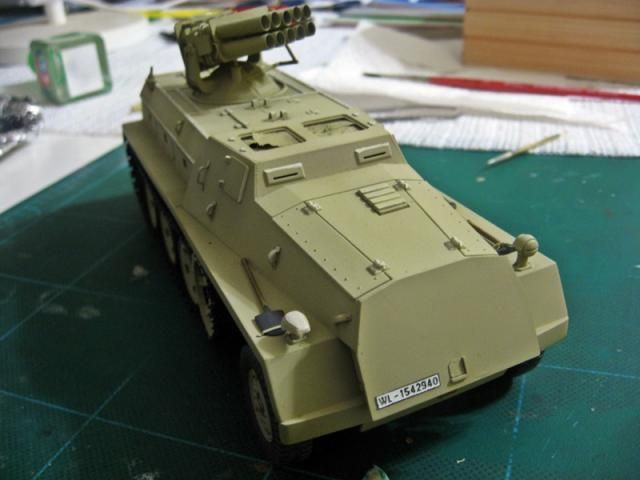 |
|
|
|
Post by dupes on Jul 21, 2014 6:23:25 GMT -5
Looking good!  |
|
|
|
Post by deafpanzer on Jul 21, 2014 12:49:39 GMT -5
Agree with Dupes... looking forward to more. Now I am tempted to get same kit... LOL
|
|
|
|
Post by Leon on Jul 21, 2014 17:43:52 GMT -5
Looking really good Dennis.  |
|
|
|
Post by wbill76 on Jul 21, 2014 19:07:59 GMT -5
Nice trick on the license plates...almost like an ink-stamp in reverse!
|
|
DennisM
Full Member
  
Member since: January 2012
Posts: 214
Jan 24, 2012 8:18:54 GMT -5
Jan 24, 2012 8:18:54 GMT -5
|
Post by DennisM on Jul 25, 2014 14:50:35 GMT -5
Thanks everybody! I did a little more today. I did some chipping which may look a little heavy right now but will down down later. If anyone is thinking of getting this kit, beware. It has some serious issues. The tracks are absolutely terrible. If a company makes a replacement set get them. Do not even bother with the kit tracks. As far as the tubes go, it wasn't that hard (I did it so...). I am still working on redoing the template and as so as soon as that is finished I will let everyone know. There is the Bronco kit but my goodness, the price $$$. Even in the Bronco kit the launcher and tubes were so-so. I used the Eduard PE set which also brought the kit up to acceptable standards. Anyway... 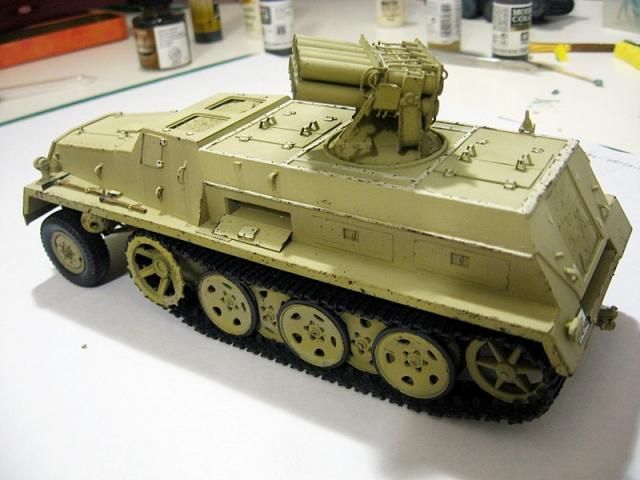 |
|
|
|
Post by wbill76 on Jul 25, 2014 16:58:22 GMT -5
Chipping looks like it will provide a solid foundation for the weathering to come Dennis, nice!
|
|
|
|
Post by deafpanzer on Aug 2, 2014 21:51:29 GMT -5
Excellent subtle chipping work! Thanks for the head up about this kit...
|
|
|
|
Post by dupes on Aug 2, 2014 22:33:58 GMT -5
Yeah, it definitely needs help...which is why I have Fruils, the Eduard set, etc. But the launcher on top is still very dominant and is not completely fixed with that set - needs scratchy love like you've given it here!
|
|
DennisM
Full Member
  
Member since: January 2012
Posts: 214
Jan 24, 2012 8:18:54 GMT -5
Jan 24, 2012 8:18:54 GMT -5
|
Post by DennisM on Aug 11, 2014 5:13:08 GMT -5
Thanks everyone! I have been slowly chipping(pun anyone)away at this and have been making slow progress, but progress nonetheless. I have started using some AK wash for dark yellow vehicles. I really love this stuff. It can take a so-so modeler like myself and really produce some nice looking stuff with so much ease. Here is what I have so far on the launcher and the roof. 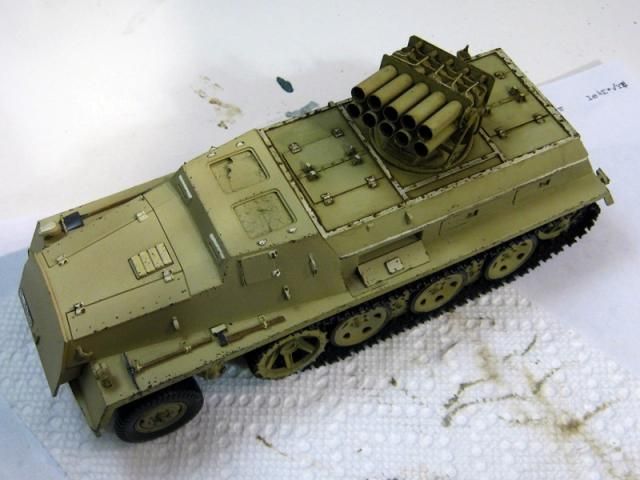 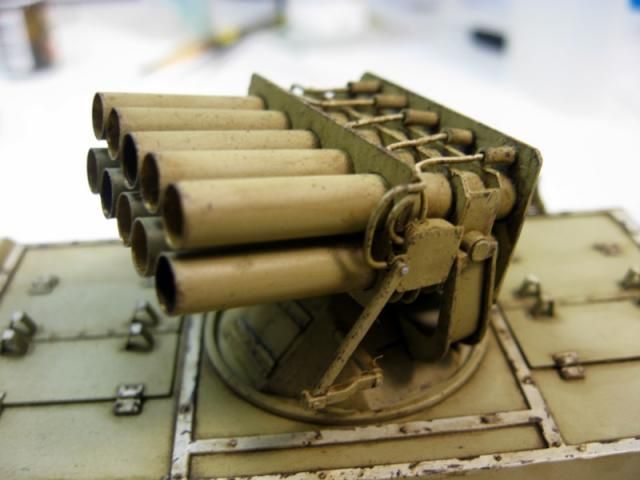 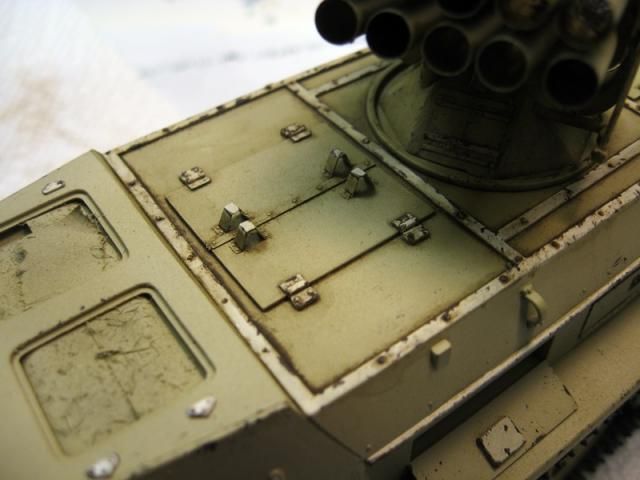 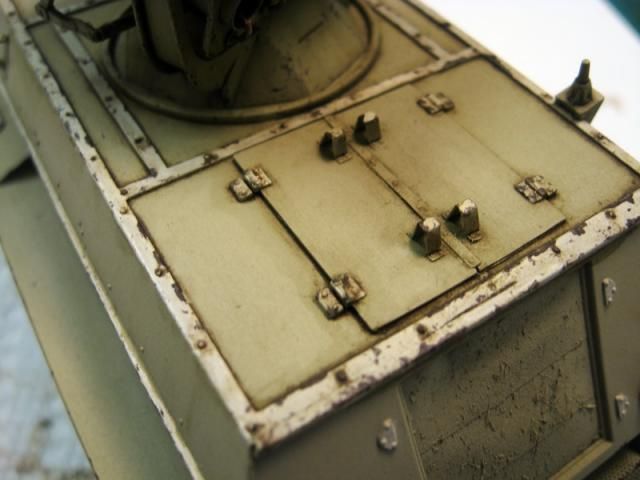 Hope to post some more soon Dennis |
|
|
|
Post by dupes on Aug 11, 2014 10:56:15 GMT -5
Looks great Dennis!
|
|
elco
Full Member
   July & Oct 2014 MoM Winner
Member since: May 2013
MOY 2014 Winner
Posts: 660 
|
Post by elco on Aug 11, 2014 13:48:00 GMT -5
Nice and raw, looking great!
|
|
|
|
Post by wbill76 on Aug 11, 2014 15:06:09 GMT -5
Nice little update there Dennis, definitely adding some depth to that DY finish.
|
|
desertrat
Full Member
  
Member since: October 2013
Posts: 934 
|
Post by desertrat on Aug 11, 2014 15:34:39 GMT -5
like it !! chipping looks spot on!
|
|
|
|
Post by Leon on Aug 11, 2014 16:15:51 GMT -5
Coming along nicely Dennis,the details really pop with the wash on.
|
|
DennisM
Full Member
  
Member since: January 2012
Posts: 214
Jan 24, 2012 8:18:54 GMT -5
Jan 24, 2012 8:18:54 GMT -5
|
Post by DennisM on Aug 24, 2014 19:45:45 GMT -5
I never thought that this day would come. I put the doors and hatches (Blue tac anyway) on my Panzerwerfer! I am just about done with the basic wash and will let it dry for a few days before sealing it so I can do some more weathering. I will also make the hatch and door attachments a little more permanent. Here are the pics. This one is the closest to the actual color of the model. 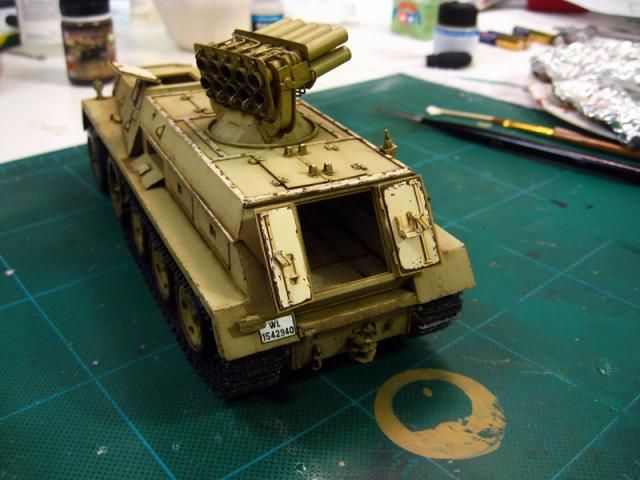 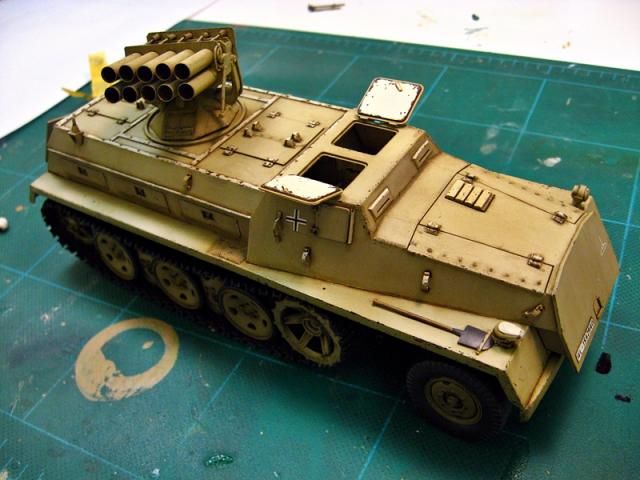 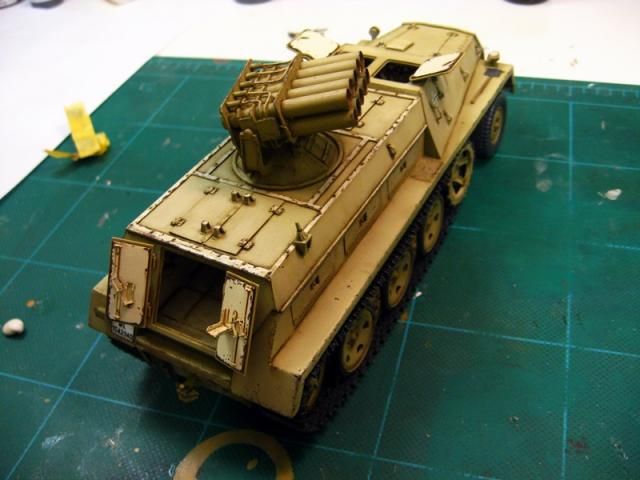 and here is what it looked like just a short while ago. It helps to keep me motivated to look at progress pics. I have changed my camera setting a little but notice how the base color changed with a very thin gloss coat and the AK wash. The pics are a little too orange compared to the actual model so I need a little more adjustment. Getting closer though  |
|