DennisM
Full Member
  
Member since: January 2012
Posts: 214
Jan 24, 2012 8:18:54 GMT -5
Jan 24, 2012 8:18:54 GMT -5
|
Post by DennisM on Jan 25, 2012 5:33:26 GMT -5
I have to get to work so I will just put some quick pics of my panzerwerfer up that I have restarted working on. I will get into more detail later on. 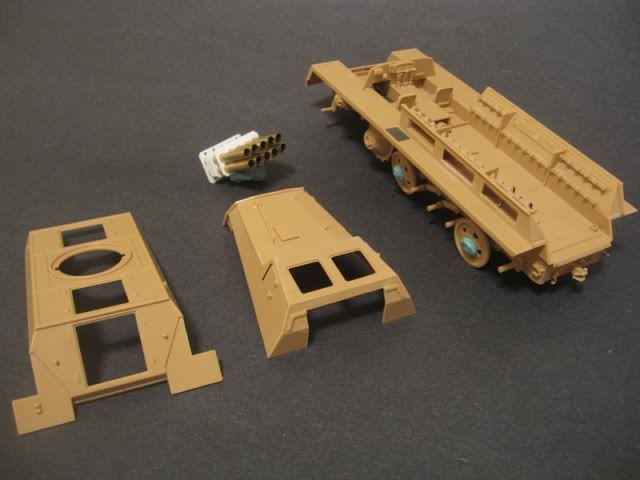 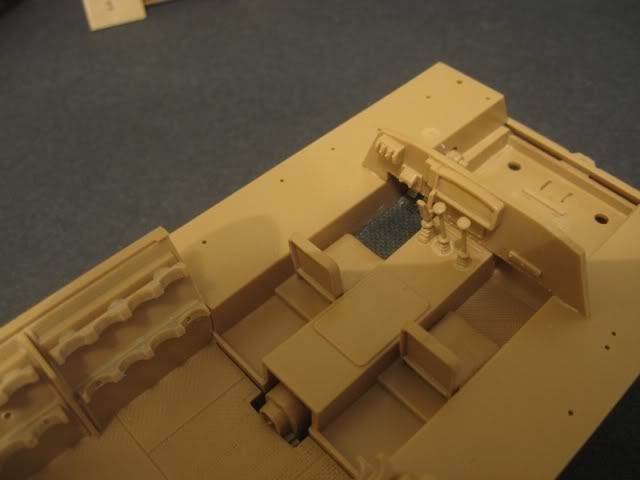 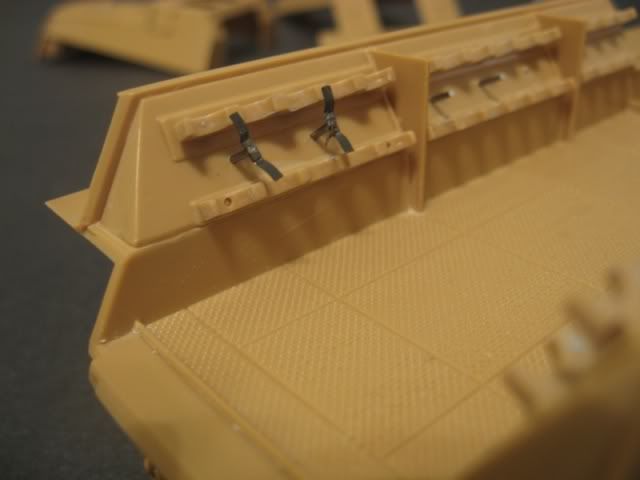 And my first attempt at some serious scratchbuilding 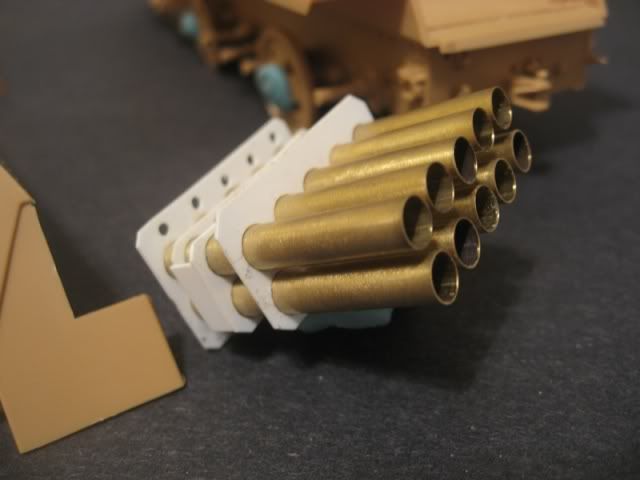 There is still a lot of work to do on this. Dennis |
|
|
|
Post by TRM on Jan 25, 2012 5:42:50 GMT -5
Looking good Dennis!! Nice little bit of scratchwork too!!! Keep it going!! :0
|
|
|
|
Post by spud on Jan 25, 2012 8:47:02 GMT -5
Awsome scratch work, looking ing forward to more
|
|
|
|
Post by Mence on Jan 25, 2012 14:59:00 GMT -5
Looking good, more please...
|
|
DennisM
Full Member
  
Member since: January 2012
Posts: 214
Jan 24, 2012 8:18:54 GMT -5
Jan 24, 2012 8:18:54 GMT -5
|
Post by DennisM on Jan 28, 2012 14:26:47 GMT -5
Thanks for the kind words. I have made some progress although it is difficult to tell. I am not very proficient with photo-etch and it is taking me longer than I would like. Here is one of the rear doors that will be shown open. 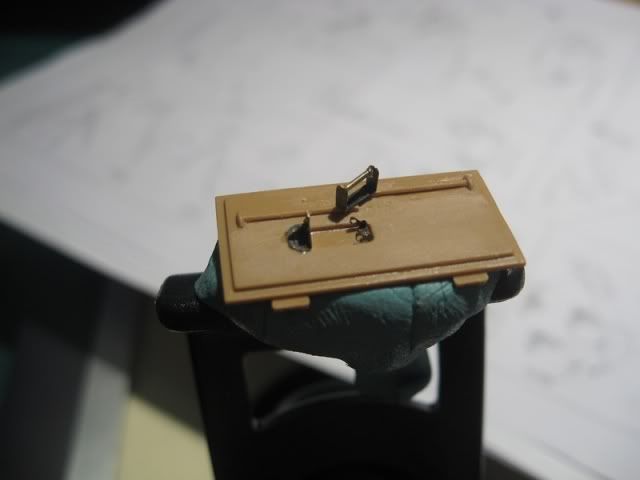 My plan for this is to show a vehicle that has fired it's last rocket and there is no more supply. I want to show it open as the crew would have just abandoned it. I would like to show a hose and some jerry cans to show that the crew would have siphoned out any remaining gas. If I could put it on a diorama base that would be great. I have never even attempted such a thing. I will try to keep this as updated as possible. I have a laptop and camera right next to my desk so I don't have an excuse. Thanks for looking Dennis |
|
bigjohn
Reviews member    
Member since: December 2011
John Hale
Posts: 3,438
Dec 21, 2011 2:17:45 GMT -5
Dec 21, 2011 2:17:45 GMT -5
|
Post by bigjohn on Jan 28, 2012 15:43:50 GMT -5
Nice project! I like the idea of it being abandoned. Can't wait to see more!
|
|
rm6239.
Full Member
  
Member since: November 2011
Ross Moore
Posts: 252
Nov 19, 2011 5:04:13 GMT -5
Nov 19, 2011 5:04:13 GMT -5
|
Post by rm6239. on Jan 28, 2012 17:46:02 GMT -5
Dennis
Looking good and as others have said, nice scratch work. Looking forward to seeing more.
cheers
Rossco
|
|
DennisM
Full Member
  
Member since: January 2012
Posts: 214
Jan 24, 2012 8:18:54 GMT -5
Jan 24, 2012 8:18:54 GMT -5
|
Post by DennisM on Feb 4, 2012 9:13:59 GMT -5
I have been chugging along on this slowly. I have been working long hours and I have been studying for my Professional Engineers exam. That is an 8 hour test that covers everything that I learned in college related to engineering. Needless to say it doesn't leave much for modeling. I did start wiring the rocket launcher. 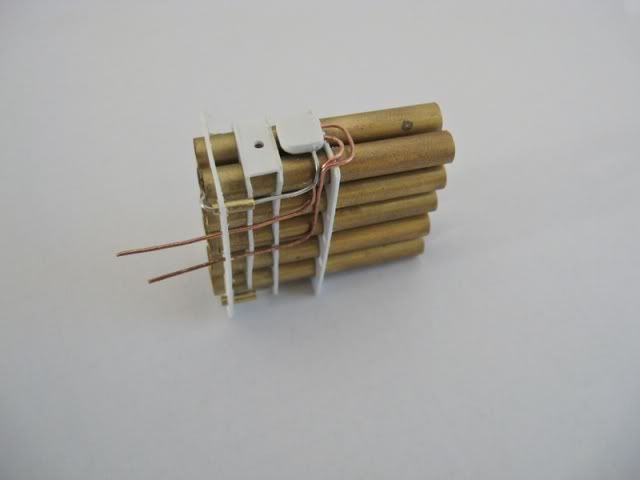 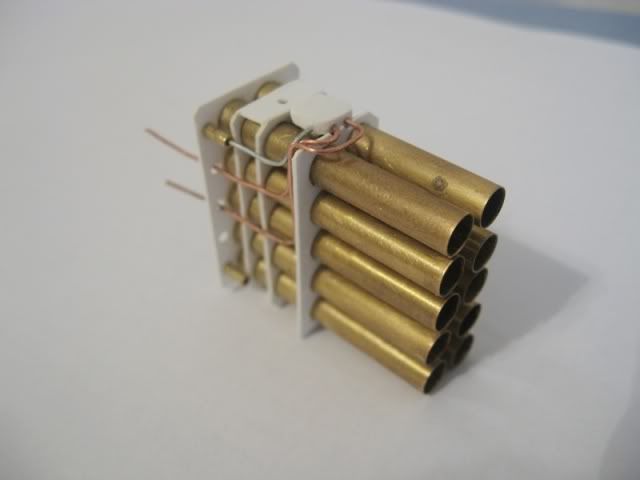 More updates soon. Thanks for looking, Dennis |
|
406 Silverado
Global Administrator     
Member since: November 2011
Posts: 10,201
Member is Online
MSC Staff
|
Post by 406 Silverado on Feb 4, 2012 9:17:53 GMT -5
wow, don 't know how I missed this one....sorry bud. Love the detailed and scratched launcher. Never got around to doing one of these. Count me in on this one.
|
|
DennisM
Full Member
  
Member since: January 2012
Posts: 214
Jan 24, 2012 8:18:54 GMT -5
Jan 24, 2012 8:18:54 GMT -5
|
Post by DennisM on Feb 12, 2012 15:41:11 GMT -5
Thanks everyone! Another update on this snail of a project. I managed to get the interior parts completed and put a coat of paint on them. I used Model Master Panzer interior and I was less than pleased. The paint seemed to form a rubbery film kind of like interior house paint. I didn't have any real trouble with it but I won't be using it any longer. I then got out my new acrylic washes by Vallejo and and followed Mig's Acrylic Techniques DVD. I am now going to use this method and my first choice in pin washing. If you haven't tried it yet and have some trouble getting a good pin wash you may want to check out the DVD. It worked really well on the flat surfaces, but the pattern on the floor was very rough and did not really let go of the wash. The color ended up darker than I wanted at first, but when the top is put on the over-weathering works well. I also did some chipping and the pics are taken a little close and look much better to the naked eye. I tend to take pics closer than my eyes can actually focus. I need to work on that. Anyway on to the pics. 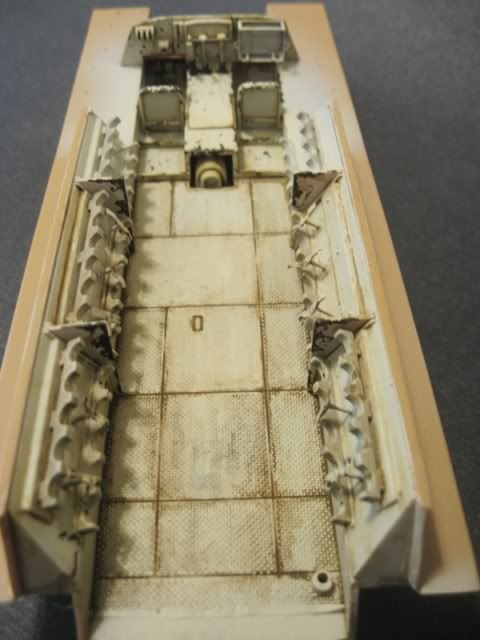 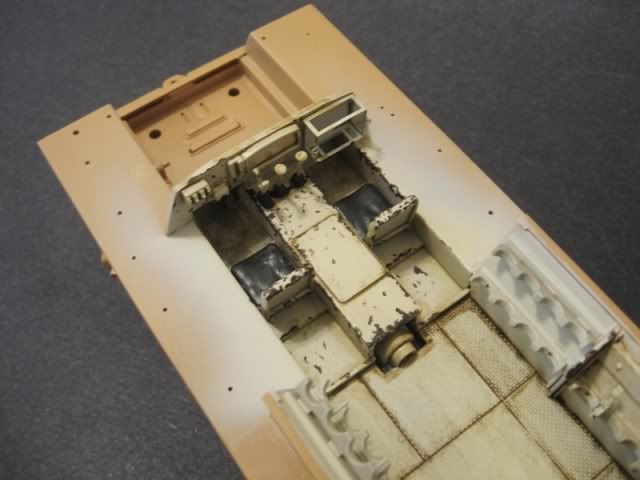 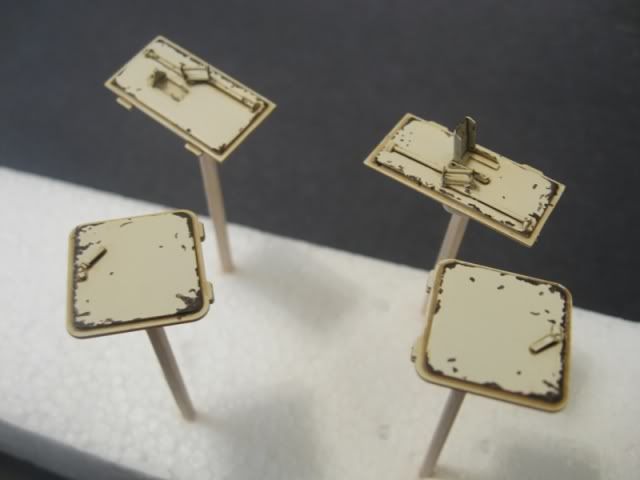 hopefully more soon. -Dennis |
|
bigjohn
Reviews member    
Member since: December 2011
John Hale
Posts: 3,438
Dec 21, 2011 2:17:45 GMT -5
Dec 21, 2011 2:17:45 GMT -5
|
Post by bigjohn on Feb 13, 2012 7:01:23 GMT -5
Paint and weathering looks great Dennis.
|
|
|
|
Post by TRM on Feb 13, 2012 7:21:52 GMT -5
Great chipping Dennis!! Love the weatheing all around!! Keep it going!!
|
|
multicam
Senior Member
   
Member since: January 2012
Nate
Posts: 2,039
Jan 10, 2012 14:35:41 GMT -5
Jan 10, 2012 14:35:41 GMT -5
|
Post by multicam on Feb 13, 2012 9:32:49 GMT -5
Looking good!
|
|
johnt
Full Member
   Feb 2012 MoM and 2012 Model of the Year Winner
Member since: November 2011
Posts: 1,174
Nov 15, 2011 5:38:32 GMT -5
Nov 15, 2011 5:38:32 GMT -5
|
Post by johnt on Feb 13, 2012 11:10:50 GMT -5
Hi Dennis, it's all going very nicely! Best of luck with your Engineers exam. Cheers!
JT
|
|
|
|
Post by robbo on Feb 13, 2012 16:54:09 GMT -5
Nice work Dennis, some great stuff on the site on the moment, yours included
|
|
DennisM
Full Member
  
Member since: January 2012
Posts: 214
Jan 24, 2012 8:18:54 GMT -5
Jan 24, 2012 8:18:54 GMT -5
|
Post by DennisM on Feb 17, 2012 19:36:03 GMT -5
Thanks everyone! Did a little more work recently and I have the top glued on now.   A little bit of PE work done too.  I will try to keep things updated a little better. Modeling time is sporadic and camera time even more so. Thanks for looking, Dennis |
|
406 Silverado
Global Administrator     
Member since: November 2011
Posts: 10,201
Member is Online
MSC Staff
|
Post by 406 Silverado on Feb 17, 2012 20:34:16 GMT -5
Very nice update. God to see you got the inside painted and weathered...all down hill now.
|
|
danb.
Reviews member     March 2013 MoM Winner
Member since: November 2011
Posts: 2,808
Nov 17, 2011 9:22:52 GMT -5
Nov 17, 2011 9:22:52 GMT -5
|
Post by danb. on Feb 18, 2012 4:09:32 GMT -5
looking good so far my friend i have recently bought Panzerwrecks 11 Normandy and there was several panzerwerfers in there awesome piece of kit keep up the good work
Dan B
|
|
DennisM
Full Member
  
Member since: January 2012
Posts: 214
Jan 24, 2012 8:18:54 GMT -5
Jan 24, 2012 8:18:54 GMT -5
|
Post by DennisM on Oct 18, 2012 5:06:08 GMT -5
Just got back from a trip in the way back machine and found this. It was on page 9 to be exact. I have done a little bit more and construction is almost complete. The tracks were really really bad on this kit. I tried to do everything I could think of to be able to take the track and wheels apart for painting but complete assembly was the only real option. I remember the tracks being one link short. The tracks are Tiger II style where there are two different kinds of links so being one off is really not good. I ended up just gluing the links to the sprocket and not to each other to get the spacing right. They are going to be a nightmare to paint.  Dennis |
|
bigjohn
Reviews member    
Member since: December 2011
John Hale
Posts: 3,438
Dec 21, 2011 2:17:45 GMT -5
Dec 21, 2011 2:17:45 GMT -5
|
Post by bigjohn on Oct 18, 2012 6:01:31 GMT -5
Looks good!! Looking forward to paint. I feel your pain on the detail painting of the tracks.
|
|
|
|
Post by wing_nut on Oct 18, 2012 9:26:23 GMT -5
Very sharp. Like he chipping of the inteiror.
|
|
panzerjager.
Full Member
  
Member since: June 2012
Posts: 204
Jun 5, 2012 21:56:23 GMT -5
Jun 5, 2012 21:56:23 GMT -5
|
Post by panzerjager. on Oct 18, 2012 12:33:30 GMT -5
The tracks were really really bad on this kit. I tried to do everything I could think of to be able to take the track and wheels apart for painting but complete assembly was the only real option. I remember the tracks being one link short. The tracks are Tiger II style where there are two different kinds of links so being one off is really not good. I ended up just gluing the links to the sprocket and not to each other to get the spacing right. They are going to be a nightmare to paint. Dennis Yep, I suffer that issue years ago with the sWS cargo version. Anyway you managed it really well. Waiting for painting Darío |
|
|
|
Post by bbd468 on Oct 18, 2012 22:26:05 GMT -5
Dennis, This thing looks great!!! Ive had my eye on this kit...its neat and different. Yeah, i just said the word NEAT! ;D Lookin' forward to paint man!  Gary |
|
Deleted
Member since: January 1970
Posts: 0
Nov 22, 2024 23:34:50 GMT -5
Nov 22, 2024 23:34:50 GMT -5
|
Post by Deleted on Oct 19, 2012 2:37:45 GMT -5
Great work so far very neat
|
|
|
|
Post by wing_nut on Oct 19, 2012 7:55:33 GMT -5
The way back machine? Sherman must be all grown up by now  Like the work with the tubes. Nice all around. |
|
DennisM
Full Member
  
Member since: January 2012
Posts: 214
Jan 24, 2012 8:18:54 GMT -5
Jan 24, 2012 8:18:54 GMT -5
|
Post by DennisM on Oct 19, 2012 8:32:02 GMT -5
The way back machine? Sherman must be all grown up by now  Like the work with the tubes. Nice all around. And Mr. Peobody is just an old mutt.  |
|
|
|
Post by wbill76 on Oct 19, 2012 20:37:43 GMT -5
Nice to see this one get resurrected! Looking forward to more.
|
|
DennisM
Full Member
  
Member since: January 2012
Posts: 214
Jan 24, 2012 8:18:54 GMT -5
Jan 24, 2012 8:18:54 GMT -5
|
Post by DennisM on Oct 27, 2012 18:05:44 GMT -5
I finished the last few bits of construction that were left and put on a coat of primer. I use Floquil railroad enamel primer. Stinks something awful but I have yet to find something that goes on smoother and as tough as this stuff. I am really happy with how the launcher came out. When compared with the original kit part I am quite happy. First time for everything  . Well on to the pics    Thanks for looking, Dennis |
|
406 Silverado
Global Administrator     
Member since: November 2011
Posts: 10,201
Member is Online
MSC Staff
|
Post by 406 Silverado on Oct 27, 2012 18:09:16 GMT -5
Damn that looks sweet. I haven't built this one yet but have wanted to wreck one for years. Time to check Red Frog to see if they have this kit.
Yep the launcher looks great with the primer, the entire model does.
|
|
bigjohn
Reviews member    
Member since: December 2011
John Hale
Posts: 3,438
Dec 21, 2011 2:17:45 GMT -5
Dec 21, 2011 2:17:45 GMT -5
|
Post by bigjohn on Oct 27, 2012 19:24:44 GMT -5
That looks really sweet with the primer on!
|
|