|
|
Post by deafpanzer on Mar 24, 2013 17:19:03 GMT -5
Freaking awesome! Bet it is the llllloooonngggeeesssstttt track you ever have worked on? Saw couple of same kit at the show yesterday but they wanted $65-$75 so I passed... knowing it is on sale often at Dragon USA site.
|
|
|
|
Post by tonylee-Rest In Peace on Mar 24, 2013 17:50:00 GMT -5
Sorry i'm late Bill but I was watching the race. Nice update and good progress to boot. See you next time which should be soon  Tony lee |
|
|
|
Post by wbill76 on Mar 24, 2013 18:25:50 GMT -5
Freaking awesome! Bet it is the llllloooonngggeeesssstttt track you ever have worked on? Saw couple of same kit at the show yesterday but they wanted $65-$75 so I passed... knowing it is on sale often at Dragon USA site. Dragon USA has it listed right now for $49.99 under their current sale which is good through 3/29, much better than the $65-$75 range for sure (checking the Hobby Intel system shows anything over $65 is highway robbery!).  I picked this one up as part of a Christmas sale for $40 IIRC. This is indeed the longest track I've worked with...the previous record was 118 links for a T-28 build.  Sorry i'm late Bill but I was watching the race. Nice update and good progress to boot. See you next time which should be soon  Tony lee No problem Uncle Tony, you've got the perfect excuse! This week is my 'Spring Break' vacation/celebration since my wife has the time off from her job as an elementary school music teacher. That may translate into a couple more updates depending outside of the usual schedule. Have to see! |
|
reserve
Senior Member
   
Member since: July 2012
Si vis pacem para bellum
Posts: 2,372
Jul 11, 2012 9:11:45 GMT -5
Jul 11, 2012 9:11:45 GMT -5
|
Post by reserve on Mar 24, 2013 19:51:21 GMT -5
Nice!!
Regards,
Mark
|
|
bigjohn
Reviews member    
Member since: December 2011
John Hale
Posts: 3,438
Dec 21, 2011 2:17:45 GMT -5
Dec 21, 2011 2:17:45 GMT -5
|
Post by bigjohn on Mar 24, 2013 19:54:44 GMT -5
You bout got it whipped now Bill. The rest will be easy breezy.
|
|
|
|
Post by wbill76 on Mar 24, 2013 20:07:45 GMT -5
Thanks Mark!
BJ, I'm still debating with myself how best to paint and weather the tracks along with the lower hull and sponsons. Reference pics showed these things got really dusty/dirty as a result of the track runs, so I may end up approaching this one a little differently as a result. Have to ponder it a bit before deciding.
|
|
|
|
Post by 406 Silverado on Mar 25, 2013 5:28:07 GMT -5
Now that's what I'm talking about. Great to see you getting bench time Bill. Nice way to tackle the complex...or pia suspension. Tracks look good too, just the right amount of slack.
|
|
|
|
Post by wbill76 on Mar 25, 2013 12:51:48 GMT -5
Thanks Rob! Complex = PIA for sure!  |
|
afvfan
Senior Member
   
Member since: December 2012
Bob
Posts: 1,772
Dec 10, 2012 17:32:38 GMT -5
Dec 10, 2012 17:32:38 GMT -5
|
Post by afvfan on Mar 25, 2013 23:27:12 GMT -5
Great progress there, Bill. Now that you've got the heavy work done, and are on the downhill slide, can I expect to see this on the tables at Atlanta?
|
|
|
|
Post by Mence on Mar 26, 2013 2:24:04 GMT -5
Very nice Bill, great to see this rumbling along again.
|
|
Deleted
Member since: January 1970
Posts: 0
Nov 26, 2024 14:54:03 GMT -5
Nov 26, 2024 14:54:03 GMT -5
|
Post by Deleted on Mar 26, 2013 3:33:55 GMT -5
Nice progress here Bill !
|
|
|
|
Post by wbill76 on Mar 26, 2013 13:19:57 GMT -5
Great progress there, Bill. Now that you've got the heavy work done, and are on the downhill slide, can I expect to see this on the tables at Atlanta? Unfortunately no...I have so much other stuff I have to pack and bring that space is at a premium and I won't be entering any builds. Will definitely be enjoying the shows/displays though! Mence and Carl thanks for the comments as well! |
|
|
|
Post by wbill76 on Mar 28, 2013 12:29:09 GMT -5
The track saga continues with some more progress to report. After letting the 4 runs per side thoroughly set up for at least 24 hours, I carefully removed them from the suspension for painting. Since the two sides are not identical, it was essential to avoid any mix-ups between them, so I used an old MK track box with a divider and handy post-it note labels to keep things separate. I airbrushed a base coat of MM Burnt Umber as the foundation and let that cure for 24 hours before moving on to the next phase. 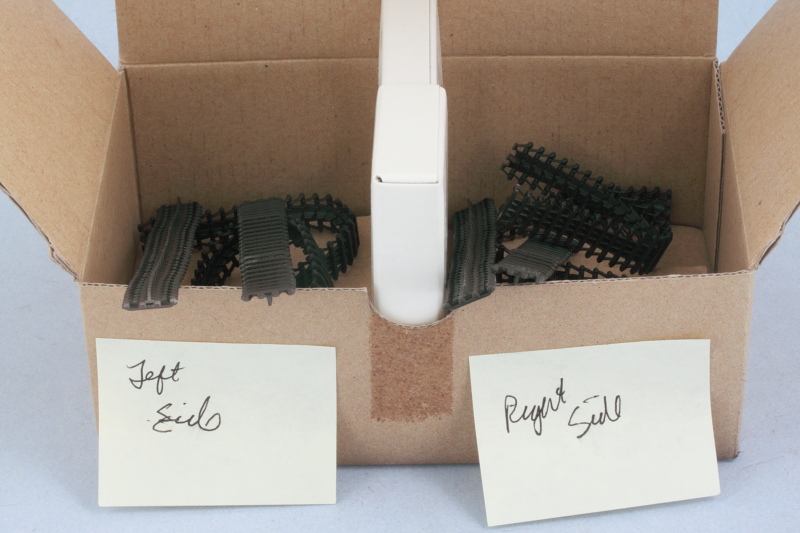 The track runs were further detailed by dry-brushing MM enamel Steel with a large round 0 sable brush followed by a light wash of MM enamel Raw Umber to tone down the Steel and tie things together. Once the wash had dried, the track runs were knitted together on both sides and installed. 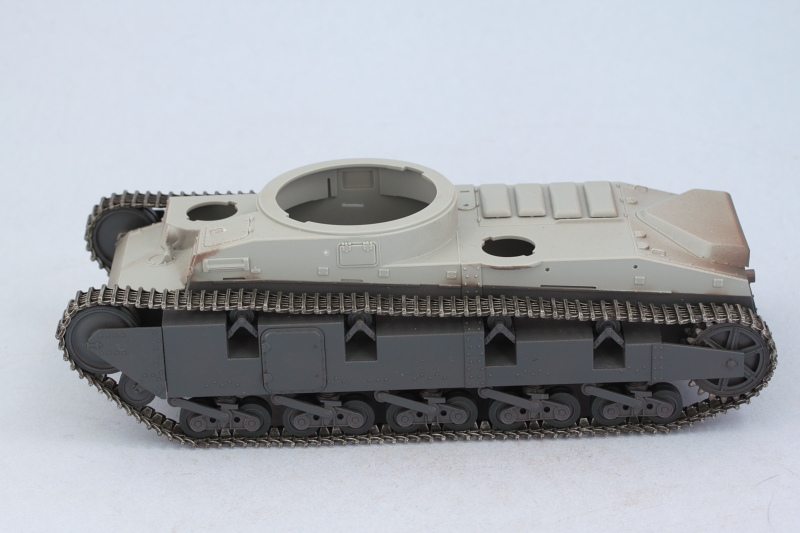 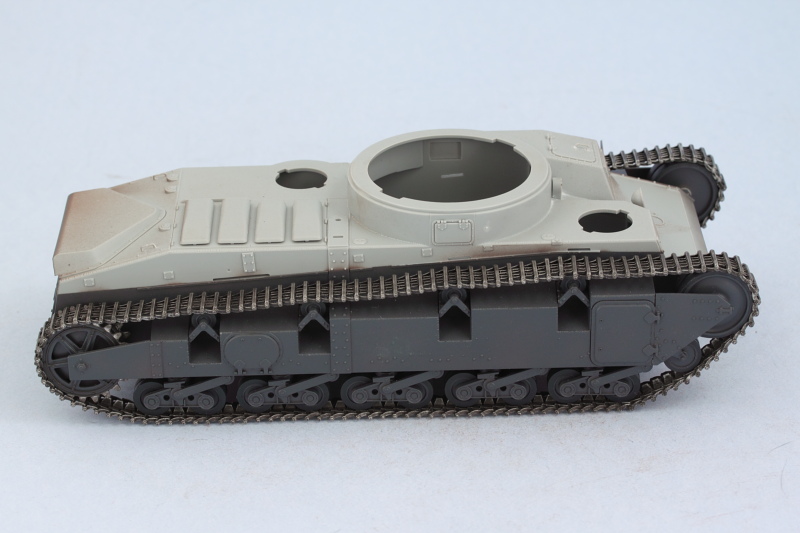 Next up will be adding the fenders and continuing the paint work for the top side. |
|
|
|
Post by Mence on Mar 28, 2013 12:33:36 GMT -5
Very nice track work Bill, looks excellent.
|
|
|
|
Post by eastrock on Mar 28, 2013 12:45:41 GMT -5
awesome drybrushing Bill, I still keep reviewing your articles in FSM hoping to get the finish I want in my T-62 build  |
|
jsteinman
Full Member
  
Member since: March 2013
Posts: 735
Mar 24, 2013 9:29:10 GMT -5
Mar 24, 2013 9:29:10 GMT -5
|
Post by jsteinman on Mar 28, 2013 12:54:09 GMT -5
Funny looking beast, no? Keep it coming 'cause she looks sharp!
|
|
|
|
Post by Tojo72 on Mar 28, 2013 12:58:24 GMT -5
Nice look on those tracks,might have to try out your formula
|
|
|
|
Post by tonylee-Rest In Peace on Mar 28, 2013 13:02:58 GMT -5
Track work is a site to see Bill. You've got a good handle on the technique for sure.  Tony lee |
|
|
|
Post by wbill76 on Mar 28, 2013 16:26:08 GMT -5
Mence Thanks! Tracks are behind me now, major hurdle cleared in terms of getting this one closer to the finish line. ERglad to hear the FSM articles are helping you out, the key is just to experiment and have fun!  John John can't argue with you there...definitely one of the wierder looking beasts in terms of design! Anthony give it a whirl and see if it works out for you. It's one that evolved for me over the span of several builds and will probably evolve again as time goes by!  Tony Tony thank you kindly sir!
|
|
|
|
Post by fightnjoe on Mar 28, 2013 18:35:46 GMT -5
bill another excellent update. neat trick with the tracks.
joe
|
|
|
|
Post by bbd468 on Mar 28, 2013 18:42:52 GMT -5
Trackification?.......CHECK!  Looks great Bill.  Gary |
|
bigjohn
Reviews member    
Member since: December 2011
John Hale
Posts: 3,438
Dec 21, 2011 2:17:45 GMT -5
Dec 21, 2011 2:17:45 GMT -5
|
Post by bigjohn on Mar 28, 2013 19:19:43 GMT -5
Ahh yes, always nice to see the tracks finished! Getting ready to upload track photos on my prject here in a few.
|
|
|
|
Post by TRM on Mar 28, 2013 19:37:15 GMT -5
The tracks look superb Bill!! I might have to put one of these on the "wish list". Looks like it will be a treat to weather!! BTW...Nice seeing the Brummbar on the pages of FSM!! Well done.............again!!  |
|
Deleted
Member since: January 1970
Posts: 0
Nov 26, 2024 14:54:03 GMT -5
Nov 26, 2024 14:54:03 GMT -5
|
Post by Deleted on Mar 29, 2013 2:58:49 GMT -5
Nice Bill .
|
|
|
|
Post by wbill76 on Mar 29, 2013 10:55:59 GMT -5
Joe, Gary, and Carl, thanks for the comments! T, you should add one of these monsters for sure...so much potential because of the design. I keep switching back and forth in my mind as to how I plan to weather it.  Thanks for the kudos on the Brummbar as well.
|
|
|
|
Post by wbill76 on Mar 31, 2013 18:27:21 GMT -5
First off, Happy Easter to those who observe/celebrate the holiday! Lots of progress to report so we'll get right to it. First order of business was to install the fenders. I used a combination of regular glue on the tab slots and liquid glue along the edges to get a good and level join. I also reinstalled the little side hull lights that had gotten knocked off earlier. While not visible in the photo, I took advantage of that opportunity to drill out their solid faces with a pin vise to allow for greater detail later on. 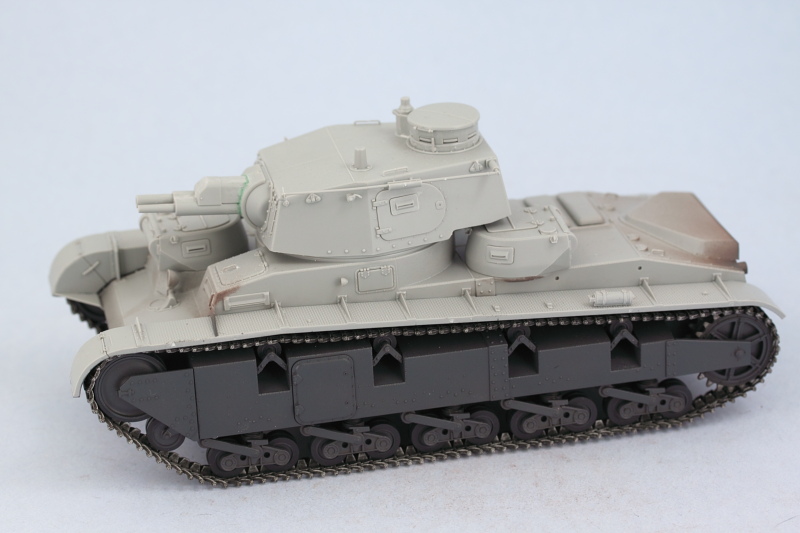 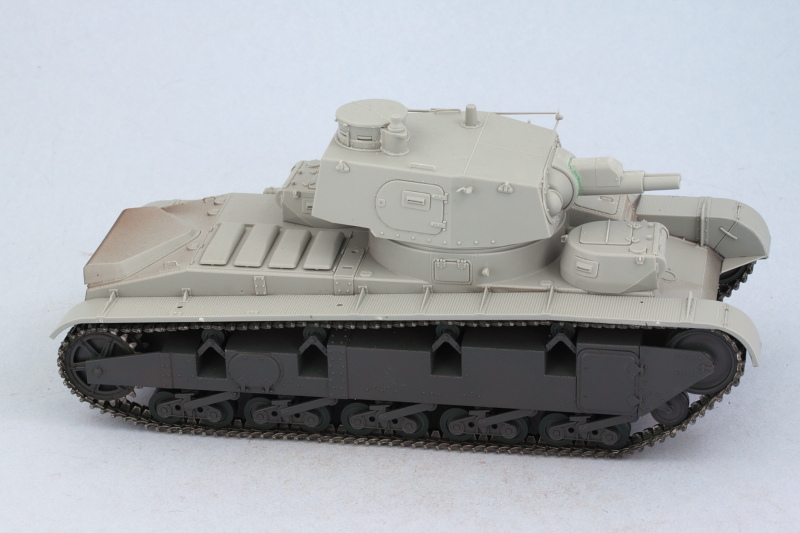 Prior to painting, I masked off the lower hull and tracks using a combination of thin strips of sheet styrene inserted under the fenders and blue painter's tape. Primer coat of Italian Dark Brown was applied by airbrush as the foundation. Three cardboard tubes and painter's tape created handles so I could easily paint the three turrets. 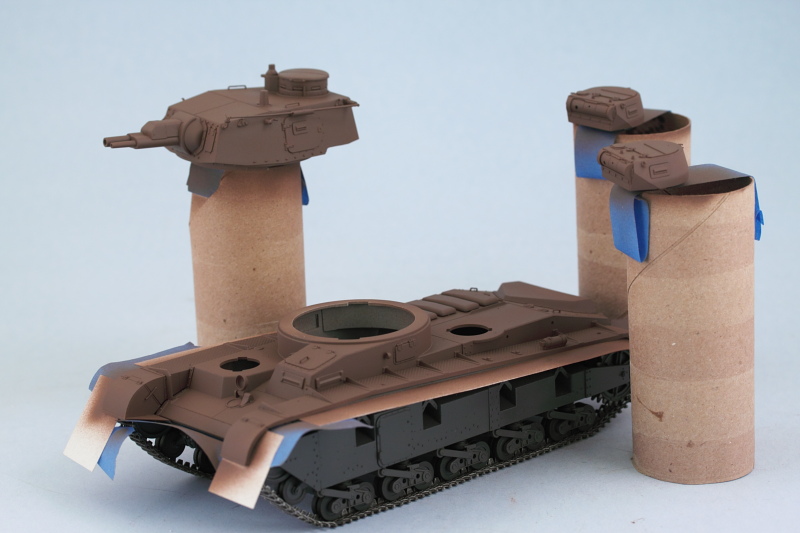 Base coat of MM Panzer Schwarzgrau came next. 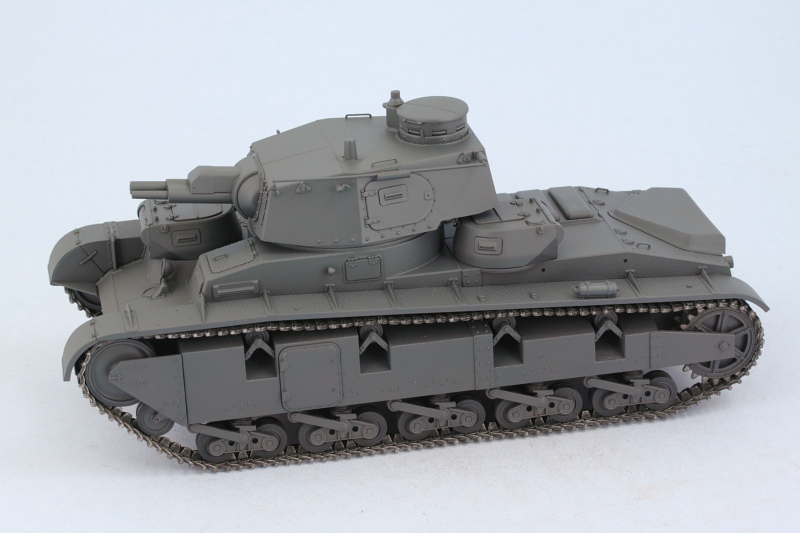 Base coat highlights were added using an 80/20 mix of Schwarzgrau and Light Gray. Highlights were applied semi-randomly but with the main intent of creating a post-shade effect. 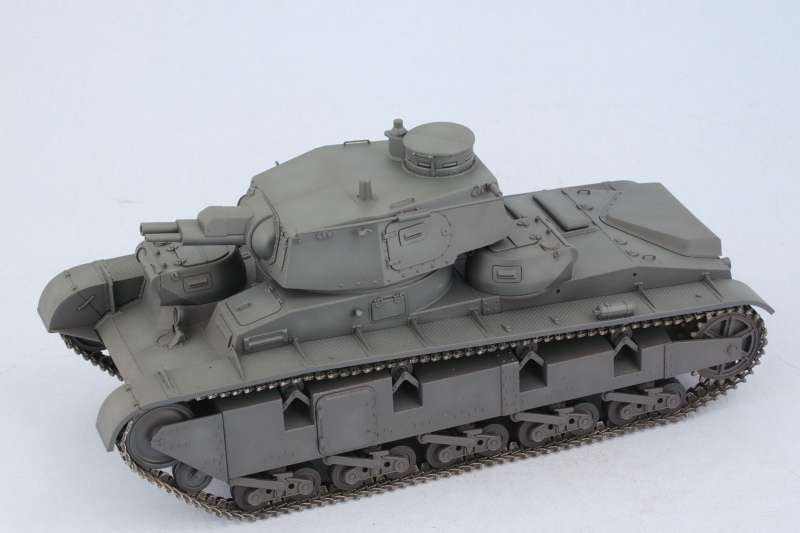 Then came the fun part, applying the disruptive camo pattern suitable for a vehicle in Norway in 1940. I used MM enamel Schokoladenbraun and applied the pattern free-hand. 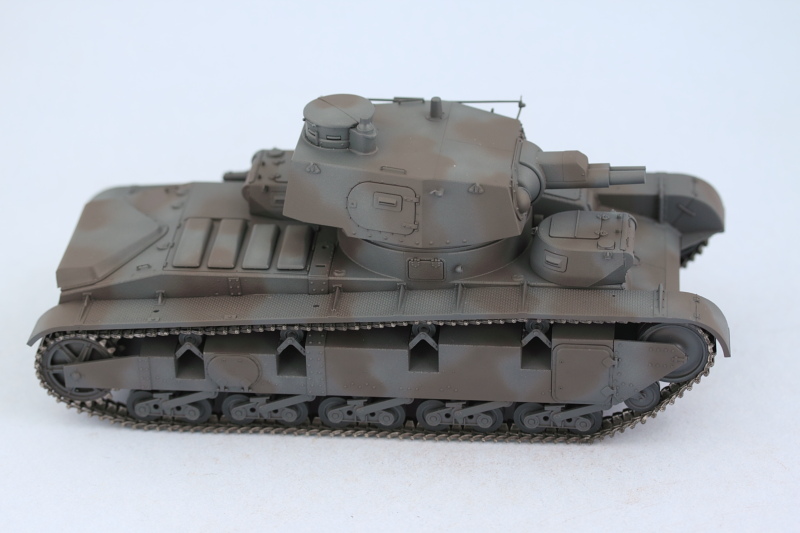 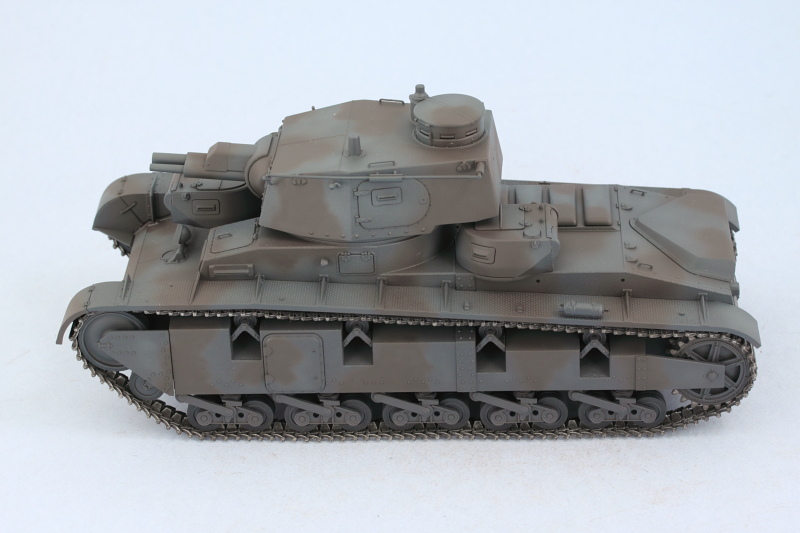 Paint will get the chance to cure thoroughly over the course of the next week and attention will shift to the remaining equipment and fender details. |
|
bigjohn
Reviews member    
Member since: December 2011
John Hale
Posts: 3,438
Dec 21, 2011 2:17:45 GMT -5
Dec 21, 2011 2:17:45 GMT -5
|
Post by bigjohn on Mar 31, 2013 18:44:26 GMT -5
Very nice update Bill!!!!! She is looking good with all that paint on her!
|
|
|
|
Post by bbd468 on Mar 31, 2013 19:02:20 GMT -5
Fantastic Bill! Love the base color and the subtle camo looks just right to me.  Gary |
|
|
|
Post by Leon on Mar 31, 2013 19:25:30 GMT -5
Same as the guys Bill.Looks fantastic.  |
|
|
|
Post by TRM on Mar 31, 2013 19:39:55 GMT -5
Always a treat watching you paint Bill!! The Schokoladenbraun for the camo is superb!!
|
|