panzerjager.
Full Member
  
Member since: June 2012
Posts: 204
Jun 5, 2012 21:56:23 GMT -5
Jun 5, 2012 21:56:23 GMT -5
|
Post by panzerjager. on Jan 16, 2013 20:09:45 GMT -5
|
|
|
|
Post by bbd468 on Jan 17, 2013 0:49:13 GMT -5
Fantastic start PJ! Thanks for putting in the extra effort in adding the links to you references...very cool!  Gary |
|
|
|
Post by deafpanzer on Jan 17, 2013 0:51:46 GMT -5
Nice details on the engine! Dig the links you provided too! Great idea doing this...
|
|
|
|
Post by bullardino on Jan 17, 2013 4:40:17 GMT -5
Off to another great start Panzejager  |
|
|
|
Post by spud on Jan 17, 2013 8:33:21 GMT -5
Oh yummy, I have this and plan on attacking it soon
|
|
Deleted
Member since: January 1970
Posts: 0
Nov 26, 2024 17:13:17 GMT -5
Nov 26, 2024 17:13:17 GMT -5
|
Post by Deleted on Jan 17, 2013 11:49:31 GMT -5
nice start indeed watching with interest
|
|
|
|
Post by Mence on Jan 17, 2013 15:45:24 GMT -5
Fantastic kit, enjoy...
|
|
|
|
Post by wbill76 on Jan 17, 2013 17:38:10 GMT -5
This will be a fun project to watch come together, keep us posted!
|
|
panzerjager.
Full Member
  
Member since: June 2012
Posts: 204
Jun 5, 2012 21:56:23 GMT -5
Jun 5, 2012 21:56:23 GMT -5
|
Post by panzerjager. on Jan 27, 2013 13:03:58 GMT -5
Thanks, fellas! I'm not sure about which version Tamiya represents; I think is an early F3? Well, if you fellas can helps with that info ( how to recognize the differents variants) I'll gratefull Meanwhile I fix a little mistake in the engine: the wire going to the carburator must be fixed to the big hose over it, as seen in this pic  After move the wire I found a book saying this engine is an HL98, from an Famo F2. The F3 carries the HL 108 TUKRM, so I'm not sure about anything :?  Following Aber instructions, I modify the front suspension  About Panzer Art resin wheels, I have serious suspects thats was just perfect copies of the Tamiya wheels. Judge yourself:    That's all for now Darío |
|
Deleted
Member since: January 1970
Posts: 0
Nov 26, 2024 17:13:17 GMT -5
Nov 26, 2024 17:13:17 GMT -5
|
Post by Deleted on Jan 27, 2013 13:27:38 GMT -5
nice work those wheels do look very much like a straight copy
|
|
|
|
Post by wbill76 on Jan 27, 2013 16:36:35 GMT -5
Interesting side-by-side on the wheels. Not uncommon for that to happen when AM stuff is created for a specific kit.
|
|
|
|
Post by Mence on Jan 27, 2013 16:40:10 GMT -5
Nice update, yep the PA wheels are dead ringers!
|
|
panzerjager.
Full Member
  
Member since: June 2012
Posts: 204
Jun 5, 2012 21:56:23 GMT -5
Jun 5, 2012 21:56:23 GMT -5
|
Post by panzerjager. on Feb 9, 2013 15:43:49 GMT -5
Thank, guys! Time to update. You can see the yellow fan provided by the kit; next to it is the Aber part that I was no able to give the right circle shape, so I take a spare part from an old Dragon kit to build the center of the fan and add the P.E. blades 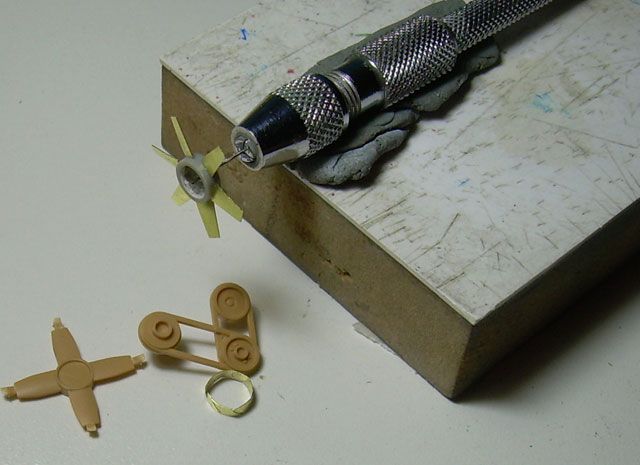 Other details added: compressed air pipes and transmission rods 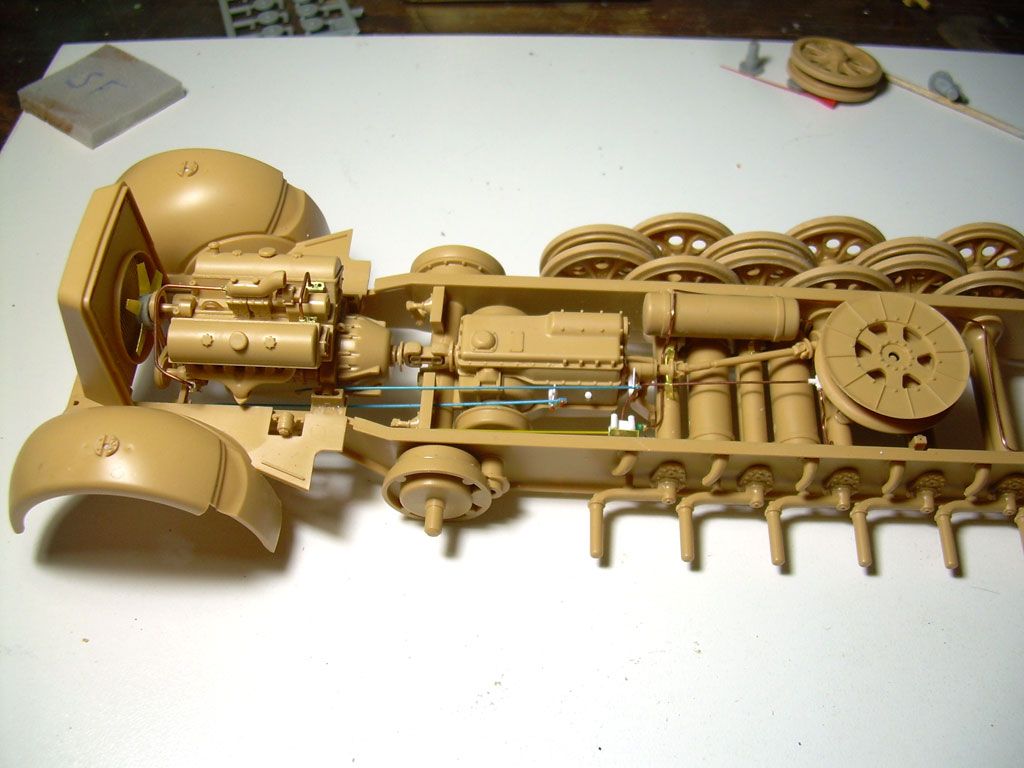 More details added to the rear chassis 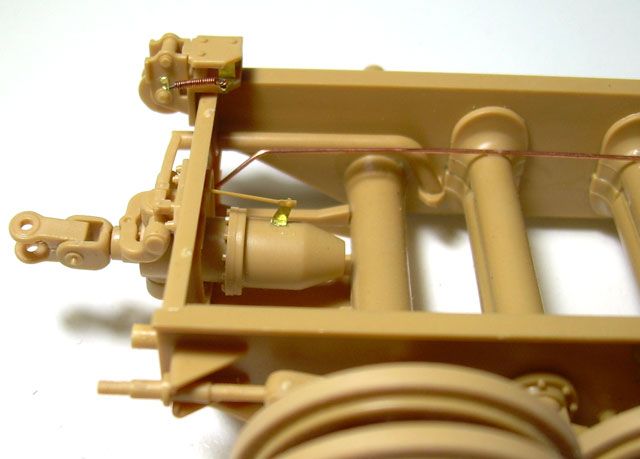 And finally, some color, just to check how it looks 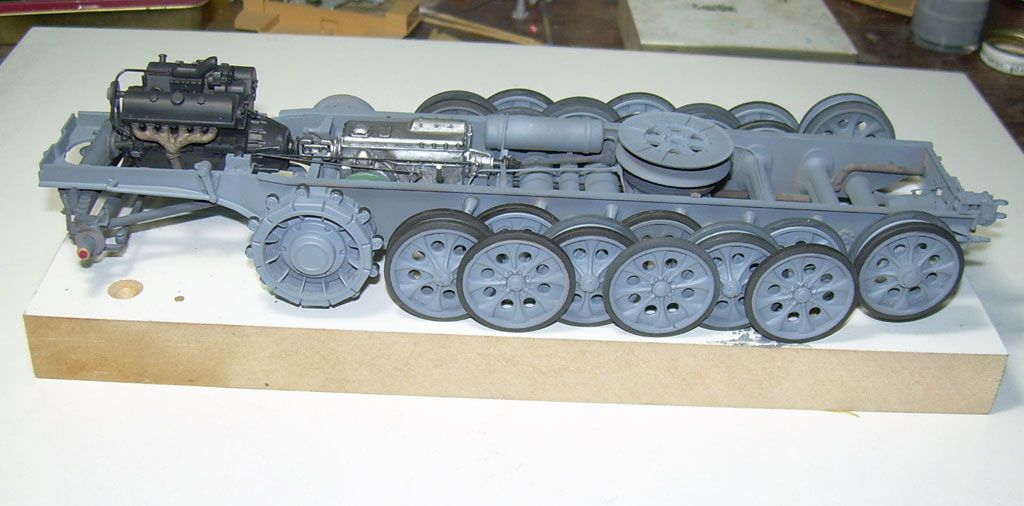 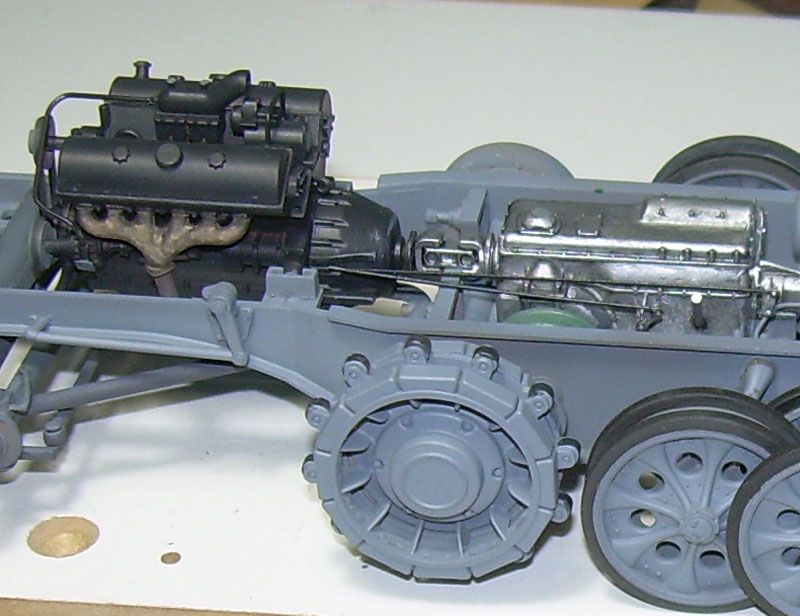 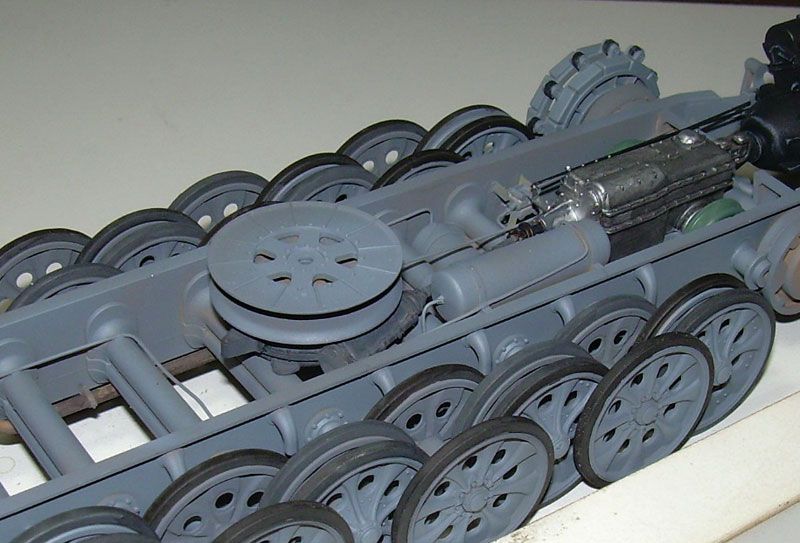 Darío |
|
|
|
Post by ceresvesta. on Feb 9, 2013 15:51:45 GMT -5
Very nice! And thanks for the links, I`ll surely use them.
definitly following.
Phil.
|
|
|
|
Post by Leon on Feb 9, 2013 17:17:52 GMT -5
Nice start on this one PJ.
|
|
|
|
Post by bbd468 on Feb 9, 2013 18:31:21 GMT -5
Hey Dario, Great update man...comin' along sweet!!!  Gary |
|
Deleted
Member since: January 1970
Posts: 0
Nov 26, 2024 17:13:17 GMT -5
Nov 26, 2024 17:13:17 GMT -5
|
Post by Deleted on Feb 9, 2013 18:37:12 GMT -5
Very nice !
|
|
|
|
Post by wbill76 on Feb 9, 2013 21:07:02 GMT -5
Nice to see this one moving again Dario! Nice fix on the fan.
|
|
406 Silverado
Global Administrator     
Member since: November 2011
Posts: 10,244
Member is Online
MSC Staff
|
Post by 406 Silverado on Feb 9, 2013 22:40:47 GMT -5
Off to a very good start on the big guy. Reminds me ...I have that 116 trailer to finish one of these days.
|
|
|
|
Post by TRM on Feb 9, 2013 22:47:24 GMT -5
Great details added Dario!! Looking real nice!! Keep it going!!
|
|
|
|
Post by Mence on Feb 10, 2013 3:13:36 GMT -5
Excellent work, she's coming along really well.
The extra detail you have added really makes a difference!
|
|
danb.
Reviews member     March 2013 MoM Winner
Member since: November 2011
Posts: 2,808
Nov 17, 2011 9:22:52 GMT -5
Nov 17, 2011 9:22:52 GMT -5
|
Post by danb. on Feb 10, 2013 3:47:10 GMT -5
WOW great work Dario the progress is look awesome keep it coming buddy  Dan B |
|
|
|
Post by spud on Feb 10, 2013 16:31:38 GMT -5
Very Nice Dario
|
|
afvfan
Senior Member
   
Member since: December 2012
Bob
Posts: 1,772
Dec 10, 2012 17:32:38 GMT -5
Dec 10, 2012 17:32:38 GMT -5
|
Post by afvfan on Feb 10, 2013 17:09:47 GMT -5
No matter which engine you have, I think it was a safe call to move the air line off the fuel body and up onto the air intake. Nice detailing.
|
|
|
|
Post by wing_nut on Feb 11, 2013 8:35:59 GMT -5
Oh my... that's nice!
|
|
Tojo72
Forum Moderator      Sept '24 Showcased Model Awarded
Member since: November 2012
Posts: 5,330
Member is Online
MSC Staff
|
Post by Tojo72 on Feb 11, 2013 10:17:54 GMT -5
Wow,you really got some fantastic detailing going on,can't wait to see this one progress.
|
|
sfcmikej
Full Member
  
Member since: December 2012
Peace through superior firepower.
Posts: 153
Dec 4, 2012 10:00:36 GMT -5
Dec 4, 2012 10:00:36 GMT -5
|
Post by sfcmikej on Feb 11, 2013 11:00:40 GMT -5
Hey PJ
Really nice work. I will be following along.
Mike
|
|
panzerjager.
Full Member
  
Member since: June 2012
Posts: 204
Jun 5, 2012 21:56:23 GMT -5
Jun 5, 2012 21:56:23 GMT -5
|
Post by panzerjager. on Feb 19, 2013 13:32:01 GMT -5
Thanks so much, guys, glad you like it! Some updates: The sprocket wheels was detailed with some Aber P.E. parts, 12 each wheel; it was not easy to my to align the parts  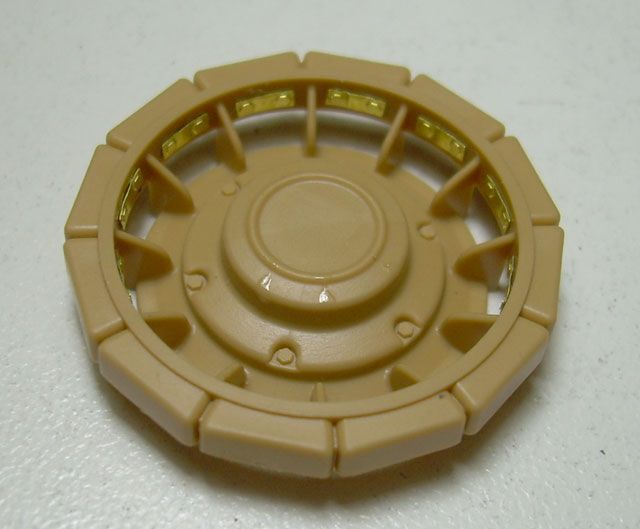 In this pic you can see at left the Tamiya supplied tire, netx to the same but sanded using 3M pads and next to it, the resin one. The mold seam is still visible after sanding in the vinil tires. 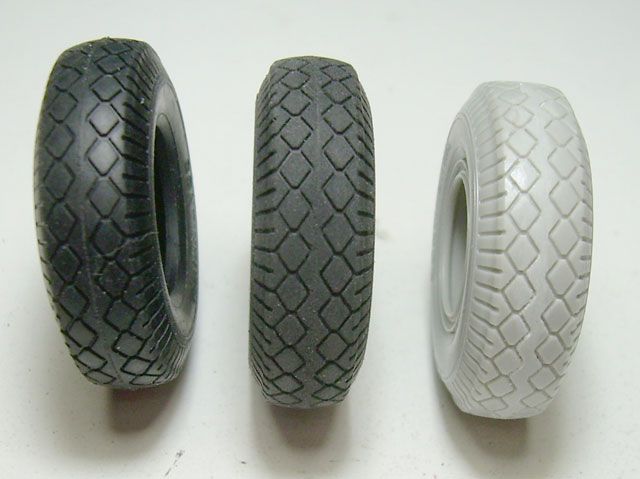 Aber fasteners are formed in 3 parts: this is the base, which often is not easy to glue or if you success gluing, the ciano shows a horrible spot; well, to avoid that, I drill a .3 mm hole before the part was cut from the frame and I made a stretched sprue "rivet" to fix the fastener to the vehicle 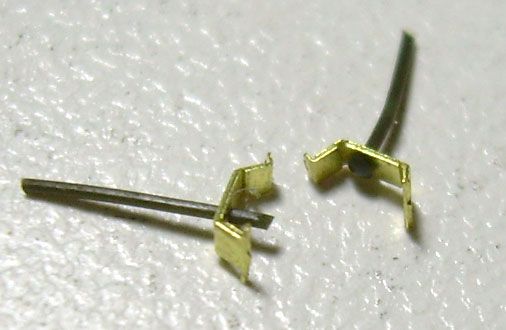 This is the first time I get the clasps workables  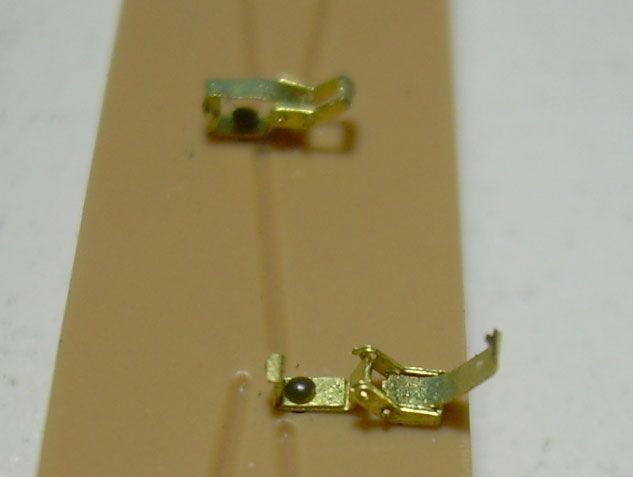 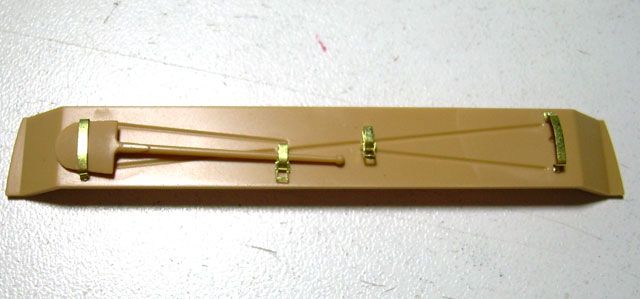 Some pipes and wiring added to the firewall: 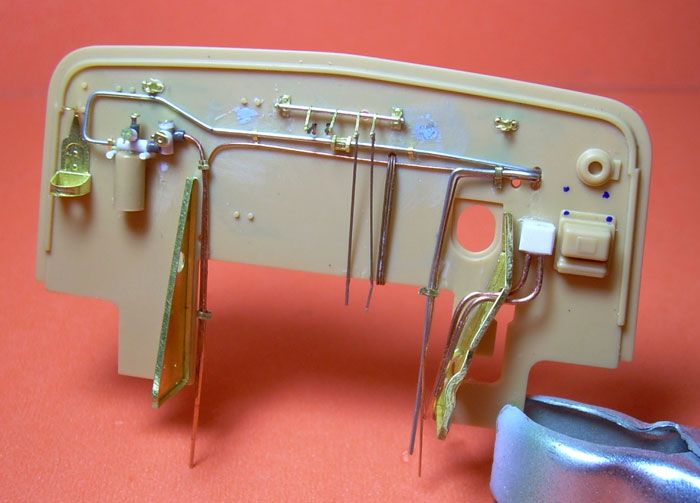 A bad pic of how it look 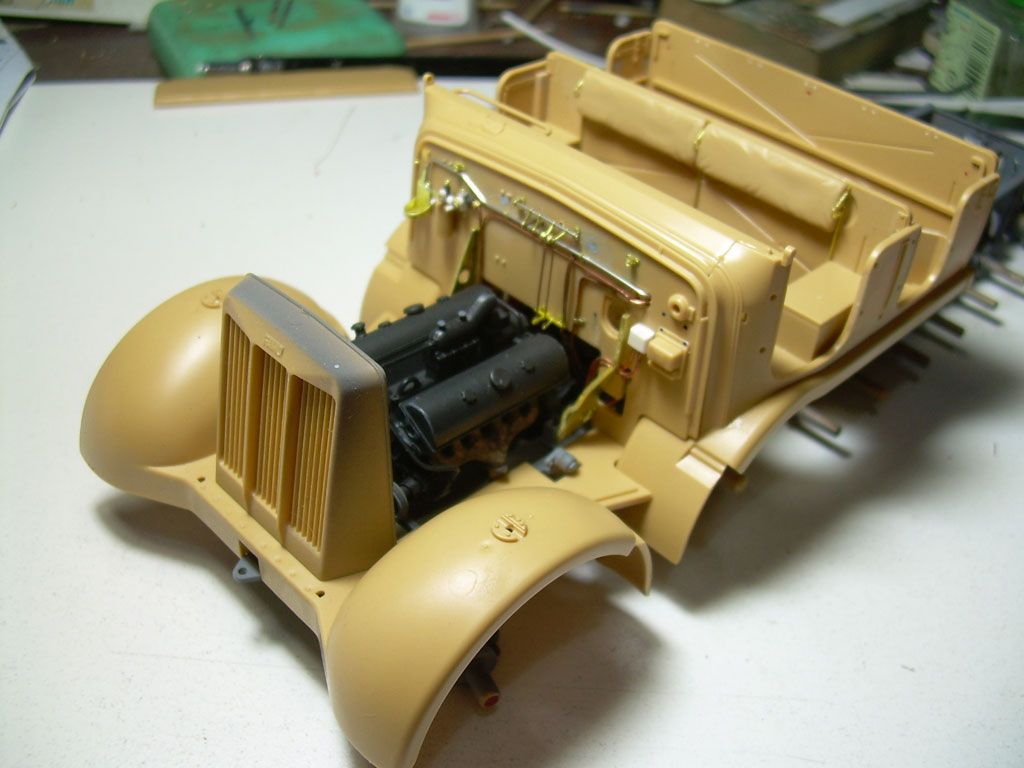 Cabine inside 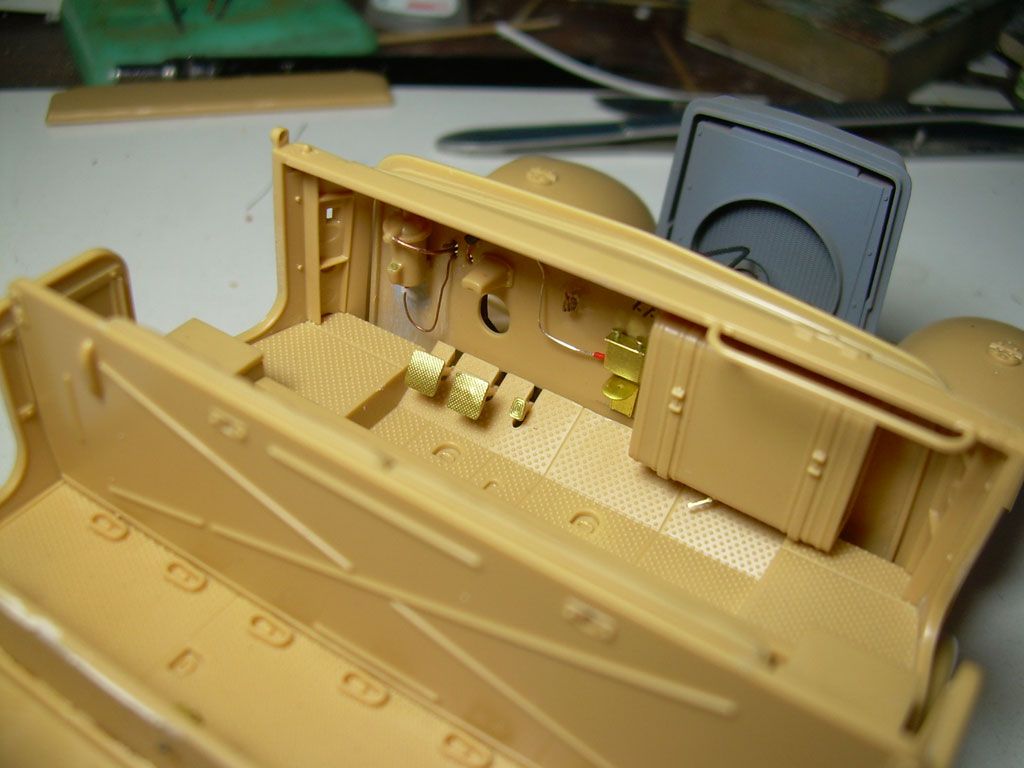 Some of the ties added: 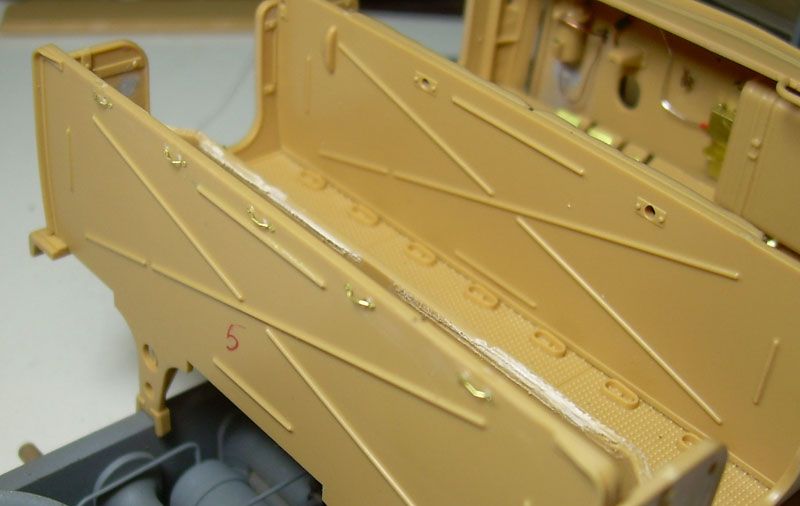 And the Kar 98 clasps; I think I could weld those parts, but I just get a burnt finger :oops: So, I use ciano 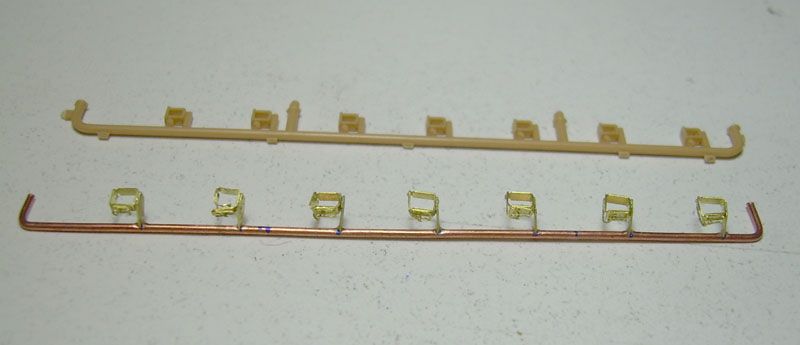 Regards Darío |
|
|
|
Post by tonylee-Rest In Peace on Feb 19, 2013 13:51:44 GMT -5
Very fine work Mr.Dee  Tony lee |
|
Deleted
Member since: January 1970
Posts: 0
Nov 26, 2024 17:13:17 GMT -5
Nov 26, 2024 17:13:17 GMT -5
|
Post by Deleted on Feb 19, 2013 13:58:58 GMT -5
OMG 0.3mm rivets  Now that's just insane  Superb work there Darío , great attention to detail . |
|