Deleted
Member since: January 1970
Posts: 0
Dec 2, 2024 2:33:07 GMT -5
Dec 2, 2024 2:33:07 GMT -5
|
Post by Deleted on Nov 13, 2012 2:58:43 GMT -5
Can't help with the door details but can say that this is coming on very well, running gear looks good  |
|
|
|
Post by eastrock on Nov 13, 2012 11:51:32 GMT -5
Its ok Steve, I should have a better saw lol  |
|
brembo--Rest In Peace
Full Member
  
Member since: September 2012
RIP--04 October 2019
Posts: 264
Sept 7, 2012 4:35:14 GMT -5
Sept 7, 2012 4:35:14 GMT -5
|
Post by brembo--Rest In Peace on Nov 13, 2012 20:39:10 GMT -5
yep, the trumpy Lav R has this 2 door setup, same as the command variant, but not the extended hieght. the instruction for this kit are in your email which i sent to you this afternoon. i'm with nemo, not sure its worth busting too much butt on this older kit altho scratching at placky card is a worthy pastime ;D your call my friend  |
|
|
|
Post by eastrock on Nov 13, 2012 21:18:06 GMT -5
Thanks Dicky if your confused I'm more confused than you, I already started working on the rear door just don't recommend if its workable lol  Brembo, got it buddy thanks for the extra hand... will try to get her done, just having trouble with the brittled plastic  Cheers!! |
|
reserve
Senior Member
   
Member since: July 2012
Si vis pacem para bellum
Posts: 2,373
Jul 11, 2012 9:11:45 GMT -5
Jul 11, 2012 9:11:45 GMT -5
|
Post by reserve on Nov 14, 2012 1:45:53 GMT -5
Nice fixin on a dog of a kit, I expect you'll have something to be proud of in the end.
Regards,
Mark
|
|
|
|
Post by eastrock on Nov 16, 2012 12:20:35 GMT -5
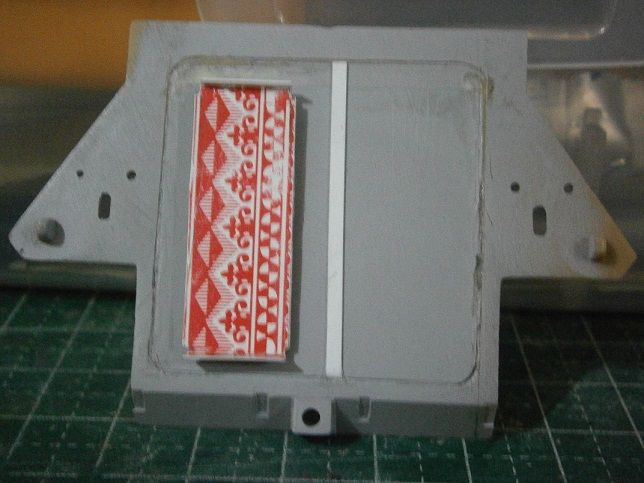
Thanks for checking Mark ;D Here's a tiny bit of update with the rear just playing with the cards just have a bit of a problem with the tool shed on the reference pic, and a stuck with the cleaning on the rear door. in this time I need Nemo's Advice, Brembo or anyone could suggest might help thanks  Cheers!! |
|
|
|
Post by eastrock on Nov 16, 2012 13:05:31 GMT -5
Yes, havin a hard time with the door scoring if you can see on the side there a layers of filler... I should invest a good saw in the future what do you recommend? as now I'm using the Tamiya saw which is kinda soft. and for the tool rack what do you use to get those holes cut out? thanks
|
|
|
|
Post by eastrock on Nov 16, 2012 13:30:45 GMT -5
where did you sent, Buds? might be lost in traffic lol
|
|
brembo--Rest In Peace
Full Member
  
Member since: September 2012
RIP--04 October 2019
Posts: 264
Sept 7, 2012 4:35:14 GMT -5
Sept 7, 2012 4:35:14 GMT -5
|
Post by brembo--Rest In Peace on Nov 16, 2012 15:09:58 GMT -5
I have a couple of scratchbuilt tool racks on the side of my LAVIII kit, (which is currently still in bare plastic.) I will take some close up pics so you can see what i did.....might be of use.
for cutting panels i often use the tamiya panel line scriber. its great for long straight runs. if you have hinges and things in the way, you can remove them and rescribe the line prior to hitting it with panel line tool.
you will need to replace the hinges but that can be done with plastic card.
|
|
brembo--Rest In Peace
Full Member
  
Member since: September 2012
RIP--04 October 2019
Posts: 264
Sept 7, 2012 4:35:14 GMT -5
Sept 7, 2012 4:35:14 GMT -5
|
Post by brembo--Rest In Peace on Nov 16, 2012 17:43:44 GMT -5
Ok, here are the pics....  models 13 001 models 13 001 by Brembo2012, on Flickr This is the Trumpy LAV III conversion i was working on. ( thank you trumpeter for kitting it once i was 2/3rds done...     ) any how, it was a fun project while it lasted, and now you know where the LAV 25 turret ended up! I like scratching the placky card so it was an interesting challenge to graft these bits onto a standard Styker chassis to make the kiwi version. The tool racks are mostly scratch from PC...but i did use some stock kit tools from the spares box, and i did have some pretty good ref pics to model off when i made them (which helped alot!)  models 13 003 models 13 003 by Brembo2012, on Flickr This is the long tool rack on the LHS of the vehicle.  models 13 002 models 13 002 by Brembo2012, on Flickr and the smaller one on the RHS...sorry the camera had problems getting its focus, so the image is a little soft hopefully this helps  |
|
|
|
Post by eastrock on Nov 16, 2012 21:50:40 GMT -5
Thanks Brembo, that's what I'm looking for, just havin troubles making small incisions on the tool rack base. I might drop by to the arts store to check some scribe template.
Cheers!!
|
|
|
|
Post by eastrock on Nov 17, 2012 12:48:59 GMT -5
Thanks Nemo, I'll post some progress later, I just stick the tool rack with some bostick  |
|
brembo--Rest In Peace
Full Member
  
Member since: September 2012
RIP--04 October 2019
Posts: 264
Sept 7, 2012 4:35:14 GMT -5
Sept 7, 2012 4:35:14 GMT -5
|
Post by brembo--Rest In Peace on Nov 17, 2012 14:50:35 GMT -5
As I explained in my PM (and I'm sure Brembo will agree) - it's much easier to build things like these racks off the model - I make square/rectangular holes by pin drilling the corners and then joining the holes and then sanding to shape Yep, correct-o-mundo  i built the tool racks, the front and rear winch guides, the rear box mounts and the box all off the model and added them as sub assemblies. it makes life easier that way, but it did make my brain hurt.... ;D |
|
|
|
Post by 406 Silverado on Nov 17, 2012 16:53:37 GMT -5
Your on a roll ER. Looking good my friend
|
|
|
|
Post by eastrock on Nov 17, 2012 20:59:17 GMT -5
Thanks boss much appreciated  Nemo's if your brains hurts whats more to me  lol have to run to LHS today run out of paint, and I'll check out some good saw not the wobbly one. I'll get my crash helmet  Might as well check the Academy modern stowage set. |
|
|
|
Post by bbd468 on Nov 19, 2012 12:54:05 GMT -5
Lookin' fine ER! Your in good hands with them fellas that set ya straight.  Gary |
|
|
|
Post by eastrock on Nov 21, 2012 21:41:01 GMT -5
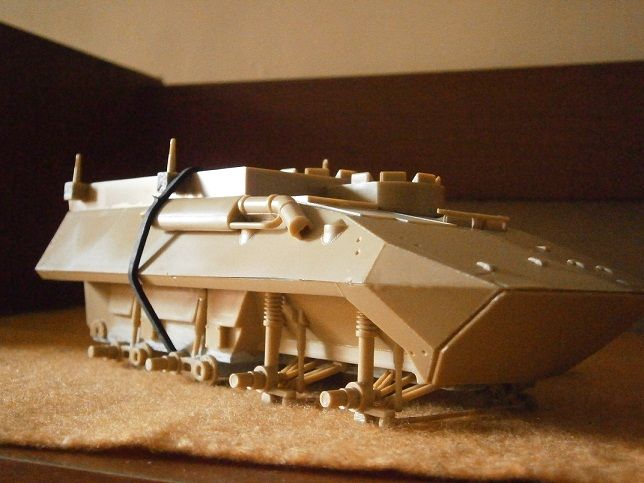
Mated the upper and lower hull, this will take some time to perfectly fit it... just gluing part by part  did a rework on the LAV rear door, laminated a thin sheet of card, much easier to smooth the center rather than reworking the edges (goodbye queen of hearts)  Cheers! ER Thanks for the guidance of Nemo and Brembo |
|
modelfreak72
Full Member
  
Member since: January 2012
Why worry, each of us is wearing an unlicensed nuclear accelerator on his back.
Posts: 1,479
Jan 28, 2012 23:21:46 GMT -5
Jan 28, 2012 23:21:46 GMT -5
|
Post by modelfreak72 on Nov 22, 2012 1:25:54 GMT -5
ER my man you've taken some brave steps into a place where I would turned around screaming and running like a little girl! Sweet work! Can't wait to see this come together!
|
|
|
|
Post by bullardino on Nov 22, 2012 3:22:32 GMT -5
What an improvement over the original kit... Congrats ER  |
|
|
|
Post by eastrock on Nov 22, 2012 11:49:15 GMT -5
Thanks again, Pete but with the guidance of Nemo and Brembo I'm sure there's always a light to guide especially when you see Dicky lol
Thanks Luigi, I was thinking about if I could cover the exhaust, with protective armor
Cheers!
|
|
|
|
Post by eastrock on Nov 25, 2012 11:22:43 GMT -5
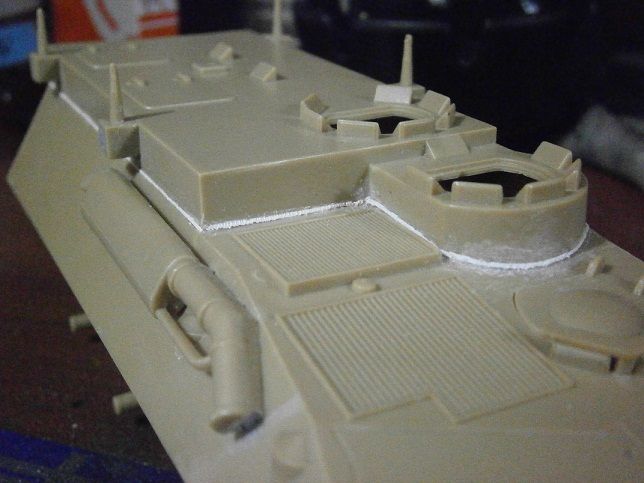
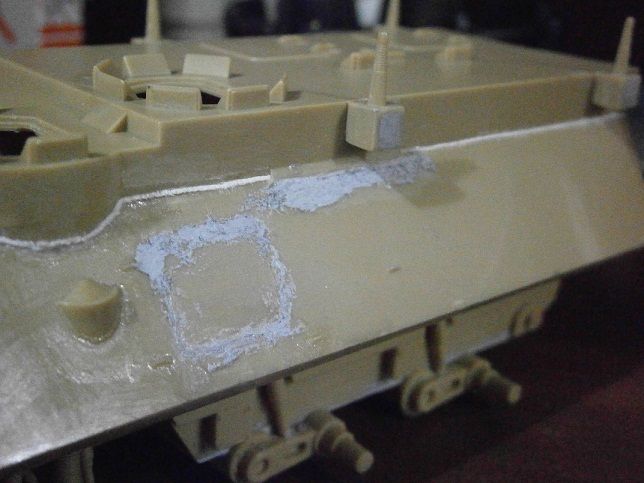
we got welds, still a lot more to do, rear door still not yet finish, no latches, tool rack still need to be assembled.  Close up  need to repair the left side, no door on left side (prime portal reference) still need to finish the weld line  Cheers! |
|
|
|
Post by spud on Nov 25, 2012 11:26:02 GMT -5
you dont half pic dogs to do er  |
|
|
|
Post by bbd468 on Nov 25, 2012 11:38:01 GMT -5
Very nice welds ER!  Gary |
|
|
|
Post by eastrock on Nov 25, 2012 12:07:14 GMT -5
Thanks Spud and Gary, much appreciated  |
|
|
|
Post by eastrock on Nov 25, 2012 22:20:58 GMT -5
Heat shield? I would try to make one in cardboard first looking forward.
|
|
|
|
Post by deafpanzer on Nov 25, 2012 22:27:00 GMT -5
VERY NICE weld seams you got on it!!!!
|
|
|
|
Post by eastrock on Nov 25, 2012 23:40:43 GMT -5
Hey Andy, Thanks for checking, I haven't forget your evil smile on the intro thread lol  |
|
|
|
Post by bullardino on Nov 26, 2012 2:14:26 GMT -5
Wow, that's a hard work... You like difficult kits, huh? Great job ER  |
|
|
|
Post by eastrock on Nov 26, 2012 3:49:56 GMT -5
Luigi, it just happen... this kit was about to be trash by a friend of mine, told him I get the kit and build it for myself. thanks for checking  |
|
|
|
Post by 406 Silverado on Nov 26, 2012 9:02:56 GMT -5
That is some awesome weld work ER, very nice bro.
|
|