|
|
Post by robbo on Feb 19, 2013 17:35:26 GMT -5
Coming along very nicely, that MG set up looks loads better
|
|
|
|
Post by Leon on Feb 19, 2013 18:00:36 GMT -5
Awesome job so far Dave.Keep it coming.
|
|
|
|
Post by hasenpfeffer on Feb 19, 2013 19:18:09 GMT -5
Thanks guys.. I'm gonna try for weekly updates. I don't have much time during the week itself to get much done at the bench. Gotta pay for these things somehow ya know.  |
|
bish
Full Member
  
Member since: January 2013
Horatio Nelson 'I am a Norfolk man, and i glory in being so'
Posts: 555
Jan 13, 2013 8:57:43 GMT -5
Jan 13, 2013 8:57:43 GMT -5
|
Post by bish on Feb 20, 2013 2:30:14 GMT -5
Nice work on the ball mount. This is shapeing up great.
|
|
|
|
Post by hasenpfeffer on Mar 3, 2013 22:33:06 GMT -5
Well, another seemingly small update. All these little fixes take a lot more time than I anticipate... So, on to the pics & stuff... The kit towing cables are pretty awful. The Karaya cables I installed on my last Panther had plenty of extra length... all I had to do was come up with the loops and I'd be set. I followed Wingnut's fix for his Panther and got this. I used the correct diameter styrene tubing and chucked it up in the Dremel to shave down one end for the proper shape. Best I could do for the eyelet was cut off the kit part and attach it to the end. Not extravagant, but far superior to the kit part. 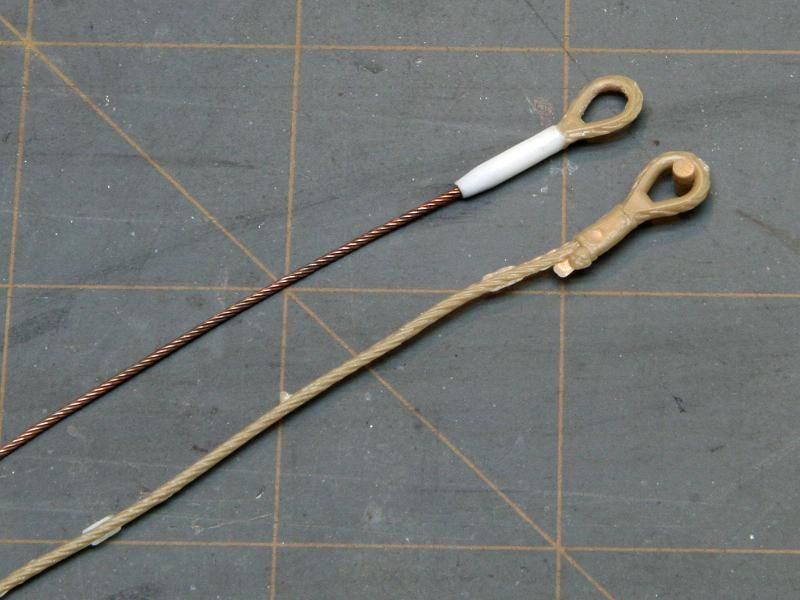 Next I played with the Bronco tracks a touch, but only to compare them to others and to assemble a very short run to see how they went together. Here are a couple pics. First one with the kit tracks, Dragon DS, Bronco and Friul from top to bottom. The Bronco tracks I'm gonna use are the earlier type without the cleats. The Broncos went together fairly easily and are pretty strong when assembled. They have very good detail, maybe even a touch better than the Friuls. There is only minor clean-up (which you can see I didn't do very well here...) 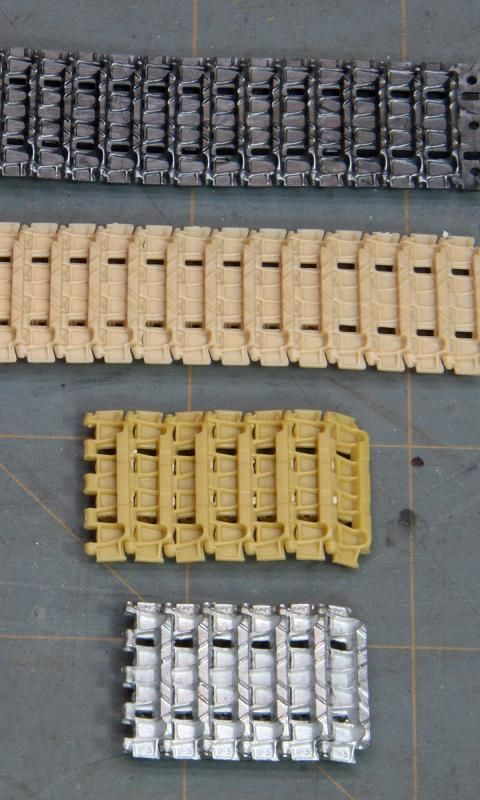 Comparison of Bronco & Friul: You don't have all that white metal flash... I only had cleaned out the front half here, you can see all the gunk in there on the rear half. PITA. 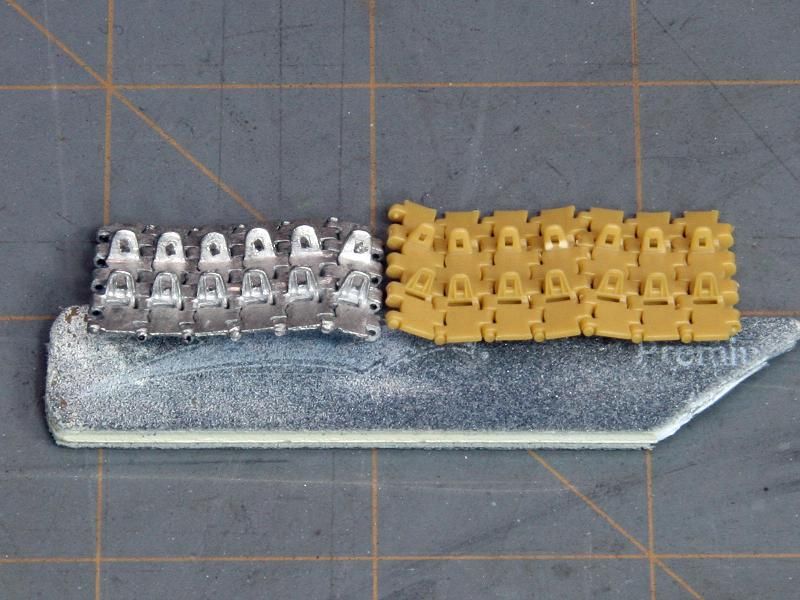 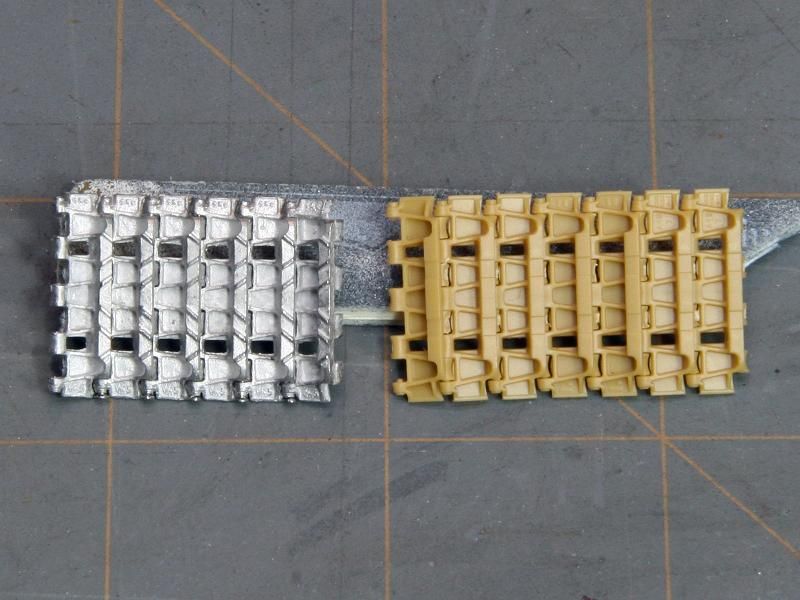 The Broncos are very well detailed. If I can paint and weather them even halfway decent, I think we have a solid contender to Friuls - especially given the price. IIRC I paid $17.99 vs. $40ish for the Friuls. 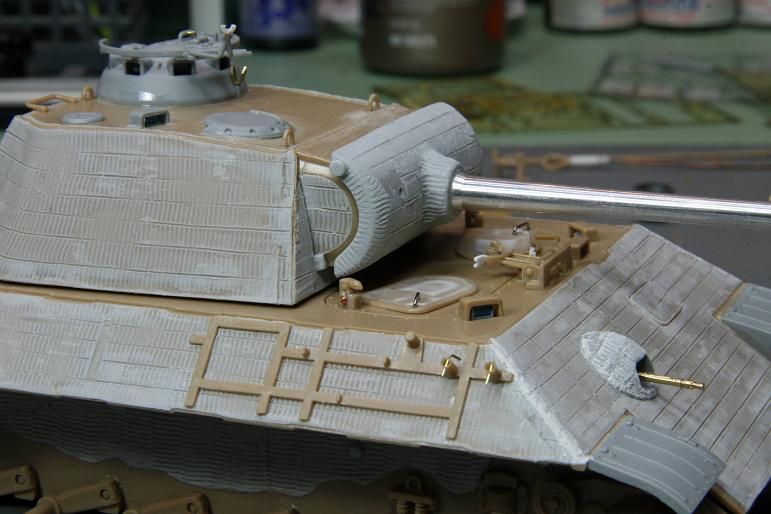 Other stuff I was able to accomplish: The gun travel lock, hatch retainer latches (added release lever complete with spring - but you can't see it very well in the photo), cupola w/AA mg mount, started the tool racks, drilled out the tubes and bent a ton of little pins.  Thanks for lookin' fellas.  |
|
|
|
Post by armorguy on Mar 4, 2013 14:31:57 GMT -5
Nice progress Dave, that's a good looking Panther already, the Bronco tracks seem to be a tadd bigger and very attractive !
|
|
|
|
Post by deafpanzer on Mar 4, 2013 16:13:55 GMT -5
That was a great post... really appreciate you listing all different tracks. One day I have to try one of those Bronco kits... gonna save money now.
|
|
|
|
Post by Leon on Mar 4, 2013 17:30:34 GMT -5
Dave i like the improvements.The bronco tracks look good.
|
|
|
|
Post by wbill76 on Mar 4, 2013 21:13:07 GMT -5
Details are looking very nice Dave, and workable tracks at a decent price can't be beat!
|
|
|
|
Post by wing_nut on Mar 5, 2013 7:29:19 GMT -5
YO P-Bro. Cables look terrific  |
|
|
|
Post by hasenpfeffer on Apr 12, 2013 15:08:49 GMT -5
Well, I apologize for not being able to write a proper build log... Time is just escaping me these days. I have made some progress on the Panther. If you have any questions on how I did something, or if you have any feedback, just let me know. Pic of what the Bronco track runs look like when finished. 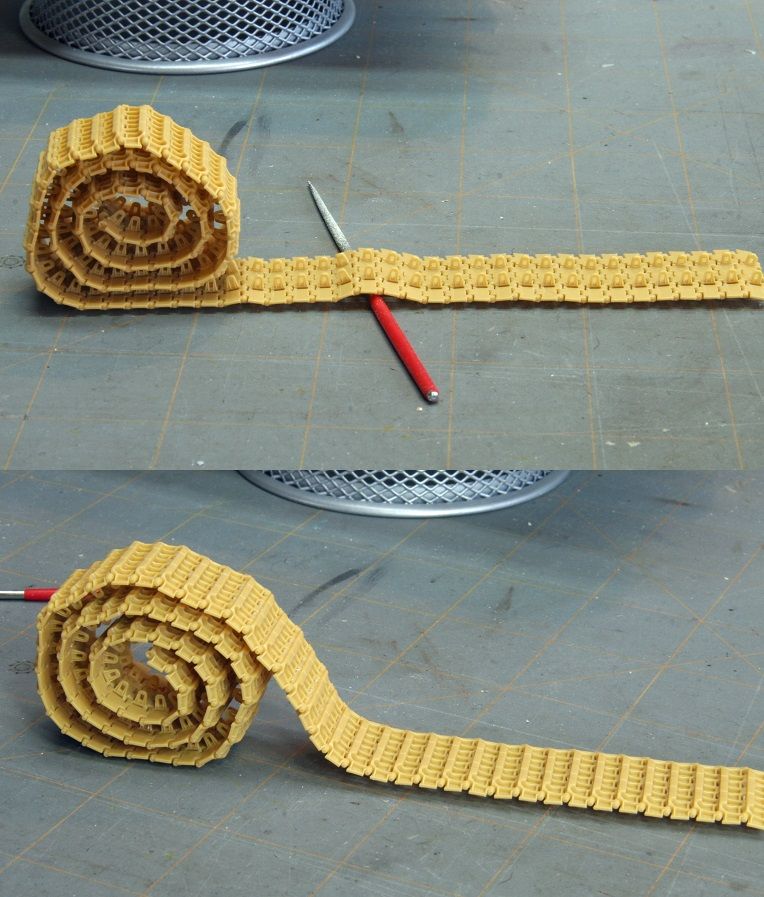 I didn't spend a whole lot of time on the engine as it won't really be seen anyway. The access door itself doesn't give much of a view either. Also shows where some fit issues existed. 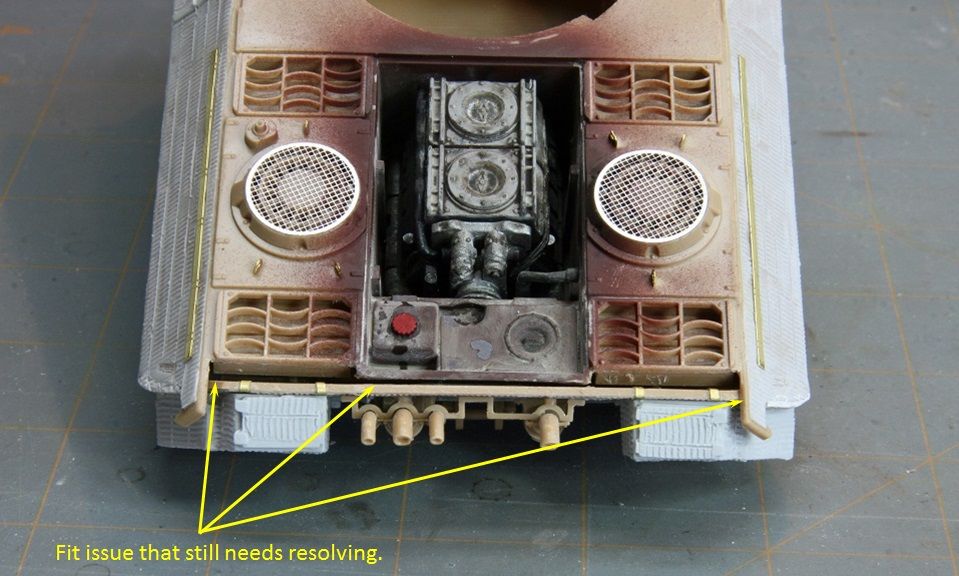 As good as it will get... passing grade. I suppose. 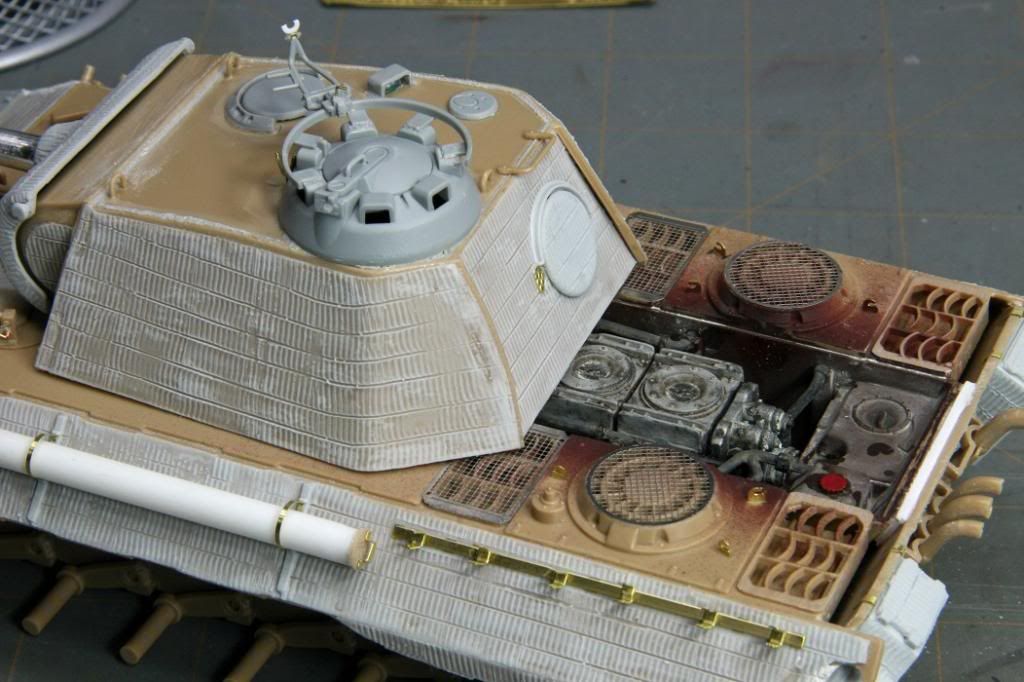 Some of the added detail... still working on the gun travel lock as I didn't like the kit chain and the way it attached on an over-sized "swivel". 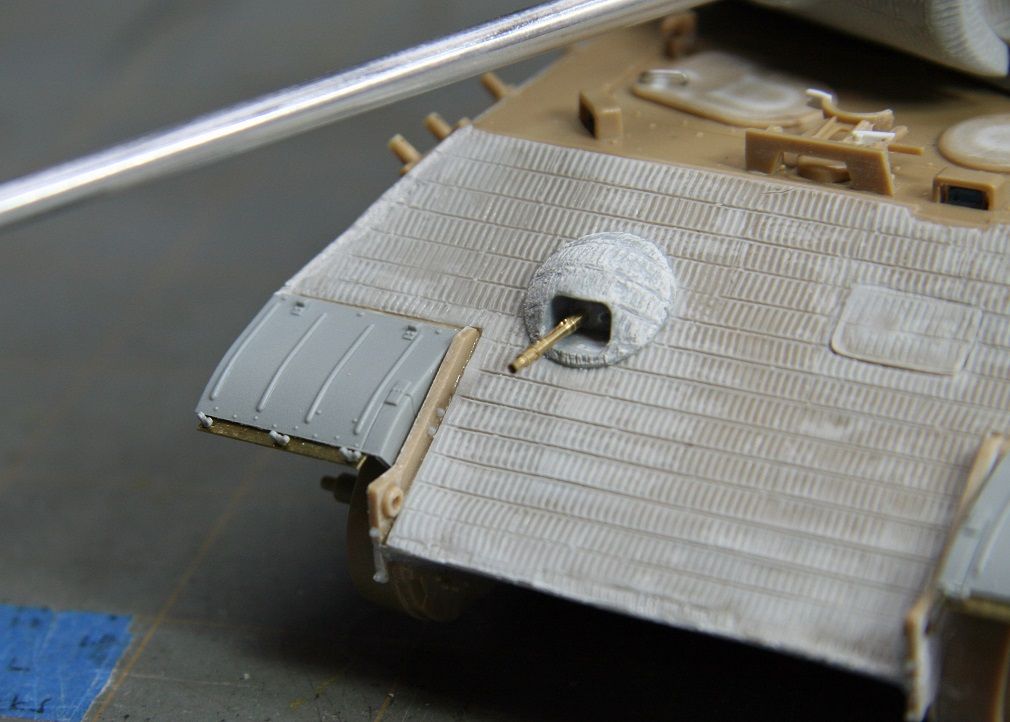 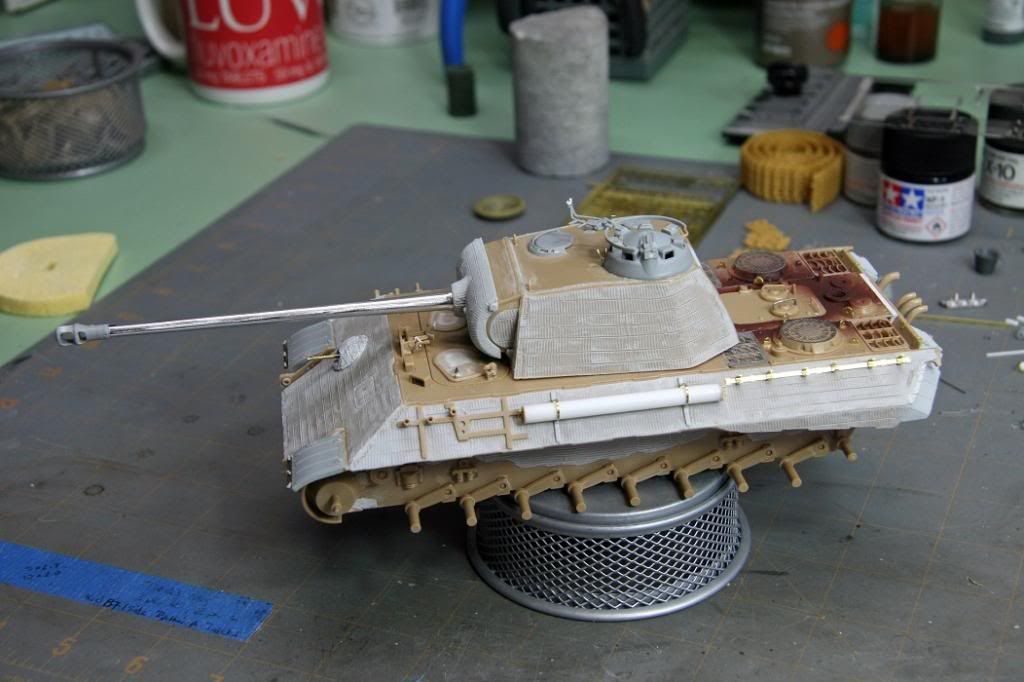 Engine deck closer to being finished. 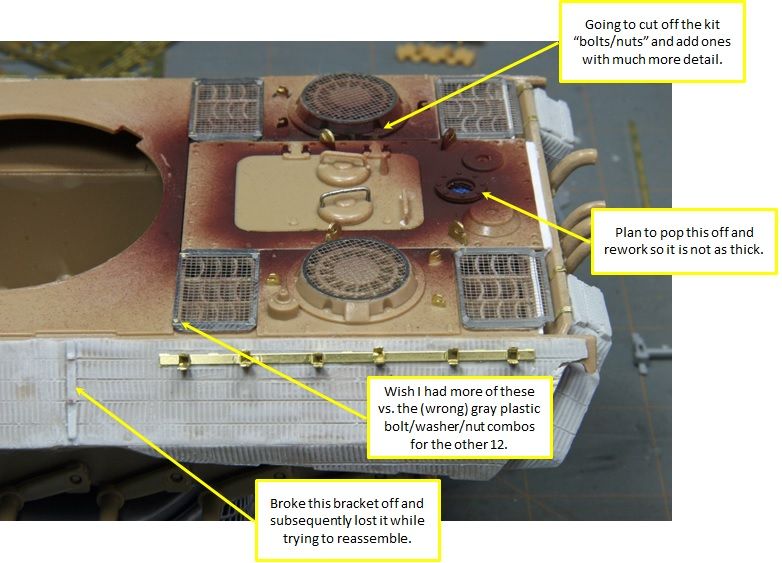 And finally... where she stands at the moment. 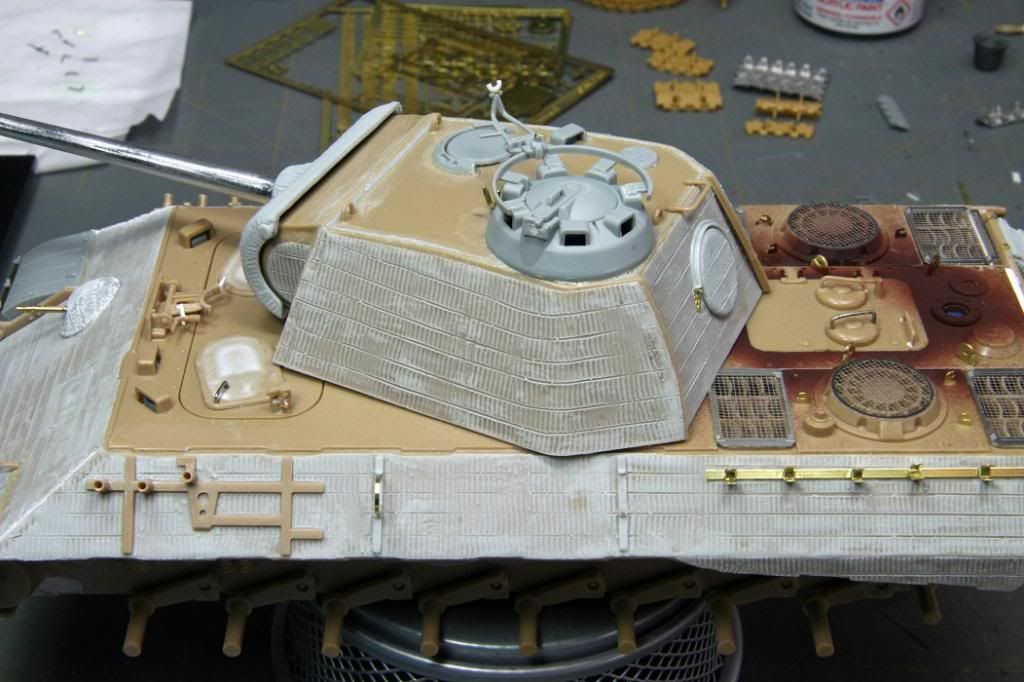 Thanks for all the previous comments fellas. It's much appreciated!  |
|
|
|
Post by Leon on Apr 12, 2013 15:18:17 GMT -5
Dave really like all the detail going into this.Looking awesome.  |
|
|
|
Post by wbill76 on Apr 12, 2013 16:55:21 GMT -5
Hiya Dave! Nice to see this one come back to the surface. Nice progress and plans for the future on this beastie.
|
|
panzerjager.
Full Member
  
Member since: June 2012
Posts: 204
Jun 5, 2012 21:56:23 GMT -5
Jun 5, 2012 21:56:23 GMT -5
|
Post by panzerjager. on Apr 13, 2013 9:26:48 GMT -5
Impressive work of detailing! Is nice to read this kind of threads
Darío
|
|
afvfan
Senior Member
   
Member since: December 2012
Bob
Posts: 1,772
Dec 10, 2012 17:32:38 GMT -5
Dec 10, 2012 17:32:38 GMT -5
|
Post by afvfan on Apr 13, 2013 10:30:08 GMT -5
That's coming together quite nicely, Dave. I really like a lot of the detailing you're doing.
|
|
|
|
Post by deafpanzer on Apr 13, 2013 19:46:02 GMT -5
GREAT UPDATE! It is really looking great! Don't feel bad... I feel bad for not checking GB at old forum for a while. Me serious... looking forward to your next update!
|
|
|
|
Post by hasenpfeffer on Apr 13, 2013 22:35:06 GMT -5
Thanks for the words of encouragement fellas!  Another small update as I was able to swing some bench time today... As promised, I cut off the little "dots" around the exhaust grilles and replaced them with much better looking attachment bolts/nuts. I also attempted and completed my very first soldering effort. The spare track rack here has the U-shaped brackets soldered on! With a little practice I could really grow to enjoy this. It won't take me 1.5 hrs to do 6 small joints...  and it's o'so much stronger than CA. It's a start at least. You can also see about half of the vent screen cover I made thinner. A little messy with the liquid glue so a couple spots of it melted a bit... but I think I can make it work. 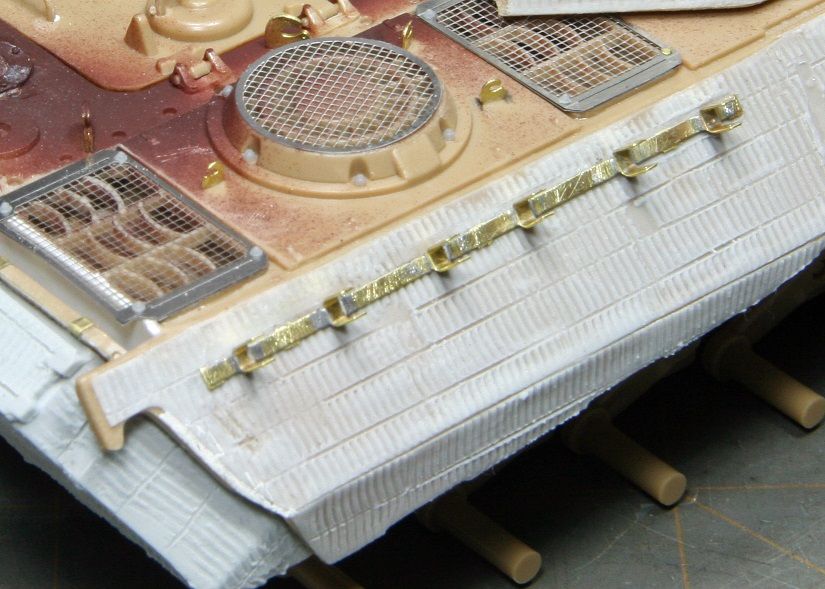 I also added the main gun elevation stop block on the top of the turret. It might be a touch big, but looks o.k. to me. 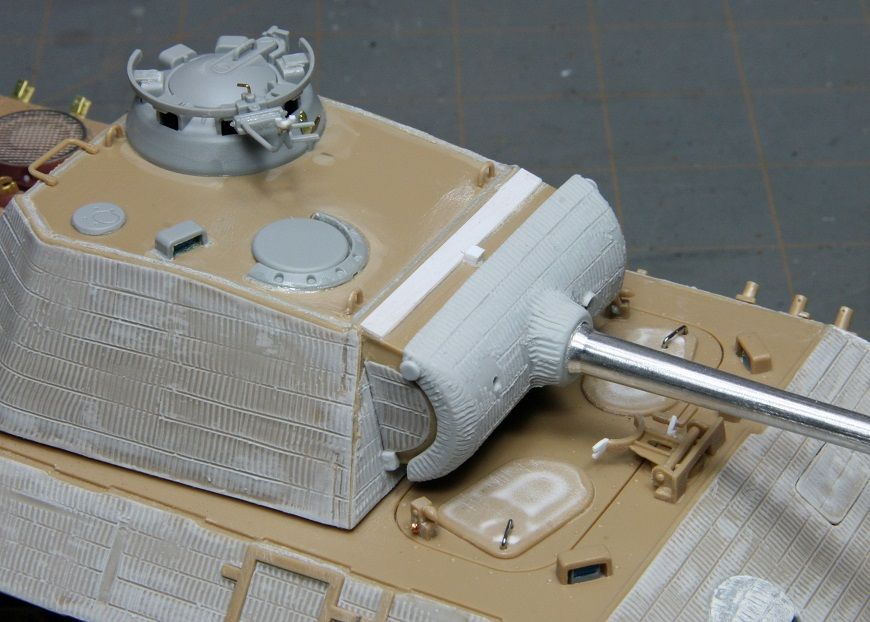 |
|
ironhand6
Full Member
  
Member since: March 2013
Posts: 280 
|
Post by ironhand6 on Apr 13, 2013 22:51:47 GMT -5
dave i had this kit a while ago and sure didnt see the gem youve made of it. i really cant believe how good of a panther you are making out of this dog of a kit. do you have any unit and camo in mind?
|
|
|
|
Post by hasenpfeffer on Apr 14, 2013 9:02:47 GMT -5
Hey Clint - thanks! I appreciate the comment. Since I had just built a CH Panther A (Basically Dragon Panther A Premium minus MTs)right before this I was lucky to have a nice stock of spares. The Italeri kit can be upgraded pretty much everywhere... so my challenge has been and will be, where do I stop? It's been great practice though for a great many skills that I need improving on.
I don't have a unit/scheme picked out yet. I've been looking for something to catch my eye. When I started I was thinking something from Wiking around Kovel, 1944.
|
|
bigjohn
Reviews member    
Member since: December 2011
John Hale
Posts: 3,438
Dec 21, 2011 2:17:45 GMT -5
Dec 21, 2011 2:17:45 GMT -5
|
Post by bigjohn on Apr 14, 2013 9:39:17 GMT -5
Looking great! Thats some very nice work on that old kit. Be proud of that build! I have used that same trick before with the tow cable ends. It work very well.
|
|
|
|
Post by wbill76 on Apr 14, 2013 20:22:11 GMT -5
Making good progress on this one Dave. Your first soldering adventure has paid off nicely.
|
|
|
|
Post by bbd468 on Apr 14, 2013 23:14:11 GMT -5
Hello Dave, You really have made a magnificent piece of work of this kit. Love every detail you added. Well done sir!  Gary |
|
|
|
Post by TRM on Apr 15, 2013 5:13:16 GMT -5
This is looking really nice...kickin' job on the Zimm!!! Can't wait to see this under some paint!!
|
|
|
|
Post by hasenpfeffer on Apr 20, 2013 20:20:34 GMT -5
Thanks John, Bill, Gary & TRM. I figure if I can do half as well as you fellas, I'm doing all right.  TRM TRM - Looking forward to getting some paint on this beast too! The zimmerit is a set of AM Cavalier, supposedly made for this particular Italeri kit. I wanted to compare it to the ATAK set I used on my last Panther. So the painting will be a great test... Not a whole lot done in the last week, but some progress. Switched up the close defense weapon, really just for the heck of it. Maybe just because I was playing around with the soldering and I thought it looked kinda cool. I fixed the right rear cleaning rod stowage bracket, put together the fire extinguisher and got the side skirts sorted. Once I get the tool clasps on, I think she'll be ready for some paint... finally. 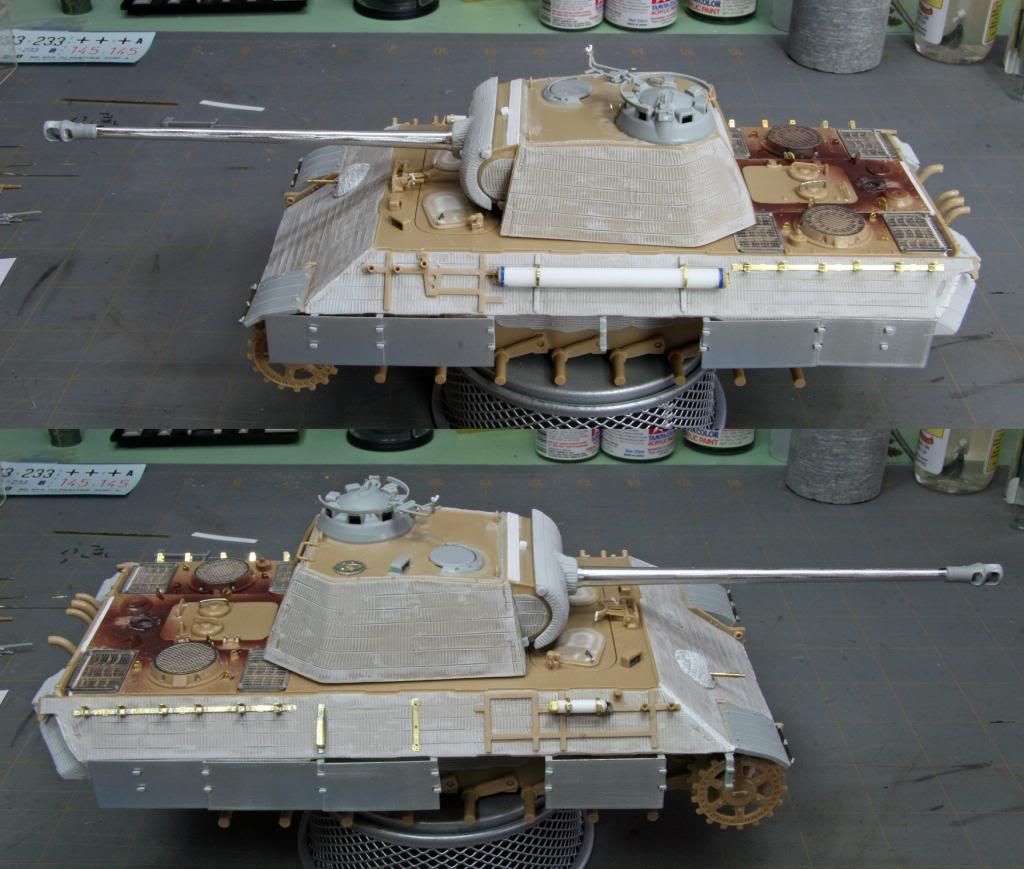 |
|
|
|
Post by Leon on Apr 20, 2013 20:37:58 GMT -5
Making nice progress Dave.A lot of nice detail.  |
|
|
|
Post by deafpanzer on Apr 21, 2013 8:24:35 GMT -5
Am anxious to hear from you which Zimm set you like better... have both sets in stash and I haven't used them yet.  |
|
|
|
Post by wbill76 on Apr 21, 2013 19:22:42 GMT -5
Nice progress Dave...and you did say paint so watch out! The vultures here will be circling in anticipation for the next update!  |
|
|
|
Post by TRM on Apr 21, 2013 19:33:05 GMT -5
Nice progress Dave...and you did say paint so watch out! The vultures here will be circling in anticipation for the next update!  Sniff sniff sniff sniff..................I heard paint....I don;t smell paint?  ?? Looks like this vulture will need to fly back up to it's perch then!!!  |
|
|
|
Post by hasenpfeffer on May 4, 2013 16:25:00 GMT -5
Thanks for the comments, fellas. Sorry it's been a couple weeks... but now that the weather is improving drastically, outside duties and activities abound. Next, I'll be crying for some rain on a weekend, just to get bench time... well, maybe not. It is getting harder to find time though. Well, as promised - some paint. Was able to find some time today to get some Tamiya Hull Red down as a primer coat. It color looks a little lighter in the pics than it does 1st person. 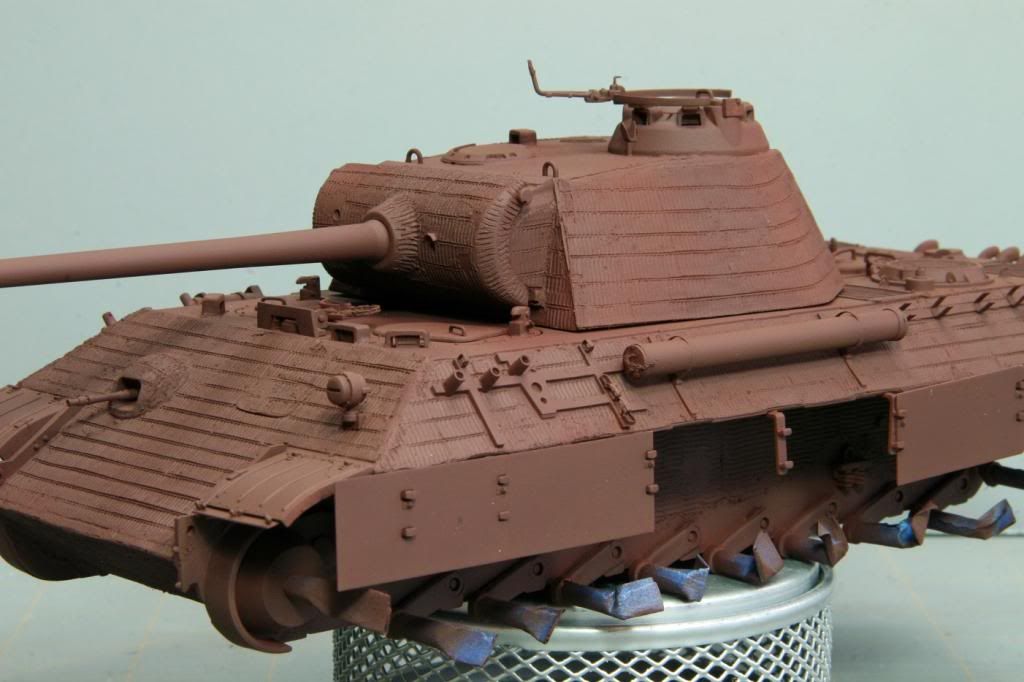 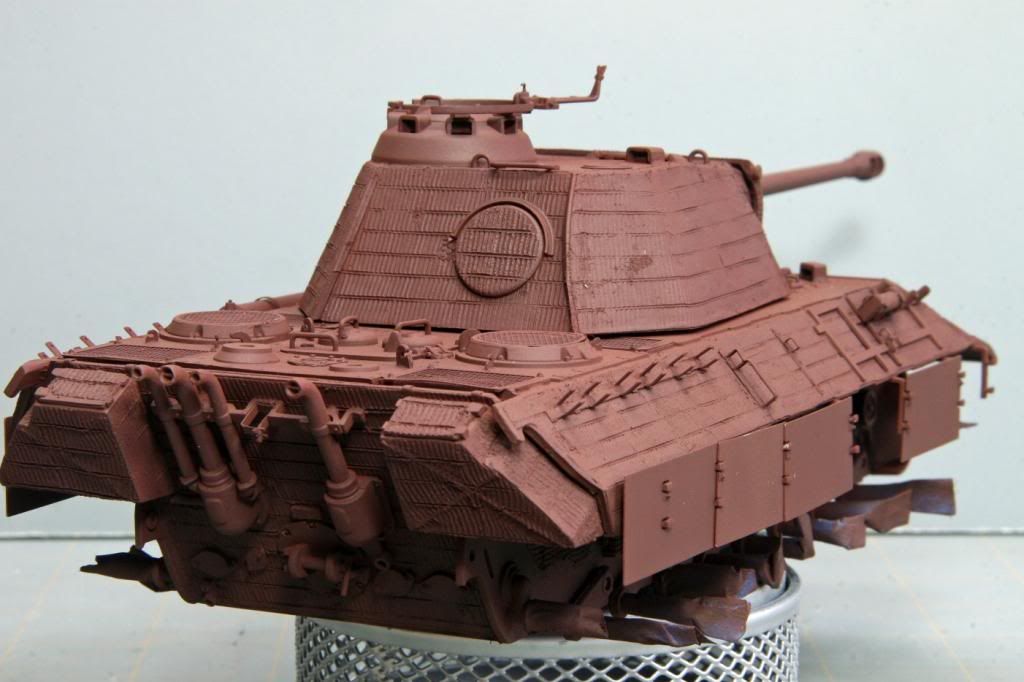 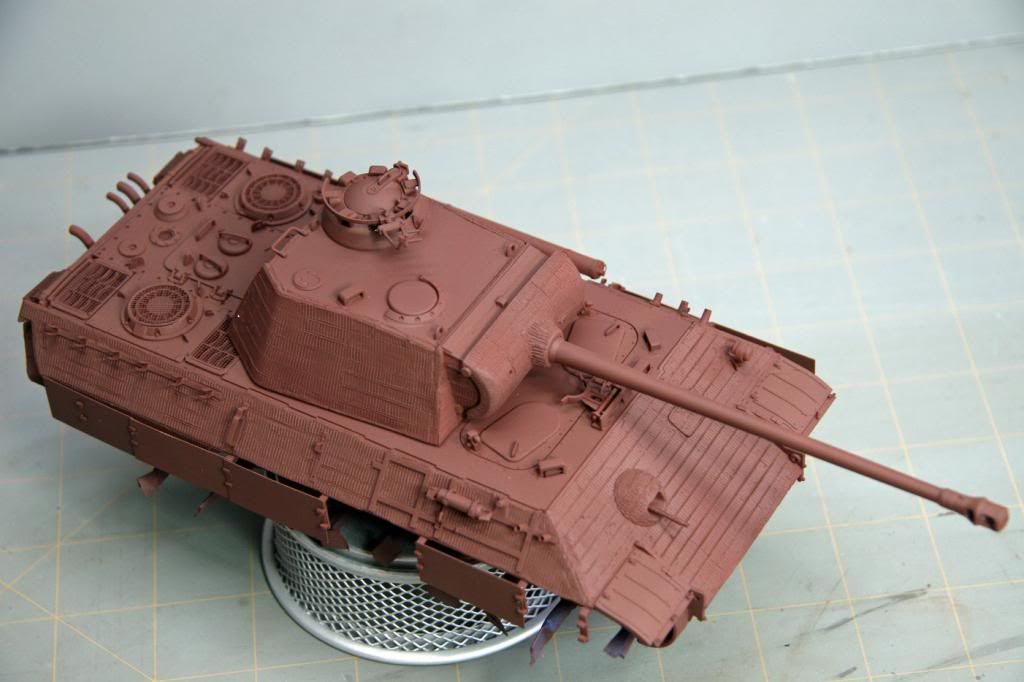 I'm really hoping to get the Dunkel Gelb base coat on tomorrow...  |
|
|
|
Post by wbill76 on May 4, 2013 17:45:09 GMT -5
Primer! Always a positive sign! Looking forward to more Dave.  |
|