|
|
Post by deafpanzer on May 4, 2013 22:49:22 GMT -5
Always dig the look of primed models! Looking real good buddy
|
|
panzerconor.
Full Member
  
Member since: April 2013
My cat's breath smells like cat food.
Posts: 176 
|
Post by panzerconor. on May 6, 2013 20:29:43 GMT -5
Wow, that, sir, is pretty awesome. I can hardly count all the little details on it. I've got Dragon's Panther A, can hardly wait to tear into that. Got Verlinden damadged zimm for it. That's gonna be my first major aftermarket job on it too. I couldn't think to do all this hahaha Looking forward to more  -Conor |
|
|
|
Post by hasenpfeffer on May 9, 2013 7:52:53 GMT -5
Thanks, Bill. Always appreciate the encouragement. Andy, always good to have you lurking around. Maybe mine will be pretty enough for your courtship consideration... lol  As for which brand ATAK vs. Cavalier... I think at this point I lean towards the ATAK. I think only because of the detail and dimensions/fit. It was more work to get it on the model because I feel you have to thin it as it's pretty thick. Sanding the back of all of those pieces is a work in patience, because once you start to thin it, it's easy to break it along score lines, etc. (Obviously - as you can see - the Cavalier zimmerit looks pretty darn good too) I think that if you can find the ATAK for under $25, it's a pretty good value. The last sets I purchased I found for $18 - even less than what I paid for this Cavalier set. Conor - Thanks for the comments! I built a CyberHobby Panther A right before this kit. That made me feel like I had to upgrade a lot on this one since the detail out of the box is really lacking. All of the gray bits you saw on the unpainted model were leftovers from the CH kit. The PE is from a set I purchased ~20 years ago (for a Ausf G so a lot couldn't be used) The company is On the Mark Models and I don't know if they are still in business or not... This model is a mish mash of the Italeri kit, the CH kit leftovers and a bunch of stuff I had lying around. The only things I purchased specifically for it were the tracks and zimmerit. I have a base coat of the Dark Yellow on, but haven't had a chance to take pics yet. Hoping to get some this weekend with some more painting... but I'll be changing the suspension out on my car, so we'll see how it goes. |
|
|
|
Post by hasenpfeffer on May 12, 2013 21:00:01 GMT -5
|
|
panzerconor.
Full Member
  
Member since: April 2013
My cat's breath smells like cat food.
Posts: 176 
|
Post by panzerconor. on May 12, 2013 23:08:02 GMT -5
I like the new name...Italeragon lol... I would stick with the Wiking markings. But I'm biased, that's one of my favorite divisions to model and read about.
What colors did you use for the basecoat? I like the highlights on the turret, really works well.
|
|
|
|
Post by hasenpfeffer on May 13, 2013 10:14:07 GMT -5
Hi Conor... nothing fancy for the base coat. It's plain ole Tamiya Dark Yellow. I did the whole thing 100% DY, then worked in Tamiya Flat White in stages, sticking to the upper most surfaces more and more as I went. There are 4 shades total on there. Tires on the road wheels are Dark Rubber (Vallejo). I used only 2 shades of DY on the wheels airbrushed on using a circle template as a mask. Base DY and then one shade from the lightest on the caps. I didn't measure ratios. I figured with camo, weathering, filters, washes and the like it was only necessary to get close to what I was looking for.
|
|
Deleted
Member since: January 1970
Posts: 0
Nov 26, 2024 17:29:19 GMT -5
Nov 26, 2024 17:29:19 GMT -5
|
Post by Deleted on May 13, 2013 11:30:56 GMT -5
Nice colour and a nice variation of tone top stuff
|
|
|
|
Post by hasenpfeffer on May 13, 2013 20:25:09 GMT -5
Thanks sniper & Dicky... the kit by itself is by no means a jewel. The Dragon offerings are far superior. I don't know about any of the "newer" Tamiya kits as I only built the very old Ausf. A about 30 years ago. The kit I built prior to this one was the Cyber Hobby Black Knight kit (Panther A), which is essentially the Dragon Premium. It was more detailed in almost every way. Many of the spares and what was left over from upgrading that kit is what made this as good as it is. I'm with you though... I dig the result.  |
|
|
|
Post by wbill76 on May 13, 2013 20:30:52 GMT -5
Nice work on the hybrid Dave! Wheels are looking good, always a 'fun' part of German vehicles.  |
|
|
|
Post by hasenpfeffer on May 14, 2013 13:15:45 GMT -5
Thanks Bill... I hear ya. At least the larger wheels on the big cats are a little easier with handling, etc.  |
|
|
|
Post by bbd468 on May 14, 2013 13:28:01 GMT -5
Hiya Dave, The Panther is comin along fantastic! Paint job and color look great....nice job fella!  Gary |
|
|
|
Post by hasenpfeffer on May 14, 2013 15:00:00 GMT -5
Appreciate the comments, Gary. Glad you like it, man.
|
|
|
|
Post by hasenpfeffer on May 19, 2013 16:10:41 GMT -5
|
|
|
|
Post by wbill76 on May 19, 2013 20:45:48 GMT -5
Woohoo! Time for weathering! Nice work on that camo pattern and turret numbers Dave, looking forward to more.
|
|
|
|
Post by deafpanzer on May 19, 2013 22:44:12 GMT -5
L-O-V-E the camo!!! I think it is PERFECT! Can't wait to see more...
|
|
|
|
Post by hasenpfeffer on May 20, 2013 15:47:28 GMT -5
Thanks Bill & Andy. I'm hoping I can do it justice...
(...and just for you Andy... I have some new AK products that I'll be trying for the 1st time on this. You may now collect your commission from Mr. Jimenez - LOL)
|
|
|
|
Post by Leon on May 20, 2013 15:54:25 GMT -5
Great job on the camo and numbers Dave.Looking good from were i'm sitting.
|
|
Deleted
Member since: January 1970
Posts: 0
Nov 26, 2024 17:29:19 GMT -5
Nov 26, 2024 17:29:19 GMT -5
|
Post by Deleted on May 21, 2013 7:30:10 GMT -5
very very nice camo and the turret numbers look just right in my opinion.
|
|
panzerconor.
Full Member
  
Member since: April 2013
My cat's breath smells like cat food.
Posts: 176 
|
Post by panzerconor. on May 21, 2013 9:05:19 GMT -5
Awesome stuff. Love how the camo came out. Looks amazing so far.
-Conor
|
|
elco
Full Member
   July & Oct 2014 MoM Winner
Member since: May 2013
MOY 2014 Winner
Posts: 660 
|
Post by elco on May 21, 2013 16:21:27 GMT -5
Great paintjob you got here! Even when the kit isn't to today's standards you made a very nice model out of it. Have fun with the AK stuff i am sure you like it  |
|
|
|
Post by bbd468 on May 21, 2013 19:53:32 GMT -5
OH MAN, Thats a fine camo job right there! Great job with the stencil numbers too! Thats somethin i still havent been able to do is successfully cut out my own numbers and letters....well done fella!  |
|
|
|
Post by hasenpfeffer on May 22, 2013 10:28:52 GMT -5
Thanks guys! Glad you like the way it's turning out... Sniper - the numbers look ok to me too. My comment was because they are a little fatter than the pics I've seen of this particular tank. Another inconsistency will be the real 822 had a shield shape cut out of the zimmerit in front of the numbers on the turret sides. Elco - yep, looking forward to the AK stuff. I have a fair stock of Mig products, so I expect similar results. Gary - yeah, those puppies took an eternity to cut out... I would suggest starting with some numbers that have more straight edges... lol. Decals are much easier if not quite as realistic to the real deal. If I had 822 decals, I pry would have used them!  |
|
|
|
Post by hasenpfeffer on Jul 7, 2013 12:58:43 GMT -5
All right.. long enough without an update. Falling to page 3 is kinda embarrassing.  So, here's the progress I've made in the last month and a half or so. Doesn't seem like much, but I've been plugging away when I can. I built the 2nd track run (Bronco indies) and primed them with Tamiya Flat Brown. The fit of these isn't great on the drive sprockets, so I'll have to see if I can work something out. They just don't "snug" down enough to look right. I have most of the tools painted up and mounted. I also put a couple filters on the base paint job. 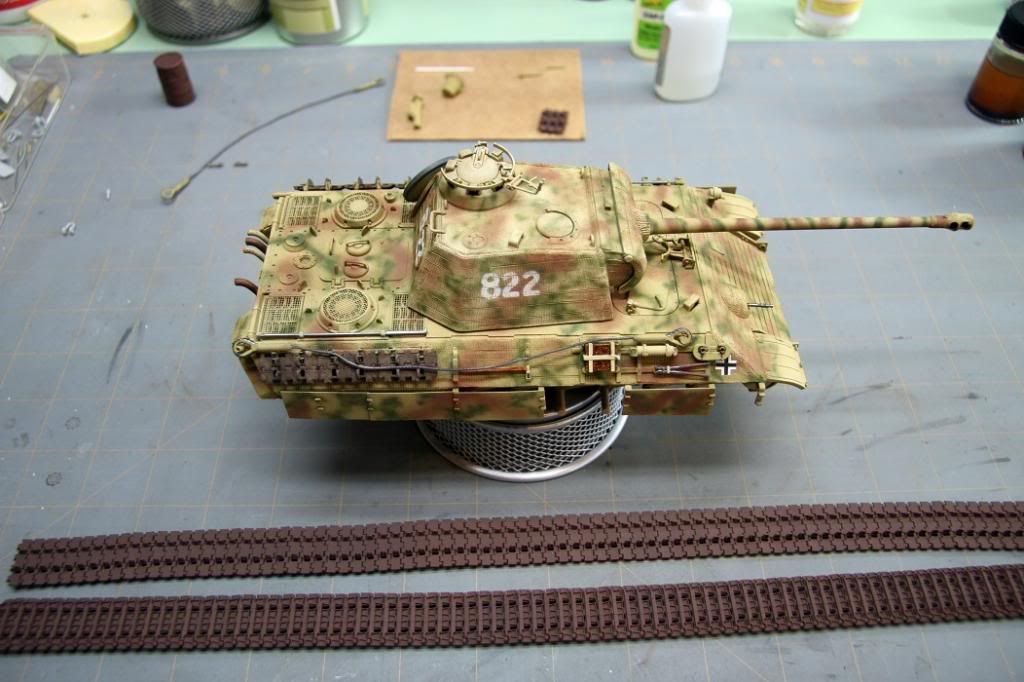 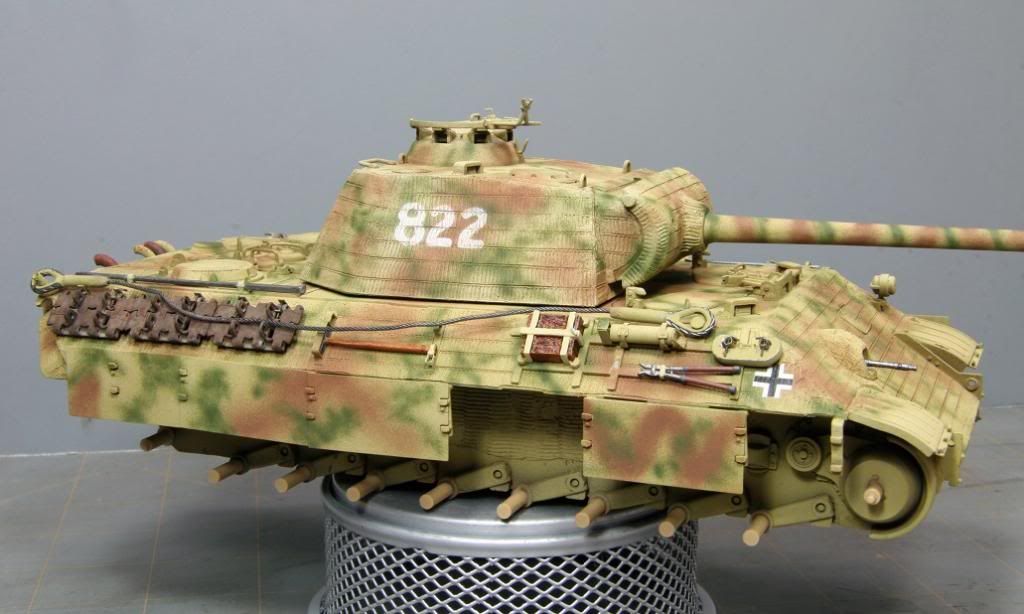 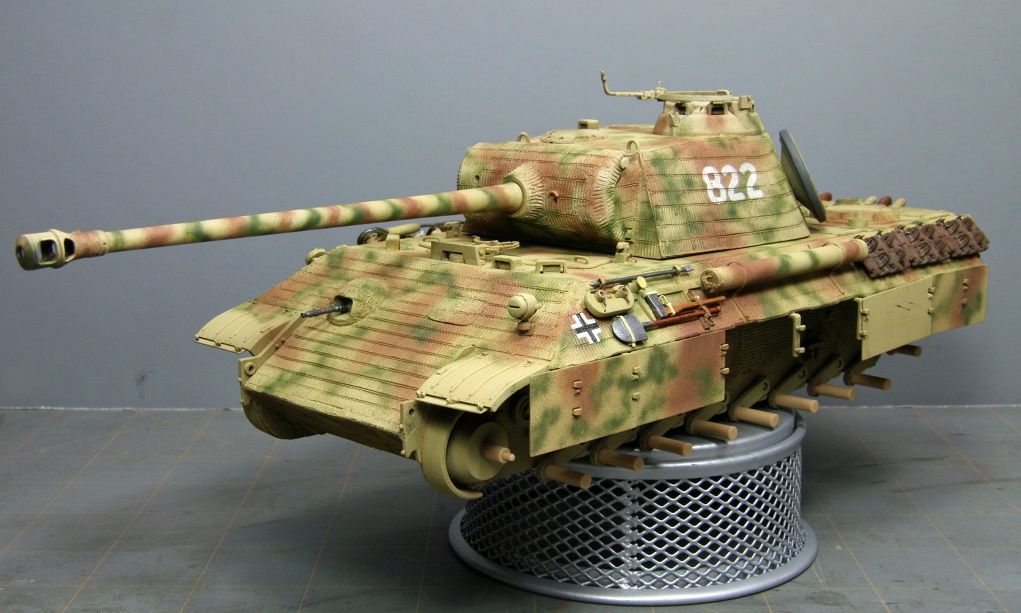 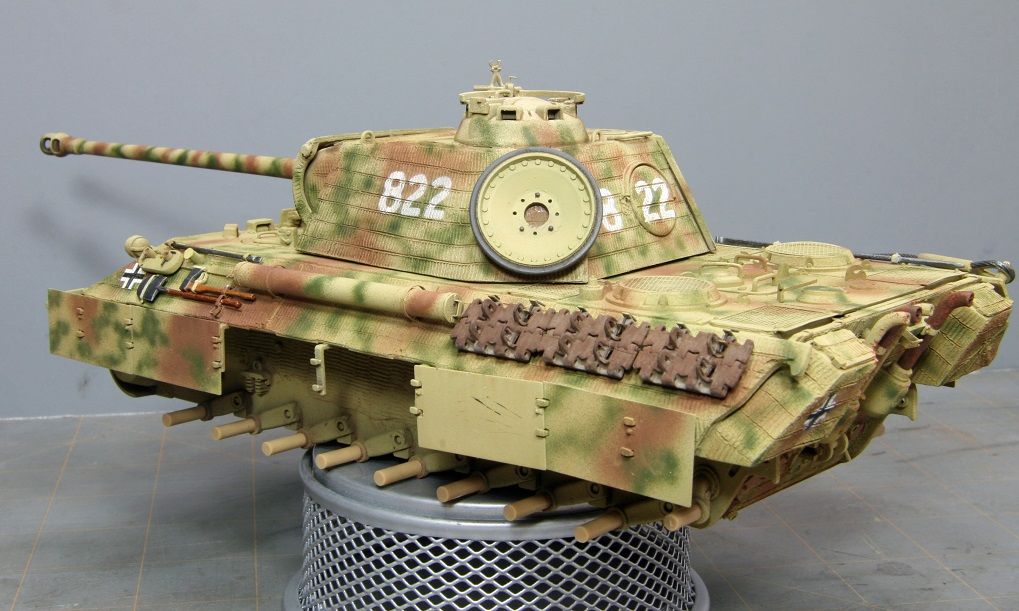 Next up will be trying to get the wheels and tracks squared away. That is the last major assembly hurdle. Then it's on to the majority of the weathering, wear and tear. |
|
|
|
Post by tonylee-Rest In Peace on Jul 7, 2013 13:02:29 GMT -5
Nice scheme pattern  Tony lee |
|
AndyArgent.
Senior Member
    Aug 2013 MoM Winner
Member since: November 2011
Andy Bodge Argent - Aug 2013 MoM Winner
Posts: 1,746
Nov 17, 2011 17:09:43 GMT -5
Nov 17, 2011 17:09:43 GMT -5
|
Post by AndyArgent. on Jul 7, 2013 14:40:40 GMT -5
Looks really nice. I did one very similar with the same base kit and similar zim and all the added details ,loved building it too.keep up the great work.
|
|
406 Silverado
Global Administrator     
Member since: November 2011
Posts: 10,245
Member is Online
MSC Staff
|
Post by 406 Silverado on Jul 7, 2013 14:55:30 GMT -5
Looking much better now. Liking the home made numbering.
|
|
|
|
Post by deafpanzer on Jul 7, 2013 16:17:10 GMT -5
Again I really like the camo! Glad you are back! Spare tracks look good...
|
|
|
|
Post by wbill76 on Jul 7, 2013 17:15:38 GMT -5
Nice to see this one rolling again Dave, looking forward to the weathering!
|
|
craigcole20b.
Full Member
  
Member since: June 2012
Posts: 397
Jun 8, 2012 22:26:16 GMT -5
Jun 8, 2012 22:26:16 GMT -5
|
Post by craigcole20b. on Jul 7, 2013 23:03:09 GMT -5
Great job on the panther
|
|
|
|
Post by hasenpfeffer on Jul 23, 2013 8:53:19 GMT -5
Well another small update. Where do you fellas find the time? lol Managed to start on the turret, chipping and such. 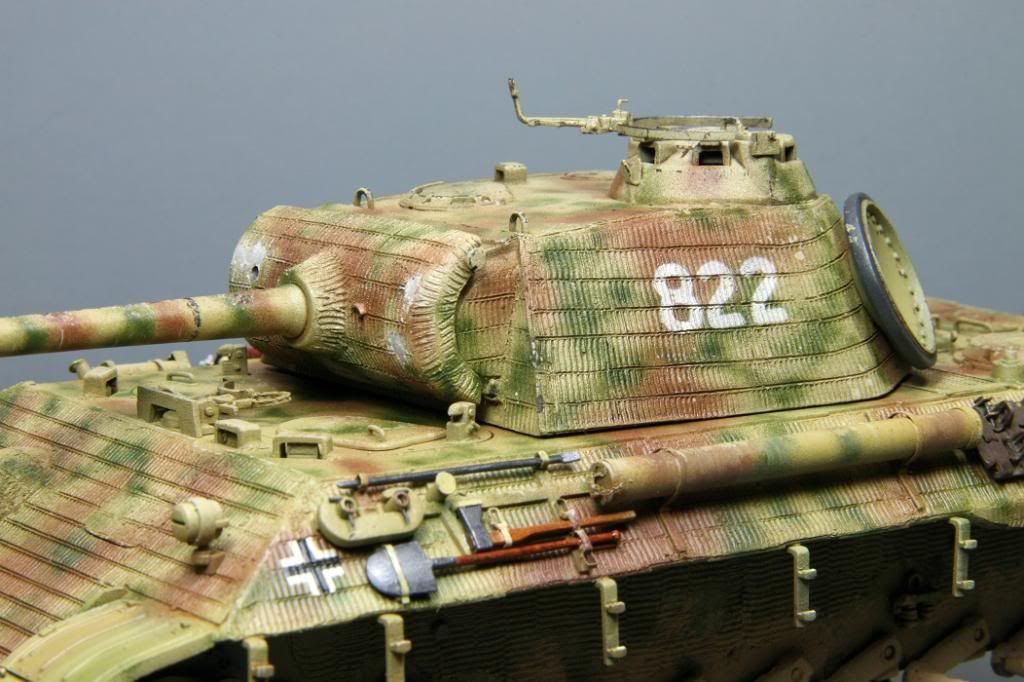 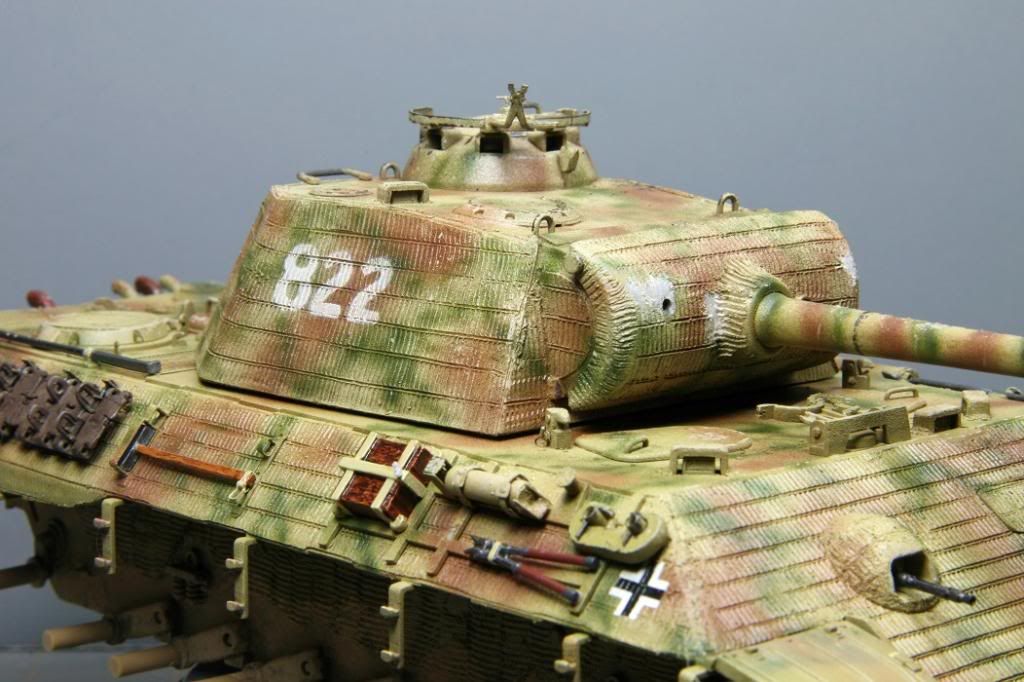 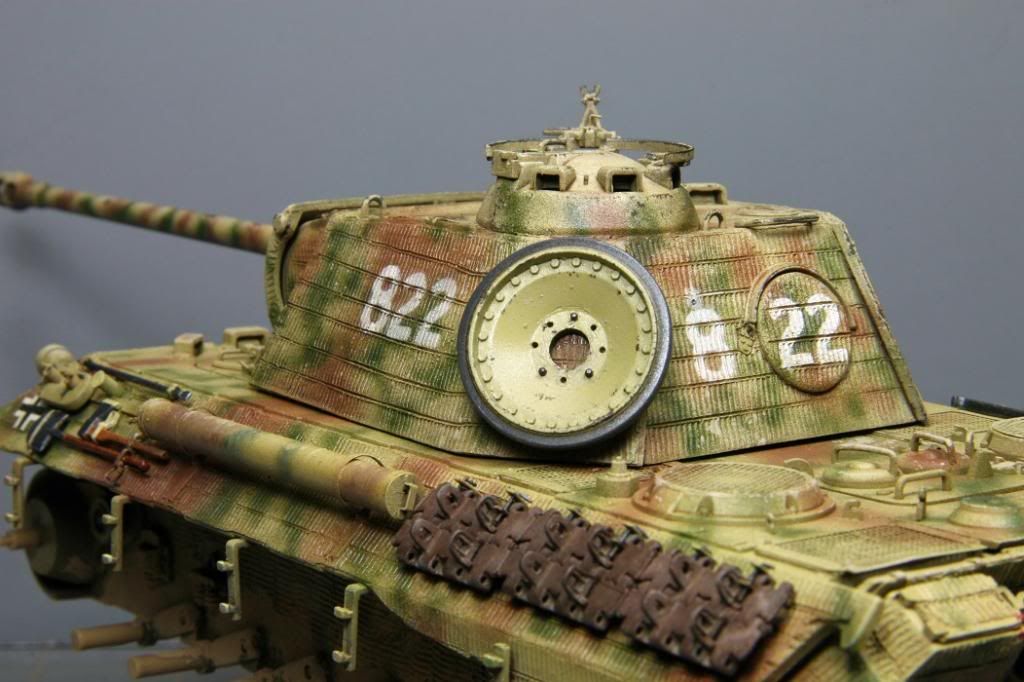 More to come... |
|