danb.
Reviews member     March 2013 MoM Winner
Member since: November 2011
Posts: 2,808
Nov 17, 2011 9:22:52 GMT -5
Nov 17, 2011 9:22:52 GMT -5
|
Post by danb. on Jan 30, 2013 8:11:22 GMT -5
Hello fellow MSC'ers another wingy build for me as i have lost my mojo with armour projects at the moment  a few weeks ago i picked up Jans issue of Model Airplane International and there was a review and build log of Airfix's latest new tooled Zero the review got a 10/10 for value for money and how detailed the kit was for the money so as im new to the wingy scene this was a must for me to get some practice in  . Part 1. Cockpit and fuselage Heres the box art 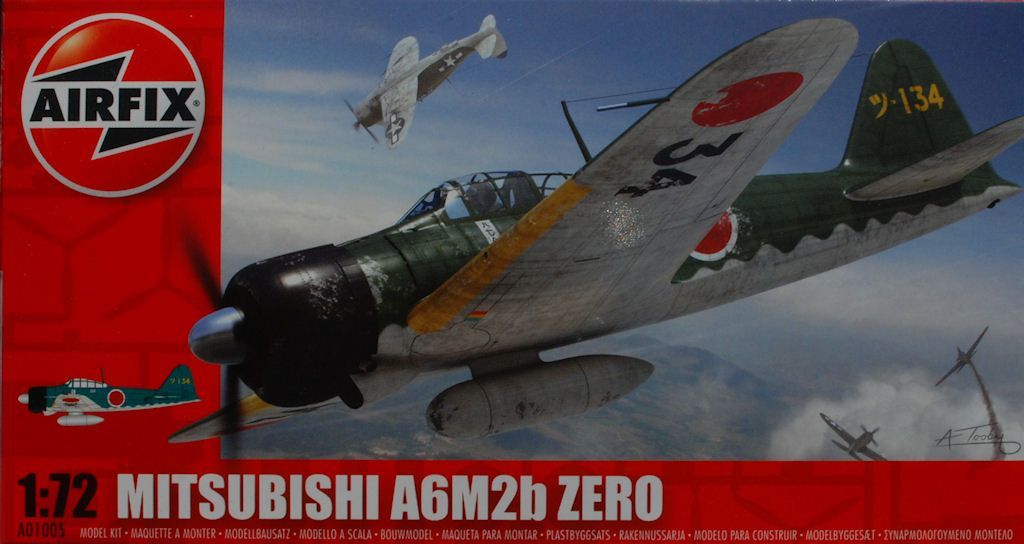 Then i made a start on the office this fell together with no problems i made a few modifications to the seat and made some belts from printer paper and super glue once this was finished it was primed and painted using the following products: Halfords plastic primer Tamiya XF-71 Cockpit green IJN Vallejo black GW Bleached bone GW Scorched brown GW Boltgun metal AK Slime and grime green enamel wash kit decals 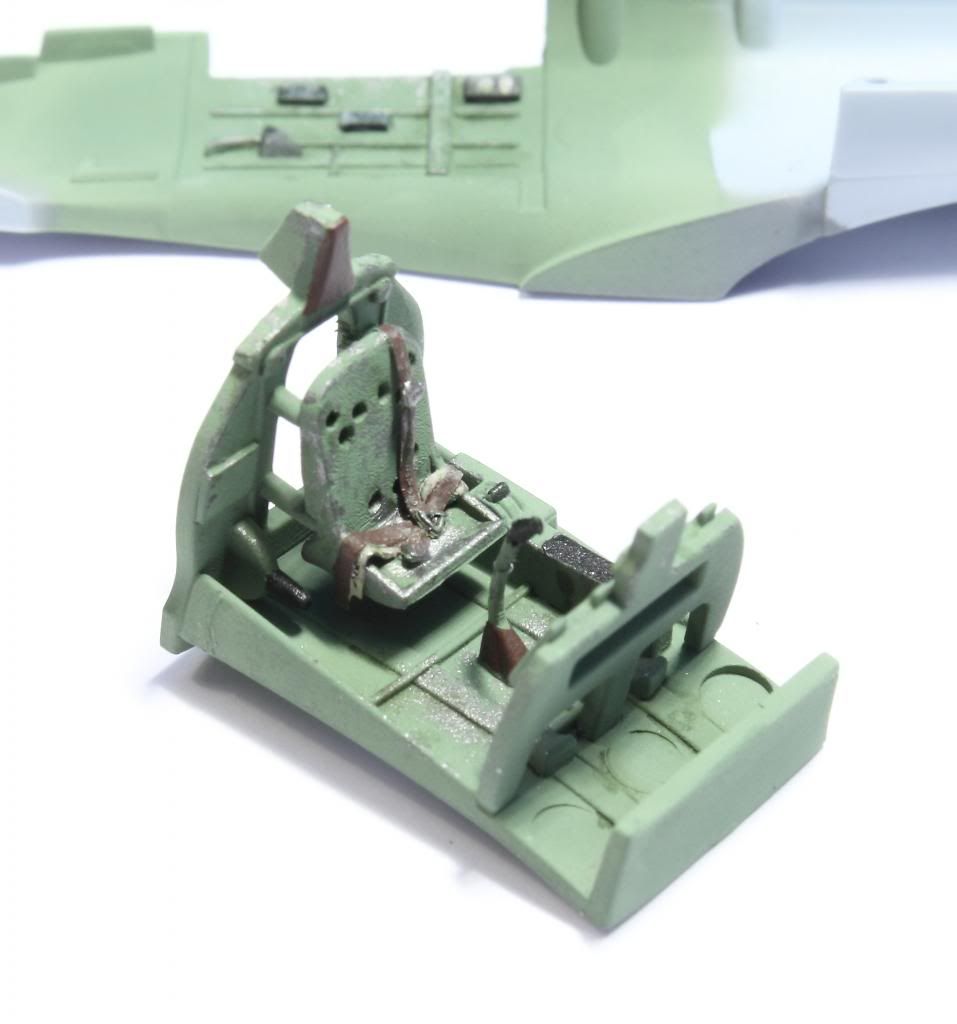 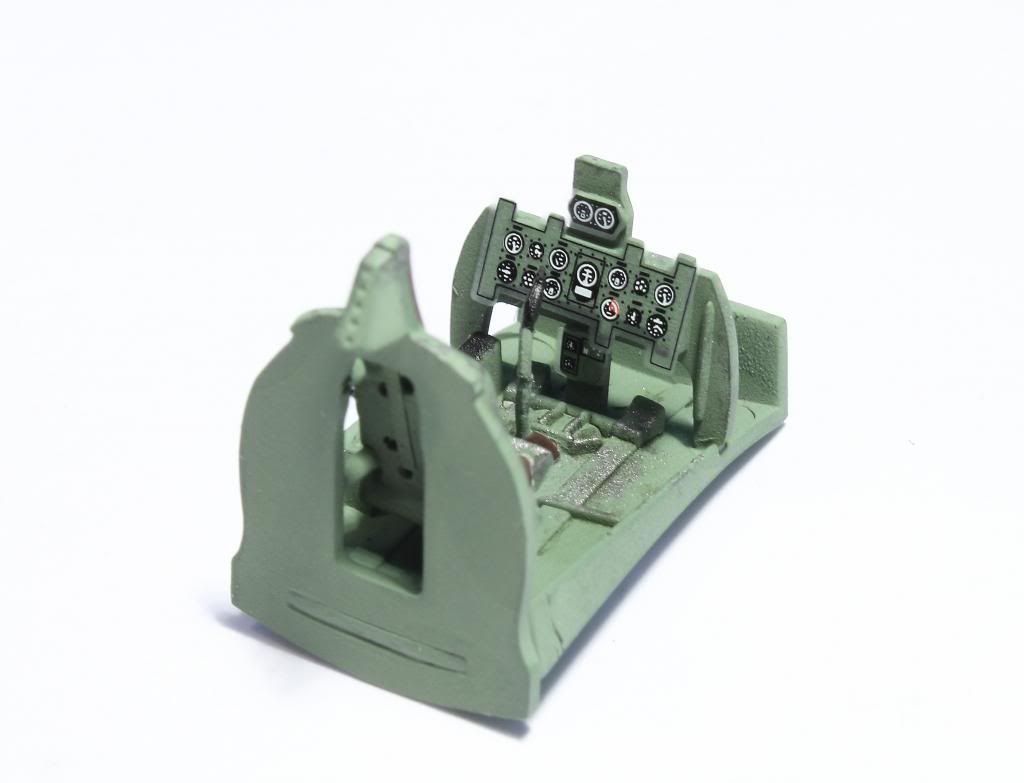 Then the fuselage was painted using the same colours. 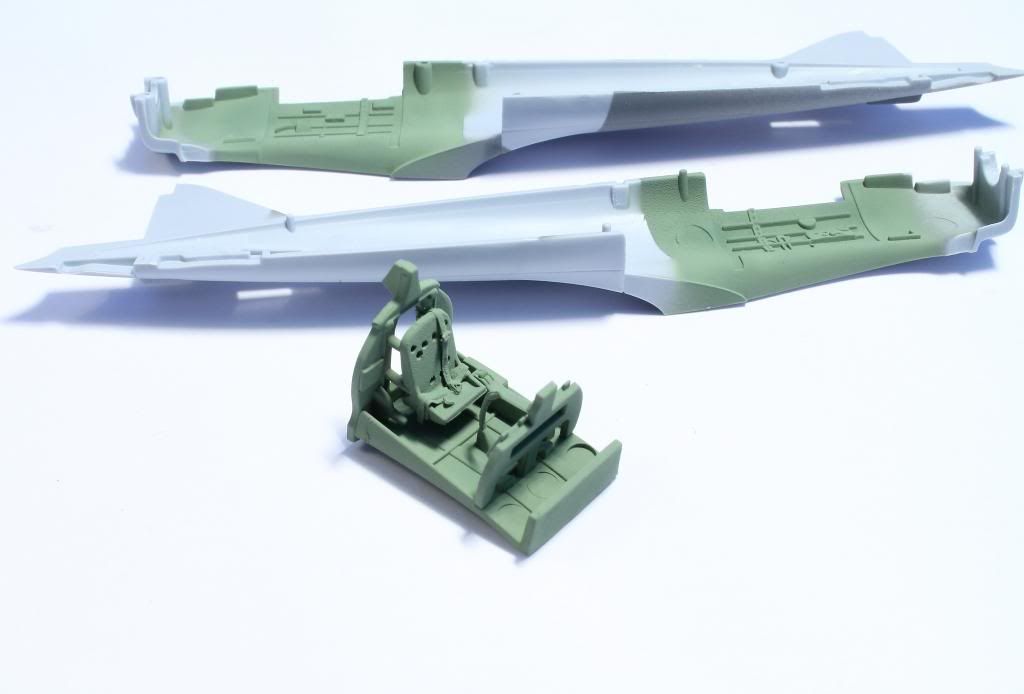 Once the paint had dried it was time to assemble the fuselage and wings this also fell together fine with a small amount of filling needed on the spine and underbelly superglue was used for this the engine and cowling was then fitted i was intending to paint the engine and cowling seperate but where it joins to the fuselage i was scared the glueing stage might ruin the paint so it will have to be done fitted  . 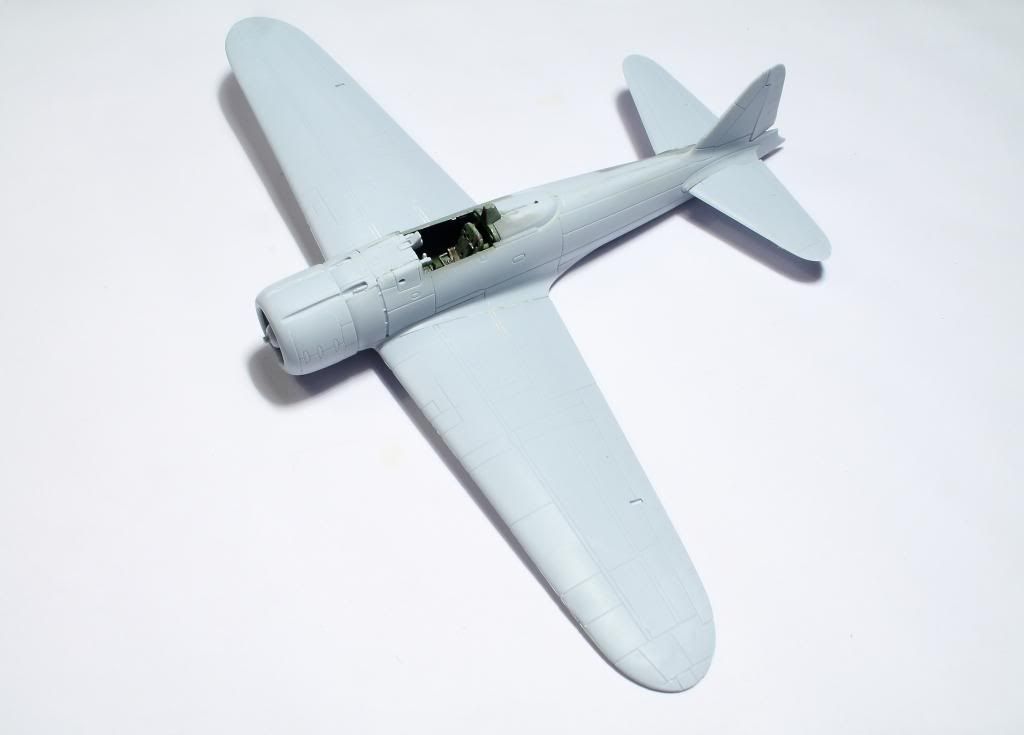 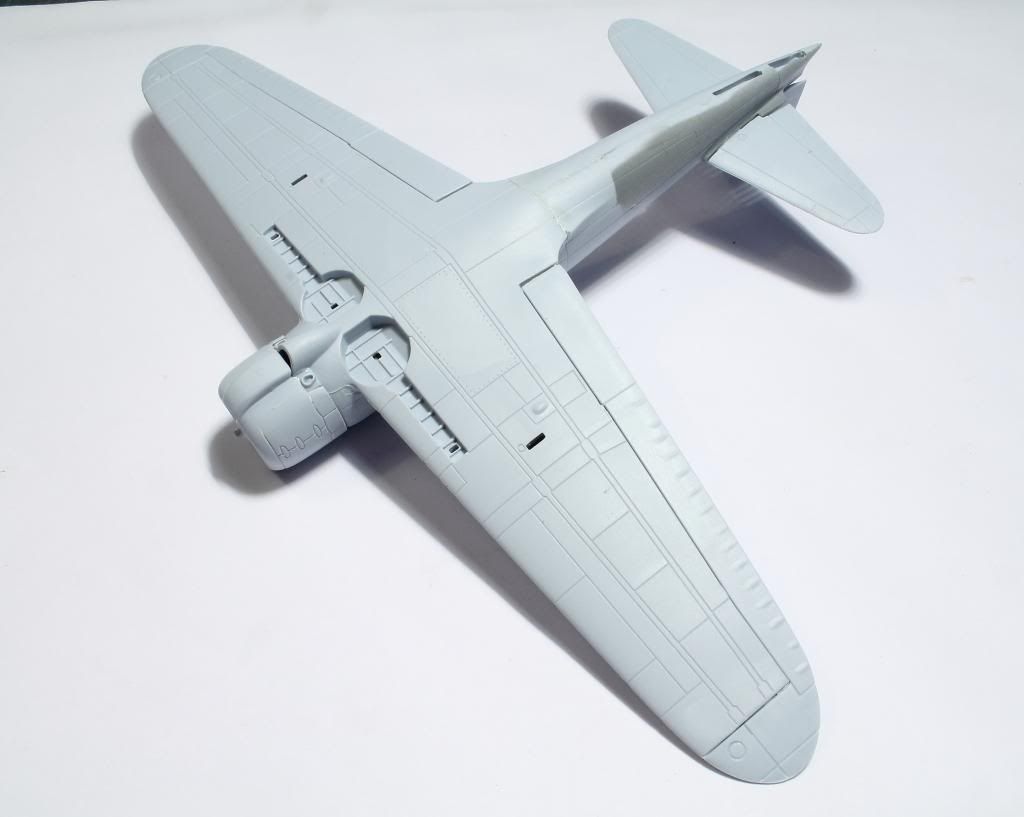 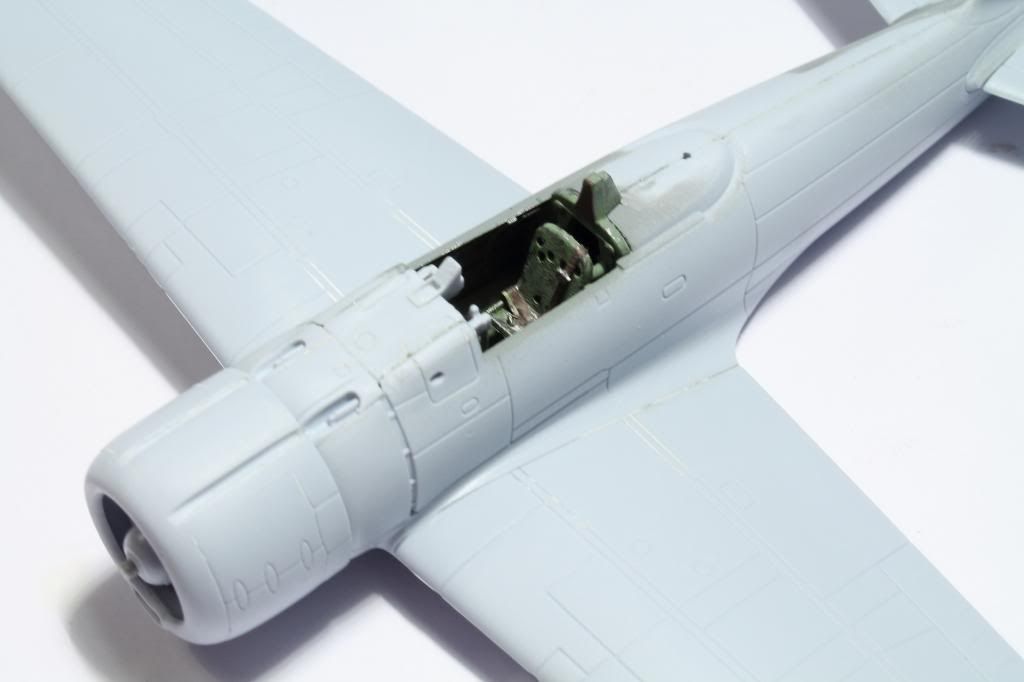 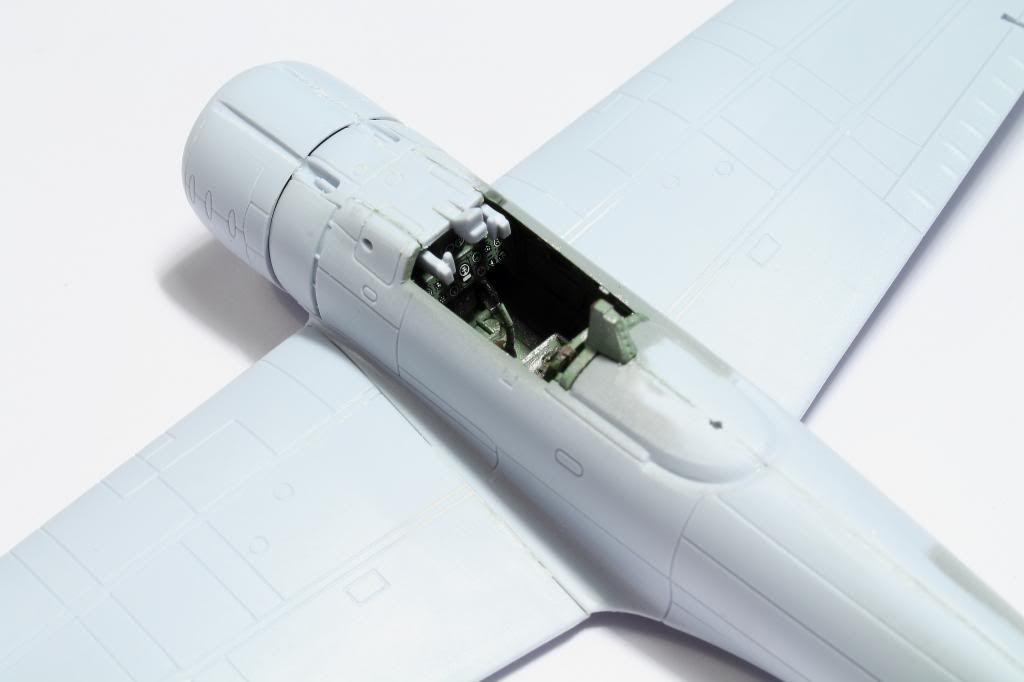 Part 2 next priming and painting Dan B |
|
|
|
Post by fightnjoe on Jan 30, 2013 9:47:47 GMT -5
she looks good from here. should look very good painted.
joe
|
|
danb.
Reviews member     March 2013 MoM Winner
Member since: November 2011
Posts: 2,808
Nov 17, 2011 9:22:52 GMT -5
Nov 17, 2011 9:22:52 GMT -5
|
Post by danb. on Jan 30, 2013 9:49:36 GMT -5
Thanks Joe should have part 2 posted up by tonight  Dan B |
|
|
|
Post by Mence on Jan 30, 2013 10:32:20 GMT -5
Judging by the way you posted this in acquisitions I didn't think it would take you long to get cracking and you've nearly finished it already!
Bet it's a pleasure compared to the other wingy you're doin?
|
|
danb.
Reviews member     March 2013 MoM Winner
Member since: November 2011
Posts: 2,808
Nov 17, 2011 9:22:52 GMT -5
Nov 17, 2011 9:22:52 GMT -5
|
Post by danb. on Jan 30, 2013 12:29:42 GMT -5
You aint wrong there Prof the jug is nearly in the bin im sliding it along the bench in the direction of the bin hoping it might fall in there!!!! LOL  its an absolute nightmare loosing interest with it rapidly  on the other hand this zero is really enjoyable Dan B |
|
Deleted
Member since: January 1970
Posts: 0
Nov 30, 2024 17:53:02 GMT -5
Nov 30, 2024 17:53:02 GMT -5
|
Post by Deleted on Jan 30, 2013 13:27:41 GMT -5
looks very nice indeed
|
|
danb.
Reviews member     March 2013 MoM Winner
Member since: November 2011
Posts: 2,808
Nov 17, 2011 9:22:52 GMT -5
Nov 17, 2011 9:22:52 GMT -5
|
Post by danb. on Jan 30, 2013 13:31:37 GMT -5
Thanks Smudge laying down some Alclad at the moment hoping to get another update done tonight  Dan B |
|
danb.
Reviews member     March 2013 MoM Winner
Member since: November 2011
Posts: 2,808
Nov 17, 2011 9:22:52 GMT -5
Nov 17, 2011 9:22:52 GMT -5
|
Post by danb. on Jan 30, 2013 17:29:37 GMT -5
As promised Part 2.... With the primer sanded it was time to lay down a metallic basecoat for this i used Alclad's Duraluminium this was applied through the AB in 3 light coats with 15 mins drying time between coats a hairdryer was used to aid with the curing process. Basecoat...... 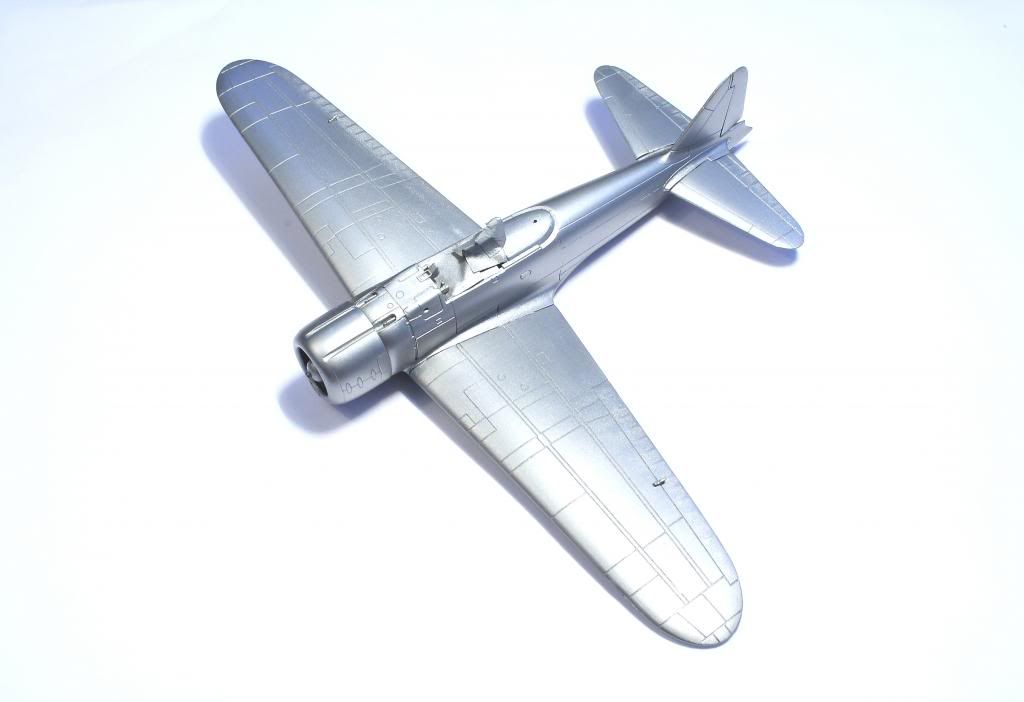 Then i used to lighter shades to highlight certain panels. 1st highlight Straight aluminium 2nd Highlight White aluminium then sealed with Vallejo matt varnish ready for part 3.. 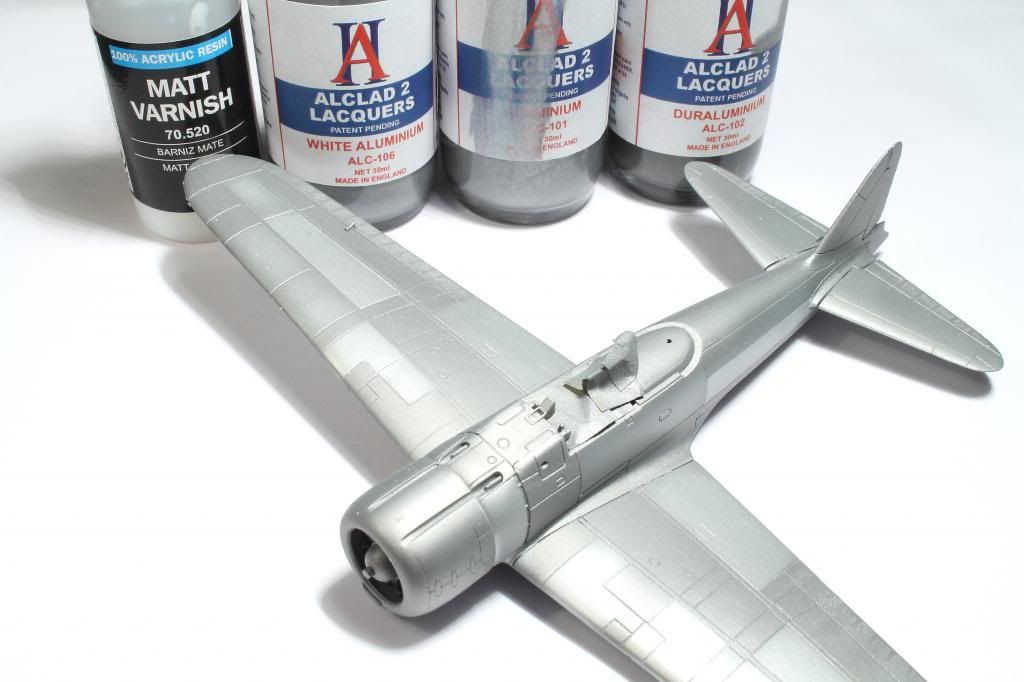 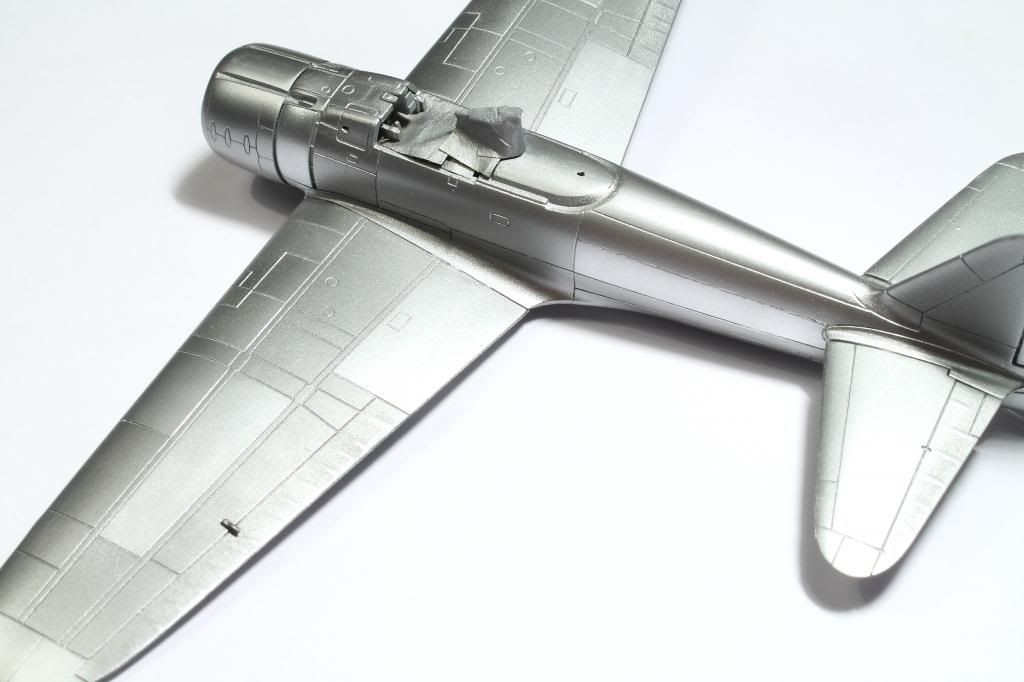 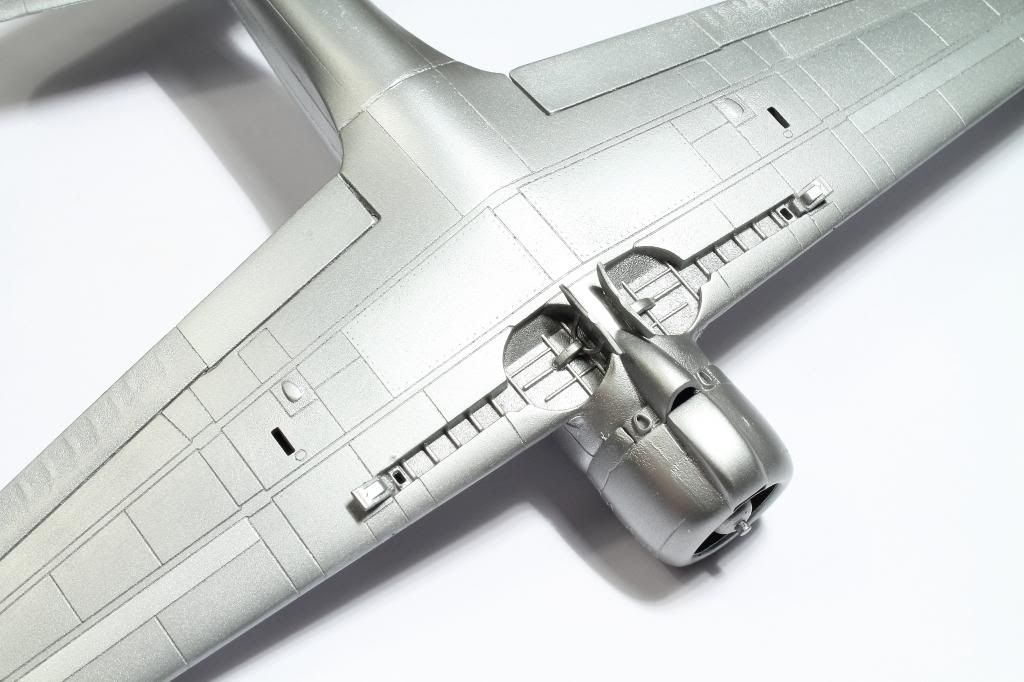 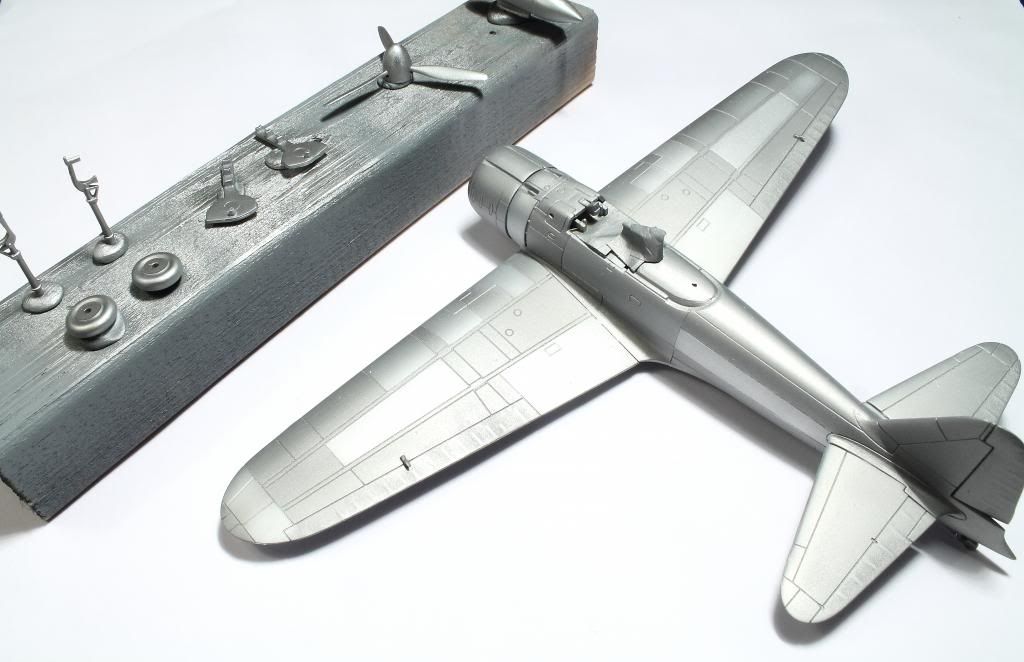 Dan B |
|
|
|
Post by `Boots` on Jan 30, 2013 17:38:05 GMT -5
Looks tip top Dan....  , real good to see ya having a go at the wingies buddy..............i find them a challenge i have too say..............keep up the terrific work fella  |
|
|
|
Post by Mence on Jan 31, 2013 3:10:11 GMT -5
That's looks really good Dan, great finish.
|
|
danb.
Reviews member     March 2013 MoM Winner
Member since: November 2011
Posts: 2,808
Nov 17, 2011 9:22:52 GMT -5
Nov 17, 2011 9:22:52 GMT -5
|
Post by danb. on Jan 31, 2013 3:35:25 GMT -5
Thanks chaps much appreciated  Dan B |
|
|
|
Post by bullardino on Jan 31, 2013 5:22:31 GMT -5
Stunning job, Dan. How did you mask the panels without marring the alclad finish?
|
|
|
|
Post by bbd468 on Jan 31, 2013 9:35:12 GMT -5
WOW Dan....you did not hesitae to open the box and get at it!!! Jeesh...that looks freakin' awesome in the alclad. So you'll be chippin' away at the paint?
Gary
|
|
danb.
Reviews member     March 2013 MoM Winner
Member since: November 2011
Posts: 2,808
Nov 17, 2011 9:22:52 GMT -5
Nov 17, 2011 9:22:52 GMT -5
|
Post by danb. on Jan 31, 2013 17:14:18 GMT -5
Welcome Part 3....... Whilst searching on the net i came across this Ref pic of a "Kate" which did looked a bit tired i liked the look of all the scratches and chips so this decided for me what my Zero shall look like  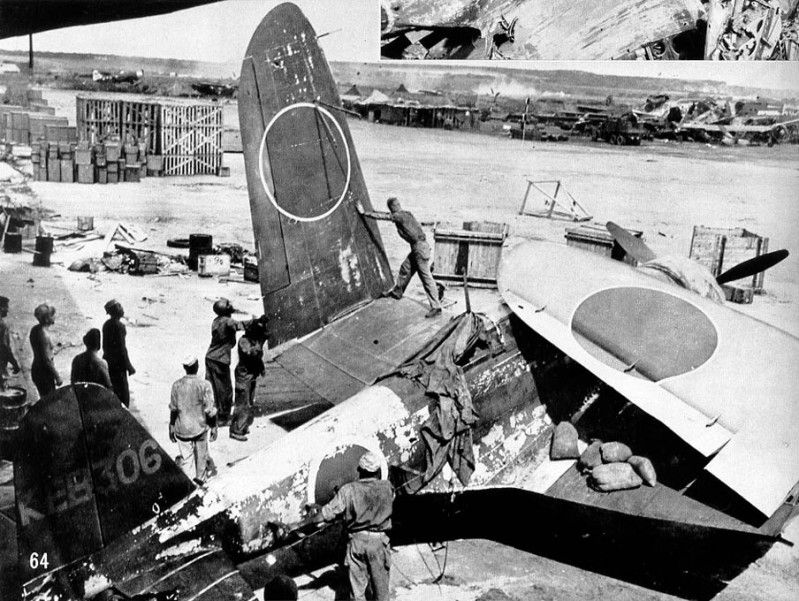 Underside.... To start things off the whole model got 2 coats of HS through the AB then 2 misted coats of highly thinned Tamiya XF-76 IJN Grey just enough was applied so the tones of the metallic undercoat could still be visible this was then left for 15 mins before the chipping could begin.  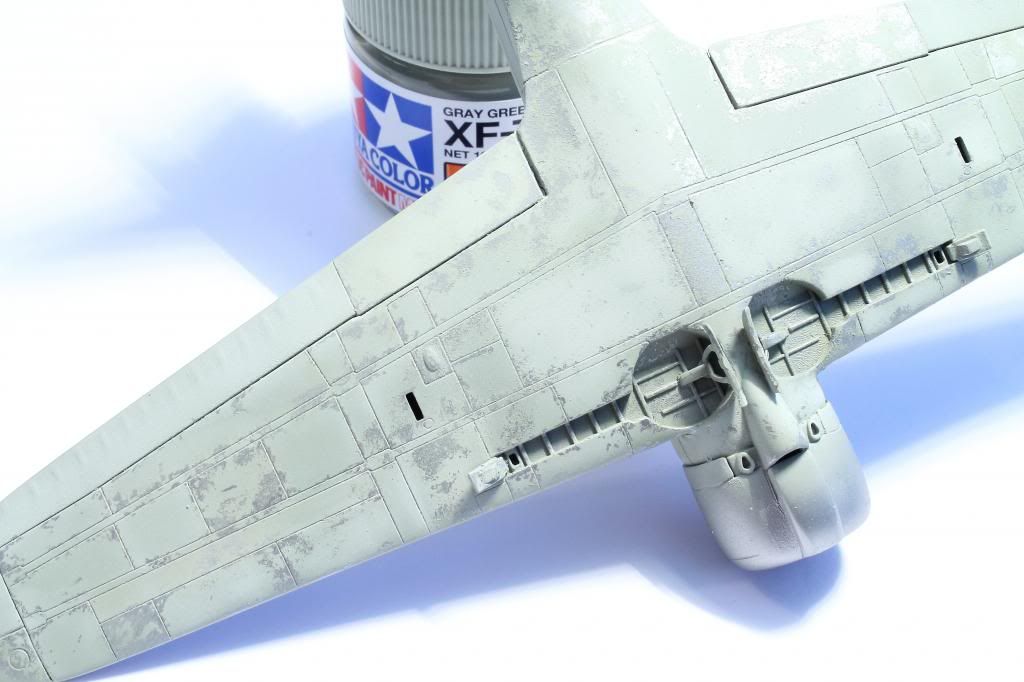 Topside........... Once i washappy with the chipping i moved on to the upper fuselage 1st i cut a wiggly mask out of tamiya tape this mask will be where the grey meets the green camo as the box art suggests when this was in place i mixed up a highly diluted Tamiya XF-70 IJN Dark Green2 mix 2 light coats were applied certain panels were picked out to break up the tones then onto the chipping... 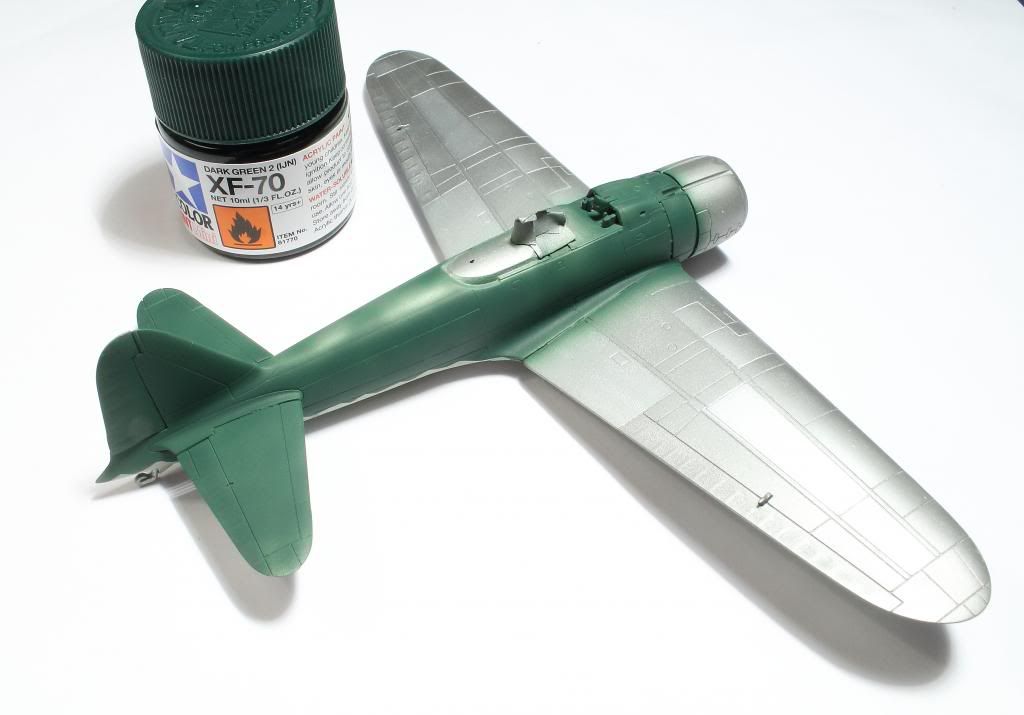 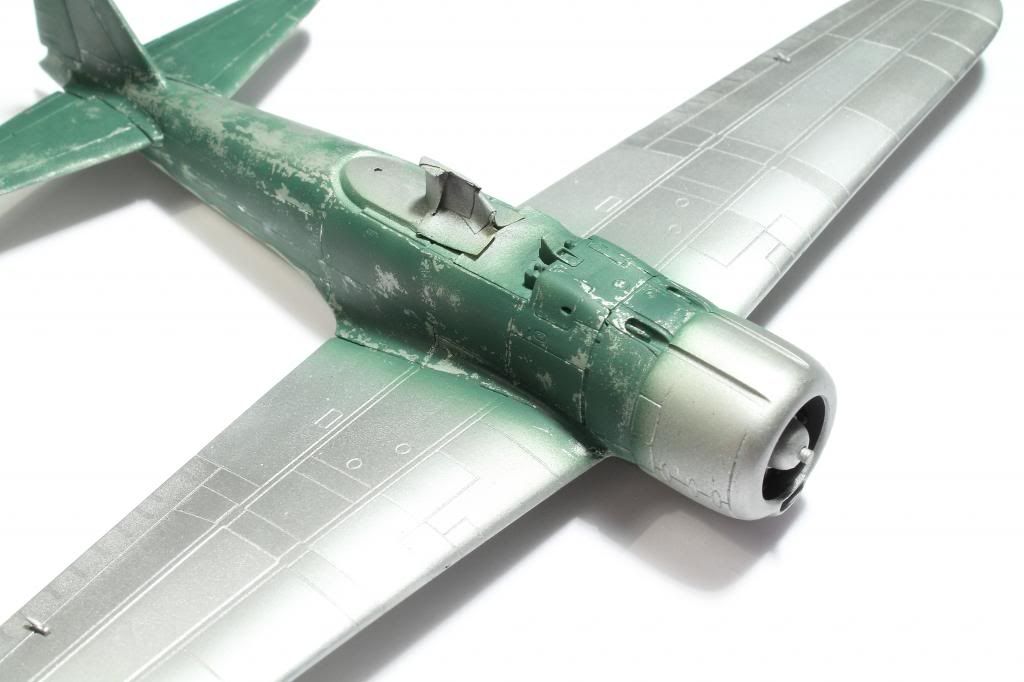 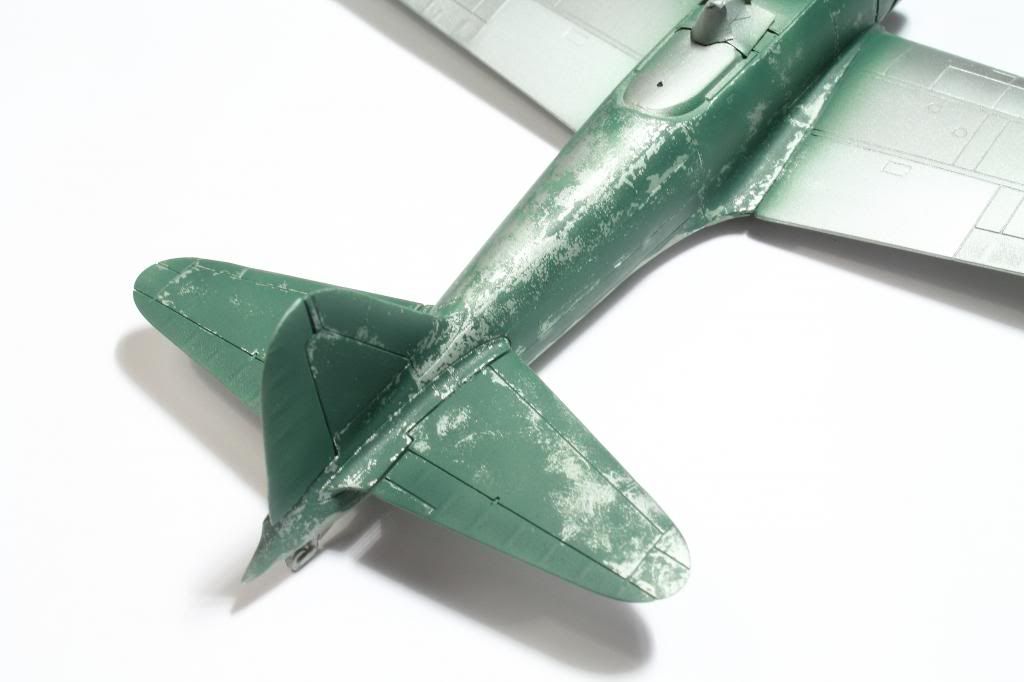 Wings......... 2 coats of HS was applied to the wings then a light coat of dark green again some panels were picked out to replicate weathering effects on the different panels once again this was chipped but only in the high use areas 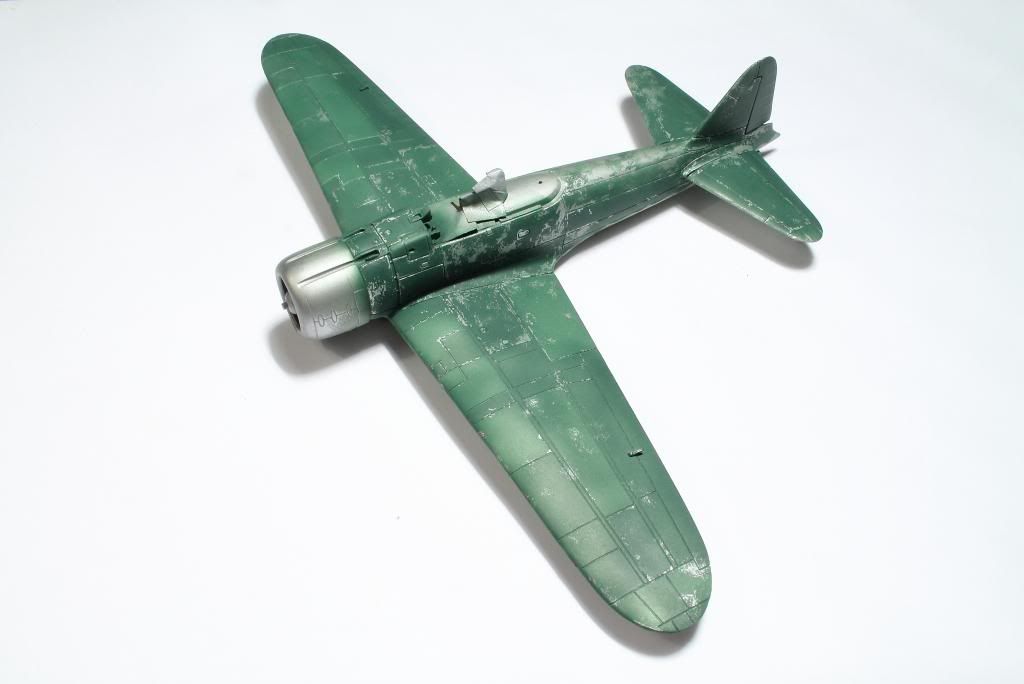 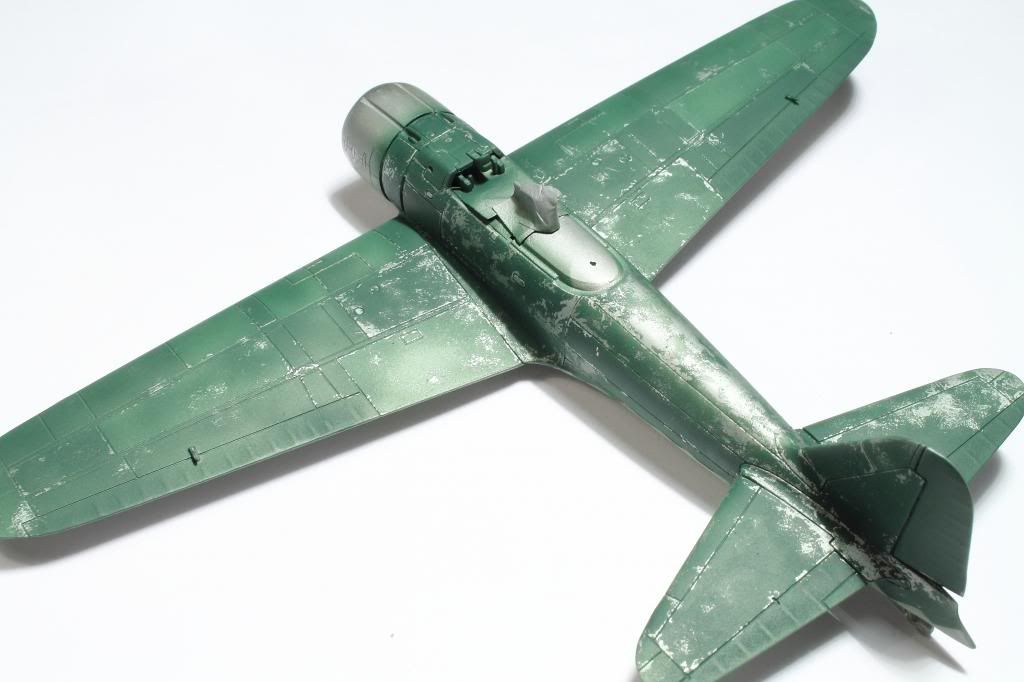 The last bit to get done was the engine cowling Tamiya black and blue was mixed together then sprayed on followed by some light chipping. 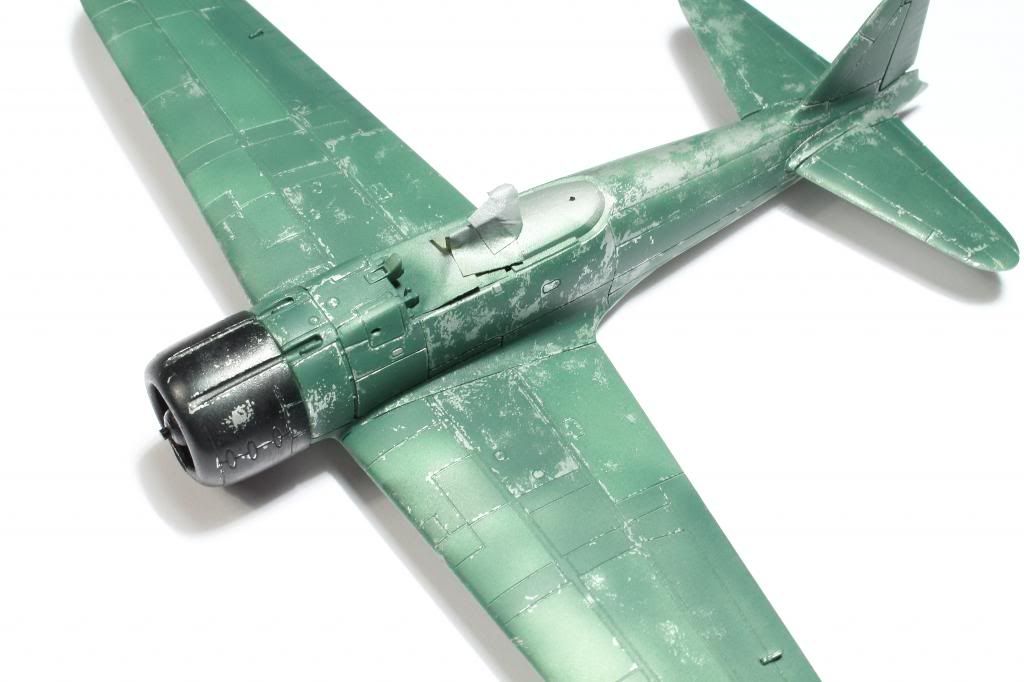 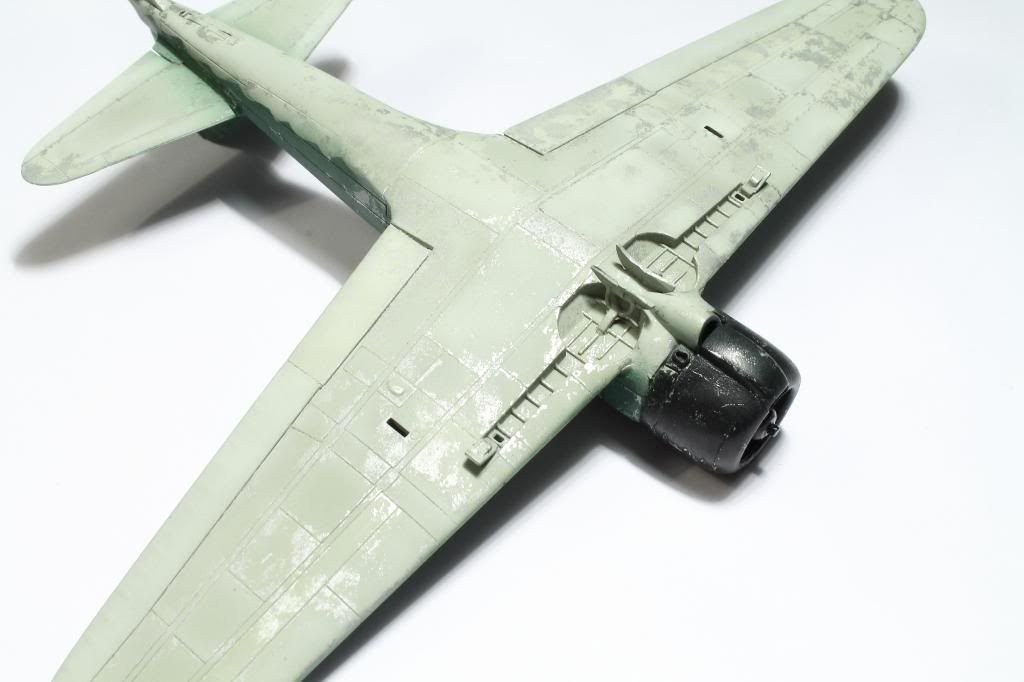 Dan B |
|
|
|
Post by `Boots` on Jan 31, 2013 17:29:56 GMT -5
I love it Dan............great find on the pic as well, the chipping looks ace to me fella and a nice little SBS to accompany  |
|
|
|
Post by bullardino on Jan 31, 2013 17:35:17 GMT -5
Wonderful technique showcase, Dan  |
|
|
|
Post by fightnjoe on Jan 31, 2013 17:48:59 GMT -5
wow. now that is impressive.
joe
|
|
|
|
Post by Leon on Jan 31, 2013 17:58:41 GMT -5
Dan that is some fine work there fella
|
|
danb.
Reviews member     March 2013 MoM Winner
Member since: November 2011
Posts: 2,808
Nov 17, 2011 9:22:52 GMT -5
Nov 17, 2011 9:22:52 GMT -5
|
Post by danb. on Feb 1, 2013 2:41:41 GMT -5
Boots thanks buddy hope the sbs can be of some use to others  Luigi for masking i used Tamiya tape and sticky post it notes Alclad is very strong as long as the surface is clean and light coats are applied and be left overnight to harden there should be no problem thanks for your comments mate  Joe thanks mate glad you like it Leon mucho gracias my freind  Dan B |
|
danb.
Reviews member     March 2013 MoM Winner
Member since: November 2011
Posts: 2,808
Nov 17, 2011 9:22:52 GMT -5
Nov 17, 2011 9:22:52 GMT -5
|
Post by danb. on Feb 1, 2013 2:42:06 GMT -5
Boots thanks buddy hope the sbs can be of some use to others  Luigi for masking i used Tamiya tape and sticky post it notes Alclad is very strong as long as the surface is clean and light coats are applied and be left overnight to harden there should be no problem thanks for your comments mate  Joe thanks mate glad you like it Leon mucho gracias my freind  Dan B |
|
|
|
Post by bullardino on Feb 1, 2013 3:19:08 GMT -5
Thanks a lot, Dan  You're making me wish to take my F-100D shelf queen and finish it... |
|
venom1
Full Member
  
Member since: October 2012
Posts: 1,369
Oct 10, 2012 2:40:03 GMT -5
Oct 10, 2012 2:40:03 GMT -5
|
Post by venom1 on Feb 1, 2013 7:45:20 GMT -5
Hey Dan, Looking superb so far mate! I bought this kit a few weeks back due to the excellent review it got, and on opening the box I wasn't disappointed! Obviously it doesn't have the detail of the Tamiya kit, but at 1/4 of the price, who cares! That picture you are using is the same one that Jamie Haggo used for inspiration for his magnificent Kate, so you are in excellent company! If you haven't had a look yet, check out his blog at haggismodels.blogspot.co.uk/ it is well worth the read if you are doing less-than-cared-for airplanes. This guy is my new modelling hero! Anyway, sorry for the minor thread hijack, love yer work, bring on the next bit!  Cheers, Sam  |
|
|
|
Post by deafpanzer on Feb 1, 2013 8:49:30 GMT -5
Excellent chipping job!!! I know little about WWII planes... always wondered why Japanese planes couldn't hold paint any better than others? Harsher weather or its their paint that doesn't bond well?
|
|
|
|
Post by bullardino on Feb 1, 2013 9:02:52 GMT -5
Both paint quality and tropical weather in conjunction with sea salt.  |
|
|
|
Post by Mence on Feb 1, 2013 9:23:29 GMT -5
Loving the effect Dan, she's looking really good. Keep it up buddy!
|
|
danb.
Reviews member     March 2013 MoM Winner
Member since: November 2011
Posts: 2,808
Nov 17, 2011 9:22:52 GMT -5
Nov 17, 2011 9:22:52 GMT -5
|
Post by danb. on Feb 1, 2013 10:41:52 GMT -5
Many thanks chaps for all the comments and encouragement its much appreciated Prof glad you like it bud  Deafpanzer Luigi has hit the nail on the head for ya buddy the pacific was a harsh place for paint;) i have probably over done this factor on mine but i love it  Venom: I did find that piccy on JH's blog and found some other nice abandoned pics of Jap aircraft i sent the link to CB hopefully he can put them up in the libary i am too a follower of his blog im going to use his oils tech on this one fingers crossed i dont ruin it :/ Dan B |
|
|
|
Post by bbd468 on Feb 1, 2013 14:14:59 GMT -5
WOW Dan!!! Tha chipping is most impressive! Looks awesome buddy.  Gary |
|
danb.
Reviews member     March 2013 MoM Winner
Member since: November 2011
Posts: 2,808
Nov 17, 2011 9:22:52 GMT -5
Nov 17, 2011 9:22:52 GMT -5
|
Post by danb. on Feb 1, 2013 14:29:03 GMT -5
Cheers Gary  Dan B |
|
|
|
Post by deafpanzer on Feb 1, 2013 15:05:46 GMT -5
Thanks! Makes sense... because I love hairspray technique especially chipping now I am tempted to try that on a plane one day. LOL Keep it coming Dan!
|
|
danb.
Reviews member     March 2013 MoM Winner
Member since: November 2011
Posts: 2,808
Nov 17, 2011 9:22:52 GMT -5
Nov 17, 2011 9:22:52 GMT -5
|
Post by danb. on Feb 3, 2013 11:05:59 GMT -5
Thanks for the comments chaps as always i really apreciate it  Dicky: Thanks for letting me off with the mojo issues!!!!LoL when i find a suitable scheme and scenario for the VK im hoping i should be back to normal :/ I did plan on using the kit decs thats why i left the markings off until now but due to the chipping i decided on painting them. Part 4...... Filter and markings Once i had made my mind up on the markings issue i got on and cut some stencils out of Tamiya tape and a circle cutter once these were applied to the kit instructions i sprayed two light coats of HS followed by tamiya white as a highlight for the red then GW Blood red once dry the chipping could begin  I used AK's Winter streaking grime as a filter highly thinned with white spirit and applied with a round brush it was thinned due to not wanting to lose the light grey on the underside or lose the highlights of the green on the topside and luckily this filter was dark enough for the panel lines  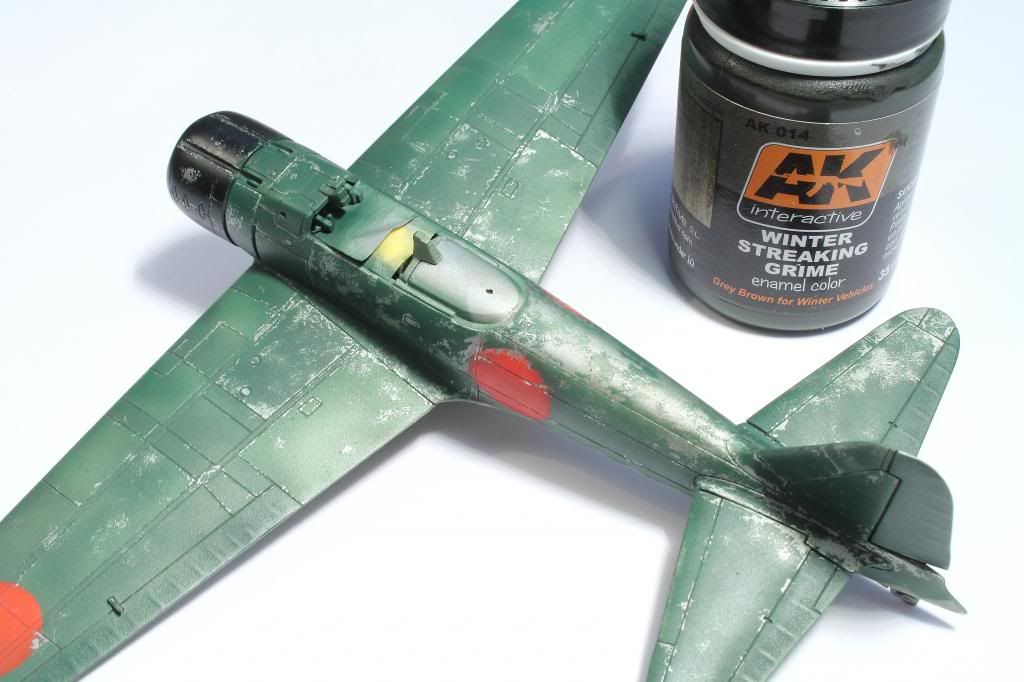 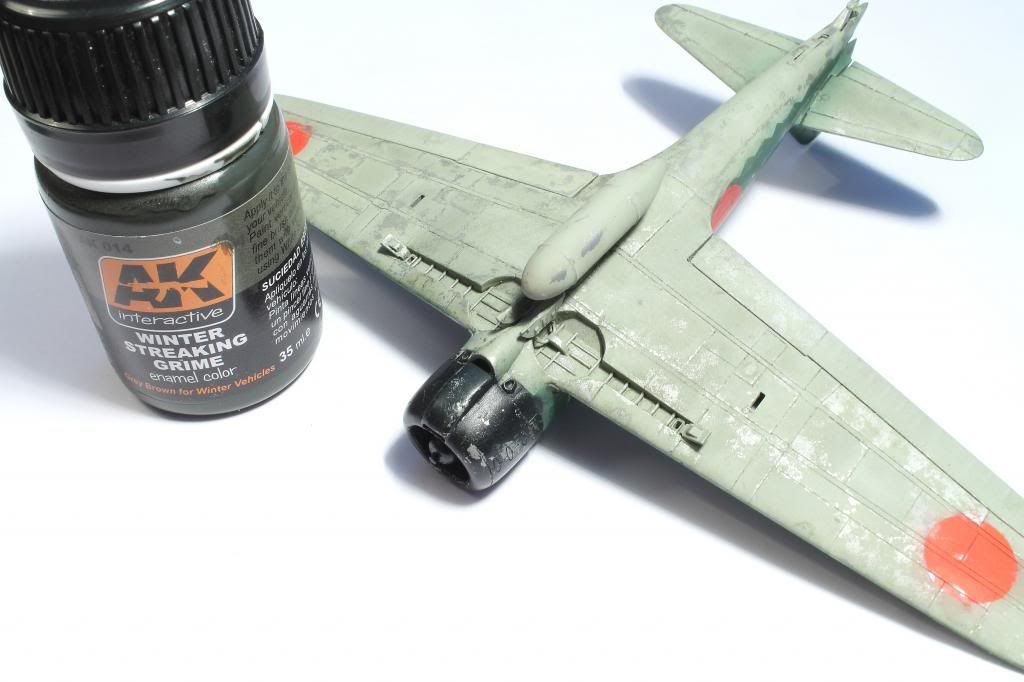 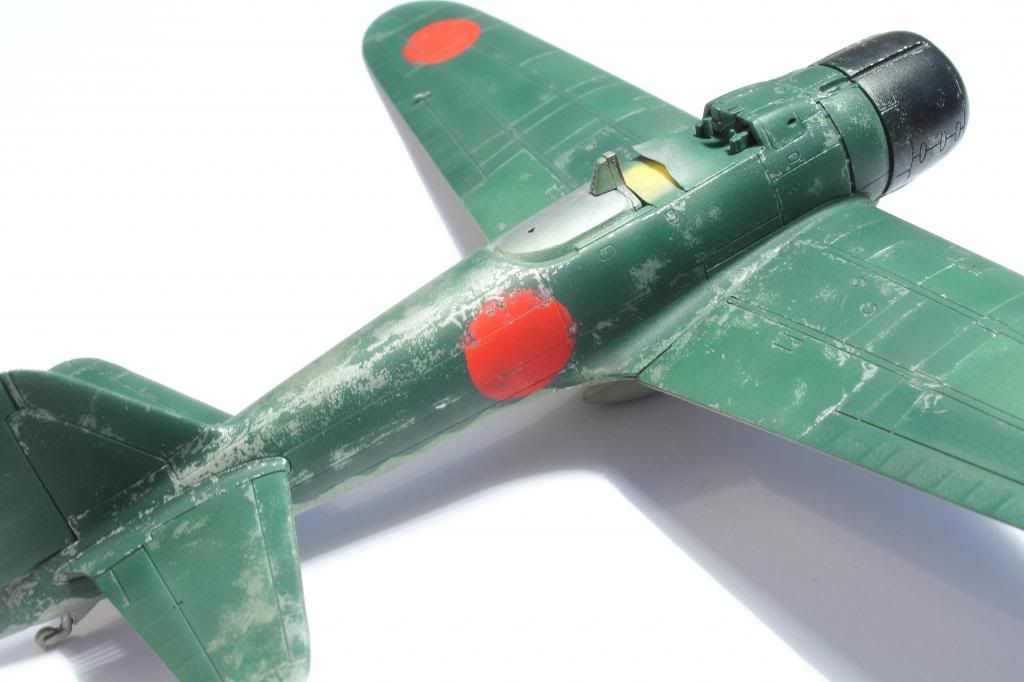 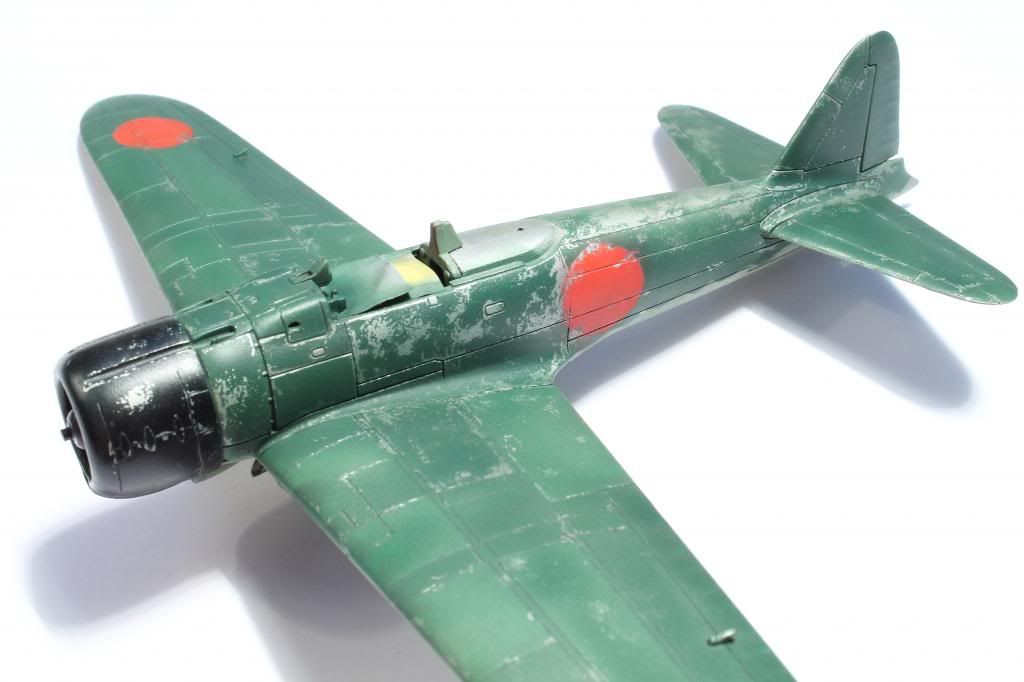 Next up is Part 5 Oils........... Dan B |
|