panzerjager.
Full Member
  
Member since: June 2012
Posts: 204
Jun 5, 2012 21:56:23 GMT -5
Jun 5, 2012 21:56:23 GMT -5
|
Post by panzerjager. on Mar 23, 2013 17:56:11 GMT -5
To take a break from the amount of parts of the FAMO I'm current building, I start the building of this little russian tank, which was gifted by a friend partially built, as you can see in the first pic 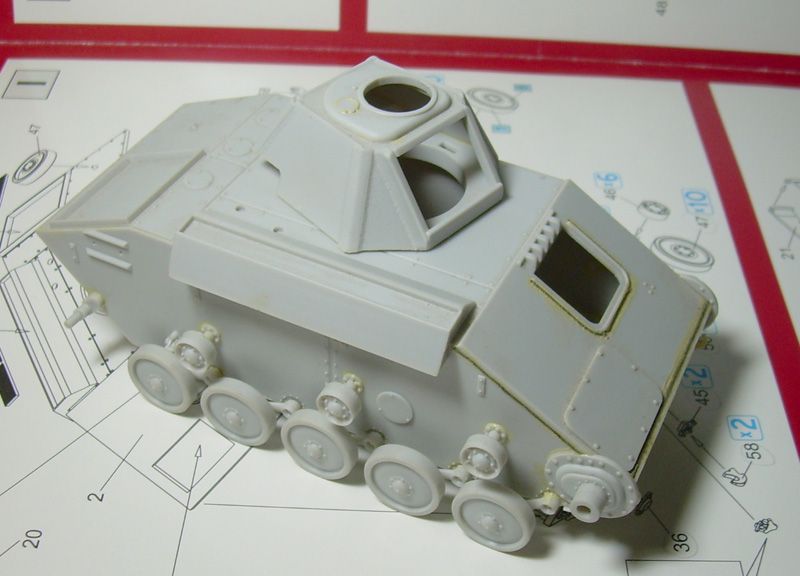 It lacks of any P.E. parts, so, I start building the engines ventilation fins, using a brass foil. It should looks like this: 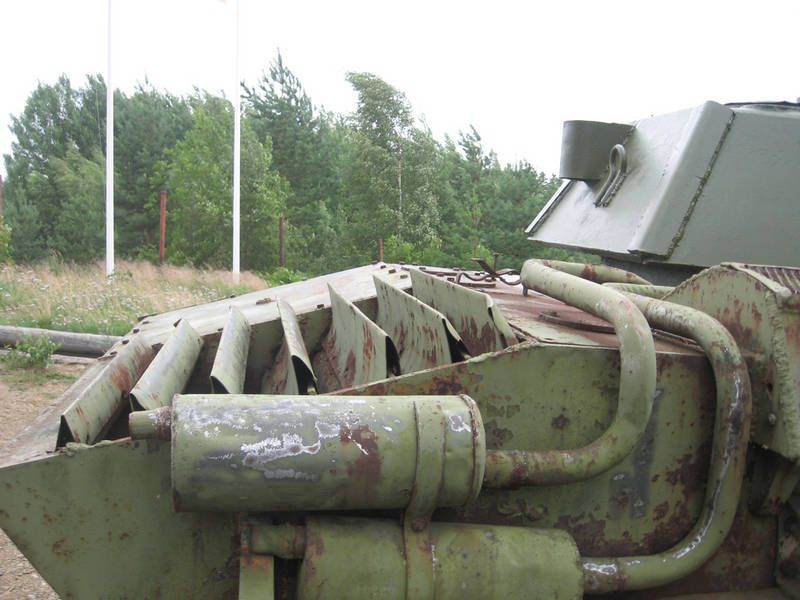 Parts are not glued yet 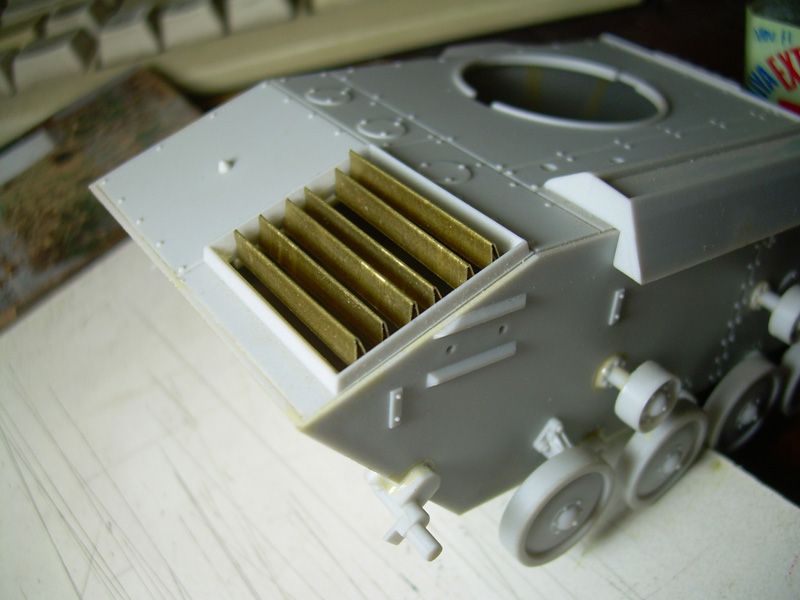 NOw I need to know how looks the view of the engines compartment from outside, so, if you have any good pic, it will be apretiated Darío INFOwww.wwiivehicles.com/ussr/tanks-light/t-70.aspes.wikipedia.org/wiki/T-70beute.narod.ru/Beutepanzer/su/su.htmWALKAROUNDSwww.primeportal.net/tanks/yuri_pasholok/t-70_light_tank/www.thetankmaster.com/english/afv/t70-soviet-light-tank.asparmor.kiev.ua/Tanks/WWII/T70/www.youtube.com/watch?v=VNcvlToTW-Awww.primeportal.net/tanks/yuri_pasholok/t-70_light_tank/photoka.info/t_70/index.htmsvsm.org/gallery/T-70 (Kubinka) svsm.org/gallery/T-70_nov (Velikiy Novgorod) www.weapon.df.ru/potroh/t70/index-e.html (Kubinka interior) www.andreaslarka.net/T-70/T-70.htmlmilitarymodels.co.nz/2012/06/04/mini-photo-walkaround-russian-t-70/blog.net-maquettes.com/walk-around/t-70/MODELSIn box review by J.Rae: www.armorama.com/modules.php?op=modload&name=Reviews&file=index&req=showcontent&id=1648In box review, kit 35026 (beute) by H.Meerdink: www.armorama.com/modules.php?op=modload&name=Reviews&file=index&req=showcontent&id=1631Review by C.Sewell: www.cybermodeler.com/hobby/kits/ma/kit_ma_35025.shtmlM Ramsden www.militarymodelling.com/news/article/miniart-t-70/3346/Joaquin García G: ipmsmalta.forumotion.net/t1244-t-70-m-miniart-1-35 or panzermodelling.com/wordp/?cat=39 |
|
|
|
Post by Leon on Mar 23, 2013 18:02:25 GMT -5
Dario looks like your off to a good start.Vent fins look fine.  |
|
|
|
Post by bullardino on Mar 23, 2013 18:34:53 GMT -5
Very nice, Dario  Unfortunately I have little if none pics of the T-70... |
|
Deleted
Member since: January 1970
Posts: 0
Nov 24, 2024 6:38:09 GMT -5
Nov 24, 2024 6:38:09 GMT -5
|
Post by Deleted on Mar 24, 2013 4:35:47 GMT -5
Looks very interesting Dario,the brass louvred panel you've made looks superb  |
|
|
|
Post by deafpanzer on Mar 24, 2013 10:17:39 GMT -5
PE work is killer there... you have my attention as usual! Great links for anybody to learn and use...
|
|
|
|
Post by 406 Silverado on Mar 25, 2013 7:00:39 GMT -5
I like this one so far. The metal fins look the part. Nice work Dario
|
|
panzerjager.
Full Member
  
Member since: June 2012
Posts: 204
Jun 5, 2012 21:56:23 GMT -5
Jun 5, 2012 21:56:23 GMT -5
|
Post by panzerjager. on Mar 28, 2013 21:37:43 GMT -5
Thanks guys. I have in mind to use this tank as an excercise of painting partially burnt/rusted vehicles. I added a metal screen and a cardboard frame, covered with 2 coats of acrilic floor polish 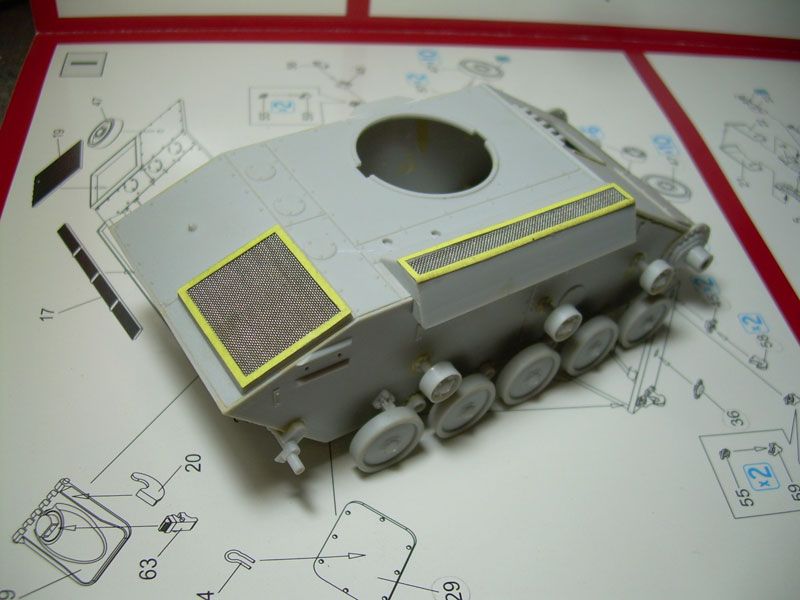 I paint and install the tracks before the fenders to avoid broke the tiny links. Tracks was airbrushed with Tamiya XF-64, then a mix of fine sand, beige acrilic and window cleaner was applied to simulate the dirt. 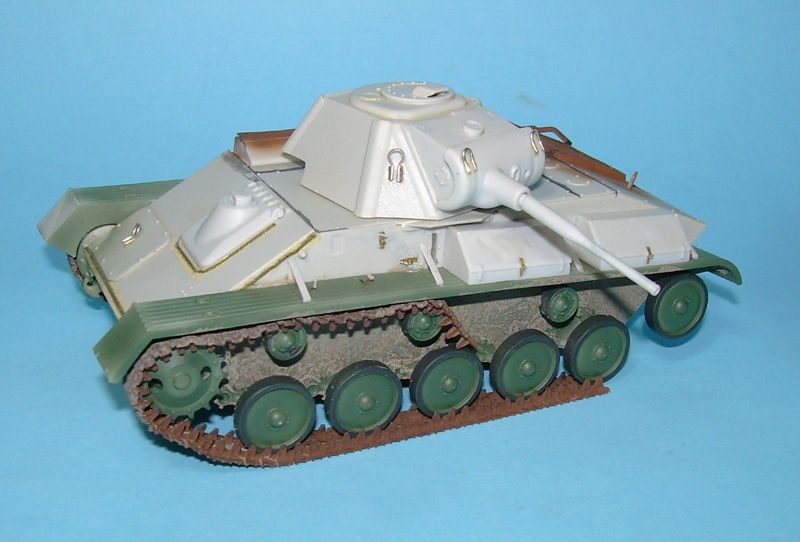 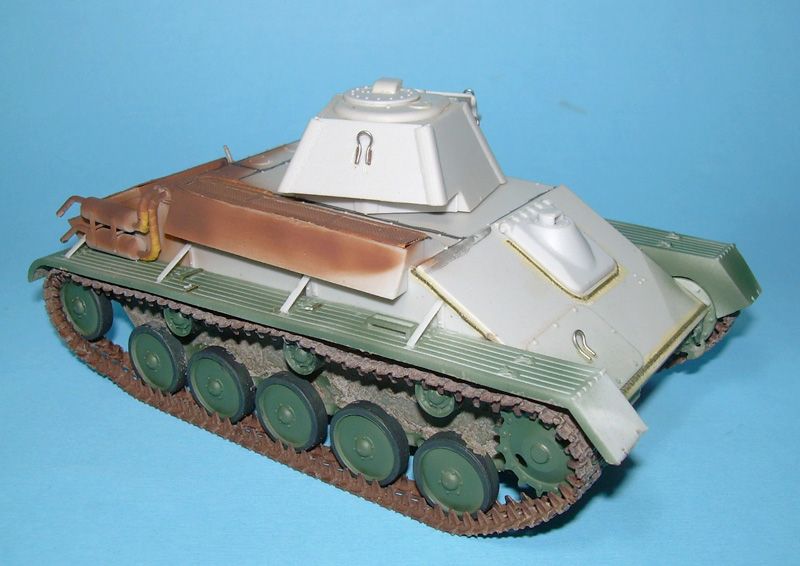 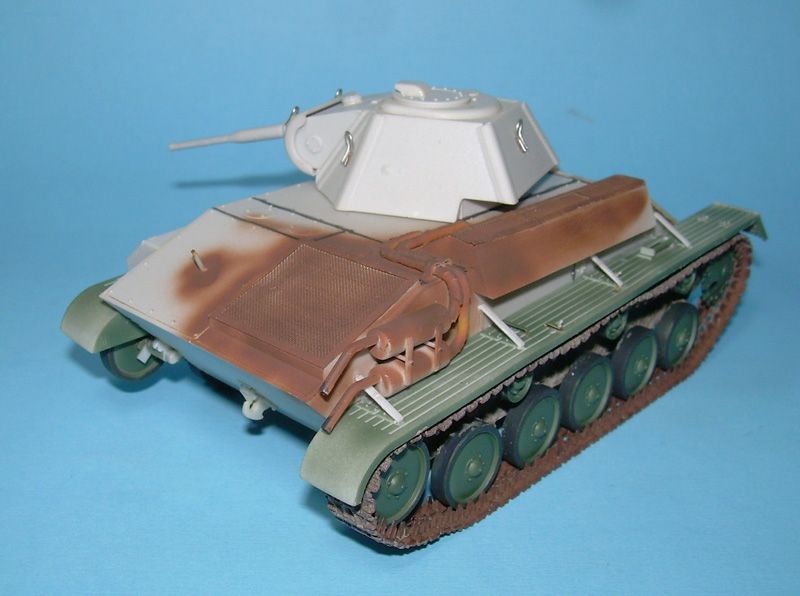 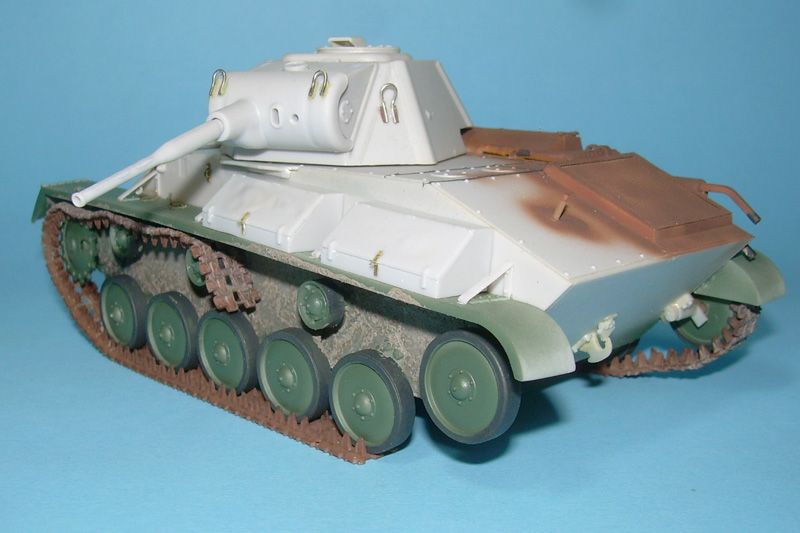 I use Photoshop to see how the burnt/rusted zone will look 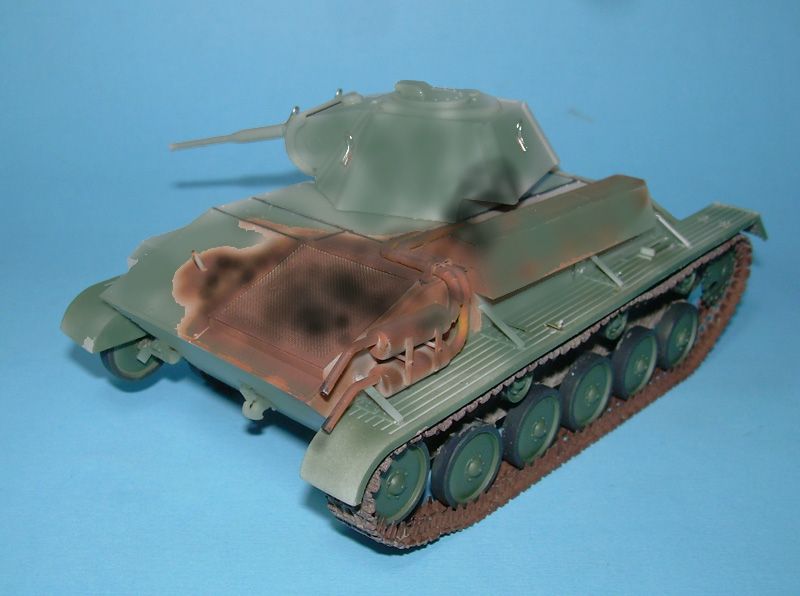 Darío |
|
|
|
Post by bbd468 on Mar 28, 2013 21:42:00 GMT -5
Lookin nice Dario....Great job! Thx for the links as well.  |
|
|
|
Post by Leon on Mar 28, 2013 21:45:19 GMT -5
Nice effects Dario.I like it.  |
|
jsteinman
Full Member
  
Member since: March 2013
Posts: 735
Mar 24, 2013 9:29:10 GMT -5
Mar 24, 2013 9:29:10 GMT -5
|
Post by jsteinman on Mar 28, 2013 21:53:28 GMT -5
Burn baby burn!
|
|
panzerjager.
Full Member
  
Member since: June 2012
Posts: 204
Jun 5, 2012 21:56:23 GMT -5
Jun 5, 2012 21:56:23 GMT -5
|
Post by panzerjager. on Mar 30, 2013 13:43:47 GMT -5
Thanks, guys! I continue with this burnt/rusted painting excercise: 1 - Base color: Tamiya XF-64 toned down with yellow. The spots you can see are acrilic paint, to obtain different shades of oxide, later, when I paint the chipping. The black & white decal you see on the left wall of the turret is...a decal. My idea was paint on the turret, apply the decal and then paint on the decal; then I will try to peel the decal, to show the paint below; but something fail, the decal seems to be very good, because I can't peel it  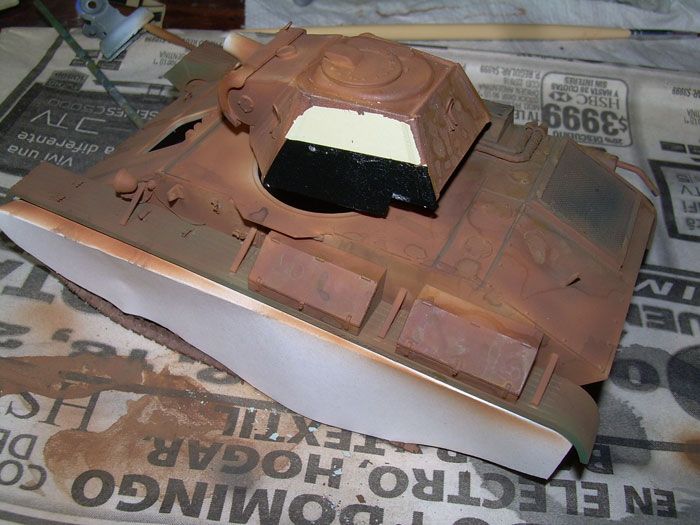 2 - After a coat of hairspray I apply a coat of a Tamiya mix (I'm out of green, so I mixed yellow, Royal blue and black) and start to rub to remove the paint with a brush. Again...something fail, the base color was removed too, in some parts 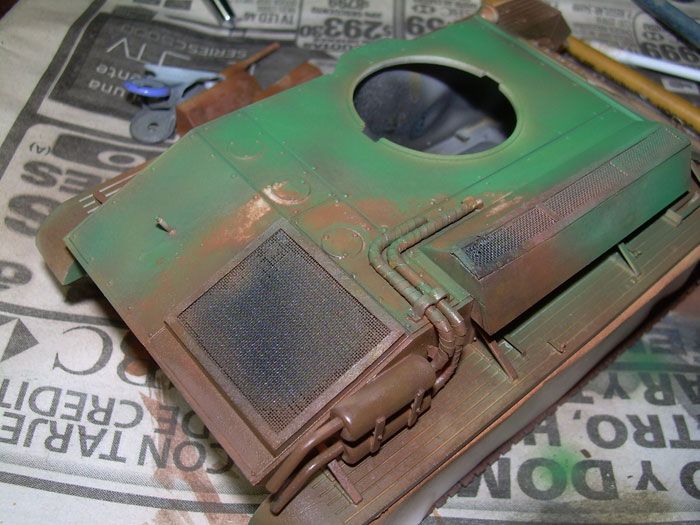 3 - I forget to apply the decals, so, I painted some numbers. I added spots with artist acrilic paits, mixed with a bit of Tamiya Flat Base, over the moistened surfaces. 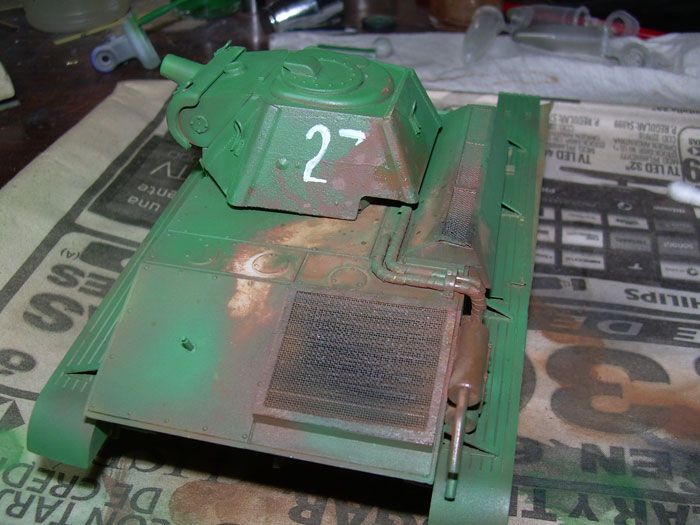 4 - More acrilic applied. 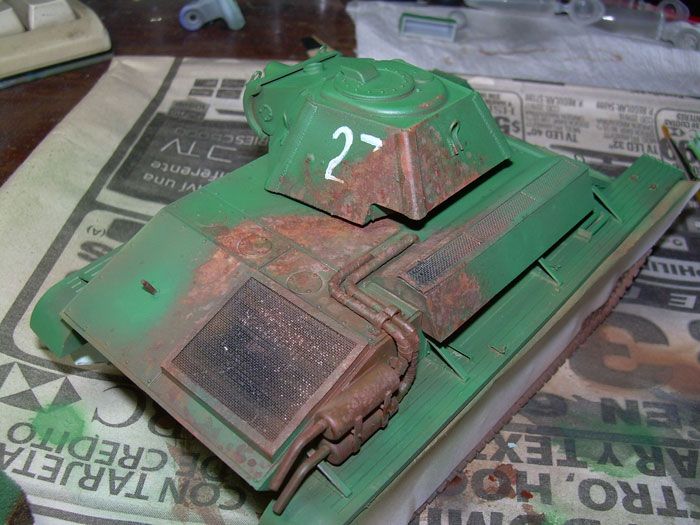 5 - Now I added some grey color, delimiting the zone where the inside hot make the paint chipping. I paint the asbest covering the exhaust pipes in a dark gray color (no idea of which color it should be). I apply more acrilic in oxide shades, but this time using a sponge instead of a brush. I make some pin washes with oils to the reccesed parts and add some light to the green, using oils too 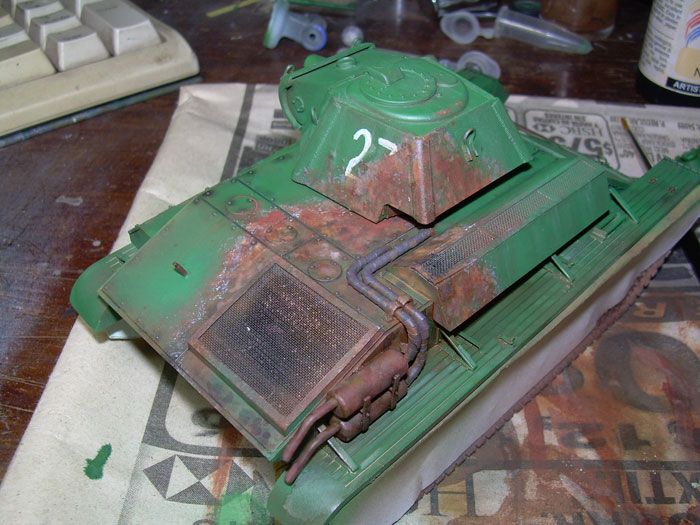 6- And finally, some pigments to blend the acrilic spots. 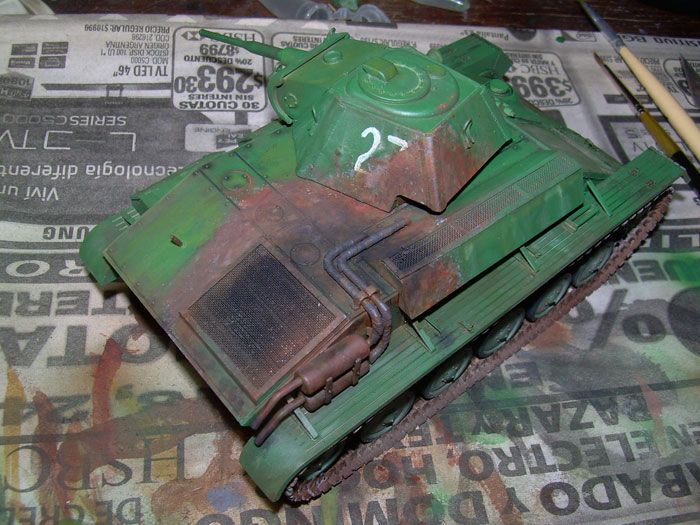 Next step will be.....To extend the burnt zone over the right side wall, seal all with flat varnish, a coat of hairspray, repaint in a lighter green and more chipping. Darío |
|
|
|
Post by Leon on Mar 30, 2013 13:51:11 GMT -5
Looks like your doing a fine job Dario.  |
|
|
|
Post by wbill76 on Mar 31, 2013 19:32:30 GMT -5
Nice work on the burnout area Dario.
|
|
panzerjager.
Full Member
  
Member since: June 2012
Posts: 204
Jun 5, 2012 21:56:23 GMT -5
Jun 5, 2012 21:56:23 GMT -5
|
Post by panzerjager. on Apr 8, 2013 13:45:44 GMT -5
Thanks, guys; I sealed all with MM acrylic matt varnish and I repeat all the steps: little spors with acrylic, HS, green paint, oils and finally pigments. I take this method from Rob's thread: modelerssocialclub.proboards.com/thread/120/destroyed-blown-apart-kv?page=4Some pictures (using flash, to show the effects) 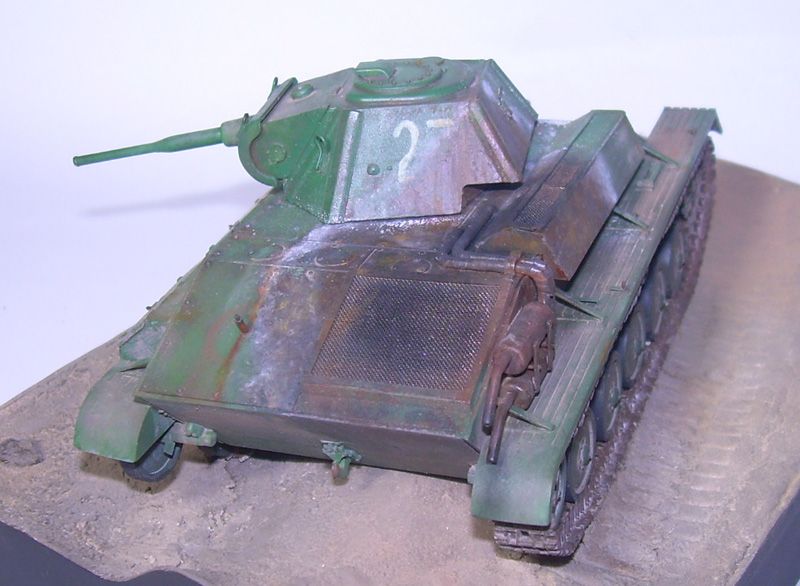 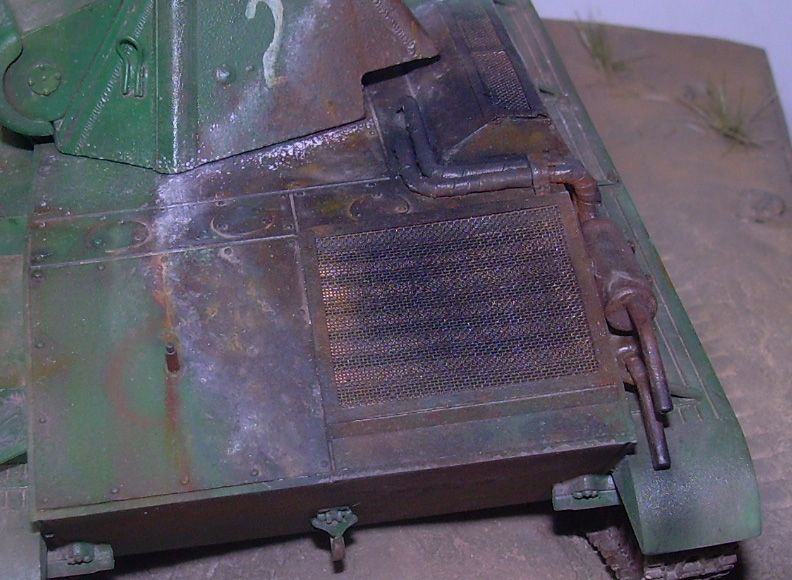 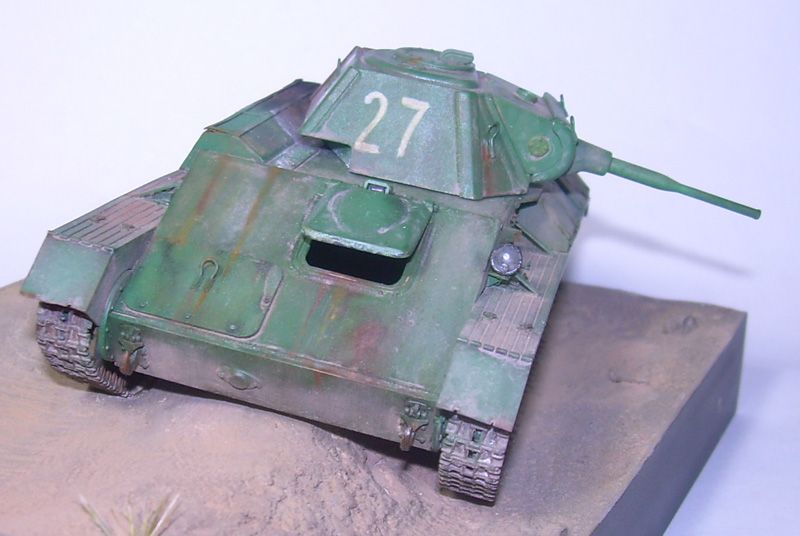 It need some oil/grease on the wheels and some wingnuts on the grill and will be finished. The exercise let me 2 conclusions: 1) Practice is necessary to obtain good results  2) Miniart kit beside the wrong shape of the turret, is a nice kit to be detailed with P.E. fenders (which allow to add damages) and a metal barrel..and perhaps stronger tracks. Darío |
|
|
|
Post by Leon on Apr 8, 2013 15:19:52 GMT -5
You did a fine job Dario.Like the burned areas.  |
|
|
|
Post by wbill76 on Apr 8, 2013 19:31:03 GMT -5
A fine effort Dario! You're right about the T-70 kits. This one made for the perfect test-bed!
|
|
|
|
Post by deafpanzer on Apr 8, 2013 20:01:19 GMT -5
Great work there... burnt area looks pretty realistic!
|
|