Holdfast
Junior Member
 
Member since: November 2012
Posts: 71
Nov 30, 2012 7:46:40 GMT -5
Nov 30, 2012 7:46:40 GMT -5
|
Post by Holdfast on Mar 24, 2013 9:58:28 GMT -5
Well, here I am doing my first "blog", on a model of one of my favourite vehicles. I will be building an Accurate Armour FV180 CET (Combat Engineer Tractor)I have a plan for the finished vehicle to be in a larger diorama but will also stand on it's own. A bit of the background to my love of this vehicle is that I crewed them in West Germany during the early eighties and had many an exercise living and working on them. I was also lucky enough to complete the REME fitters course and helped the RE sales team in the Far East to show it to the Singapore and Malaysian Armies. A great six weeks were had by all. I also spent time teaching the vehicle at RAC Centre D&M school Bovington. 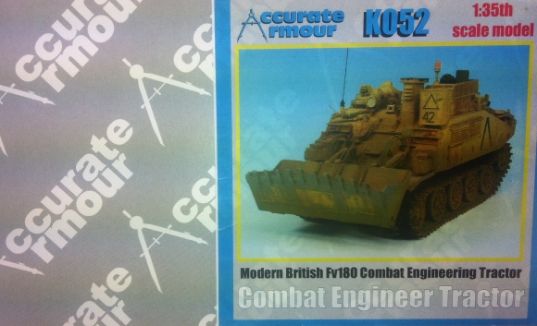 I will not be rushing this as I am learning as I go along. Any helpful tips\tricks along the way would be helpful. As a point of note the bucket is on the rear of the vehicle and the crew hatches on the left hand side  REgards John |
|
|
|
Post by Leon on Mar 24, 2013 10:06:26 GMT -5
John that looks sweet.Take your time and have fun.  Sounds like you had an interesting career.  |
|
Holdfast
Junior Member
 
Member since: November 2012
Posts: 71
Nov 30, 2012 7:46:40 GMT -5
Nov 30, 2012 7:46:40 GMT -5
|
Post by Holdfast on Mar 24, 2013 10:15:30 GMT -5
What I've written above is just a small portion of my career as a Sapper. Hopefully it will reflect in the builds I do.  |
|
|
|
Post by deafpanzer on Mar 24, 2013 13:33:02 GMT -5
Awesome! I swear I don't think I have seen it before. Count me in... am always up to learn about modern armors!
|
|
ironhand6
Full Member
  
Member since: March 2013
Posts: 280 
|
Post by ironhand6 on Mar 24, 2013 13:54:43 GMT -5
sapper... definately high speed. my brother in law was in the engineers for the 82nd and had alot of respect for you guys.
i also cant wait to see this come together as engineer vehicles are not that plentiful in the forums. i look foward to your insghts and tips about this monster.
|
|
|
|
Post by bbd468 on Mar 24, 2013 14:45:34 GMT -5
Yeah, its a new one for me too...not seen it before now...looks very cool!
|
|
Deleted
Member since: January 1970
Posts: 0
Dec 2, 2024 3:08:57 GMT -5
Dec 2, 2024 3:08:57 GMT -5
|
Post by Deleted on Mar 24, 2013 14:57:12 GMT -5
Nice one mate!!!These came in to service not long before I left the mob.But they were/are a good little workhorse.For those that aren't familiar with this motor,have a quick look here..... www.military-today.com/engineering/cet.htmBTW if Brian sees this,he'll be all over it like a rash!!!!   |
|
Holdfast
Junior Member
 
Member since: November 2012
Posts: 71
Nov 30, 2012 7:46:40 GMT -5
Nov 30, 2012 7:46:40 GMT -5
|
Post by Holdfast on Mar 24, 2013 15:50:51 GMT -5
I'm also doing a Chieftain MK5 AVLB at the same time, but that is definitely going to take a lot longer and will have all the bells and whistles. In fact that one will be the vehicle in my avatar but in a slightly different guise.  |
|
Holdfast
Junior Member
 
Member since: November 2012
Posts: 71
Nov 30, 2012 7:46:40 GMT -5
Nov 30, 2012 7:46:40 GMT -5
|
Post by Holdfast on Mar 24, 2013 16:00:04 GMT -5
After removing the parts from the packaging and reading the instructions I decided to make sure the two hull pieces fitted together properly before continuing and getting the running gear attached and tracks fitted. I then spent sometime this afternoon trying to get the two hull pieces to marry up. The front went together quite easily but I've had to scrape, file and saw the rear parts and sides of the lower hull to even get it to vaguely fit together. Not the best start I've ever had on a model  The detail on the upper hull is very good though. Not excellent, has I have spotted a couple of things that I may have to adjust, but most people wouldn't know any different. Might be the pedant coming out in me.  |
|
|
|
Post by wbill76 on Mar 24, 2013 16:48:23 GMT -5
Take your time, have fun, and enjoy the ride! Look forward to seeing this one come together John.
|
|
|
|
Post by robbo on Mar 27, 2013 18:00:00 GMT -5
Looking forward to seeing this take shape, too right
|
|
|
|
FV180 CET
Mar 27, 2013 19:56:03 GMT -5
via mobile
Post by dupes on Mar 27, 2013 19:56:03 GMT -5
I have a few of their kits on the same chassis...interested to see how it goes together for sure! Hope the fit issues aren't representative of all AA kits?
|
|
Holdfast
Junior Member
 
Member since: November 2012
Posts: 71
Nov 30, 2012 7:46:40 GMT -5
Nov 30, 2012 7:46:40 GMT -5
|
Post by Holdfast on Mar 29, 2013 11:53:46 GMT -5
Most of the kit is resin, with some PE to add more detail. Over all the casting shows a lot of detail but is showing signs of age with bits broken or missing, especially at the rear of the top hull. I've finally managed to get both hull sections to fit, but they will need filling to close the gaps. I am a bit disappointed with the kit at the moment, but hopefully it will improve as the build comes along. 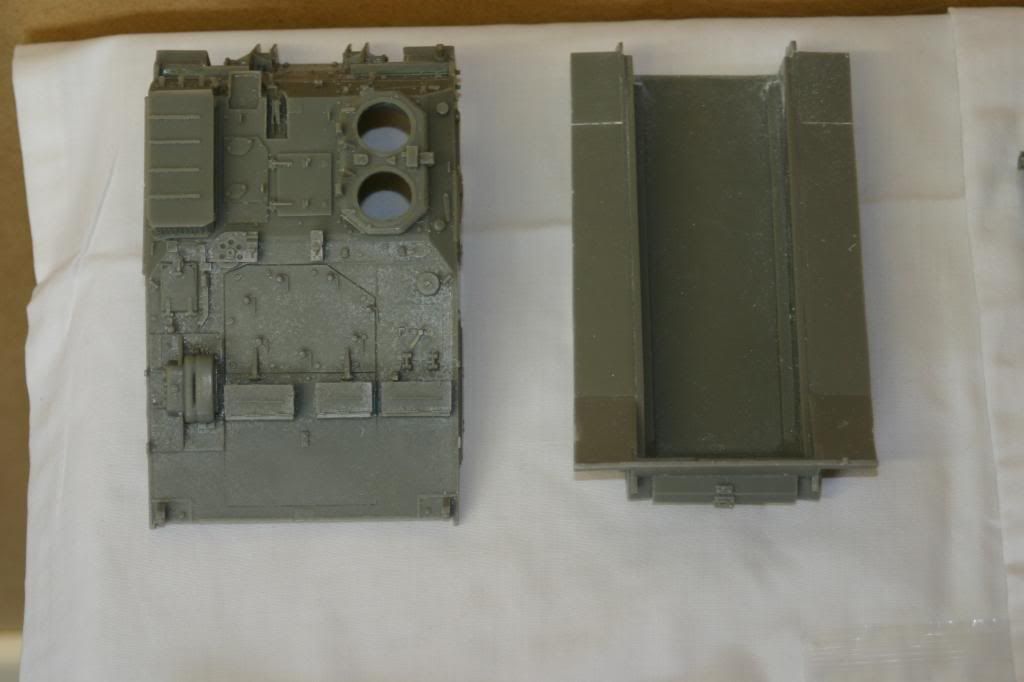 Hull sections 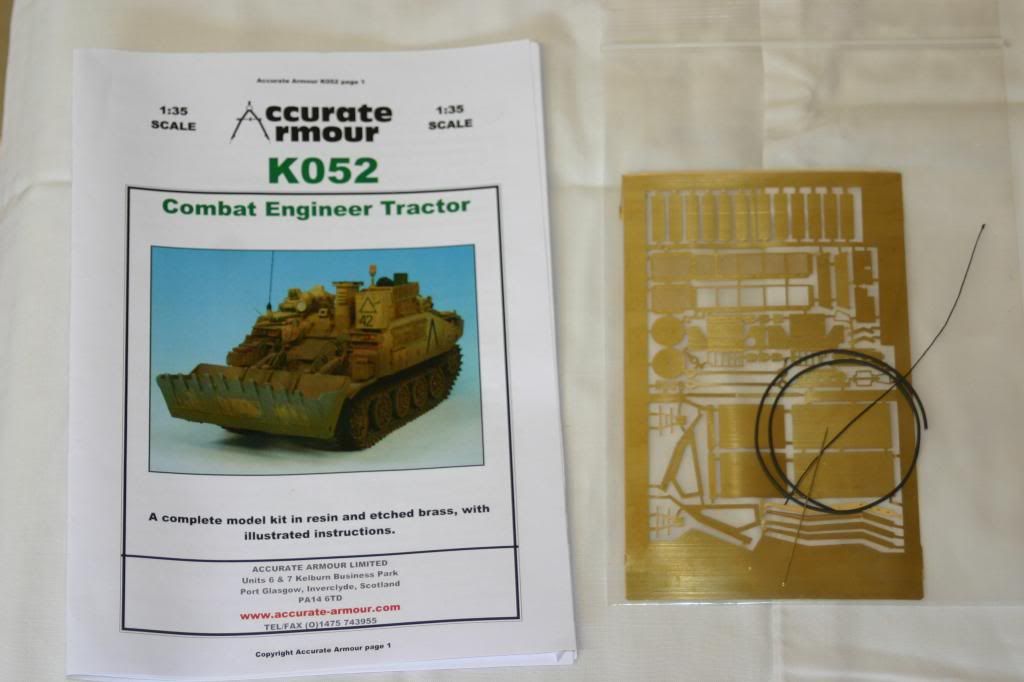 Instructions and PE 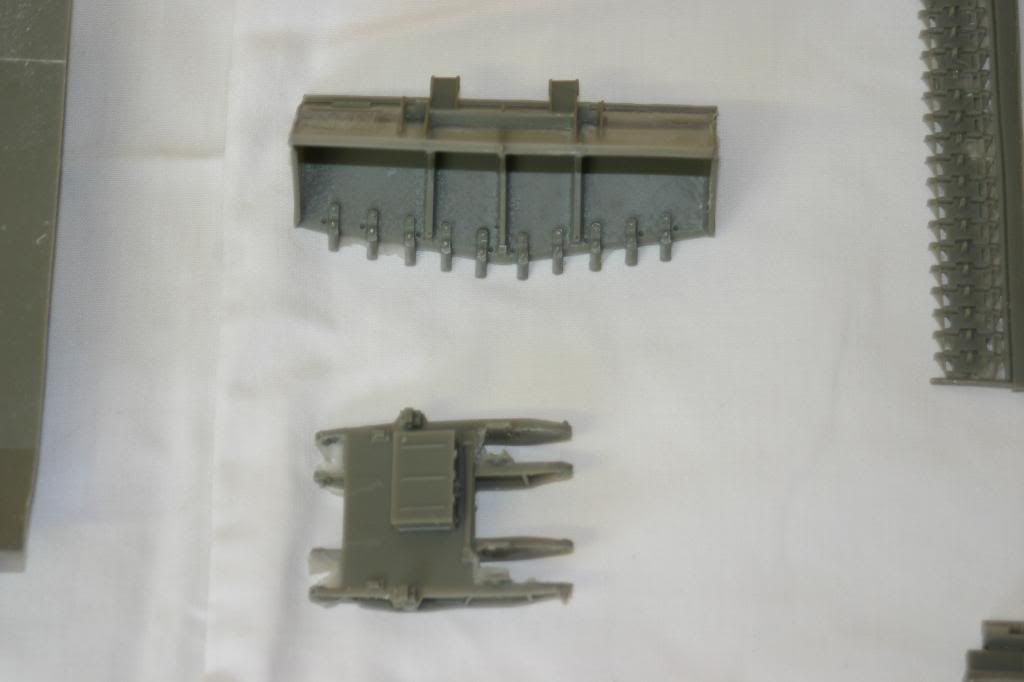 Bucket and Boom 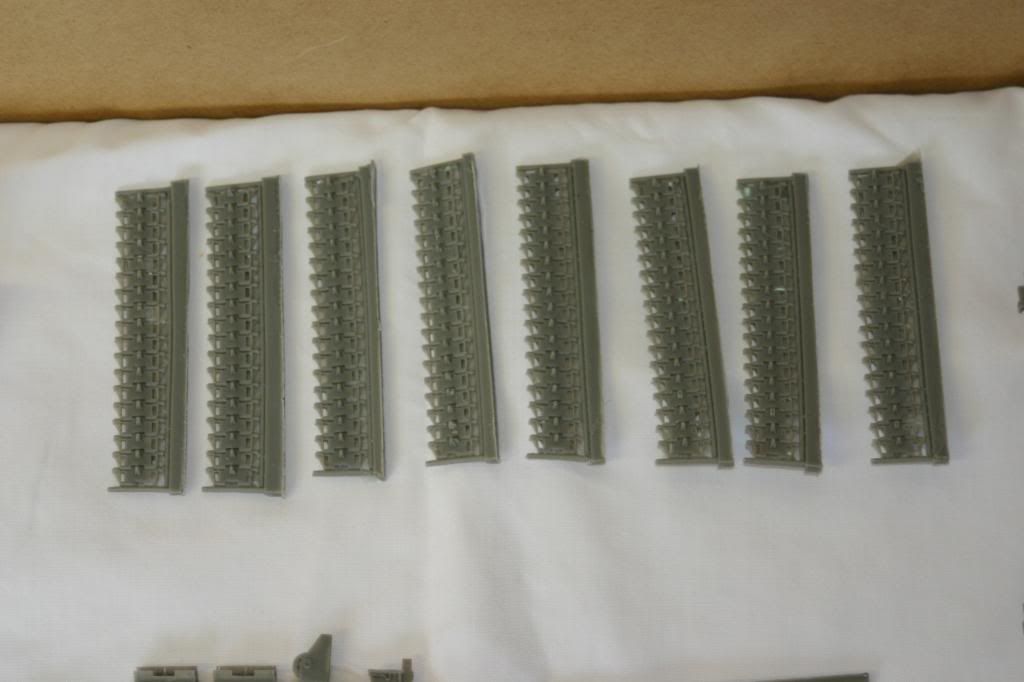 Track sections 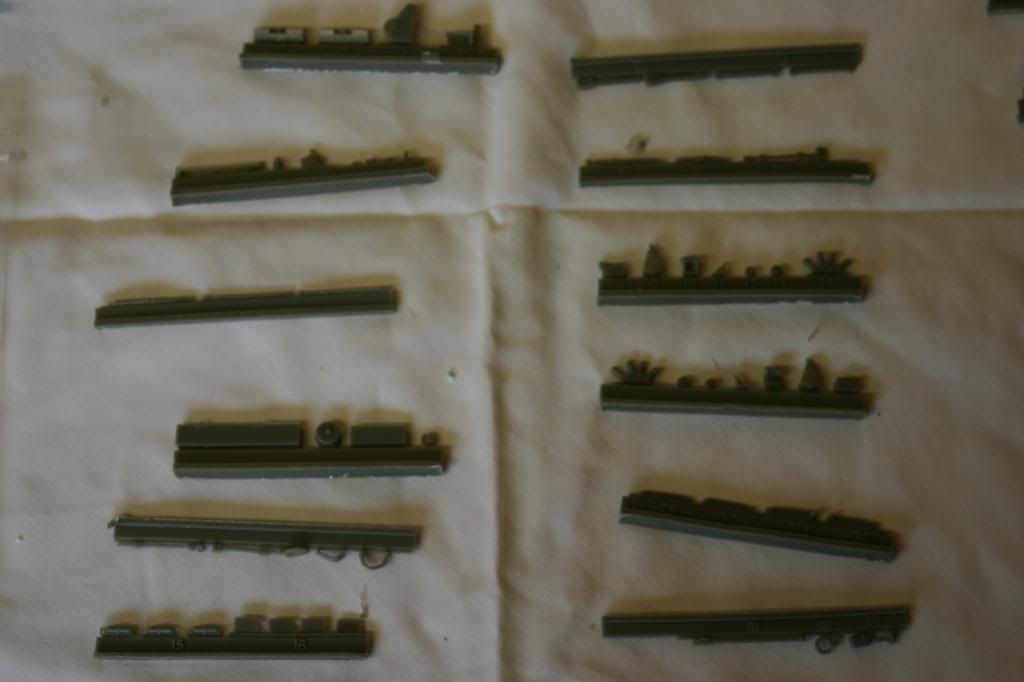 Hull detailing 1 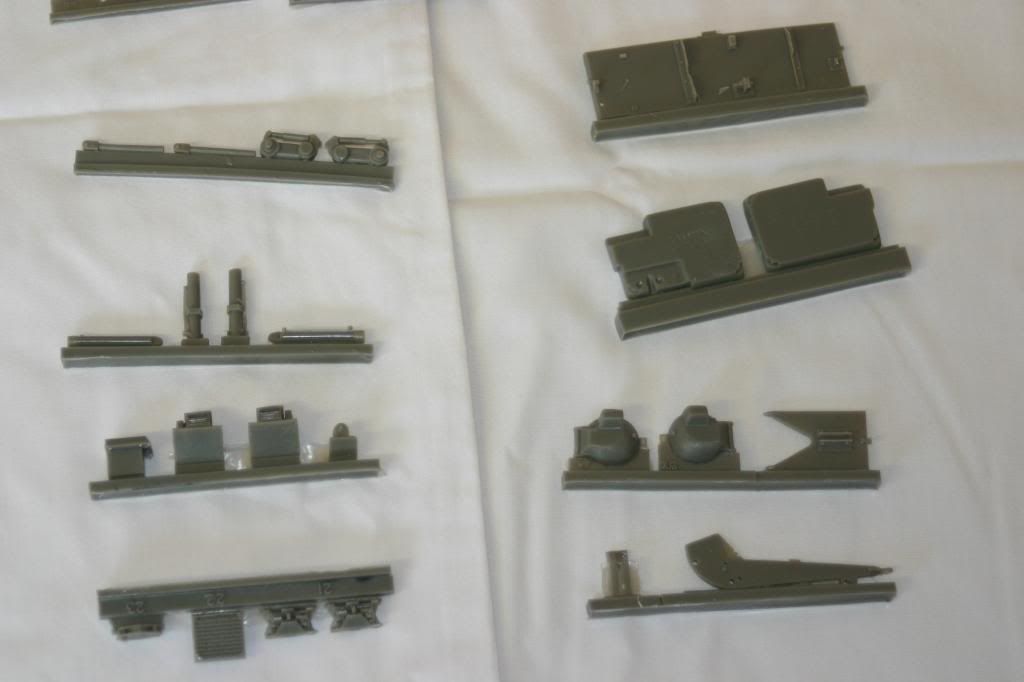 Hull detailing 2 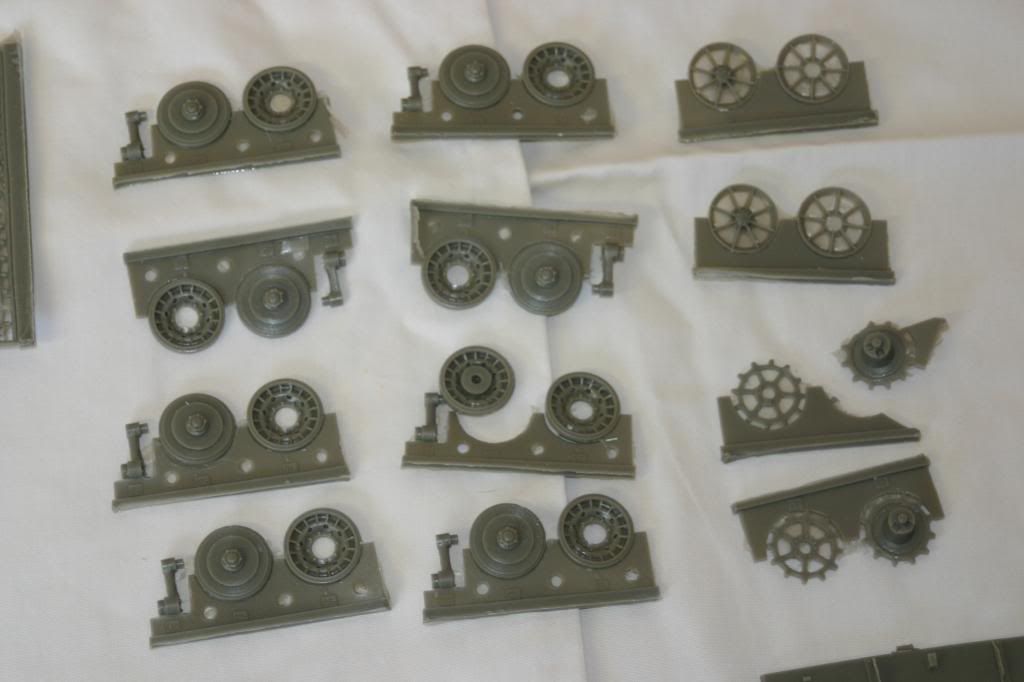 Road wheels, Sprockets and TA wheels |
|
Holdfast
Junior Member
 
Member since: November 2012
Posts: 71
Nov 30, 2012 7:46:40 GMT -5
Nov 30, 2012 7:46:40 GMT -5
|
Post by Holdfast on Mar 29, 2013 12:14:46 GMT -5
Hull sections fitted dry. Work on lower hull will need to be carried out before they are joined together. 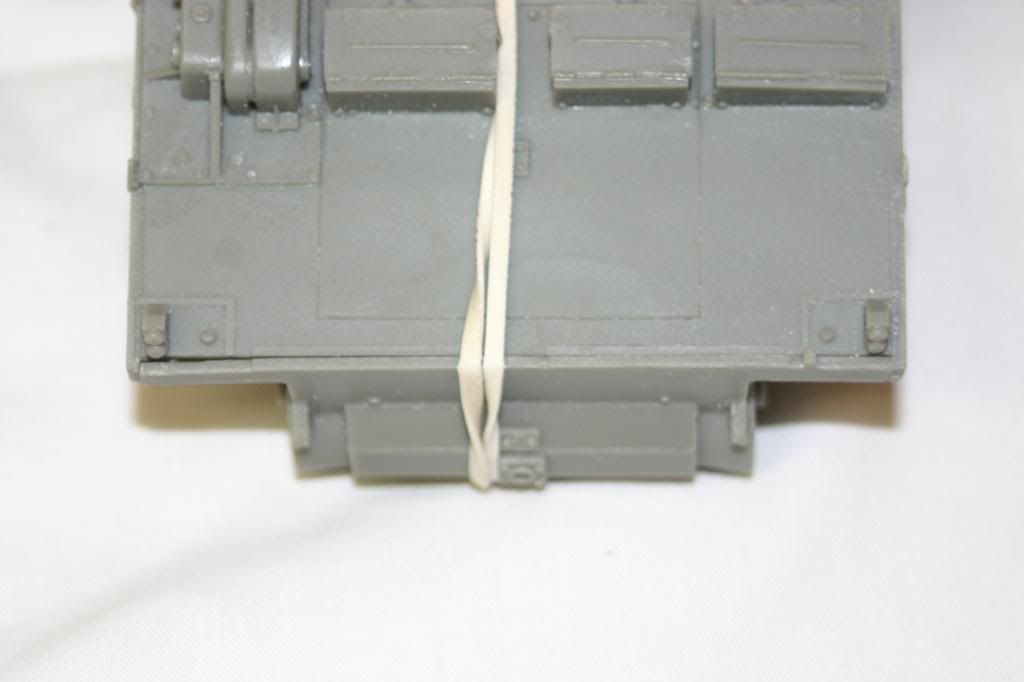 Front hull section fit 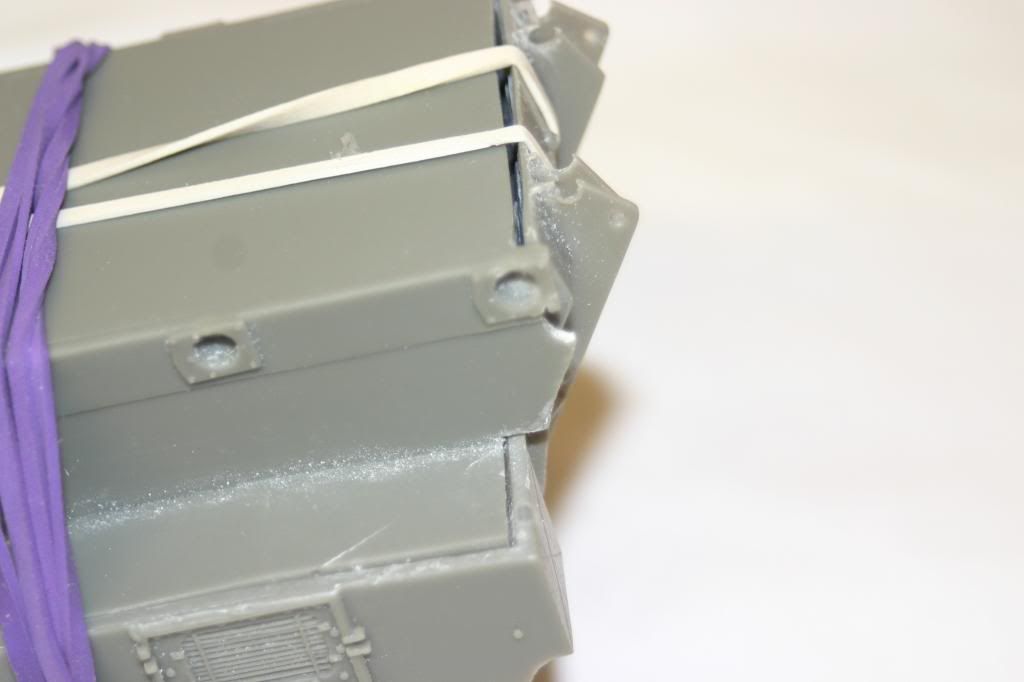 Rear hull section fit 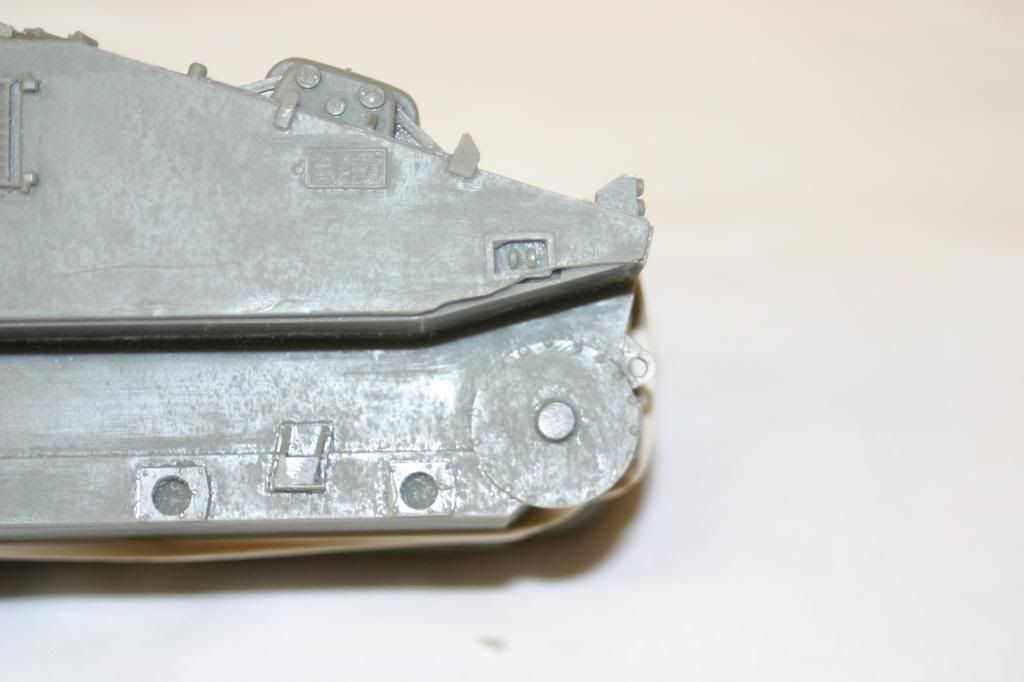 Poor casting |
|
|
|
Post by wbill76 on Mar 30, 2013 15:49:31 GMT -5
Looks like this one might put up a bit of a fight along the way. Hopefully not too much of one that it becomes non-fun, stick with it!
|
|
Holdfast
Junior Member
 
Member since: November 2012
Posts: 71
Nov 30, 2012 7:46:40 GMT -5
Nov 30, 2012 7:46:40 GMT -5
|
Post by Holdfast on Apr 1, 2013 11:37:34 GMT -5
Lower hull fitted with 10mm spaces to allow correct level fitting of road and TA wheel assemblies. 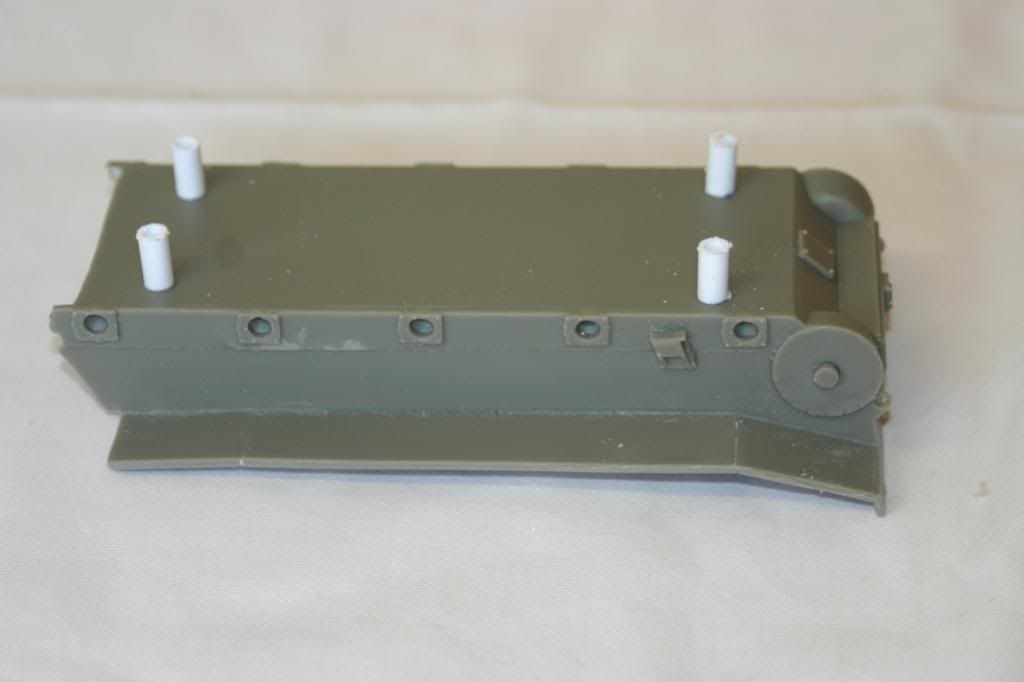 Running gear assembled and ready for fitting. 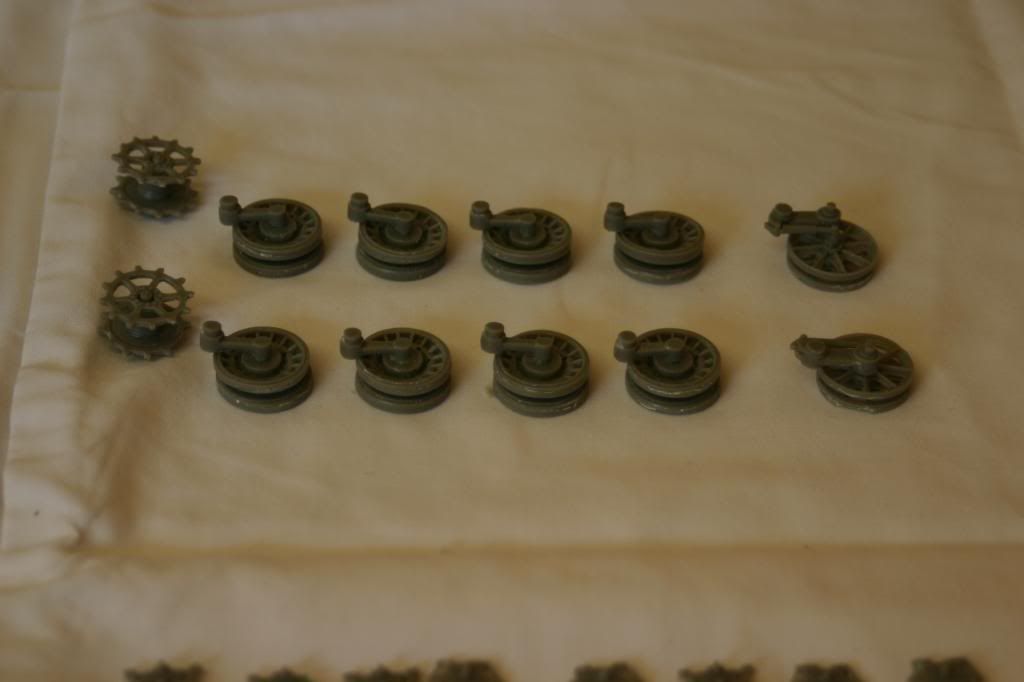 Track strips after cleaning excess flash. 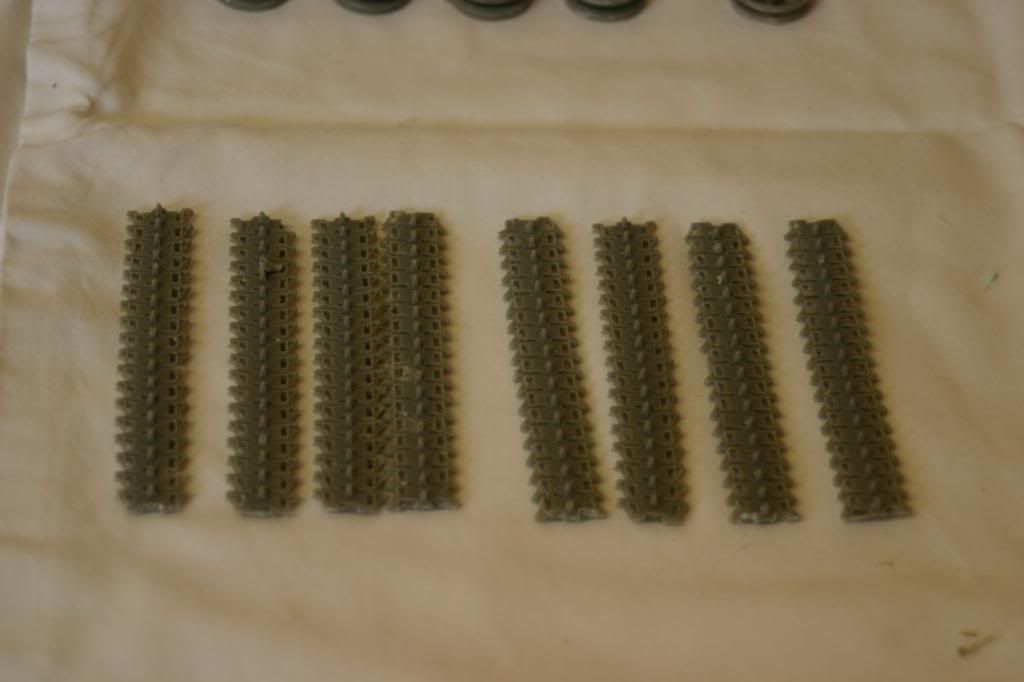 I haven't been impressed with the casting of the running gear and tracks. I will be trying for another set of tracks as the casting of these strips was poor, with a lot of excess flash. There is also an incorrect amount of links (72) for a new track, instead of 77 left and 76 right. A very worn track may have been allowed to get as low as 72 on the right but not on the left. This is something I will have to rectify as the build goes on. The instructions suggest suggest putting 10mm spaces on the lower hull to get the road and TA wheel set at the correct height and all level. As you can see I have done this, but due to the amount of work that the rear hull requires doing to it I won't be putting the running gear on just yet. What I have done is joined the two hull pieces together. This will give a better area to attach any extra pieces. I have also started modifying the upper hull to conform to a earlier variant before the ACU (Air conditioning Unit) was fitted and cosmetic details during use. In the following photo I have used some Maskol to highlight the places that I will be changing. As you look at it the front right NBC bin lever is in the wrong position and will be remodelled shut, centre left the steering unit access cover will be removed and at the rear right, the cable cutter will also be removed as they were never fitted due to the length of time it took to unscrew the mount and clamp the cutter. 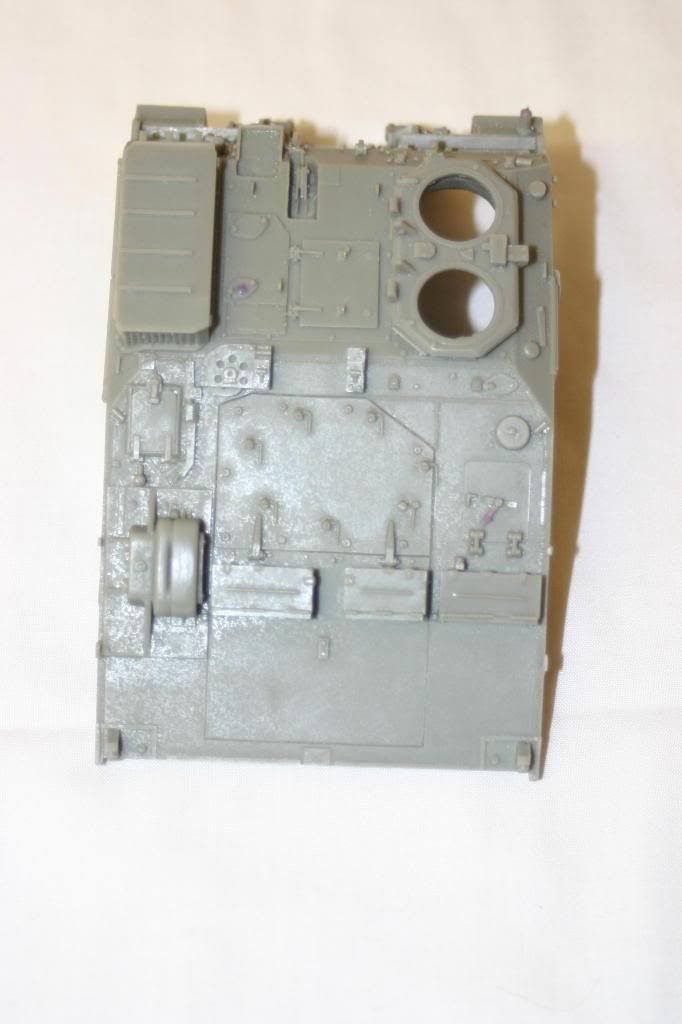 |
|
|
|
Post by robbo on Apr 1, 2013 13:15:06 GMT -5
Good to see this layed out mate
|
|
multicam
Senior Member
   
Member since: January 2012
Nate
Posts: 2,039
Jan 10, 2012 14:35:41 GMT -5
Jan 10, 2012 14:35:41 GMT -5
|
Post by multicam on Apr 9, 2013 20:51:02 GMT -5
Very cool start of a cool kit:)
|
|
Holdfast
Junior Member
 
Member since: November 2012
Posts: 71
Nov 30, 2012 7:46:40 GMT -5
Nov 30, 2012 7:46:40 GMT -5
|
Post by Holdfast on May 12, 2013 16:24:53 GMT -5
So, it seems ages since I last posted anything here. I've not been as busy as I would've liked to have been but I have got quite a bit of the build done. I've managed to get the poor casting errors sorted out by using filler or plastic card. I have also added some details that aren't catered for by the kit and come from knowledge of the vehicle, and they are only small innocuous details as well. So below is my build so far. There is still some bits to add and some to either scratchbuild to replace or adjust to make fit. It is also having the VRN of a CET I actually drove\commanded  Front View 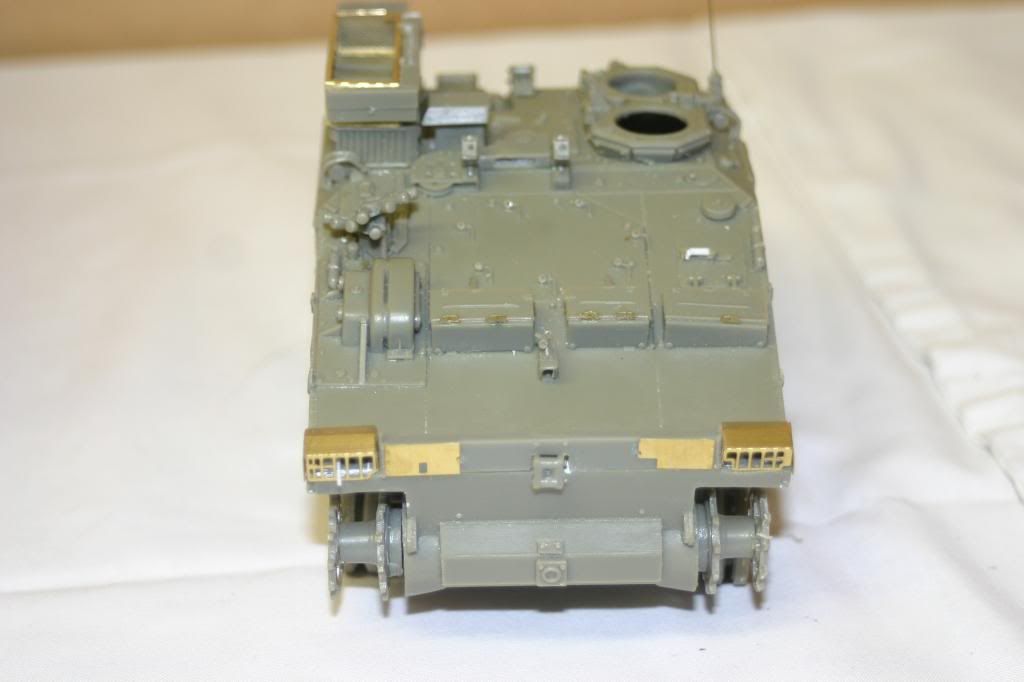 LHS View 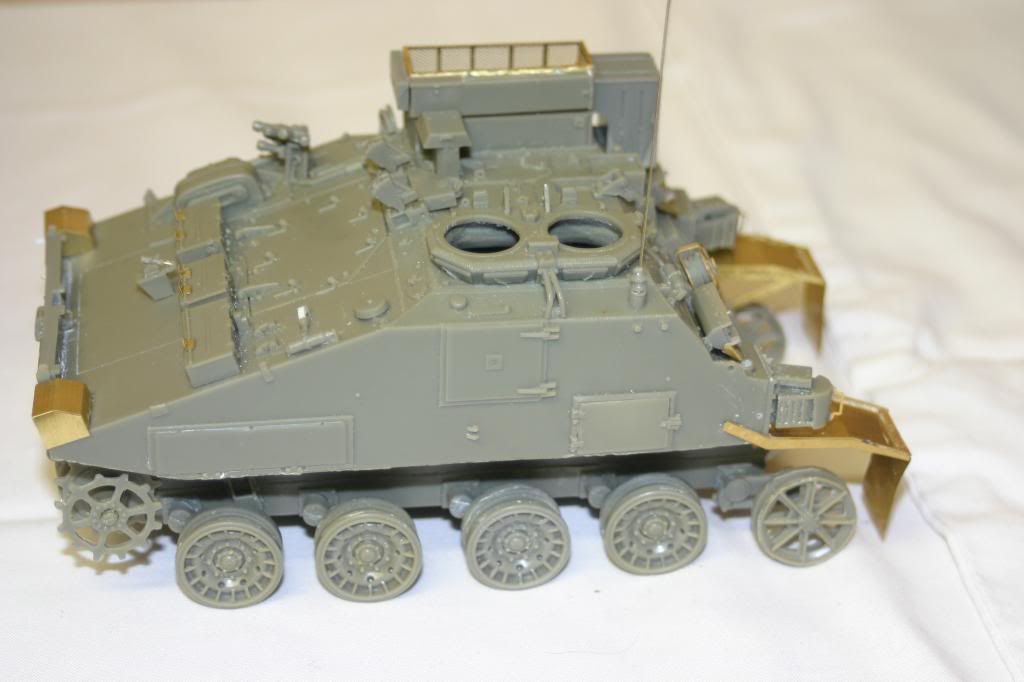 Rear View  RHS View  |
|
|
|
Post by deafpanzer on May 12, 2013 21:32:55 GMT -5
Nice PE work on it!!! Keep it coming...
|
|
Holdfast
Junior Member
 
Member since: November 2012
Posts: 71
Nov 30, 2012 7:46:40 GMT -5
Nov 30, 2012 7:46:40 GMT -5
|
Post by Holdfast on May 13, 2013 0:54:48 GMT -5
Cheers DP  |
|
|
|
Post by Leon on May 13, 2013 1:08:52 GMT -5
Looking good despite the issues with it.Waiting for more updates.
|
|
|
|
Post by bullardino on May 13, 2013 2:52:34 GMT -5
The result is spot on, I really like it  Can't wait to see more  |
|
Deleted
Member since: January 1970
Posts: 0
Dec 2, 2024 3:08:57 GMT -5
Dec 2, 2024 3:08:57 GMT -5
|
Post by Deleted on May 13, 2013 12:00:15 GMT -5
nice work so far it's an interesting vehicle
|
|