iking.
Full Member
  
Member since: November 2012
Posts: 244
Nov 22, 2012 3:24:55 GMT -5
Nov 22, 2012 3:24:55 GMT -5
|
Post by iking. on Mar 26, 2013 14:44:24 GMT -5
Hi comrades, Here is one of my latest builds/wips. This is actually an entry on Scale Model Addict's Big Spring 2013 groupbuild. It's the Trumpy BM-21 kit. It is a brand new kit released by Trumpeter with sharp details and nice molding. I built it with some modifications such as adding some wirings in the engine. Externally, not much is modified. Here are some of the pictures: Interior of the driver cab:  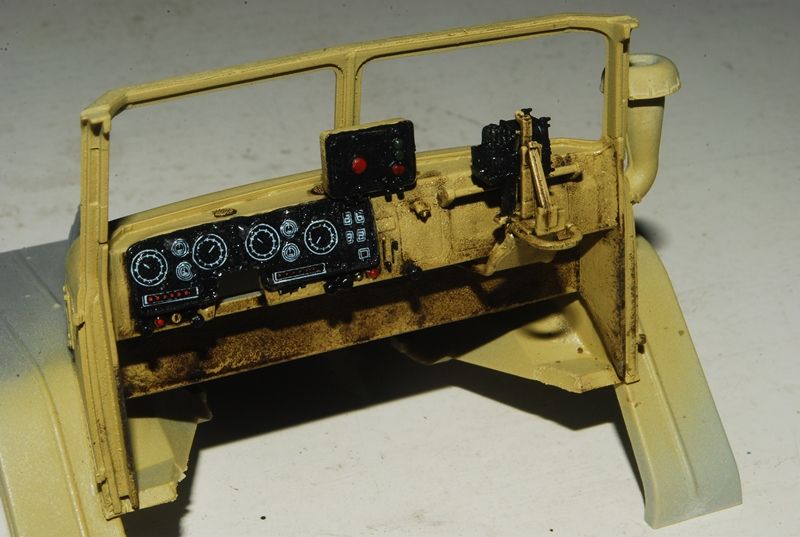 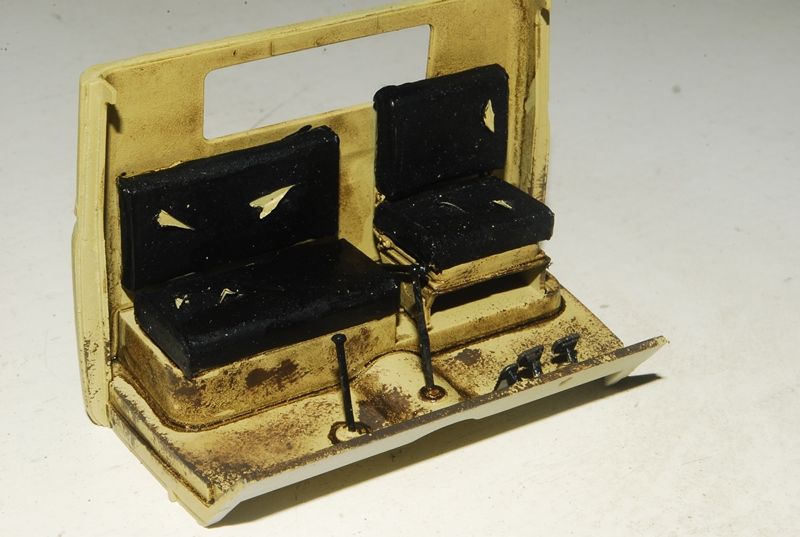  I used aluminum foil to wrap the seats to create some upholstering. After i wrapped the seats, I sealed the foil with primer and then when dry, slashed on them randomly to create torn fabric and create a worn out look. The rocket launcher tubes were also slightly modified: 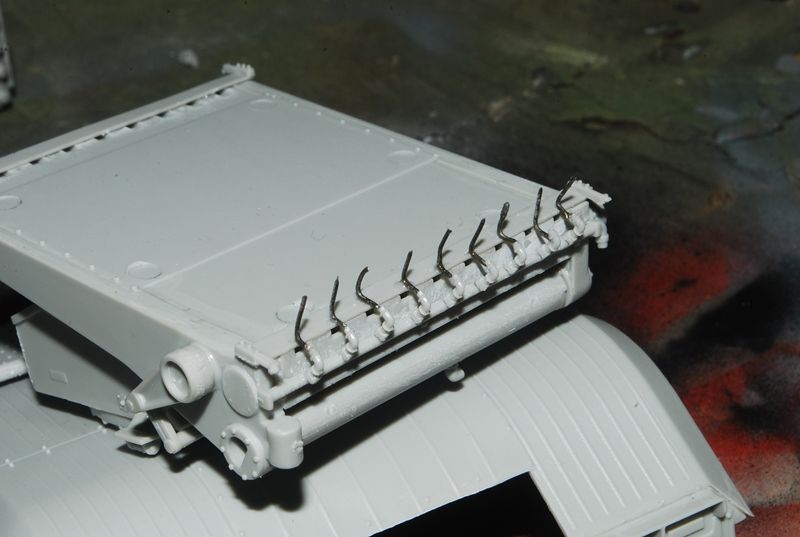 I added connection wires to the launchers that is connected on the main line of the ignition stem. Additional vinyl wires were also added to simulate electrical connections.  For the engine cab, I added some wires, tubes, spares to fill up the engine cavity aside from the main engine block. The items were referenced on some www photos of the Ural truck. 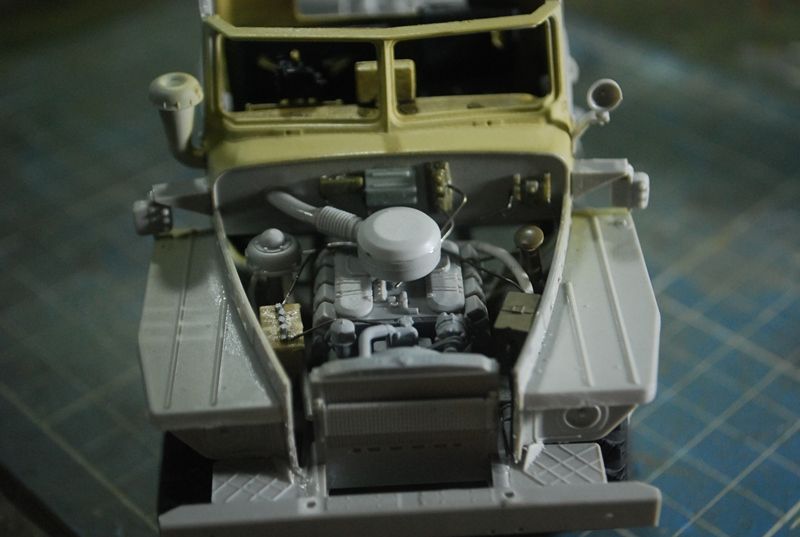  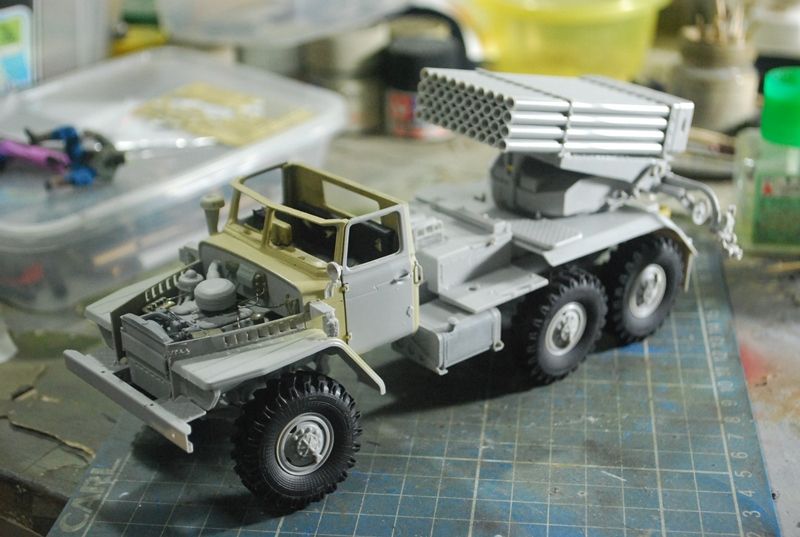  I painted the kit in light sand mixture of Tamiya paints Dark Yellow and Flat White. 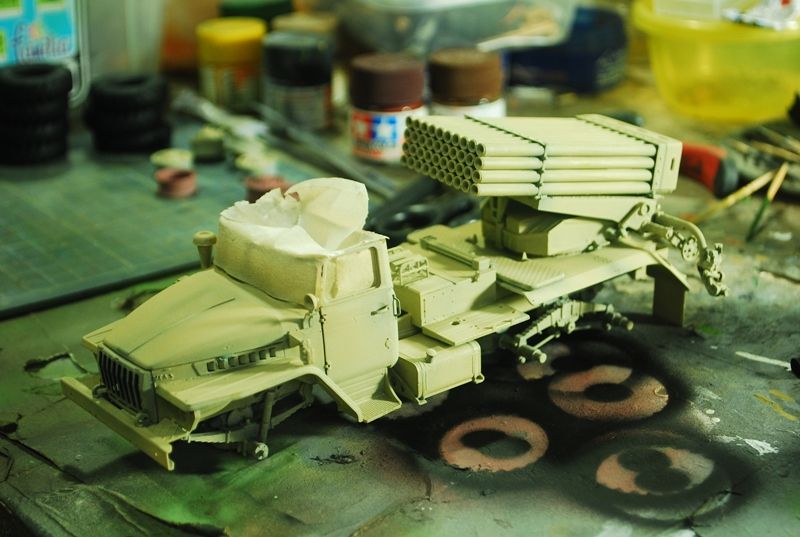 I then proceeded with painting the tire with black aerosol lacquer. 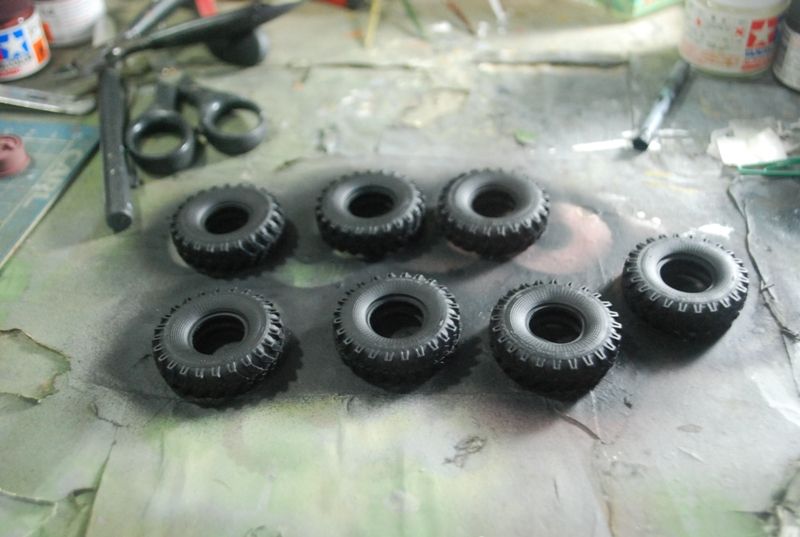 I then printed my own decals! I bought a local decal paper here and tried my hands in printing it using an inkjet printer. Right now, it shows that i intend to build this into an Iranian vehicle and Ill first use the Sepah logo and one of the Iranian roundels. 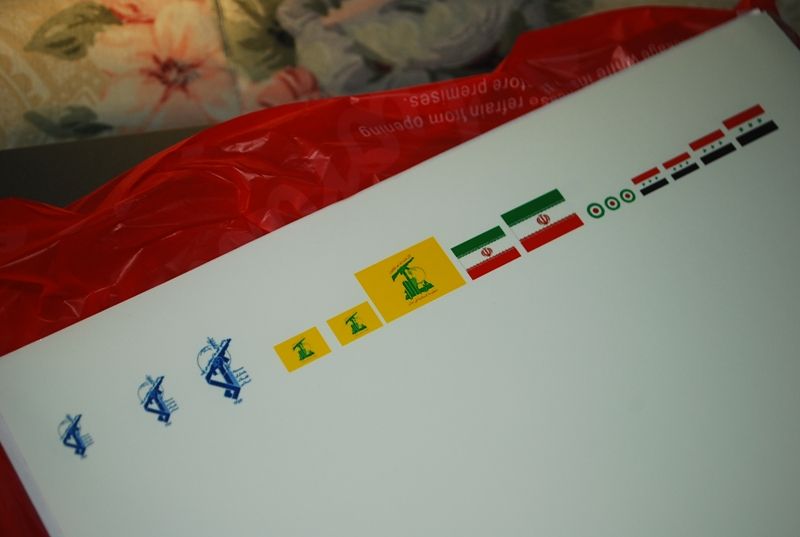 The other decals (Hezbollah, Iran and Iraq flag) will be used for other projects upcoming this year.  For added touch, and to add some livery, I attached a photo of Imam Ali mosque in Najaf Iraq holy to Iranian Shiites. This is a fun build with great parts and great kit made by Trumpy.I dont know how it fared with the older generation BM-21 kits but as far as I have experienced, I am having a great time with this one. The only challenge for me is building the chassis and suspensions as Im more used to in buiding tracked vehicles though now, I find wheeled vehicles a fun already!  I just hope that Trumpy include a much wider variety of decals for their Sov/Russian vehicles. That's all! Enjoy guys!  Iking |
|
|
|
Post by 406 Silverado on Mar 26, 2013 14:53:56 GMT -5
Very nice work on this model. The cab painting looks cool.
|
|
|
|
Post by Leon on Mar 26, 2013 15:17:17 GMT -5
Fine job Iking.I like it.  |
|
|
|
Post by wbill76 on Mar 26, 2013 20:01:38 GMT -5
Another fine piece of work, got to love that detail work on the cab, top notch.
|
|
|
|
Post by eastrock on Mar 26, 2013 21:41:40 GMT -5
Its great to see it also here, Komrade!!! did Nemo Mention again??? lol
|
|
|
|
Post by dupes on Mar 26, 2013 23:10:06 GMT -5
8-)Hoping you'll do some more step by step stuff when you're painting/weathering the exterior?
|
|
macmcconnell.
Full Member
  
Member since: December 2011
Posts: 1,238
Dec 11, 2011 12:07:33 GMT -5
Dec 11, 2011 12:07:33 GMT -5
|
Post by macmcconnell. on Mar 27, 2013 1:26:01 GMT -5
Looks great IK another heading for my stash nice paint job
Mac
|
|
paulh.
Senior Member
   
Member since: November 2011
build, fail, learn, succeed - ENJOY
Posts: 2,389
Nov 15, 2011 15:54:51 GMT -5
Nov 15, 2011 15:54:51 GMT -5
|
Post by paulh. on Mar 27, 2013 2:44:11 GMT -5
excellent job mac! watching avidly. P BTW; Just out of curiosity -do you sleep at all?  |
|
iking.
Full Member
  
Member since: November 2012
Posts: 244
Nov 22, 2012 3:24:55 GMT -5
Nov 22, 2012 3:24:55 GMT -5
|
Post by iking. on Mar 30, 2013 12:05:55 GMT -5
Thanks a lot guys for the support! Im excited to see this done as well hahaha!  Hello Dupes wish granted and I did a more detailed step on how I progressed on this crawler. cheers bro! PAulH thanks a lot man! hahahaha yeah still do sleep but when i sleep i still think of what scheme/modifications etc to be done on some of the models on my stash hahahaha!  cheers mate! Here it goes!  After painting the sand color, I coated the kit with a gloss clear coat. Fortunately, I did not encounter any frosting of sort when I used this one. What I used is a common hardware clear spray paint diluted with Gunze lacquer thinner. The results are good and suits my taste  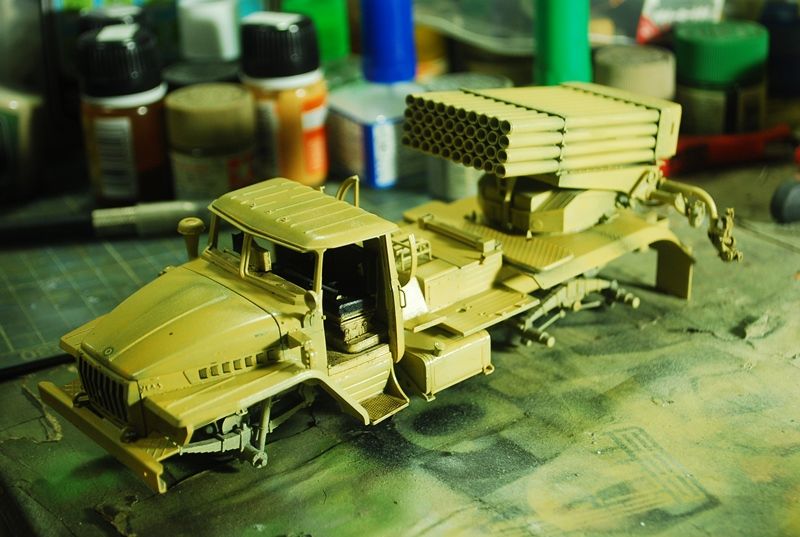 The undersides were painted this way. I left some black portions as these will be dritied up with dust, grime and pigments plus this was the color that I noticed common on truck undersides. 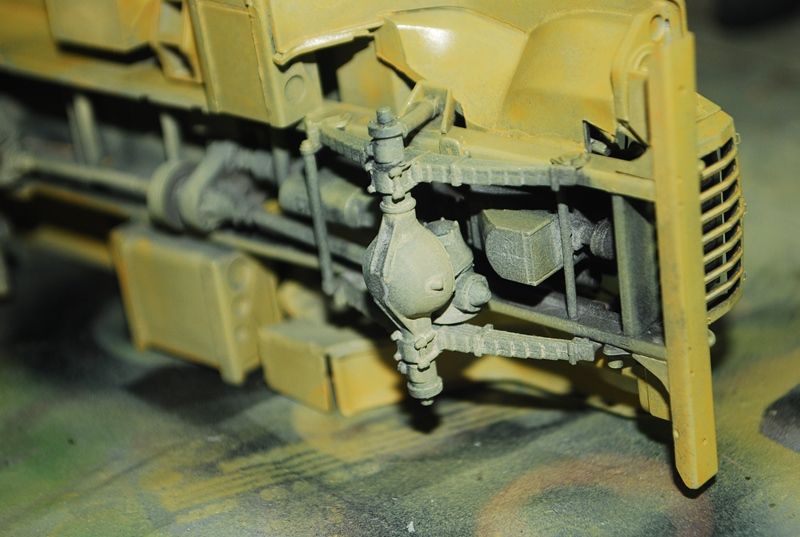 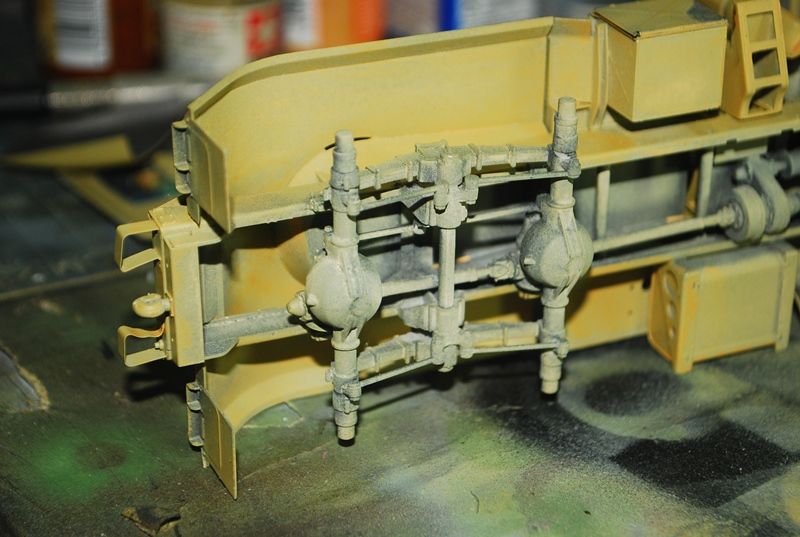 After the clear coat was cured, I applied a wash of AK Interactive washes. I used the Dark Brown Wash (Works best!) and the Rust Wash on some areas like some rivets, crevices and some nooks and crannies that most likely will accumulate rust. 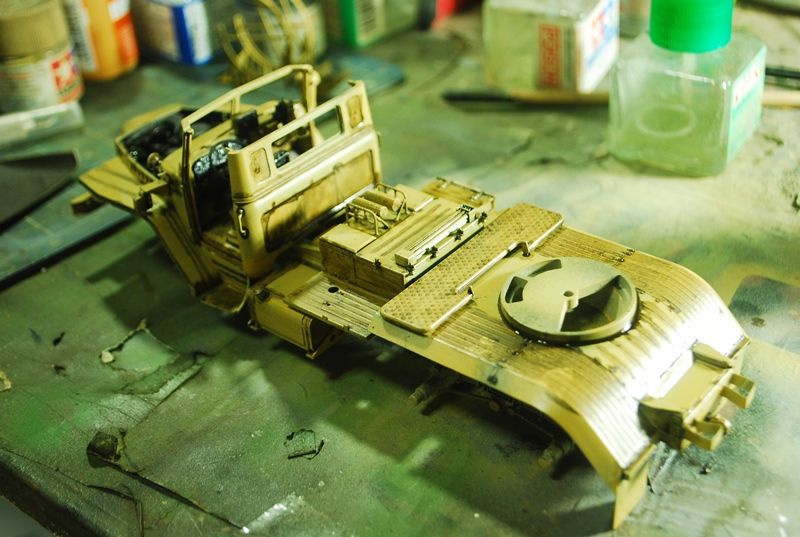 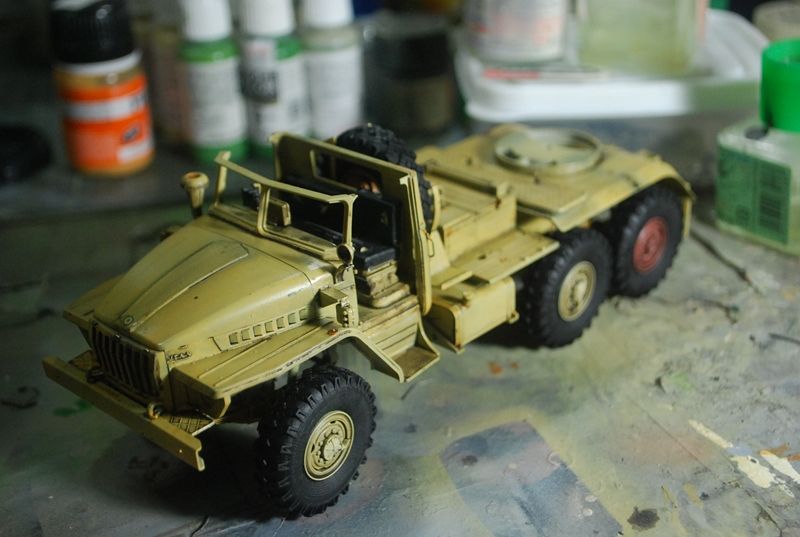 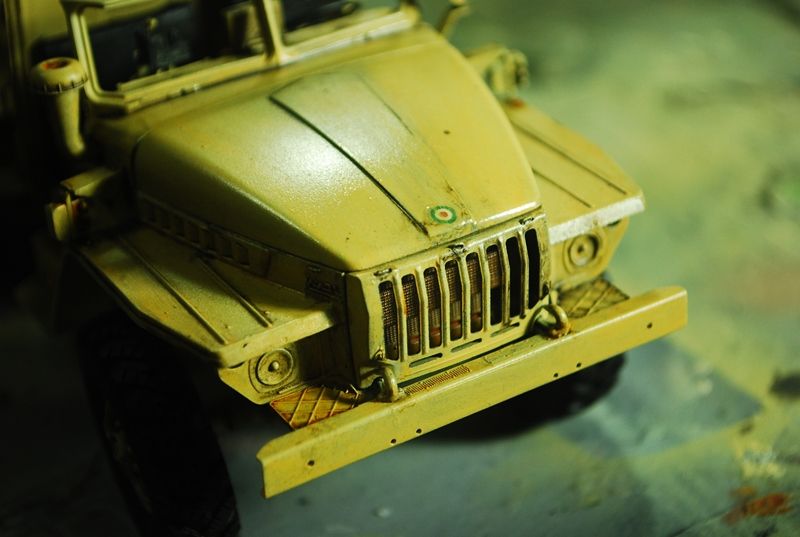 Here are the side doors; painted, coated and washed with AK mediums. The Sepah decals were done and mated already. The other door sports a Farsi script that says 'marg bar Saddam' (translated to 'Down with Saddam'). 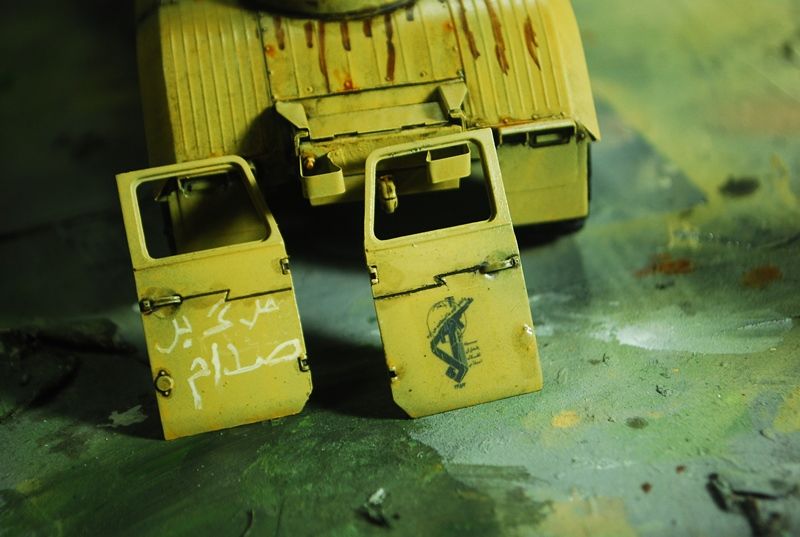 The wheel rims were painted and washed also. Now, you will see that I painted the wheel rims in a random color. 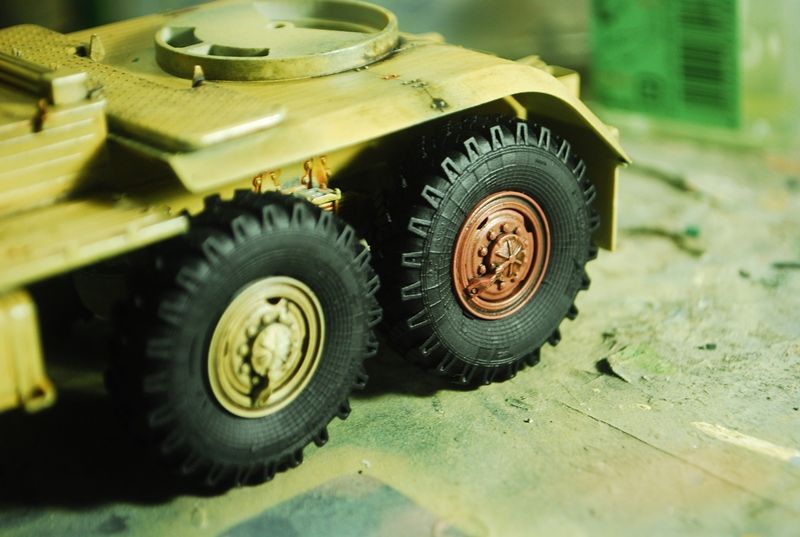 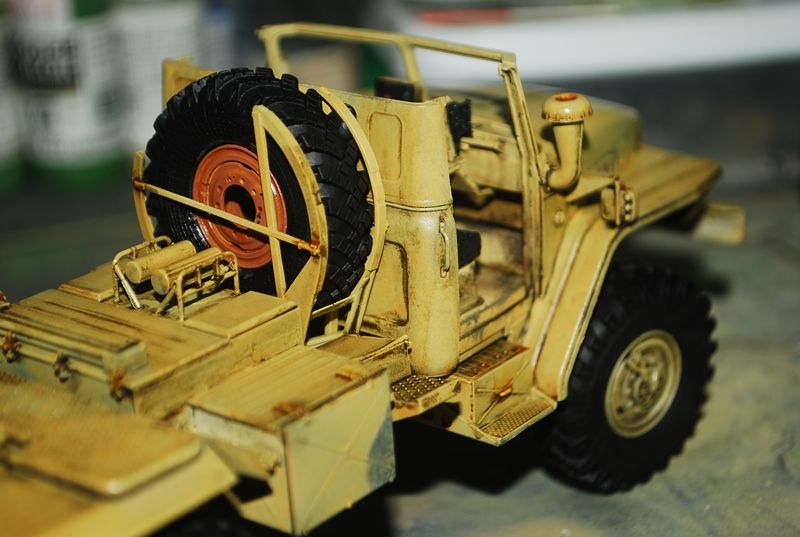 Some were painted in sand while some were painted in hull red. This is to give an idea of battlefield modification and to give an impression of urgent battlefield repairs using whatever materials at hand. Now that the wash has cured and settled, I applied the AK streaks. The streaks that I used were the AK Streaking Grime and the Rust Streaks. AK did provide a very easy medium for modulating your models. Kudos to the AK team. These are samples of the streaks applications. 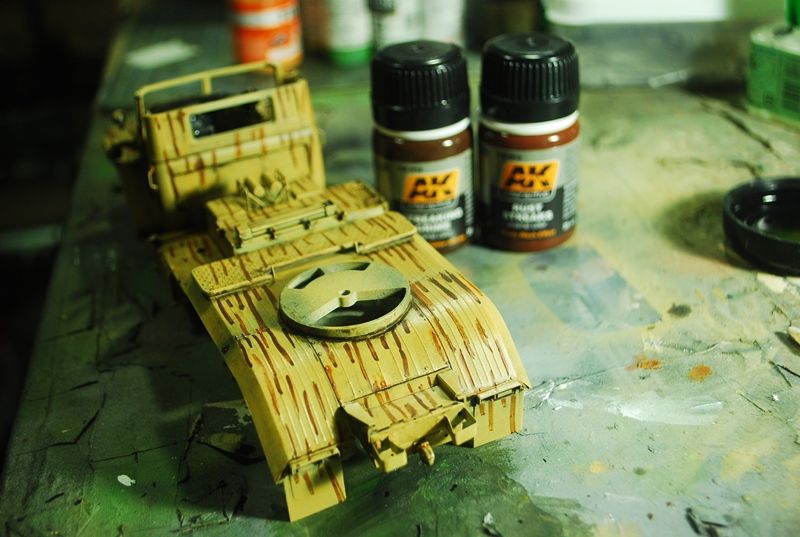  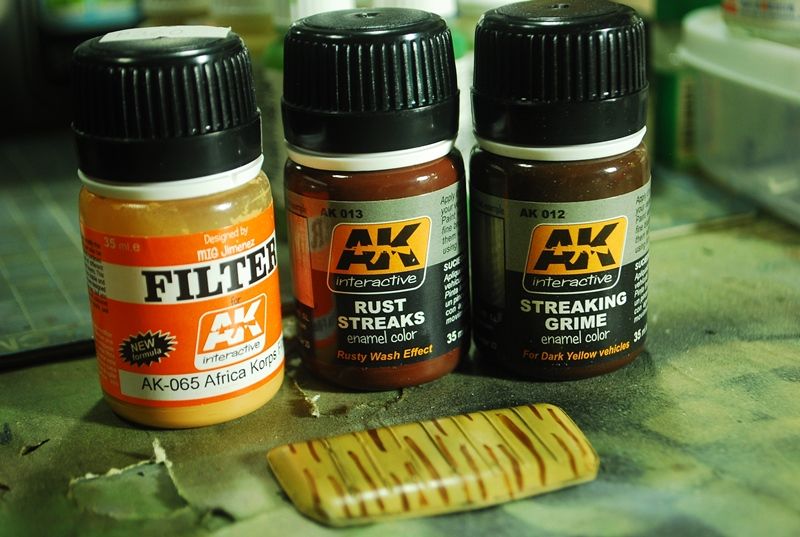 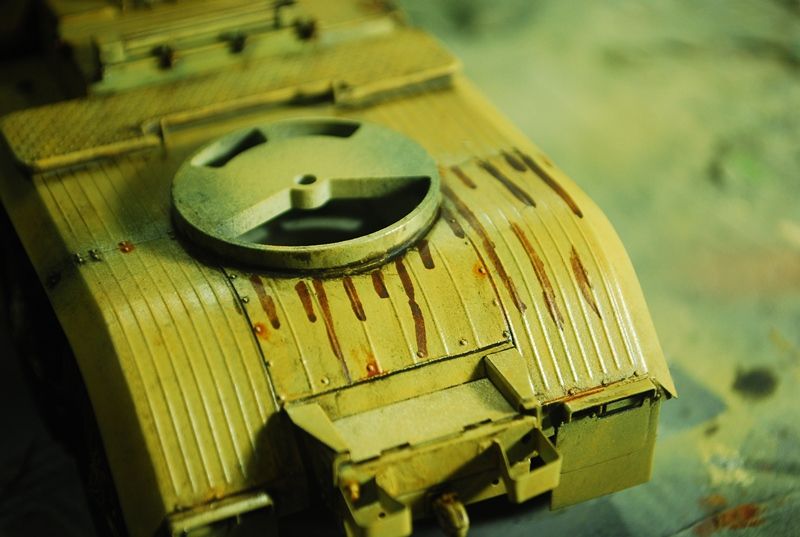 Note that you will see some of the rust washes that have accumulated on some of the rivets on random fashion. For now, last to be applied is the AK Filter. What I used is the DAK filter suitable for Dark Yellow vehicles. Here is an example of the of the streaked and filtered finishes that I had. This is the rear bed of the Ural truck and also the engine hood. 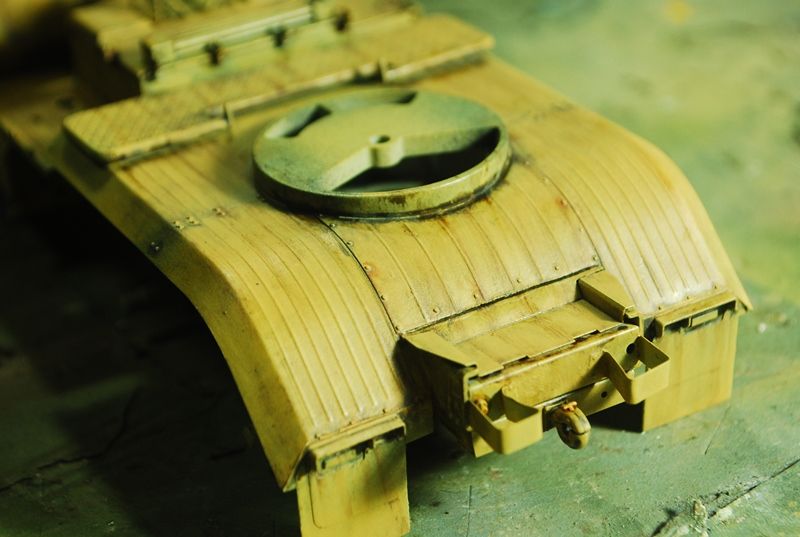 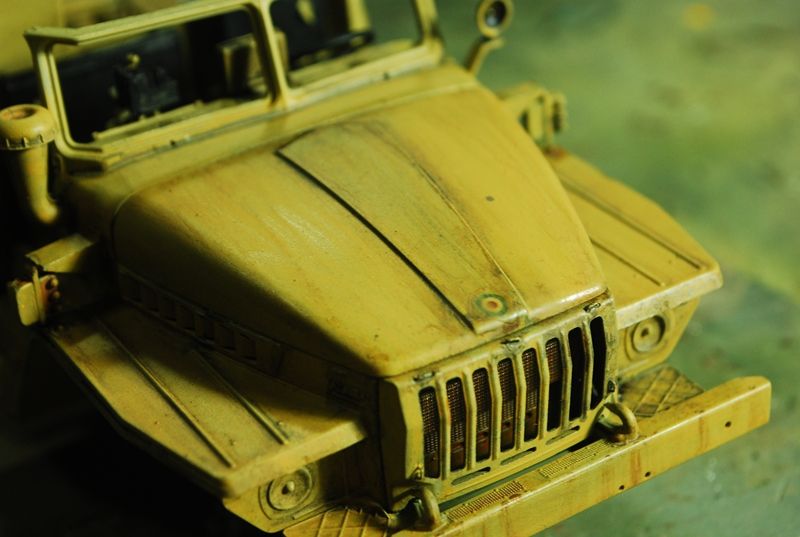 Also noticeable is the effect it made on the 2 side doors of the truck after the filter was applied.  I love the AK filters as it makes the paint looks a bit sundamaged and a tad faded. I researched and asked about what needs to be applied first if wash then filter or vice versa but there are mixed reviews so I just did what suits me and that is Wash then Filters. Thanks to ER for this tip btw. Finally you can notice the old basic color of the paint and the weathered one.  The initial paint color is still on the rocket launchers while the truck sports the AK'ed effect. Next is to repeat this process on the rocket launcher cab then on to the chipping. Enjoy guys! Suggestions are most welcome! Cheers Iking |
|
|
|
Post by eastrock on Mar 30, 2013 13:21:32 GMT -5
PaulH, in-short he doesn't sleep at all its awake even at wee hours in the morning  Komrade Iking, awesome step by step progress, weathering is already spot on, should I concede now? lol when do you plan to get the dust marks? |
|
|
|
Post by wbill76 on Mar 30, 2013 15:55:05 GMT -5
Some nice progress Iking, got to love the layered approach to produce a good finish, keep it up!
|
|
reserve
Senior Member
   
Member since: July 2012
Si vis pacem para bellum
Posts: 2,373
Jul 11, 2012 9:11:45 GMT -5
Jul 11, 2012 9:11:45 GMT -5
|
Post by reserve on Mar 31, 2013 0:56:47 GMT -5
Very nice job Iking, it looks great
Regards,
Mark
|
|
|
|
Post by Leon on Mar 31, 2013 1:14:11 GMT -5
Nice job Iking.Like the effects your doing.
|
|
|
|
Post by bullardino on Mar 31, 2013 3:34:56 GMT -5
Nice job, you're a master of russki modern armor  |
|
mokush
Full Member
  
Member since: January 2013
Mostly harmless
Posts: 156
Jan 19, 2013 2:28:00 GMT -5
Jan 19, 2013 2:28:00 GMT -5
|
Post by mokush on Mar 31, 2013 13:06:15 GMT -5
Nice one   |
|
iking.
Full Member
  
Member since: November 2012
Posts: 244
Nov 22, 2012 3:24:55 GMT -5
Nov 22, 2012 3:24:55 GMT -5
|
Post by iking. on Apr 1, 2013 5:47:14 GMT -5
Thanks a lot guys! Hahaha I still sleep but it was a long holiday here because of the Lenten Season so I maximized it and stayed late until past midnight to build build build hahaha!  I have some update today but im still gonna sort out the pics and compose it  Stay tuned:D Thanks again guys! Iking |
|
|
|
Post by eastrock on Apr 1, 2013 10:00:46 GMT -5
You just gave me some sleepless night Komrad... I don't the lenten season off lol
|
|
iking.
Full Member
  
Member since: November 2012
Posts: 244
Nov 22, 2012 3:24:55 GMT -5
Nov 22, 2012 3:24:55 GMT -5
|
Post by iking. on Apr 1, 2013 10:14:35 GMT -5
hahaha but you had a burger ER! kidding aside, here are some updates from the holidays. Hi guys, I already did the chipping and the kit is on a final hurdle on the weathering. The chipping method that I did is one that was suggested by Mig Jimenez on his blogsite. It is the sponge technique. What we did here is to use an enamel paint (I prefer Tamiya Red Brown plus German Grey), and then mix it to create a shade somewhat similar to oxidized steel. What I did is to drop a small blob of each enamel paint on a paper. Using a small sponge or brush, mix it well so as it would appear grey-brown. Once done, dip the sponge on the mixture then brush off the paint on another part of the paper. This is similar to drybrushing. Now, we dont want a wet sponge to be brushed on the model so the sponge should just be barely damp.  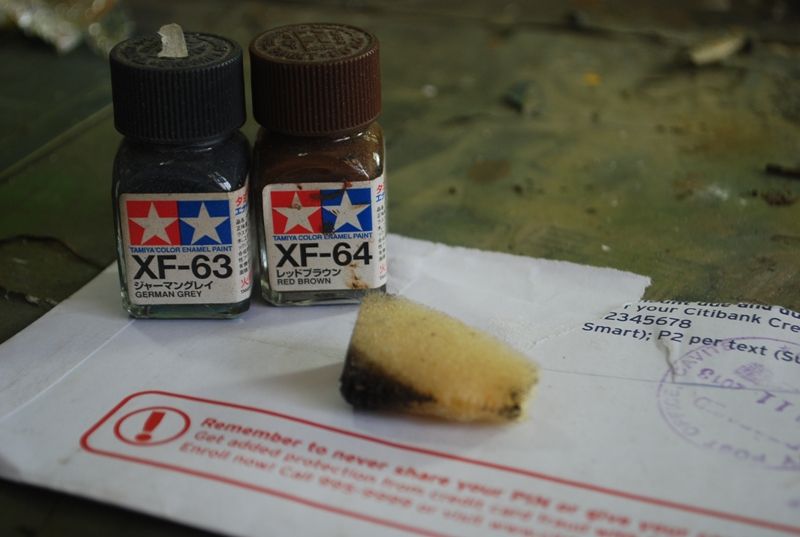 After doing this, touch the model surface using the sponge to create some random chipped effect. Do this on areas that are most likely to experience wear and tear like door edges, surfaces, hinges etc. I did mine a bit heavy as this is on a battlefield plus the fact that there are sandstorms and Haboob in the Gulf that could have sandblasted the paint on the Ural truck. If you dont want the effect, you can simply clean it off with a small brush dipped on a paint thinner, white spirit or lighter fluid.  I also have the AK and MIG chipping effects but havent used it yet as I plan to use it on the 2S3 Akatsiya as it has a lot of flat surface thus a wide area to practice on.  Here are some of my progress: The engine hood: 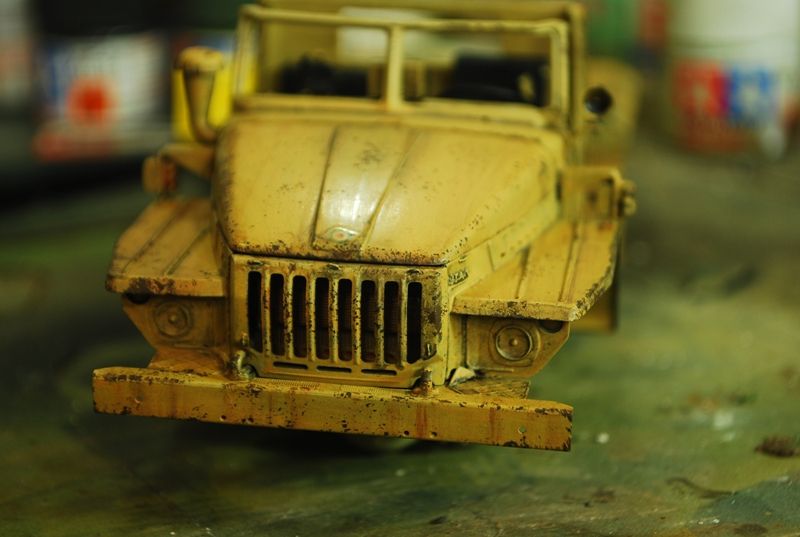  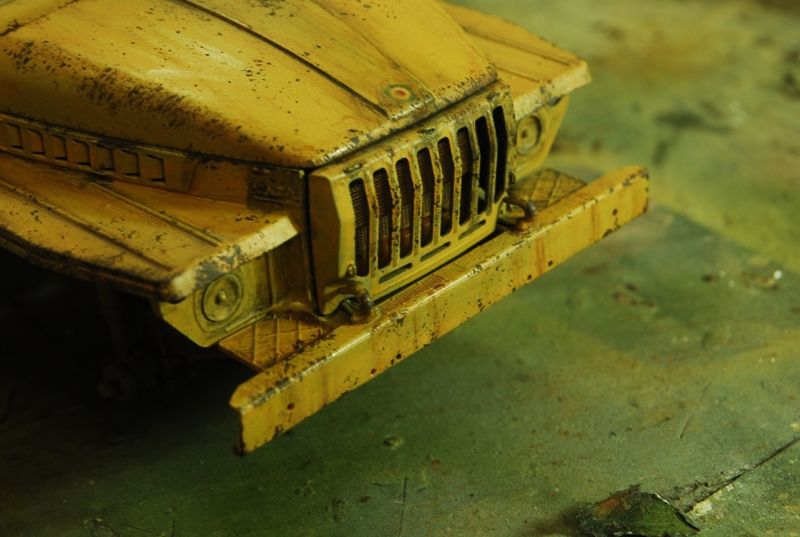 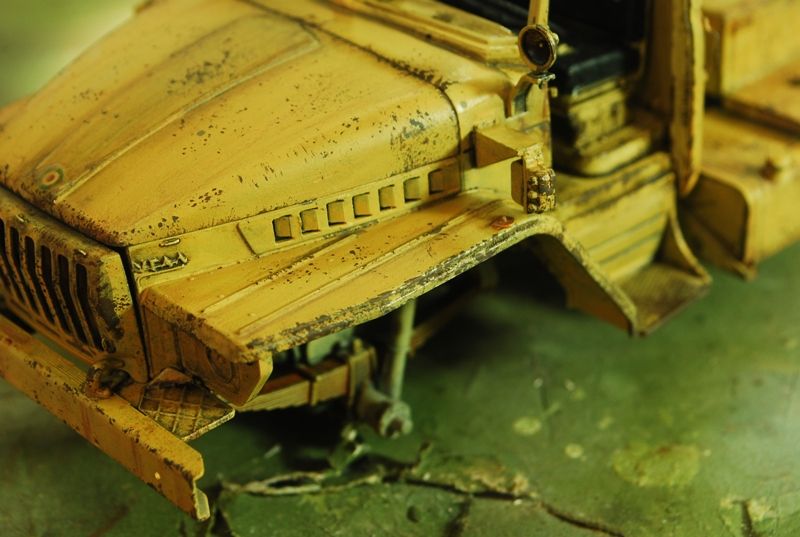 Under sides:  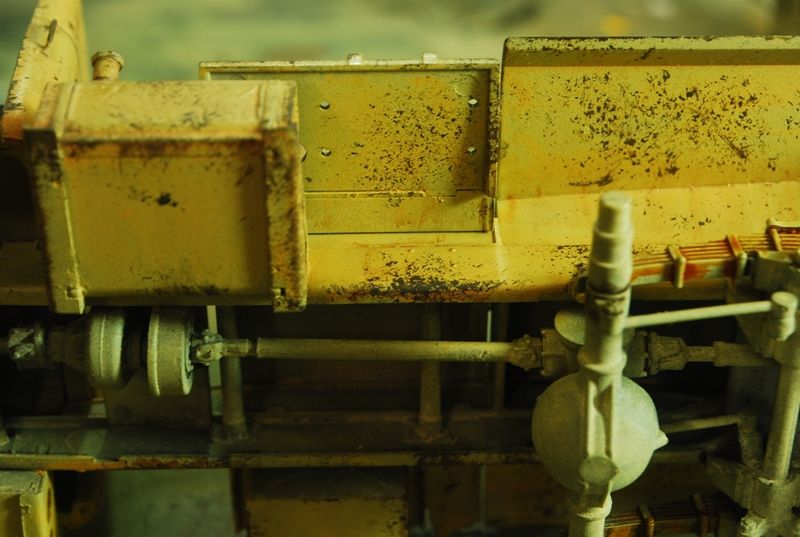 other parts like fuel tanks, flat bed and doors: 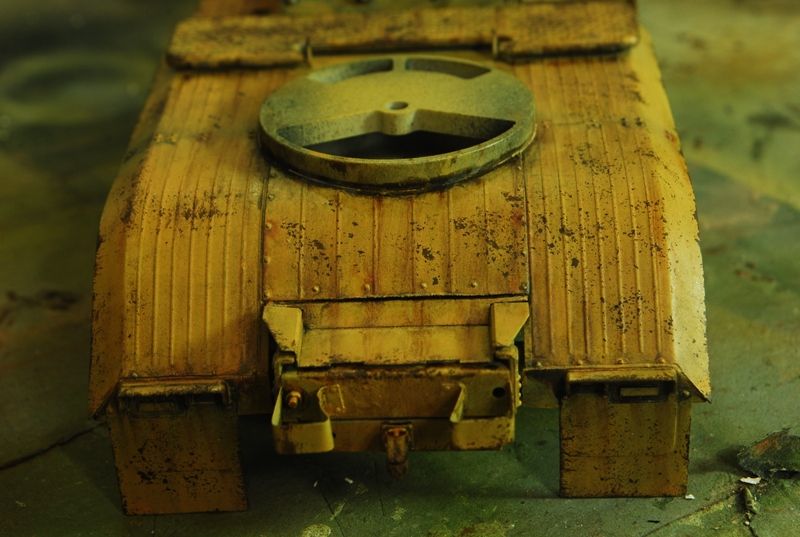  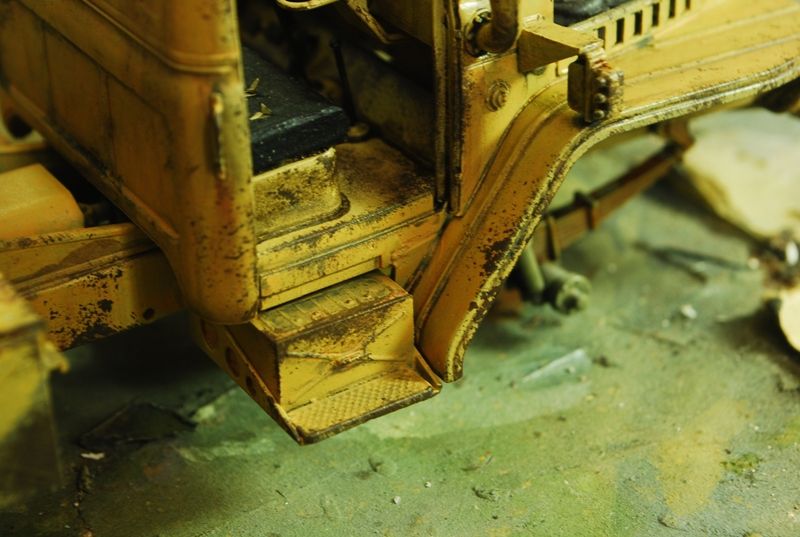 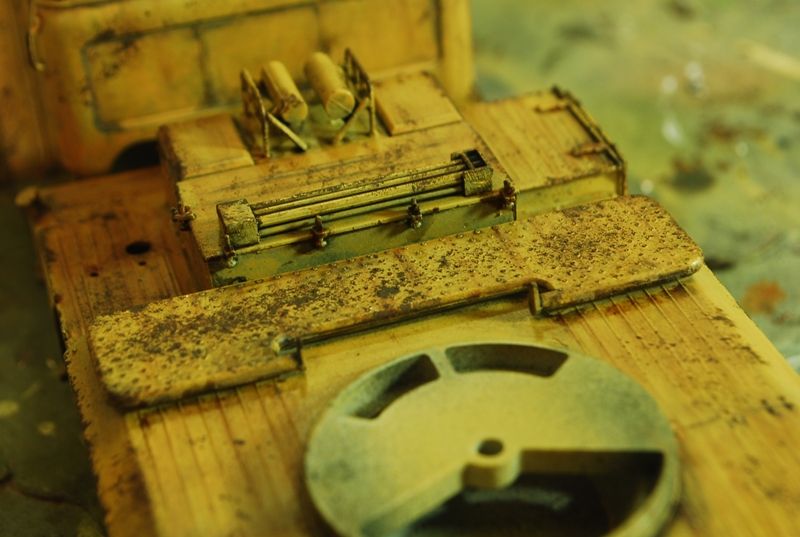 Enjoy guys! Iking |
|
|
|
Post by eastrock on Apr 1, 2013 10:21:35 GMT -5
chipping looks great  yes the burger or the beer? lol |
|
|
|
Post by robbo on Apr 1, 2013 13:22:10 GMT -5
Only just seen this one, I like it a lot mate
|
|
|
|
Post by Mence on Apr 1, 2013 15:09:03 GMT -5
Great build Iking, looks like an excellent kit?
|
|
|
|
Post by Leon on Apr 1, 2013 17:49:12 GMT -5
Stunning job on the chipping and weathering.Looks like its seen better days.  |
|
|
|
Post by wbill76 on Apr 1, 2013 19:56:53 GMT -5
Stunning job on the chipping and weathering.Looks like its seen better days.  Couldn't agree more! Definitely seen some hard miles. |
|
iking.
Full Member
  
Member since: November 2012
Posts: 244
Nov 22, 2012 3:24:55 GMT -5
Nov 22, 2012 3:24:55 GMT -5
|
Post by iking. on Apr 1, 2013 22:31:46 GMT -5
Thank you ER, Robbo, Dicky, Prof, Leon and WBill!  Yup, it sure did saw some hard miles and better days. Im still thinking of the accessories that Ill put on this truck to make it have a 'lived-on' appearance  cheers! iking |
|
|
|
Post by bullardino on Apr 4, 2013 8:33:06 GMT -5
Congrats Iking, the worn look is awesome  |
|
iking.
Full Member
  
Member since: November 2012
Posts: 244
Nov 22, 2012 3:24:55 GMT -5
Nov 22, 2012 3:24:55 GMT -5
|
Post by iking. on Apr 6, 2013 1:18:42 GMT -5
thanks guys for the support! cant wait for Sunday so I can resume work on this one!  The AK Effects is totally superb to use! cheers! iking |
|
|
|
Post by robbo on May 3, 2013 15:10:44 GMT -5
It certainly looks like it's been around for while, smashing build
|
|
|
|
Post by Leon on May 3, 2013 22:23:11 GMT -5
I like what your doing with this Iking,keep up the fine work.  |
|
iking.
Full Member
  
Member since: November 2012
Posts: 244
Nov 22, 2012 3:24:55 GMT -5
Nov 22, 2012 3:24:55 GMT -5
|
Post by iking. on May 6, 2013 8:28:10 GMT -5
thanks leon and robbo for the kind words!  you may check out the completed build in the Gallery section  cheers comrades! iking |
|


