detailfreak
Full Member
  
Member since: July 2012
Crazy Swede
Posts: 371
Jul 28, 2012 15:12:35 GMT -5
Jul 28, 2012 15:12:35 GMT -5
|
Post by detailfreak on Apr 30, 2013 6:31:50 GMT -5
cracked this one open and of course the urge to assemble was quite strong sooo. 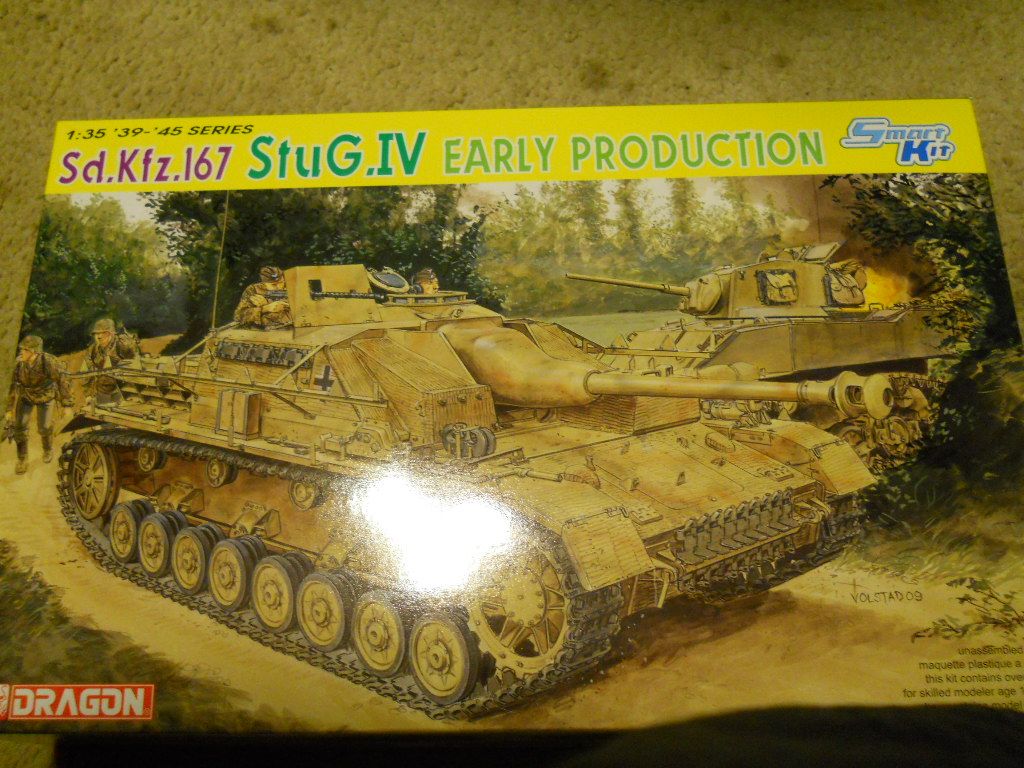 assembly of the lower hull was a bit of a pain as the frofront hull extensions seemed a bit thick.Could this be the monday syndrome or are the molds showing thier age? 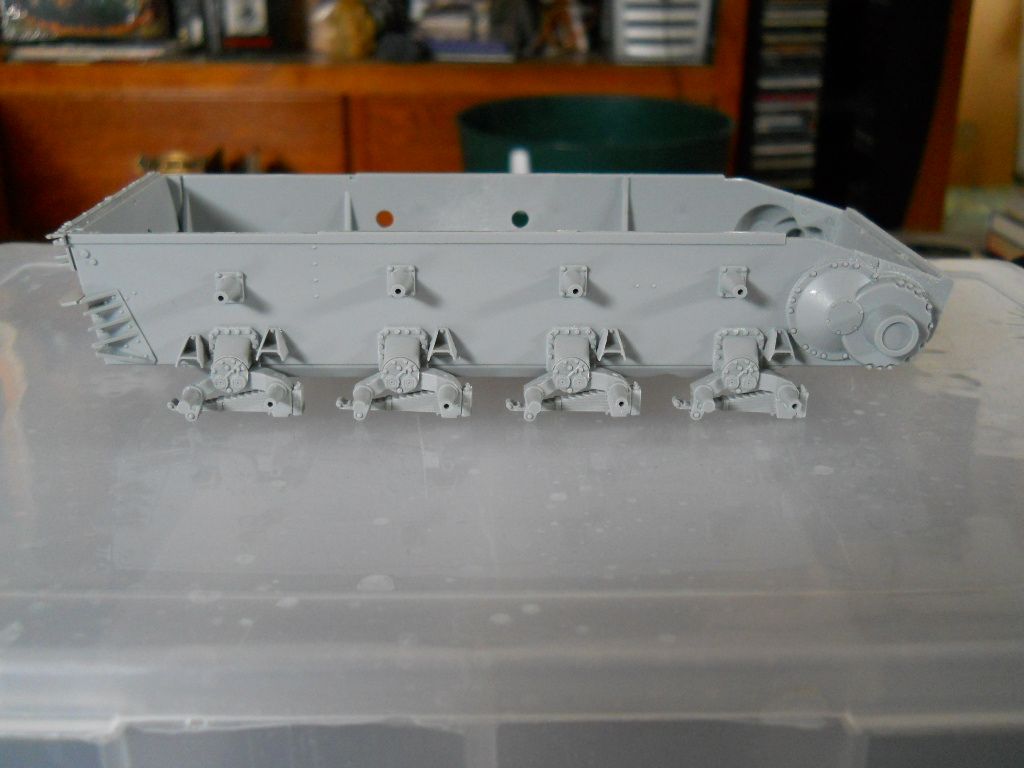 other than the afore mentioned irratation I ventured onward.  my habit of skipping about on the instructions is evident,as you can see the fighting compart and firewall have been dry fit.Also the main gun assembly is near completion.   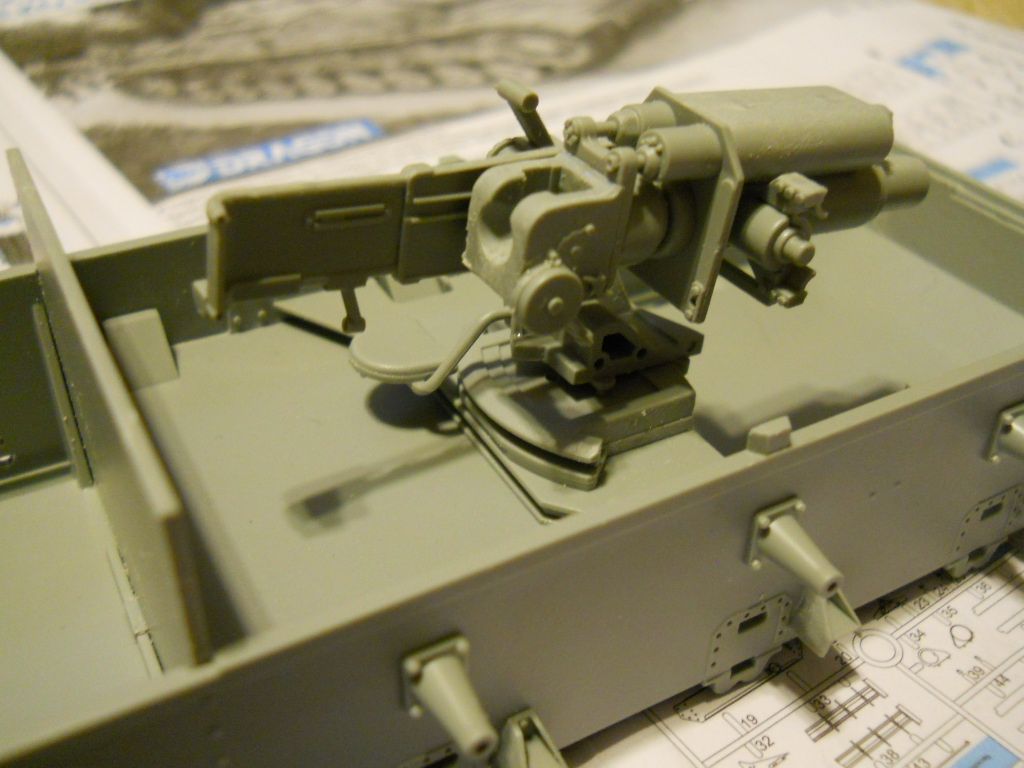 Well thats about it for now.Picked up a set of Eduard zim for it and it turns out that it is for the earlier 6043 version ,DOH!!! Must find zimmerit.. Thanks for lookin and please speak yer mind. Greg"Detailfreak"Rowley |
|
|
|
Post by bbd468 on Apr 30, 2013 9:49:10 GMT -5
Hey Greg, Great start on the StuG Buddy! Im always up for a StuG build....BOOKMARKED!!!  Gary |
|
|
|
Post by deafpanzer on Apr 30, 2013 13:28:05 GMT -5
Have same kit in stash... I will be following this. May the force be with you!
|
|
|
|
Post by Leon on Apr 30, 2013 16:26:56 GMT -5
:)I'm in Greg.Nice start on the StuG.
|
|
|
|
Post by wbill76 on Apr 30, 2013 20:17:56 GMT -5
This is a fun kit to build, have at it!  |
|
|
|
Post by TRM on Apr 30, 2013 20:45:19 GMT -5
Yes Sir! I'm in!!!! Looking forward TO IT! I have the mid, this is just making me want to build!
|
|
Deleted
Member since: January 1970
Posts: 0
Nov 26, 2024 21:37:34 GMT -5
Nov 26, 2024 21:37:34 GMT -5
|
Post by Deleted on Apr 30, 2013 22:33:13 GMT -5
That's a good start Greg .
|
|
detailfreak
Full Member
  
Member since: July 2012
Crazy Swede
Posts: 371
Jul 28, 2012 15:12:35 GMT -5
Jul 28, 2012 15:12:35 GMT -5
|
Post by detailfreak on May 19, 2013 17:03:03 GMT -5
Well now I really didnt think it had been two weeks since the start of this affair,where does the time go? Well lets get straight to some mug shots. 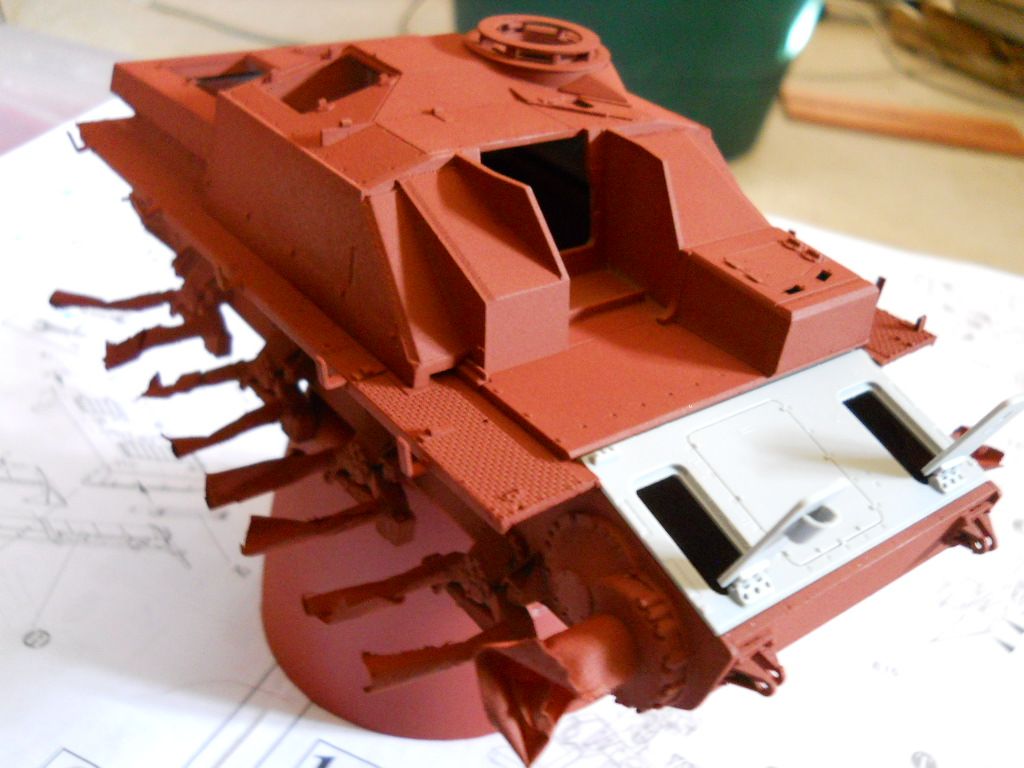 Most of te large sub-assaemblies are in primer now. 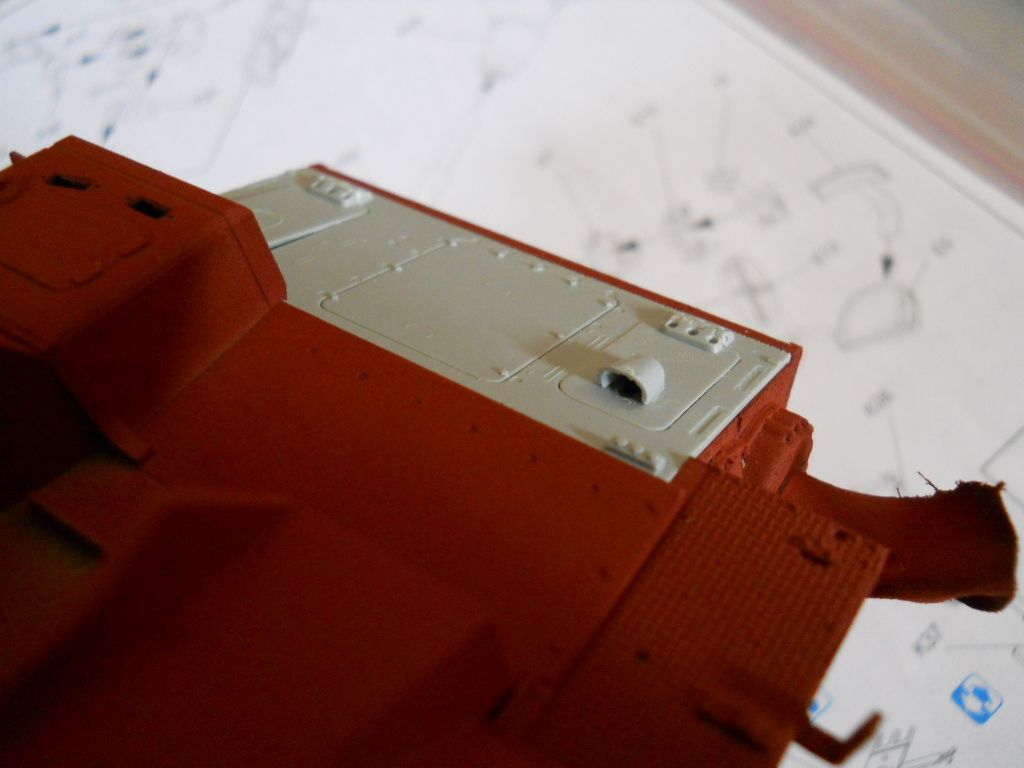 as you may have noticed the shrouds over the brake cooling ducts have been hollowed out and the inspection hatches drilled and pinned to make the hinges workable. 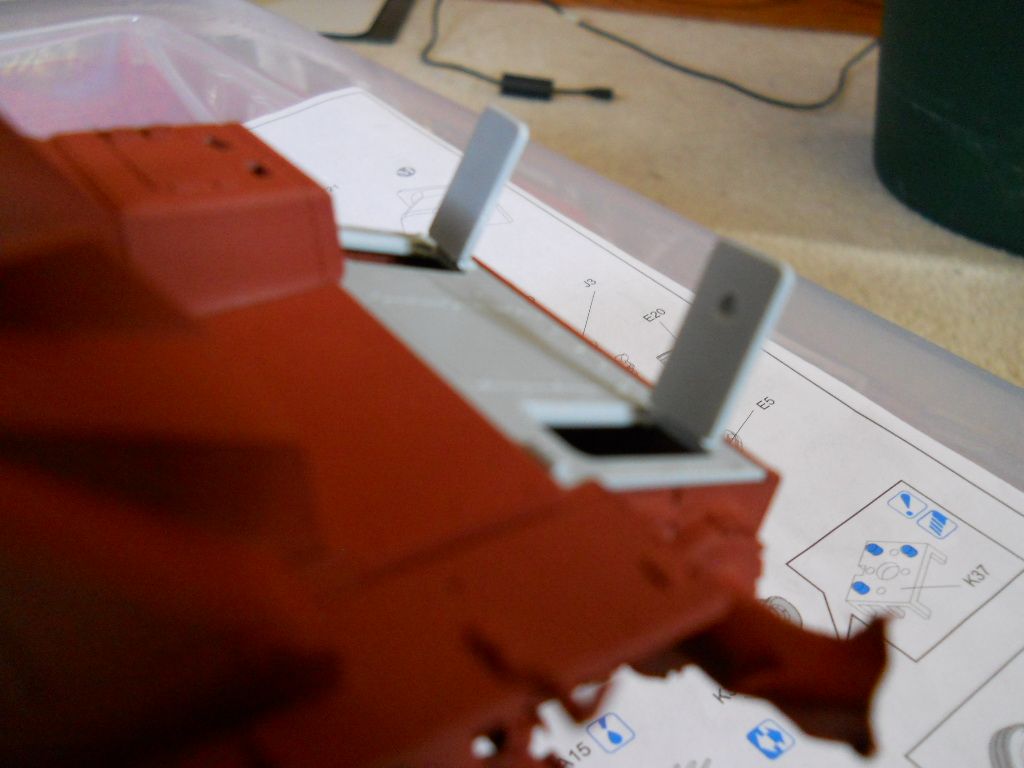 all of the roadwheels are cleaned up,primed as well as sprockets and idlers.Verlinden panzer IV engine compartment is in the early stages of fitting as is the RJ products drop in drivers compartment.more to come. |
|
|
|
Post by tonylee-Rest In Peace on May 19, 2013 17:06:50 GMT -5
Could it be?  ?? Naaaaaaa he never builds anything.  Tony lee |
|
|
|
Post by Leon on May 19, 2013 17:13:25 GMT -5
Looking good Greg.Off to a nice start.
|
|
detailfreak
Full Member
  
Member since: July 2012
Crazy Swede
Posts: 371
Jul 28, 2012 15:12:35 GMT -5
Jul 28, 2012 15:12:35 GMT -5
|
Post by detailfreak on May 19, 2013 17:14:54 GMT -5
I know I know,and he loses his way and has twenty or so un-finished shelf queens,I know.LOL thanks for checking Tony,been keeping a close eye on your nashorn progress.KKKOOOOOLL stuff there now my friend..
|
|
|
|
Post by wbill76 on May 19, 2013 20:52:33 GMT -5
Woohoo, we have progress! keep the momentum going Greg!  |
|
|
|
Post by deafpanzer on May 19, 2013 22:48:13 GMT -5
Glad you are back!!! Safe to guess that ice fishing season is officially over? LOL
Nice start on the StuG!
|
|
|
|
Post by bbd468 on May 19, 2013 23:08:48 GMT -5
There he is!!! Greg, your back!  Nice update man, keep bringin that StuGification!!!  |
|
Deleted
Member since: January 1970
Posts: 0
Nov 26, 2024 21:37:35 GMT -5
Nov 26, 2024 21:37:35 GMT -5
|
Post by Deleted on May 20, 2013 5:13:07 GMT -5
Nice! I do like the odd stug!
|
|
detailfreak
Full Member
  
Member since: July 2012
Crazy Swede
Posts: 371
Jul 28, 2012 15:12:35 GMT -5
Jul 28, 2012 15:12:35 GMT -5
|
Post by detailfreak on May 25, 2013 11:37:27 GMT -5
Ok,have been working a bit on the stug,as mentioned the verlinden engine compartment is being used. The floor section was cast thick and needed to be sanded down,enter the electric sander and some 36 grit,this made fairly short work of the excess material.Oh and this was done outdoors so the breeze carried the dust away.The floor section was aligned using the cross brace and the left and right bogie mounts as reference points. 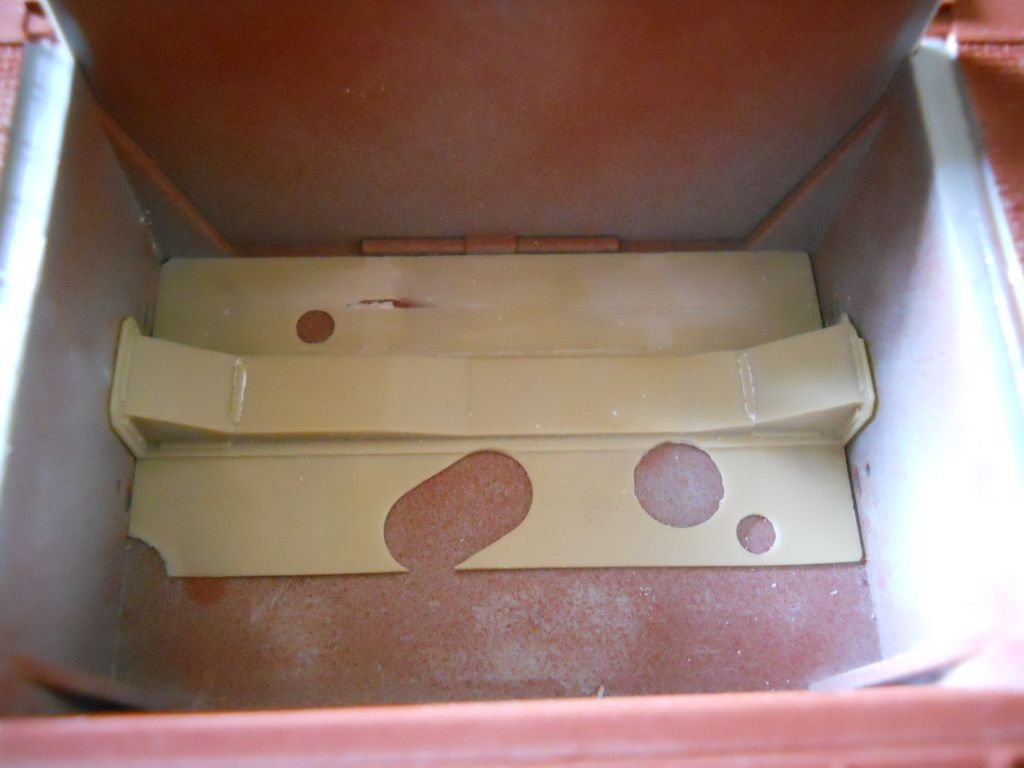 The engine mounts were cast directly to the verlinden piece and offset the engine to close to the centerline of the floor so these were removed with ,ahem,surgical like precision.Now the engine could be adjusted to line up with the exhaust openings. 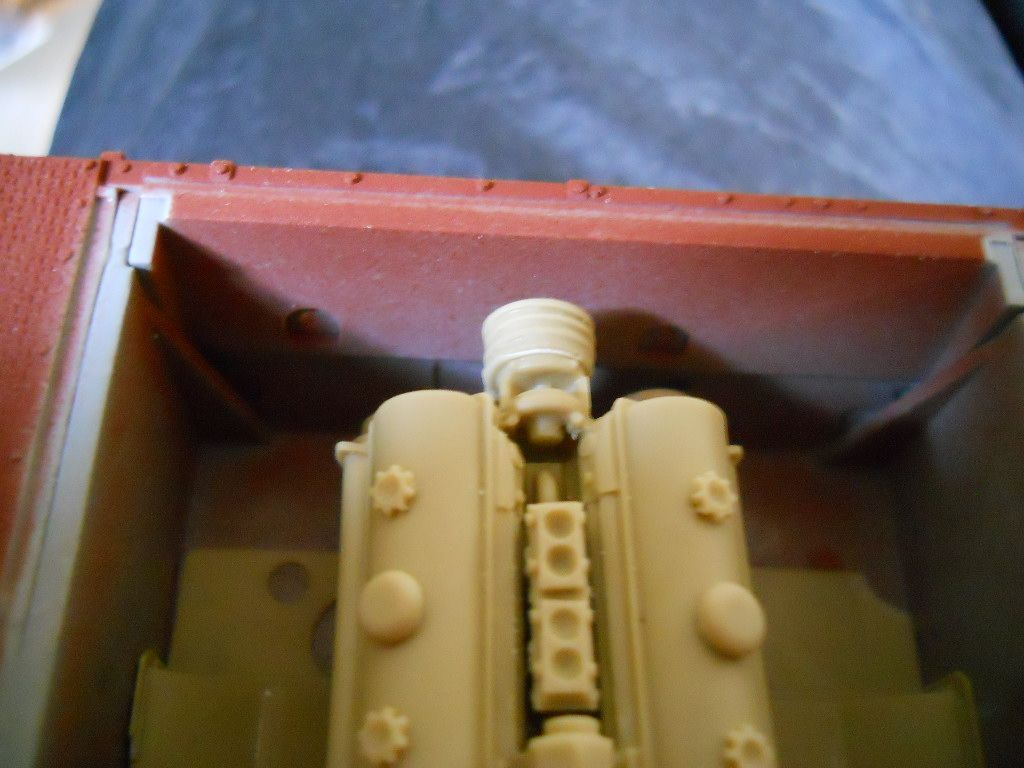 This was roughly the position prior to surgery. The engine now could be moved to better align it with the exhast openings.  The engine mounts as well as the engine block were drilled and a piece of brass tube inserted to hold them in place.This was done so that I could position the mounts and would not continuously knock them off,you know,the sausage fingers attached to ham hands.LOL 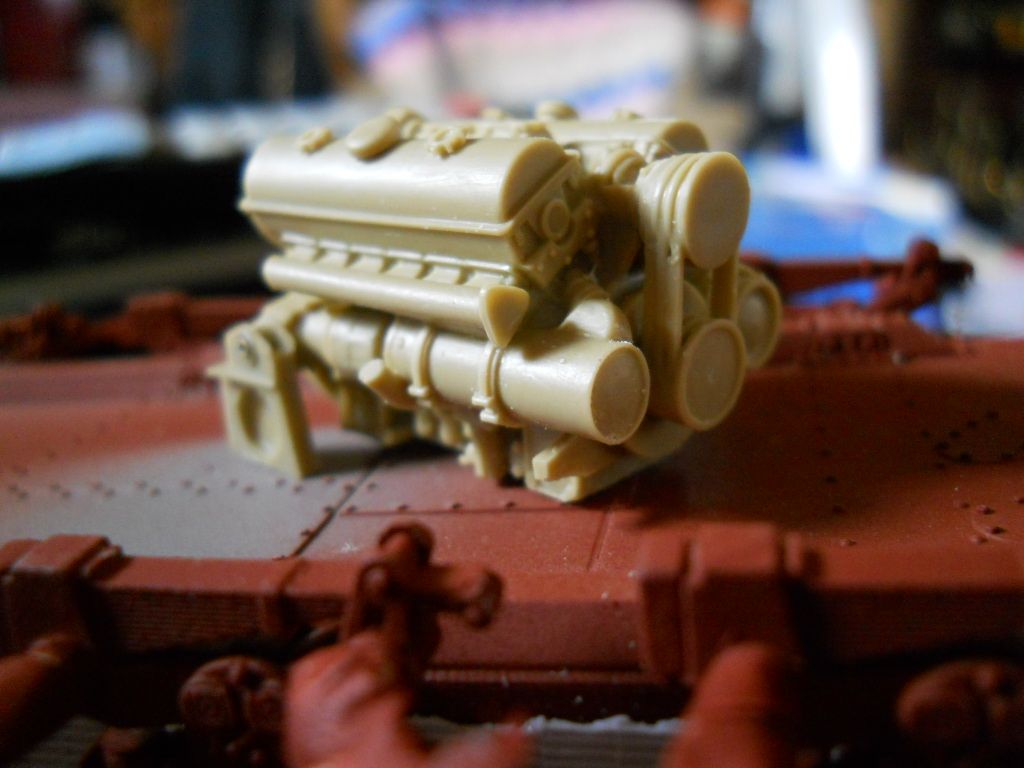  And surprise ,the Atak zimmerit from Jadar arrived fri. morning so I got to itchin for some fixin this stuff in place.Just a wee bit of trimming here and some push and shove and also remember to remove the bolt detail from the hull sides.Voila!! 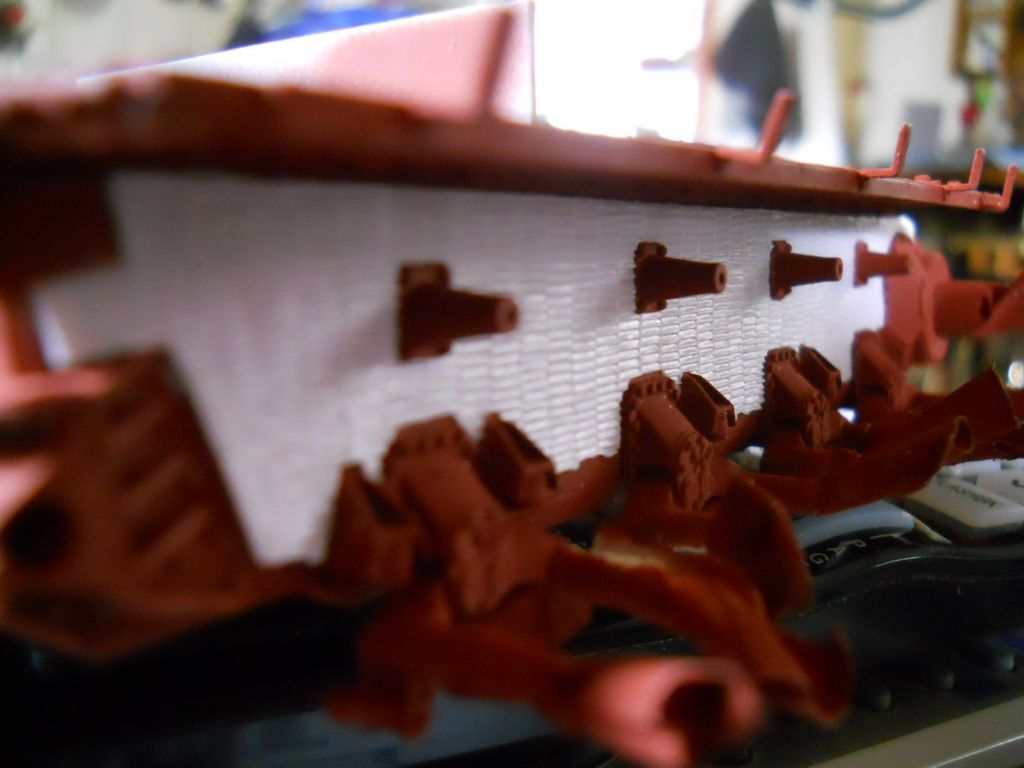 Well thats all I have for now,I must determine the best and hopefully easiest way to attach the stuff. |
|
|
|
Post by wbill76 on May 25, 2013 19:42:48 GMT -5
Atak zim is my favorite go-to provider, nice progress on that engine compartment Greg! For the Atak, I've found that for large panels Gator Grip (or similar type glue) works best and just use CA gel to tack down edges if needed. For smaller pieces, I will just run liquid glue under it and let the capillary action pull it down then press gently so it will 'stick' into the slightly softened plastic underneath to create a bond.
|
|
|
|
Post by deafpanzer on May 25, 2013 21:46:56 GMT -5
Zimm is looking great! Have to get one of those Atak sets... all I have are from Cavalier.
|
|
detailfreak
Full Member
  
Member since: July 2012
Crazy Swede
Posts: 371
Jul 28, 2012 15:12:35 GMT -5
Jul 28, 2012 15:12:35 GMT -5
|
Post by detailfreak on Jun 5, 2013 11:39:37 GMT -5
Well well well here we are in june and the april showers are still falling,at least we do not have the likelyhood of them there twisters.Keep yer heads down my southern comrades. Ok ,I've been working this Atak zimmerit using CAA gel and a professional grade interior wood glue and so far it seems to be working fine.So with that I'll just go right to the pics. Attachment Deletedthese rear panels were applied using only the wood glue. Attachment Deletedas were the front. Attachment Deletedand the upper casemate. 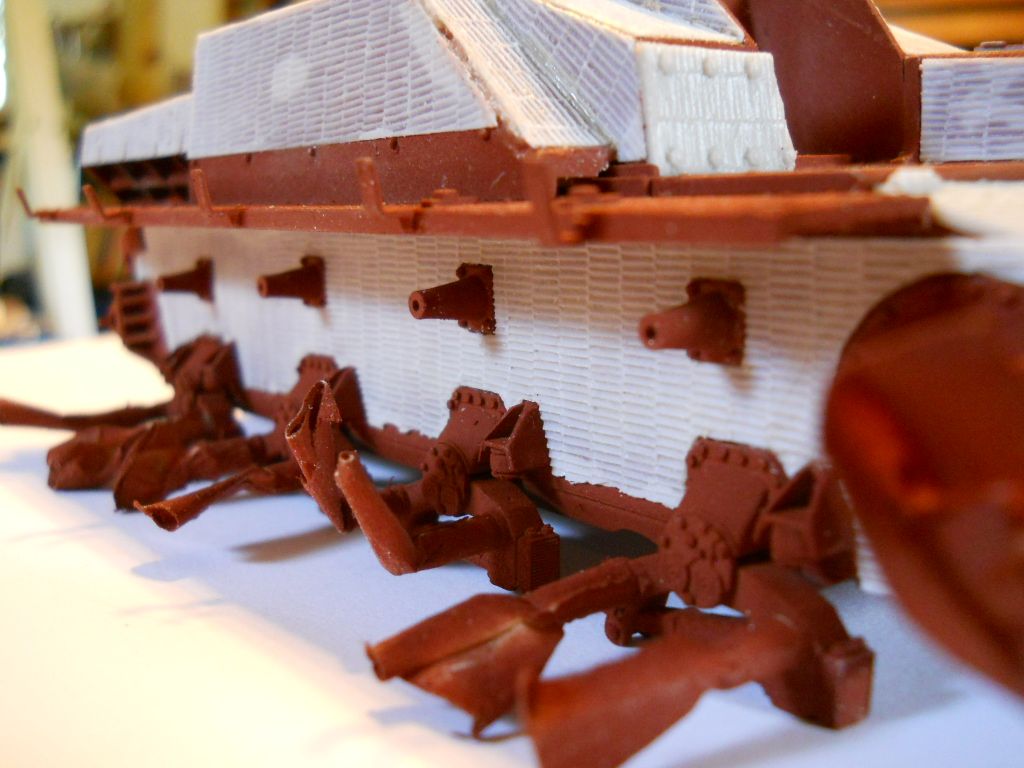 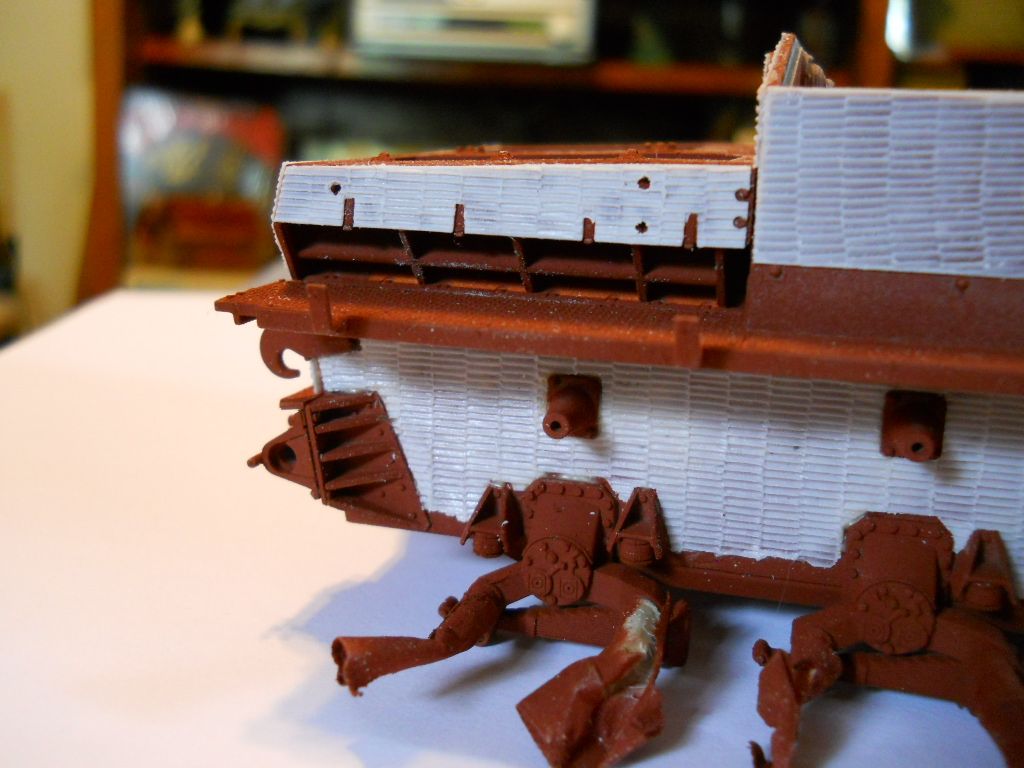 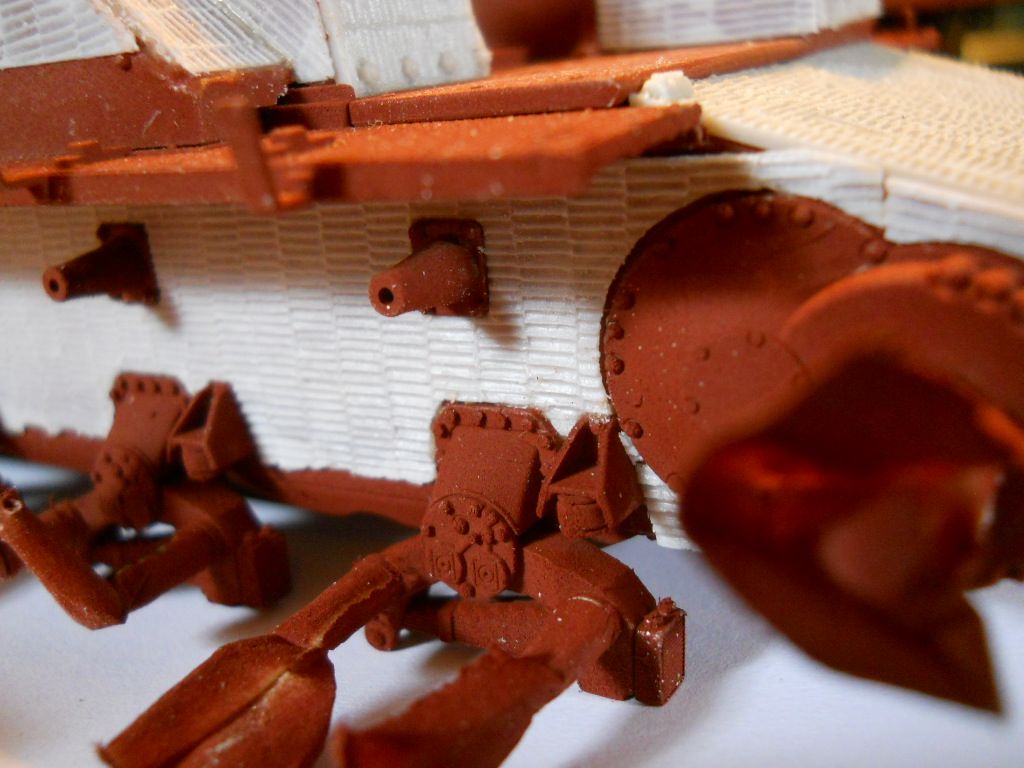 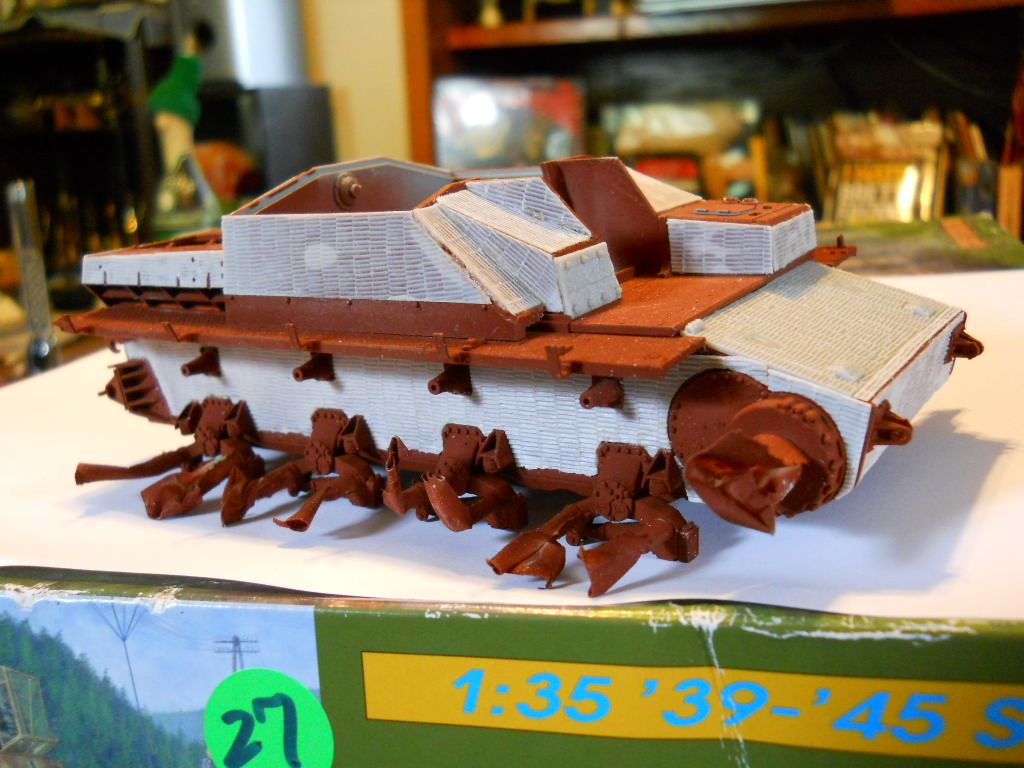 overall all this is nicely engineered stuff,I usually sand the back of the sheet/s until the pieces are released from the carrier making the very thin.Use caution and sand slowly. Thanks for looking and as always your comments are welcomed.  |
|
Deleted
Member since: January 1970
Posts: 0
Nov 26, 2024 21:37:34 GMT -5
Nov 26, 2024 21:37:34 GMT -5
|
Post by Deleted on Jun 5, 2013 11:41:25 GMT -5
You've been busy !
|
|
detailfreak
Full Member
  
Member since: July 2012
Crazy Swede
Posts: 371
Jul 28, 2012 15:12:35 GMT -5
Jul 28, 2012 15:12:35 GMT -5
|
Post by detailfreak on Jun 5, 2013 11:49:07 GMT -5
I have and double posting too I see.May a moderator please remove one. Consider it done,Greg!  CB  |
|
|
|
Post by bbd468 on Jun 5, 2013 11:49:13 GMT -5
Hello Greg, Man that Zimm looks awesome! Ya done a fine job. Thats Atak Zimm is tha Best? So ive heard anyways.  |
|
Deleted
Member since: January 1970
Posts: 0
Nov 26, 2024 21:37:35 GMT -5
Nov 26, 2024 21:37:35 GMT -5
|
Post by Deleted on Jun 5, 2013 17:15:52 GMT -5
Looking good Greg.
I don't miss torrential thunder storms and tornadoes one bit. In fact since I moved from the mid west, two tornadoes have wrecked havoc on my old neighborhood.
G
|
|
|
|
Post by wbill76 on Jun 5, 2013 20:35:05 GMT -5
Hope you dry out soon! One word of caution regarding the zim at the front just above the final drive housings. You're going to find that you'll have to remove a bit of that when you go to fit the front mud flaps as DML didn't design them with any tolerance for the added zim. I've had to do that on every single Pz IV-based chassis kit of theirs I've built when using the Atak stuff. Do a test fit and you'll see what I mean and just where you need to do a little surgical removal. That area is hidden away by the sprocket and flap once installed anyway so you won't be able to tell that the zim isn't present.  |
|
detailfreak
Full Member
  
Member since: July 2012
Crazy Swede
Posts: 371
Jul 28, 2012 15:12:35 GMT -5
Jul 28, 2012 15:12:35 GMT -5
|
Post by detailfreak on Jun 6, 2013 0:33:10 GMT -5
Good point Bill.In all likelyhood they would not have applied in these areas anyhoo.
|
|
|
|
Post by tonylee-Rest In Peace on Jun 6, 2013 13:51:04 GMT -5
My gun is bigger than yours   Love that ATAK too Tony lee |
|
406 Silverado
Global Administrator     
Member since: November 2011
Posts: 10,246
Member is Online
MSC Staff
|
Post by 406 Silverado on Jun 6, 2013 14:25:33 GMT -5
oh man this is VERY nice. Love the primer color and especially the zimerit. Should look cool with the motor in there.
|
|
|
|
Post by armorguy on Jun 6, 2013 14:53:01 GMT -5
The art of attaching Zimerit ! I like this one !
|
|
|
|
Post by bullardino on Jun 6, 2013 15:08:26 GMT -5
Great job, I finally managed somehow to see your pics. They didn't show until this evening.
|
|
detailfreak
Full Member
  
Member since: July 2012
Crazy Swede
Posts: 371
Jul 28, 2012 15:12:35 GMT -5
Jul 28, 2012 15:12:35 GMT -5
|
Post by detailfreak on Jun 7, 2013 0:08:55 GMT -5
My gun is bigger than yours   Love that ATAK too Tony lee Aint how big she is Tony its to what effect ya use it.  |
|