mz3
Full Member
   March '24 Showcased Build Awarded
Member since: October 2012
Posts: 658
Oct 14, 2012 21:09:43 GMT -5
Oct 14, 2012 21:09:43 GMT -5
|
Post by mz3 on Apr 30, 2013 21:37:01 GMT -5
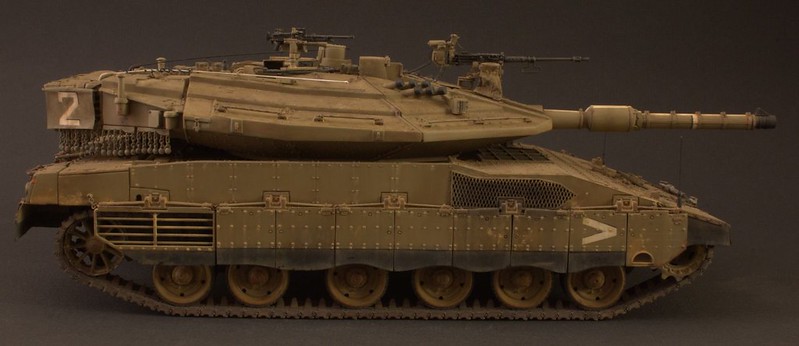
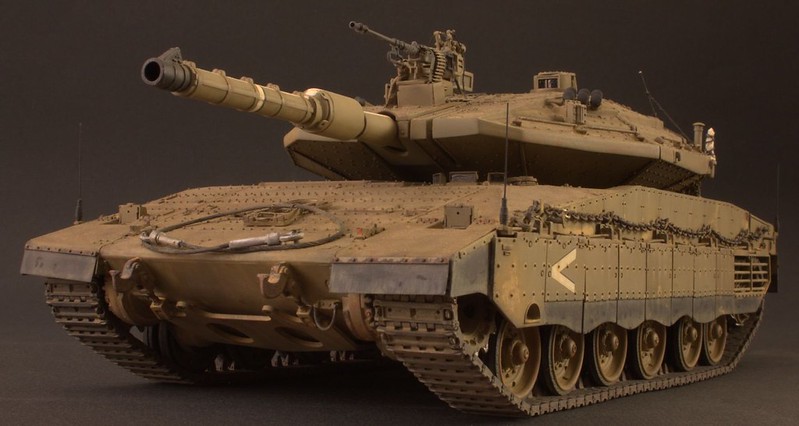
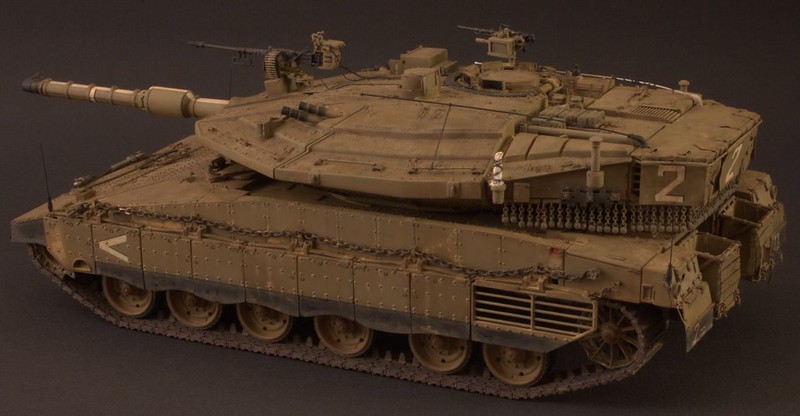
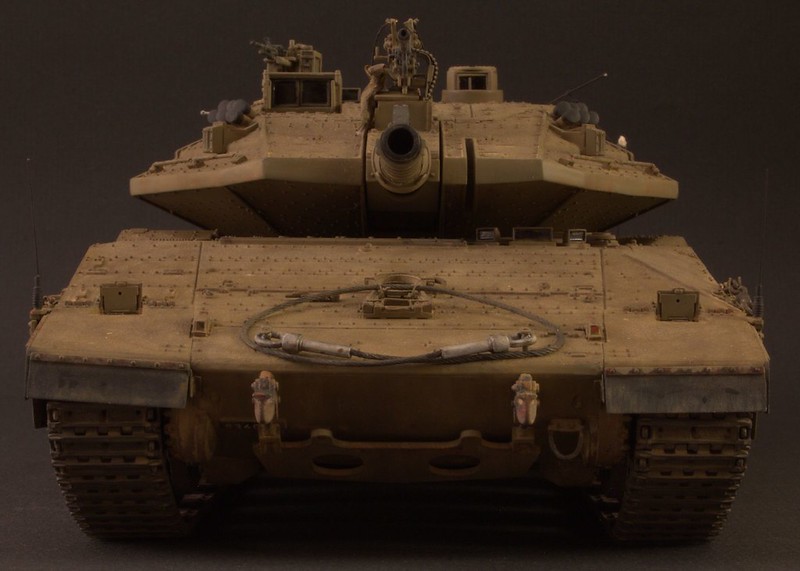
I've been working on this off and on for a few months. I've had so many problems with it. Both hull pieces were twisted, there wasn't enough chain to finish the ball chains, the barrel was BADLY, just badly!!! Many many problems. But, I'm finally at the fun part. So I figured I'd post what I do from here out. 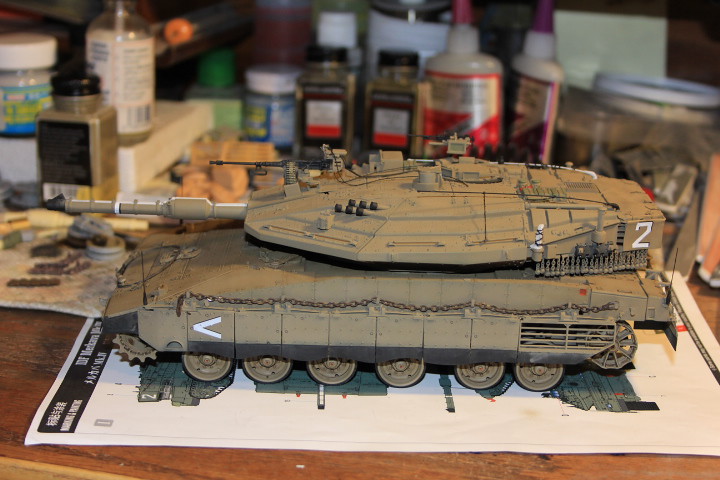 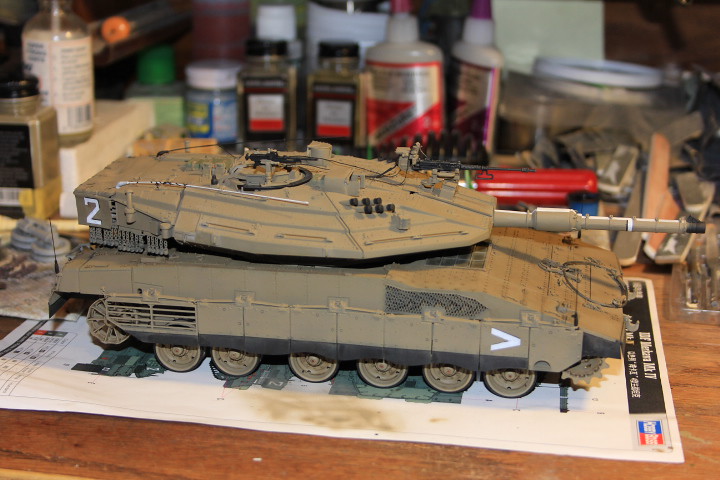 The color is Tamiya Khaki XF-49 and Medium Grey XF-20 that seems to be the color of choice right now. Seems really close to Model Masters Israeli Sand Armor. Markings on the barrel are brush painted, badly. All the other markings are decals with some white paint on them to mess them up a little/make them look hand painted. Wheels/suspension arms are "fixed", although I read much later after I "fixed" them that there was another way that looks better, whatever at that point. Mentioned above, there wasn't enough chain to finish the ball chain curtain, so I had to steal the chain from a second Hobby Boss Merkava 4 in my stash. I TOTALLY HATE the ball chains! The way Hobby Boss has you make them leaves the back half too long. I had to shorten the chains here. The photo etch provided for the chains under the basket suck as well. The chains kept falling out. I think I glued them about 7 times. And to top it off, it's impossible to get them level/straight/looking nice. I worked on them for 3 hours one day and got 4 of them to look nice. GRRR! I took six of the wheels from the second kit and throw away the six wheels that didn't match the Merkava wheels. For the life of me I could not find pictures of how the wires were run for the solenoids for the 50 cal. After a weekend of looking I found one picture with the wire run on top of the turret the way I have it. Once I saw that pic, I just ran with it, at that point I didn't care. At some point I stopped caring about making it accurate, the more I read about this kit, the more I started to hate it. The main reason I didn't smas... I mean stop working on this, I am using this to get my techniques down for a Meng Merkava 3D I am going to start soon. I don't want to have any questions or problems with that. Get them out of the way now and have a nice smooth build. Anyways... comments are more then welcome. |
|
M1Carbine
Senior Member
    November '23 Showcased Model Awarded
Member since: November 2012
Posts: 1,739
Nov 16, 2012 2:49:11 GMT -5
Nov 16, 2012 2:49:11 GMT -5
|
Post by M1Carbine on Apr 30, 2013 21:43:09 GMT -5
MZ - glad you stuck with it, turned out fantastic. Had a similiar issue with the HB Leopard Spanish version,, the kit was horrible and I trashed it.
Bob
|
|
|
|
Post by deafpanzer on May 1, 2013 6:38:02 GMT -5
Looking good... I won't have known if you have had those issues.
|
|
|
|
Post by bullardino on May 1, 2013 7:58:54 GMT -5
I agree with Andy, if you didn't tell about those issues, I wouldn't have noticed. Great job  |
|
iking.
Full Member
  
Member since: November 2012
Posts: 244
Nov 22, 2012 3:24:55 GMT -5
Nov 22, 2012 3:24:55 GMT -5
|
Post by iking. on May 3, 2013 11:38:41 GMT -5
wow thats a beauty despite the kit challenges!  i just opened my academy merkava IV and im still figuring out how to make the antislip pattern as rustoleum is not available here in the PH  goodluck buddy and youre making abeautiful build! iking |
|
|
|
Post by wouter on May 4, 2013 5:09:20 GMT -5
I've built the same kit as you and in the end decided to discard the gun barrel and the ball and chain assembly provided in the kit. Seems like you managed it well though, like what I'm seeing so far!
Cheers
|
|
|
|
Post by Teabone on May 4, 2013 13:55:32 GMT -5
Have had a few of those types of kits myself but it looks like you over came all the problems as I cant see any defects at all.
Bones
|
|
mz3
Full Member
   March '24 Showcased Build Awarded
Member since: October 2012
Posts: 658
Oct 14, 2012 21:09:43 GMT -5
Oct 14, 2012 21:09:43 GMT -5
|
Post by mz3 on May 4, 2013 14:20:28 GMT -5
Thanks for the comments guys. I was really hard to get this thing to this point where I can start having fun with it. Spacepacker- I am more then likely going to scratch build the next ball/chain curtain on my next 4. The kits balls are too big ( I'm having a hard time NOT laughing at that statement) and the short chain are just too much. I vented on my Flickr page a few months ago about the problems with this kit and how Hobby Boss should fix them, especially with how much it cost. Here are some pics with all of the detail work I put into it before I stopped caring about it... 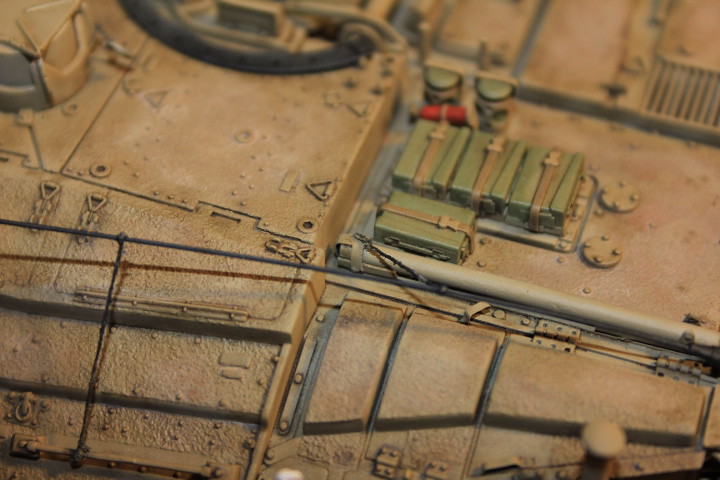 The antennas are Piano wire. I don't know what gauge, I've had it for a long time. The "rope" tying down the Antennas is plain old thread. I tied them down before priming, so they look like crap. I also added the tube right behind the antenna in this pic. The kit doesn't come with anything for that spot, I made it from a toothpick. I also added the "t" bracket on the front(left side in pic) of the tube. 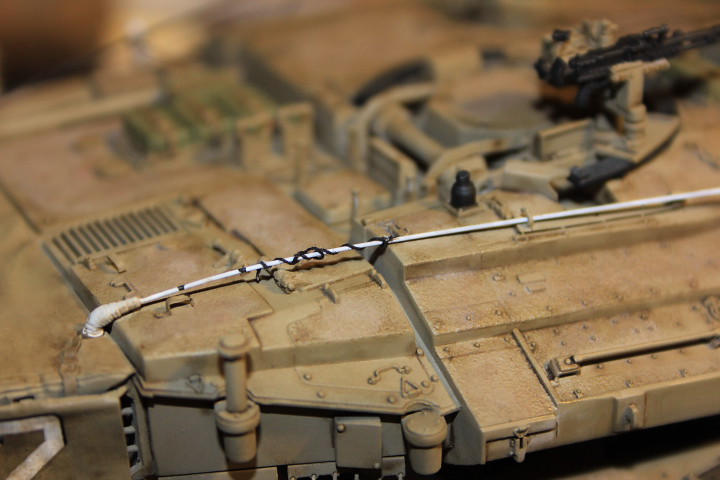 Antenna from the other side. I am using a picture from the Merkava 3D book from Desert Eagle for some reason. There is a great pic of a 4 in the front of the book and I tried to copy some of the details from it. This being one of them. The antenna is hooked into the restraint for the rifle and the rope is tied around the antenna like it broke off. the antenna bases were bent by holding them to a soldering iron just long enough to get them to bend. The tips of the wire were dipped in CA glue to get the little balls at the end of them. 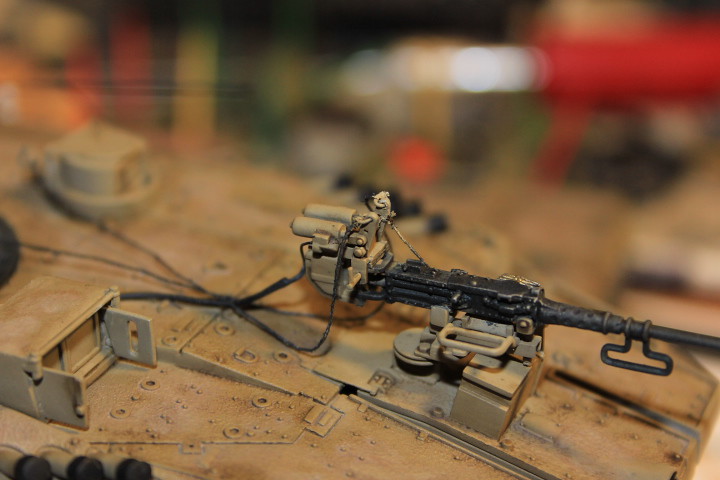 This is the part that caused the most frustration. I used links of the left over chain to attach thread to the areas on here that needed it, for the manual cables. I used a combo of pics, from the internet and from the Dessert Eagle book, to try to get it to look close. The electrical wire attached to the back is 2 smaller wires soldered to a larger wire, trying to make it look like the smaller wires were coming out of insulation. I guess. Like I posted before, I found 1 single picture with the electrical wires run on top of the hull like this, so I went with it. I haven't decided what to do with the manual cables, most of the pictures I found with the cables there had them tied up and they looked like rats nests. I still need to make a bag for the spent shells. 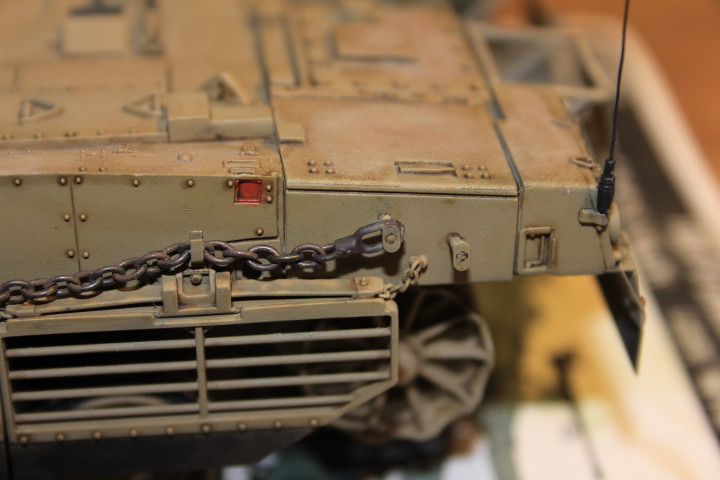 Here I used chain to replace the tow cables. In on the the AFV mags I have, there was a little walk around of the 4 and it said the Israeli tankers prefer chain to cables, as the chain doesn't whip around like wire when it breaks. The chain is from an old Spawn action figure. It was dipped in Blacken it. The loops at either end are from the kit. I took the nasty tow cables that were molded into the holders/hooks and cut them off, throwing the rest away. I replaced all of the hooks/holders with left over photo etch runner. I couldn't find anything that was the right size except the blank parts on the side of the PE set. I also used parts of the left over chain I got from the second kit to detail up the side skirts where it was needed. I, again, stole the marker antennas(don't know what to actually call them) from the other kit and added them here on the back. I think it looks a little better with them on. I drilled a small hole in the bottom of each on, glued in a little wire, made a small piece to attach it to the hull and glued it. Simple and easy. This is also an area that made me stop caring about the detail on this kit. The back parts of the skirts, pictured under the chain, is supposed to have 3 bars, not 4. By the time I found out, it was too late. I had already glued, primed and painted. 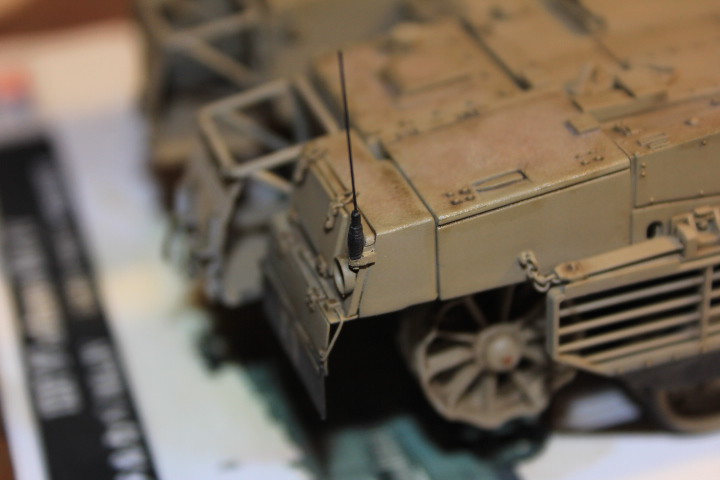 Here is the other side. On the finder I added a bit of wire (right under the tail light). 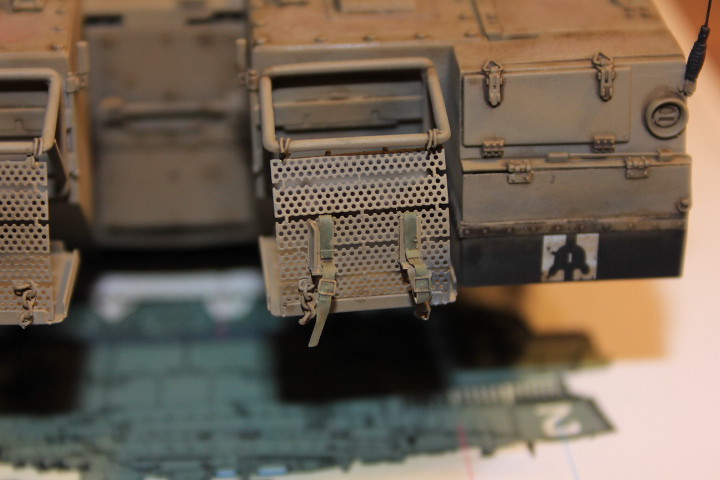 On the baskets, again I used left over chain. I also scratched the stretcher holder, the kit has nothing there. Made them from strips of evergreen and left over PE straps. 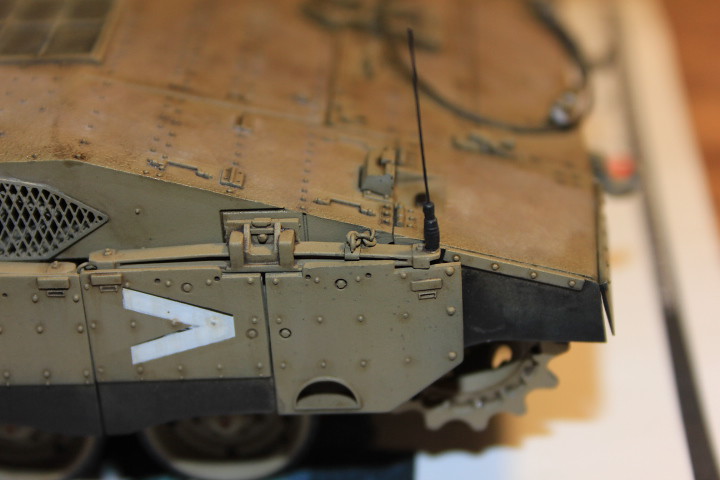 Front of the skirts. Originally I was just going to use the kit supplied Antennas for the markers, but they kept breaking off. So I cut all 4 off and replaced them with wire. Looks better and they don't break at the slightest glance. The bracket holding the chain here was made from PE runner again. 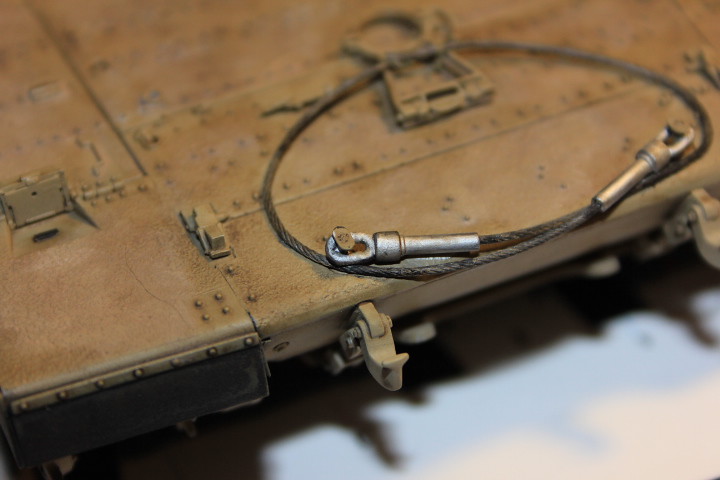 The tow cable is from Meng's 3D. The hair is from one of my cats! Again, I stole parts from the other kit, the pegs to hold the cables. 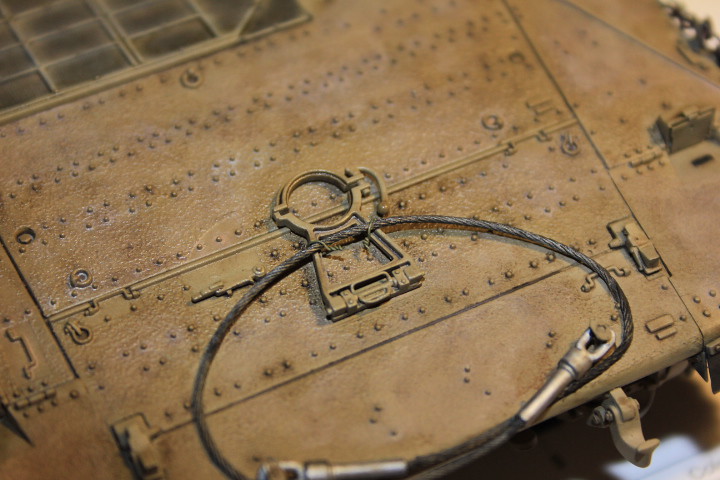 I added two handles to the barrels travel lock. I also used two smaller gauge wires to tie the cable down. I saw this on a ton of pics all over and thought it would look cool. I've also started weathering, obviously  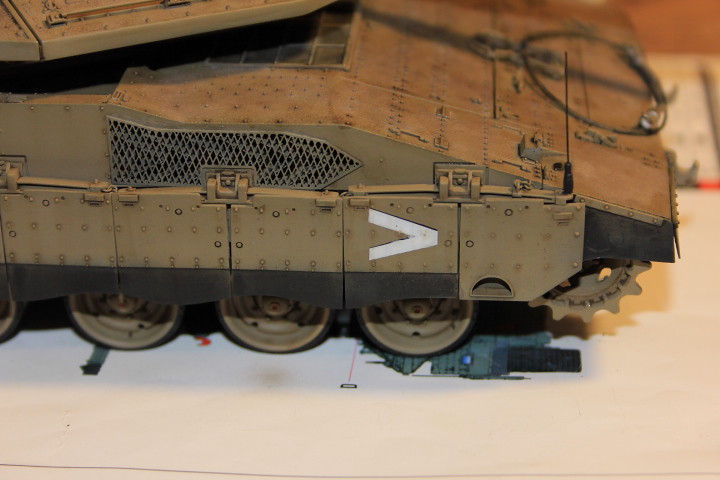 Each set of skirts came attached in pairs. I cut each one away from the other. Then mounted them. Getting a nice, normal look to each set. There is a "v" gap in between some of them. I also added a piece of plastic behind the foothold, as the kit piece is hollow but the real thing is not. 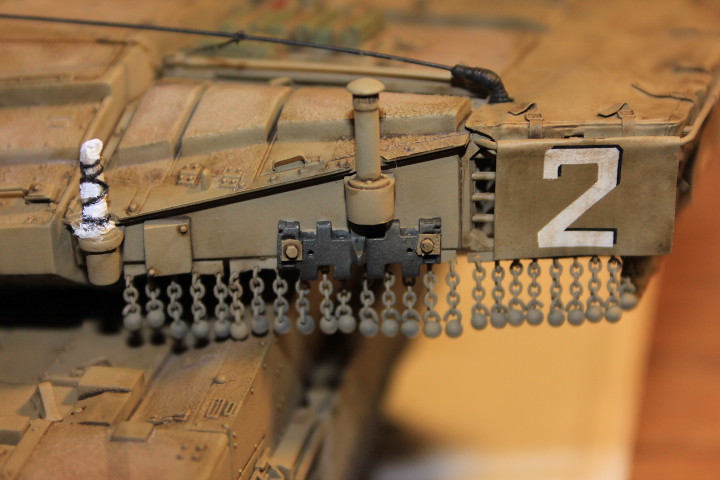 The cover over the antenna base is tissue and thread. The track link is from Friul and the bolts were taken from a donor kit. The cloth for the markings on the basket are made from Tamiya tape. Again, I think the balls are too big. Hobby Boss has a good idea with the Balls having a wire already attached, but the wire is too thick and this is the best that can be done with out getting more involved. 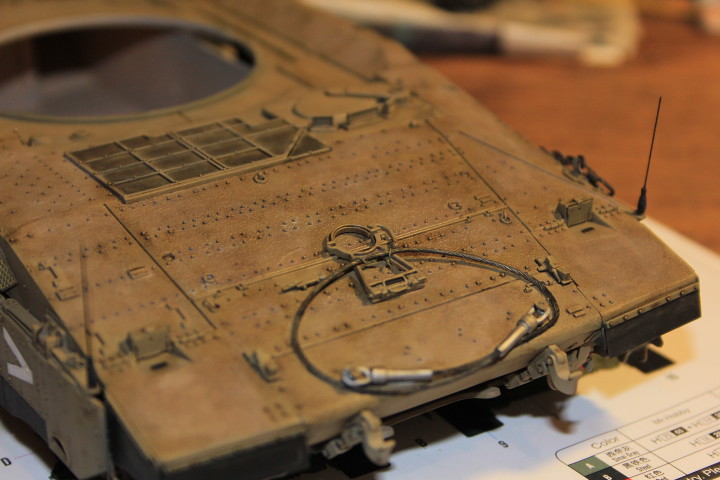 I added a pin wash. I was trying ever so hard not to get the wash into the anti-slip. It's impossible  So I decided to go the other way and basically paint the living crap out of the anti-slip and see what I get. I've hit it with 5 different oil colors at this point. Raw Umber, Buff, Orange, Burnt Umber and a hint of Black. Once it dries, I'll probably hit it with some pigments just for the hell of it. |
|
|
|
Post by wbill76 on May 4, 2013 17:16:45 GMT -5
Despite its frustrations, you've turned it into a top-notch build and finish so far mz! Looking good.
|
|
|
|
Post by Leon on May 4, 2013 17:40:33 GMT -5
Agree with Bill.Glad you hung in there mz.   |
|
mz3
Full Member
   March '24 Showcased Build Awarded
Member since: October 2012
Posts: 658
Oct 14, 2012 21:09:43 GMT -5
Oct 14, 2012 21:09:43 GMT -5
|
Post by mz3 on May 6, 2013 16:49:42 GMT -5
Update time  ... I got bored the two nights ago, so I decided to make some red oxide chips. I simply mixed red and orange oil paints with a little orchid yellow. Didn't really come out the way I wanted, but it's not a big real, since most of it will be cover to varying degree. 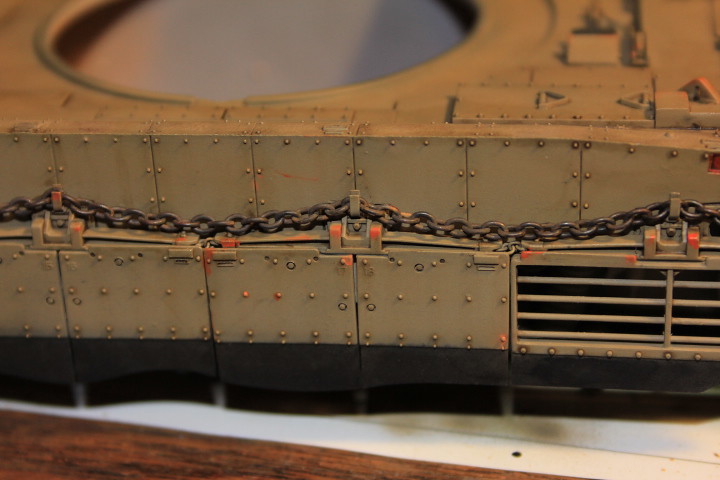 This wheels was still wet when I took the picture 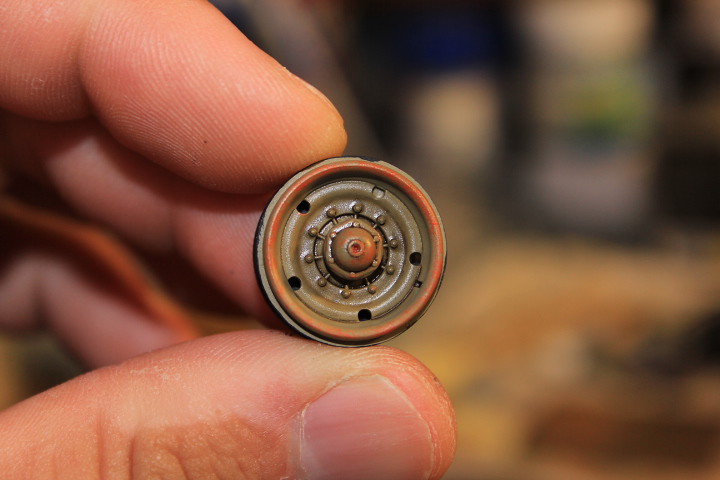 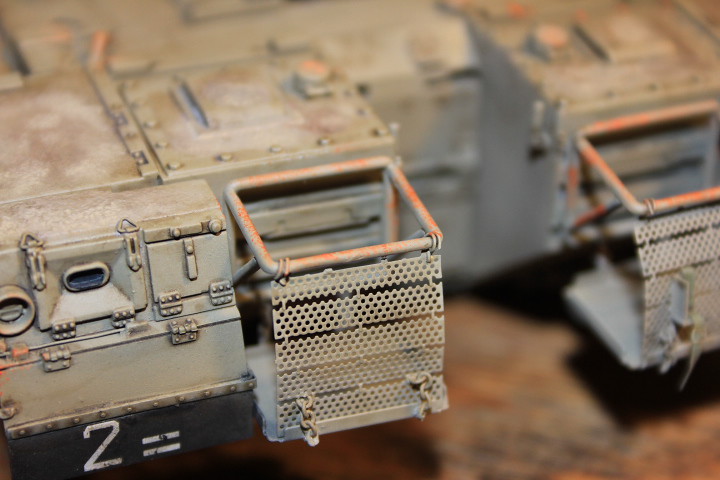 Originally I wasn't going to do this, but like I said, I got bored. I covered most of it with Raw Umber and/or the basecoat color. 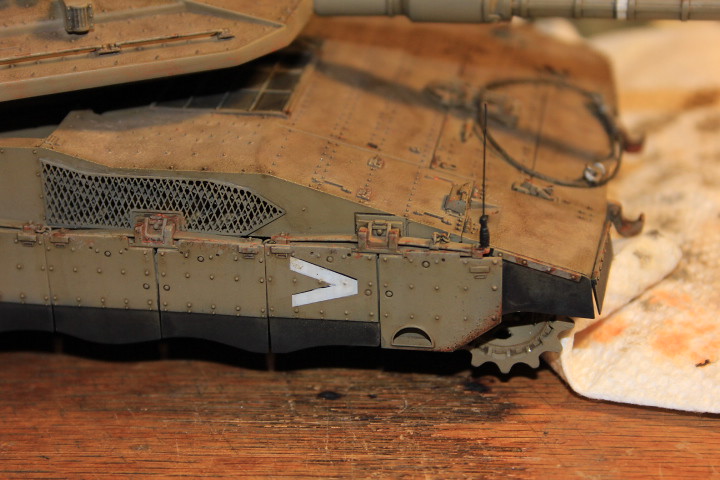 I worked the colors all day yesterday, adding and removing where ever it was needed. 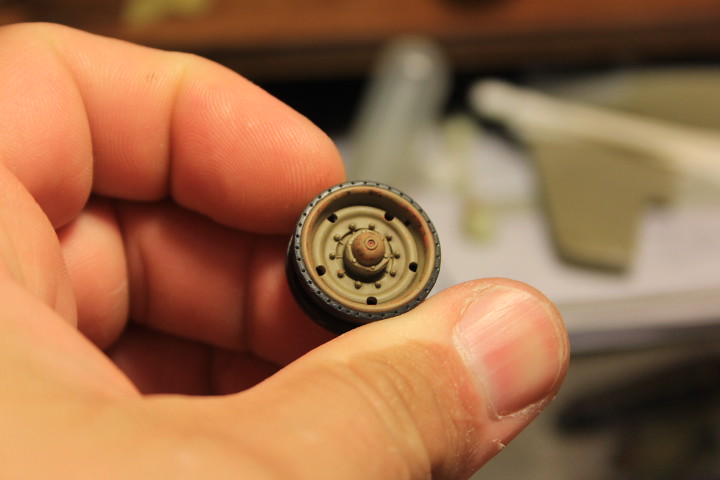 I also added some dark spots, I will go over them with a sponge and basecoat later. 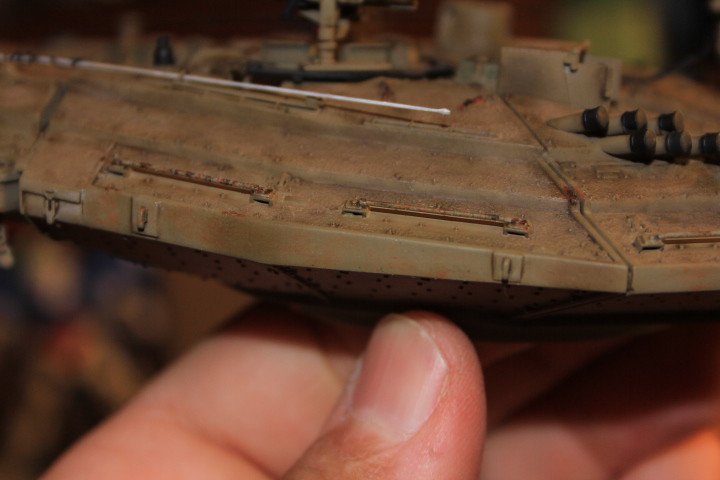 Underside of the turret got some love to. 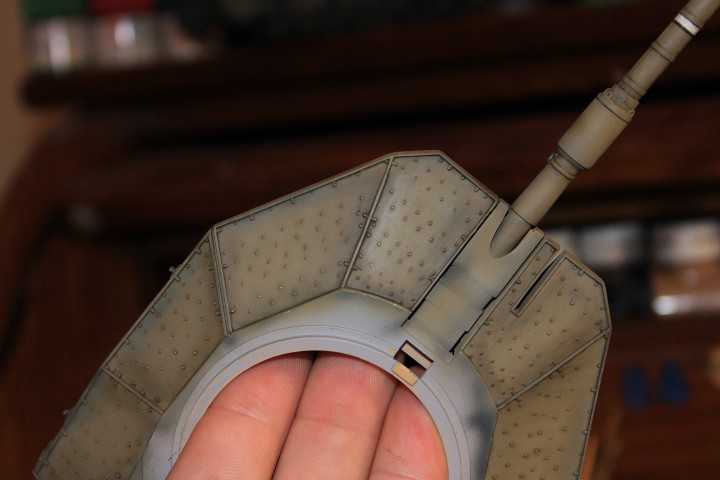 I'm not going to do too much here, it's hard to see at best. Sooner or later I'll stop with the oils and move on to dirt and dust. The fun I'm having now is making up for the pain of building. It shouldn't be like that, but it is. Oh well! More pics soon. |
|
mz3
Full Member
   March '24 Showcased Build Awarded
Member since: October 2012
Posts: 658
Oct 14, 2012 21:09:43 GMT -5
Oct 14, 2012 21:09:43 GMT -5
|
Post by mz3 on May 14, 2013 20:15:29 GMT -5
Update time... Made a bag for the 50 cal.- 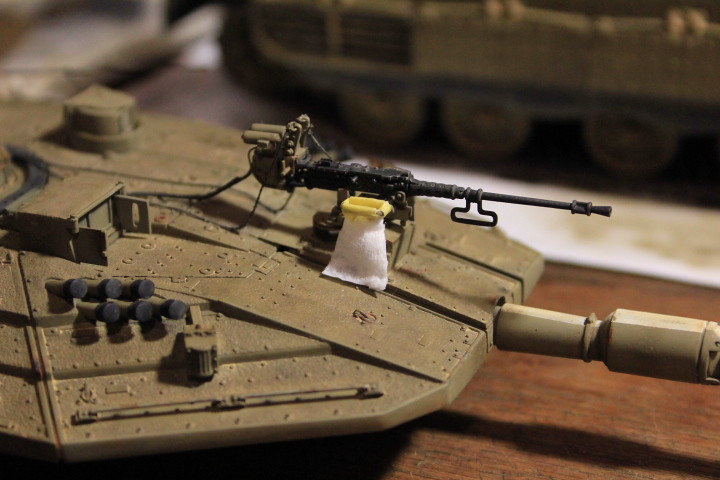 I didn't want to go overboard on this, it's simply made from tissue and Tamiya tape. 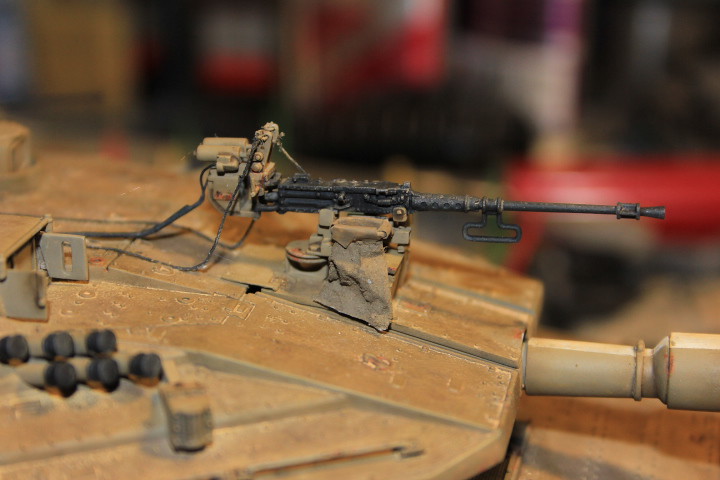 Painted it with Lifecolor flat brown. I also made bags for the rear stowage containers- 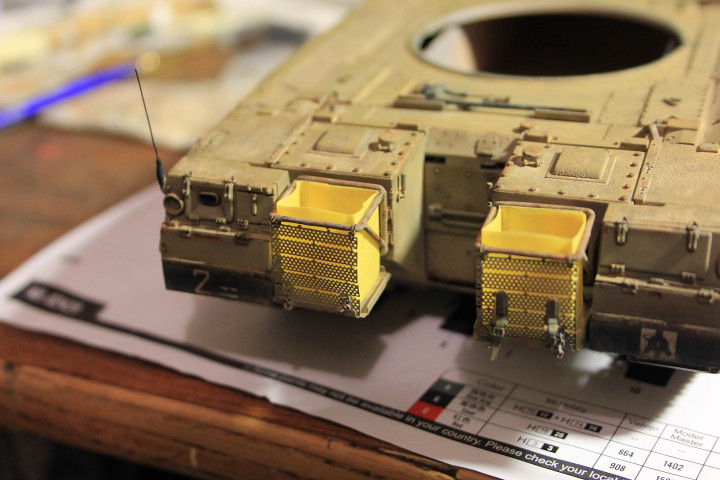 Again, Tamiya tape. Got the shape down them cut them down a bit to get them to fit better. Painted them the basecolor. 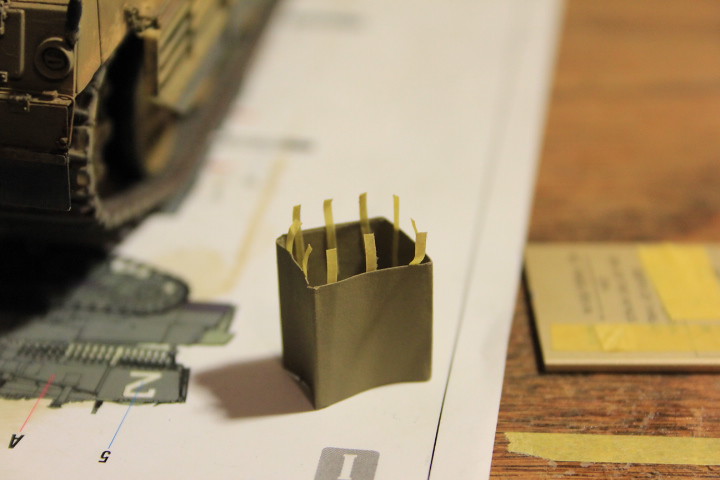 Used smaller pieces of tape for the straps. 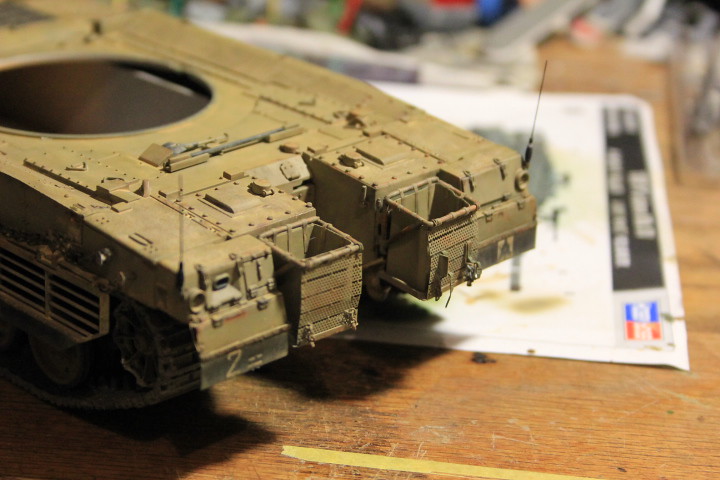 Here everything is installed. I painted the straps LC brown again. Used CA to attach the straps to the bars. I also attached the tracks. This was a MAJOR pain!!! The Friul tracks don't fit on the kit sprocket, no big deal right, the Friul set comes with sprockets. Well, THEY DON'T FIT ON THE FRIUL SPROCKET EITHER!!! You have to use 2 links without pins on the sprocket in order for it to work. Not a huge deal, but damn, at this point the problems are adding up! At least I'm almost done. I built up the dirt/sand around the whole thing with a thick oil wash- 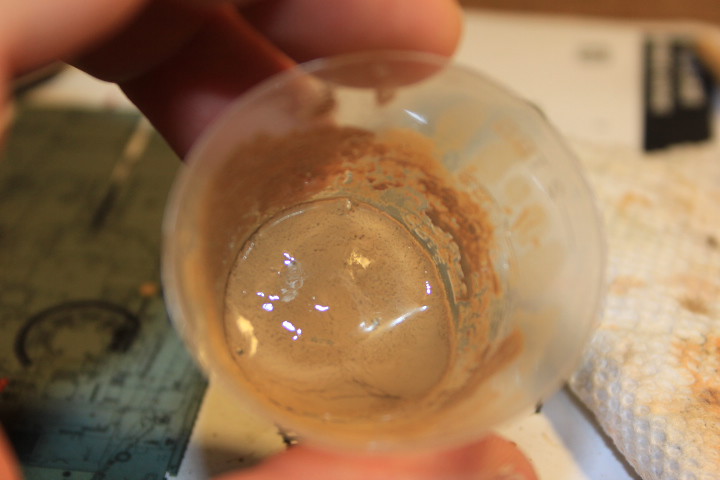 I actually made this a few days before I used it. The pigment in the paint starts to clump together and makes it good for building up dirt in corners and other places. 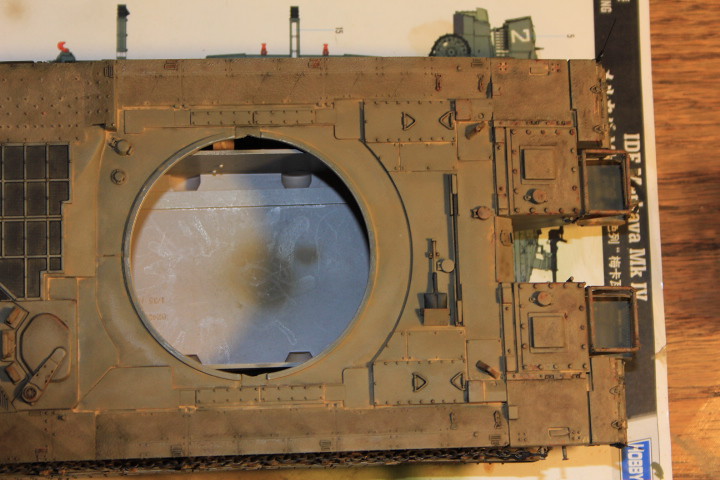 Last thing, I wasn't really getting the effect I wanted with the oils on the anti-slip, so I hit everything with a Pigment wash. I used Middle East Sand in UT, let it dry, then worked it in/off with a stiff brush. Then went over all of it with Vallejo Matt mixed 50/50 with water. The Vallejo toned down the pigment so it looked exactly the way I wanted it to look. 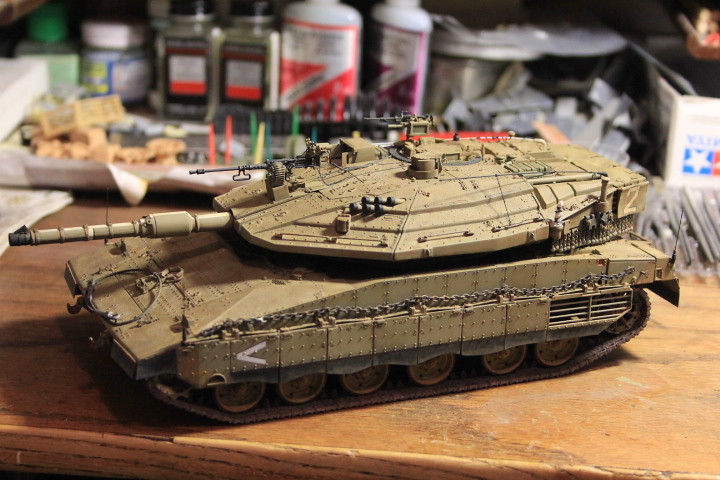 Right now it's sitting on the bench getting little touch ups. I accidentally knocked off one of the outer markers, I broke the wire off and couldn't really get it to glue back right. So I took the whole thing off and replaced it with rust paint. I'll get final pics up soon. I think I need to lighten the basecoat up a little on my next one. After the weathering steps, the paint looks brown, not the IDF color. Even if you take into consideration the color of the real Merkavas seems to change depending on the light, I still don't think it looks correct. |
|
|
|
Post by wbill76 on May 15, 2013 20:03:29 GMT -5
Stick with it! You're almost there! Looks good from here.
|
|
|
|
Post by bbd468 on May 15, 2013 20:53:13 GMT -5
Hey Mz3, Sorry im late to this party!  Your Merk looks superb fella! Love the color, weathering and details....well done man!  |
|
|
|
Post by Teabone on May 15, 2013 22:51:57 GMT -5
mz3
Got here late but I'm impressed with the build particularly the bags are just outstanding and something that I can never get right, the washes have really brought your color in nicely also, a good build and the merk balls look OK probably because they are uniform. I always wonder if they really work.
Bones
|
|
|
|
Post by robbo on May 16, 2013 2:13:28 GMT -5
Very nice work on show here mate, like it loads
|
|
|
|
Post by rbaer on May 24, 2013 12:31:08 GMT -5
I'm hearing pain, but the build sure looks nice.....
One thing I will say about IDF stuff: their equipment gets hosed with new paint on a pretty regular basis, so be careful with chips and rust, even in high-use areas.
|
|
mz3
Full Member
   March '24 Showcased Build Awarded
Member since: October 2012
Posts: 658
Oct 14, 2012 21:09:43 GMT -5
Oct 14, 2012 21:09:43 GMT -5
|
Post by mz3 on May 24, 2013 14:14:28 GMT -5
Most of the chips were covered with dirt and theblasr step I took was to go over all the remaining chips with the base coat and cover them. Only a hint of chipping is visible. I'll get some final pics up today.
|
|
mz3
Full Member
   March '24 Showcased Build Awarded
Member since: October 2012
Posts: 658
Oct 14, 2012 21:09:43 GMT -5
Oct 14, 2012 21:09:43 GMT -5
|
Post by mz3 on May 24, 2013 17:41:01 GMT -5
|
|
|
|
Post by Tojo72 on May 24, 2013 17:53:17 GMT -5
Nice job,love that ball and chain armor,it's worth the effort
|
|
|
|
Post by wbill76 on May 24, 2013 20:42:09 GMT -5
Nice on mz! You should enter this in the MoM!
|
|
|
|
Post by deafpanzer on May 25, 2013 20:54:57 GMT -5
Stunning build!!! It reminds me of those sic-fi tanks!
|
|
|
|
Post by Teabone on May 25, 2013 22:16:18 GMT -5
Mz
You should get the prize for the ball & chains if nothing else on a truly great build, there were some other outstanding scratch work there too.
Bones

|
|
|
|
Post by TRM on May 25, 2013 22:24:46 GMT -5
Well done on this one!! Outstanding weathering!!
|
|
Deleted
Member since: January 1970
Posts: 0
Dec 2, 2024 3:08:51 GMT -5
Dec 2, 2024 3:08:51 GMT -5
|
Post by Deleted on May 26, 2013 14:33:15 GMT -5
Cracking looking beastie, very impressive build
|
|
mz3
Full Member
   March '24 Showcased Build Awarded
Member since: October 2012
Posts: 658
Oct 14, 2012 21:09:43 GMT -5
Oct 14, 2012 21:09:43 GMT -5
|
Post by mz3 on May 27, 2013 15:38:36 GMT -5
Thanks everyone!!!
|
|
elco
Full Member
   July & Oct 2014 MoM Winner
Member since: May 2013
MOY 2014 Winner
Posts: 660 
|
Post by elco on May 27, 2013 15:49:17 GMT -5
Nice job, looking great with all those nice details!
|
|


 i just opened my academy merkava IV and im still figuring out how to make the antislip pattern as rustoleum is not available here in the PH


 So I decided to go the other way and basically paint the living crap out of the anti-slip and see what I get. I've hit it with 5 different oil colors at this point. Raw Umber, Buff, Orange, Burnt Umber and a hint of Black. Once it dries, I'll probably hit it with some pigments just for the hell of it.


 Your Merk looks superb fella! Love the color, weathering and details....well done man!