iking
Full Member

Member since: November 2012
Posts: 244
Nov 22, 2012 3:24:55 GMT -5
Nov 22, 2012 3:24:55 GMT -5
|
Post by iking on May 6, 2013 8:40:20 GMT -5
Hi guys, As my T-62 build went to a close, we had a spur to build some IDF items for the upcoming club NAtionals meet in October 2013. As for my overeager excitement, I ripped open some of my IDF items for the contribution. These are 3 tanks but ill be mainly focusing on the Tiran 5 and Merkava 4. The MErkava 1 is a Tamiya kit so its a shake and bake kit and doesn't need much tender loving care haha!  here it goes: 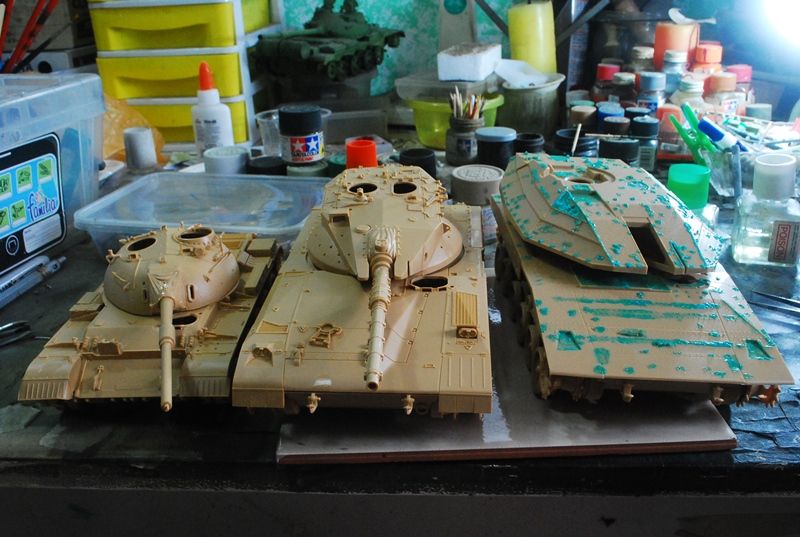 The Merkava 4 is already built and masked with Gunze Mr Masking Sol in preparation for the application of anti-slip covering. This is the old academy kit that doesn't include the anti slip. Rustoleum is not available here in the RP so Ill improvise on other methods to incorporate the anti-slip. 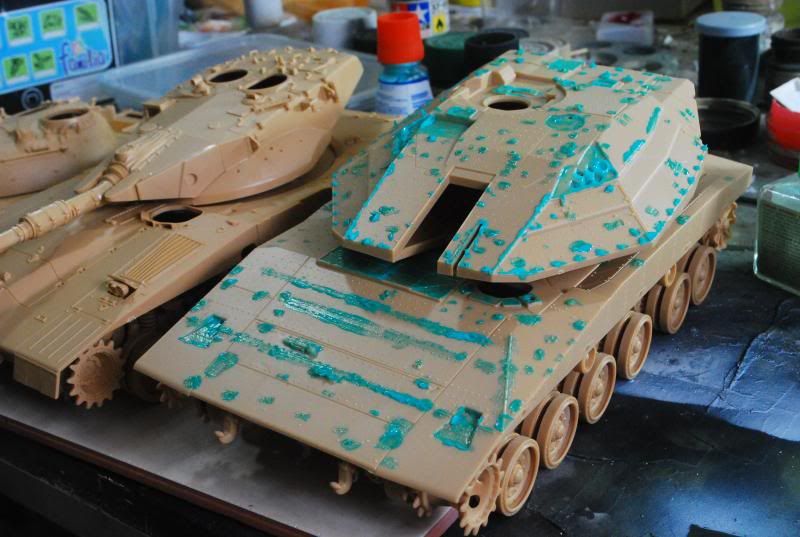 comrades, feel free to post suggestions and critics as I am a noobie in building a Merkava  cheers comrades! iking |
|
|
|
Post by dupes on May 6, 2013 9:03:02 GMT -5
Got a bunch of these waiting in the wings, so I can't WAIT to see what you do with them! |
|
Deleted
Member since: January 1970
Posts: 0
May 5, 2024 20:04:21 GMT -5
May 5, 2024 20:04:21 GMT -5
|
Post by Deleted on May 6, 2013 10:53:54 GMT -5
iking did you see my suggestion in another thread?
Go to a craft store and try to find "embossing powder" or "distressing powder". It comes in small jars in the scrapbooking section. color doesn't matter but I have a jar of brown which would be fine on a IDF Merkava. Use some paint or glue then sift the powder onto that.
It makes a great anti slip for a Merkava as well as carpet in a 1/25 scale car!
G
|
|
|
|
Post by TRM on May 6, 2013 11:26:51 GMT -5
Nice work there IKing!! Looking froward to seeing these progress!!!
|
|
|
|
Post by bullardino on May 6, 2013 11:57:11 GMT -5
IDF is something that I've always loved. I will follow, I have to |
|
Deleted
Member since: January 1970
Posts: 0
May 5, 2024 20:04:21 GMT -5
May 5, 2024 20:04:21 GMT -5
|
Post by Deleted on May 6, 2013 14:52:23 GMT -5
IDF is something that I've always loved. I will follow, I have to Follow if for no other reason than to participate in the age old debate: "What frakkin' color is a Merkava anyway?"  G |
|
|
|
Post by bullardino on May 6, 2013 15:03:22 GMT -5
LOL, go and ask in some IDF dedicated forum. But before doing so, wear an EOD  |
|
|
|
Post by wbill76 on May 6, 2013 16:30:31 GMT -5
Nice trio of IDF vehicles in the blocks there Iking, looking forward to this. |
|
Deleted
Member since: January 1970
Posts: 0
May 5, 2024 20:04:21 GMT -5
May 5, 2024 20:04:21 GMT -5
|
Post by Deleted on May 6, 2013 17:38:22 GMT -5
LOL, go and ask in some IDF dedicated forum. But before doing so, wear an EOD IDF in scale has TWO threads on the topic and both are 15+ pages.  Spent a lot of time in a bomb suit 20+ years ago. I don't miss that, though working the Bomb Squad was a blast................. G |
|
|
|
Post by bullardino on May 7, 2013 1:21:25 GMT -5
LOL, go and ask in some IDF dedicated forum. But before doing so, wear an EOD IDF in scale has TWO threads on the topic and both are 15+ pages. Spent a lot of time in a bomb suit 20+ years ago. I don't miss that, though working the Bomb Squad was a blast................. G I don't envy you, it doesn't look a relaxing job. I saw an EOD a couple of days ago and it looks even heavier than in pics. |
|
Deleted
Member since: January 1970
Posts: 0
May 5, 2024 20:04:21 GMT -5
May 5, 2024 20:04:21 GMT -5
|
Post by Deleted on May 7, 2013 9:31:09 GMT -5
The suit itself was, as I recall, 93 lbs. The helmet was another 5 or 6. Doesn't sound like much until you wear it.
G
|
|
iking
Full Member
Member since: November 2012
Posts: 244
Nov 22, 2012 3:24:55 GMT -5
Nov 22, 2012 3:24:55 GMT -5
|
Post by iking on May 8, 2013 0:44:51 GMT -5
Thanks guys for the support! Ill make this trio work as im still a noobie in IDF combat vehicles. Yup agentg, I saw your suggestions thanks for that! here are ome updates: Merkava Mk 1 It is built and ready to be painted once the putty applied to the minor gaps are dry and sanded. Question: Did the Merkava 1 always sported the ballchain anti-rpg protection under the rear turret undercut? I saw some pics who doesnt. Im making a merkava mk 1 during the 1982 Lebanese conflict. 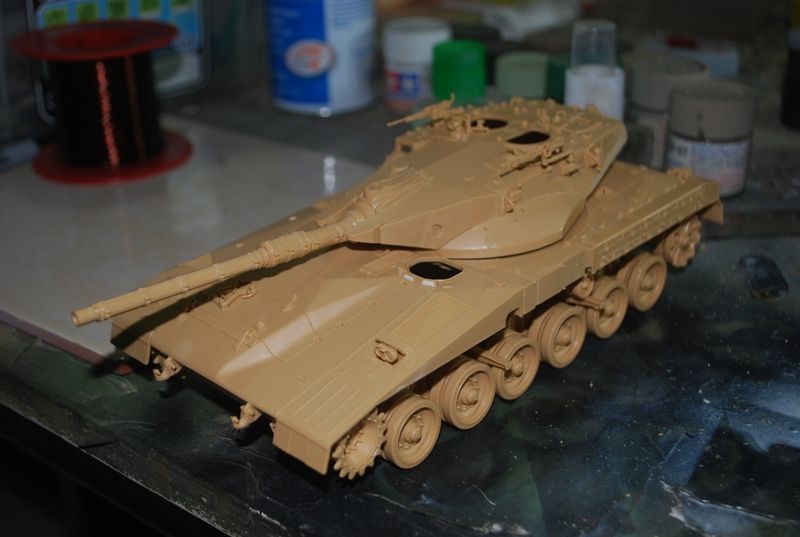 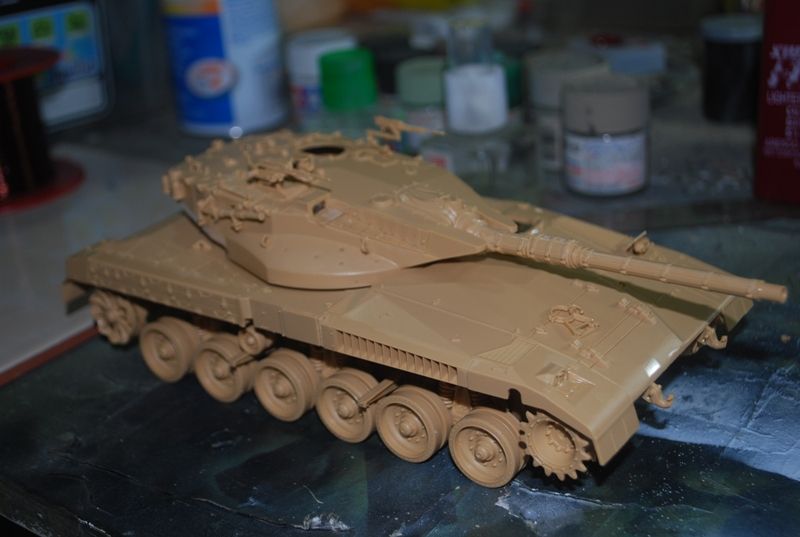 Tiran 5 Is already built and details were already added. This will be built with everything in the box; no parts will be sawed-off nor chopped. Added details are below: 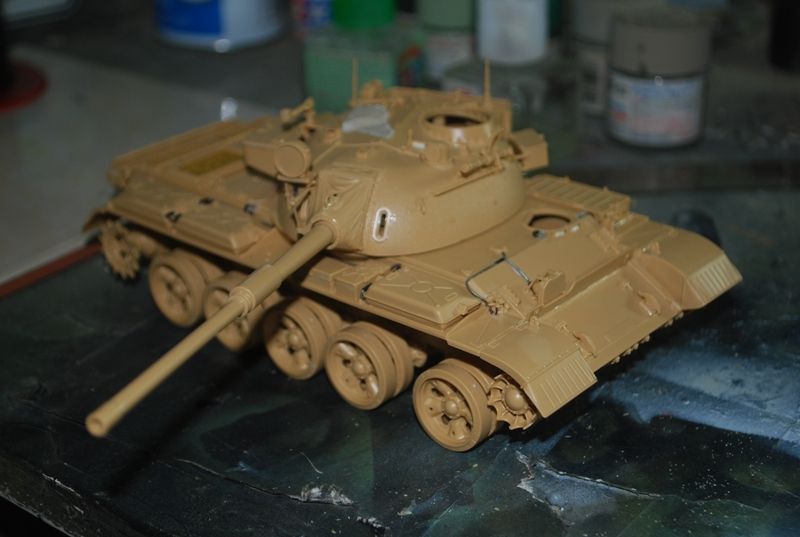 Wirings for the blow horn and for the position lights marker were done from wires and smaller gauge copper wires. 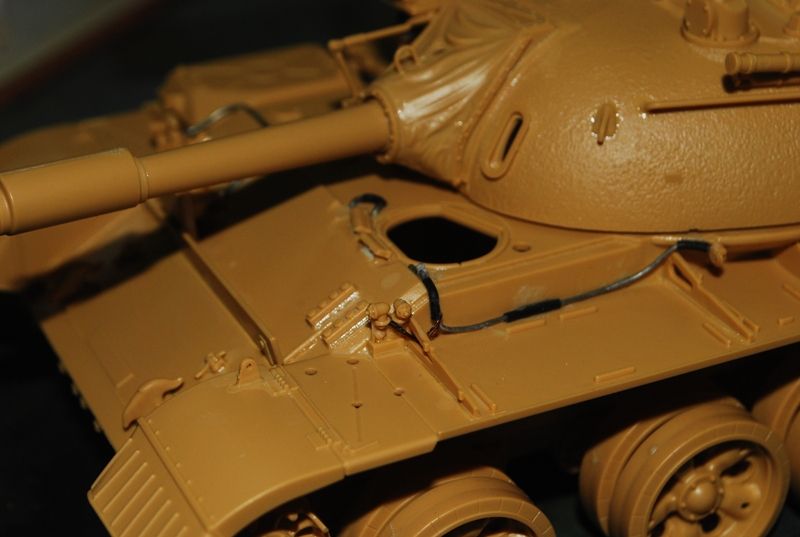 This is similar to the layout of the T-62 wirings. Port-side front hull featuring the wirings for the IR and White lights and also for the portside position lights. 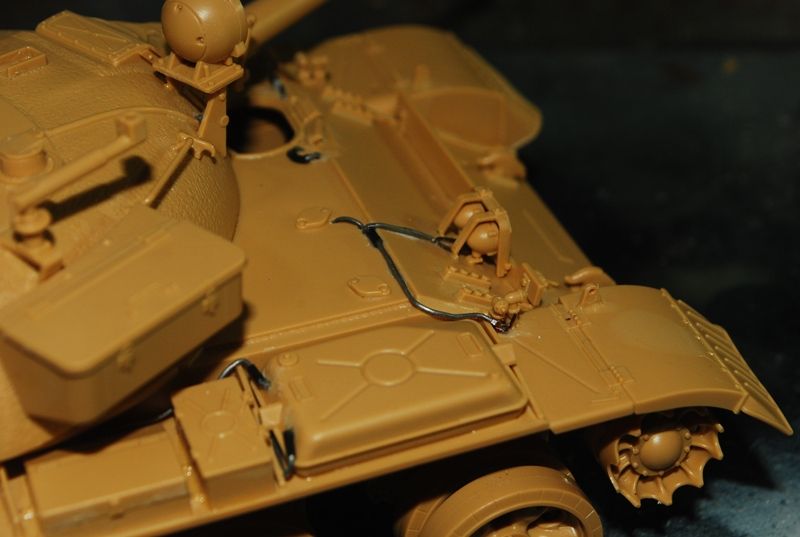 You can also notice that the fuel plumbings for the port side, sole fuel cell is also added. Thanks The engine deck were spiced-up using a copper mesh for the engine grills instead of using the kit-supplied vinyl mesh which is toy-like. 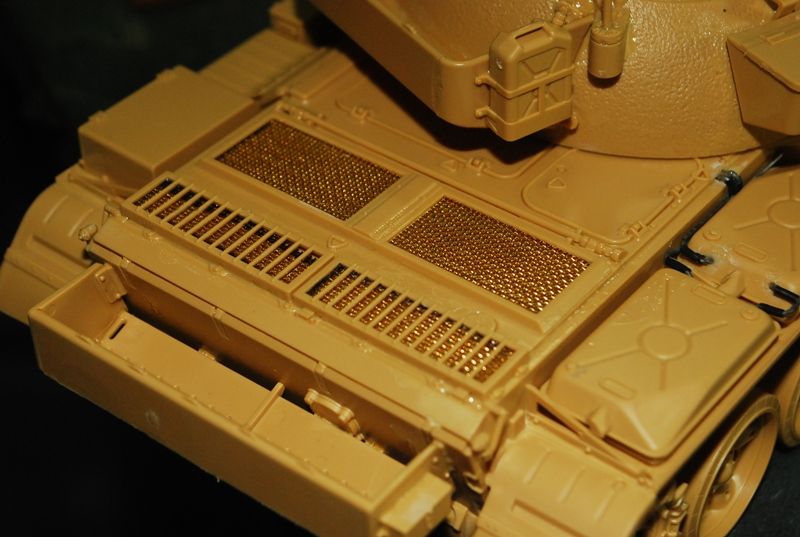 Also noticeable is the rear end fuel cells' plumbing details. Merkava Mk 4 The old academy Merkava Mk 4 was devoid of the anti-slip surface coating so I have to improvise it through the use of a hairspray as the adhesive and a sprinkled, good ole' souvenir beach sand from Bolinao Pangasinan, Philippines. Once it is dry, I will prick open the green, paint masking solution and then coat the whole kit with a lacquer-based grey primer to seal the deal. Well, the sand granules seemed to adhere already to the surface that was coated with the hairspray.  I just hope this works for my kit. The drawback with this hairspray technique.....your room will smell like a salon haha! Thanks for looking guys! cheers! iking[/s] |
|
|
|
Post by Leon on May 8, 2013 4:57:07 GMT -5
Iking that trio is looking sweet.Waiting for more progress.Keep up the fine work fella. |
|
|
|
Post by bullardino on May 8, 2013 8:44:06 GMT -5
Nice progress Iking AFAIK Merkava 1 didn't sport any ballchain rpg protection, but I'm no IDF expert too, so maybe we're better wait for someone who does. |
|
|
|
Post by wbill76 on May 8, 2013 19:37:54 GMT -5
Nice progress on the trio Iking...having your workbench smell like a salon is a small price to pay for sure. There are far worse things it could've ended up smelling like... |
|
|
|
Post by rbaer on May 9, 2013 11:25:45 GMT -5
NEAT trio. I'll be watching as well. BTW, most pics of Merkava 1s in Lebanon show them without the ball and chain (does that mean they were un-married?). I'm pretty sure that the Peace for Galilee campaign is where the need for it was made apparent.
|
|
iking
Full Member
Member since: November 2012
Posts: 244
Nov 22, 2012 3:24:55 GMT -5
Nov 22, 2012 3:24:55 GMT -5
|
Post by iking on May 15, 2013 1:14:32 GMT -5
Hi guys, Thanks Leon, Luigi, WBill, RBaer and Dicky for the kind words! I might not install the anti-RPG ball chains on the Merkava Mk 1 and will built it OOB. So fare here are my updates. It was a long weekend for us here so I managed to update my IDF build on the shelves and experimented on the IDF Sinai Grey shades. For the Tiran 5, I managed to do the primer and pre-shade of black along the panel lines. These were done using hardware spray lacquer grey primer and flat black thinned with Gunze. 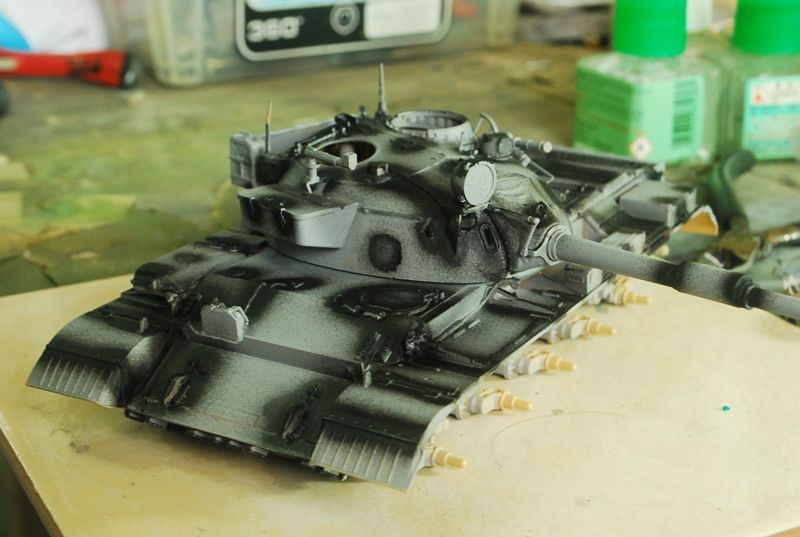 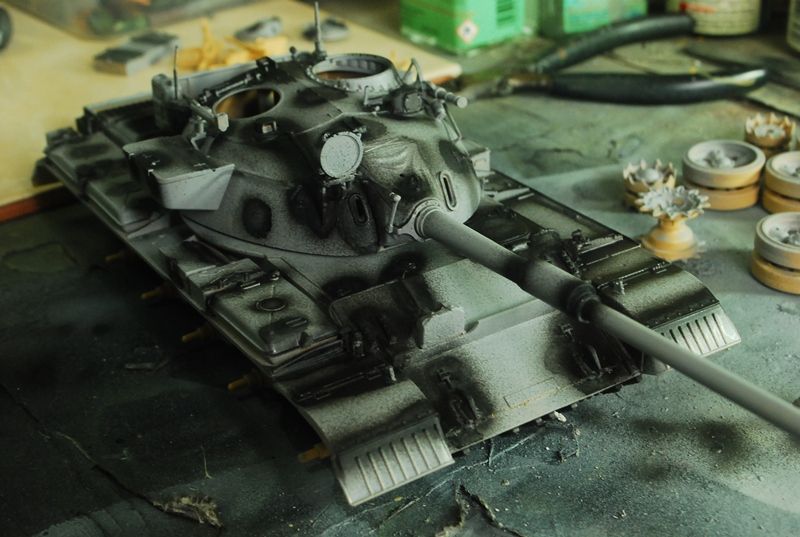 After the preshades have dried, I followed the suggested paint mix in the Tamiya kit. They are Tamiya Khaki and Tamiya Medium Grey on 1:1 ratio. 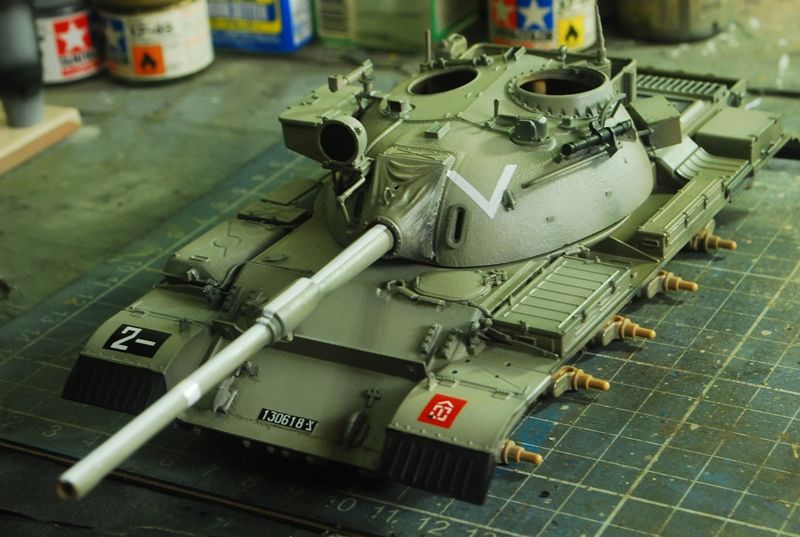 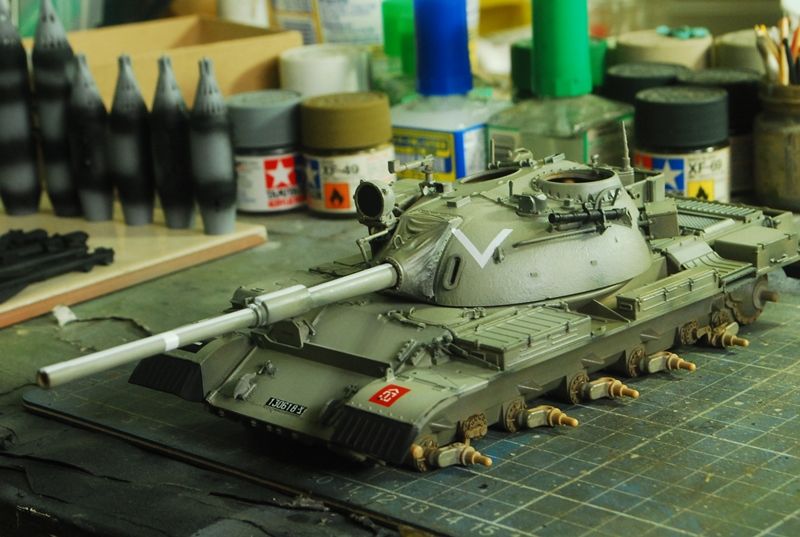 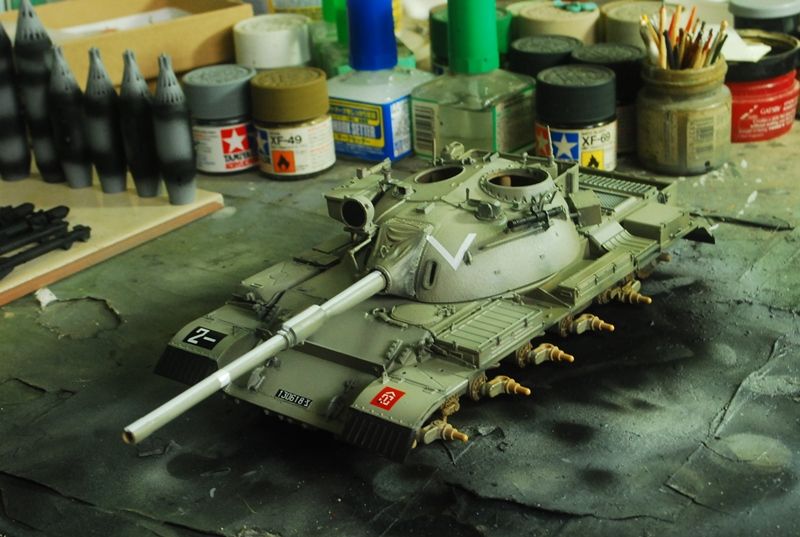 The panels were sprayed with this color and once they have dried, I re-used the Sinai Grey mix but lightened it with Flat White to give an impression of weathering and sun damage from the scorching Middle Eastern sun. The lightened mix were then sprayed on a random basis on the top surfaces of the tank. The results were sataisfactory for my eyes and if not exact, it's near the shade of the Tiran-5 from Verlinden's book. Also, I will make this into a 'Peace in Galilee' vehicle and the shade shows that it is similar on the vehicles that were used around this time. For the Merkava Mk 1, it will be painted with the same Tamiya-suggested mix as the Merkava Mk 1 will also be built and finished as an AFV that also participated in the Peace in Galillee operations. 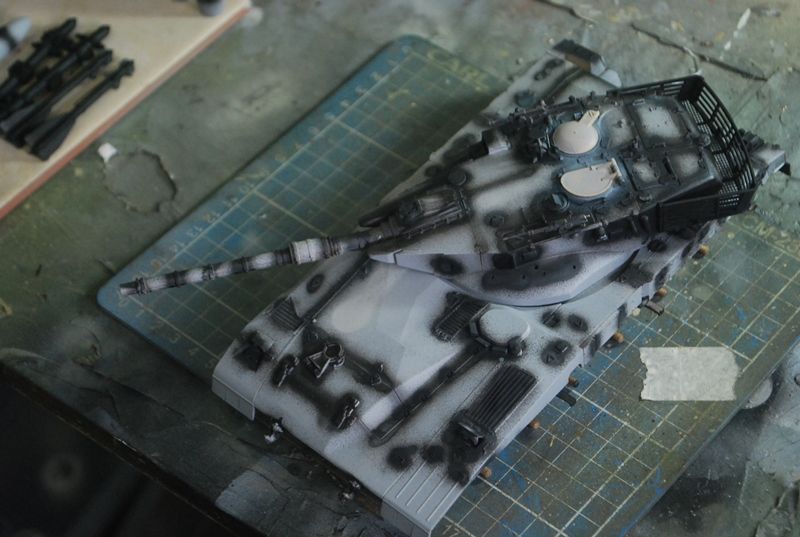 The Merkava Mk 4 is quite interesting with the new technique that I have learned from a fellow modeler. The hairspray has dried and it has adhered the sprinkled sand on the hull surface. I then pricked out the masking solution using a borer instrument (ask the missus about it haha!) that is being used on facial treatments hahaha! It's cheap, it is sharp and not pointed that much so it wont scratch, dent or ding the hull sruface. Just enough to prick out the masking solution. After I was done pricking out the masking solution, I sprayed and coated it with grey primer to seal it completely. 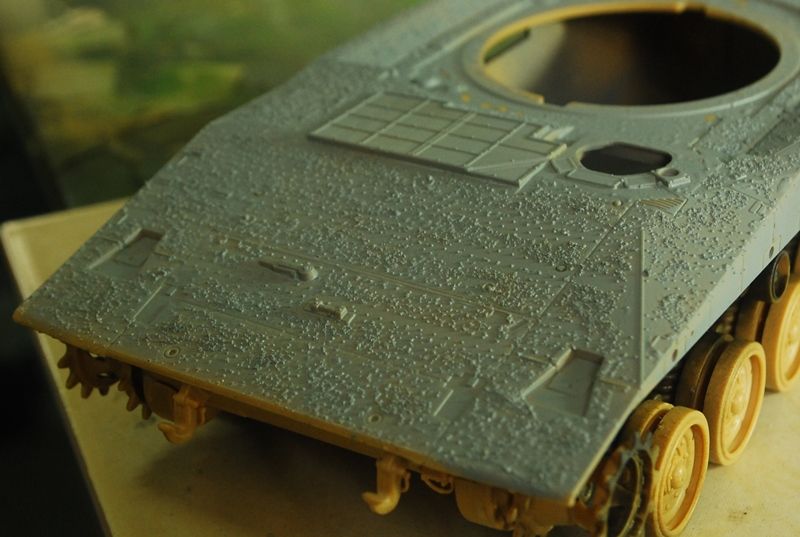 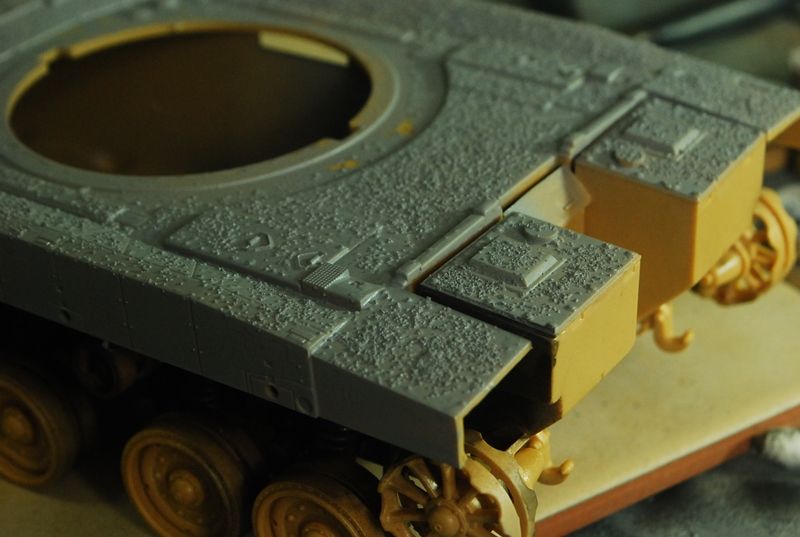 As you can see, the anti-slip pattern is now ready and the other small parts like the periscopes, et al. can now be attached. As this was a demo test re the sand/hair spray technique, I did not yet apply it to the turret just in case the hull tests fail. However, as I was satisfied, I then proceeded with the sand sprinkling on the turret superstructure. 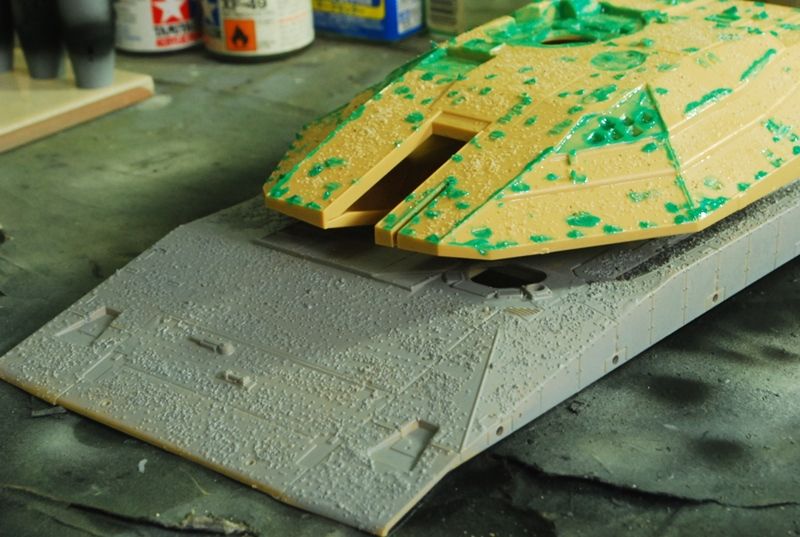 Once this is dry, I will prick out the masking solution and seal the sand with primer for the construction to proceed on the hull and turret. That's all for now fellows. Cheers! Iking |
|
|
|
Post by bullardino on May 15, 2013 8:27:16 GMT -5
Nice progress Iking. Can you show us a pic of the borer tool you used?
|
|
|
|
Post by wbill76 on May 15, 2013 20:09:06 GMT -5
Looks like the experiment paid off nicely! The Tiran's looking sharp also. As for appropriating beauty supplies for model work, that's a regular occurrence...nothing like 'found' materials to make your life easier. Just be sure to buy a brand new one for your significant other to avoid any domestic disputes. |
|
|
|
Post by deafpanzer on May 15, 2013 22:07:17 GMT -5
Great work there!!!
|
|
|
|
Post by rbaer on May 18, 2013 12:00:20 GMT -5
Very nice.... anti-slip looks good too. That's something that I've seen hugely over-done before, but I think you've nailed it.
|
|
Deleted
Member since: January 1970
Posts: 0
May 5, 2024 20:04:21 GMT -5
May 5, 2024 20:04:21 GMT -5
|
Post by Deleted on May 18, 2013 18:58:58 GMT -5
Looks great so far!
G
|
|
iking
Full Member
Member since: November 2012
Posts: 244
Nov 22, 2012 3:24:55 GMT -5
Nov 22, 2012 3:24:55 GMT -5
|
Post by iking on May 24, 2013 14:45:08 GMT -5
Thank you Luigi! Yup will take photos of that instrument:) Thanks WBill, Deafpanzer, Rbaer and AgentG! Washes were now applied to the Tiran. The AK Dark Wash and Tamiya Black and Brown washes were used for this. Some rust washes were also used. 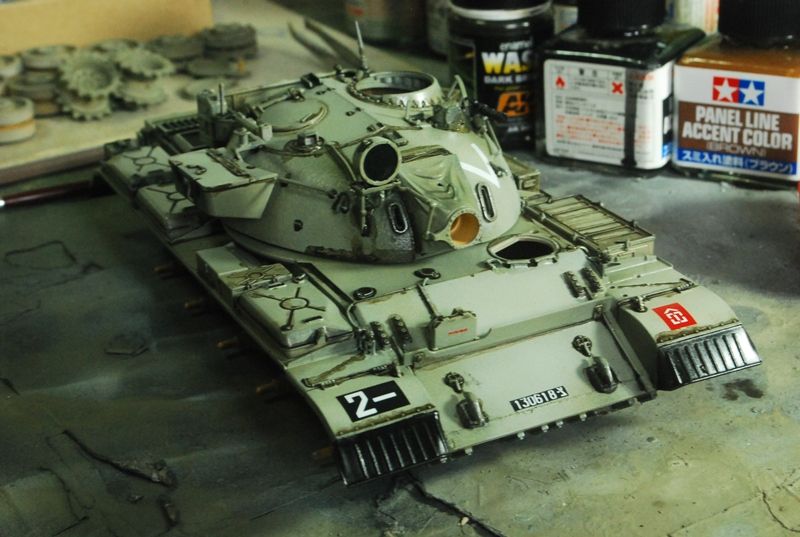 Cleaned the washes after some time and it now looked like this. 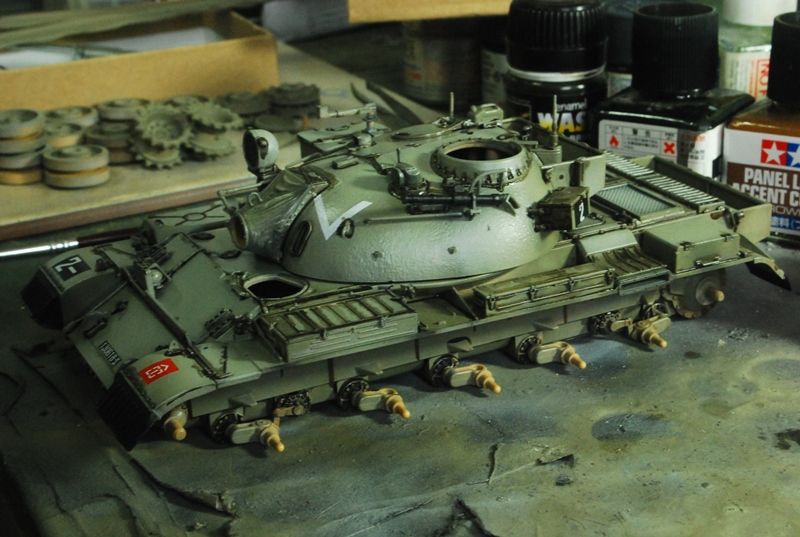 After the washes, the AK streaking grimes were used in a manner of random vertical lines. 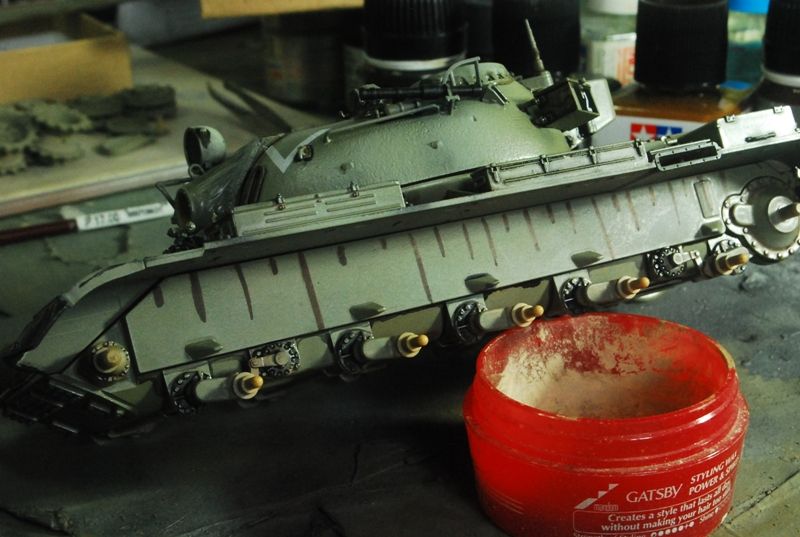 Cleaned it up with solvents so simulate rust drips and streaks. 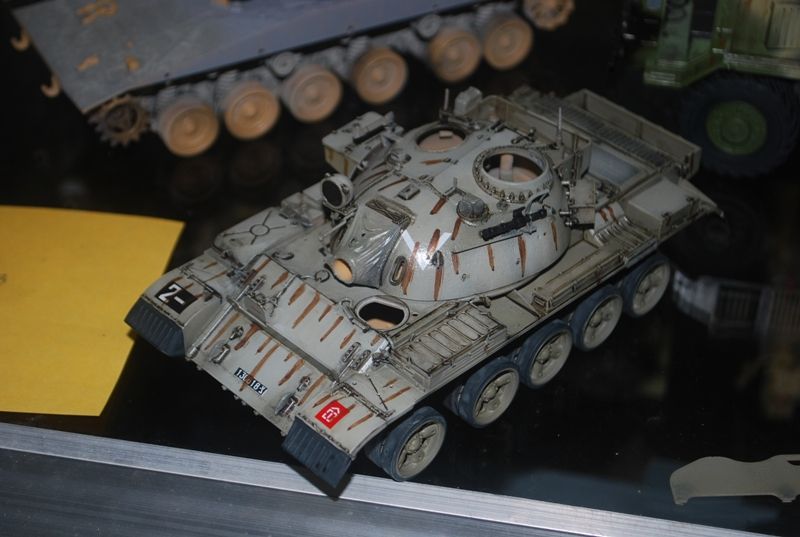 It looked like this after the washes and streaks were done and cleaned. 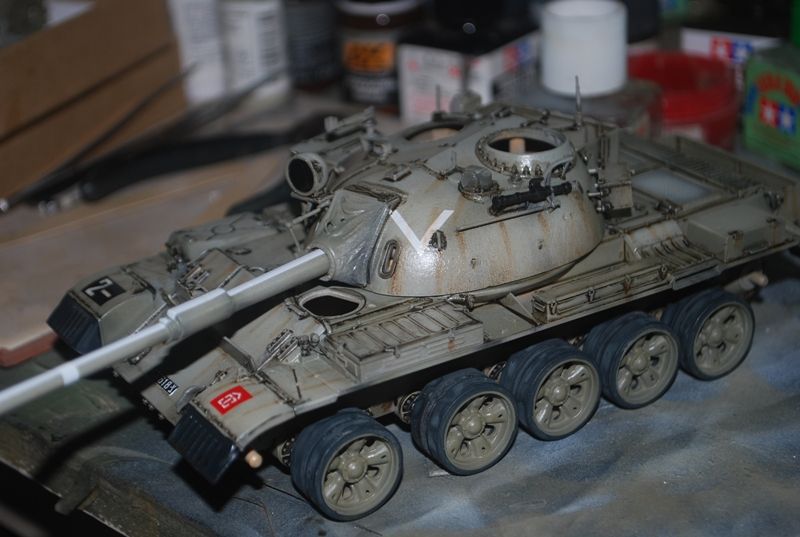 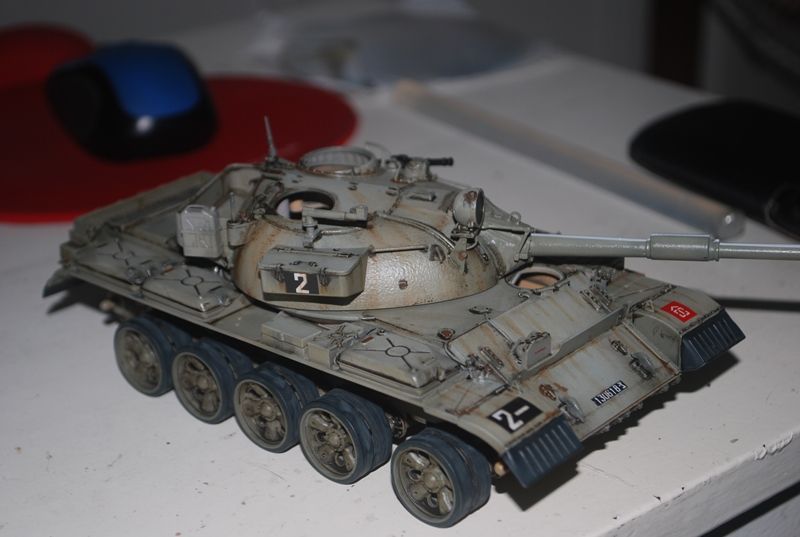 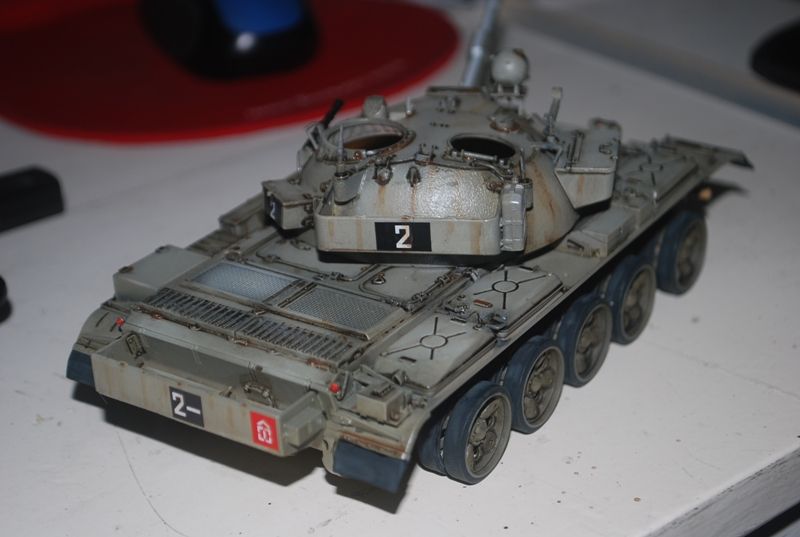 Merkava Mk 1. I painted it already with Tamiya Khaki and Light Grey 1:1 ratio. It was then washed with enamels by Tamiya and AK interactives. The tank was coated with a gloss coat to make the washes flow better on the panels and crevices and nooks and crannies. 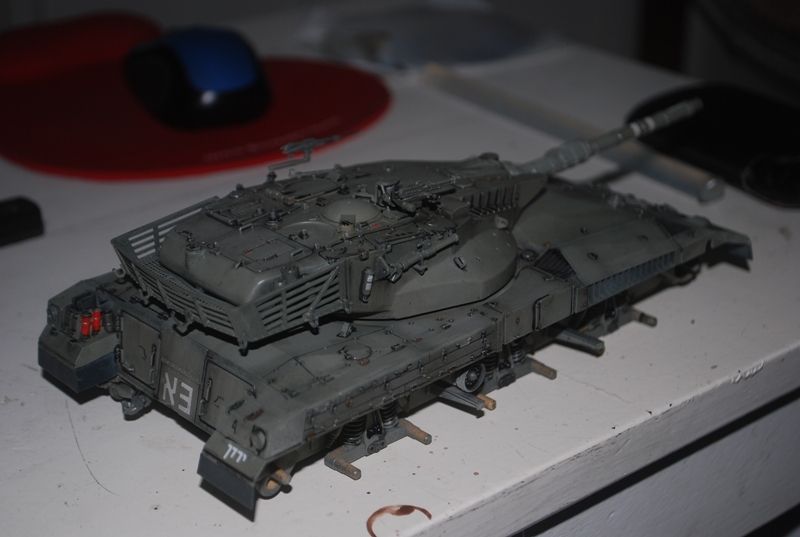 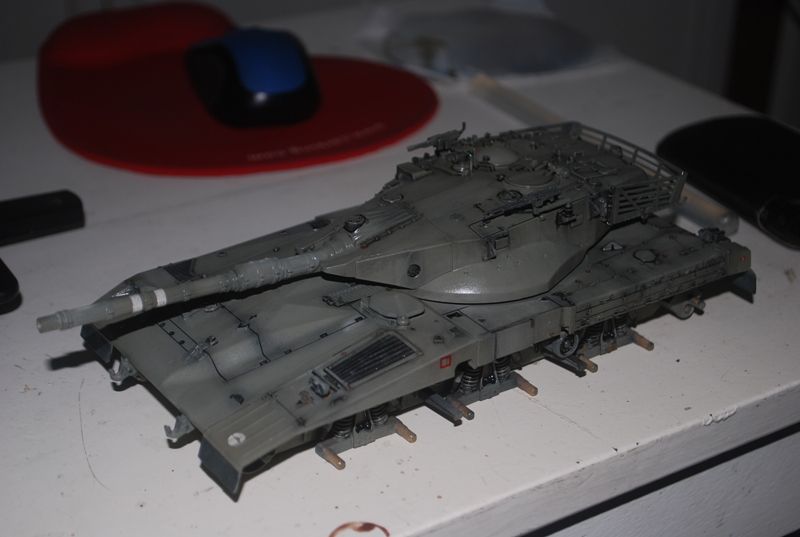 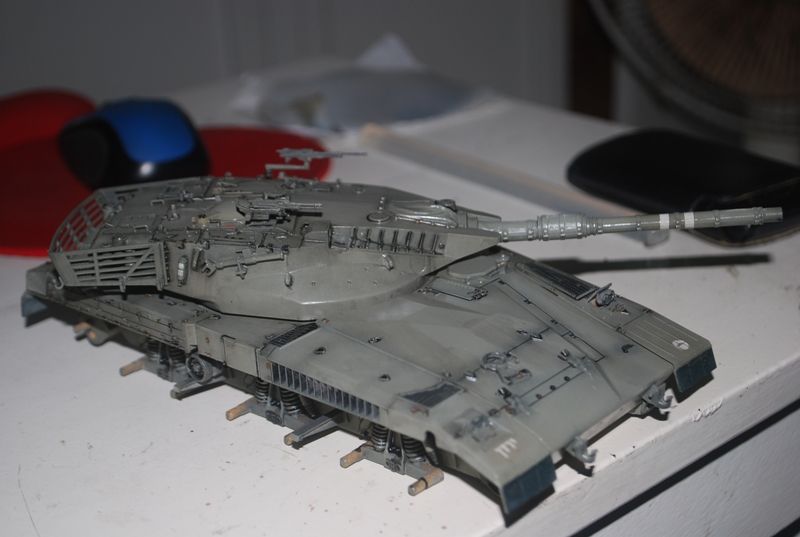 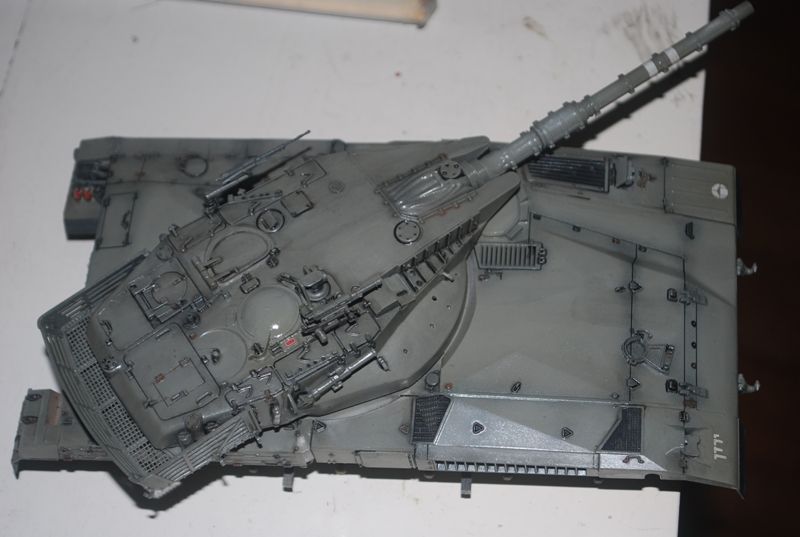 Merkava Mk 4 is now being assembled further with the small details as the hairspray and sand coating has dried and has served as the anti slip pattern. 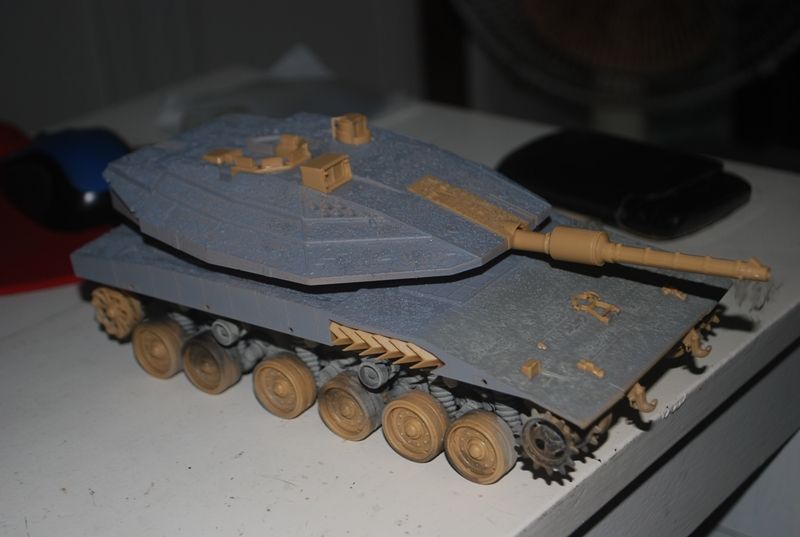 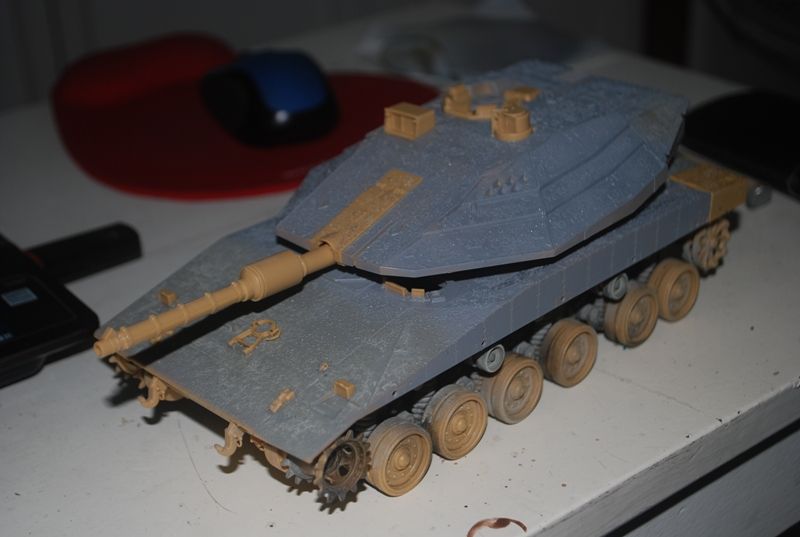 The trio. 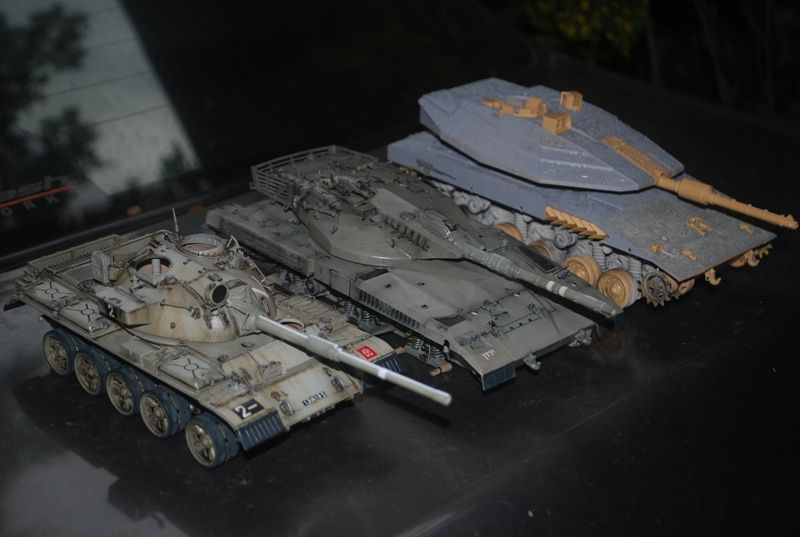  Cheers! Iking |
|
|
|
Post by wbill76 on May 24, 2013 20:49:53 GMT -5
Seeing the three of them lined up like that is kind of like a time-lapse shot! Also interesting to see the size difference between them.
|
|
Deleted
Member since: January 1970
Posts: 0
May 5, 2024 20:04:21 GMT -5
May 5, 2024 20:04:21 GMT -5
|
Post by Deleted on May 25, 2013 0:19:08 GMT -5
You have definately captured the essence of "Sinai Gray" on that Merkava I. Great work so far! If I may add a suggestion, for the Merkava IV go a bit heavier on the Khaki, it should be a slight bit darker than the color on the Tiran.
Bill I took the turret of a Academy Merkava IV and compared it with some of my builds. The turret itself is the same general size as an entire M4 Sherman.
G
|
|
|
|
Post by bullardino on May 25, 2013 15:08:09 GMT -5
Very nice, Iking. The three side by side look like the bear family from the fairy tale.
|
|
Deleted
Member since: January 1970
Posts: 0
May 5, 2024 20:04:21 GMT -5
May 5, 2024 20:04:21 GMT -5
|
Post by Deleted on May 26, 2013 14:29:29 GMT -5
great stuff and interesting to see the evolution of IDF tanks
|
|
iking
Full Member
Member since: November 2012
Posts: 244
Nov 22, 2012 3:24:55 GMT -5
Nov 22, 2012 3:24:55 GMT -5
|
Post by iking on May 28, 2013 15:50:06 GMT -5
thanks guys! im gonna post my latest wip for these babies. IDF is so much fun I guess I might take a break from Russian 'burger bun' turrets hahaha! I am researching the www for types of earth colors in N ISrael and I found some pics that shows red earth to the point that the merkava is almost red oxide in color The 3 tanks when lined up really shows the size difference. The T-55 can be run over by the Mk 4 cheers! iking |
|
iking
Full Member
Member since: November 2012
Posts: 244
Nov 22, 2012 3:24:55 GMT -5
Nov 22, 2012 3:24:55 GMT -5
|
Post by iking on May 29, 2013 11:27:57 GMT -5
hey guys, heres a quick update on the IDF task force:D Tiran 5 The Tiran is nearing completion. Weathering was executed already using a variety of mediums like AK, Tamiya, and oil paints with solvents. 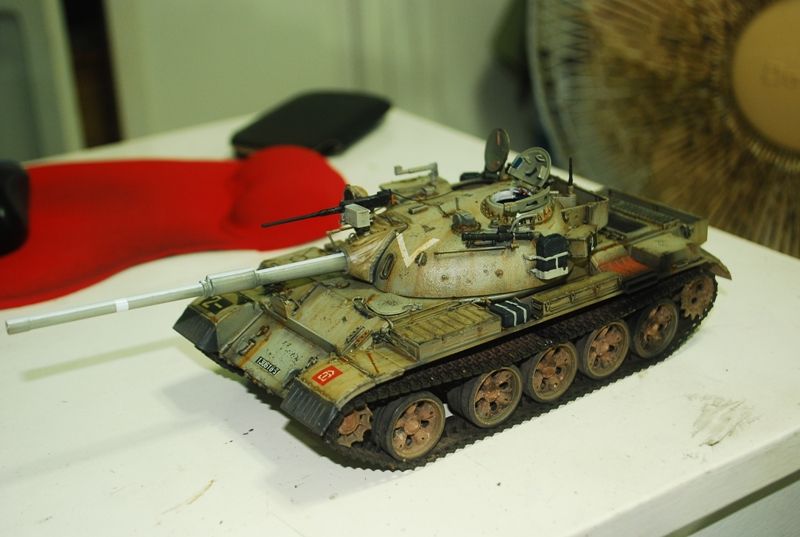 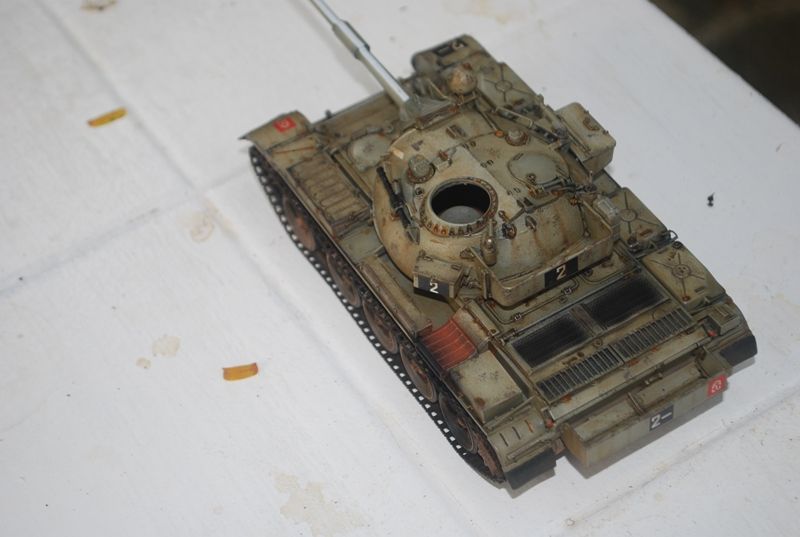 Since this is a T-55 tank, I opted for a dirtier weathering compared to the merkavas. Dark earth were used for pigments as there are reference photos taken in Northern Israel and it showed a darker color of soil. some are even red in hue. The central M2 HMG was also modified to include the manual firing pivot handle that were used by the tank crews to remotely fire the HMG. 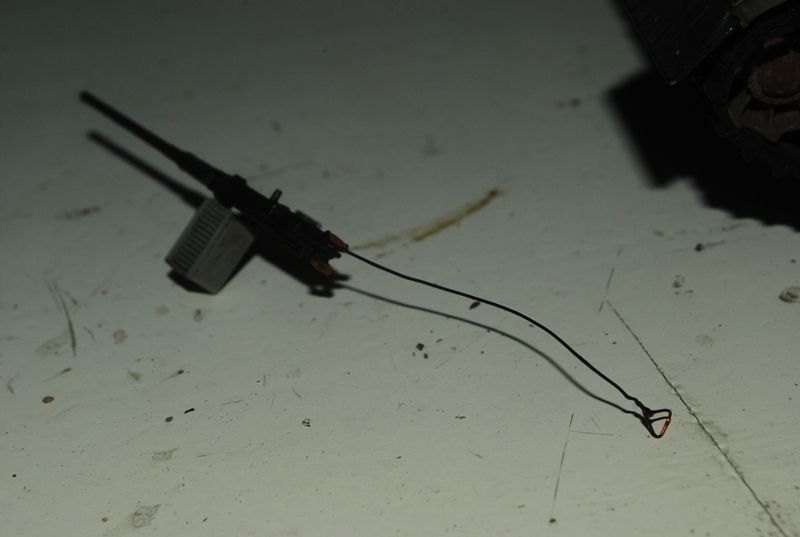 The modifications were made from styrene strip and sprue plus a very thin copper wire to serve as the rope and a simple handle on the other end. I guess finalizing it with accessories is the next step on this beast. Merkava 1 The Merkava 1 is already being weathered, I used a dusty tone for this one to make a variety. You can see the dirty tractors and suspensions using AK and Vallejo pigments. stains were also made to show grease and lubricant leaks. 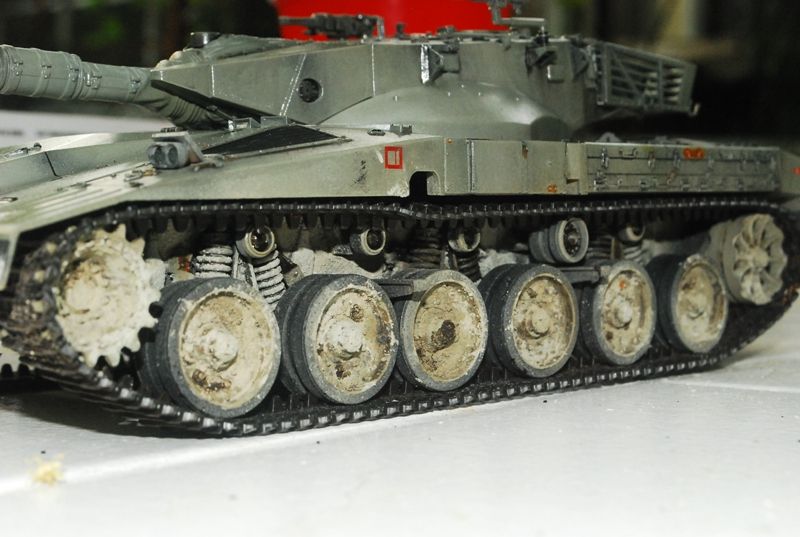 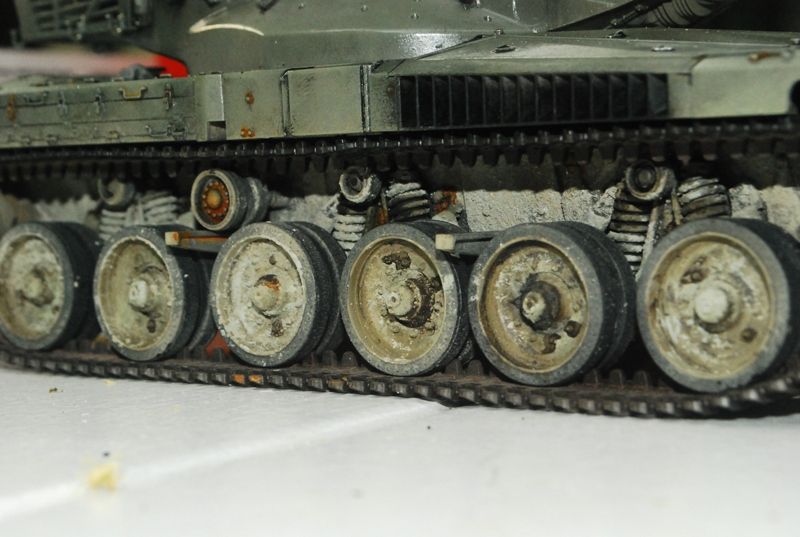 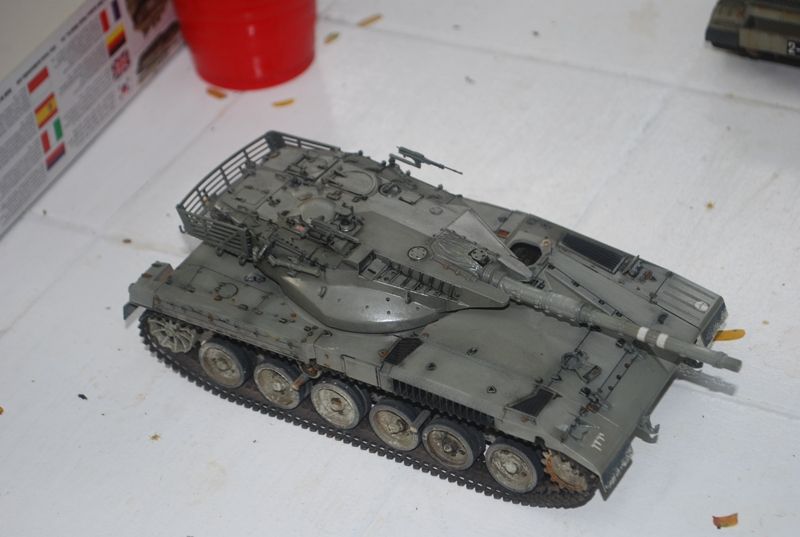 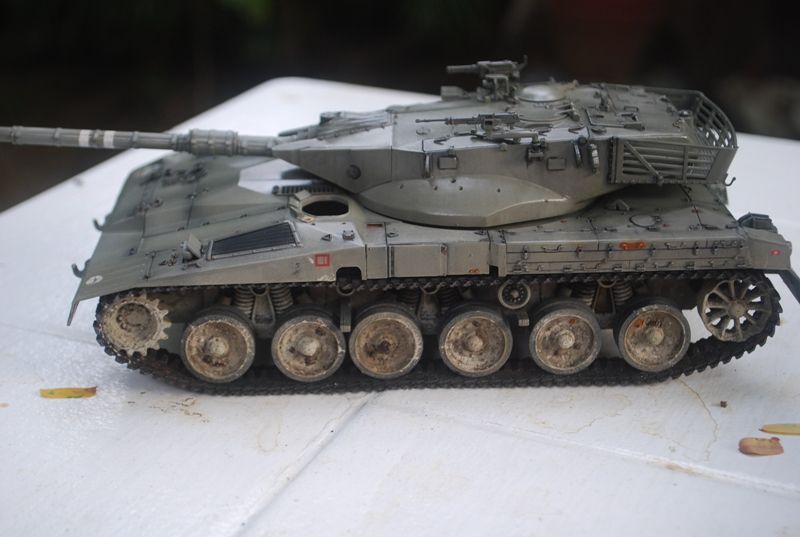 Streaking grime were then applied to add a weathered tone. 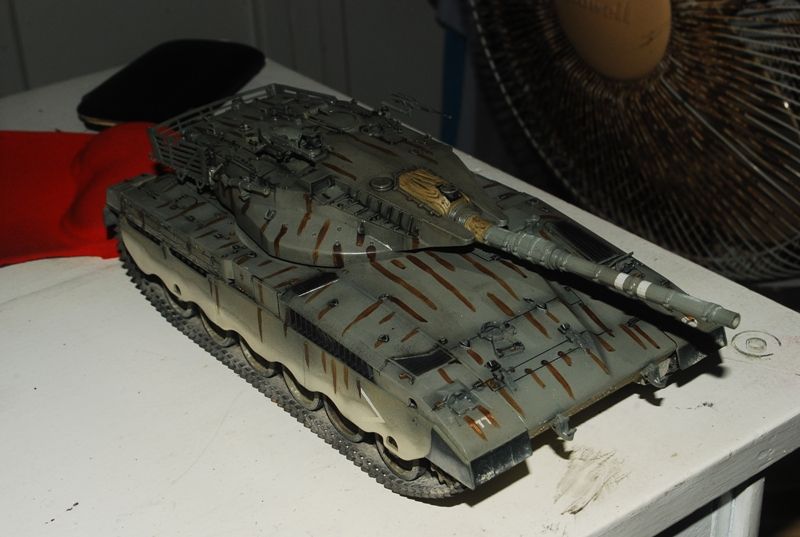 After it was dried up, rainmarks from AK Interactives were used. I find this much better than the MIG Production Rainmarks as enamel is more suited for weathering for my taste. 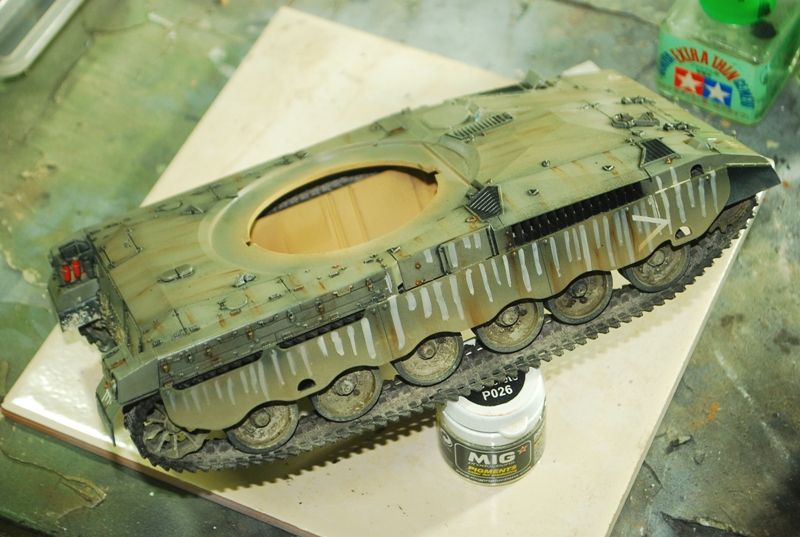 Cleaning time as of now. Merkava IV This build is the one taking a lot of time but it is fun. Im now adding the small details on the tank. First is to drill holes on the idler wheels. 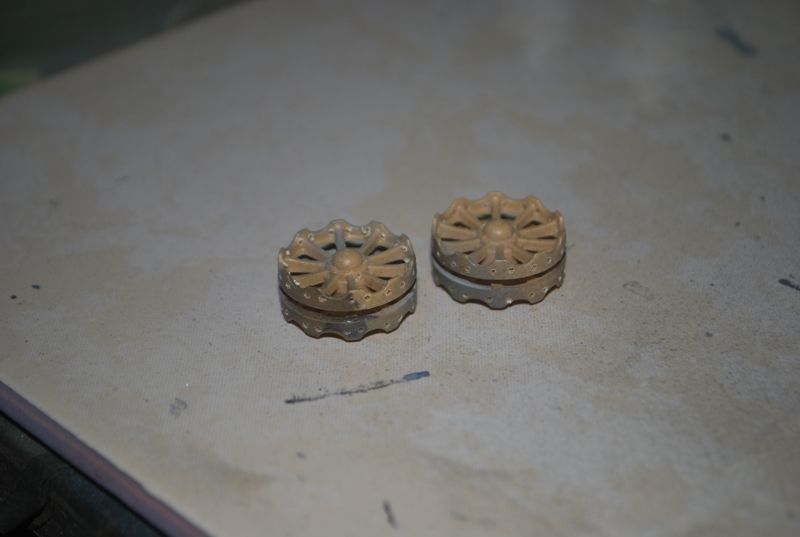 2 holes were drilled per 'pie' slice on the wheels. Next stop are some detailing on the build. The central axis M2 HMG was modified to include the electric and manual firing mechanisms. The actual mechanism comprises 2 way firing. on my build, I made use of the copper wires and vinyl tubes for this effect. 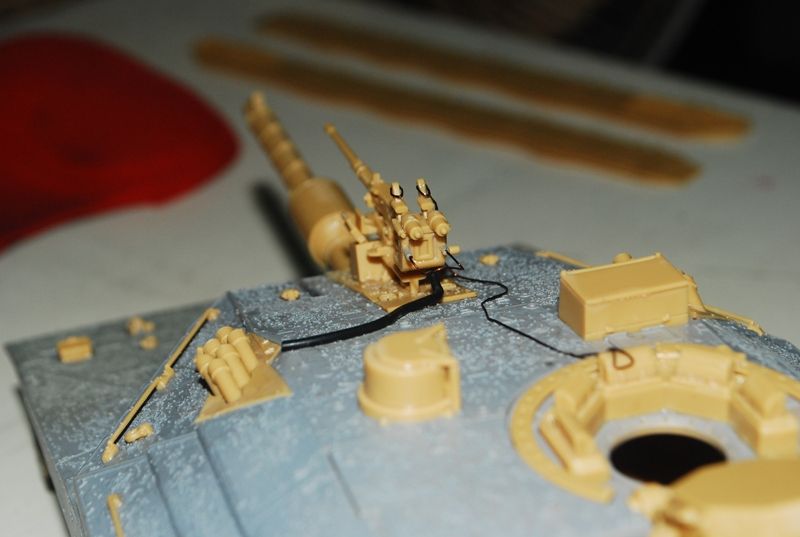 The manual firing is operated via a pulley type mechanism that is connected to the cdr hatch and pulled via a triangular handle. The electric mechanism is connected via the vinyl tube. 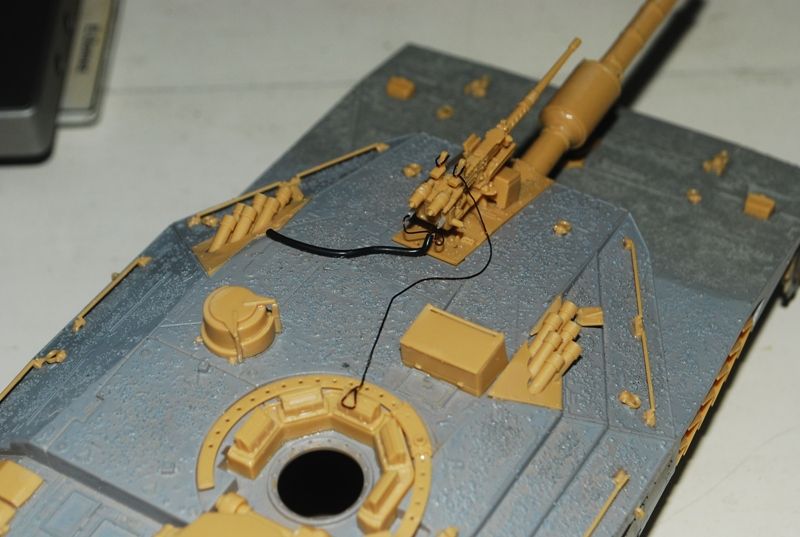 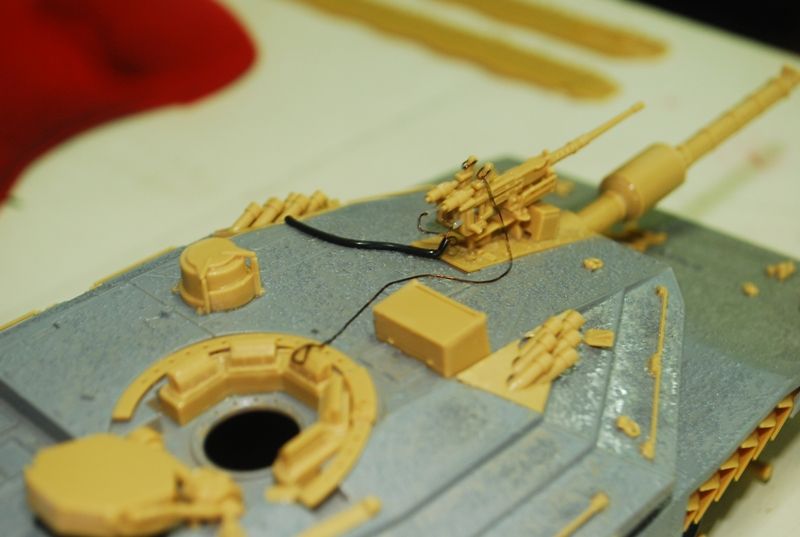 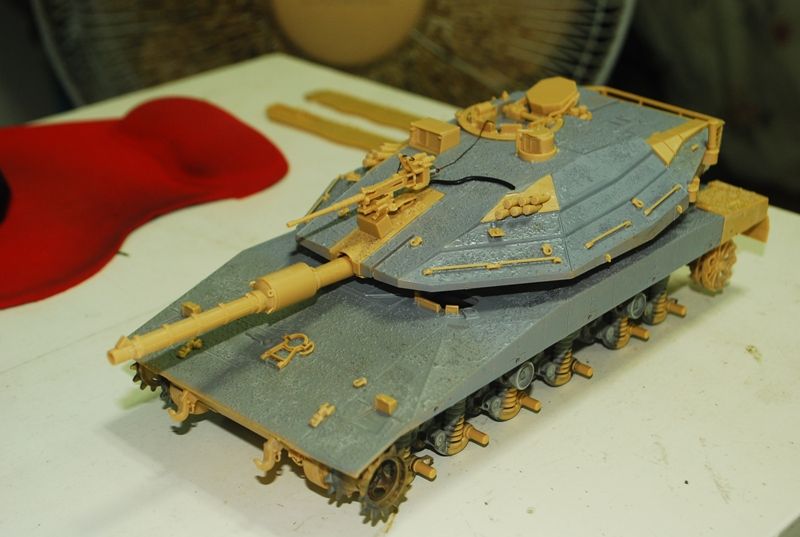 Im now making the Shimshonit covers and the ID panels on the bustle rack. Ill post photos once this is done. Cheers and happy modeling guys! iking |
|
|
|
Post by rbaer on May 29, 2013 17:29:33 GMT -5
Couldn't find an icon for a "wagging tail, hopping up and down doggie".......
|
|


