Deleted
Member since: January 1970
Posts: 0
May 5, 2024 18:54:17 GMT -5
May 5, 2024 18:54:17 GMT -5
|
Post by Deleted on May 29, 2013 18:16:53 GMT -5
Definitely interesting to watch!
|
|
|
|
Post by wbill76 on May 29, 2013 19:53:24 GMT -5
Great progress happening on all 3, keep it coming!  |
|
iking
Full Member

Member since: November 2012
Posts: 244
Nov 22, 2012 3:24:55 GMT -5
Nov 22, 2012 3:24:55 GMT -5
|
Post by iking on May 30, 2013 11:48:58 GMT -5
thanks a lot rbaer, dogfish7 and wbill!  I managed to update some items before leaving for work this morning:) Here's a minor update on the Merkava 1. The rain marks were cleaned and swiped with a solvent and here is how it went. 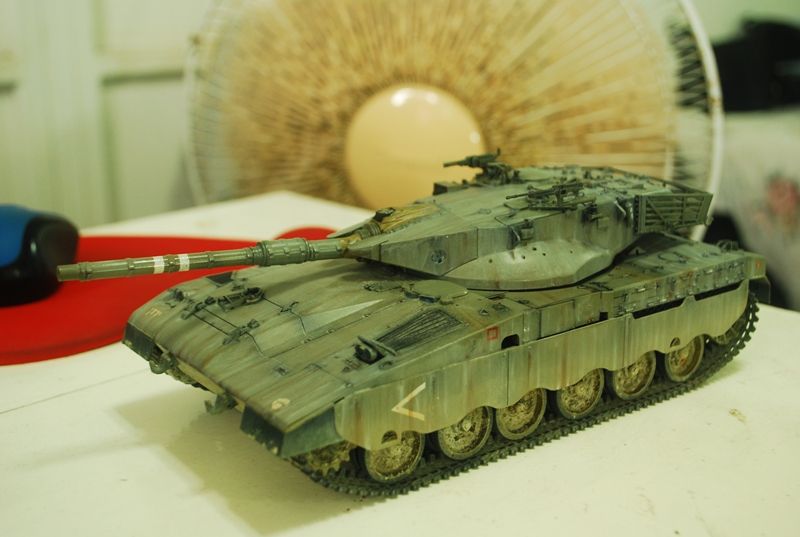 rear 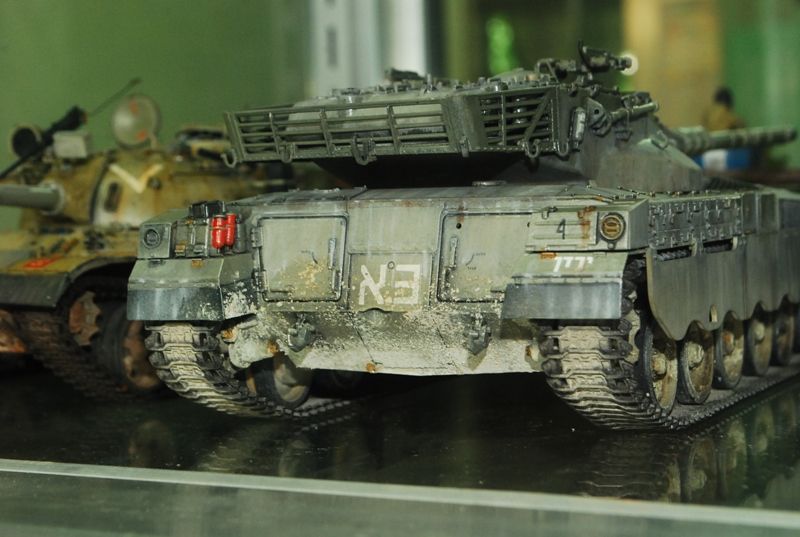 AK interactives Rain Marks were used for this effect. I find this material suitable for my need than the earlier Mig rainmarks. AK is very easy to use and clean. Some more push and this will be done. Im only thinking of the accessories that I can put here. Need to scrounge my reference photos for Beirut setting Merkava Mk 4. For the Merkava mk 4, I modified the rear baskets (all three of them) and detailed it with laminated aluminum foils.. The rear bustle rack were details with foil to serve as ID panels. This will be painted with a primer and also the same base color with the tank and then finally written over with a hebrew unit markings. The 2 rear baskets were also modified. I am not satisfied with the PE part that came frmo the kit so I sliced them up into 5 parts and then chained them up much like how it looked like. The photo below shows the kit supplied and the one that I sliced. 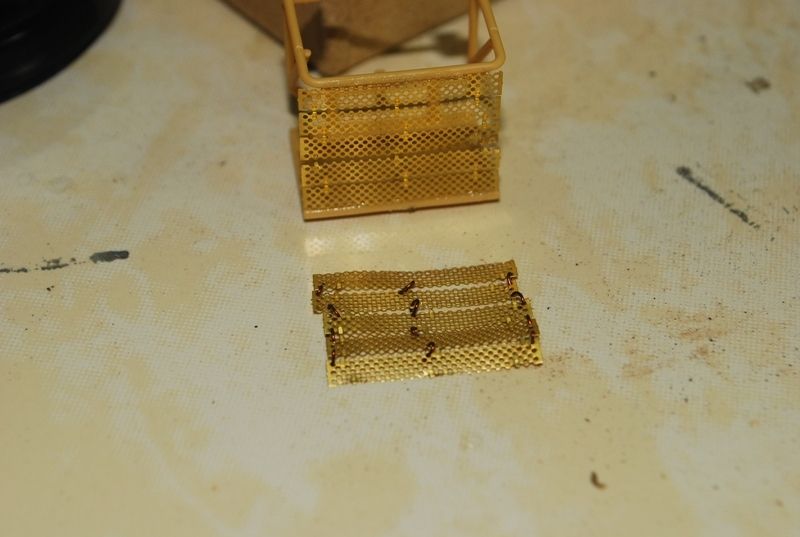 The mesh were chained up using a fine gauge of copper wire. 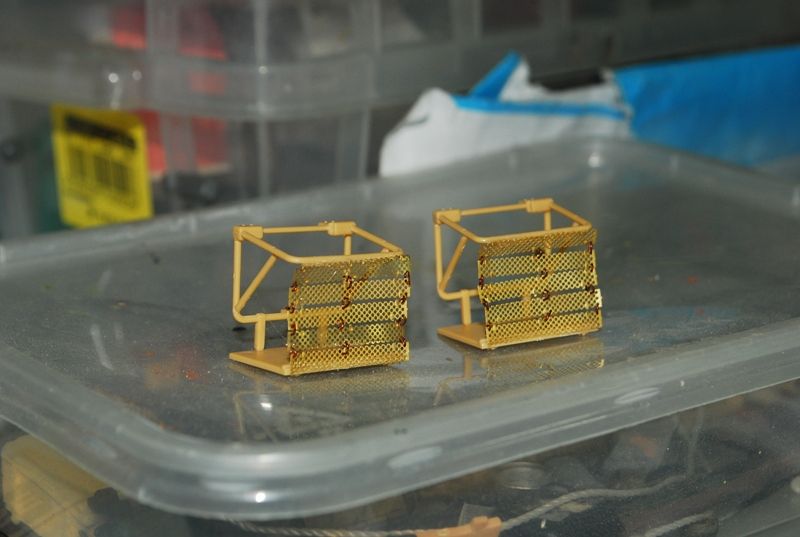 Portside view: 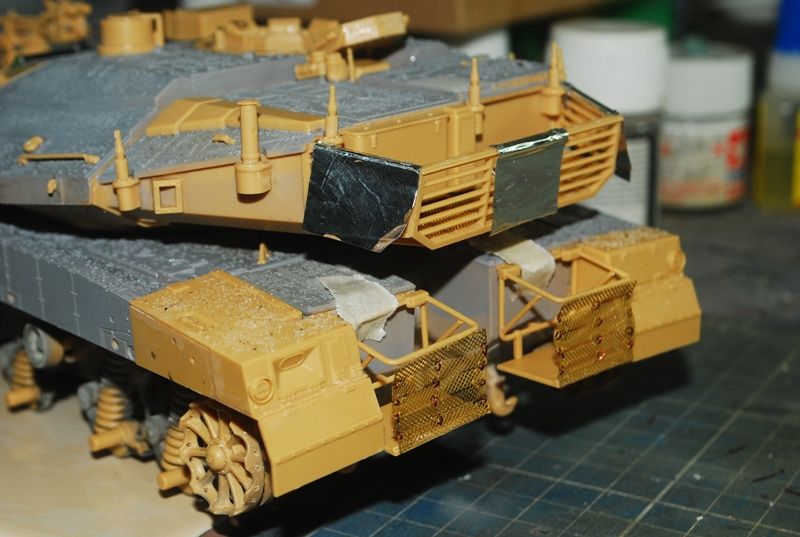 Center View: 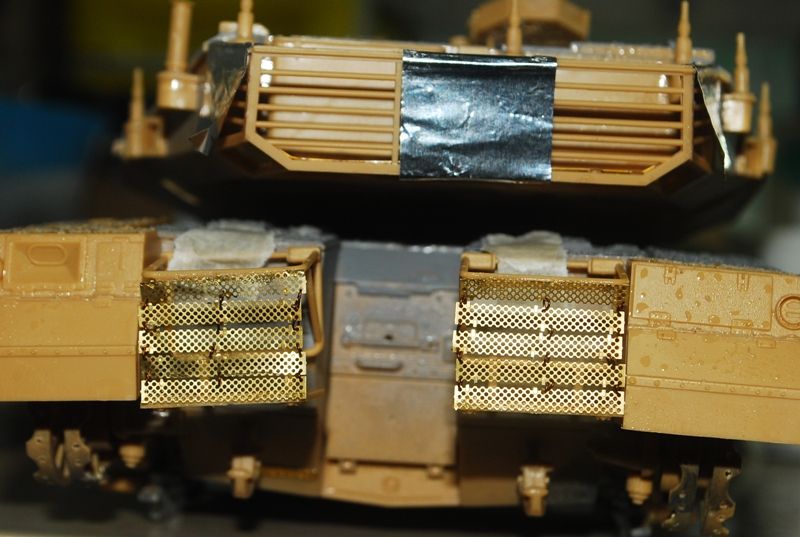 Starbord view: 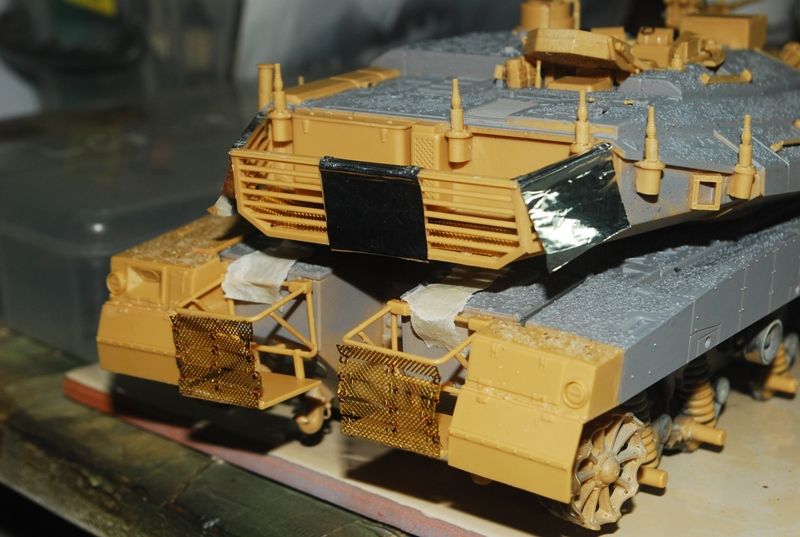 The Merkava 4 is a very big avenue to practice scratching and improvising:) Next build might be this one and the Fitter. I got this from the LHS. 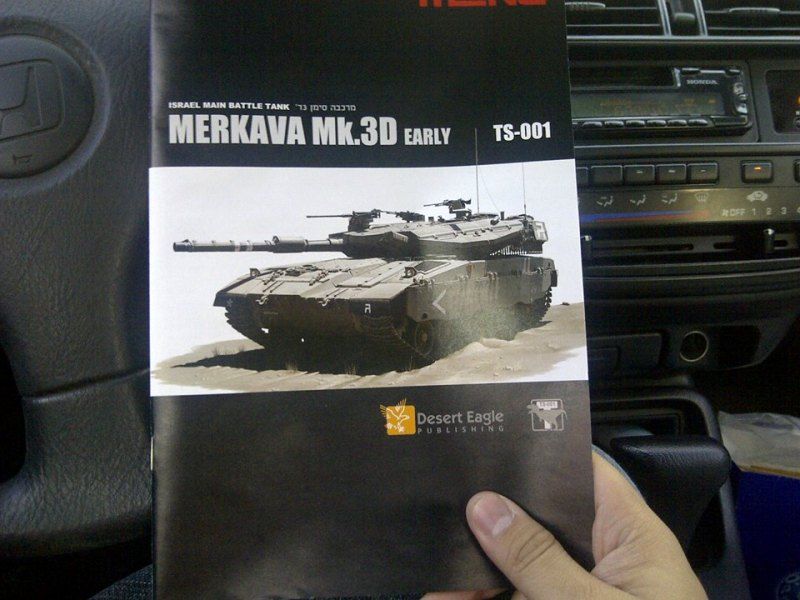 Cheers from the tropics! Iking |
|
|
|
Post by rbaer on May 30, 2013 19:51:11 GMT -5
Lookin' good!
I've been curious about the book as well.....I picked up the Magach book and have just about worn it out.
|
|
iking
Full Member
Member since: November 2012
Posts: 244
Nov 22, 2012 3:24:55 GMT -5
Nov 22, 2012 3:24:55 GMT -5
|
Post by iking on Jun 3, 2013 10:39:21 GMT -5
Lookin' good! I've been curious about the book as well.....I picked up the Magach book and have just about worn it out. Thanks mate! yup I'm into idf now and the meng merkava mk3d is superb and really exciting to build. Idf armor is just quite expensive compared to other genres. |
|
|
|
Post by bbd468 on Jun 3, 2013 11:20:26 GMT -5
Fine works Iking! That Tiran 5 is SHAWEEET!!!! Well done man!  |
|
iking
Full Member
Member since: November 2012
Posts: 244
Nov 22, 2012 3:24:55 GMT -5
Nov 22, 2012 3:24:55 GMT -5
|
Post by iking on Jun 7, 2013 8:49:44 GMT -5
thanks gary! im only looking for stowage for the tiran and merkava mk 1 then I shall call it quits for the 2 items:) so far here are the latest updates that I have. The merkava 4 is being painted and detailed with a mixture of tamiya light grey and khaki but the mixture contains more khaki than a 50/50 ratio. pre-shaded with hardware spray paint flat black  painted with first coating: 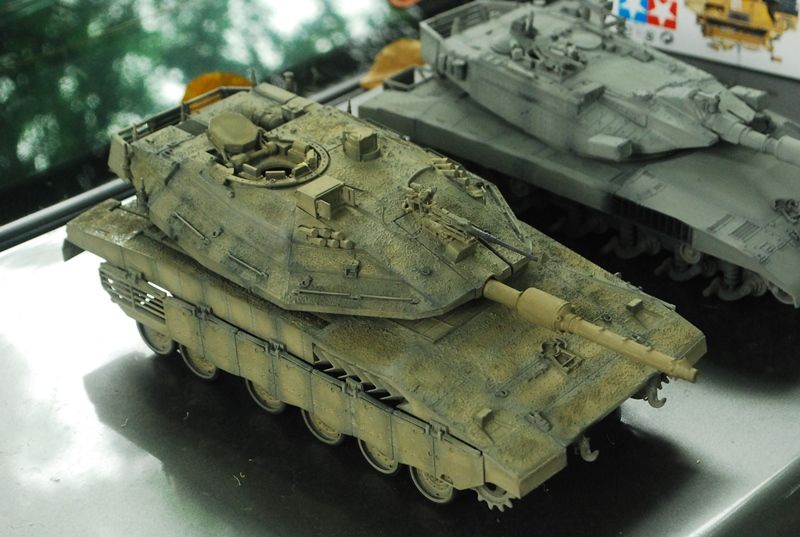 Close-up shot with the texture: 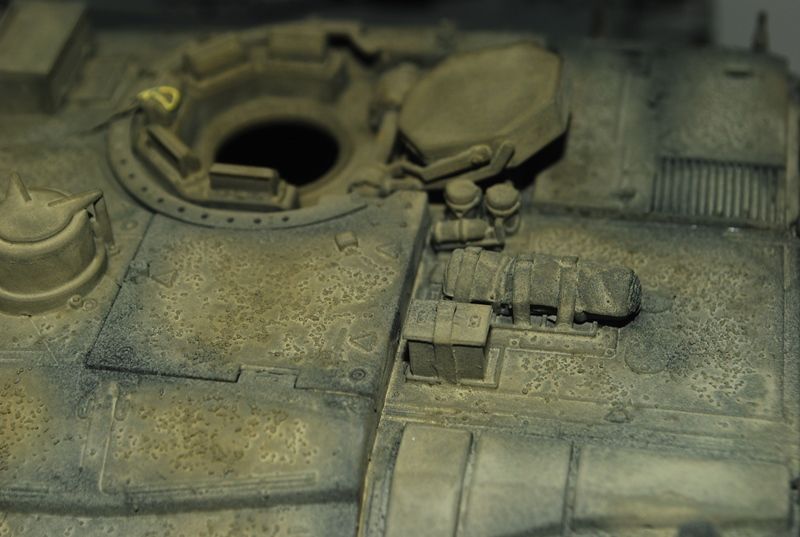 you can see the manual trigger for the 50 cal on the central turret axis. 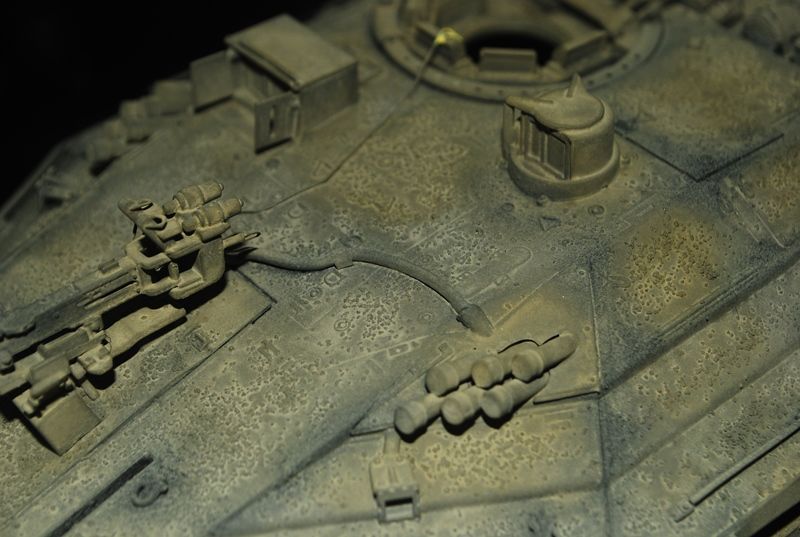 A stowage was fastened on the turret roof using laminated aluminum foil and some strip styrene. 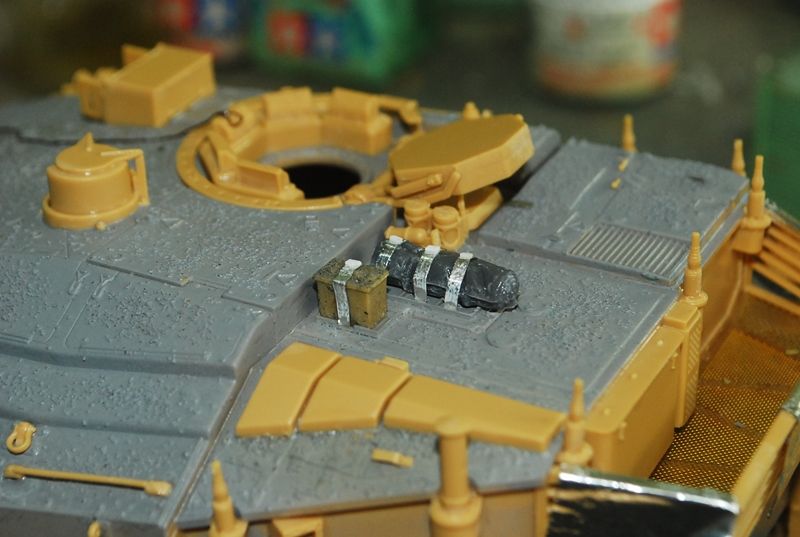 Digging up my stash i found these old IDF builds that I had. 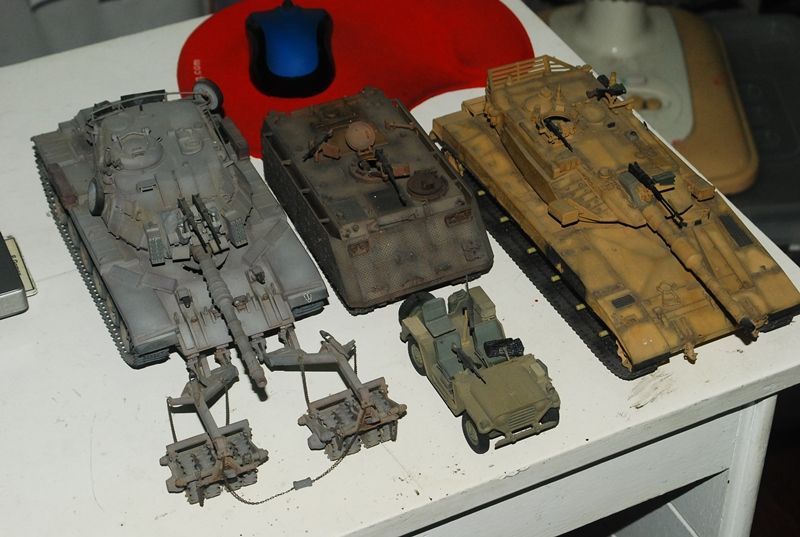 I found out that I have old MErkava Mk 3, Magach, Zelda and a Shmira. What I did was to refurbish the MErkava Mk 3 first. I painted it with a 50/50 mix of light grey and khaki to give it a more relevant shade than its old desert yellow skin. 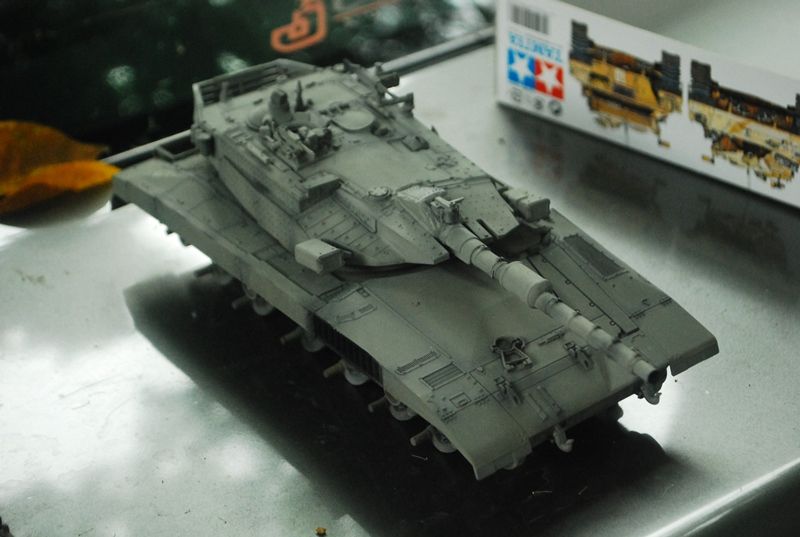 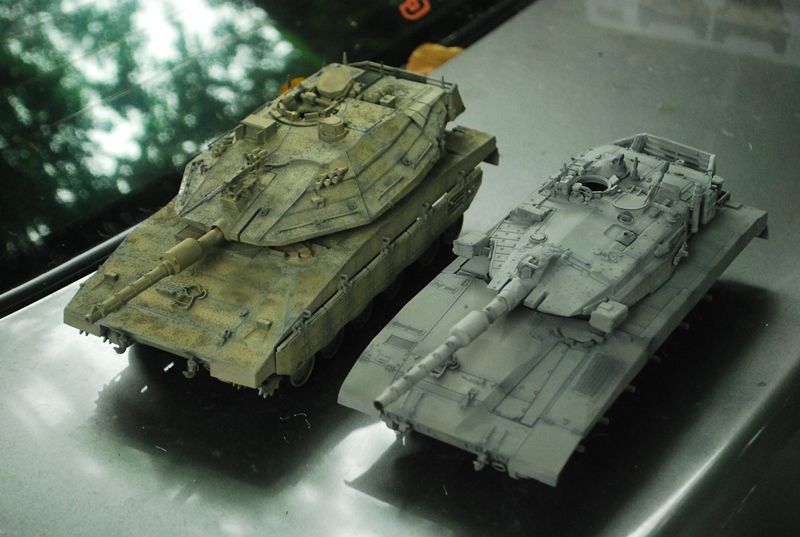 here they are together with the merkava 4, 1, and Tiran 5. 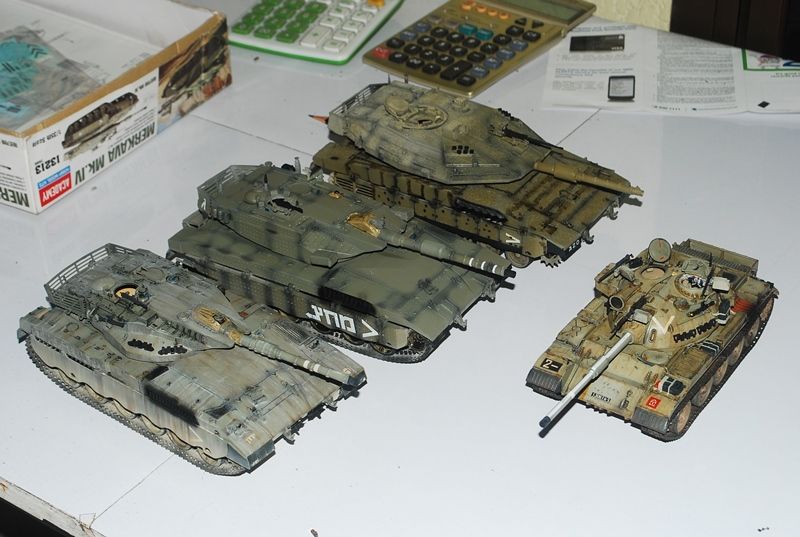 I might consider restoring the other IDF items on the shelf as well if i have the time:) cheers mates! iking |
|
|
|
Post by rbaer on Jun 7, 2013 12:57:45 GMT -5
Nice work. I especially like the no-slip texture on the 4, very nicely done and IMHO, captures to look of the real thing.
Also, I gotta say, there's something to be said for re-doing an old build....
|
|
|
|
Post by wbill76 on Jun 7, 2013 16:50:57 GMT -5
Man that Merk 4 looks mean! Love it. |
|
iking
Full Member
Member since: November 2012
Posts: 244
Nov 22, 2012 3:24:55 GMT -5
Nov 22, 2012 3:24:55 GMT -5
|
Post by iking on Jun 9, 2013 9:33:21 GMT -5
thanks a lot Rbaer, Dicky and Wbill! I just reused the old decals for the merkava 3 that was restored. Luckily it wasnt disintegrated yet:) I will wash the mk 3 and continue with the ball and chain mountings tomorrow. cant wait to get my hands on my work bench again:D so far here is the progress on the first batch of ball chain armor: 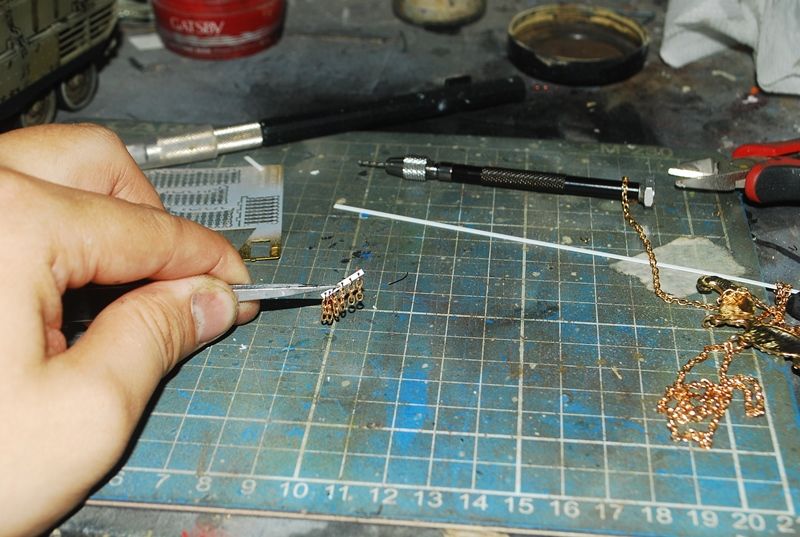 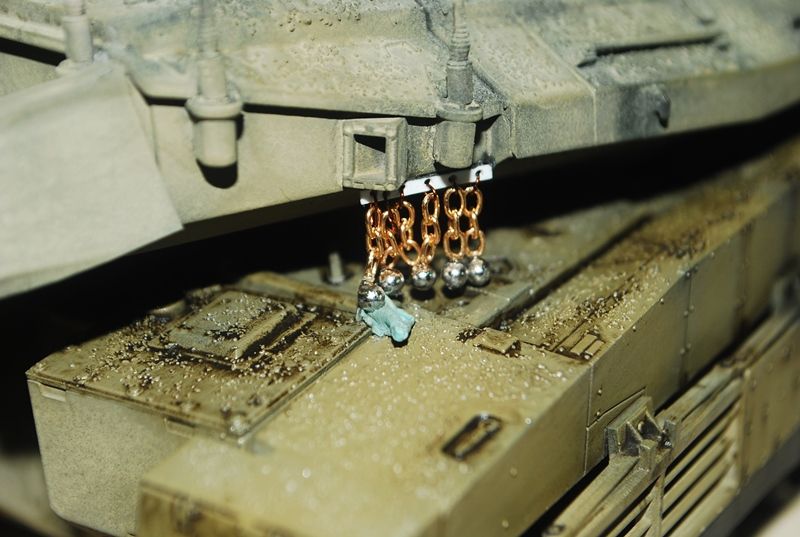 The chain is from a girly accessory and the ball is from a ball chain used on dog tags. I cut them to length and mounted them on a drilled strip styrene as its main bracket. I still have a long way to go as i need to make at least +/- 70 ball chains for the whole bustle rack undercut:) cheers guys! iking |
|
|
|
Post by eastrock on Jun 9, 2013 9:56:46 GMT -5
wow a very clean matt, btw where's my plane ticket? lol this would be a very tedious build Comrade |
|
|
|
Post by Leon on Jun 9, 2013 10:42:21 GMT -5
Iking,that is some awesome work your doing there .Agree with Dicky and Russ on the no slip texture. |
|
madairbrush
Full Member
November 2012 MoM Winner
Member since: May 2012
Cheers!! Matt
Posts: 488
May 30, 2012 14:22:05 GMT -5
May 30, 2012 14:22:05 GMT -5
|
Post by madairbrush on Jun 9, 2013 14:41:02 GMT -5
Great collection of beautyful tanks. I love them all.
|
|
|
|
Post by bullardino on Jun 9, 2013 15:47:22 GMT -5
What a titanic job you started, comrade...
|
|
|
|
Post by wbill76 on Jun 9, 2013 20:46:53 GMT -5
5 down, 70 to go! Nice start and ingenious way to create your own B&C arrangement. Just so long as the girly chain isn't a prized possession of a significant other...or you might find yourself dealing with a much larger B&C in the end! |
|
|
|
Post by rbaer on Jun 10, 2013 13:47:31 GMT -5
Oooh, how true.
Balls and chains, balls and chains, the stuff of nightmares.
|
|
iking
Full Member
Member since: November 2012
Posts: 244
Nov 22, 2012 3:24:55 GMT -5
Nov 22, 2012 3:24:55 GMT -5
|
Post by iking on Jun 11, 2013 12:14:33 GMT -5
thanks ches, leon, madairbrush, Dicky, Luigi, Wbill and Rbaer! hahaha I pretty much made sure that there arent the missus stuff or ill get a beating:D Here they are now after much eye-strain and a quite painful wrist from cutting ball chains and wires. Portside: 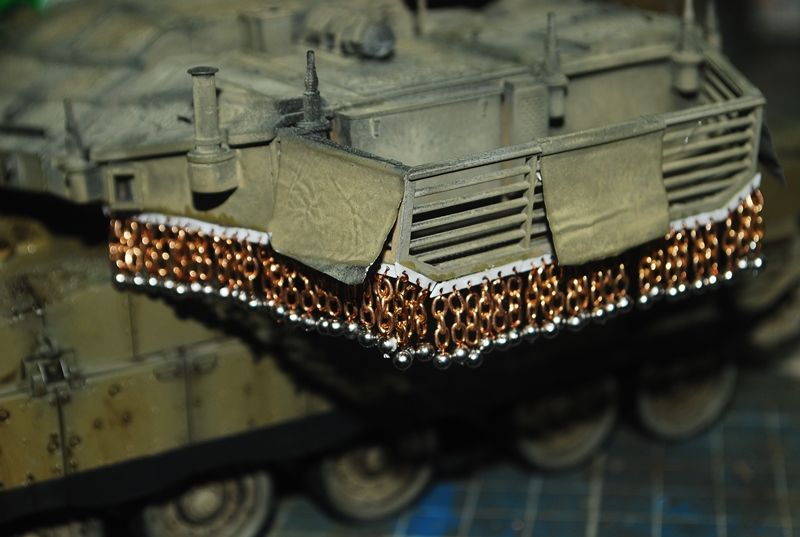 Starboard Side: 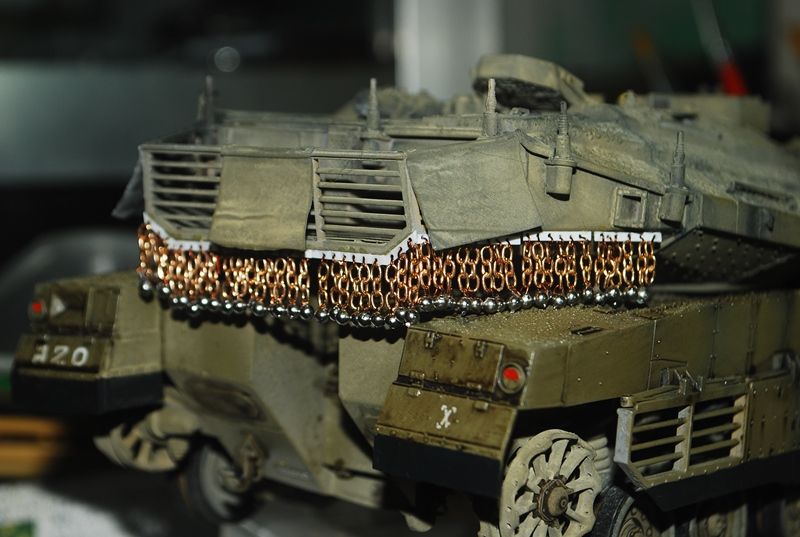 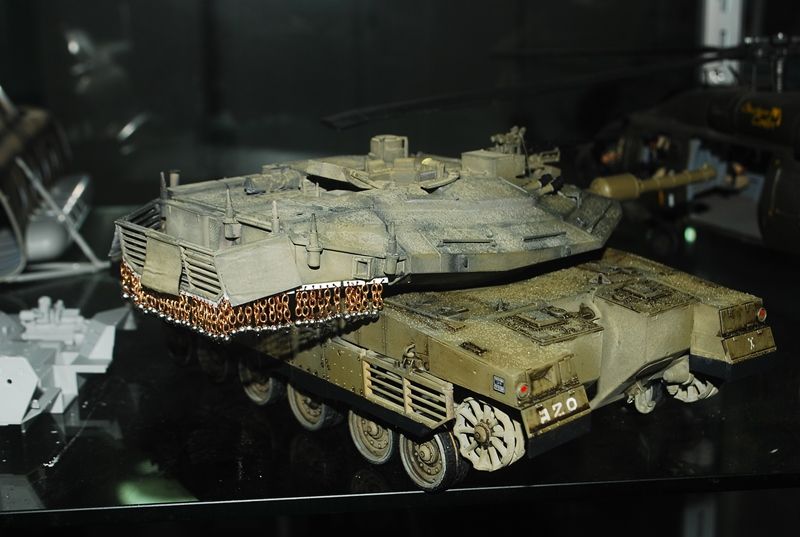 The job was tedious but in the end it was a relief to see a complete set of ball curtain armor move and sway like the real thing cheers! iking |
|
|
|
Post by rbaer on Jun 11, 2013 13:24:16 GMT -5
The dreaded balls and chains! Well done!
|
|
|
|
Post by wbill76 on Jun 11, 2013 20:17:00 GMT -5
B&Cs swaying, what's the world coming too! Nice work iking, very convincing result.
|
|
|
|
Post by bullardino on Jun 12, 2013 8:02:15 GMT -5
Great one, Iking I wonder how good they will like when painted, IMHO they'll be hard to tell from the 1:1 scale ones... |
|
iking
Full Member
Member since: November 2012
Posts: 244
Nov 22, 2012 3:24:55 GMT -5
Nov 22, 2012 3:24:55 GMT -5
|
Post by iking on Jun 13, 2013 22:14:27 GMT -5
Thanks a lot Rbaer, WBill and Luigi! It was indeed tiring and quite straining to the eyes but worth it if you see the end result:) I will see if i can still try to add the droid or if not ill add it to the Mk3D Meng kit that ill build after this. I want to complete the line of merkavas from 1-4 so here it is now painted and ready to be weathered. The wash on the hull is a mixture of tamiya washes black and brown. I mixed it because the black is just too dark for me. I wanted something of an umber wash. 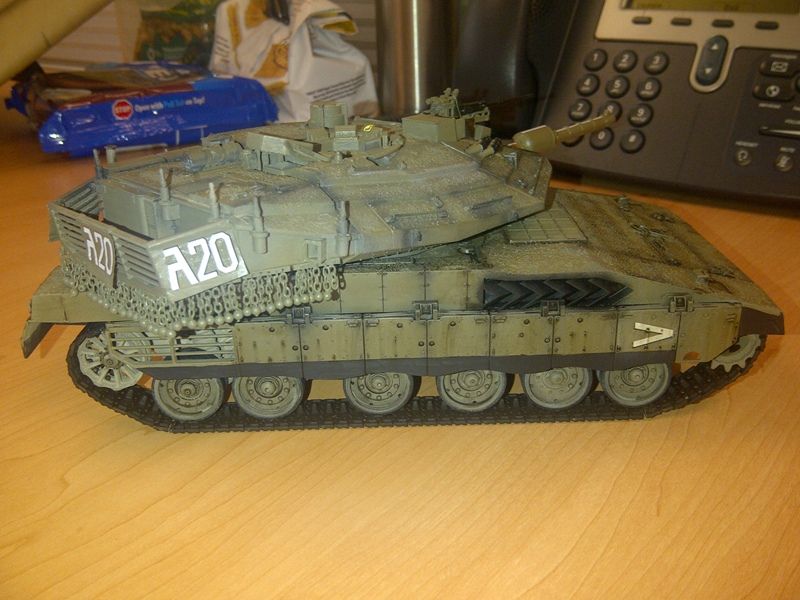 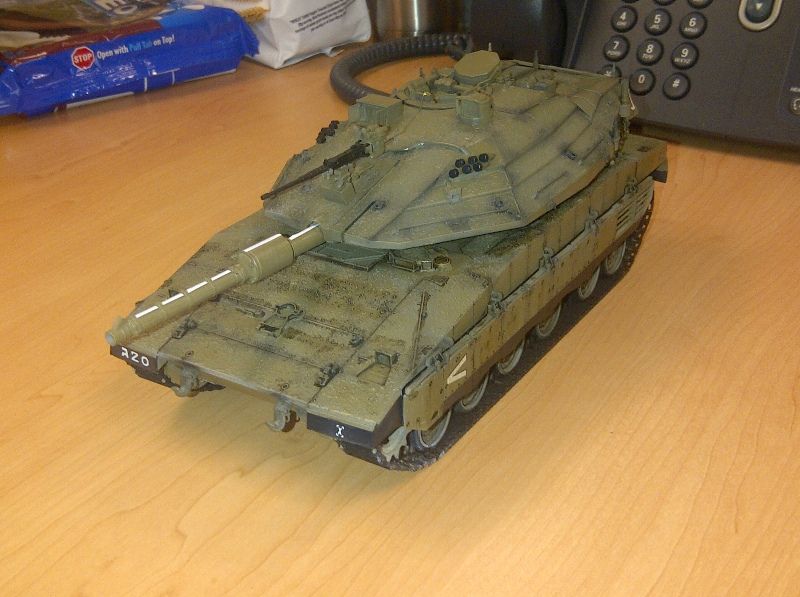 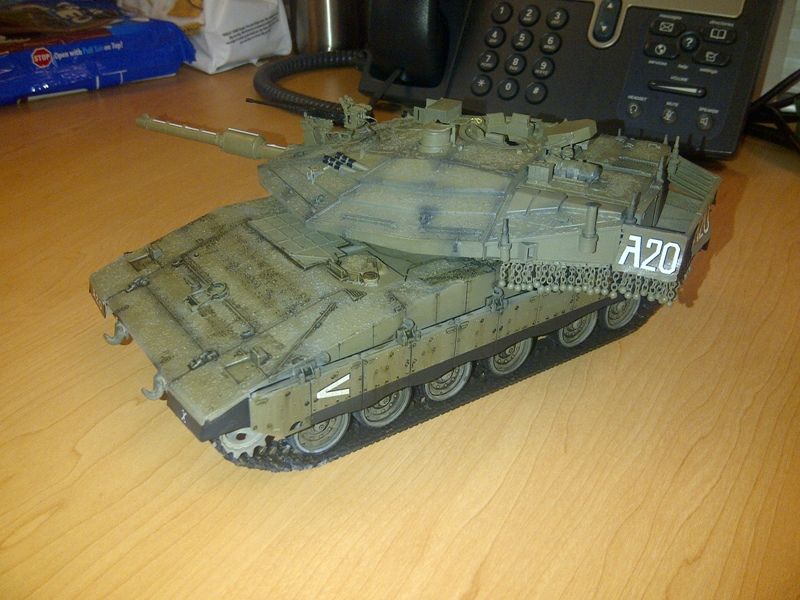 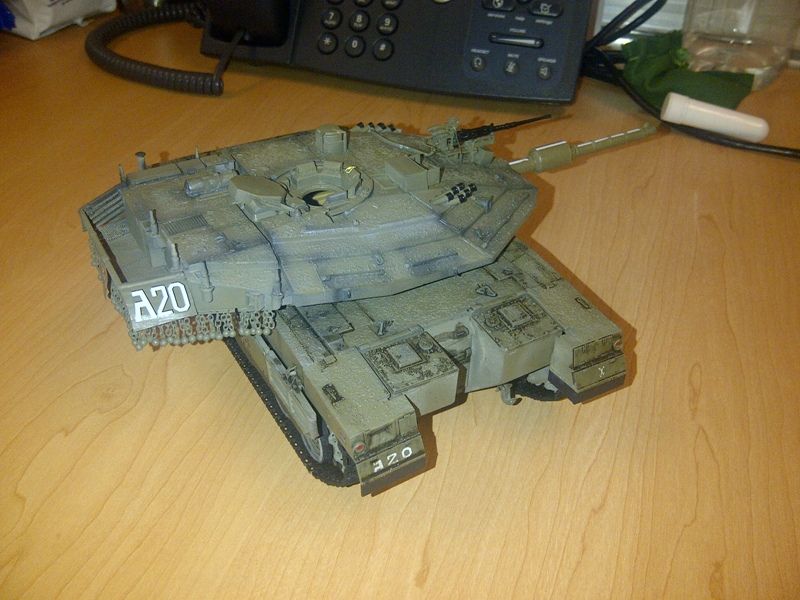 Next stop are the 2 rear basketcase i wonder how can i make the canvas bags inside them. I might try aluminum foil again. Thats all for now comrades! enjoy and happy weekend to us! cheers! iking |
|
|
|
Post by eastrock on Jun 14, 2013 9:32:46 GMT -5
Fafable profile, Comrade Iking IP Phone? Oreo? WorkStation? is it allowed to do tank thing on the desk? I almost got suspended when I bought my kit at work lol I may suggest you need a AK Dark Wash or OIF & OEF instead lol Cheers!!! |
|
Deleted
Member since: January 1970
Posts: 0
May 5, 2024 18:54:17 GMT -5
May 5, 2024 18:54:17 GMT -5
|
Post by Deleted on Jun 14, 2013 10:17:42 GMT -5
Nicely done!
The end result was well worth it my friend.
A Merkava IV LIC will not have a droid attached, most IV's will although it depends on the area of operation. 50-50 on the droid on a standard IV. You cannot go wrong.
G
|
|
|
|
Post by wbill76 on Jun 14, 2013 20:02:05 GMT -5
Wash is looking good, keep up the good work comrade! |
|
iking
Full Member
Member since: November 2012
Posts: 244
Nov 22, 2012 3:24:55 GMT -5
Nov 22, 2012 3:24:55 GMT -5
|
Post by iking on Jun 21, 2013 1:58:06 GMT -5
Thanks a lot ER, AgentG, Wbill! I see, thanks for the input, i might consider putting the droid on my Mk3 Dalet instead It is nearing completion and im letting the paint and clear coat dry up. MEanwhile here are some updates on some other IDF matters. Im trying to figure out which stowage to put on the Tiran. I tried these combo but had regrets on the m16. I might replace it with more jerry cans as these are oil guzzling babies. 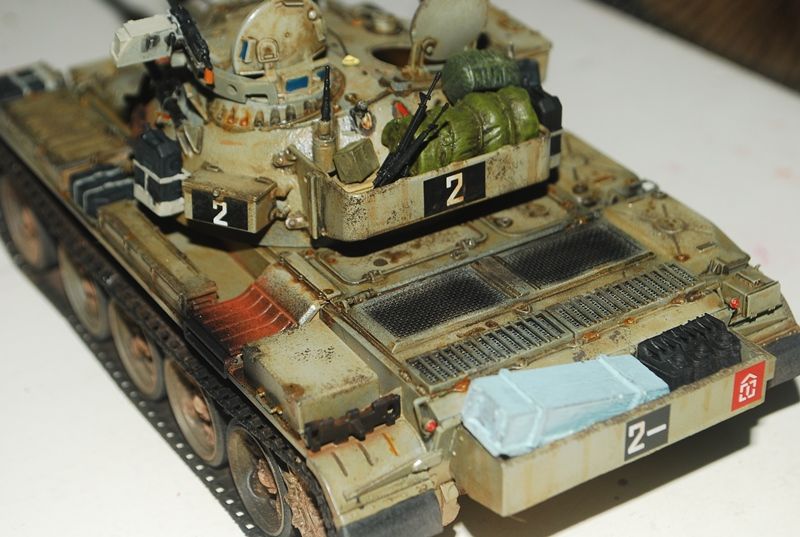 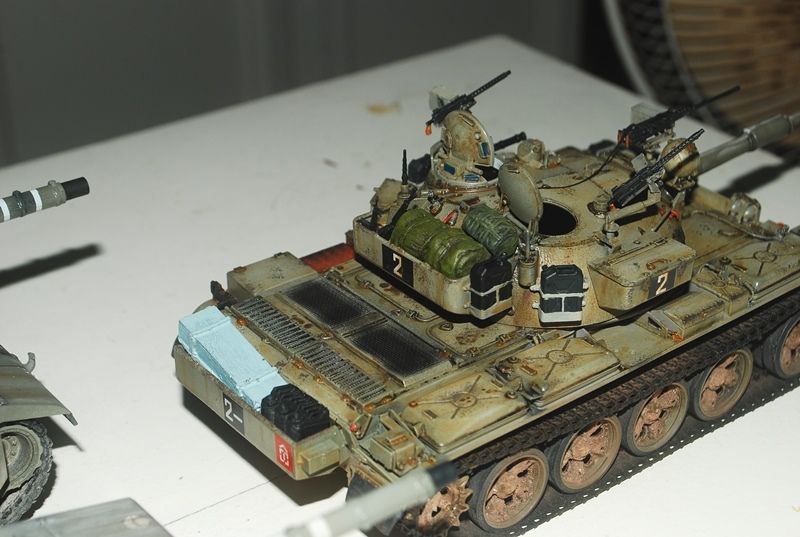 The mk1 stowage are as follows: 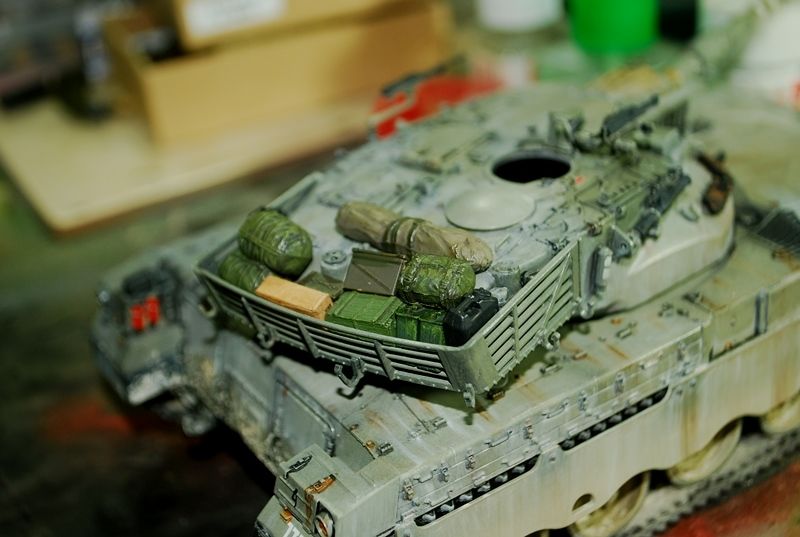 Im quite happy with this combination and i might just add the orange ID tarps. For the other merkava, the revived old academy mk3, i painted it and finished it with the AK dust effects and used it as rain marks. 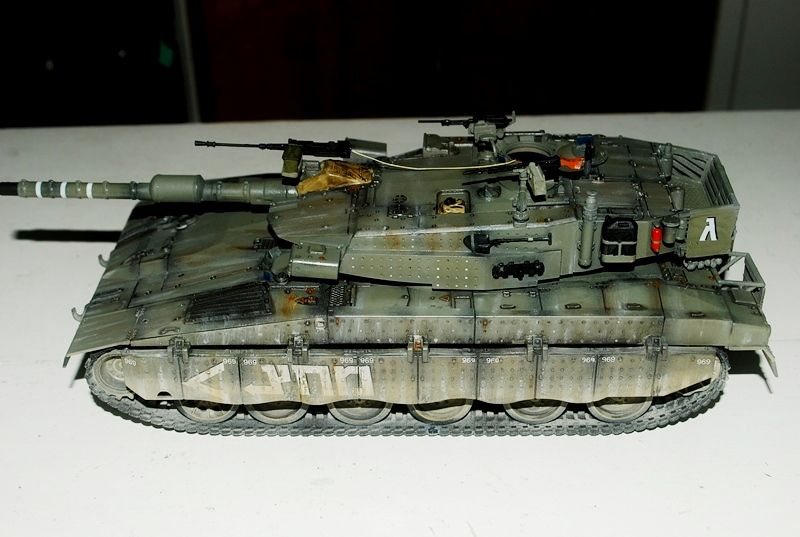 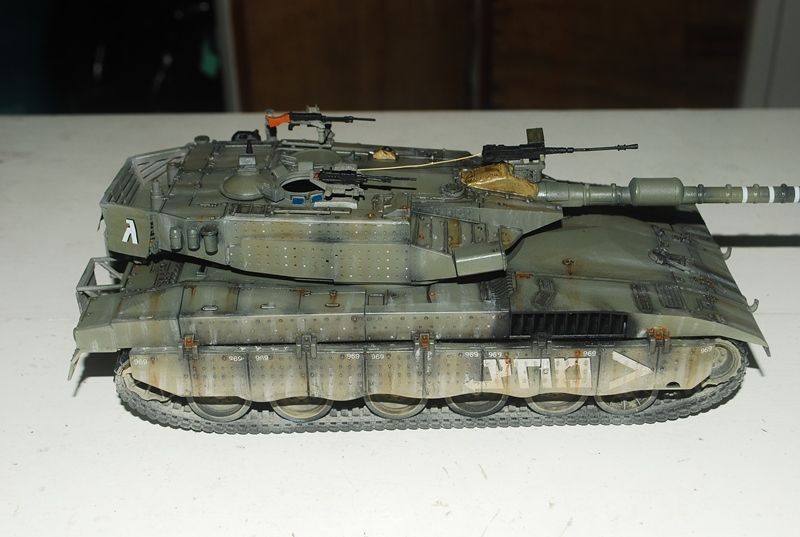 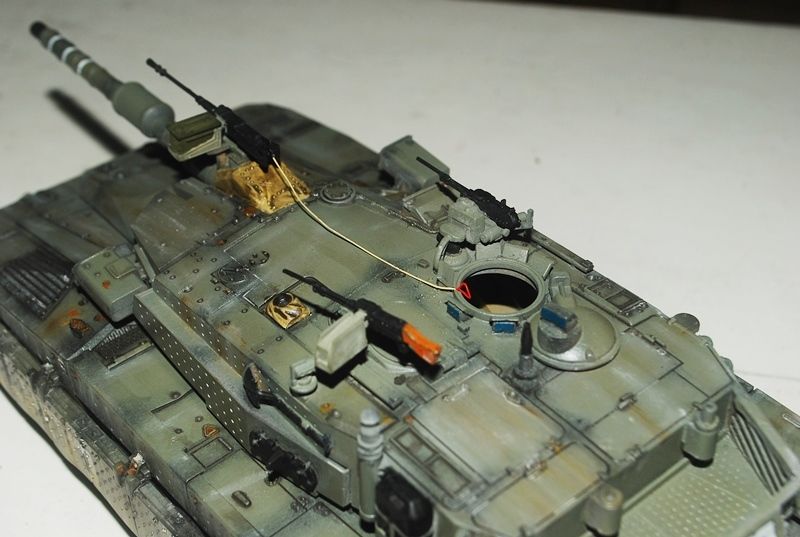 The roof part of the Mk3. you can notice the added manual firing cables for the roof mounted BMG. 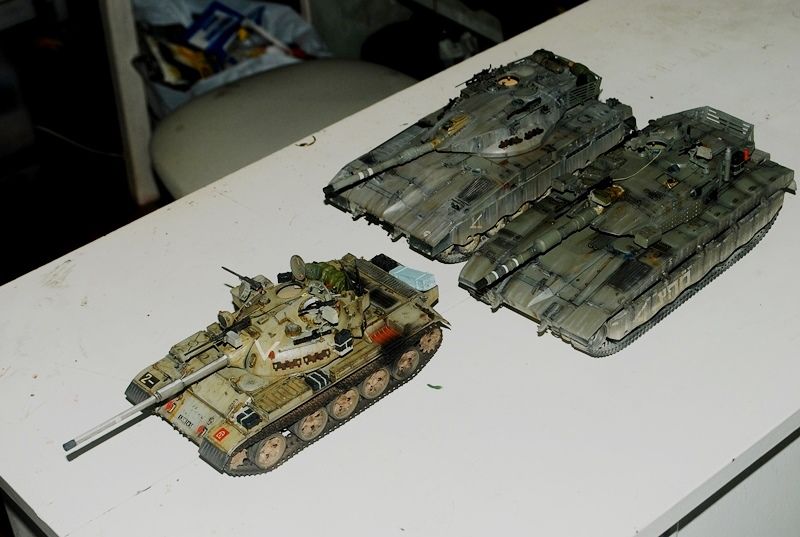 The three are grouped sans the Mk4. The Mk 4 is being weathered with pigments on its tractor systems. lube leaks are done via tamiya washes. 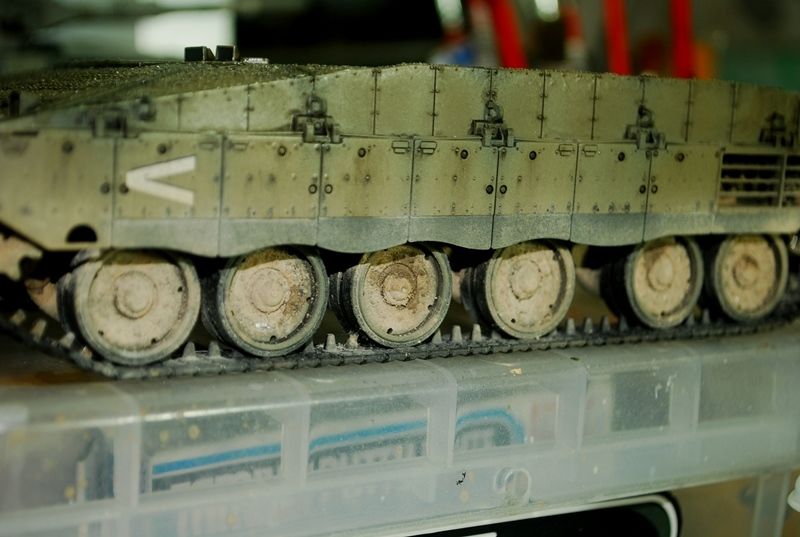 The pigments that I used are Vallejo and Mig pigments. cheers! iking |
|
jackh
Full Member
Member since: December 2011
Posts: 1,195
Dec 15, 2011 2:51:27 GMT -5
Dec 15, 2011 2:51:27 GMT -5
|
Post by jackh on Jun 21, 2013 2:56:57 GMT -5
Great progress on the IDF lot, The Merkava 1 did'nt have the ball and chain armour at the start of "Peace for Galilee" as I recall, it was the conflict that made the IDF aware of the shot trap on the Merkava I'm not sure whether the implemented the ball and chain armour during the conflict.
|
|
iking
Full Member
Member since: November 2012
Posts: 244
Nov 22, 2012 3:24:55 GMT -5
Nov 22, 2012 3:24:55 GMT -5
|
Post by iking on Jun 21, 2013 6:02:14 GMT -5
Great progress on the IDF lot, The Merkava 1 did'nt have the ball and chain armour at the start of "Peace for Galilee" as I recall, it was the conflict that made the IDF aware of the shot trap on the Merkava I'm not sure whether the implemented the ball and chain armour during the conflict. Thanks Jack! yup correct. the Tamiya kit can be built as is for AFV during the 1982 Lebanon War. The ball chain curtain appeared because of the experiences during this war:) cheers! Cheers! Iking |
|
|
|
Post by rbaer on Jun 21, 2013 10:54:45 GMT -5
Lookin' schweet!
Re the stowage on the Tiran: you're correct in adding oil cans as the T55 engine uses almost as much lube oil as fuel oil. They also make great big piles of shavings and flakes in the sump. I've read that changing the engine oil on a "new" engine can involve removing several POUNDS of metal along with the used oil. Dunno know about those that are broken-in. Also, the crew personal weapons will be very close at hand for their owners. The later Magachs actually have clips on the turret top, right by the hatches, for this purpose.
|
|
nemesis
Full Member
Member since: January 2012
Posts: 295
Jan 19, 2012 11:10:39 GMT -5
Jan 19, 2012 11:10:39 GMT -5
|
Post by nemesis on Jun 24, 2013 3:28:45 GMT -5
The T5 looks really good IK, one of the best T5's i have seen. The Merk is coming along nicely as well, looking forward to seeing that one finished  Regards from the Swamp Eth |
|
|
|
Post by bullardino on Jun 24, 2013 9:50:35 GMT -5
Sweet builds, Iking |
|


