Rick
Full Member
  
Member since: March 2013
what to build, what to build . . . Ok THAT one!
Posts: 854 
|
Post by Rick on May 12, 2013 22:55:47 GMT -5
Needed to try a quick build to get some mojo going again. The Whirlwind was not a particularly well known AC. It was designed as a small twin engine fighter and only served with two squadrons until withdrawn from service in 1943. A major contributor to the Whirlwind's short limited service life was the decision by Rolls Royce to halt the production of the unreliable Peregrine engine to focus on Merlin production. As a fighter it failed, but saw greater success when converted to carry bombs for ground attack roles. There are none in existence today. 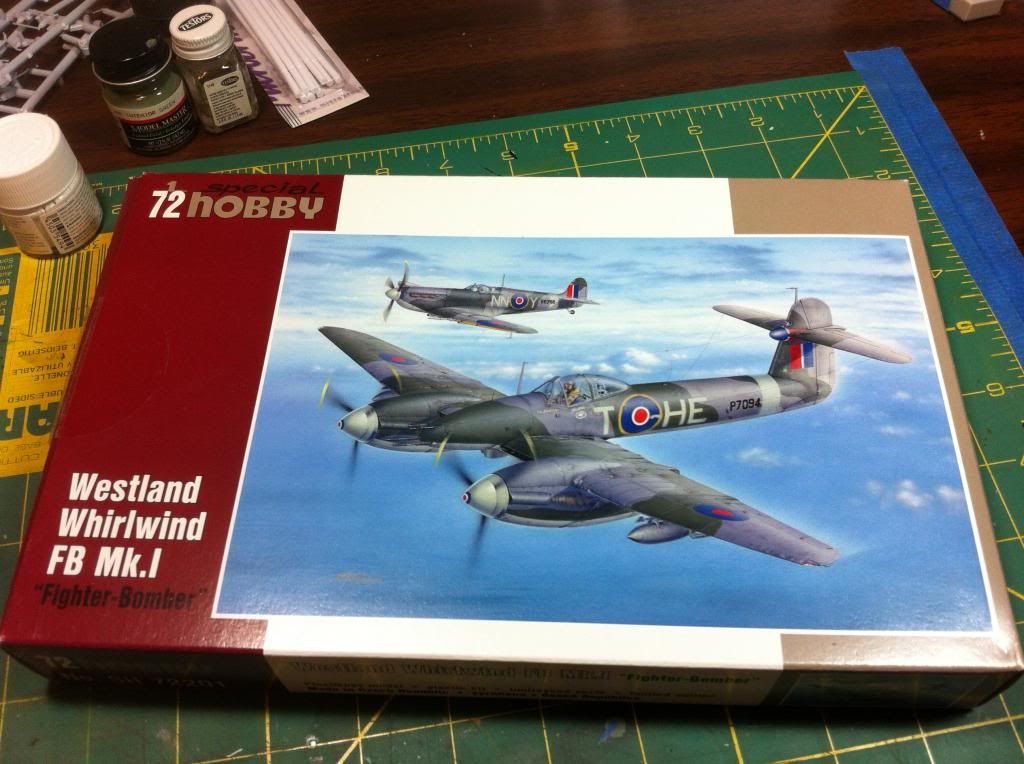 The kit itself has decent panel detail and the majority of parts are molded cleanly. The part count is quite low but does include some PE and resin parts. The 20 mm cannon barrels are not the best resin and I will be looking for replacements. Here's a few pics of the build. I'm not going to create a detailed blog of it mainly because lack of time limits how much I can accomplish in a reasonable timeframe. I'll update as I reach some milestones along the way. I've glued the cockpit together and done the paintwork inside. There is a nice printed instrument sandwich for the gauges and PE for the instrument panel along with harnesses.   Wings and fuselage needed some significant filling to hide some gaps. Wing root are next up for filling. That'll be my next focus. 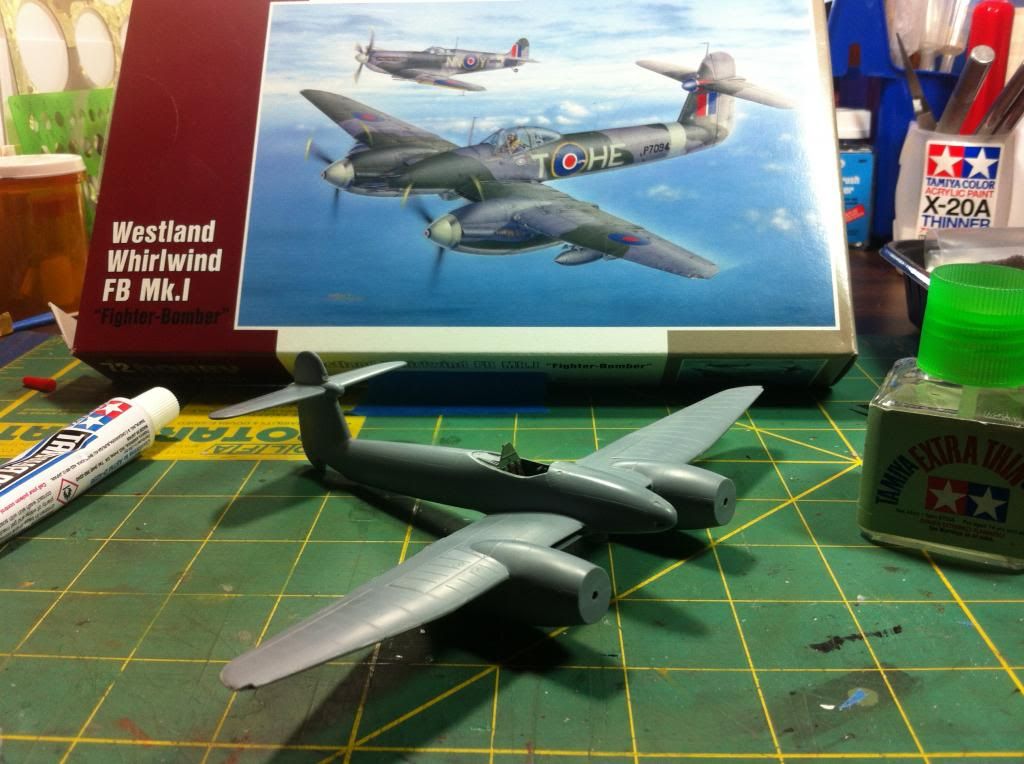 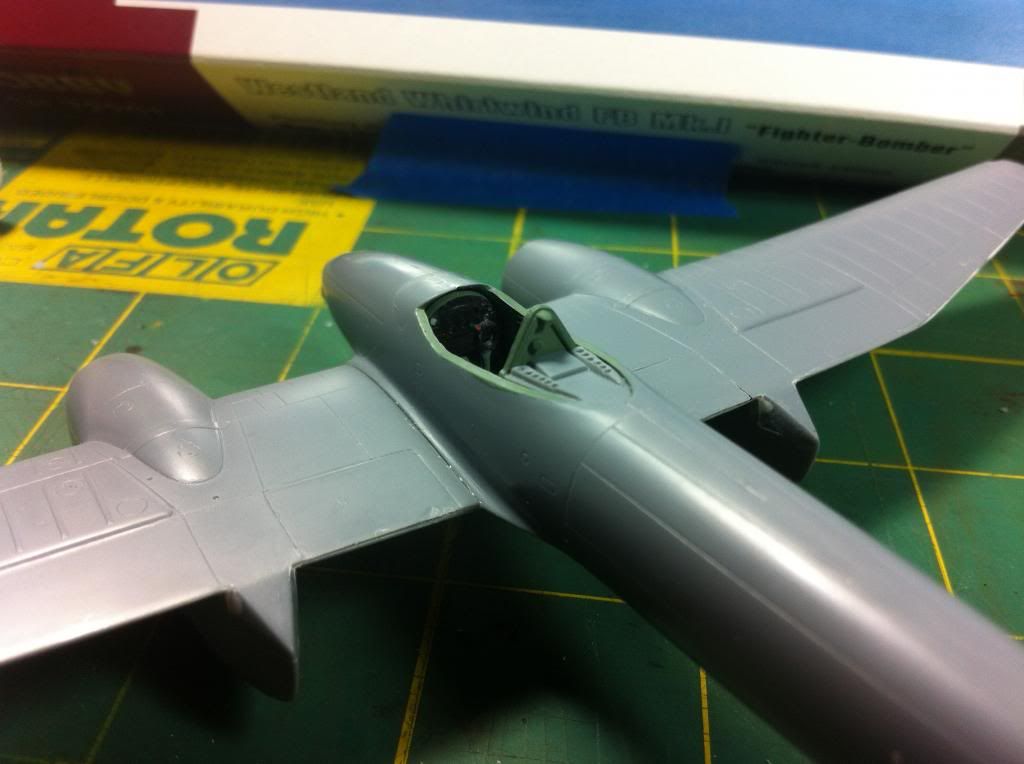 That's about it for now. Again, I'll do an update as I get to the next major milestone.. Rick |
|
venom1
Full Member
  
Member since: October 2012
Posts: 1,369
Oct 10, 2012 2:40:03 GMT -5
Oct 10, 2012 2:40:03 GMT -5
|
Post by venom1 on May 12, 2013 23:29:21 GMT -5
Off to a great start Rick! I've always liked the look of the Whirlwind, it'll be nice to see one put together.  Cheers, Sam  |
|
|
|
Post by wbill76 on May 13, 2013 19:55:23 GMT -5
Like the look of this one...you can see glimpses of a mixed heritage...the engines have the Mossie look, the tail that of the Meteor. Shame it didn't work out but has a cool look to it regardless. Will be watching this one with interest Rick.  |
|
Rick
Full Member
  
Member since: March 2013
what to build, what to build . . . Ok THAT one!
Posts: 854 
|
Post by Rick on May 13, 2013 22:04:26 GMT -5
Yeah, and the fuselage of a cigar!
|
|
Rick
Full Member
  
Member since: March 2013
what to build, what to build . . . Ok THAT one!
Posts: 854 
|
Post by Rick on May 23, 2013 20:49:58 GMT -5
|
|
|
|
Post by TRM on May 23, 2013 21:09:47 GMT -5
This is the way to get the mojo going again!! Moving right along and looking great too!! 3 days of FUN ahead of you!!!
|
|
|
|
Post by wbill76 on May 24, 2013 20:26:06 GMT -5
Nice progress! Make good use of the weekend, I know many of will be doing the same!  |
|
venom1
Full Member
  
Member since: October 2012
Posts: 1,369
Oct 10, 2012 2:40:03 GMT -5
Oct 10, 2012 2:40:03 GMT -5
|
Post by venom1 on May 24, 2013 20:36:56 GMT -5
You are doing a great job so far Rick! Looking forward to paint day!  Cheers, Sam  |
|
Rick
Full Member
  
Member since: March 2013
what to build, what to build . . . Ok THAT one!
Posts: 854 
|
Post by Rick on May 24, 2013 22:15:35 GMT -5
Thanks guys. I appreciate the encouragement. It's quite an easy kit to build. Theres not much left to add. If I can work without interruption I should be able get quite a bit done.
Rick
|
|
Rick
Full Member
  
Member since: March 2013
what to build, what to build . . . Ok THAT one!
Posts: 854 
|
Post by Rick on May 25, 2013 8:11:25 GMT -5
HOLY CRAP! Posts gone Wild!!! That's what I get for trying to edit from an iphone. Sorry for the silliness. Rick,I deleted your repeat posts for ya! Ceebee  |
|
Rick
Full Member
  
Member since: March 2013
what to build, what to build . . . Ok THAT one!
Posts: 854 
|
Post by Rick on May 25, 2013 12:00:31 GMT -5
Thanks Chris!!!
|
|
bish
Full Member
  
Member since: January 2013
Horatio Nelson 'I am a Norfolk man, and i glory in being so'
Posts: 555
Jan 13, 2013 8:57:43 GMT -5
Jan 13, 2013 8:57:43 GMT -5
|
Post by bish on May 26, 2013 1:17:15 GMT -5
Rick, nice looking build. I have the same kit in the stash, and its nice to see it built up and get some inside info. I don't think I have ever seen a kit of these.
|
|
Rick
Full Member
  
Member since: March 2013
what to build, what to build . . . Ok THAT one!
Posts: 854 
|
Post by Rick on May 26, 2013 12:23:36 GMT -5
Thanks Dicky. I appreciate your comments.
Bish, it's not a bad kit. The detail is crisp for 1/72. It's not a commonly seen model. I think that's what caught my attention. When you build it, beware the small resin parts and nav light lenses are tough to handle and not of the best quality, I'm sure mainly because of the small size. One of the resin short 20mm barrels was loose in the bag when I opened it and promptly lost it before I realized it wasn't some loose slag left from the mold. I'll need to conjure up some sort of replacement before I can finish the kit up. The cockpit is really nice with a mix of resin and PE. Wing roots gave a few issues with fit but other than that, I think it will be a good build when done, provided I don't completely screw up the paint and weathering.
|
|
Deleted
Member since: January 1970
Posts: 0
Nov 22, 2024 13:36:06 GMT -5
Nov 22, 2024 13:36:06 GMT -5
|
Post by Deleted on May 26, 2013 12:58:36 GMT -5
Bish,Airfix did a 1/72 kit of the Whirlwind.You can still pick it up as one of their 'gift sets'  |
|
bish
Full Member
  
Member since: January 2013
Horatio Nelson 'I am a Norfolk man, and i glory in being so'
Posts: 555
Jan 13, 2013 8:57:43 GMT -5
Jan 13, 2013 8:57:43 GMT -5
|
Post by bish on May 26, 2013 13:49:25 GMT -5
Thanks Rick, info like that is really handy. I have a few SH kits in the stash, but not built any yet. I will certainly make a note of what you said. I have had the same problem with lose resin bits being mistaken for waist. Note to self, check, check and check again.
Chris, ye I seem to recall that kit. I went for the SH kit firstly because I usually try and avoid Airfix, though I know a lot of their new kits are meant to be a lot better. But also the SH kit has markings for a Norfolk based aircraft and that suited a project I am doing.
|
|
|
|
Post by deafpanzer on May 26, 2013 14:41:18 GMT -5
Missed the introduction but you have my attention now! Going for same camo scheme? Always liked green & grey on UK planes!
|
|
Rick
Full Member
  
Member since: March 2013
what to build, what to build . . . Ok THAT one!
Posts: 854 
|
Post by Rick on May 27, 2013 19:54:16 GMT -5
Planning to do the standard RAF camo pattern as shown. Was hoping to get paint on it this weekend but never even made it to the mancave. Too much yard work. Does building a new deck count as a build. ?
|
|
|
|
Post by bbd468 on May 27, 2013 20:01:08 GMT -5
Hiya Rick, nice build ya got goin. Ive never seen this aircraft before, very interesting. Learn somethin new every day on MSC!  |
|
|
|
Post by deafpanzer on May 27, 2013 22:07:15 GMT -5
Yard work? There has to be conspiracy going on?!?!? The wife made me to do the same!
|
|
DeafStuG
Full Member
  
Member since: May 2013
..
Posts: 1,283 
|
Post by DeafStuG on Jun 3, 2013 18:51:27 GMT -5
Looking Good !
|
|
Rick
Full Member
  
Member since: March 2013
what to build, what to build . . . Ok THAT one!
Posts: 854 
|
Post by Rick on Jul 3, 2013 12:36:41 GMT -5
Yikes! Finally got some paint action happening. Seems like everytime I tried this past month, the agenda got changed. After a couple false starts, This week i sprayed the base gray and then cut masks for the green camo and sprayed it too. I really wanted to get a slight soft edge rather than a hard edge. Tough to get in 1/72, scale. I'll try to get a couple pics added tonite after work.
|
|
Rick
Full Member
  
Member since: March 2013
what to build, what to build . . . Ok THAT one!
Posts: 854 
|
Post by Rick on Jul 3, 2013 16:54:47 GMT -5
A couple of pics: Primed and pre-shaded 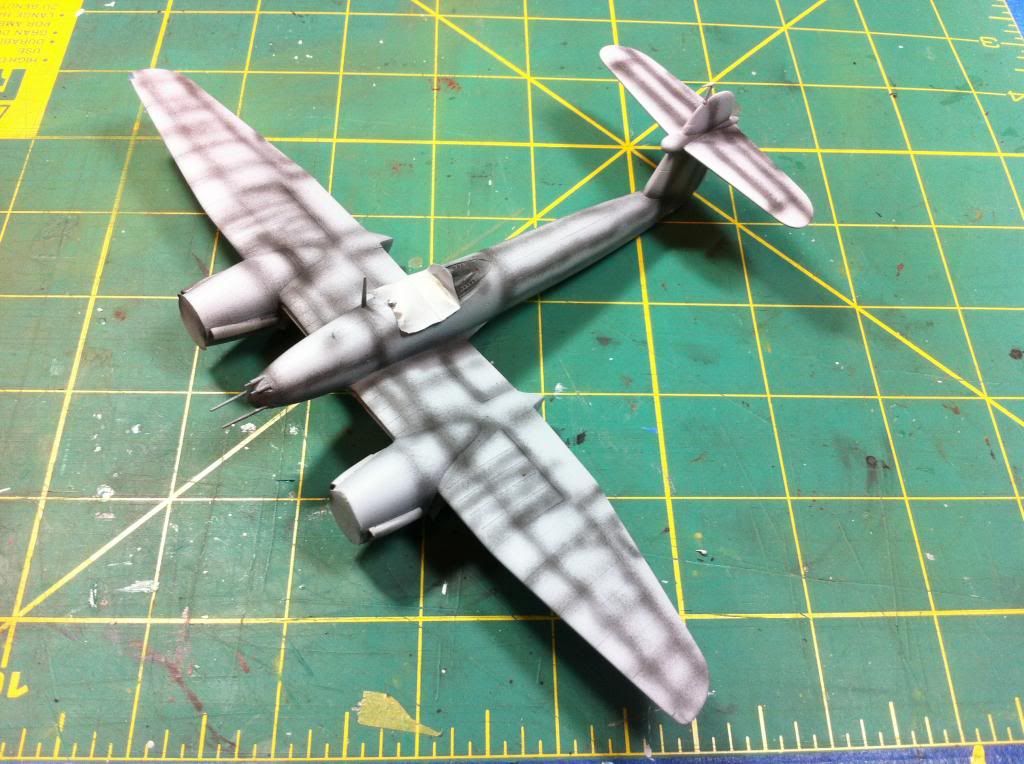 Dark gray base with masks and dark green. I wantd to try to get a slight soft edge even though 1/72 scale it's hard to see it. I enlarged the decal drawings 200% then cut out most of them to used as template over painters tape. Then added a thin sewing thread just under the edge to raise the mask slightly. Sprayed at 90 degrees as best as possible. 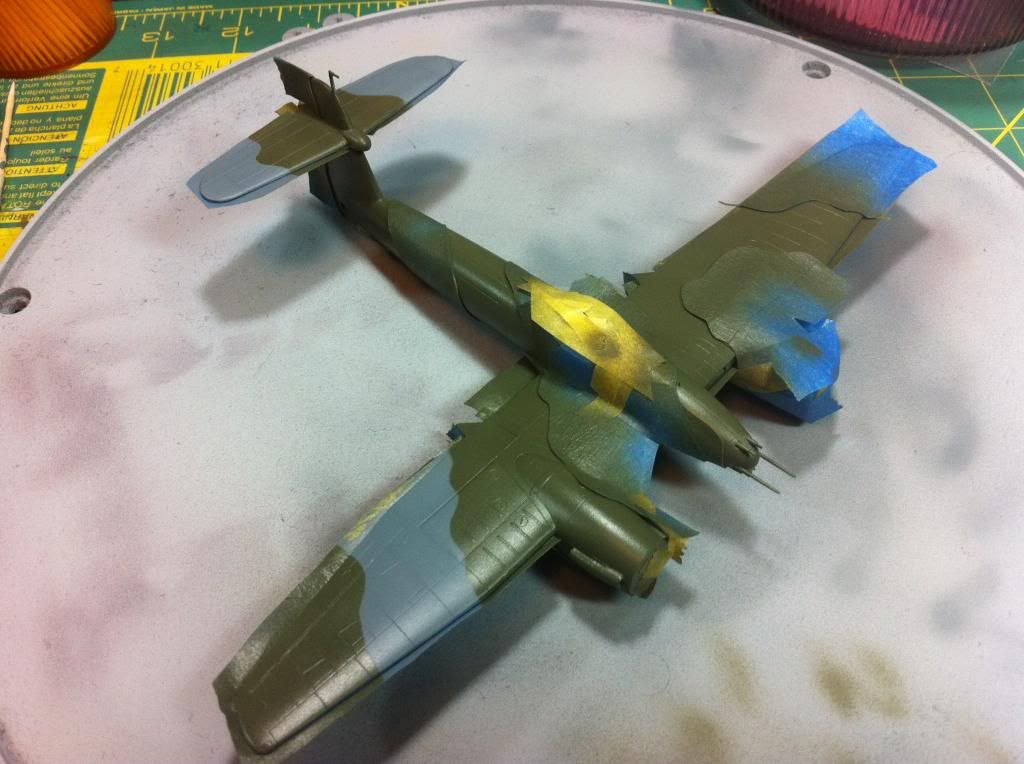 And the result. Not as happy as I'd like to be. I needed to thin the paint a bit more but at least it didn't ruin it. 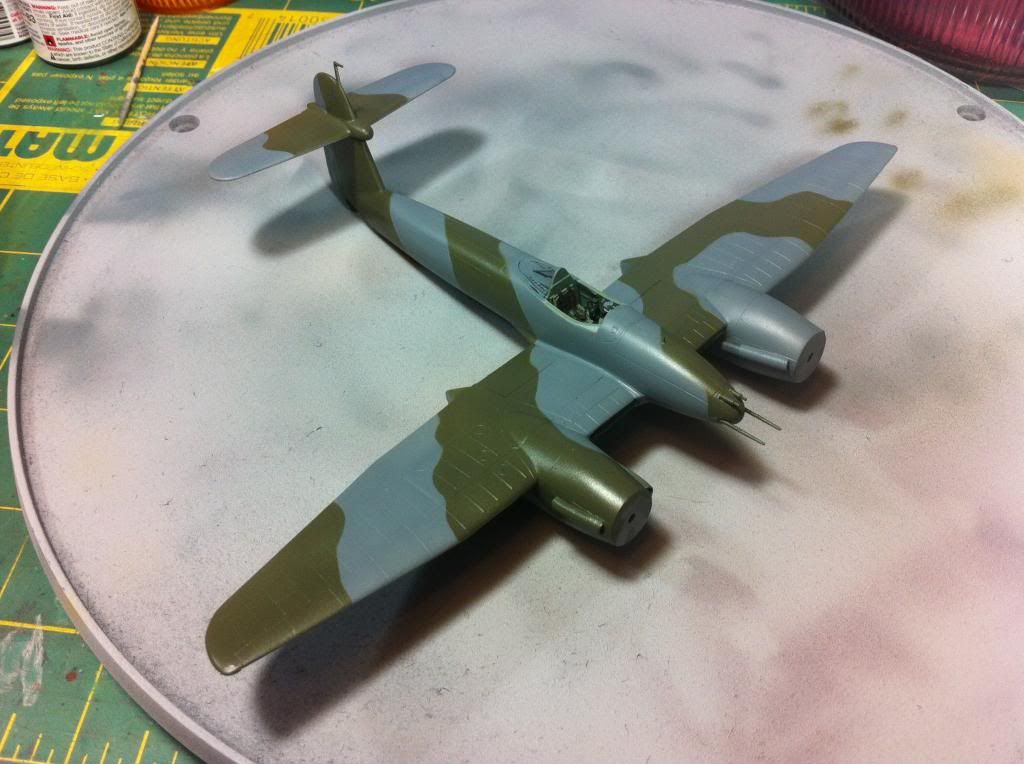 Next up will be the sky fuselage stripe and spinners. I'll have a bit of panel and line washes coming later after the decals and weathering. |
|
|
|
Post by Leon on Jul 3, 2013 19:20:59 GMT -5
Coming a long nicely Rick.Looking forward to the next update.
|
|
|
|
Post by wbill76 on Jul 3, 2013 20:29:08 GMT -5
Nice to see this one moving again. Camo pattern and paint work look good from here Rick.
|
|
Rick
Full Member
  
Member since: March 2013
what to build, what to build . . . Ok THAT one!
Posts: 854 
|
Post by Rick on Jul 7, 2013 14:06:49 GMT -5
Couple more update pics. Took care of a few touch ups. Added the yellow recognition to the leading edge and painted the sky band to the rear fuselage. Not pictured but finished up the props, spinners, wheels, and landing gear doors. All have been given a glossy shine to make ready for markings an washes. URL=http://s1357.photobucket.com/user/Scrapman76/media/Westland%20Whirlwind%20FB%20Mk%201/IMG_1669_zps042597de.jpg.html]  [/URL]  |
|
bish
Full Member
  
Member since: January 2013
Horatio Nelson 'I am a Norfolk man, and i glory in being so'
Posts: 555
Jan 13, 2013 8:57:43 GMT -5
Jan 13, 2013 8:57:43 GMT -5
|
Post by bish on Jul 7, 2013 14:34:16 GMT -5
She's looking really nice.
|
|
Rick
Full Member
  
Member since: March 2013
what to build, what to build . . . Ok THAT one!
Posts: 854 
|
Post by Rick on Jul 7, 2013 15:43:13 GMT -5
Forgot, to include this one.  |
|
|
|
Post by deafpanzer on Jul 7, 2013 15:46:58 GMT -5
Looking great... nice pre-shading and camo job!
|
|
|
|
Post by wbill76 on Jul 7, 2013 16:31:42 GMT -5
Looking good with the paint on Rick, making good progress.
|
|
Rick
Full Member
  
Member since: March 2013
what to build, what to build . . . Ok THAT one!
Posts: 854 
|
Post by Rick on Jul 10, 2013 6:05:52 GMT -5
Thanks for the kind words gents. Felt good to get moving again. Just finished up the markings and working on the landing gear. A note to any that build this kit: The decals are very good, but also VERY fragile. They released from the backing within seconds of touching the water. Take your eyes off of them and they float away. Had a couple of tears while positioning them too. The markings placement on this one are very different from all other RAF aircraft I've seen. Had to go to photo resources to verify placement. Tiny wing roundels, serial number forward of the fuselage band, and the fuselage roundel/codes are placed more forward than other aircraft. 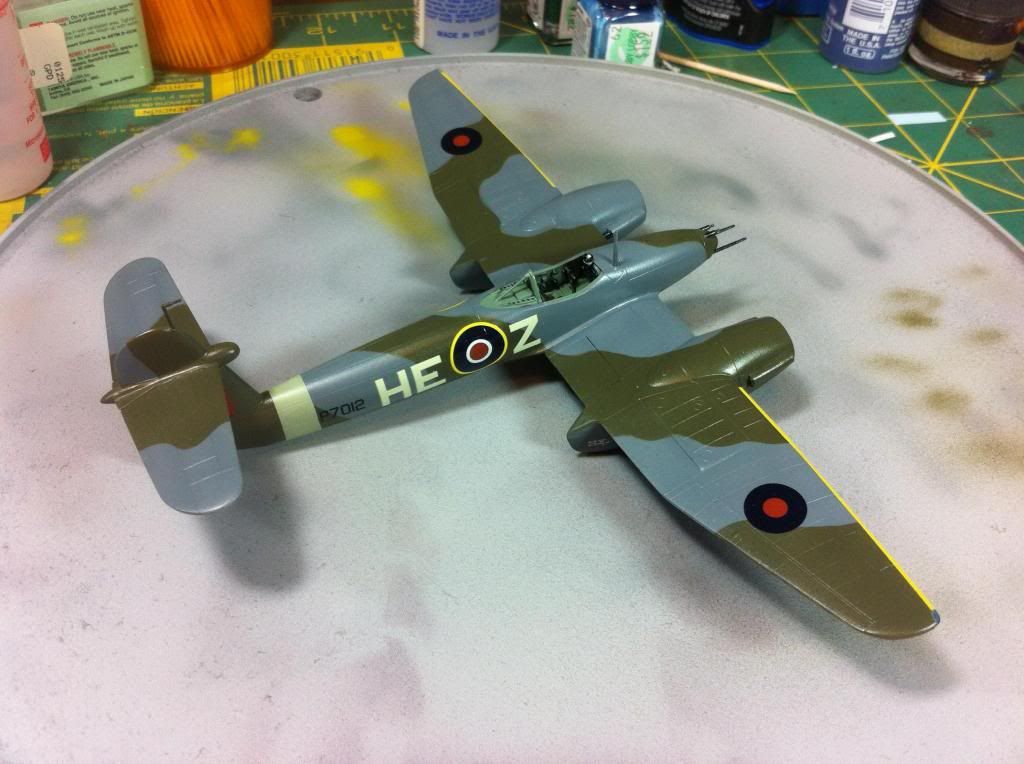 Anyway, construction is on the home stretch now. Working on landing gear (which have some serious fit issues) and the props. Next update should be at the weathering stage. Woohoo! |
|