|
|
Post by deafpanzer on Jul 10, 2013 9:07:00 GMT -5
The markings look GREAT! For some reason I like H-E-Z better...  |
|
thug626
Senior Member
   
Member since: January 2013
Posts: 2,030
Jan 15, 2013 13:05:28 GMT -5
Jan 15, 2013 13:05:28 GMT -5
|
Post by thug626 on Jul 11, 2013 12:51:48 GMT -5
Hello Rick, I too was just "kicking around the site" while enjoying my cup of java when, I came across your build. This is a very nice build and, I am glad to see that it was not relegated to the I'll-finish-it-someday- bin.  For a 1/72 kit it certainly appears to have some rather delightful detail. I had built this type about 35 years ago....must have been an Airfix kit. No where this nice! Keep up the solid work. Dave |
|
Rick
Full Member
  
Member since: March 2013
what to build, what to build . . . Ok THAT one!
Posts: 854 
|
Post by Rick on Jul 11, 2013 14:55:31 GMT -5
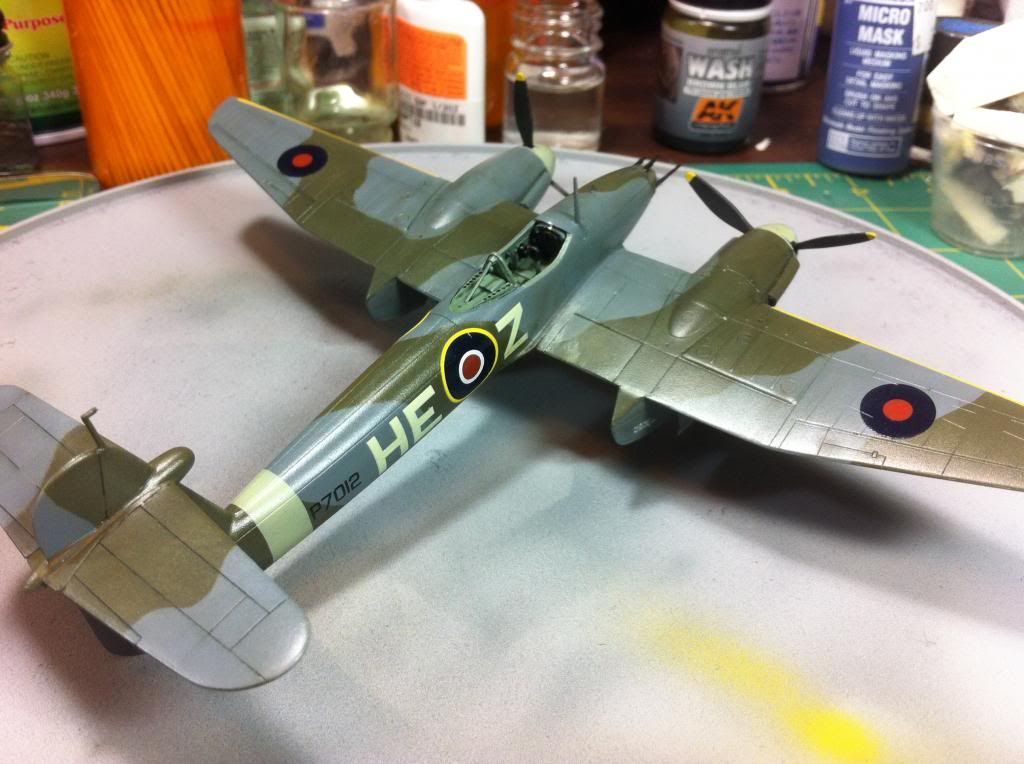
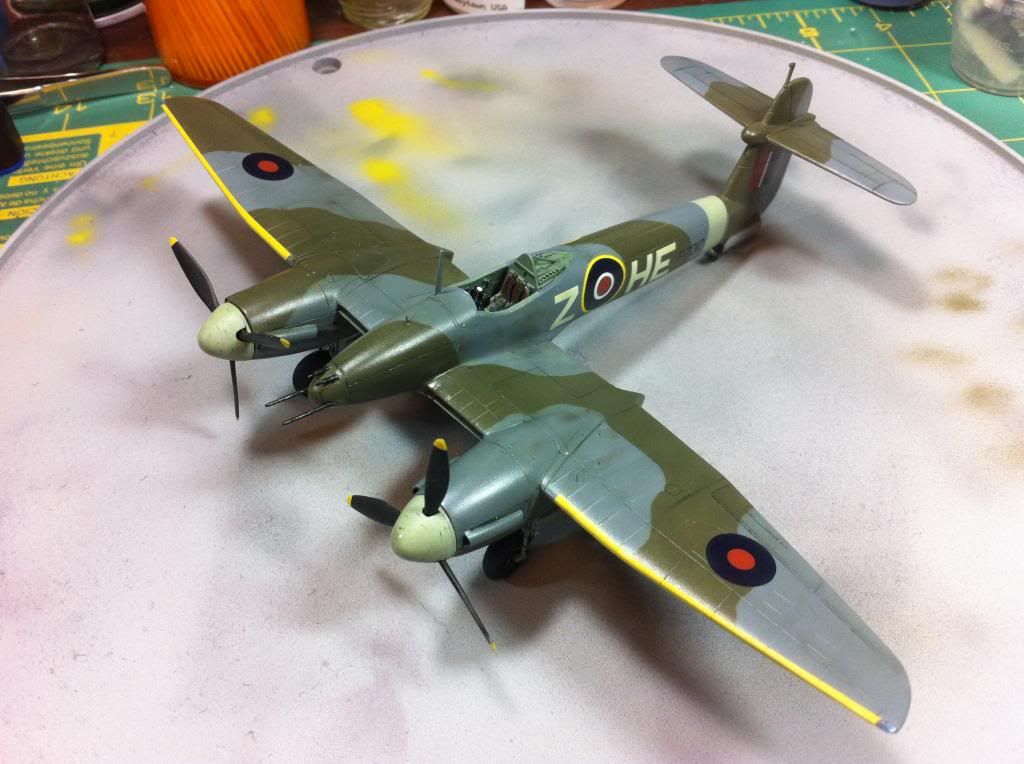
Thanks for sharing your thoughts guys. I appreciate you stopping by for a look. I'd been looking for one of these for a few years and finally came across it. I had heard of the Airfix kit and the quality concerns so I was glad to find this one. While it does have some fit issues and the resin it came with isnt the best, It does have very good detail that I hope the weathering brings out. Whirlwinds were quite the hot rods in their day, when the engines worked right. Shame that RRoyce dropped them to build Merlin's. That ended any chance of future success. Even as a twin, it's about the same size as a Typhoon, which replaced it in service. To bad none survived the scrappers. It's an interesting little aircraft.
|
|
Rick
Full Member
  
Member since: March 2013
what to build, what to build . . . Ok THAT one!
Posts: 854 
|
Post by Rick on Jul 22, 2013 1:01:33 GMT -5
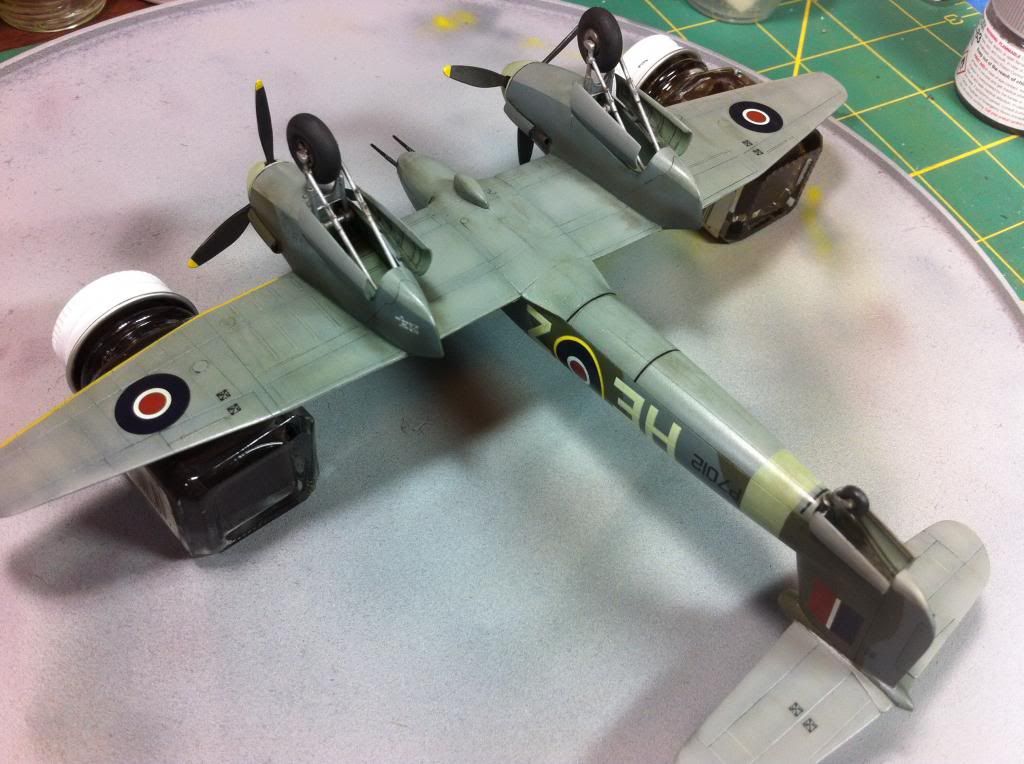
Okay, Have I ever mentioned how much I hate painting canopies. Three times now I've tried to paint the ----! thing. Each time the mask leaks paint or the paint is to thin, or it peels off the frame so it has to be re-done. Each time, I've had to strip the paint, a quick swish of Bleche White tire cleaner and water rinse and it's ready for a new coat of future and new masks. I'm so PO'd with it right now, I could almost launch it across the room. And on top of that, after being so careful with the nose mounted 20mm cannons I broke two of them off finishing the weathering. Here's a couple pics of the finished (except for the canopy!) Whirlwind:    If I can get the canopy properly finished up and a quick flat coat, she'll be ready for her finished portraits. Thanks to those that followed along. Any suggestions for masking canopies are greatly appreciated. Rick |
|
|
|
Post by deafpanzer on Jul 22, 2013 9:53:16 GMT -5
It is really looking great!!!! Nice job applying dark washes!
|
|
Deleted
Member since: January 1970
Posts: 0
Nov 22, 2024 13:24:36 GMT -5
Nov 22, 2024 13:24:36 GMT -5
|
Post by Deleted on Jul 22, 2013 14:00:14 GMT -5
|
|
|
|
Post by wbill76 on Jul 22, 2013 20:13:09 GMT -5
Sorry to hear of your canopy woes Rick! I've heard of some builders using BMF as a mask because of how well it burnishes down but I can't comment myself as it's been years (over a decade) since I last built anything with wings.  That aside, the weathering and finish on this one is top notch! |
|
Rick
Full Member
  
Member since: March 2013
what to build, what to build . . . Ok THAT one!
Posts: 854 
|
Post by Rick on Jul 22, 2013 20:48:35 GMT -5
Thank you for the kind comments. Much appreciated in this time of intense frustration. The canopy mold is soft and not clearly defined. Definitely a shortcoming of this kit. Deaf and Dicky, you both have always been encouraging through this and the mossie build and beiing fairly new on the site, I appreciate that. Chris, thank you. I've seen myself drawn to lesser known subjects over the years. And I agree with you 100% regarding the mossie. WBill, I've never used BMF either so I'm not sure I want to jump into a entire new realm just to finish this one up. Three weeks on the last stinkin' part is enough! It was supposed to be a quick easy build just so I could get another finished up after 3 years on the mosquito. At this point,I think my next one will not have a canopy! Geez, I'm just hoping I can get the canopy done on this one before the next IPMS show in Little Rock - in September!
|
|
thug626
Senior Member
   
Member since: January 2013
Posts: 2,030
Jan 15, 2013 13:05:28 GMT -5
Jan 15, 2013 13:05:28 GMT -5
|
Post by thug626 on Jul 23, 2013 17:40:59 GMT -5
The thought of "a quick easy build" is usually the last conscious thought a modeler has before waking up weeks later in a styrene/resin/cyanoacrylate/PE induced stupor. Wondering, " what the H-E-double hockey sticks" happened?
Way to stay with it. I hear ya about September! I'm hoping to get mine done before the McMinville show that month.
Dave
|
|
venom1
Full Member
  
Member since: October 2012
Posts: 1,369
Oct 10, 2012 2:40:03 GMT -5
Oct 10, 2012 2:40:03 GMT -5
|
Post by venom1 on Jul 25, 2013 0:08:33 GMT -5
Hi Rick, In regards to Bare Metal Foil (BMF), I have been using it quite a lot for masking canopies, I find it an excellent medium for this particular job. I feel it is a lot less faffing about than trying to get tape to follow a particular curve, or much less time intensive than cutting out lots of little squares of masking tape and laying them all over the canopy.  All you need is some good quality BMF (obviously!), a brand new cutting blade (nice and sharp is the key!) and a cotton bud for burnishing the foil down (I think they are called Q-Tips in the US?). Start off by cutting a piece of foil large enough to cover the area you want to do. The shape and curve of the canopy will tend to dictate how many pieces you need. Basically, I try and do it so as not to have any creases in the foil after it is burnished down. Don't be afraid to overlap the foil either, it is very thin so you will not lose any detail in the overlapping areas. Burnish the foil down over the entire canopy with the cotton bud. As you do, you will find that every single canopy detail, whether raised or engraved, will be picked up by the foil. Now, taking your fresh new blade (I use a No. 11 surgical steel blade), gently follow the (now obvious) lines of the canopy framing and trim away all the foil covering the framing, leaving only the glass areas covered. You don't need much force at all, the foil is quite fragile and you do not want to scratch the canopy itself! If you accidentally lift a part of the foil you don't want to, just burnish it back down again with the cotton bud. I will usually do this anyway, once I have finished trimming to ensure all edges are down tight against the frame before painting. Now you are basically ready for paint! Just remember to always paint the interior cockpit colour first, before the fuselage colours go on, otherwise you will be sad. Ask me how I know.....   It may sound a bit tricky, but it is actually not at all! With patience and a careful hand, you will get perfect canopy framing every time!  TBH, I never use Tamiya tape for masking. I have great vinyl sticker material which is excellent for masking, so between that stuff and BMF, I find it is all I need. As BMF is a bit expensive, I tend to use the vinyl sticker material for simple style canopies, like an F-15 or F-16, and then where there will be more effort involved (heavy framing) I will use BMF, for example on my Wessex I am currently (eternally?....) building. Ennyweigh, sorry to ramble on, hope that has been of some help to you mate! Don't give up at this late stage, you are almost there!!!  Cheers, Sam  |
|
Rick
Full Member
  
Member since: March 2013
what to build, what to build . . . Ok THAT one!
Posts: 854 
|
Post by Rick on Jul 25, 2013 21:03:32 GMT -5
Dave and Sam, thanks for sounding off. I appreciate the comments. Sam, your explanation of BMF makes it sound like a very intriguing method that I can see will be worth the try in the near future. (OV-10, HE-219) I appreciate you sharing how it's done. I'm going to plan to pick some BMF up next time in the hobby shop. That's one of the great things about this site that I really like. Sharing knowledge freely. I hope your description of the process helps more than a few others as well. Thank you. On another note, 3rd times a charm!!!!! I finally got a decent coat of paint on the canopy!  Not sure why this was so difficult but it was one problem after another. Canopy details are extremely soft which made it difficult to gauge correct placement of the mask. For some reason, my AB is spewing paint rather than controllably laying out nice even coverage. Had to go to about 40 psi just to get it to pass paint. (Yes, I have disassembled it multiple times to check for blockages. I clean it at the end of each color paint too.) For now, here is one more pic of the completed 1/72 Whirlwind alongside the canopy of my 1/24 mosquito for scale comparison. Next: Good camera and lighting for finished portraits. Will post those once done.  |
|
venom1
Full Member
  
Member since: October 2012
Posts: 1,369
Oct 10, 2012 2:40:03 GMT -5
Oct 10, 2012 2:40:03 GMT -5
|
Post by venom1 on Jul 25, 2013 21:59:24 GMT -5
Great work Rick! Looks the bees knees!!  Glad you got the canopy sorted!  Cheers, Sam  |
|
Deleted
Member since: January 1970
Posts: 0
Nov 22, 2024 13:24:36 GMT -5
Nov 22, 2024 13:24:36 GMT -5
|
Post by Deleted on Jul 26, 2013 1:53:18 GMT -5
Nicely finished there,Rick!  |
|
|
|
Post by wbill76 on Jul 26, 2013 16:33:48 GMT -5
3rd time is indeed the charm! Glad you stuck with it, it came out looking brilliant. That Mossie canopy by comparison really gives you a good scale difference!
|
|
Rick
Full Member
  
Member since: March 2013
what to build, what to build . . . Ok THAT one!
Posts: 854 
|
Post by Rick on Jul 26, 2013 21:53:35 GMT -5
Well, she is finally done. I'd stick a fork in it but I'd end up breaking it. I appreciate all the encouragement and input. I have created a thread in the Gallery for her final portraits. Thank you.
Rick
|
|
|
|
Post by `Boots` on Jul 28, 2013 16:33:16 GMT -5
That is fabulous Rick......i really like the look of this wingy i gotta say, seems like you got the canopy issue sorted  , superb work on this fine lady  |
|
bish
Full Member
  
Member since: January 2013
Horatio Nelson 'I am a Norfolk man, and i glory in being so'
Posts: 555
Jan 13, 2013 8:57:43 GMT -5
Jan 13, 2013 8:57:43 GMT -5
|
Post by bish on Jul 31, 2013 5:29:15 GMT -5
That's a great looking build. Looking forward to the final pics. Looks like I have interesting challenges ahead with this kit.
What did you use for the wash.
|
|
Rick
Full Member
  
Member since: March 2013
what to build, what to build . . . Ok THAT one!
Posts: 854 
|
Post by Rick on Jul 31, 2013 6:09:05 GMT -5
Thanks Bish. I used AK's brown wash for panzer gray for the panel lines but they are very shallow so it did not have great effect. Better effect came from using artist oils to fade and grunge up the pans. Tamiya oily black weathering powder took care of the exhaust. I think the biggest challenges were a bit outside of the kit itself. Mainly being careful of not breaking off those 20mm cannon sticking so far out of the nose, and keeping track of the resin when you open the bag. Parts are just so small. It actually went together pretty well with the exception of the landing gear and wheels. Alignment wasn't the greatest but I've seen worse problems before. The canopy is soft in it's molding which made aligning the tape mask the hardest part. I ended up doing the vertical sections in one stage then after curing, masked the horizontals. My bigger issue was my AB and paint which I still have not resolved yet. I couldn't get it to atomize the paint well. I mixed the paint same as I have for years but had to double or triple my air pressure to get it to spray. Maybe it's a good excuse to get a new one!  I think you will enjoy the kit so don't shy away from it. I'll look forward to your build when you take a crack at it. Rick |
|
bish
Full Member
  
Member since: January 2013
Horatio Nelson 'I am a Norfolk man, and i glory in being so'
Posts: 555
Jan 13, 2013 8:57:43 GMT -5
Jan 13, 2013 8:57:43 GMT -5
|
Post by bish on Jul 31, 2013 6:47:21 GMT -5
Thanks for the info. I have been using AK's streaking grime recently, which has good results, but always looking to try something new.
I will keep those points in mind, and remember to keep those resin parts some where safe.
|
|
Deleted
Member since: January 1970
Posts: 0
Nov 22, 2024 13:24:36 GMT -5
Nov 22, 2024 13:24:36 GMT -5
|
Post by Deleted on Jul 31, 2013 7:24:10 GMT -5
Awesome work!
|
|