mz3
Full Member

Member since: October 2012
Posts: 485
Oct 14, 2012 21:09:43 GMT -5
Oct 14, 2012 21:09:43 GMT -5
|
Post by mz3 on Jun 2, 2013 13:04:14 GMT -5
I just looked back at the other posts in here and I didn't mention the jig. If you don't know, this kit comes with a jig for track construction. It also has areas molded in for bending the PE parts of the kit to their proper shape. It's a nice tool, even if it caused me a little headache.
|
|
mz3
Full Member
Member since: October 2012
Posts: 485
Oct 14, 2012 21:09:43 GMT -5
Oct 14, 2012 21:09:43 GMT -5
|
Post by mz3 on Jun 6, 2013 16:55:07 GMT -5
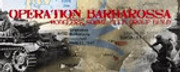
I would like to see more people building this kit. It's a great and fairly easy kit to build. Update... So I know I said I was going to build this OOB, I lied. I couldn't help myself, I ran wires and added a few missing weld lines. 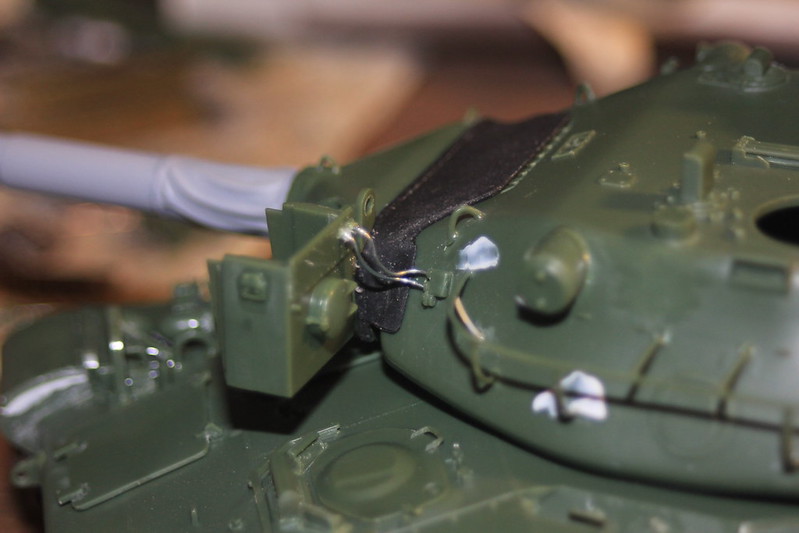 I am assuming this is the way to run these wires. I couldn't find anything online that showed where the wires went into the tank. 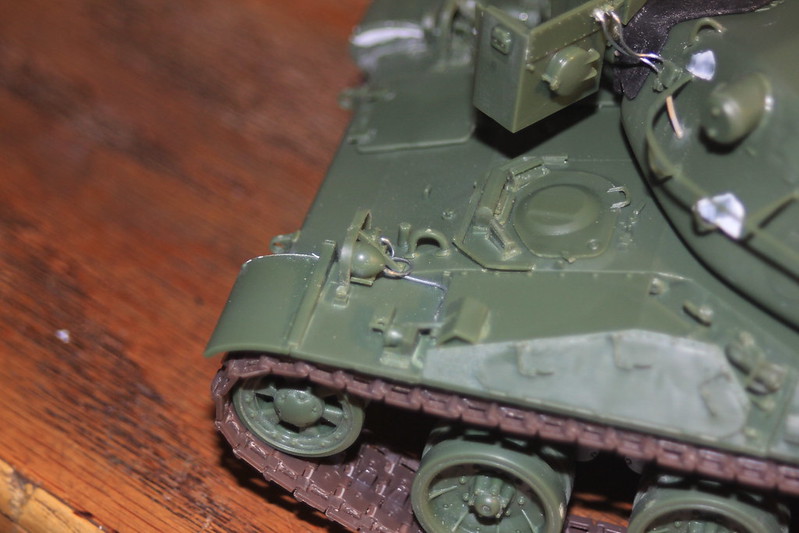  This side was a pain, there are 4 items that need wires in this little area. 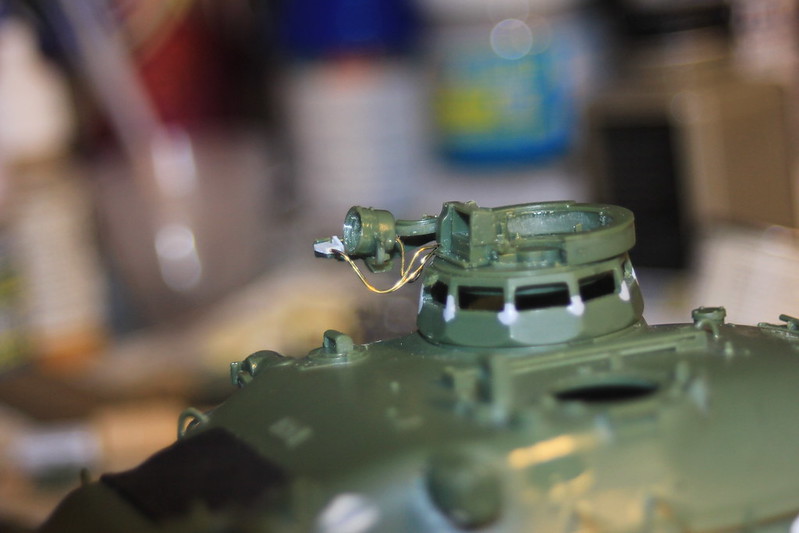 Again, I ran into a part that didn't finish forming, part of the MG mount. I just added a generic piece of styrene, the gun will cover it. 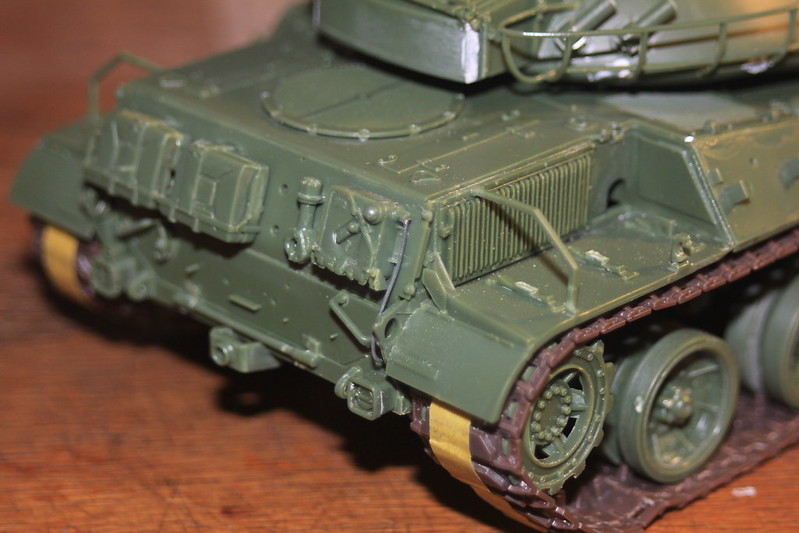 This is the part that made me decide to run wires. For most of the parts there are already connectors molded into place to take wire. The lights on the front don't have any, but it can't really be seen. 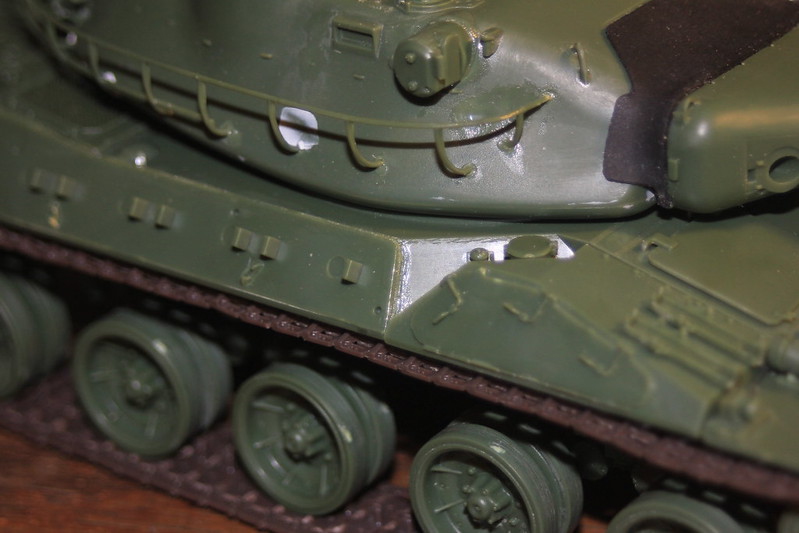 I also added weld lines around the panel that holds the spare tracks and on the panel opposite. They looked weird without them. The panels were just sitting there. 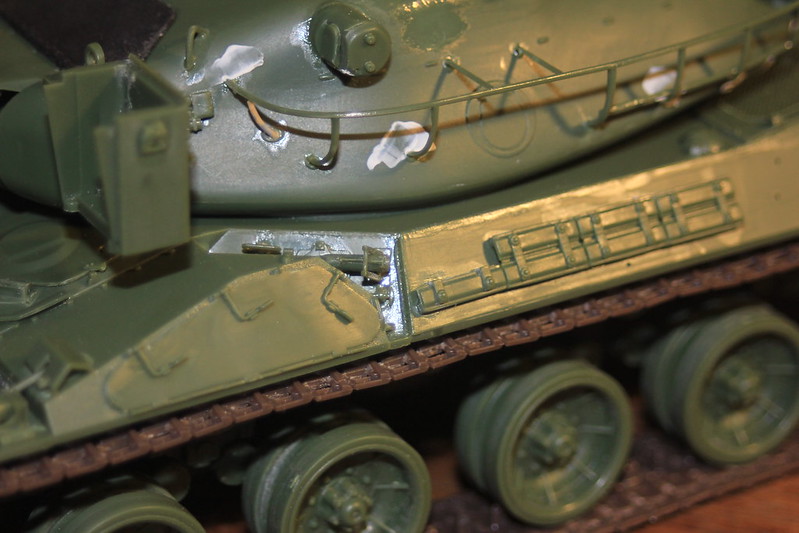 Just a few more things left to do. I think I am going to give the turret a light texture. |
|
|
|
Post by wbill76 on Jun 6, 2013 20:10:46 GMT -5
Nice work on the subtle details mz, always love seeing things like that added to a build.  |
|
|
|
Post by bbd468 on Jun 6, 2013 20:27:52 GMT -5
Wow, nice work with the wires man! Very clean and precise....well done! |
|
mz3
Full Member
Member since: October 2012
Posts: 485
Oct 14, 2012 21:09:43 GMT -5
Oct 14, 2012 21:09:43 GMT -5
|
Post by mz3 on Jun 7, 2013 17:39:00 GMT -5
Thanks guys! Alright, last update before painting!!! I added a light texture to the mantlet and turret- 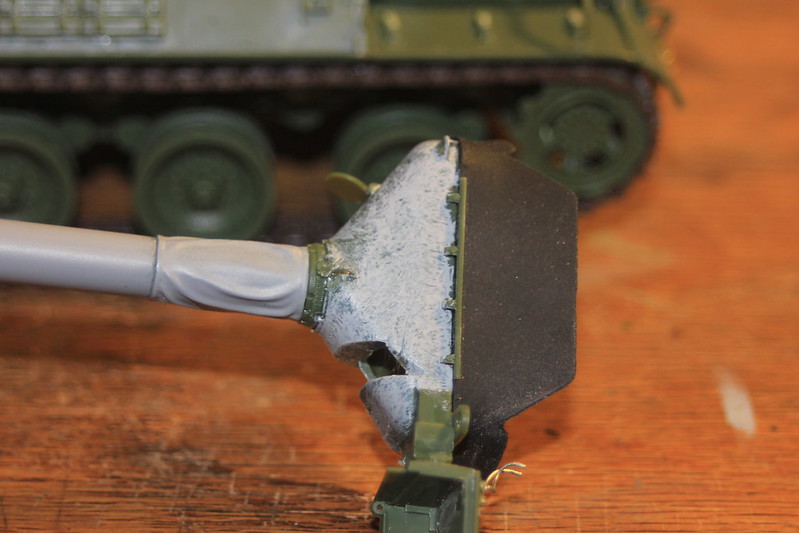 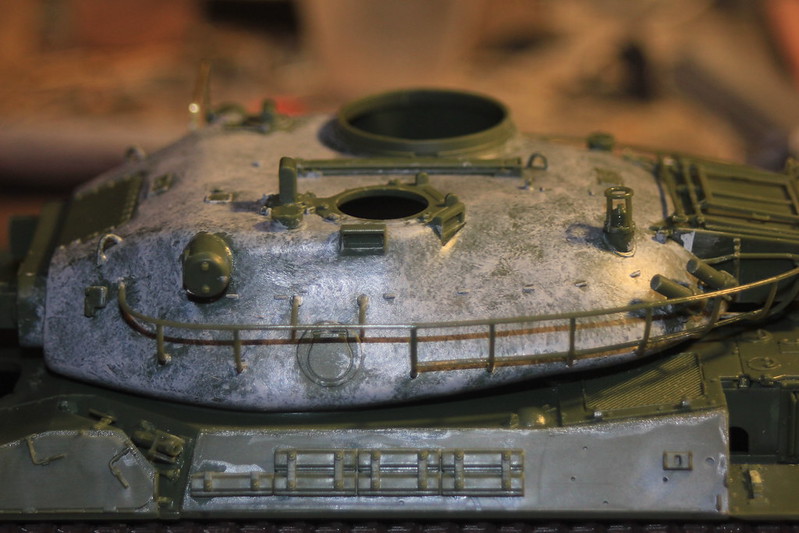 I wanted the texture to be really thin and light, so I stippled Mr. Surfacer 1200 very lightly. I only want the slightest hint of texture on this. Don't ask me why, for some reason I just want it like that. I should get it in primer tonight or tomorrow and hopefully first coat of paint before the end of the weekend. Hopefully. |
|
|
|
Post by Leon on Jun 7, 2013 19:13:48 GMT -5
WOW making very nice progress MZ.Really like the addition of the wiring and texture on the turret. |
|
mz3
Full Member
Member since: October 2012
Posts: 485
Oct 14, 2012 21:09:43 GMT -5
Oct 14, 2012 21:09:43 GMT -5
|
Post by mz3 on Dec 29, 2013 21:57:02 GMT -5
Well that sucked, anyways here's an update... 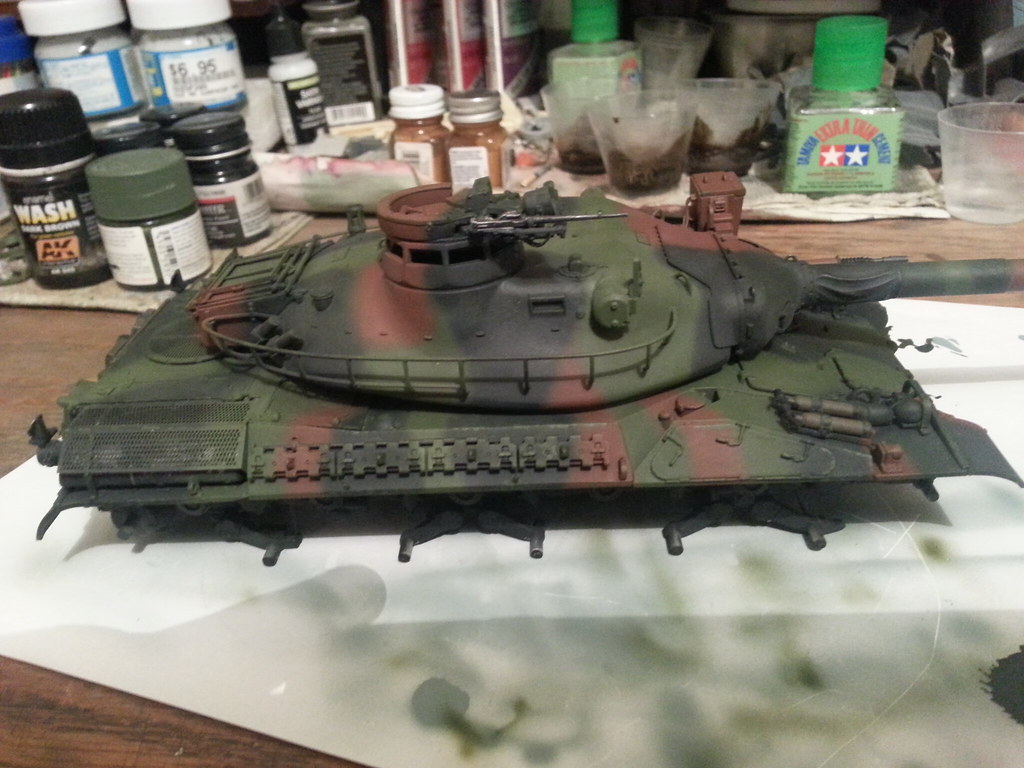  Camo is on, tools are on, first round of chips are done. Colors are Tamiya Nato green, black and brown. Chips are green to show the black and brown wearing off here and there. Hopefully my next update will only be a day or two away, not 7 months. |
|
|
|
Post by wbill76 on Dec 30, 2013 9:28:00 GMT -5
Nice to see this one come back around, here's hoping you can get more bench time in on this one with the winter season. |
|
|
|
Post by deafpanzer on Dec 30, 2013 9:30:41 GMT -5
Lovely work on the camo!
|
|
Deleted
Member since: January 1970
Posts: 0
Apr 29, 2024 3:11:48 GMT -5
Apr 29, 2024 3:11:48 GMT -5
|
Post by Deleted on Dec 30, 2013 13:32:29 GMT -5
glad you are back with it, nice camo
|
|
|
|
Post by Deano on Jan 3, 2014 5:44:30 GMT -5
Excellent work so far , 10 out of 10 for patience with the tracks ... well worth it!
|
|