mz3
Full Member

Member since: October 2012
Posts: 485
Member is Online
Oct 14, 2012 21:09:43 GMT -5
Oct 14, 2012 21:09:43 GMT -5
|
Post by mz3 on May 18, 2013 17:32:47 GMT -5
Meng AMX-30B, something I've been looking forward to building since it was announced. I've been sitting on it for a couple of weeks, getting other things finished. I wanted to build the old Heller kit, but heard some things about and wasn't sure about it. When Meng announced this one, I was sold. 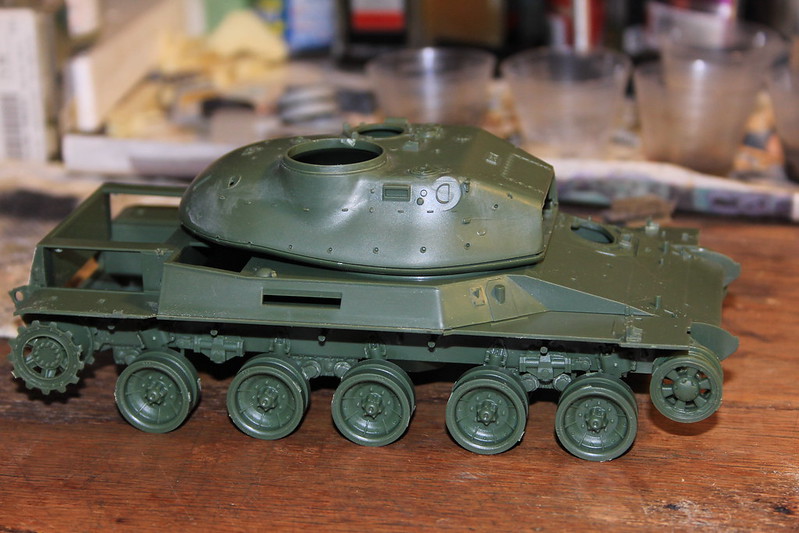 I worked on it for the better part of yesterday and got all of the bottom hull/suspension complete. I love the working suspension. It seems a little fragile in a couple of areas, but once everything is in place it supports the rest of the kit nicely. So far at least. 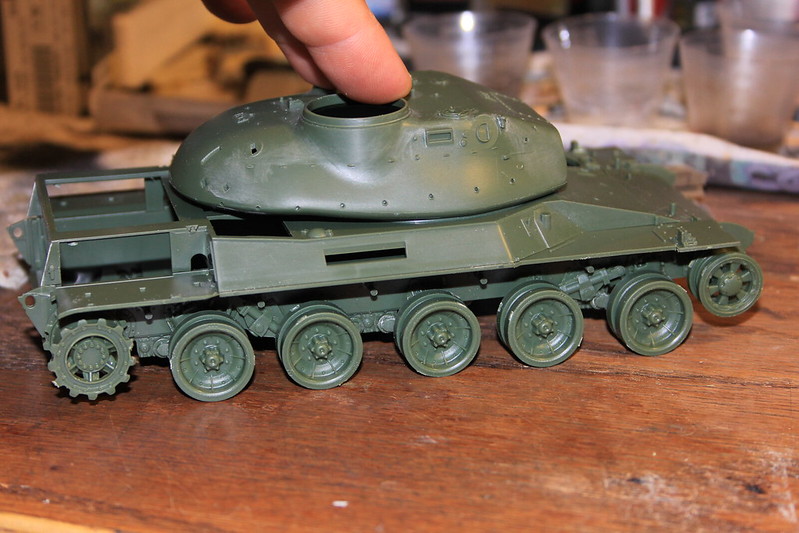 Suspension in action!  Basic turret parts put together... 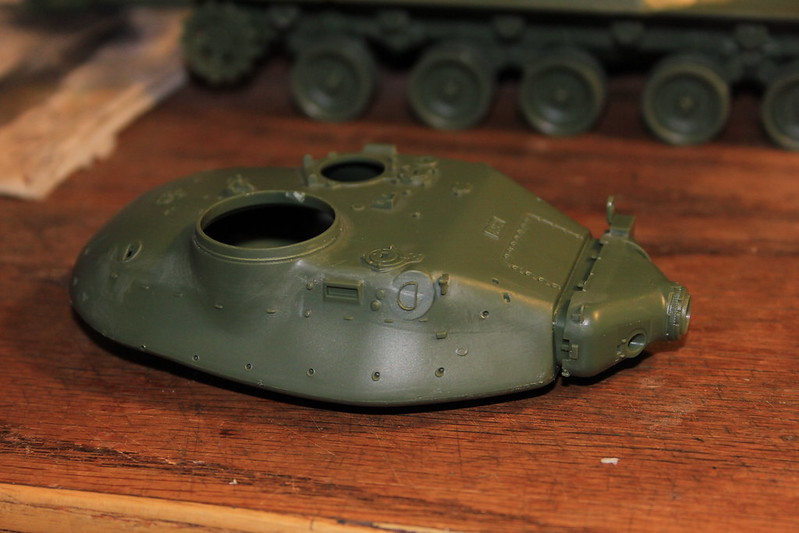 Turret halves and the parts for the gun. I left the rubber cover off the mantlet for 2 reasons. First for texture and painting. Lots easier to do those with out the cover in place. 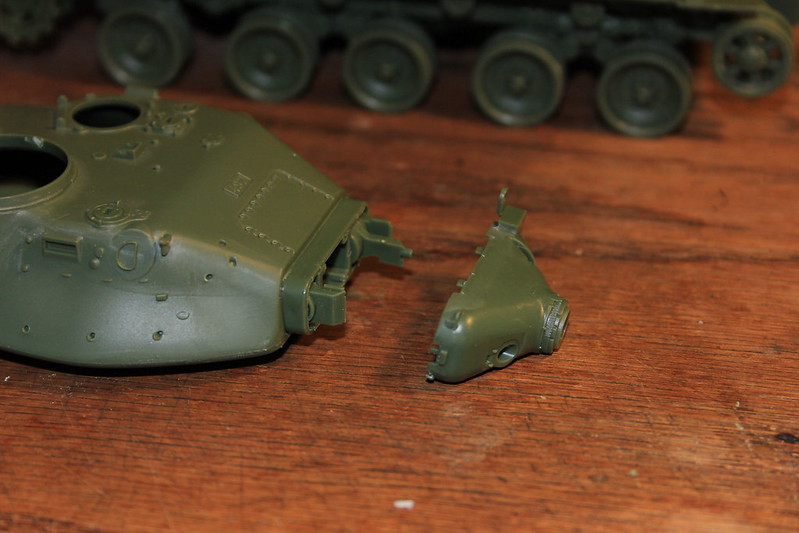 Second, right where the 2 turret halves meet with the other parts, there is a gap on both sides. If the mantlet and cover are on, you can not get to these gaps easily to fix them. |
|
|
|
Post by TRM on May 18, 2013 17:43:13 GMT -5
Looks like you got this going together pretty good!! Count me in on this one!!
|
|
|
|
Post by rbaer on May 18, 2013 19:03:59 GMT -5
I'm gonna keep an eye on this one as well, looks like a really neat kit.
|
|
|
|
Post by wbill76 on May 18, 2013 19:28:37 GMT -5
Nice to see one of these get built up, will be following along with interest!
|
|
mz3
Full Member
Member since: October 2012
Posts: 485
Member is Online
Oct 14, 2012 21:09:43 GMT -5
Oct 14, 2012 21:09:43 GMT -5
|
Post by mz3 on May 19, 2013 17:56:44 GMT -5
Just testing to see how hard it is to post things from my phone... 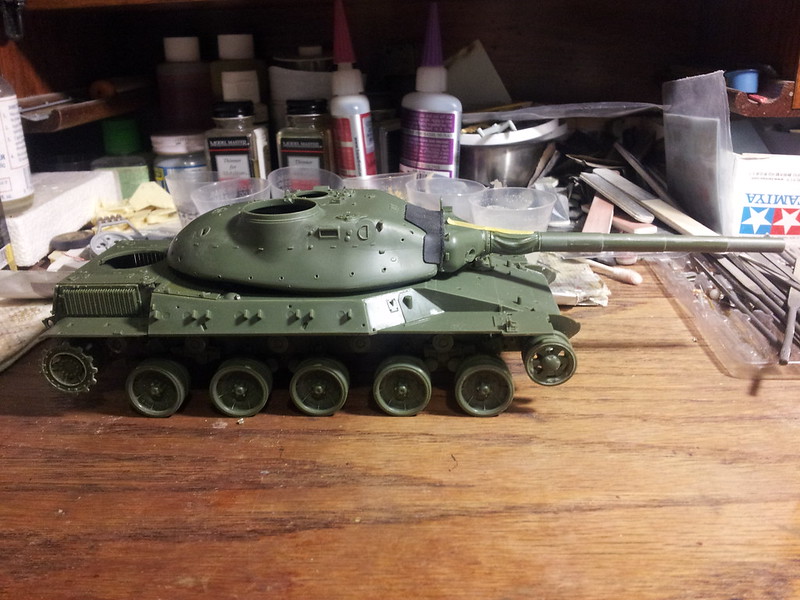 I added more of the details/panels and set the barrel and cover in place to see how to will look. |
|
|
|
Post by TRM on May 19, 2013 19:42:08 GMT -5
Looks sweet!! Almost ready for some color ey?  |
|
Deleted
Member since: January 1970
Posts: 0
Apr 29, 2024 8:10:17 GMT -5
Apr 29, 2024 8:10:17 GMT -5
|
Post by Deleted on May 20, 2013 5:18:09 GMT -5
Looks nice, have one in the stash so watching with interest
|
|
Deleted
Member since: January 1970
Posts: 0
Apr 29, 2024 8:10:17 GMT -5
Apr 29, 2024 8:10:17 GMT -5
|
Post by Deleted on May 20, 2013 9:36:41 GMT -5
I believe this is the first time I've seen one of these built online, or ever!
Keep it going, I'm hooked.
G
|
|
mz3
Full Member
Member since: October 2012
Posts: 485
Member is Online
Oct 14, 2012 21:09:43 GMT -5
Oct 14, 2012 21:09:43 GMT -5
|
Post by mz3 on May 21, 2013 16:47:58 GMT -5
TRM- Paint is a little bit away. If the suspension is any indication, the detail parts on the upper hull/turret are going to take a bit of time. Small update today- Got the barrel done, I think- 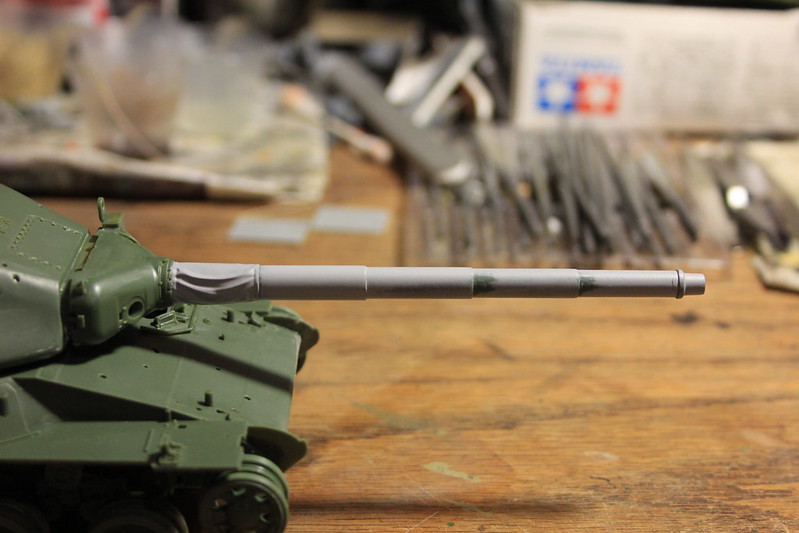 Pretty easy. The main part of the barrel is 2 halves. Sanding was a breeze compared to some of the other barrels I've built lately(see Merkava thread). The tip of the barrel is a separate part, the hole had some flash and is not centered in the barrel tip. Not a huge deal, can't fix it because Meng molded it with rifling. Which is kind of nice. It can only really be seen if I point it out, I hope. I am thinking about putting this in a local show here in a few months. The "cloth" area is 2 separate half. They needed more sanding and filling then the barrel. Overall, I think it turned out nice. |
|
|
|
Post by Leon on May 21, 2013 18:24:28 GMT -5
Some really nice work there MZ.Keep it up fella.
|
|
mz3
Full Member
Member since: October 2012
Posts: 485
Member is Online
Oct 14, 2012 21:09:43 GMT -5
Oct 14, 2012 21:09:43 GMT -5
|
Post by mz3 on May 22, 2013 15:21:52 GMT -5
Update time... Details are going on smooth. Some of the parts are very small. So small I actually changed the way I sit at my desk so I wouldn't drop them into the carpet. 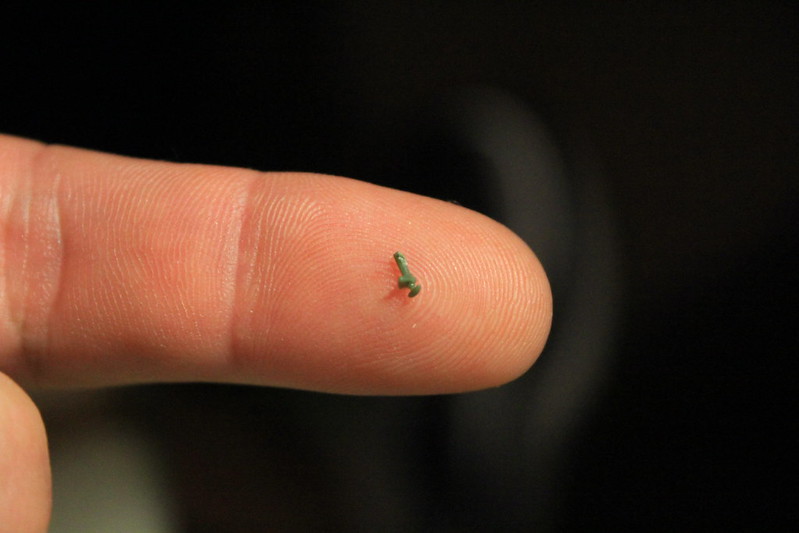 I didn't get as much done as I wanted yesterday, I had some running around to do. But I was able to get most of the detail on the front of the hull. 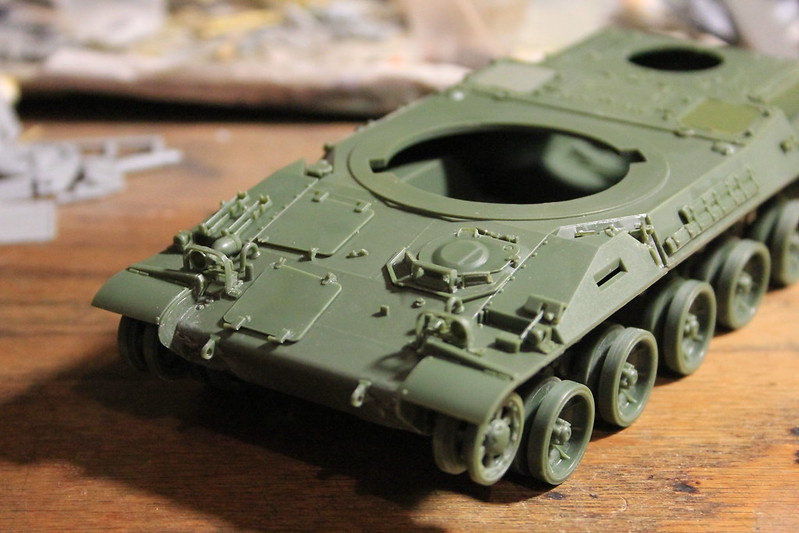 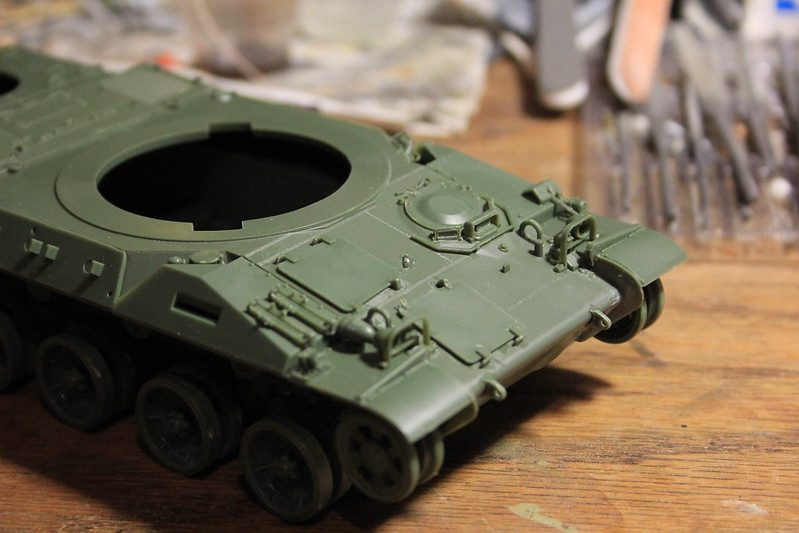 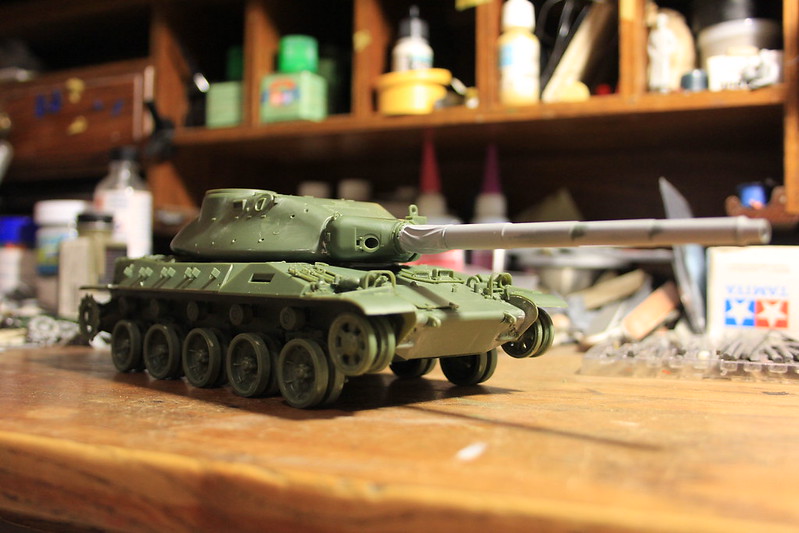 |
|
|
|
Post by rbaer on May 22, 2013 16:28:45 GMT -5
I'm assuming the iddy-biddy part is a hold-down for a tool box lid or something? That's really small....
The dust boot on the barrel looks good. Kit part?
|
|
mz3
Full Member
Member since: October 2012
Posts: 485
Member is Online
Oct 14, 2012 21:09:43 GMT -5
Oct 14, 2012 21:09:43 GMT -5
|
Post by mz3 on May 22, 2013 17:33:24 GMT -5
rbaer- That tiny part is some kind of shut off valve or something. I have extremely limited knowledge of this tank. It's behind the port toolbox, it almost can't be seen. The dust boot is a kit part, I am doing this strictly OOB. Not adding or modifying anything. Dicky- The suspension is basically the same as the Dragon Tiger 1 suspensions- 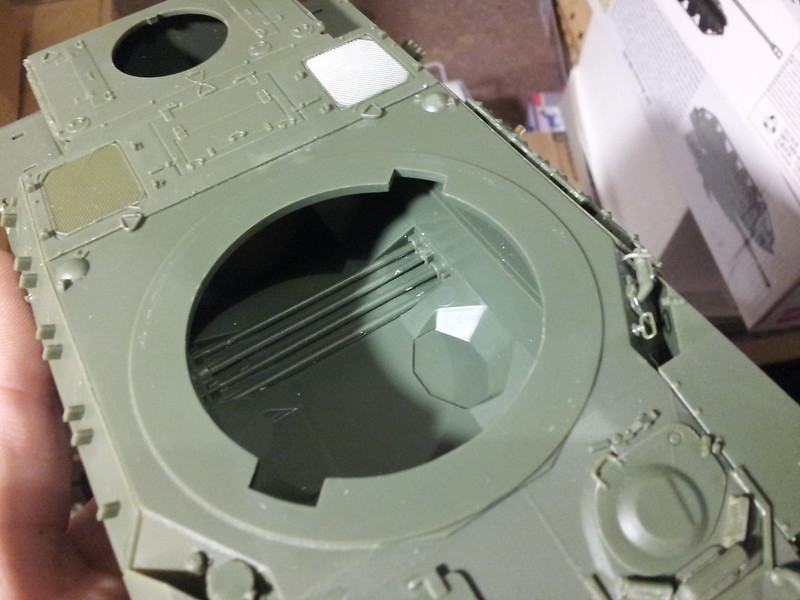 Messing with it on my bench, it doesn't seem to springy. All together there is a spring to it, but individually they aren't strong at all. I will wait until I have completed the tracks before I decide how good or bad it is. My main concern is actually the tracks. If they are going to be "loose" enough to follow the wheels on ground. I would like to make a base for this that has different areas of bumps and mounds to show off the suspension. I don't want to attach it so I can move it around to show the suspension actually works. Obviously, if the tracks are too stiff and have to be physically moved every time, that will not work. Now that my interest is there, I'll probably start the tracks tonight or tomorrow. |
|
|
|
Post by bbd468 on May 22, 2013 19:00:53 GMT -5
Hey MZ3, Ive been wondering when id get to see this kit built and here it is! Looks nice so far man.  |
|
|
|
Post by wbill76 on May 22, 2013 20:15:52 GMT -5
Making good strides on this one mz! Keep at it! I hear you about dealing with small parts...sometimes I have to do the same and usually just as that little voice says 'you really should be careful with this! caused me to lean in a bit more over the work bench.  |
|
Deleted
Member since: January 1970
Posts: 0
Apr 29, 2024 8:10:17 GMT -5
Apr 29, 2024 8:10:17 GMT -5
|
Post by Deleted on May 23, 2013 13:42:05 GMT -5
Smashing stuff! the kit does look good
|
|
mz3
Full Member
Member since: October 2012
Posts: 485
Member is Online
Oct 14, 2012 21:09:43 GMT -5
Oct 14, 2012 21:09:43 GMT -5
|
Post by mz3 on May 24, 2013 19:16:08 GMT -5
Well, turns out that the tracks are too loose. I put a length of them together and they all fell apart. The problem seems to be the 2 halves of the link don't make a good connection around the "pins". I worked on it for a while, I think I can get it to work. I'll have to hit every link around the pins with thin cement and use tweezers to make the connections come together. I think the tracks will work with the suspension with a little work.
The suspension arms and torsion bars are molded as one piece. But it would be very easy to work them into place with cement if someone wanted to do that. The suspension arms fit into the holes in the lower hull nicely, a little glue will hold them in place without any problems.
|
|
|
|
Post by dupes on May 24, 2013 19:18:03 GMT -5
Looking at the top of your hull, I can certainly see some places that Heller simplified.
Like how she's coming out so far!
|
|
|
|
Post by Leon on May 24, 2013 19:34:12 GMT -5
MZ,That is coming a long very nicely .I know all about those itty bitty parts and the carpet monster.Lost quite a few hatch hinges to it.  |
|
mz3
Full Member
Member since: October 2012
Posts: 485
Member is Online
Oct 14, 2012 21:09:43 GMT -5
Oct 14, 2012 21:09:43 GMT -5
|
Post by mz3 on May 28, 2013 12:22:18 GMT -5
I would have posted sooner, but my computer decided it wanted the long weekend off  Anyway, I got one set of the tracks done last week. It took the better part of 3 days to get the tracks going. I worked on them each day until I could no longer take it. 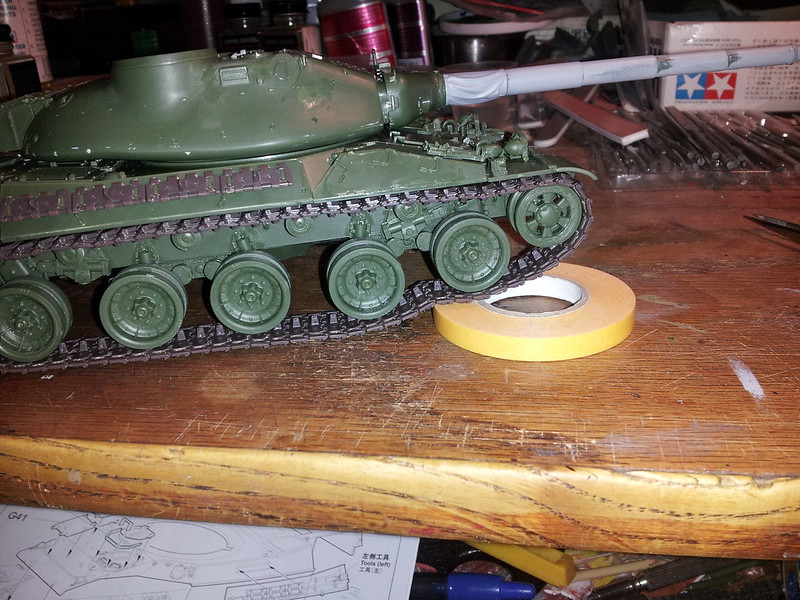 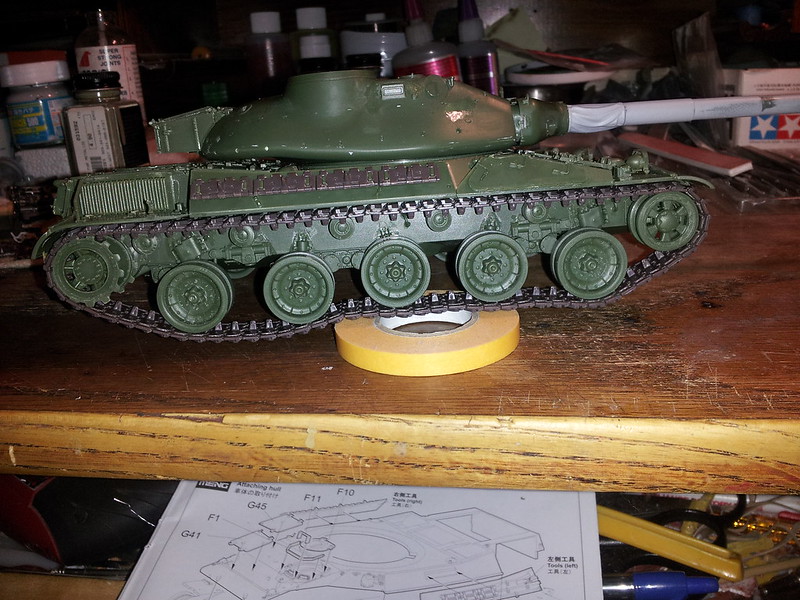 OK, maybe not a little work. Each link has 3 places that need to be glued and tweezed together. 80 links per run. 240 very small, very annoying, very time consuming links to make. But I think it worth the extra effort to get them to work. You can just glue and set them in place, but where's the fun in that. I'll try to get pictures of the process on the second track. |
|
|
|
Post by wbill76 on May 28, 2013 14:49:38 GMT -5
Your time/effort has paid off, the workable nature of the tracks looks good! one down, one to go. |
|
mz3
Full Member
Member since: October 2012
Posts: 485
Member is Online
Oct 14, 2012 21:09:43 GMT -5
Oct 14, 2012 21:09:43 GMT -5
|
Post by mz3 on May 28, 2013 16:03:18 GMT -5
one to go.
|
|
|
|
Post by bbd468 on May 28, 2013 17:19:05 GMT -5
Hiya MZ3, Tracks look nice man. Never really noticed how BAD A$$ this tank looked till i saw your build....very cool.  |
|
mz3
Full Member
Member since: October 2012
Posts: 485
Member is Online
Oct 14, 2012 21:09:43 GMT -5
Oct 14, 2012 21:09:43 GMT -5
|
Post by mz3 on May 28, 2013 17:29:14 GMT -5
I am very much looking forward to painting this. 3 tone nato will make this look even more bad A$$!!!
|
|
Deleted
Member since: January 1970
Posts: 0
Apr 29, 2024 8:10:17 GMT -5
Apr 29, 2024 8:10:17 GMT -5
|
Post by Deleted on May 28, 2013 18:42:33 GMT -5
This looks good. The work required on the tracks is definately worth it in my opinion. I'm waiting for the camo....
G
|
|
mz3
Full Member
Member since: October 2012
Posts: 485
Member is Online
Oct 14, 2012 21:09:43 GMT -5
Oct 14, 2012 21:09:43 GMT -5
|
Post by mz3 on May 31, 2013 20:39:53 GMT -5
Update time- Finally started on the second track- 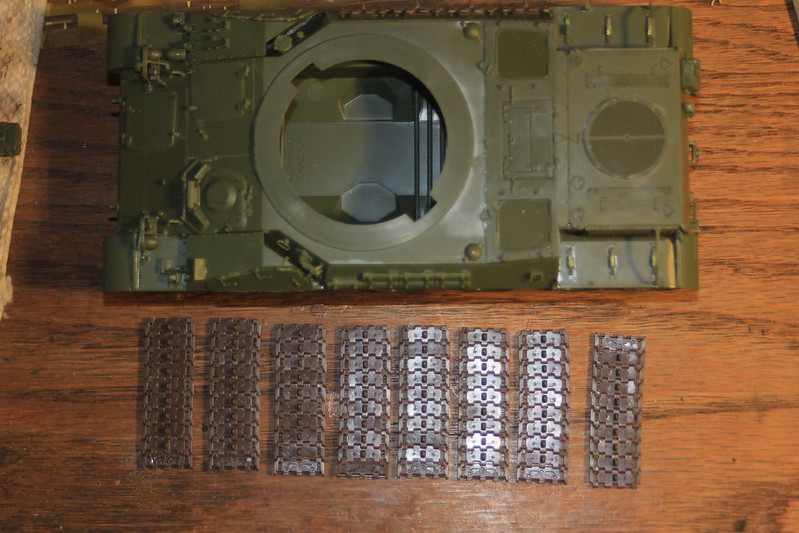 8 runs of 10 links. Makes it easier for me to handle. I will let them sit overnight and get them all attached together tomorrow. One thing I totally love about this kit, the instructions say 80 links, it takes exactly 80 links. I just think that's great! Just sayin'. I've also been working on the turret details- 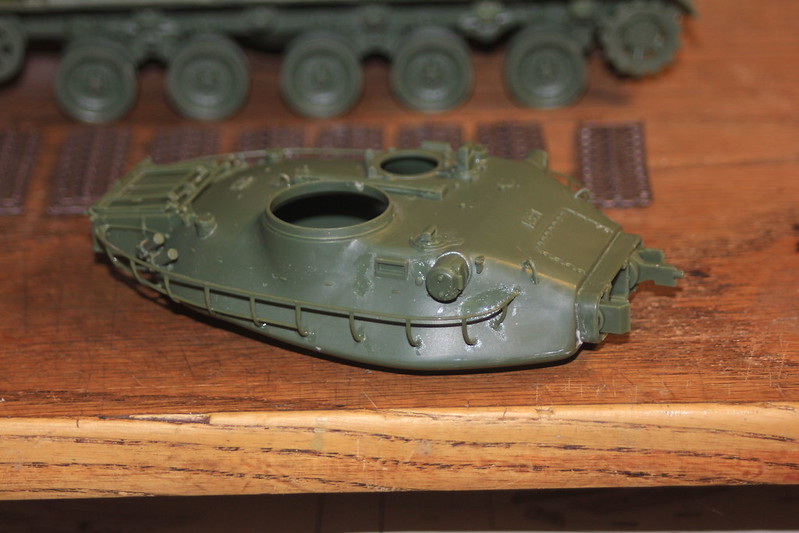 Lots of small details. The stowage racks are very fragile. Luckily I didn't break any part of them getting them off the sprue. Then this- 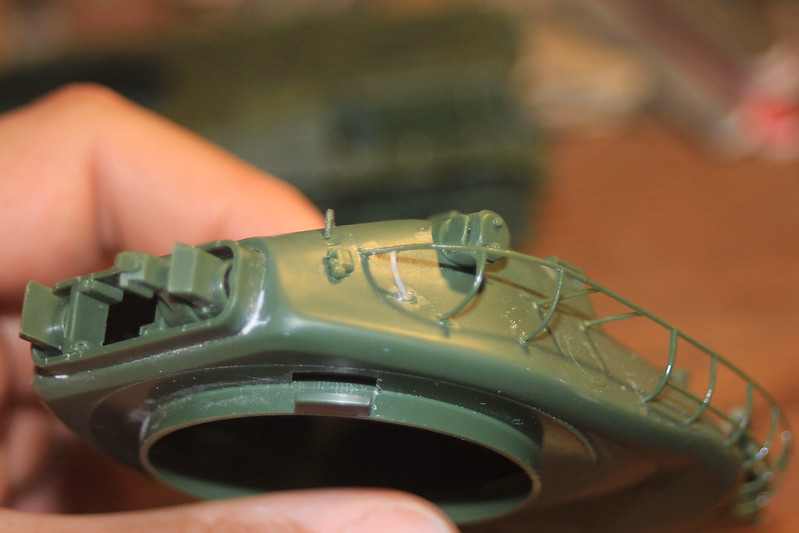 That bar didn't form. There was just a little bit of a nub. Easy fix. Thought it was weird. |
|
Deleted
Member since: January 1970
Posts: 0
Apr 29, 2024 8:10:17 GMT -5
Apr 29, 2024 8:10:17 GMT -5
|
Post by Deleted on Jun 1, 2013 0:55:31 GMT -5
great work on the tracks and the rest is looking good too
|
|
macmcconnell
Full Member
Member since: December 2011
Posts: 1,238
Dec 11, 2011 12:07:33 GMT -5
Dec 11, 2011 12:07:33 GMT -5
|
Post by macmcconnell on Jun 1, 2013 1:34:55 GMT -5
Nice build lot of detail on that one
Mac
|
|
|
|
Post by wbill76 on Jun 1, 2013 17:29:53 GMT -5
Nice work on the tracks, it's a good feeling when the instructions are right! The short shot on the one turret railing is unusual, the QC must've been asleep for that one. Nice fix though. |
|
mz3
Full Member
Member since: October 2012
Posts: 485
Member is Online
Oct 14, 2012 21:09:43 GMT -5
Oct 14, 2012 21:09:43 GMT -5
|
Post by mz3 on Jun 2, 2013 13:00:09 GMT -5
We call that where I work a Friday afternoon Tracks are done!!!! 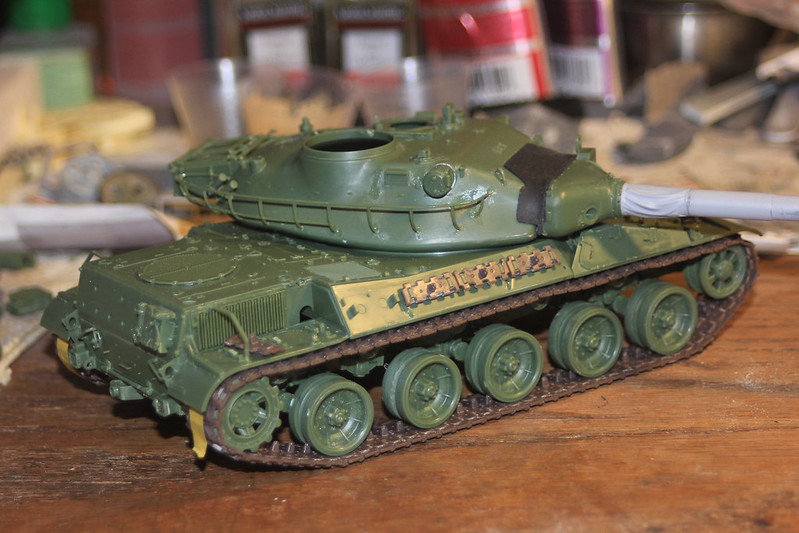 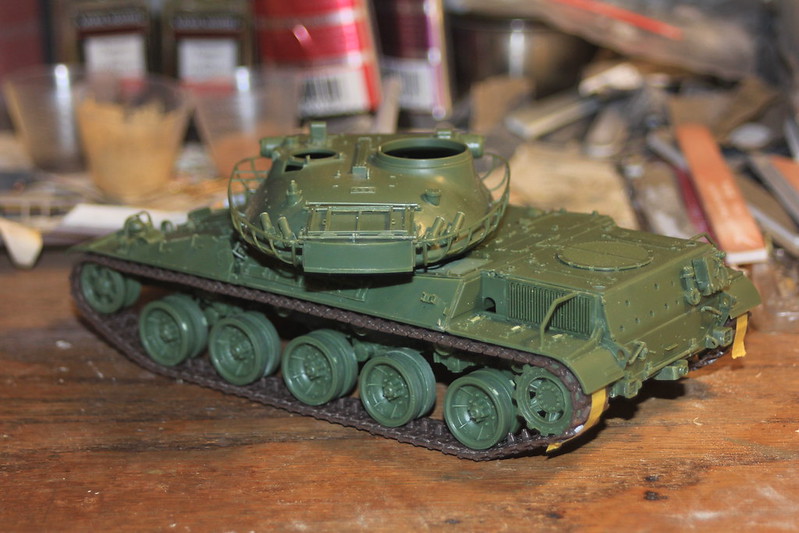 I found that the jig was causing the problems with the link halves not going together properly. The first track, I set the lower links in, glued the upper links in place, then applied pressure to each link. The jig wasn't allowing the pressure to let the 2 halves go together properly. For the second track, I did everything the same, except I took each run out of the jig before I applied pressure. This made the last step about 50 times easier. Instead of fighting the loops for hours, most of them were already making contact and all I had to do was apply thin cement. I took hours for me to make those links connect on the first track, it took 1 hour on the second  I don't know what the exact problem is, at this point I don't really care. The tracks are done, I can move on. I see paint soon!!! |
|


