Deleted
Member since: January 1970
Posts: 0
Nov 28, 2024 16:53:07 GMT -5
Nov 28, 2024 16:53:07 GMT -5
|
Post by Deleted on Jun 1, 2013 6:25:42 GMT -5
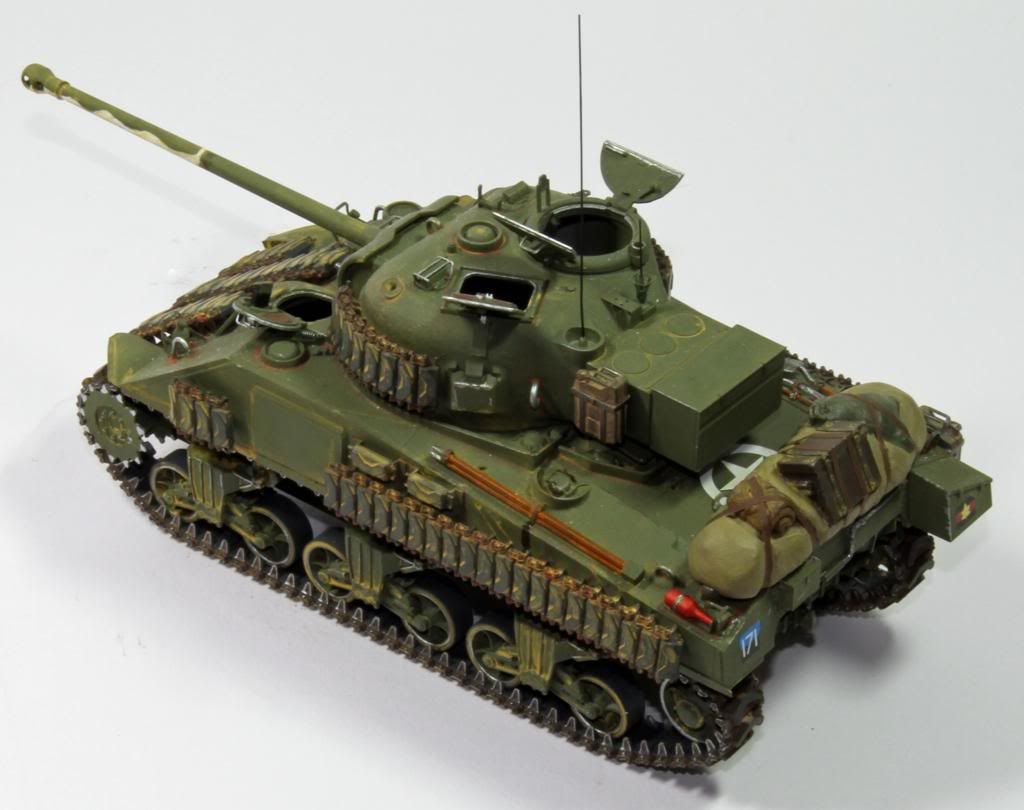
Greetings and Salutations Folks Here's a recent build - not without issues but it came good in the end.  |
|
Deleted
Member since: January 1970
Posts: 0
Nov 28, 2024 16:53:07 GMT -5
Nov 28, 2024 16:53:07 GMT -5
|
Post by Deleted on Jun 1, 2013 6:29:32 GMT -5
Sorry that came in huge, back to the drawing board...
|
|
|
|
Post by bullardino on Jun 1, 2013 8:44:06 GMT -5
Nice one, what did you use for the stowage?
|
|
|
|
Post by deafpanzer on Jun 1, 2013 10:26:35 GMT -5
Nice work!!! Noticed extended stowage box behind the turret. Never noticed it before and it looks cool!
|
|
|
|
Post by TRM on Jun 1, 2013 10:49:23 GMT -5
Nice work on this one Simon!! She looks great!!
|
|
|
|
Post by Leon on Jun 1, 2013 11:02:33 GMT -5
Looks really great Simon.Like the addition of the stowage and all the spare track.
|
|
Deleted
Member since: January 1970
Posts: 0
Nov 28, 2024 16:53:07 GMT -5
Nov 28, 2024 16:53:07 GMT -5
|
Post by Deleted on Jun 1, 2013 14:36:47 GMT -5
I believe that because of the larger weapon mounted in the turret,they relocated the radios into the extension to the turret,then mounted the 'Bustle bin'for personal equipment,etc...(Could be wrong tho?,and frequently am!!!!)
|
|
Deleted
Member since: January 1970
Posts: 0
Nov 28, 2024 16:53:07 GMT -5
Nov 28, 2024 16:53:07 GMT -5
|
Post by Deleted on Jun 1, 2013 15:05:34 GMT -5
Superb work there Simon love it
|
|
|
|
Post by wouter on Jun 2, 2013 0:00:48 GMT -5
welcome over here Mr. Hammerton!
Don't mind about the huge photo: it's a great model and it deserves it ^^
Cheers
|
|
Deleted
Member since: January 1970
Posts: 0
Nov 28, 2024 16:53:07 GMT -5
Nov 28, 2024 16:53:07 GMT -5
|
Post by Deleted on Jun 2, 2013 8:53:30 GMT -5
Hi Guys
Thanks for the kind words.
In answer to your questions:
The recoil travel of the 17pdr required the Type 19 Radio to be relocated in the armoured box, with a hole cut in the turret rear for control adjustment. Some Fireflys had the additional stowage box fitted behind the radio box.
Canadian and Polish Shermans often had these lengths of worn track welded on as appliqué armour. This set was from a Bronco set of T48 links I got my grubby mitts on.
The stowage was created using a product from Deluxe Materials called Create and Shape. It is an acrylic medium that comes in a tub and is the consistency of thick polyfilla when first used. But it dries to a mass that can be cut, sanded and shaped as a solid. The additional bits and pieces were pushed in while the CaC was still soft. Once solid depressions for the straps were carved and filed into the mass and cargo straps were made from strips of Tamiya tape. Avoid using spirit-based paints, but it works fine with all water/acrylic paints.
The extra Jerry Cans were from a deceased Tasca Luchs kit.
Simon
|
|
Deleted
Member since: January 1970
Posts: 0
Nov 28, 2024 16:53:07 GMT -5
Nov 28, 2024 16:53:07 GMT -5
|
Post by Deleted on Jun 2, 2013 8:57:27 GMT -5
Very nice!
I like your take on the stowage.
Ever see photos of these after the war when they cleaned them up for victory parades? They had he!!to pay cutting all those links off. The tanks looked like modern art masterpieces!
G
|
|
Deleted
Member since: January 1970
Posts: 0
Nov 28, 2024 16:53:07 GMT -5
Nov 28, 2024 16:53:07 GMT -5
|
Post by Deleted on Jun 2, 2013 15:25:27 GMT -5
Ha. I've sussed posting images...   Other than getting the nose casing to meet up with the main hull and the rubbish fit of the two turret halves, this was not too taxing a build. |
|
|
|
Post by deafpanzer on Jun 2, 2013 21:35:42 GMT -5
Glad you posted more pictures... it really looks GREAT!
|
|
|
|
Post by bbd468 on Jun 2, 2013 23:45:25 GMT -5
Very nice Shermie Simon....well done sir.  |
|
Deleted
Member since: January 1970
Posts: 0
Nov 28, 2024 16:53:07 GMT -5
Nov 28, 2024 16:53:07 GMT -5
|
Post by Deleted on Jun 3, 2013 2:34:47 GMT -5
Thanks Folks
|
|