wetsellery
Full Member

Member since: June 2013
Posts: 130 
|
Post by wetsellery on Jun 4, 2013 16:04:15 GMT -5
This project started with 1 conversion (F40 => F40 LM), but currently there are 4 F40's on the workbench. I'm using the old Bburago model : 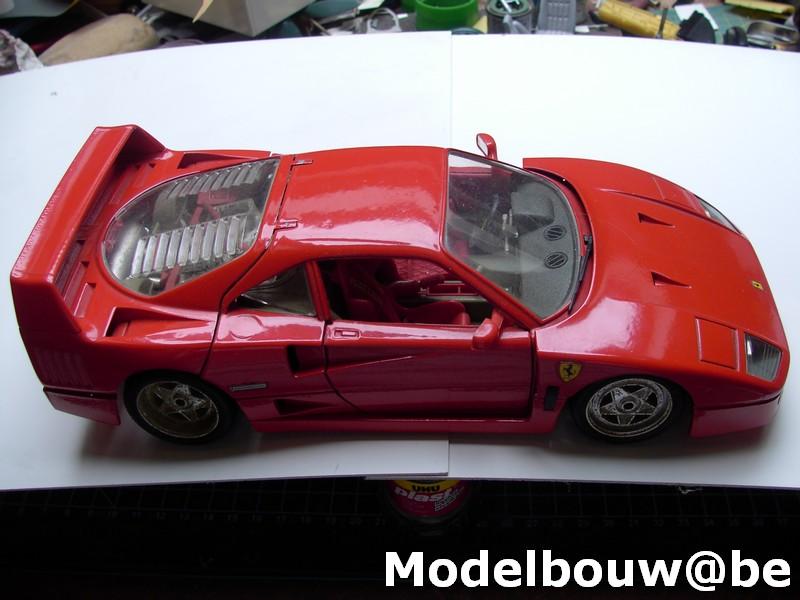  The first one is for a dutch collector and will look like this :  The second one is for a french collector : 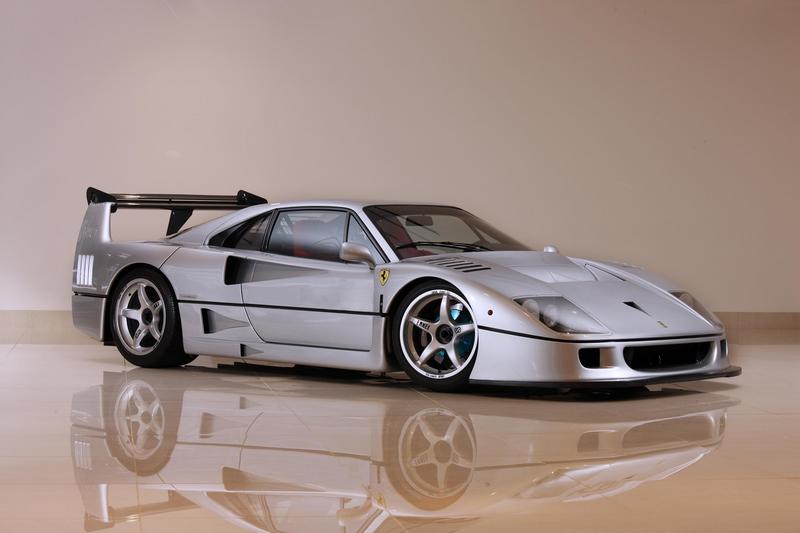 The third one is for me :  I started with an all-out attack with my Dremel on the chassis  : .jpg) .jpg) .jpg) .jpg) First try : .jpg) Nope, second try : .jpg) Not quite, third try : .jpg) Yes, this might work  Second Dremel attack from the rear (auch !) : .jpg) .jpg) Ooh yeah !! I love the smell of a hot cutting disc ! Sincerely Pascal |
|
MOOSE
Full Member
Member since: May 2013
"Imagination is more important than Knowledge"
Posts: 396
|
Post by MOOSE on Jun 5, 2013 1:56:29 GMT -5
Very nice. Are you restoring all 4?
|
|
wetsellery
Full Member
Member since: June 2013
Posts: 130
|
Post by wetsellery on Jun 5, 2013 3:25:34 GMT -5
Very nice. Are you restoring all 4? Yes, but I haven't decided what the fourth one will look like when finished. There's also a Hotwheels F40LM on the workbench. That one will become an F40 IMSA. |
|
|
|
Post by Leon on Jun 5, 2013 3:38:28 GMT -5
Fantastic work your doing Pascal.Never knew diecast could be re worked.  |
|
|
|
Post by bullardino on Jun 5, 2013 15:22:03 GMT -5
Dremel dealers must love you Sorry, just joking Great job, I wouldn't know where to start, it's not easy at all to deal with hard metal... |
|
Deleted
Member since: January 1970
Posts: 0
May 3, 2024 9:43:41 GMT -5
May 3, 2024 9:43:41 GMT -5
|
Post by Deleted on Jun 5, 2013 16:50:09 GMT -5
I've always wondered what could me made out of these diecast models so I'm going to enjoy you're builds... Bring it on!  |
|
Deleted
Member since: January 1970
Posts: 0
May 3, 2024 9:43:41 GMT -5
May 3, 2024 9:43:41 GMT -5
|
Post by Deleted on Jun 5, 2013 17:05:14 GMT -5
Dremel dealers must love you Sorry, just joking Great job, I wouldn't know where to start, it's not easy at all to deal with hard metal... Easier than doing a 1:1 conversion mate,might still end up the same price tho!!!   |
|
wetsellery
Full Member
Member since: June 2013
Posts: 130
|
Post by wetsellery on Jul 1, 2013 15:00:10 GMT -5
ROLFMAO I've been very busy at work (thursday the 4th is the biggest event of the year for us), but had some time for modelling. I used my Dremel (what else ?) to cut the floor and firewall out of the frame. Replaced them with plasticard : .jpg) Filled all the holes and gaps : .jpg) Started working on the center console : .jpg) Sincerely Pascal |
|
Deleted
Member since: January 1970
Posts: 0
May 3, 2024 9:43:41 GMT -5
May 3, 2024 9:43:41 GMT -5
|
Post by Deleted on Jul 1, 2013 15:38:37 GMT -5
Still really intrigued by this Pascal, looking forward to more |
|
wetsellery
Full Member
Member since: June 2013
Posts: 130
|
Post by wetsellery on Jul 31, 2013 5:01:55 GMT -5
I'm cutting the rear chassis to get rid off those ugly metal tubes that hold the screws. The suspension and rear frame will be scratchbuild to resemble that of a real F40. The engine/gearbox look awful, to the left is that of the Hotwheels LM, not much better : 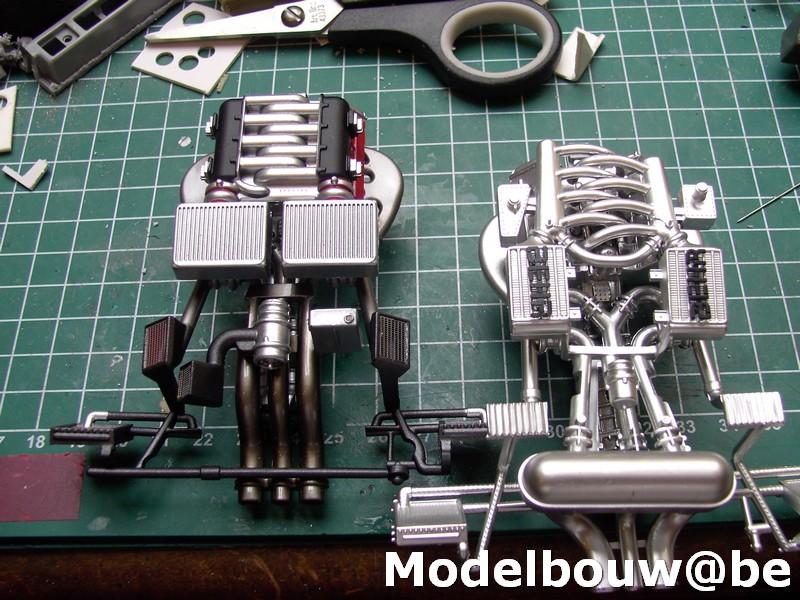 The goal is to make it look like this :  I bought a Kyosho F40 and took it apart. Some parts will be copied for my F40 LM's. This is the first, with 2 resin copies :  The cockpit needs some changes : 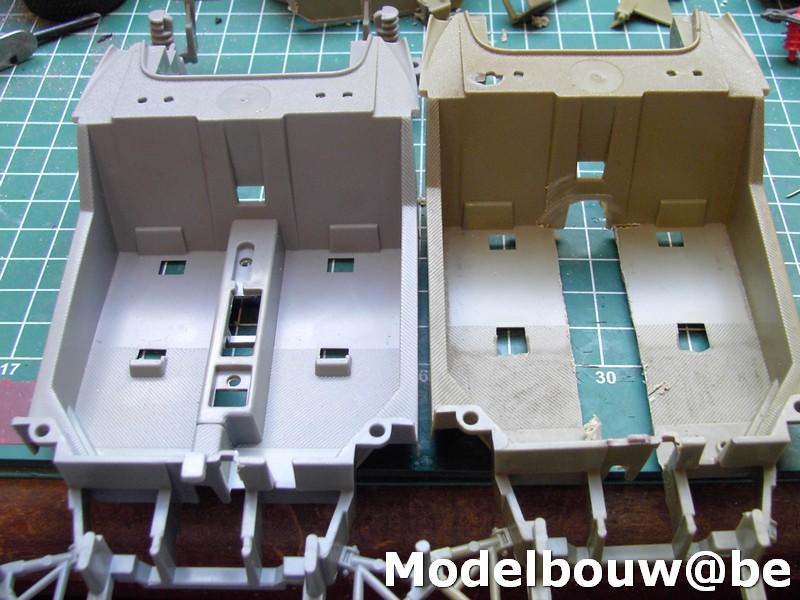 I cut the floor out and filled some holes with plasticard : I sanded the firewall and made a center console (tunnel) : .jpg) The front chassis looks like this : .jpg) The Hot Wheels version is almost the same, but is has a radiator : .jpg) First step is to remove the overscale metal : .jpg) The plastic parts get the same treatment : .jpg) So everything can be rebuild : .jpg) |
|
|
|
Post by wbill76 on Jul 31, 2013 19:51:14 GMT -5
Nice cutting and scratching here, good progress!
|
|
MOOSE
Full Member
Member since: May 2013
"Imagination is more important than Knowledge"
Posts: 396
|
Post by MOOSE on Aug 4, 2013 1:06:38 GMT -5
I like what you're doing here.... Very creative... Nice work
|
|
wetsellery
Full Member
Member since: June 2013
Posts: 130
|
Post by wetsellery on Aug 6, 2013 9:57:07 GMT -5
Thanks guys. Update. I cut the front part of the chassis, and rebuild it with brass and plasticard : .jpg) Left side has received the diagonal piece of plasticard : .jpg) It's strong enough to support the weight of the hood : .jpg) Dryfit with the other parts : .jpg) .jpg) It's not finished, but there's already a big difference with the original Bburago chassis : .jpg) Sincerely Pascal |
|
|
|
Post by wbill76 on Aug 6, 2013 19:36:07 GMT -5
Nice progress Pascal, your patience is paying off with that hood shot.
|
|
|
|
Post by Mence on Aug 7, 2013 1:13:01 GMT -5
Fantastic transformation there, really clean conversion work.
|
|
wetsellery
Full Member
Member since: June 2013
Posts: 130
|
Post by wetsellery on Aug 28, 2013 16:17:53 GMT -5
Thanks guys. The hood in the picture is the original from Bburago, this will be replaced by a resin one from legende-miniatures.com :  |
|
Deleted
Member since: January 1970
Posts: 0
May 3, 2024 9:43:41 GMT -5
May 3, 2024 9:43:41 GMT -5
|
Post by Deleted on Aug 28, 2013 17:49:11 GMT -5
Talk about update kits!
|
|
wetsellery
Full Member
Member since: June 2013
Posts: 130
|
Post by wetsellery on Sept 25, 2013 17:53:39 GMT -5
Small update. I decided to make the front part of the frame out of brass tube : .jpg) .jpg) .jpg) Took me a couple of hours to find the right dimensions, but it will save me a ton of putty / sanding work. |
|
|
|
Post by deafpanzer on Sept 25, 2013 20:51:10 GMT -5
And it is alot less messy too! Looking great...
|
|
wetsellery
Full Member
Member since: June 2013
Posts: 130
|
Post by wetsellery on Sept 27, 2013 10:29:11 GMT -5
I wasn't satisfied with the way I made the front part of the frame. So I replaced all the plastic tubes with brass tubes. Before : .jpg) After : .jpg) Not much is left of the original Bburago frame : .jpg) .jpg) |
|
wetsellery
Full Member
Member since: June 2013
Posts: 130
|
Post by wetsellery on Sept 27, 2013 14:21:29 GMT -5
Thanks for the replies. The decision to use a Bburago to start this project came from the collectors that asked me to build them an F40LM. I don't know if Fujimi or Tamiya have an F40 in 1/18 scale. It would have been easier to use a Kyosho F40 for this project, but these models are 10 to 15 times more expensive. One thing is sure, when they're finished they will be the most detailled Bburago's in the world |
|
wetsellery
Full Member
Member since: June 2013
Posts: 130
|
Post by wetsellery on Oct 17, 2013 14:42:33 GMT -5
I made another version (3 bis) with a copper plate soldered to the brass tubes : .jpg) But then I wandered if the tubes were the right scale, the answer was : NO. So I bought smaller brass tubes, and after a day's work this is the result : .jpg) .jpg) The sixth frame will get the same treatment, as will the frames from 2 Hotwheels Elite F40 LM's. Sincerely Pascal |
|
Deleted
Member since: January 1970
Posts: 0
May 3, 2024 9:43:41 GMT -5
May 3, 2024 9:43:41 GMT -5
|
Post by Deleted on Oct 17, 2013 14:55:19 GMT -5
Superb brass work Pascal |
|
|
|
Post by wbill76 on Oct 17, 2013 17:56:19 GMT -5
Wow, that's a lot of chassis frames you've got stacked up there! Nice.
|
|
wetsellery
Full Member
Member since: June 2013
Posts: 130
|
Post by wetsellery on Oct 19, 2013 15:20:09 GMT -5
I added a few details to the first chassis : .jpg) .jpg) And drilled a small hole in the 2 brass tubes. Reference picture from Ferraris-online : 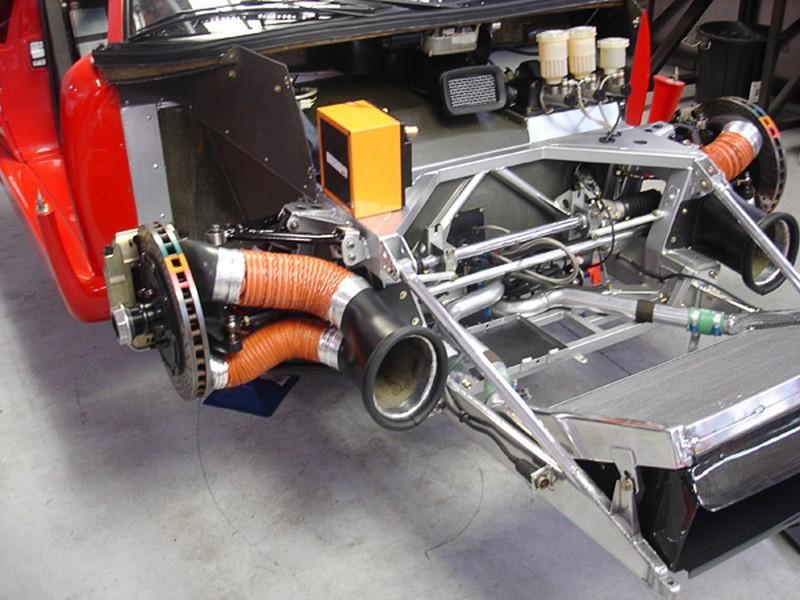 The shape is a little different, this will be alterd with the other chassis : .jpg) I made the first cuts in the front hood : .jpg) Using a resin one from legende-miniatures as a reference : .jpg) |
|
|
|
Post by Mence on Oct 24, 2013 2:49:32 GMT -5
Missed an update, nice work, I think you're very brave.
|
|
wetsellery
Full Member
Member since: June 2013
Posts: 130
|
Post by wetsellery on Oct 25, 2013 15:03:29 GMT -5
Thanks for the kind replies. Fifth and final version of the frame. The rectangular brass tubes will be replaced by ones that are 1 mm higher. Makes them look less wide and looks more like the real F40LM. Version 5 is the one on top : .jpg) .jpg) |
|
wetsellery
Full Member
Member since: June 2013
Posts: 130
|
Post by wetsellery on Nov 4, 2013 12:09:54 GMT -5
After hours and hours spent looking at the pictures and drawings of the frame of the real LM, this is what I came up with : .jpg) De rectangular brass tube is now a little wider, the frame on top is before the modification : .jpg) The rectangular brass tube is now a little longer towards the back : .jpg) Normally the copper plate should be where the rectangular brass tubs ends. To do this I would have to rebuild the zamac part of the frame and also the front of the windscreen, but since the copper plate will no longer be visible from the side when the build is finished, I will leave it in place : .jpg) I used a file to shape the middle part of the rectangular tube in a diagonal form, just like the real LM. The U-shape supports will be added to the left and right of the diagonal form : .jpg) .jpg) Sincerely Pascal |
|
|
|
Post by bullardino on Nov 4, 2013 12:25:41 GMT -5
|
|
|
|
Post by deafpanzer on Nov 4, 2013 13:37:11 GMT -5
It is starting to confuse me now... I can not tell if its the real car or not. Stunning work...
|
|


 :
:


