BezoulaBuilds
Full Member
  
Member since: July 2013
Posts: 136 
|
Post by BezoulaBuilds on Jul 11, 2013 23:23:46 GMT -5
I started this a few months ago. So the next few days will be periodically updating my WIP on this. These will be my 3rd and 4th complete builds since my return to plastic model planes in early 2012. I have learned a tremendous amount of techniques as well as develop new skill-sets since my return. With each build something new learned from fails and successes. My skill development continue to be a ongoing work in progress. Hasegawa's 1:32 P47D Jug for this double build. Russian 255 IAP, Northern Fleet and "Slick Chick" 368FG/395FS "Panzer Busters. The Russian Jug will get the PE treatment/wheels/blast tubes while Slick Chick will be OOB with exception of belts/wheels/blast tubes. Aftermarket items include:Eduard Big Ed for the Russian Jug HGW Belts for Russian Jug Eduard Belts for Slick Chick Barracuda Wheel set for both Jugs Hasegawa brass Blast Tubes for both Jugs AML decals for Russian Jug Kits World decals for Slick Chick 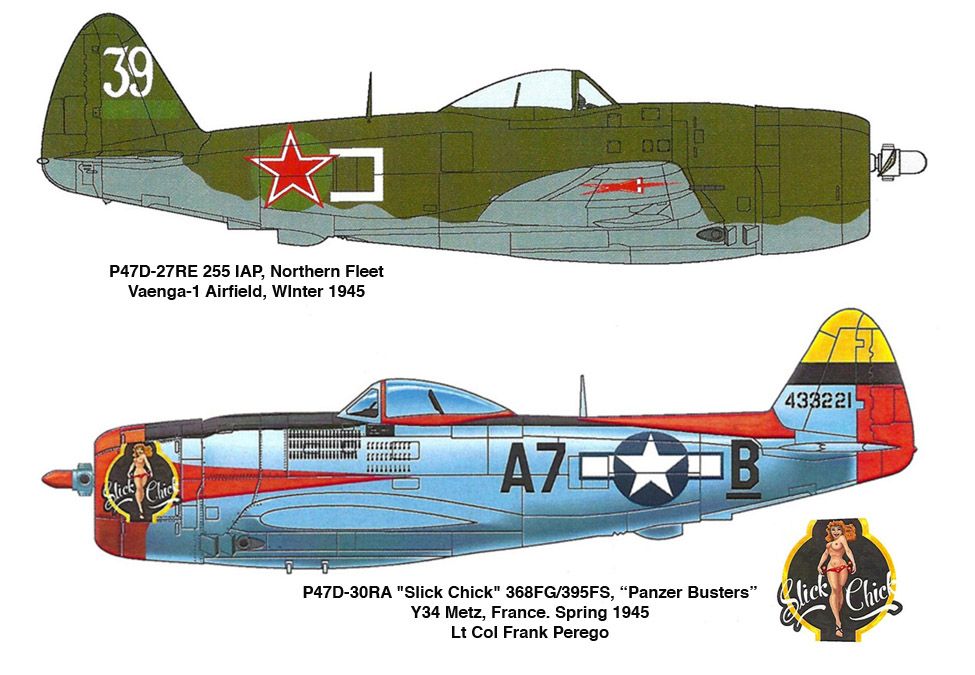 TEST FIT TEST FIT
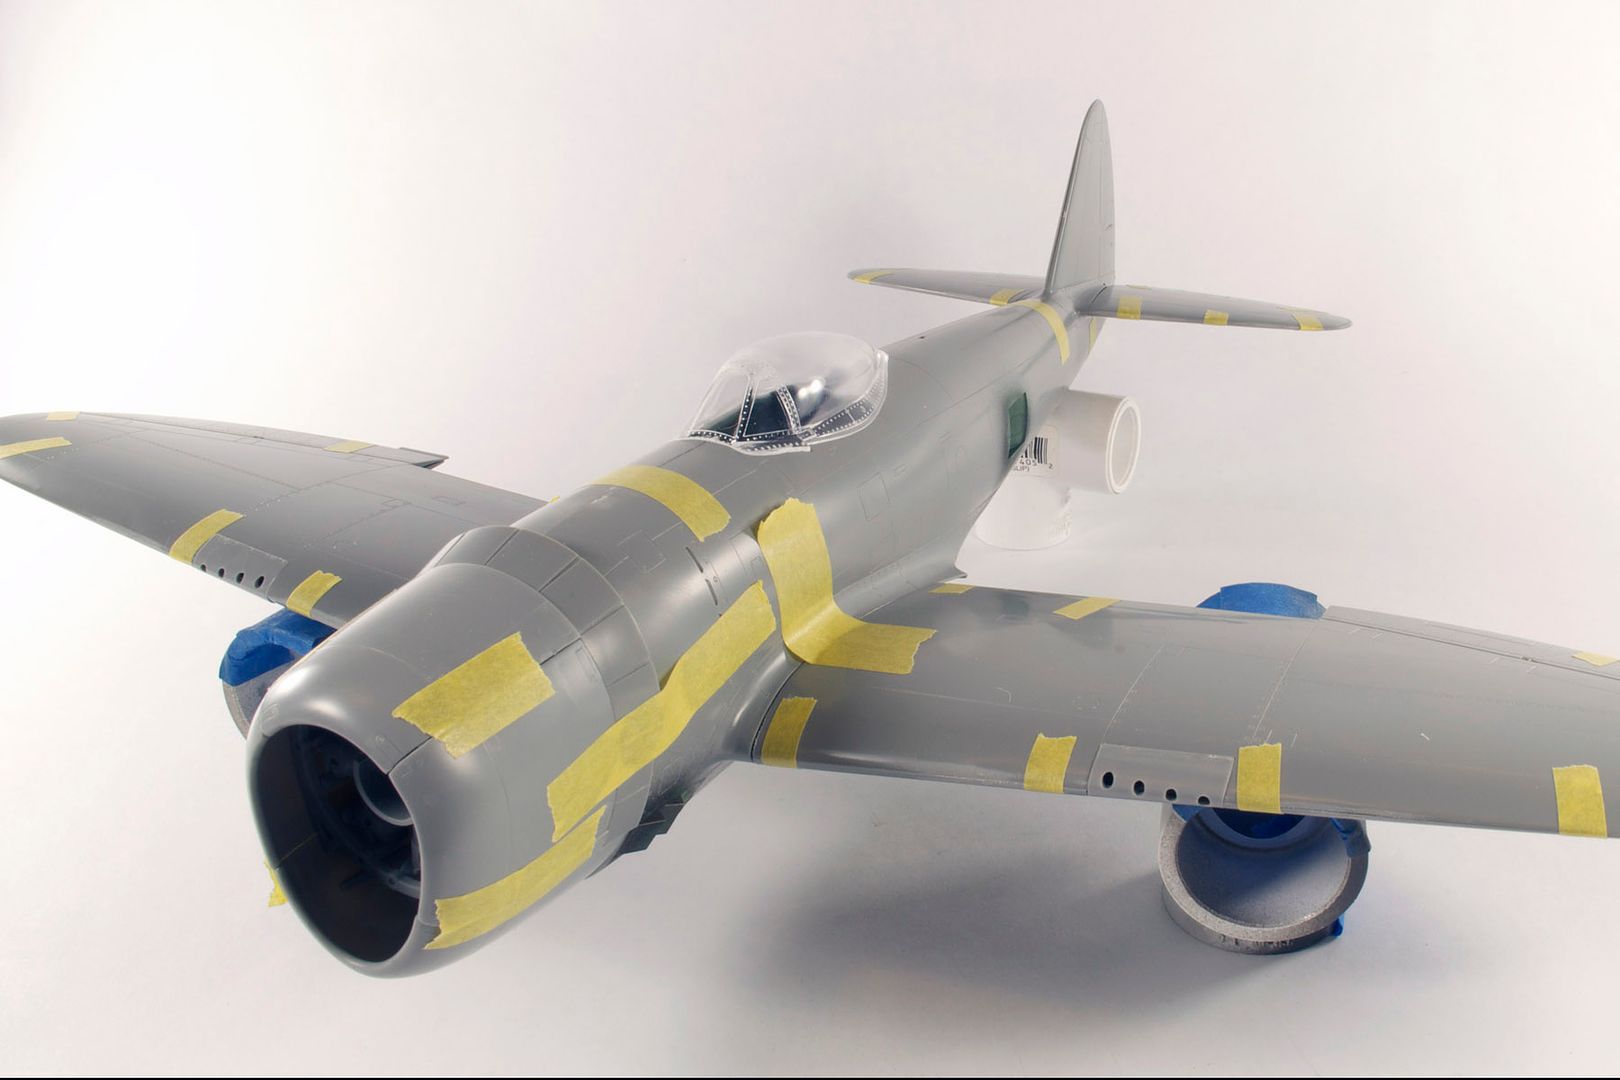
General fit seems pretty good with no issues projected on seams, wing roots...however 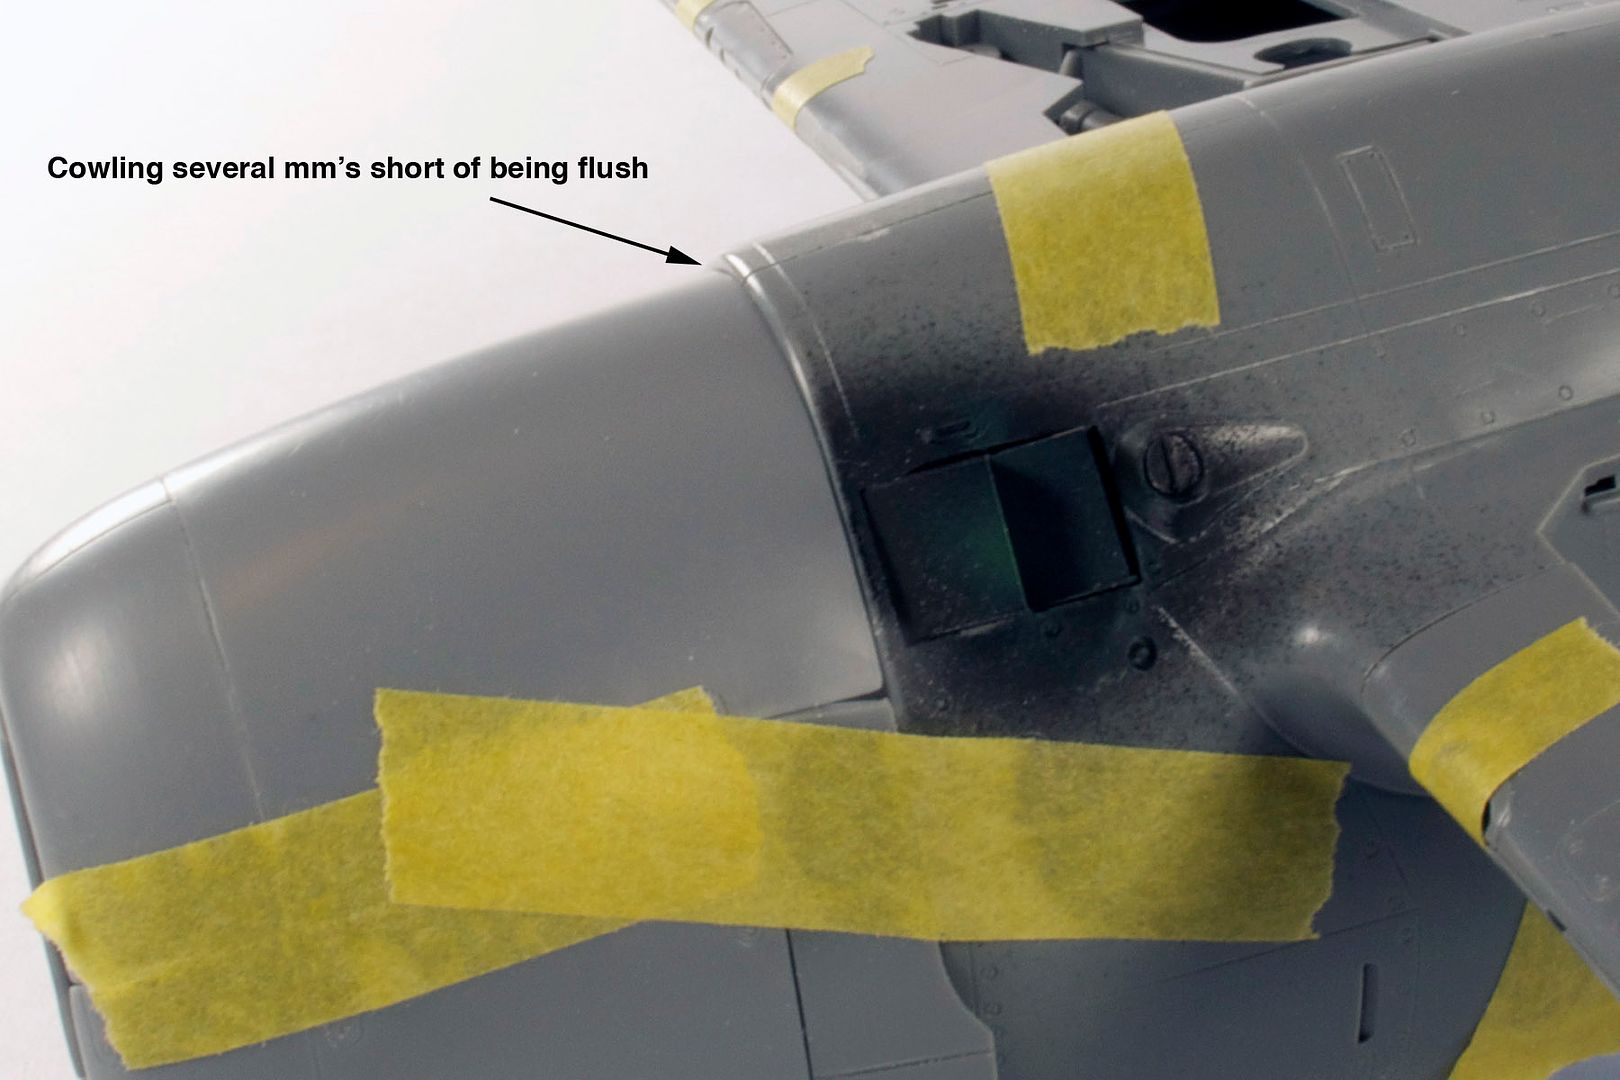 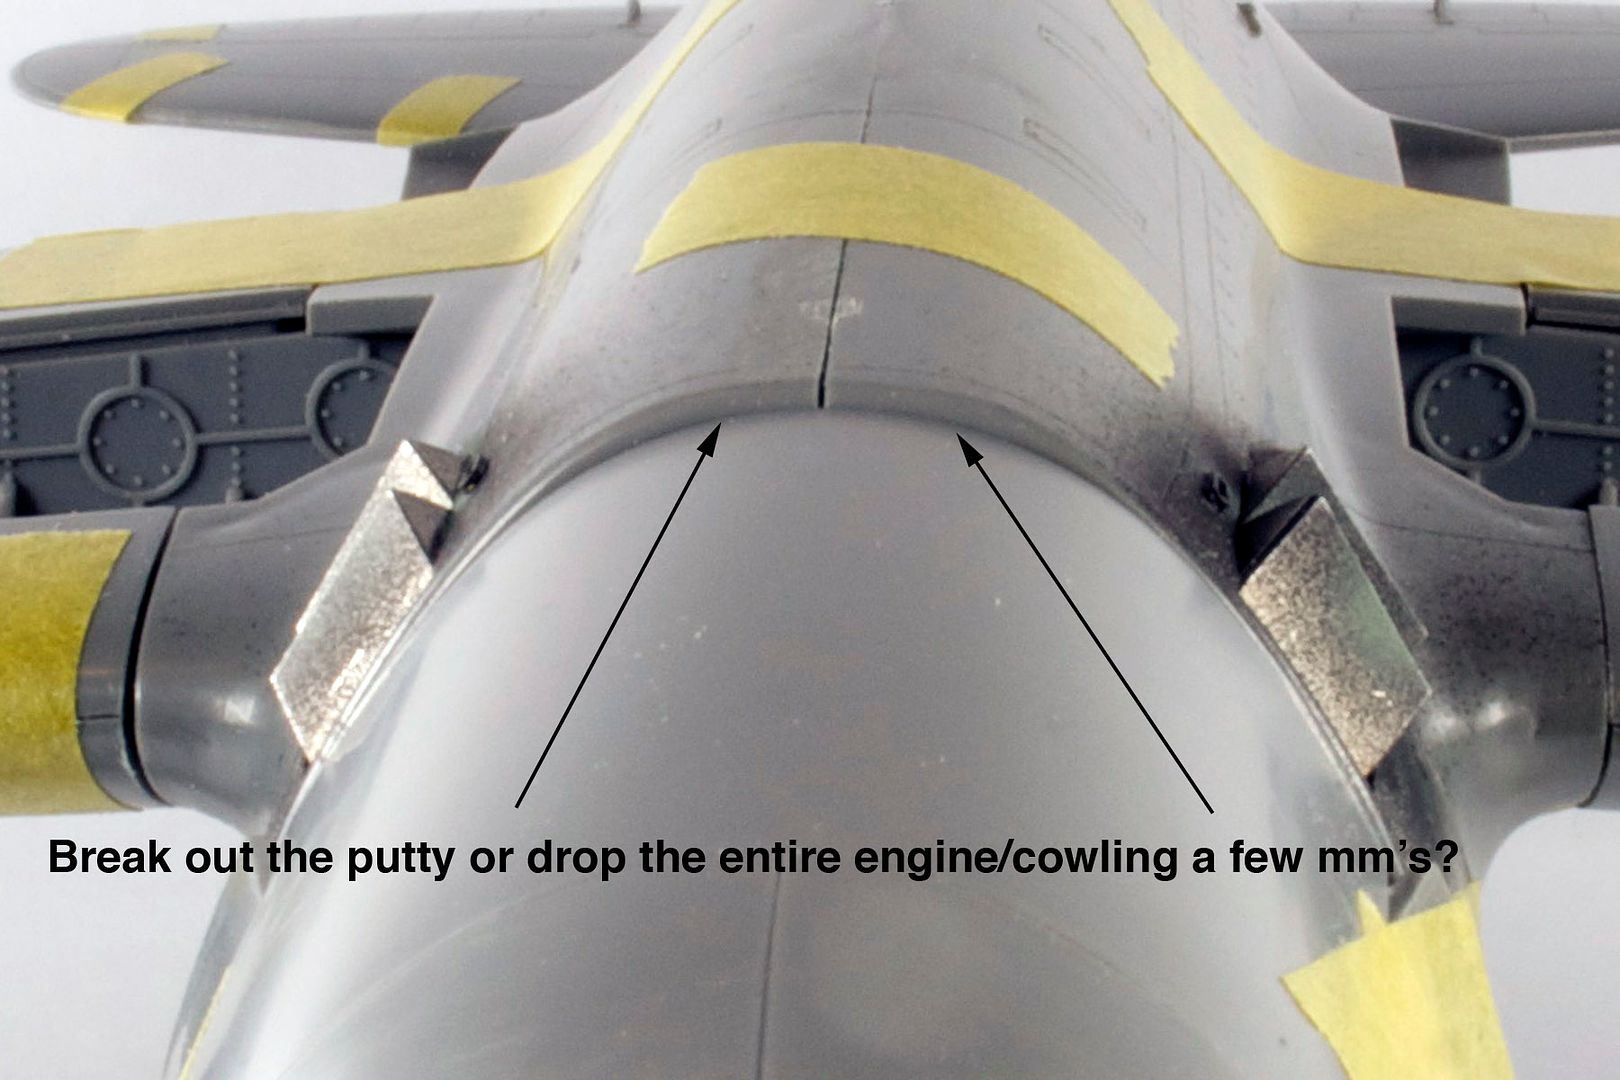 about 1mm difference between lower cowling and f uselage. i have a plan...
|
|
|
|
Post by Teabone on Jul 11, 2013 23:51:16 GMT -5
Bezoula
Having a plan is good, I can see you take your dry fits serious which is a good thing. I don't do wingy things so Im not much value here but I think I will look in to see your solution.
Bones
|
|
BezoulaBuilds
Full Member
  
Member since: July 2013
Posts: 136 
|
Post by BezoulaBuilds on Jul 12, 2013 6:49:37 GMT -5
IN THE PITS 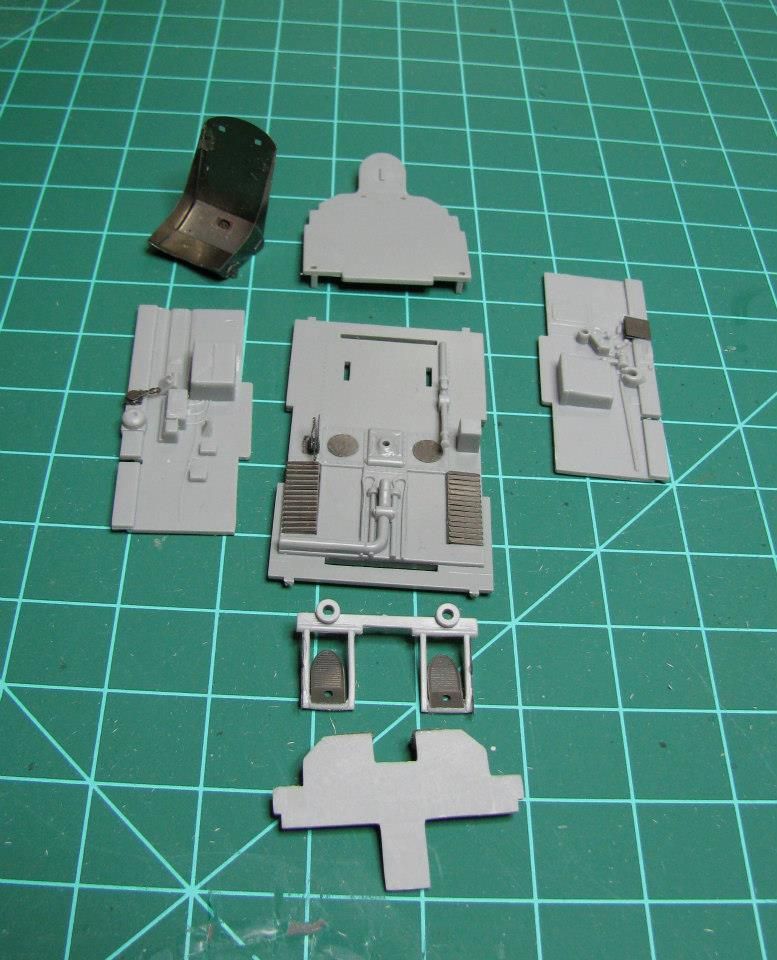 The Russian Jug will receive Eduard's PE treatment. IP sanded, useable parts folded and in place. 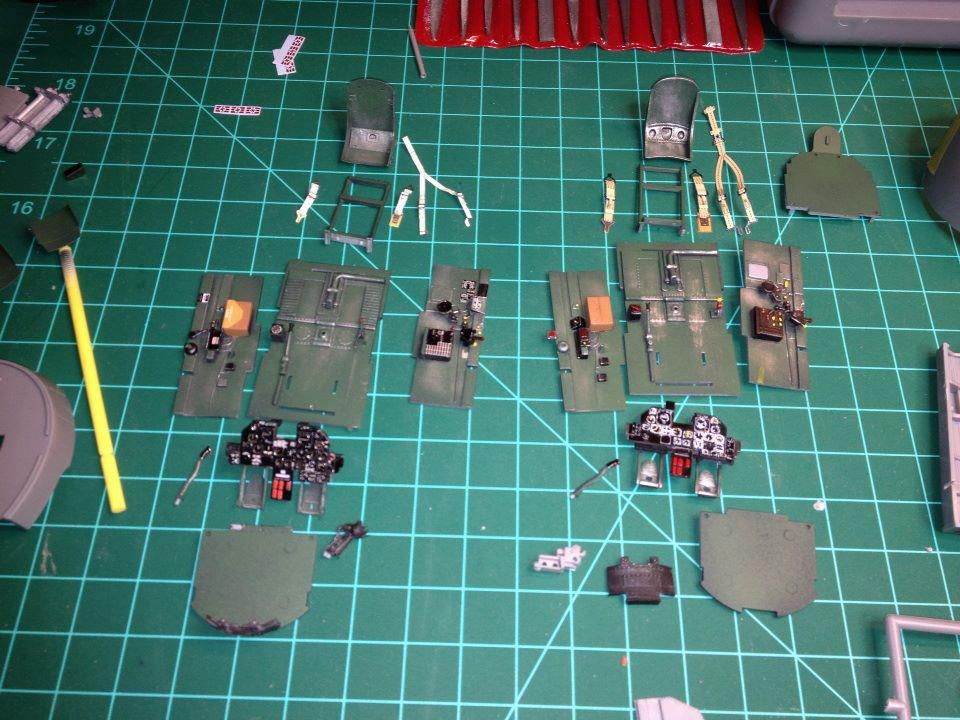 A nice comparison of the Eduard PE enhanced cockpit on left with HGW textile seatbelts for the Russian Jug and Out Of Box construction of cockpit for Slick Chick on the right with only enhancement being the PE seatbelts, will give both pits and belts a drk brown/black wash. 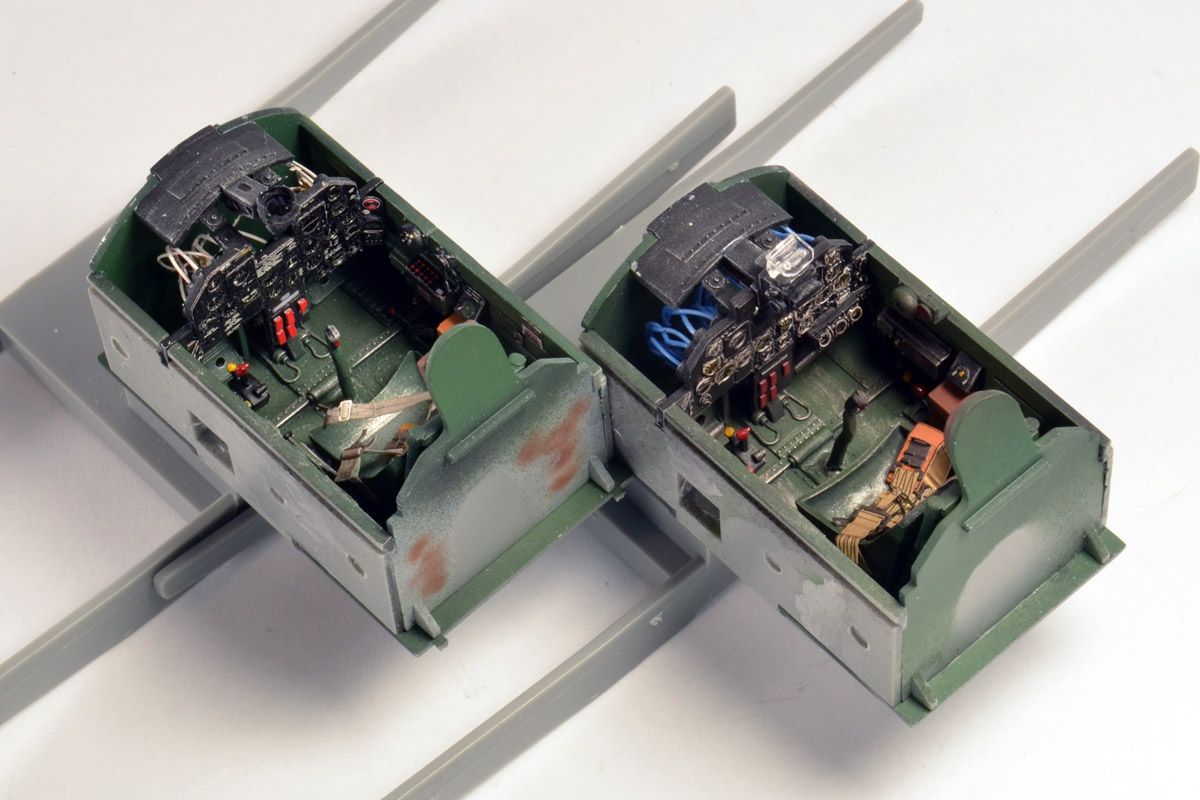 Left pit is the Russian Jug, all Eduard PE with exception of the HGW belts. "Slick Chick" pit is out of box with Eduard PE belts added and detail picked out with Vallejo paints. The IP decal required about 6 coats of Mr. Mark Softer to get settled nicely. Some dry brushing with flat silver followed by a thinned wash of brown with touch of black applied globally then dials were all hit with a drop Vallejo's Still Water. 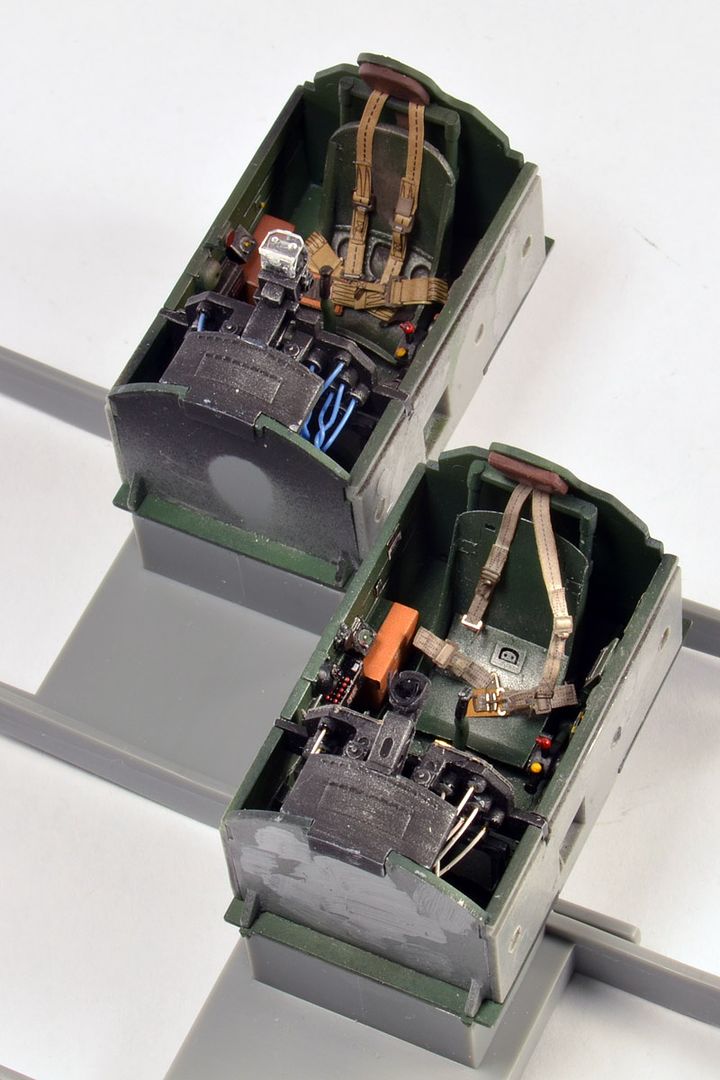 The hideous thick plastic gunsight glass on "Slick Chick" (left) will be replaced with clear sheet styrene. 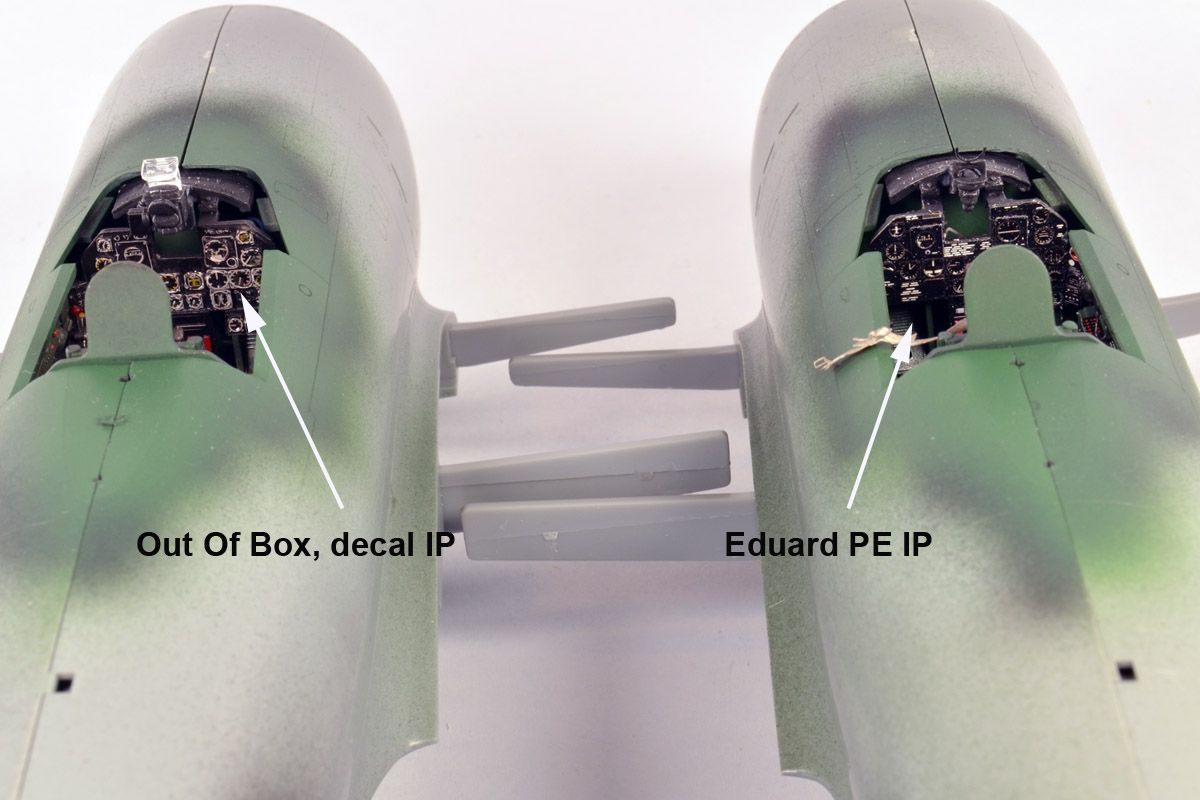 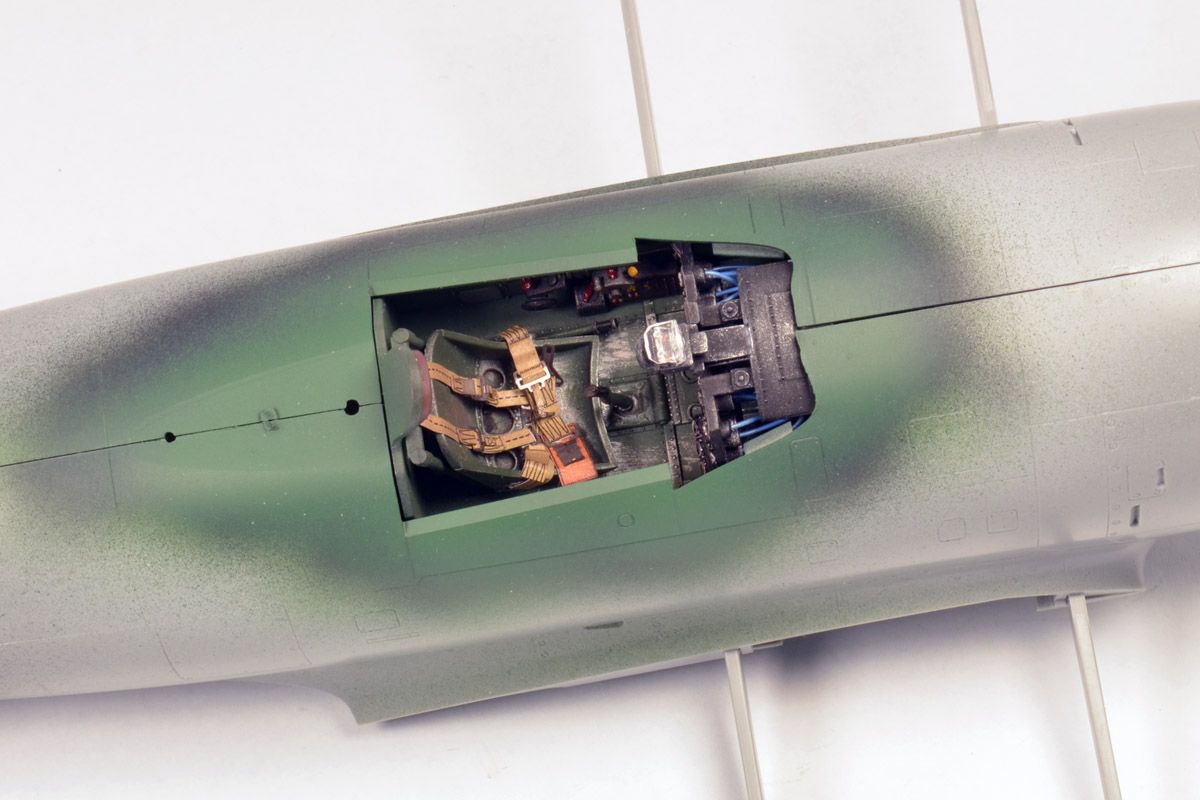 "Slick Chick" pit OOB with exception of Eduard belts. 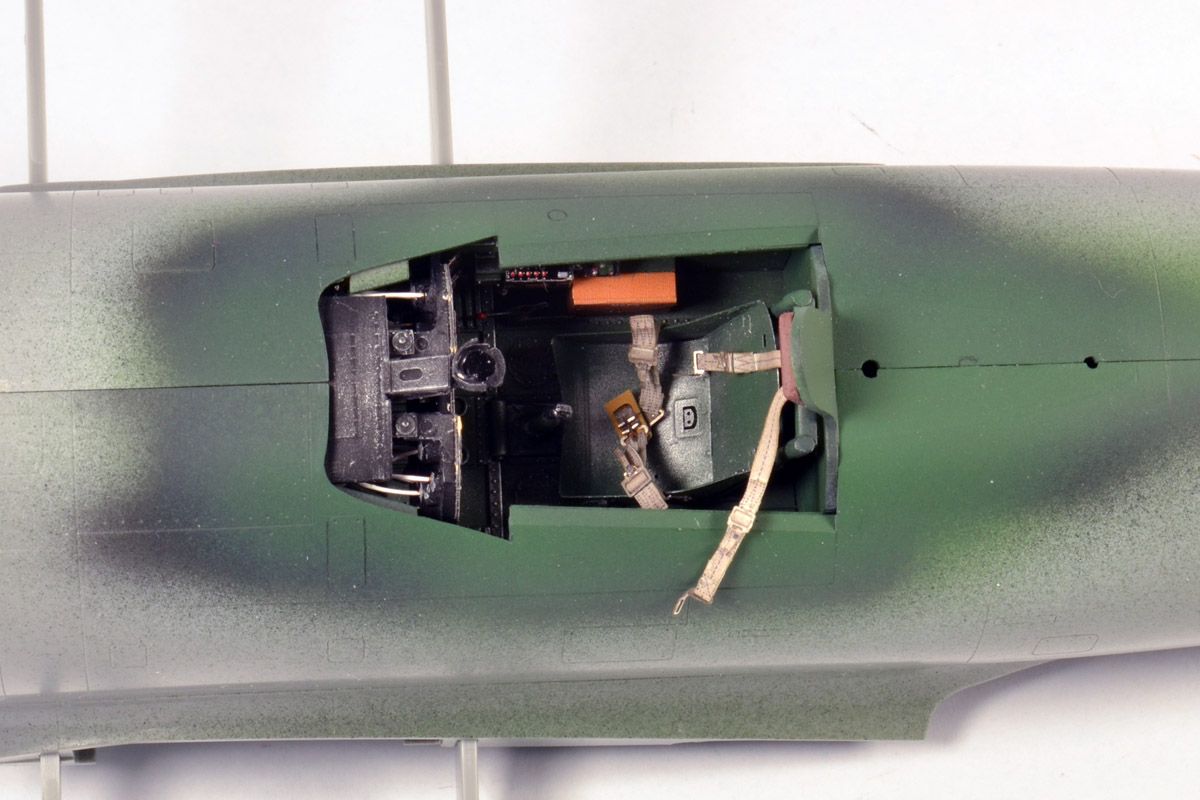 Russian Jug pit HGW belts. 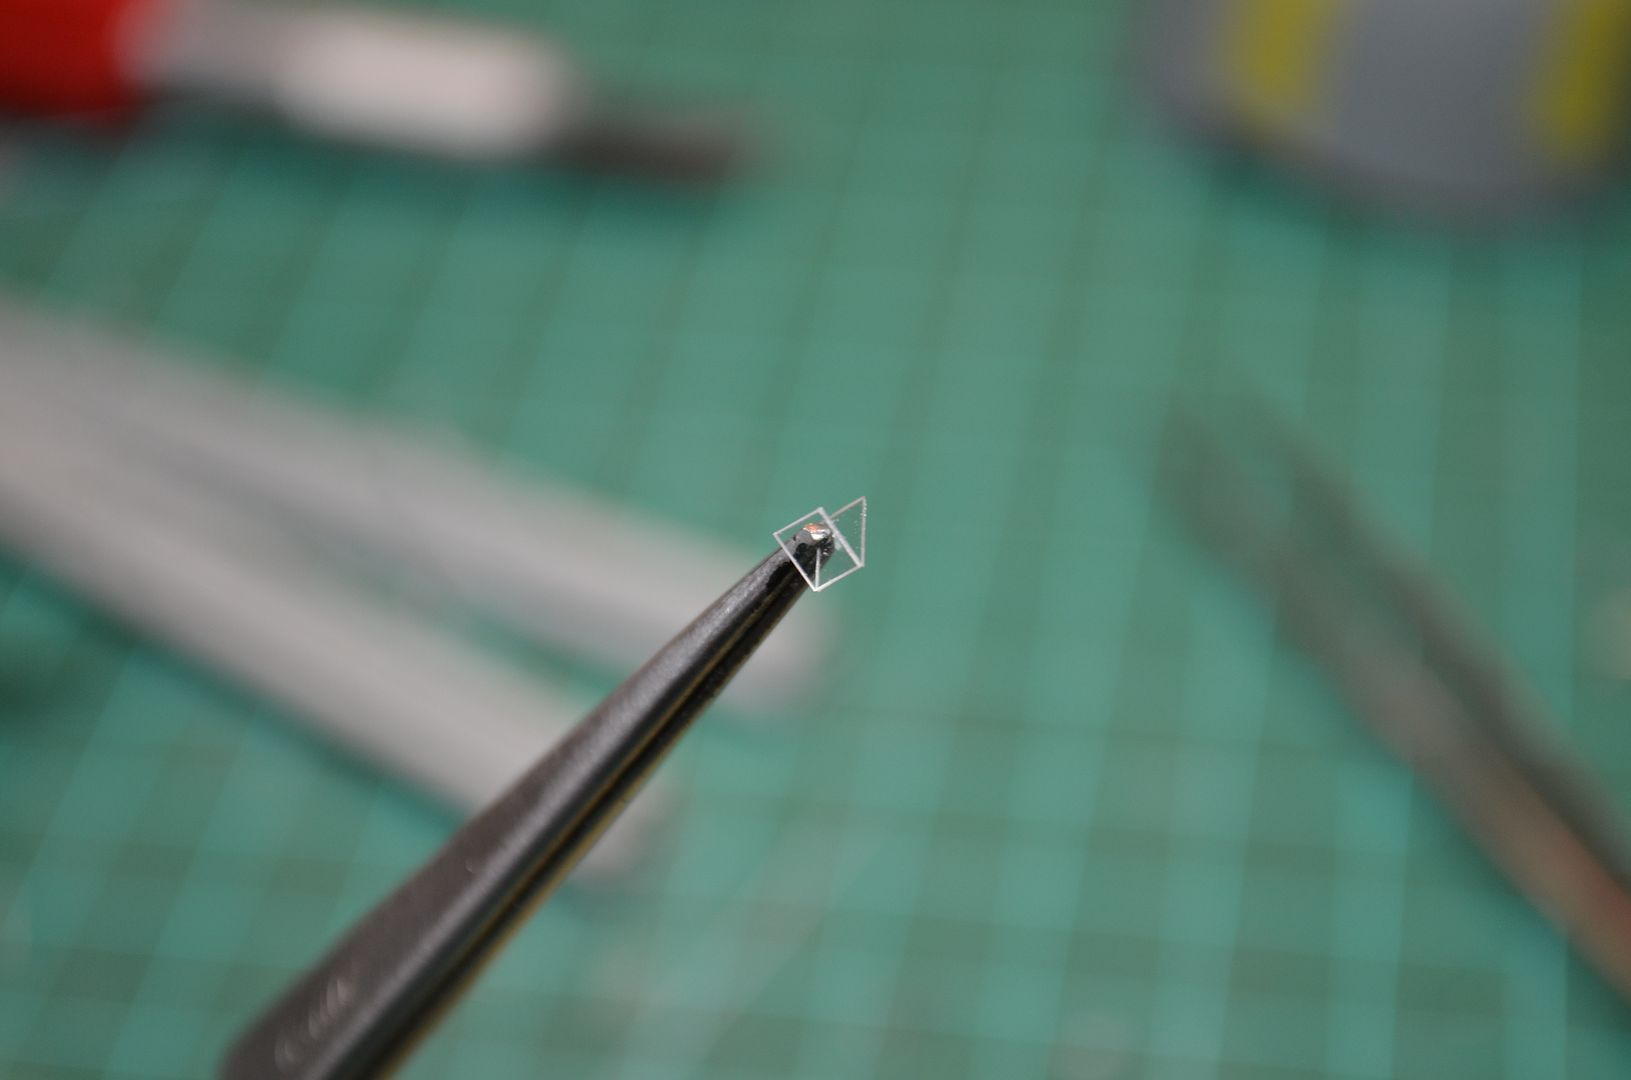 Replacing hideous with 0.13mm clear styrene. Scored, cut then folded. 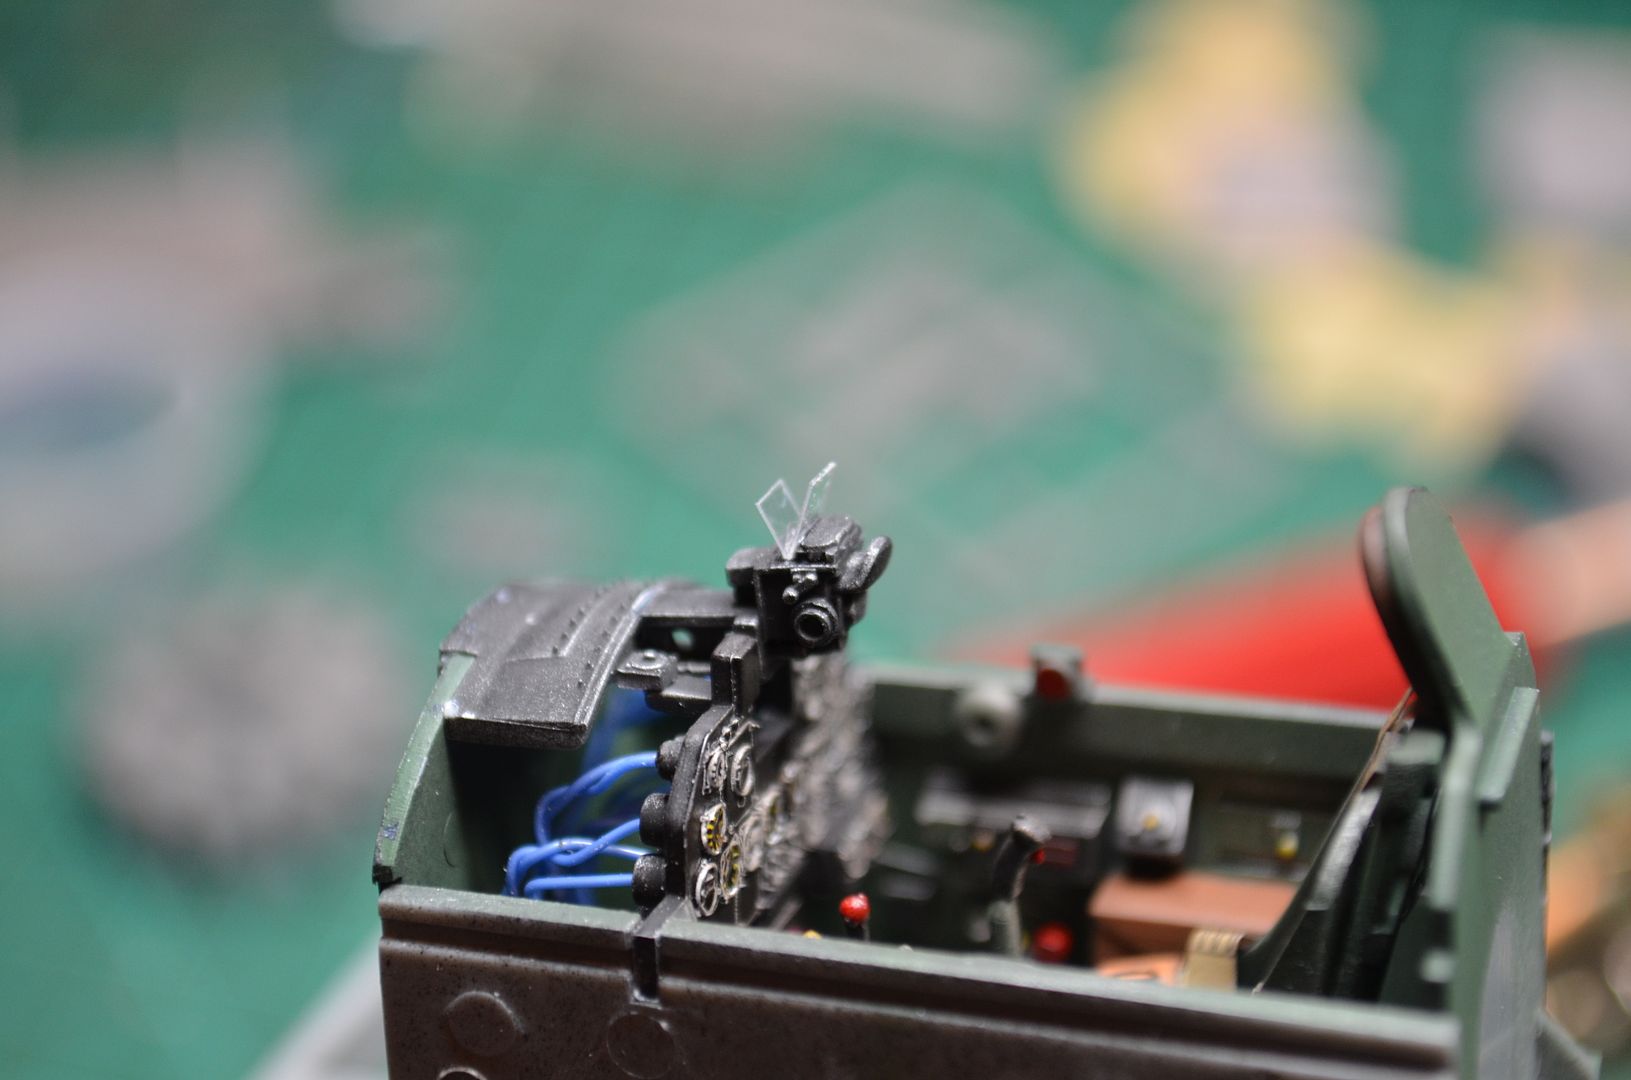 Color me happy. Paint crash pad and all done. |
|
BezoulaBuilds
Full Member
  
Member since: July 2013
Posts: 136 
|
Post by BezoulaBuilds on Jul 12, 2013 6:55:29 GMT -5
"SLICK CHICK" PACKS A PUNCH 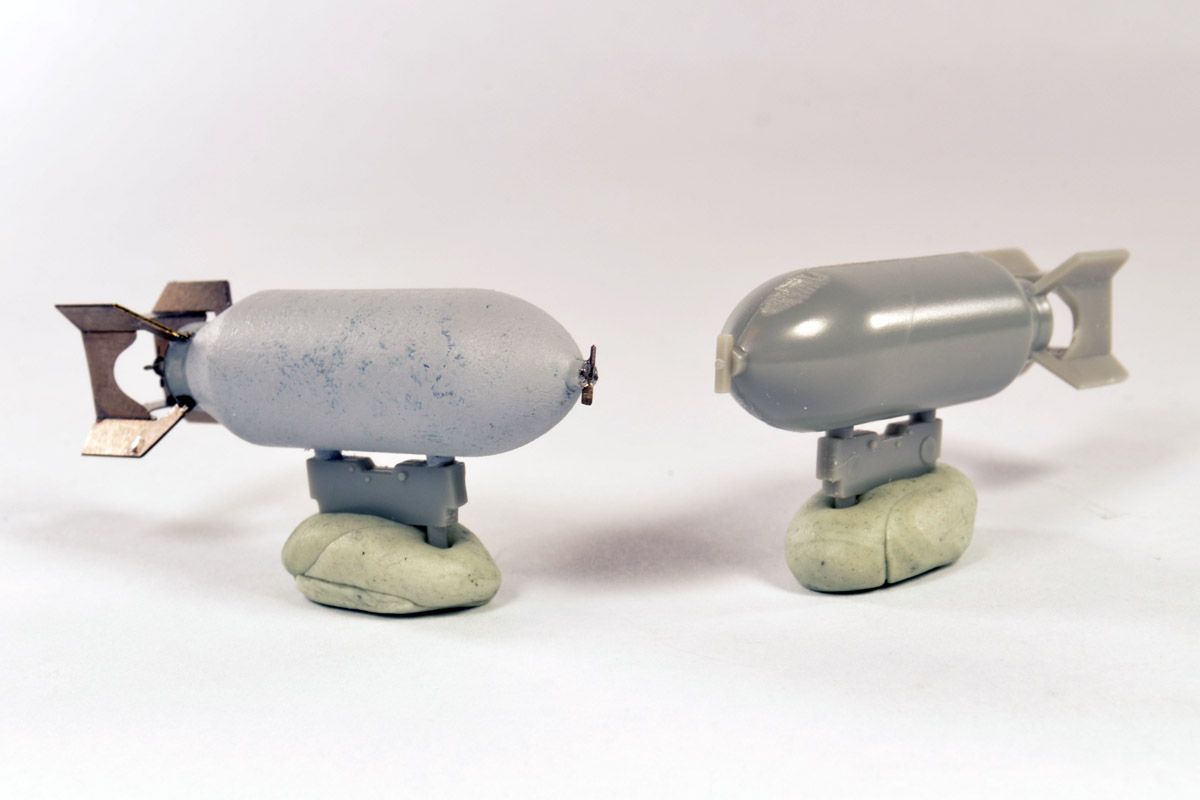 "Slick Chick" will pack a punch with 500lb GP bombs and M10 bazookas (borrowed from a Trumpy P47N). Taking the kit supplied bombs I gve them the Eduard PE Treatment. Comparison shows difference. Textured surface achieve by painting bomb with Mr Surfacer 500 then "stippled" with short brush. 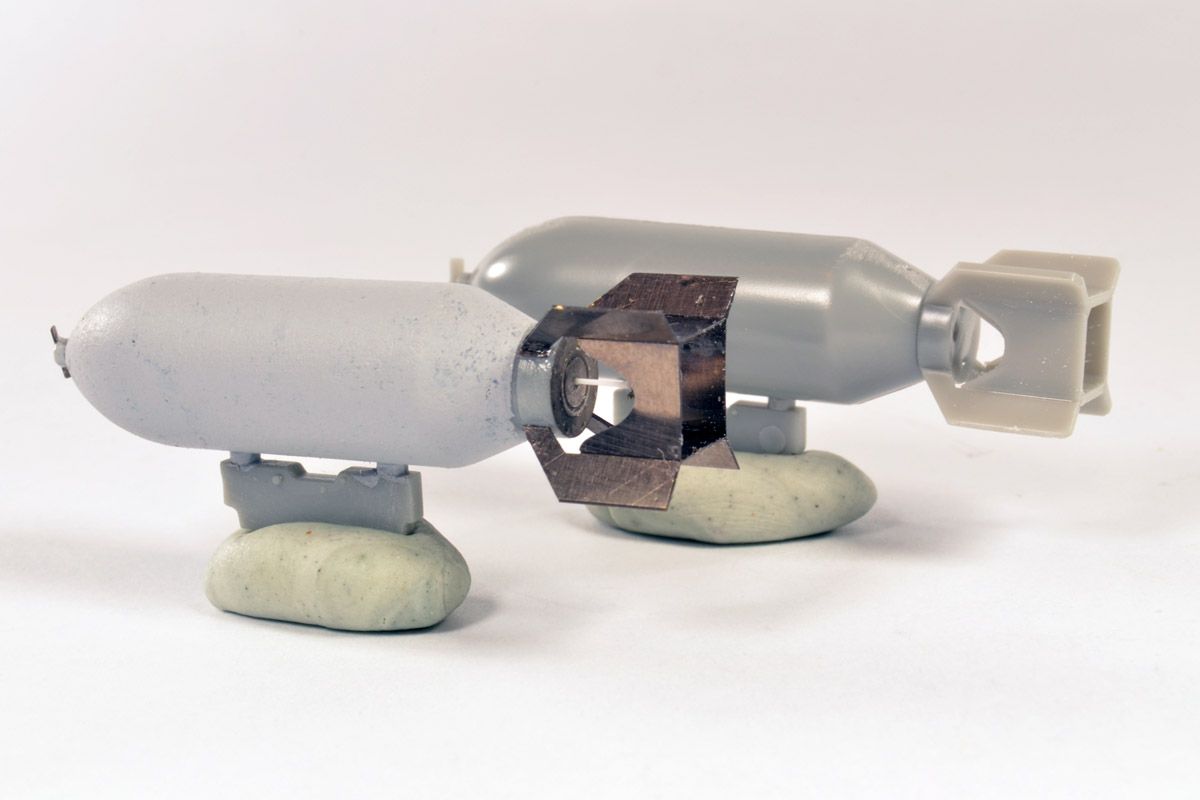 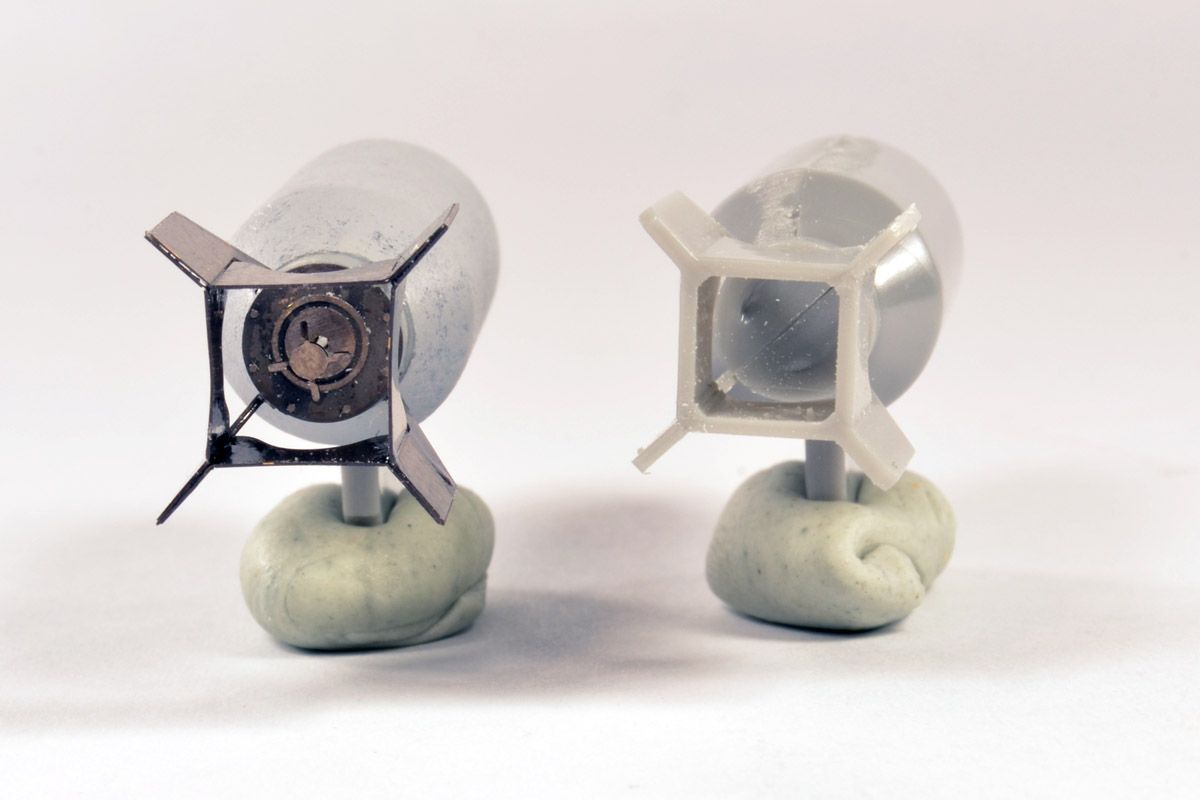 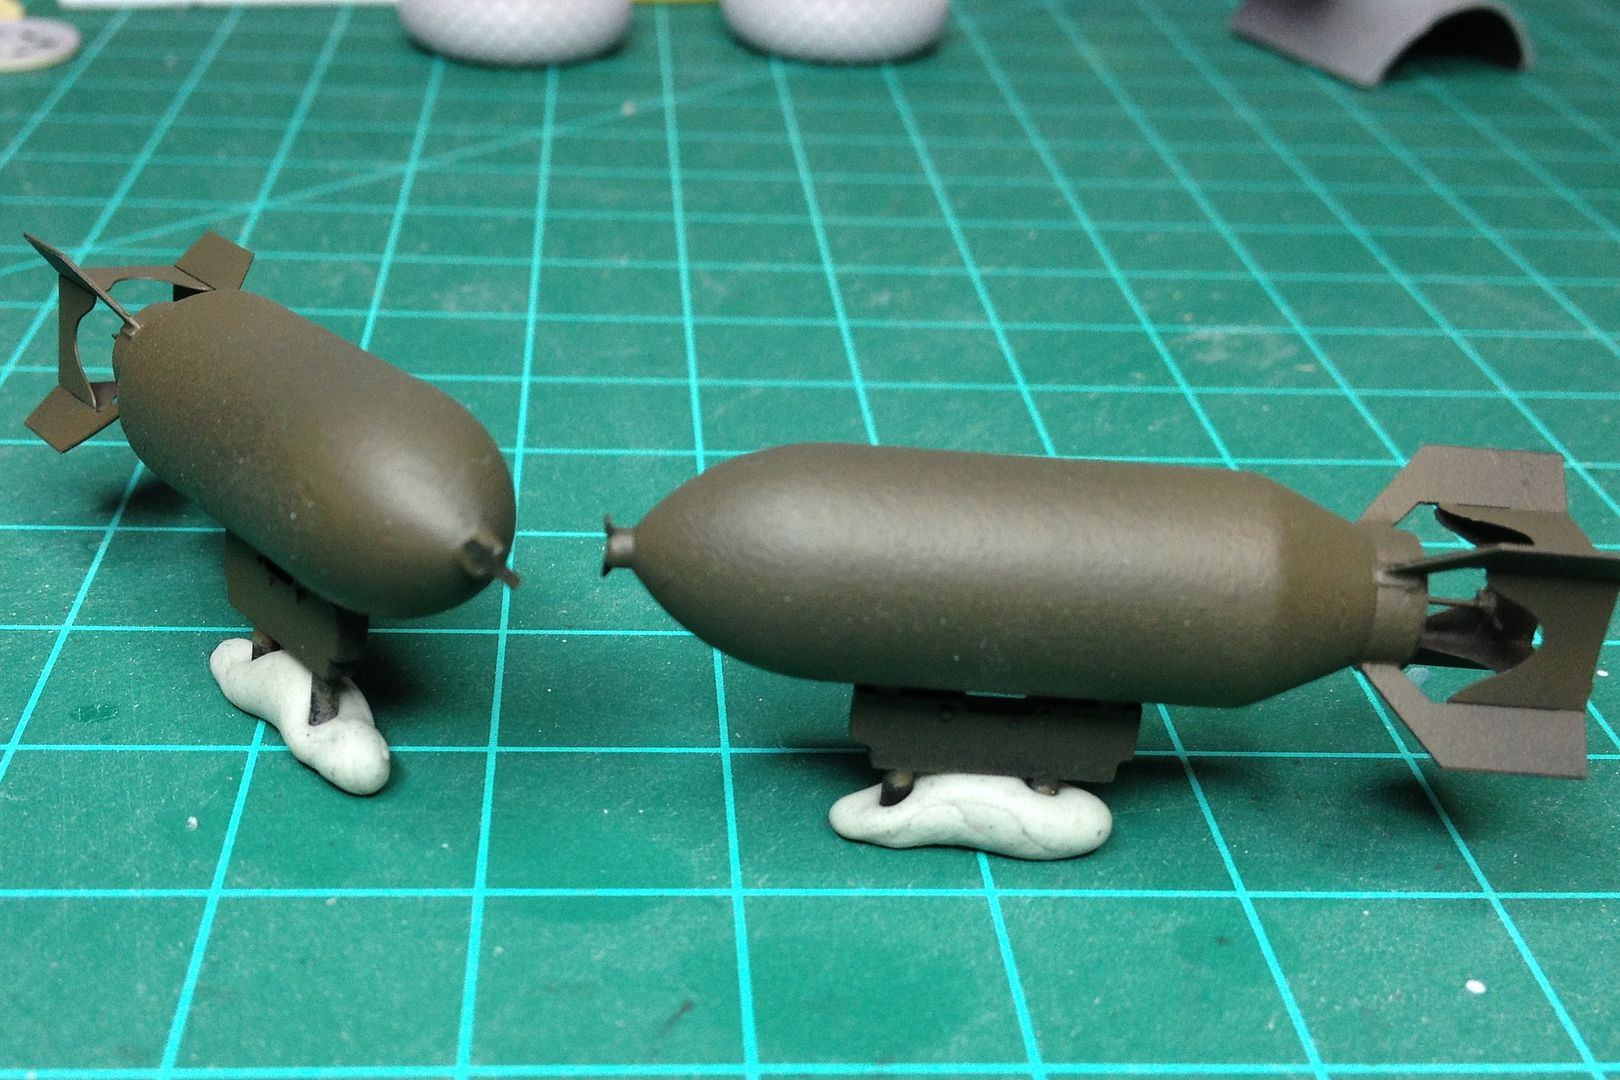 Bombs for "Slick Chick" painted OD. Cast iron texture is hard to see in this pic, but I am happy with results. Sorry about the dust! Detail painting, yellow ID stripes, fuse wires and weathering will be added later. 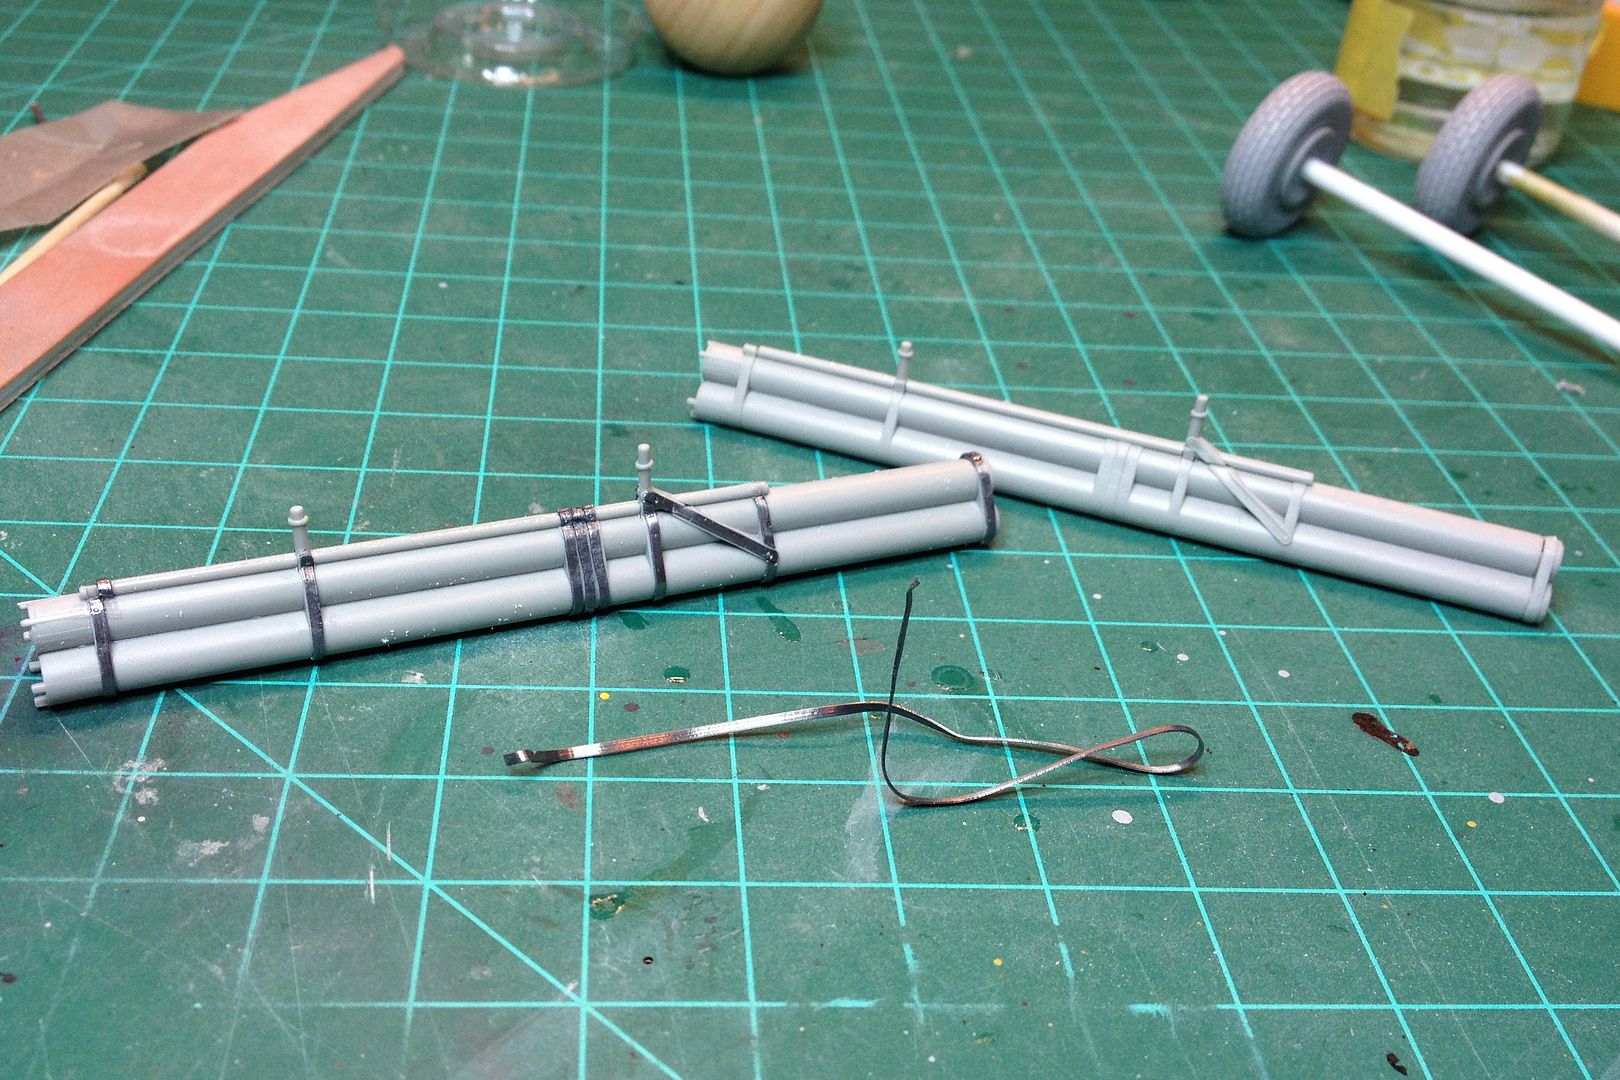 M10 bazookas from a Trumpy P47 get a little love. Using flat lead wire (UMM-USA FLW103 Flat Lead Wires 1.0 X 0.3mm) and rivet tool I enhanced the detail on the tubes. 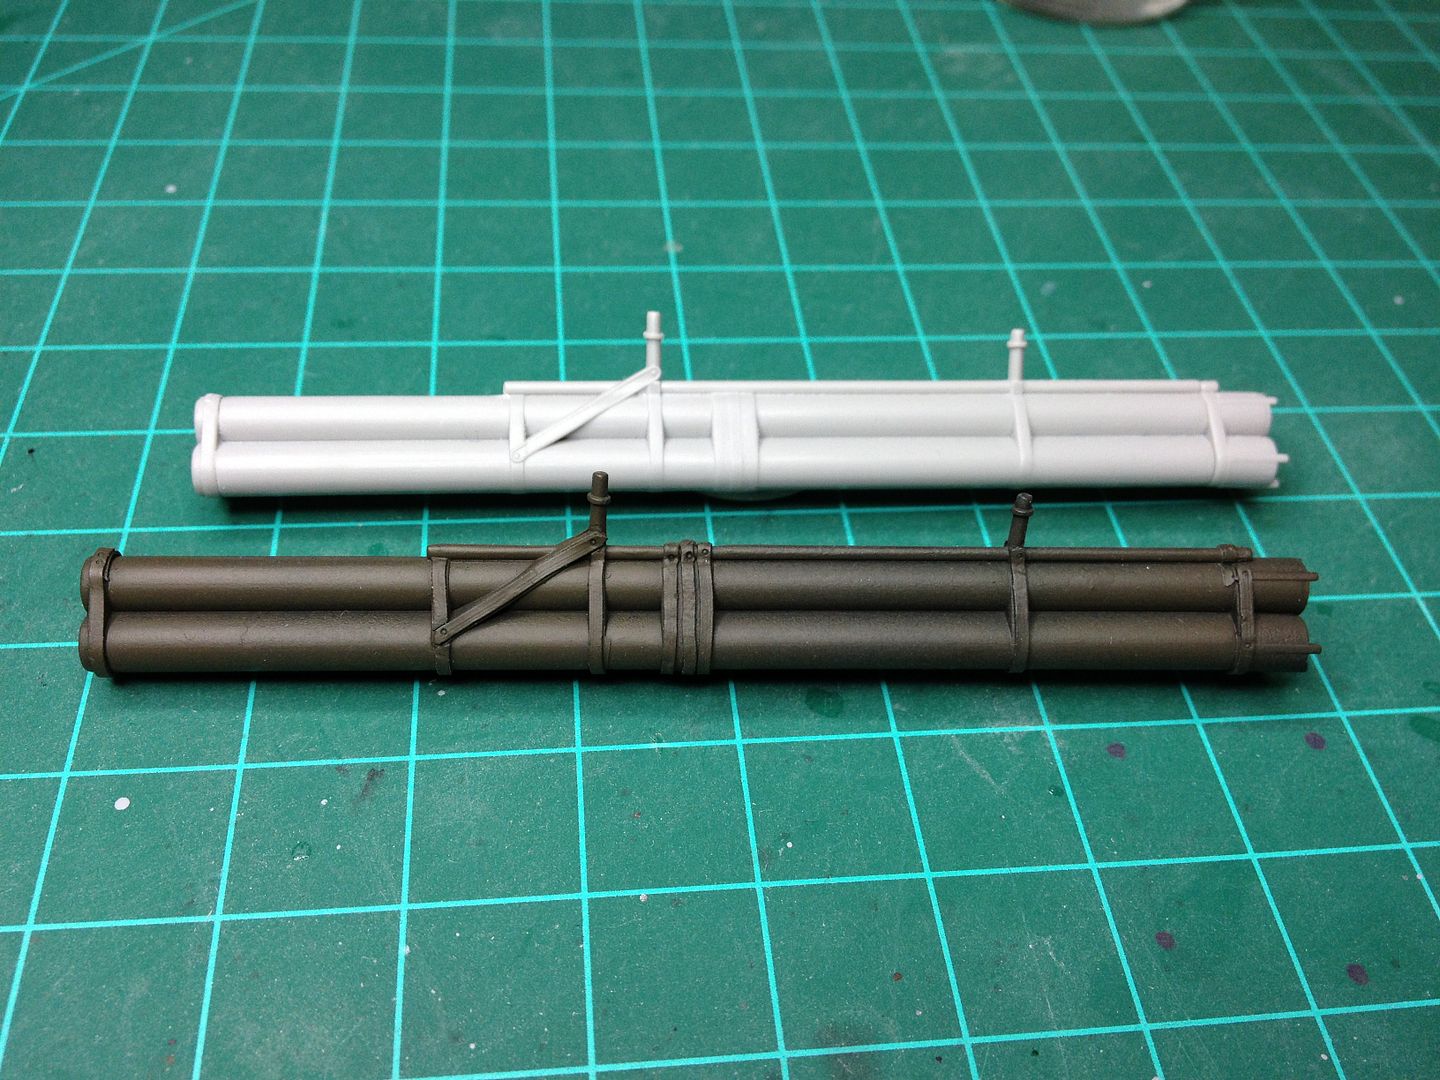 Painted bazooka (black base then OD) shows good detail otherwise lost. Weathering and ignition wires on deck for a later time. |
|
BezoulaBuilds
Full Member
  
Member since: July 2013
Posts: 136 
|
Post by BezoulaBuilds on Jul 12, 2013 7:04:29 GMT -5
THE DOCTOR IS IN  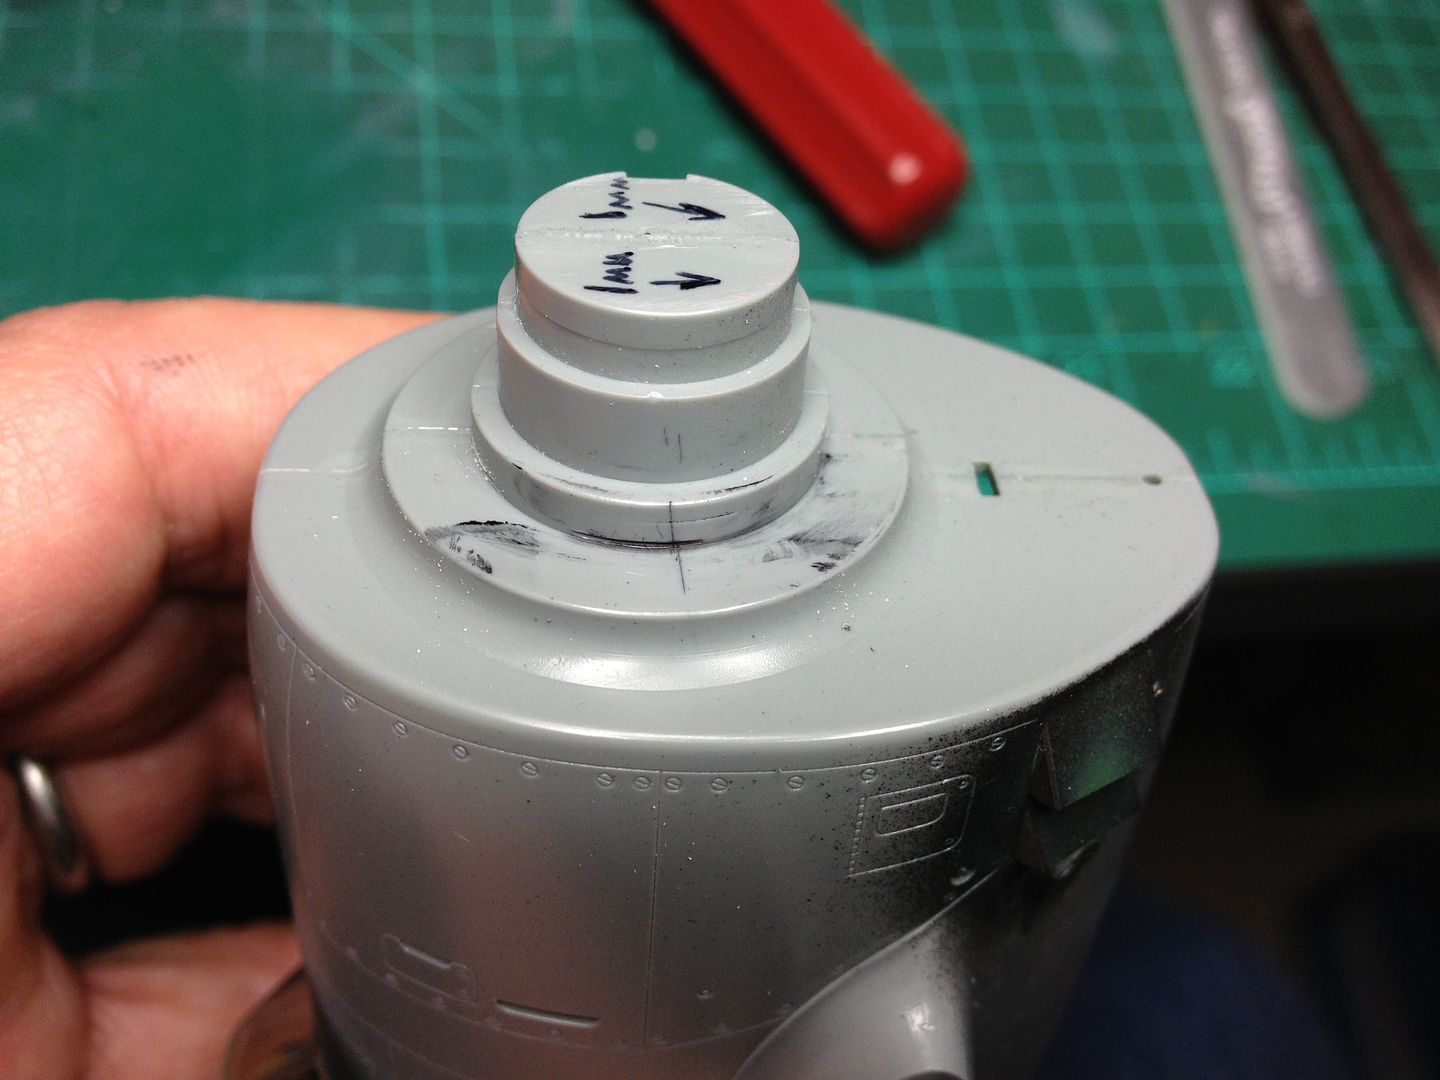 Off by 1mm. 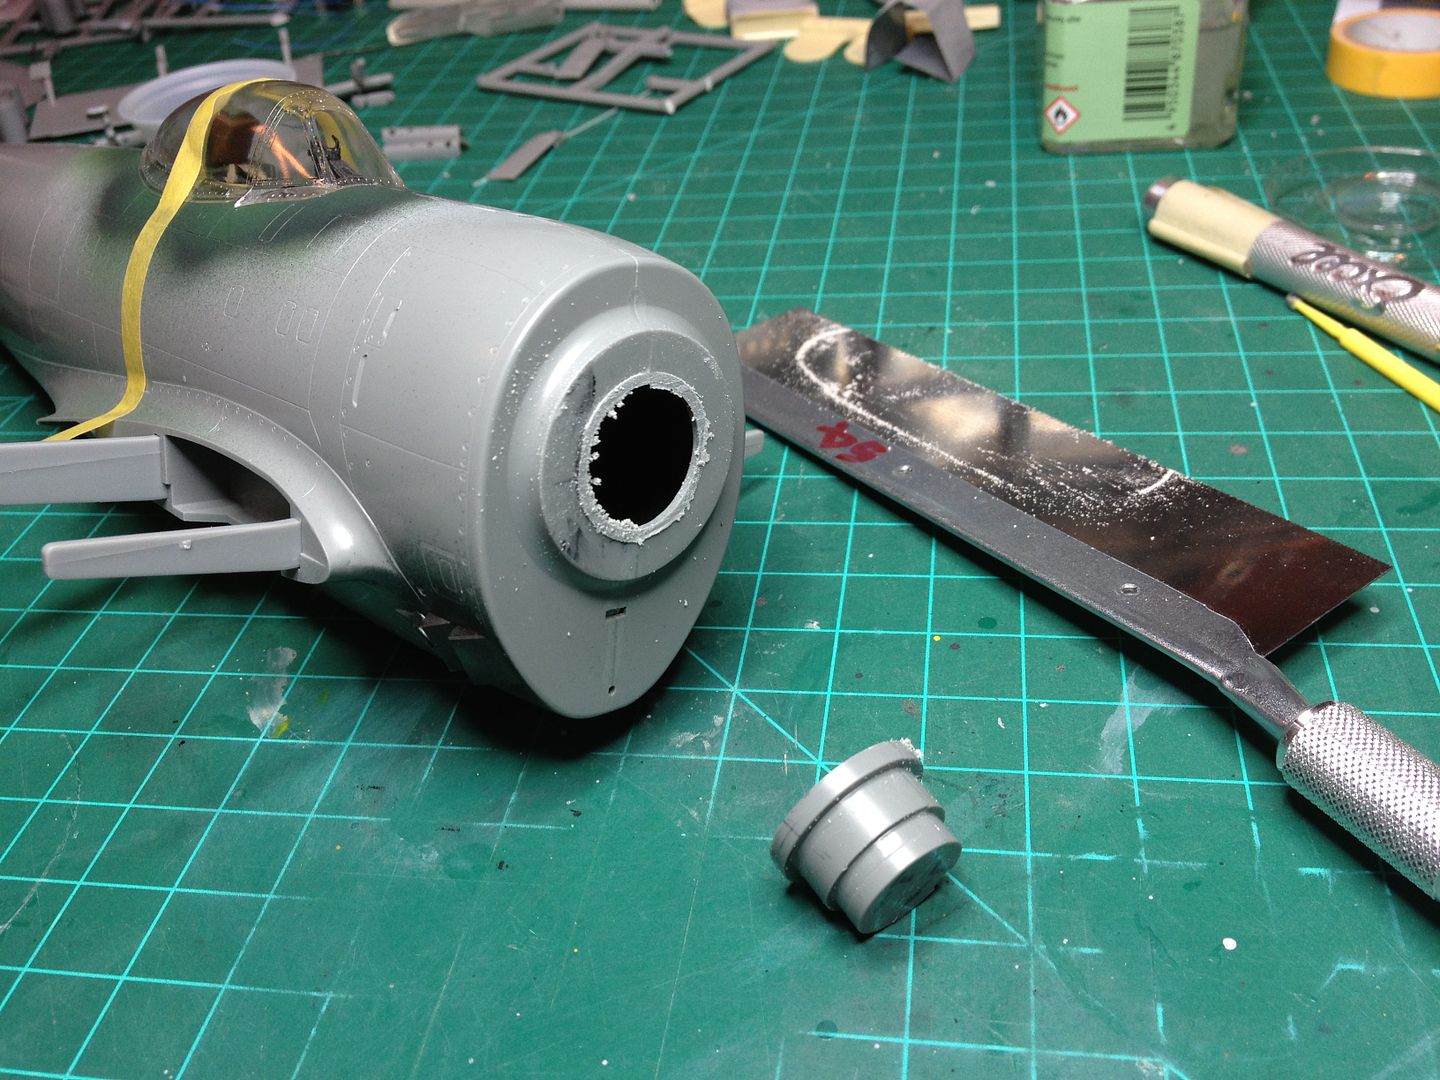 After fuselage is glued and cured I carefully remove the engine mount. The one piece canopy (I'm using the two piece option for both final builds) is very handy to protect the pit during surgery. 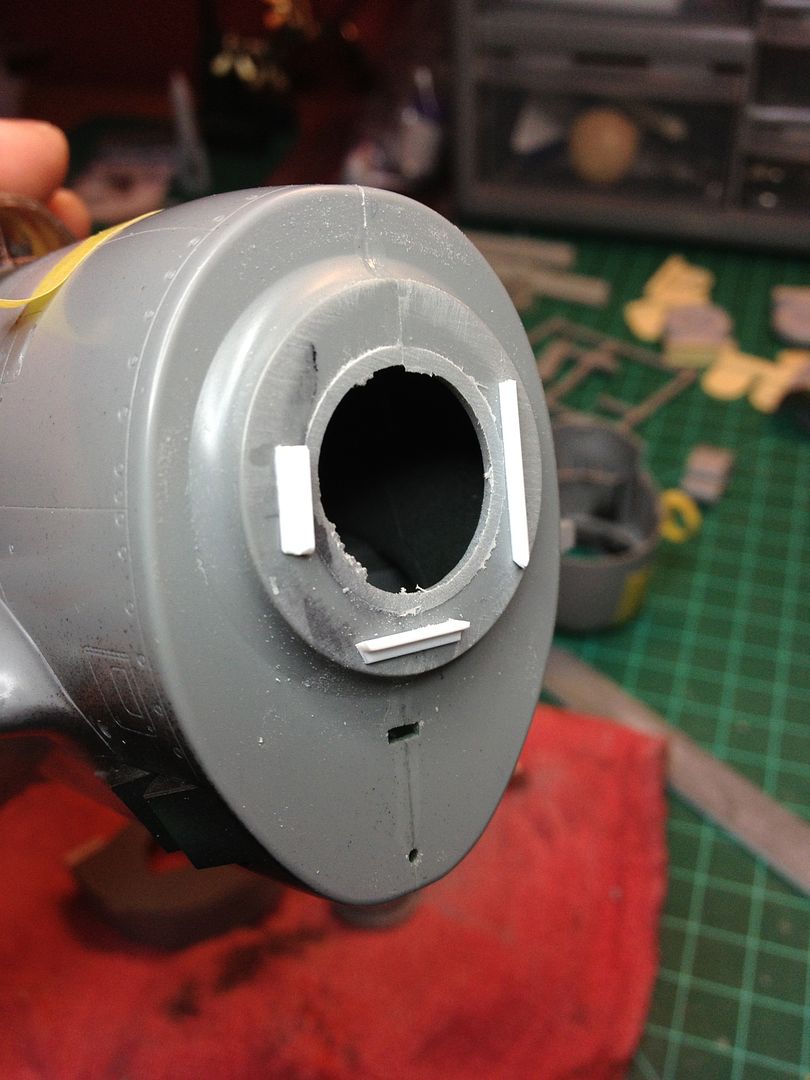 Using 1.6mm styrene angle. 3 pieces are cut and glued, port and starboard sides are easy to position however, the critical bottom piece is dropped 1mm. 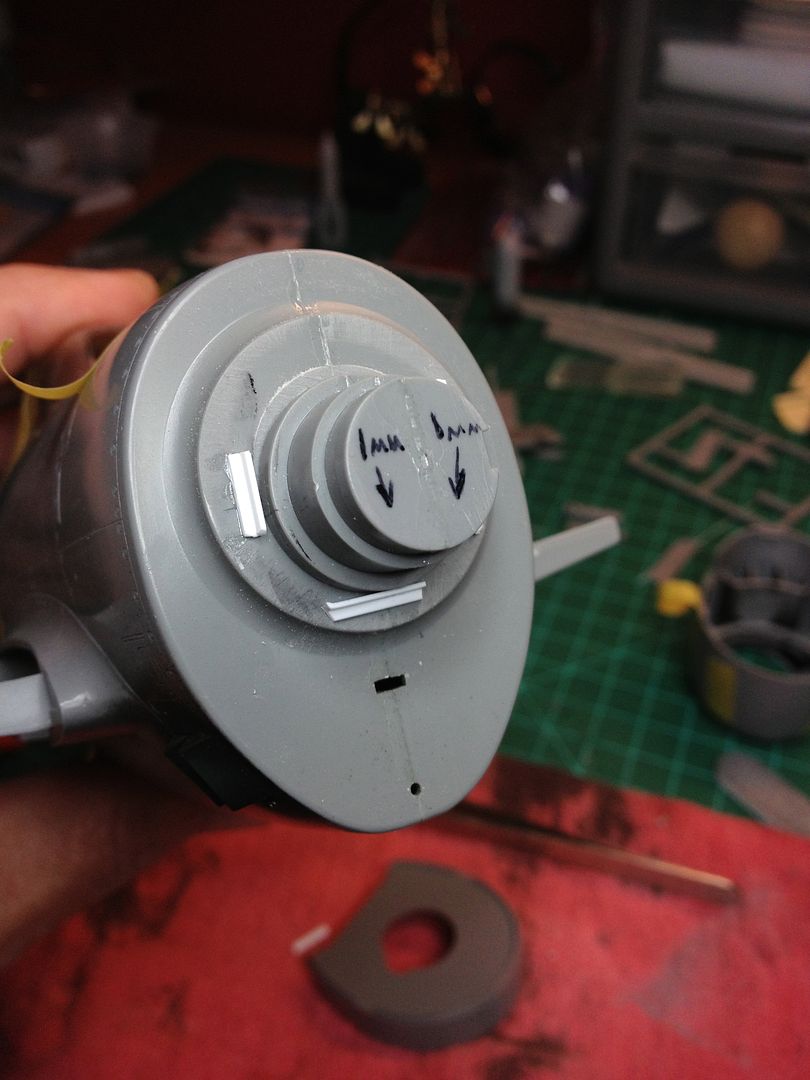 Engine mount plug is test fitted for 1st measure check. 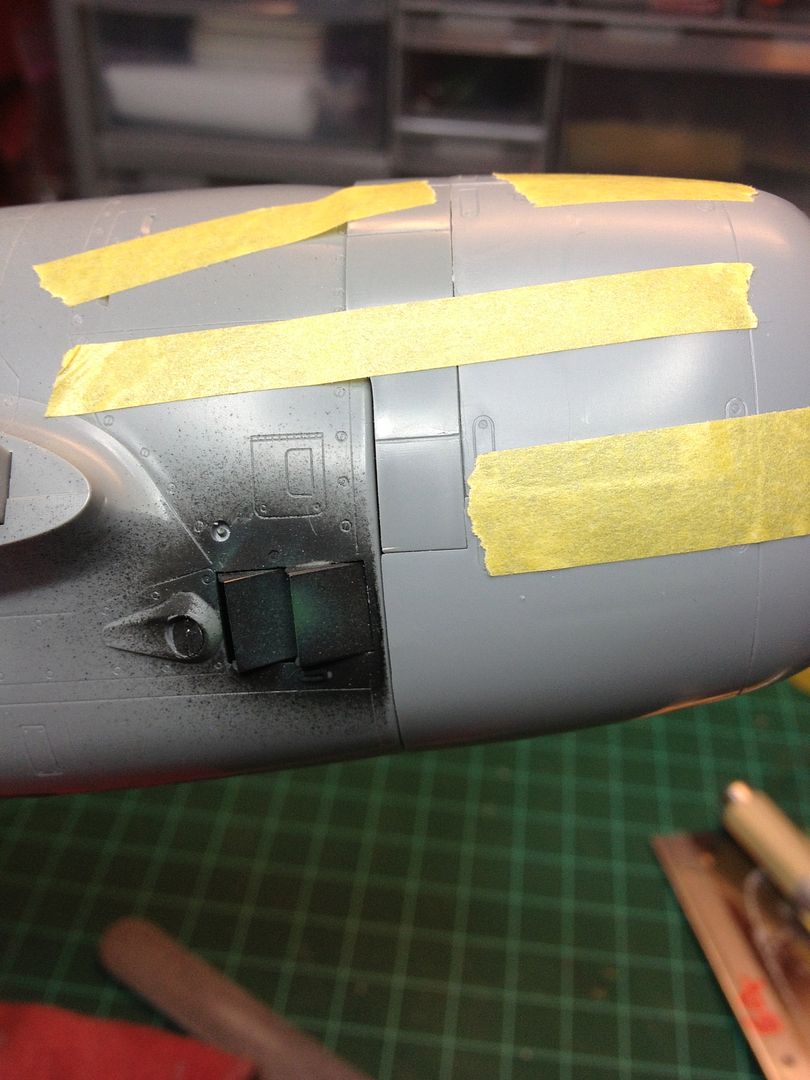 2nd test fit (with complete engine parts) shows an acceptable fit. 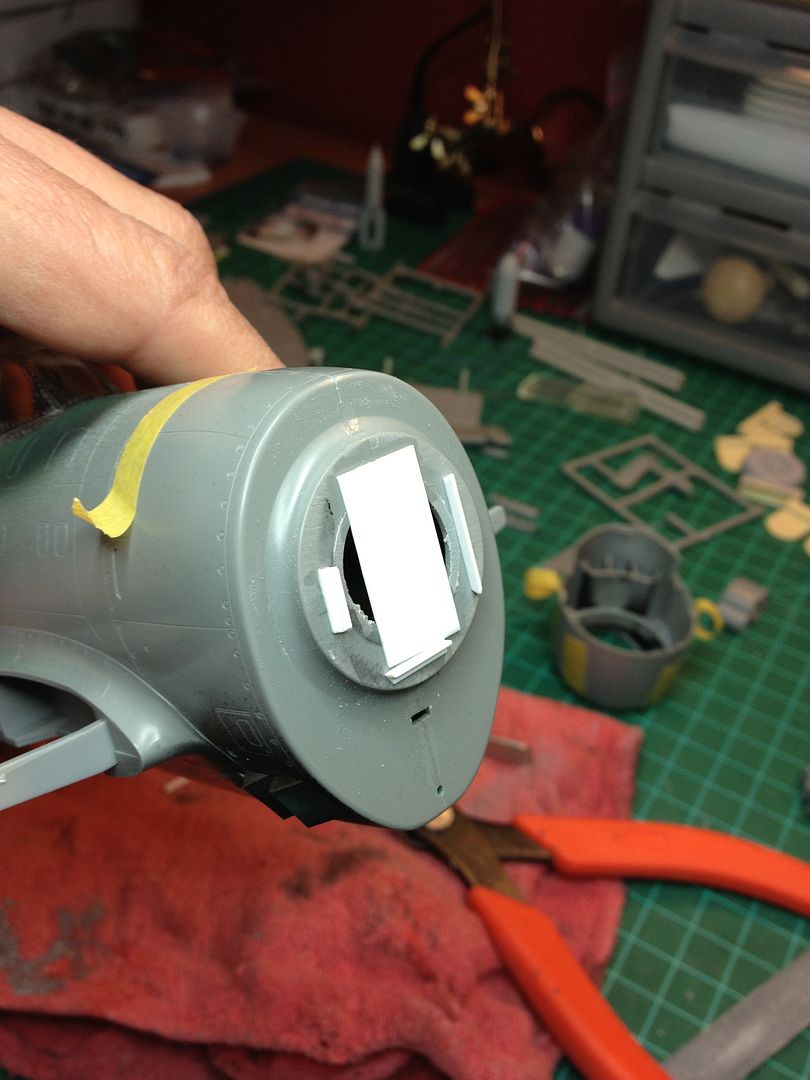 A .05mm styrene card is placed to recapture space lost from the "saw off" and give the repositioned engine mount some glue area. 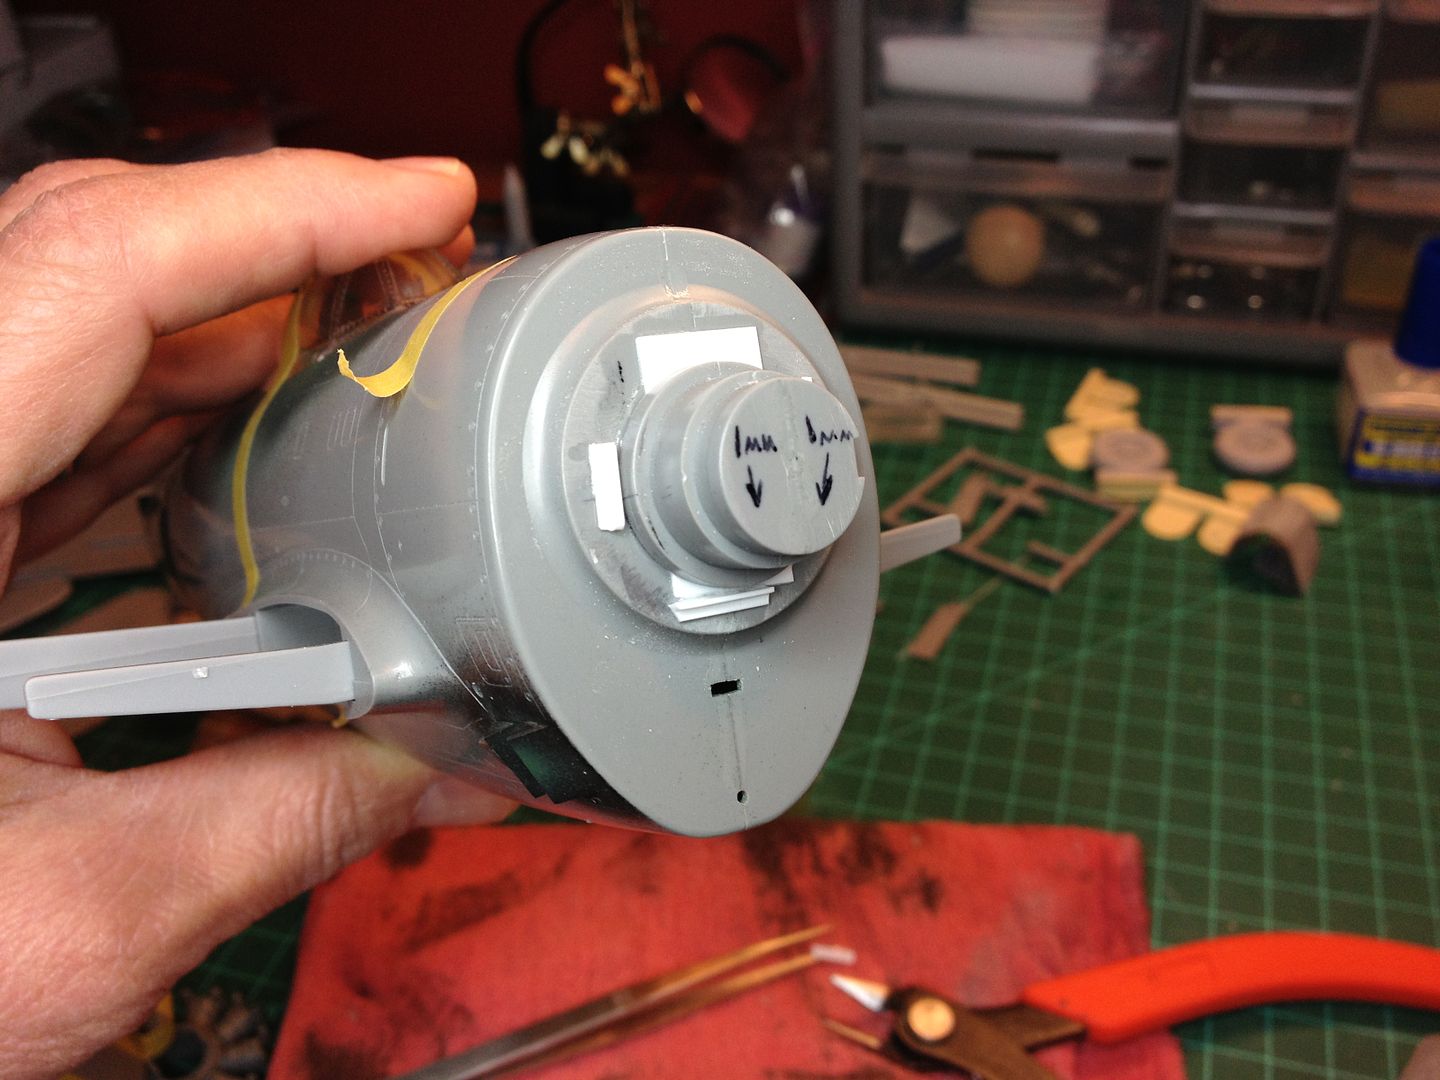 Engine mount positioned and glued. 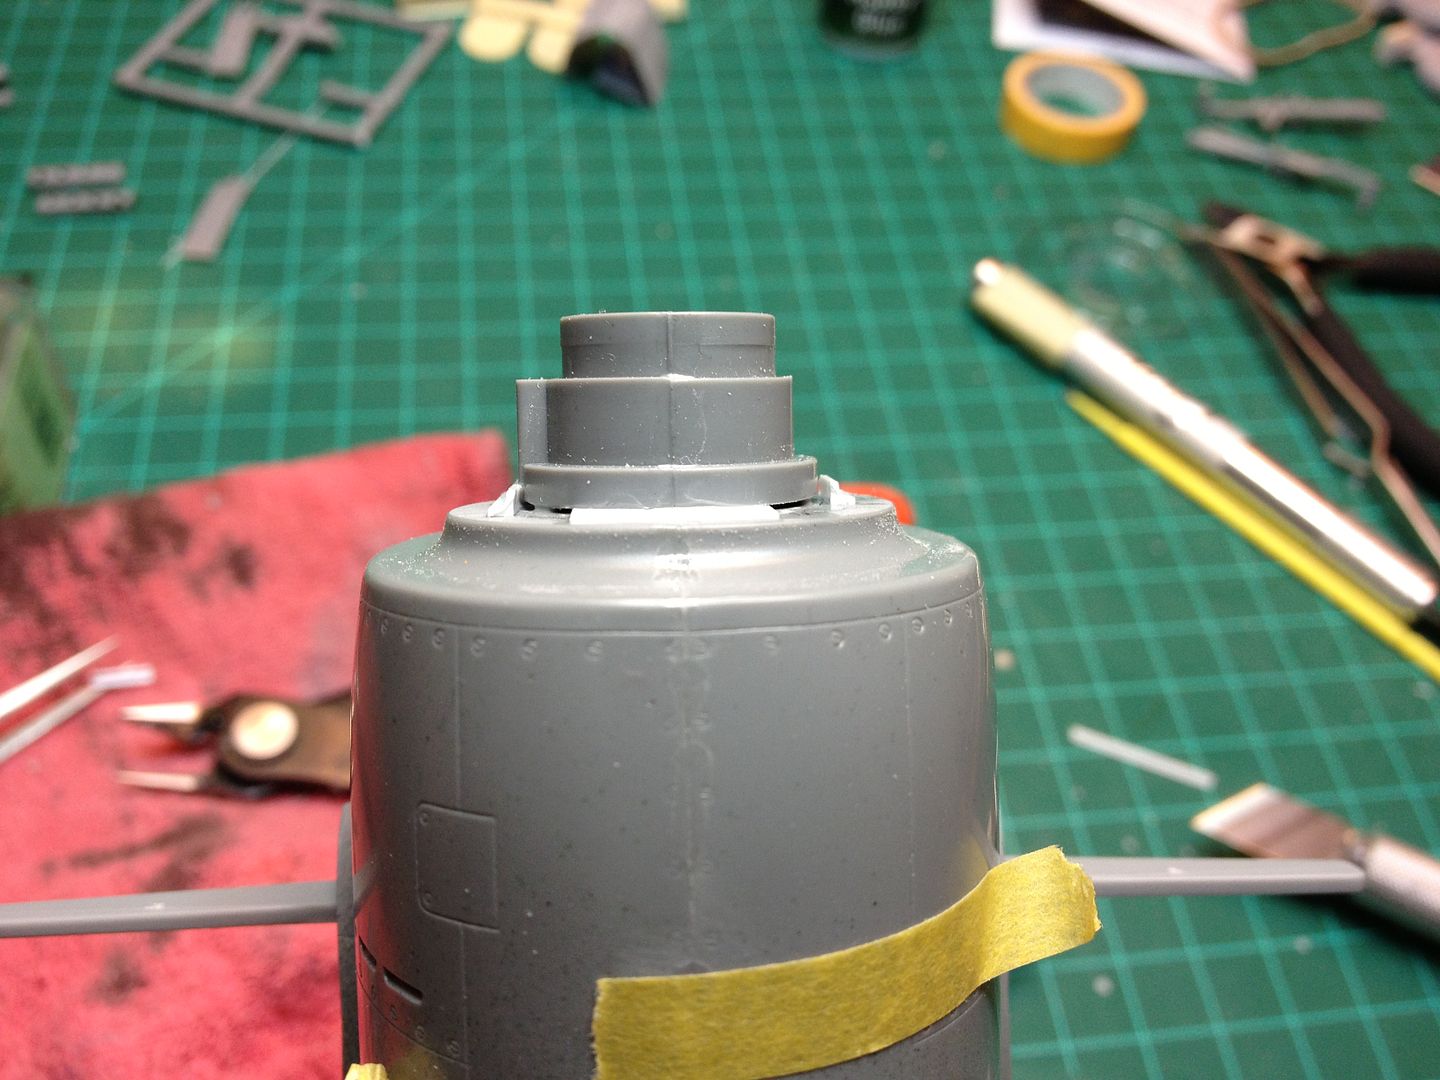 Styrene card shows "saw off" recovery. |
|
venom1
Full Member
  
Member since: October 2012
Posts: 1,369
Oct 10, 2012 2:40:03 GMT -5
Oct 10, 2012 2:40:03 GMT -5
|
Post by venom1 on Jul 12, 2013 7:26:51 GMT -5
Wow BB, heck of a way to make an entrance!! Fantastic stuff!  Look forward to seeing this unfold, some fantastic marking choices should make for two very different looking versions of the same bird!  Bring on the next installment.....  Cheers, Sam  P.S. Attention all mods! May I suggest moving this thread into the fixed wing section, as I almost missed it, and I'm sure there are others who will do the same! This is one thread worth watching......though aren't they all round these parts??  |
|
thug626
Senior Member
   
Member since: January 2013
Posts: 2,030
Jan 15, 2013 13:05:28 GMT -5
Jan 15, 2013 13:05:28 GMT -5
|
Post by thug626 on Jul 12, 2013 11:28:08 GMT -5
That is outstanding work you have done. There are some small details that I really like what you have done. The simplicity of scoring the clear styrene for the gunsight instead of using two pieces. The texture for the bombs. The not so small detail that is simply smashing is the save you did on the engine cowling.  Keep up the solid work. I'll be looking forward to further installments on this build. Dave |
|
|
|
Post by Teabone on Jul 12, 2013 12:06:01 GMT -5
Bezoula
I have to say, not being a wingy guy, that your work here is so outstanding I will just have to follow your builds for the pleasure of seeing the kind of detail I enjoy in scale model building. You are a real artist at this and do wonderful work and a serious photographer also.
Bones
|
|
Rick
Full Member
  
Member since: March 2013
what to build, what to build . . . Ok THAT one!
Posts: 854 
|
Post by Rick on Jul 12, 2013 12:35:31 GMT -5
Wow! A pair of big jugs! Your eye for detail and resolving the gunsite and cowl fit issue really show your forward thinking approach to solving common issues many of us face. Will be keeping an eye on your builds. Cockpits are awesome as well. You are well on your way to a couple of big 'ol beauties!
Rick
|
|
|
|
Post by wbill76 on Jul 12, 2013 13:13:45 GMT -5
Very nice, will be following this one with interest!
|
|
BezoulaBuilds
Full Member
  
Member since: July 2013
Posts: 136 
|
Post by BezoulaBuilds on Jul 12, 2013 14:08:49 GMT -5
ENGINE/COWLING ADJUSTMENT COMPLETE  The final fit is good... 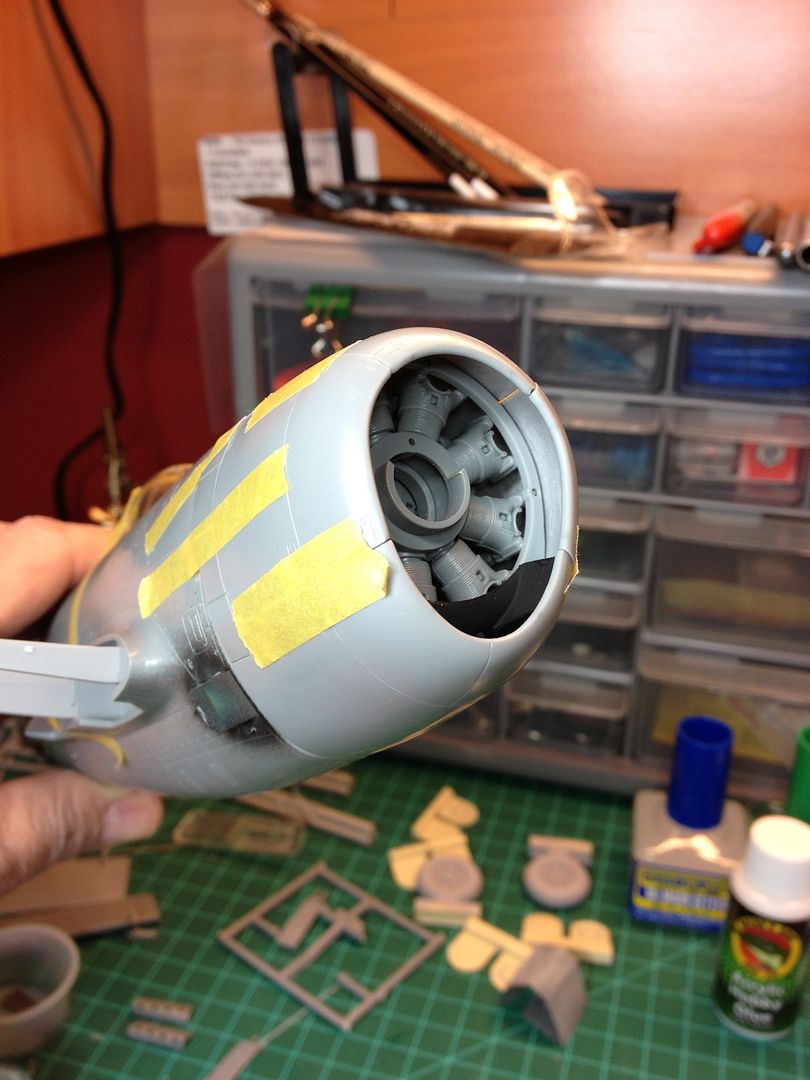 Finish, repeat on 2nd Jug. 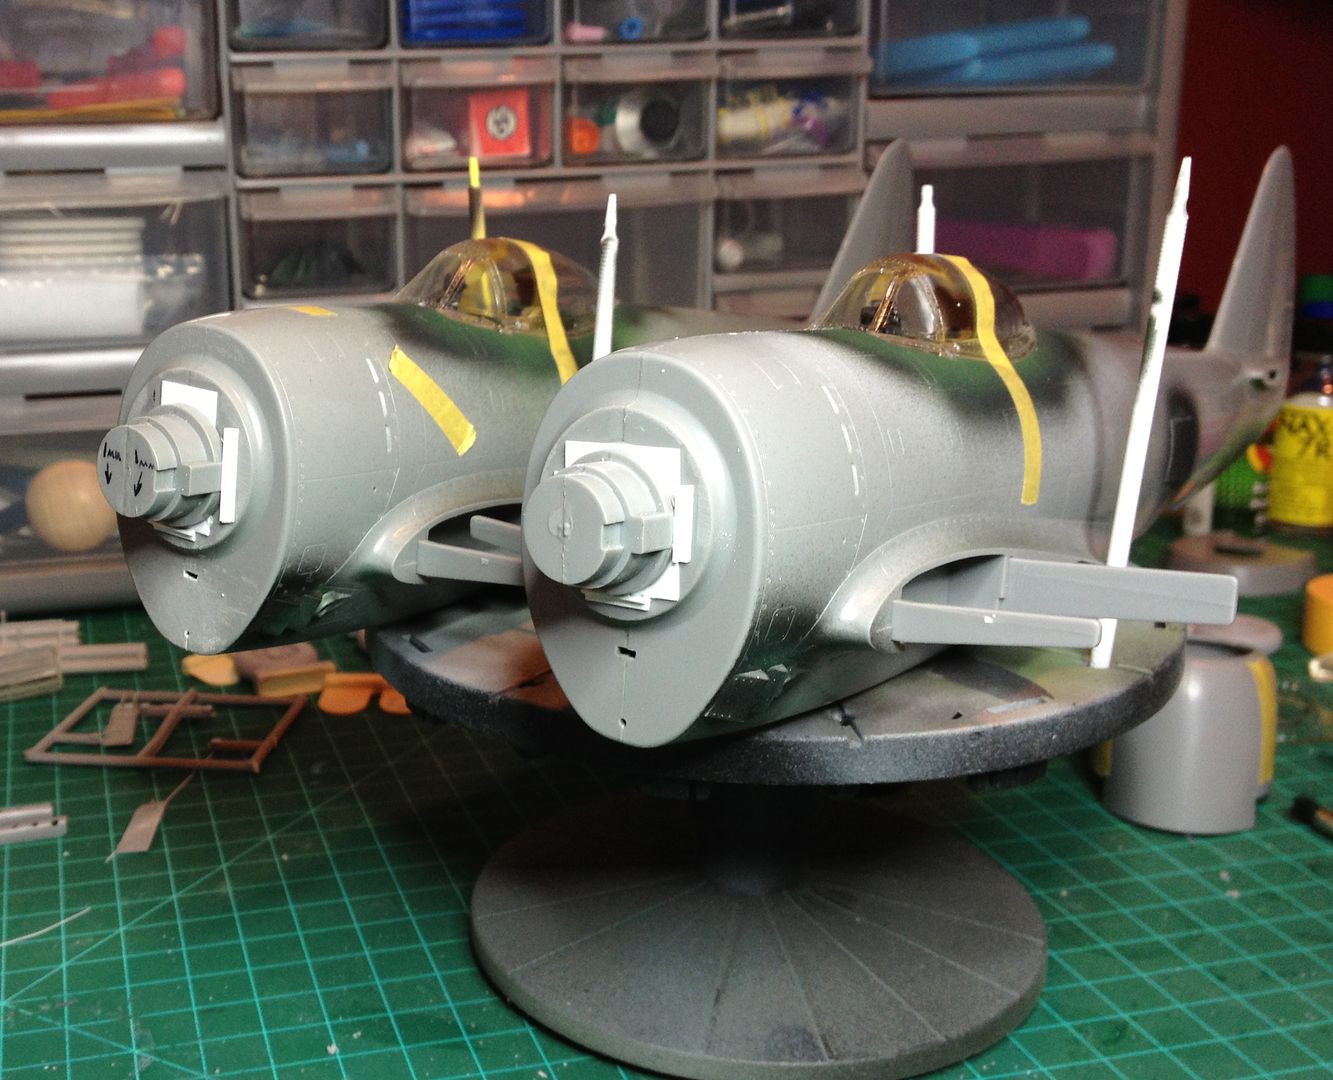 Two happy campers.  A fine pair of Jugs. WINGS & THINGS 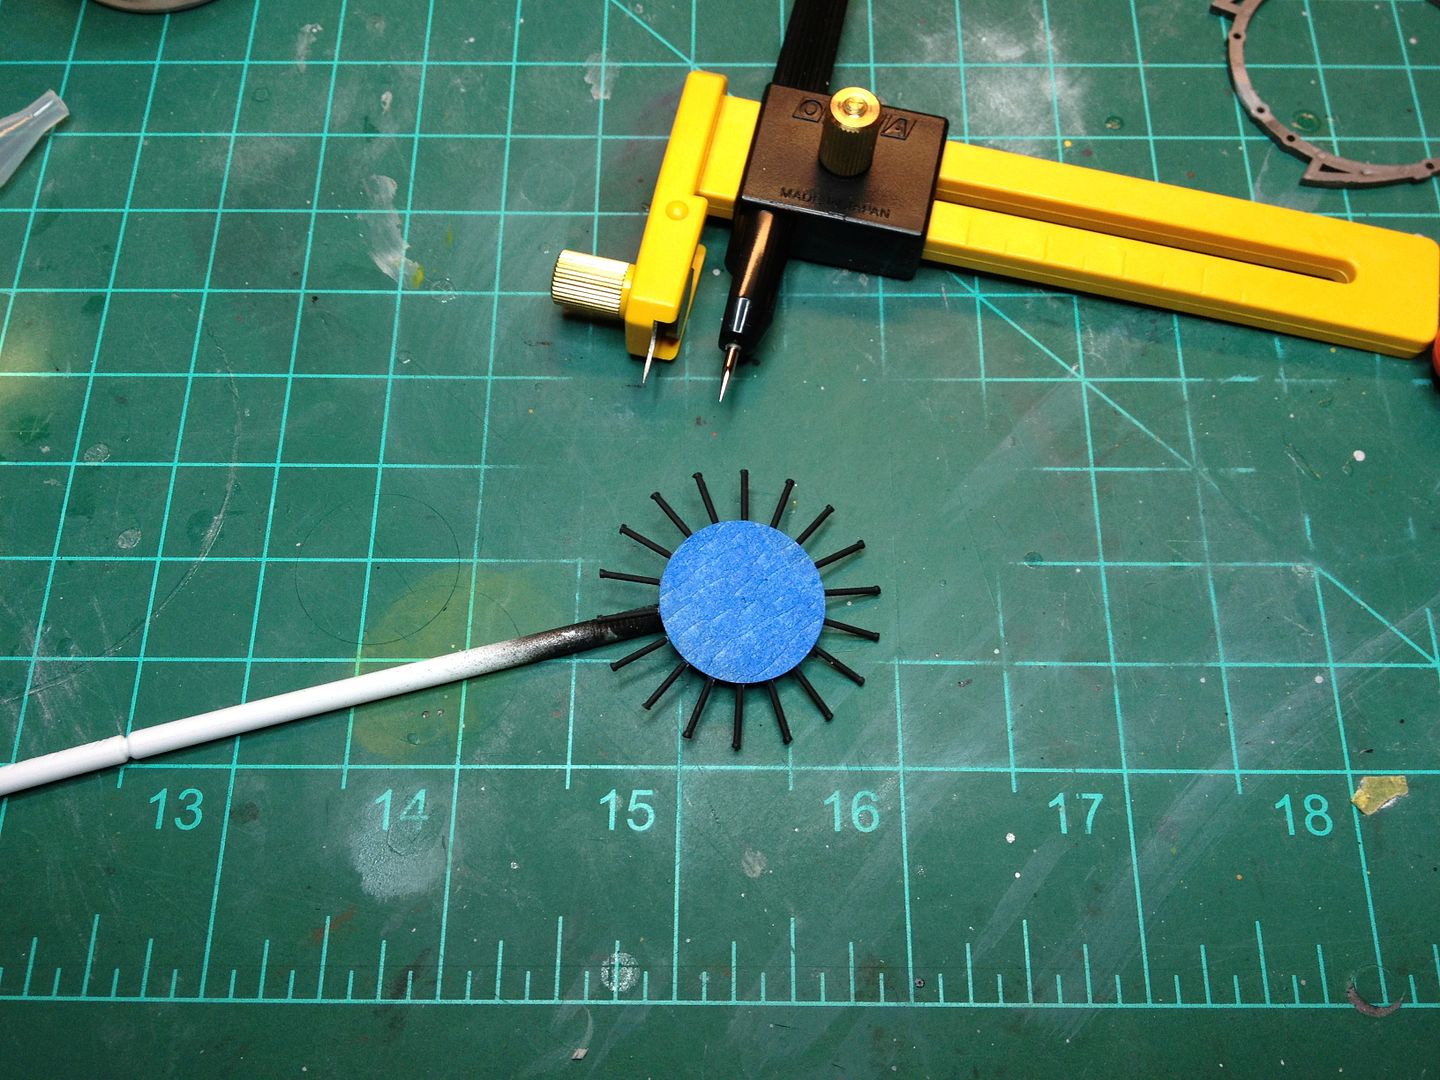 Circular cutting tool works great for making paint masks. 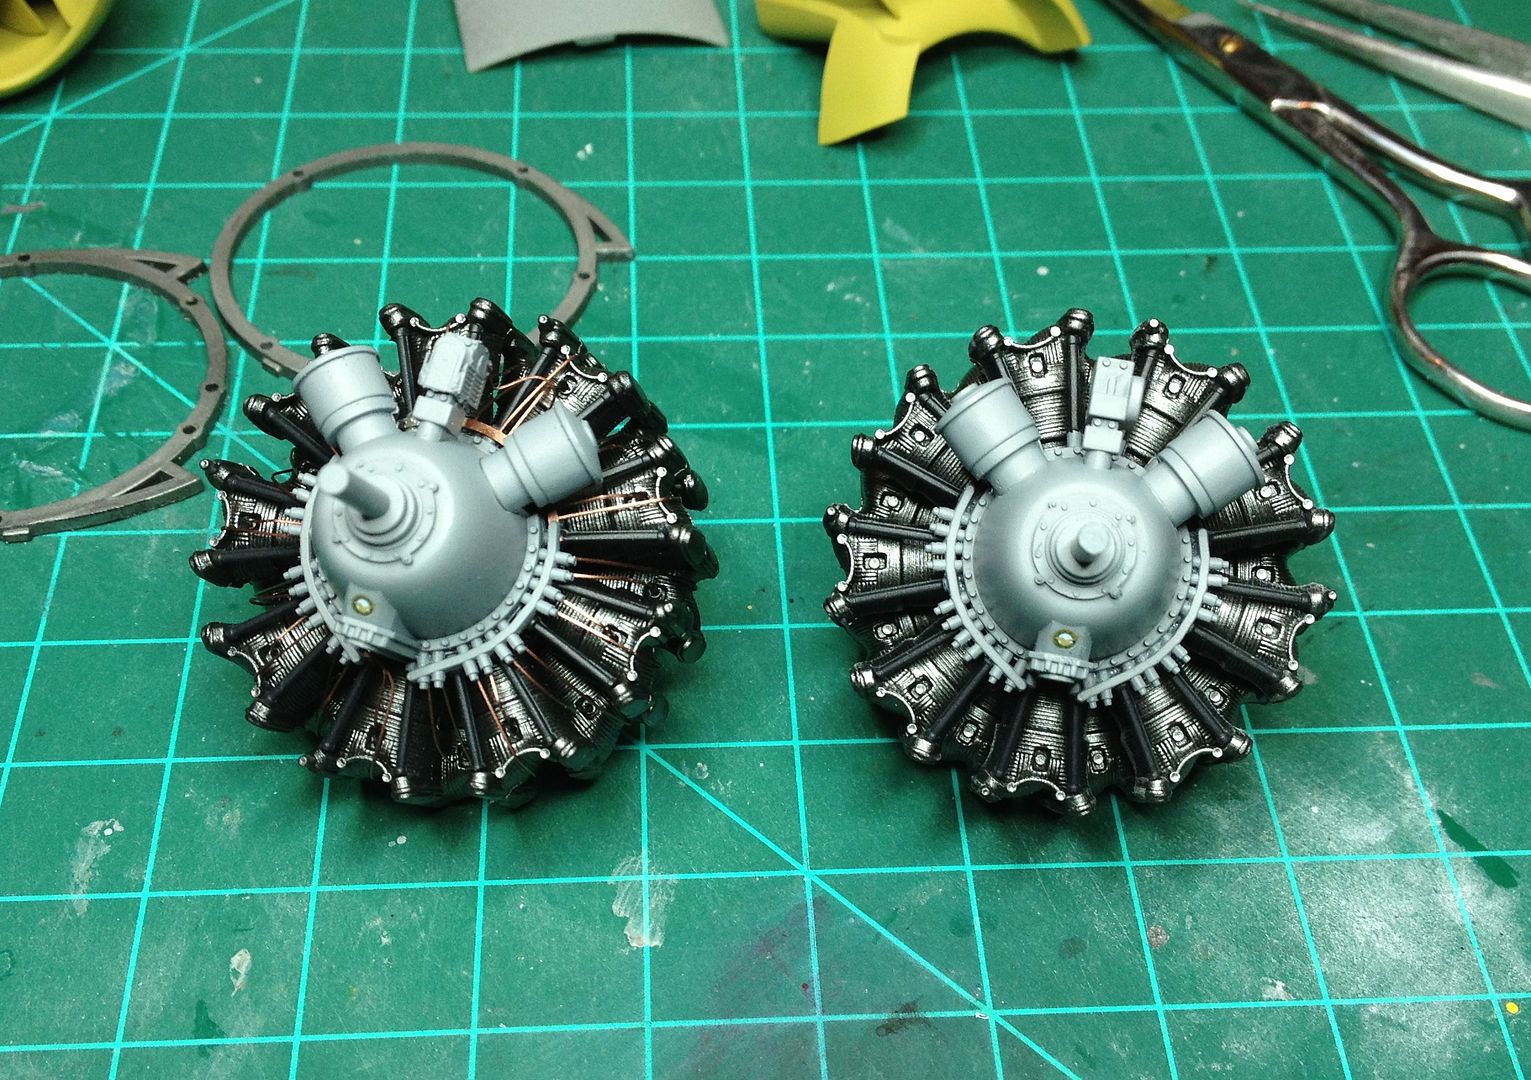 R2800's ready for test fit. These will be given a weathering wash before and post installation. Pratt & Whitney logo plate decal in place on both engines. Engine on left is Russian Jug and has ignition wires installed. Slick Chick engine on right is built OOB. Fuselage, wings and tail plane glued. Fit was good, not spectacular. Some seam work needed on the fuselage and a annoying gap at lower wing joint. 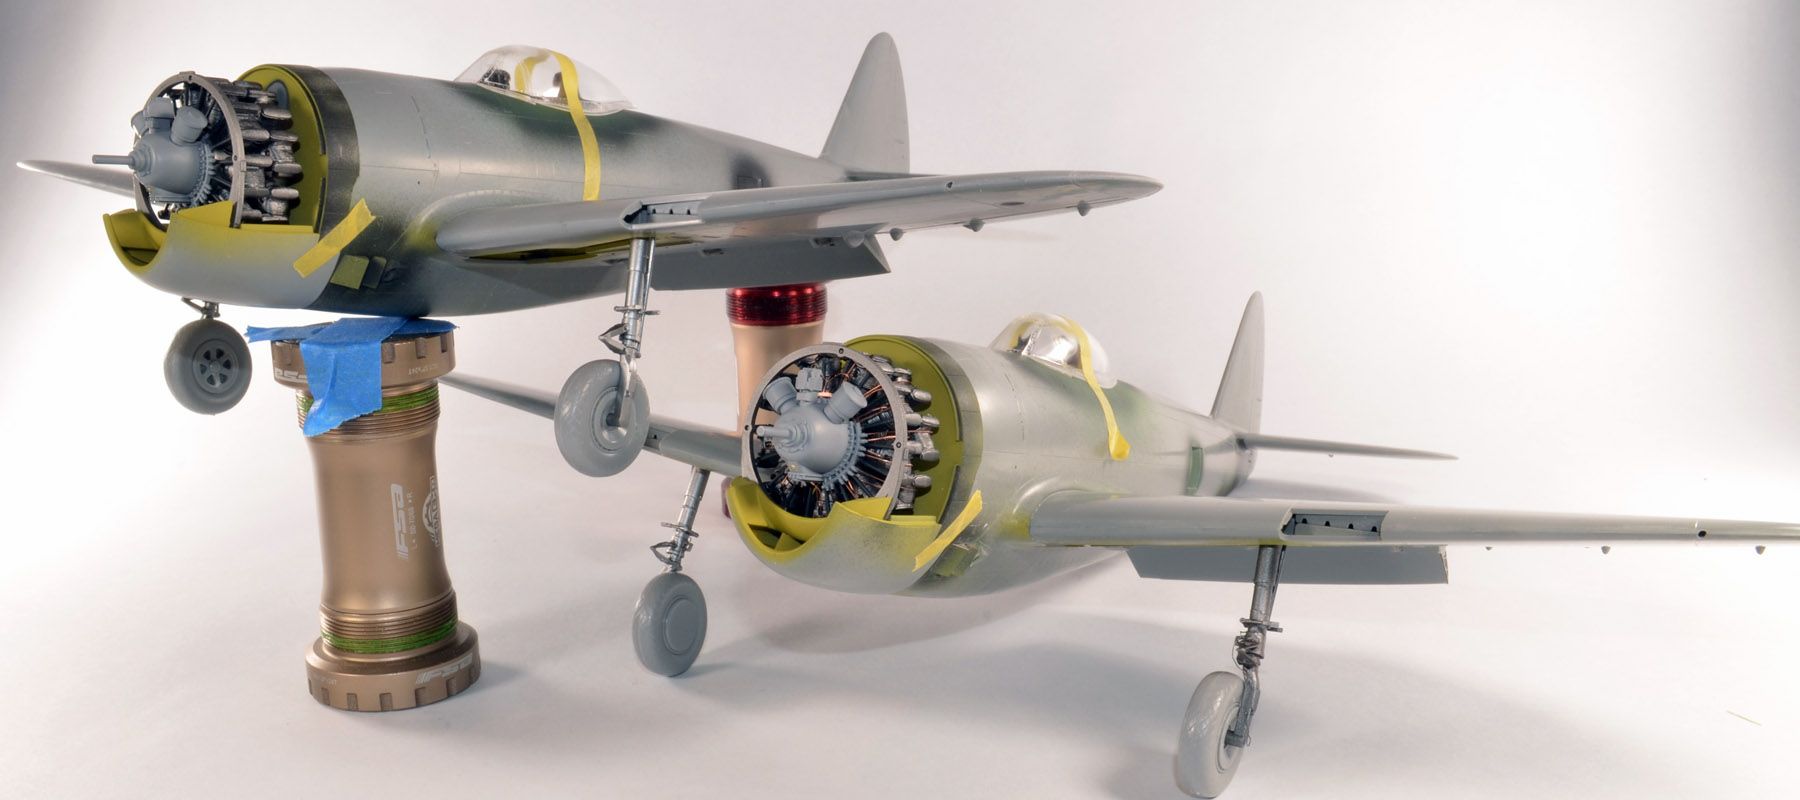 Slick Chick on left and Russian Jug on right. Engine and landing gear dry fitted. Canopies are in position to protect cockpits during sanding, handling, etc. Fuselage seams slightly puttied, sanded and scribed. There may be more work after primer applied. Upper and lower wing roots will need some attention. Kit wheels are on now, will be using Barracuda's awesome resin wheels. 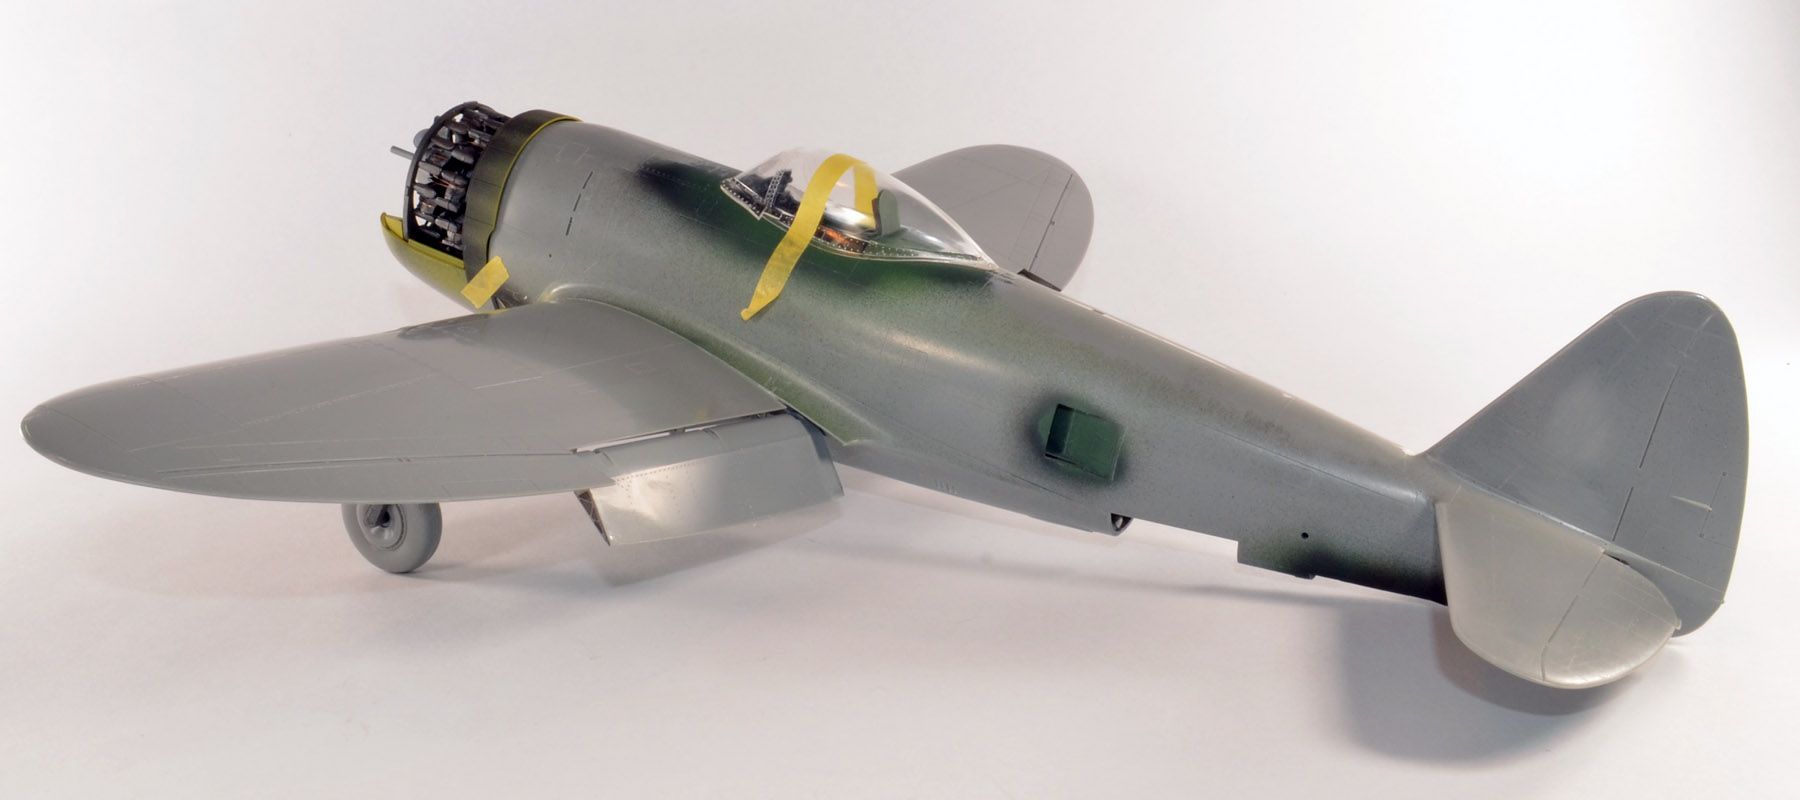 Russian Jug. Landing flaps will be down on both planes. The Russian Jug is getting lots of Eduard PE stuff. 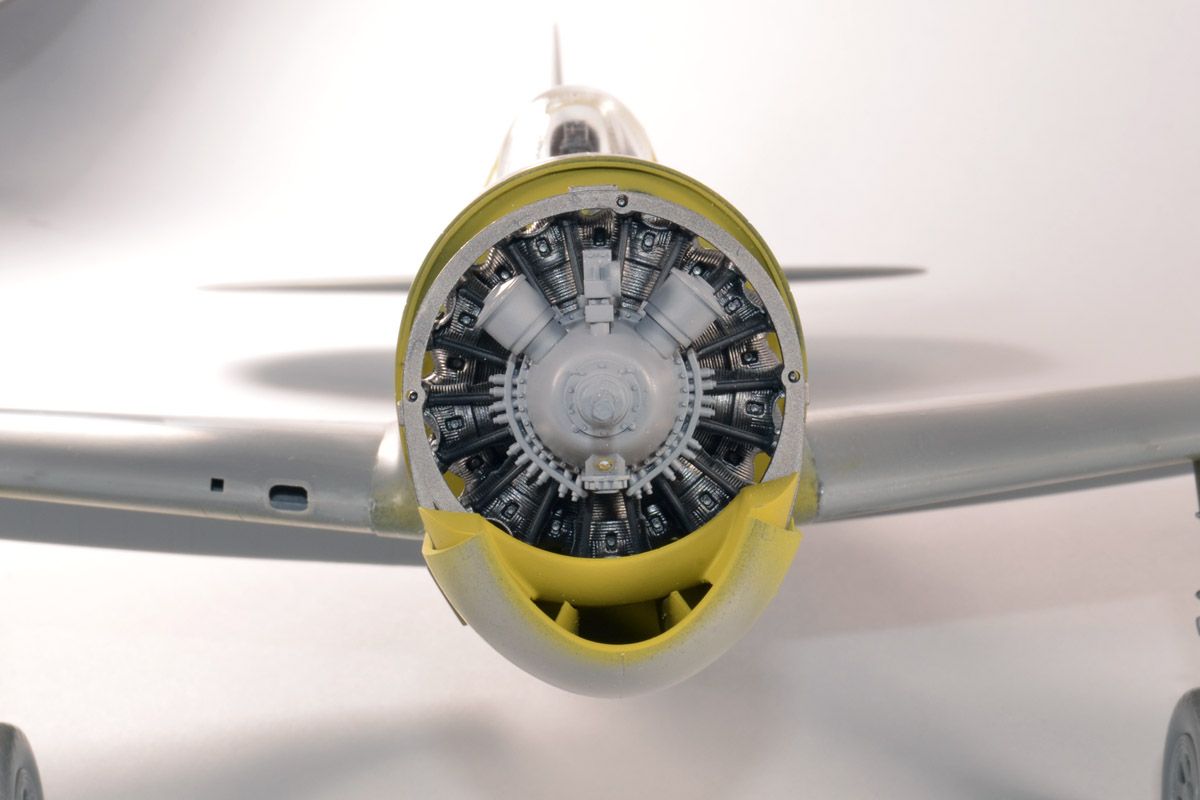 Slick Chick engine is OOB. My original plan was to build Slick Chick completely OOB. However, the belts had to be added and the wheels replaced. Engine will be removed and weathered. The detail is sparse, just enough to get by after cowling is buttoned up. 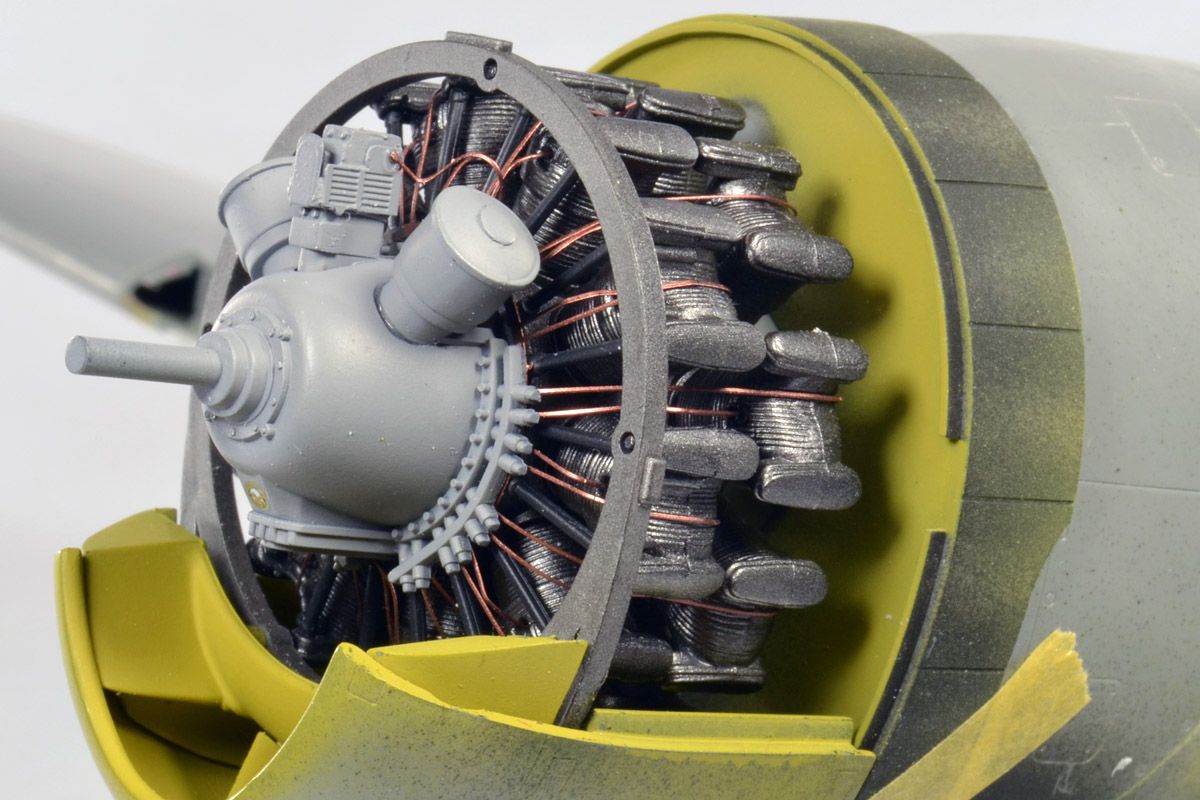 A little PE treatment in the Russian Jug engine. On deck for some weathering. Dust is everywhere....sorry 'bout that. 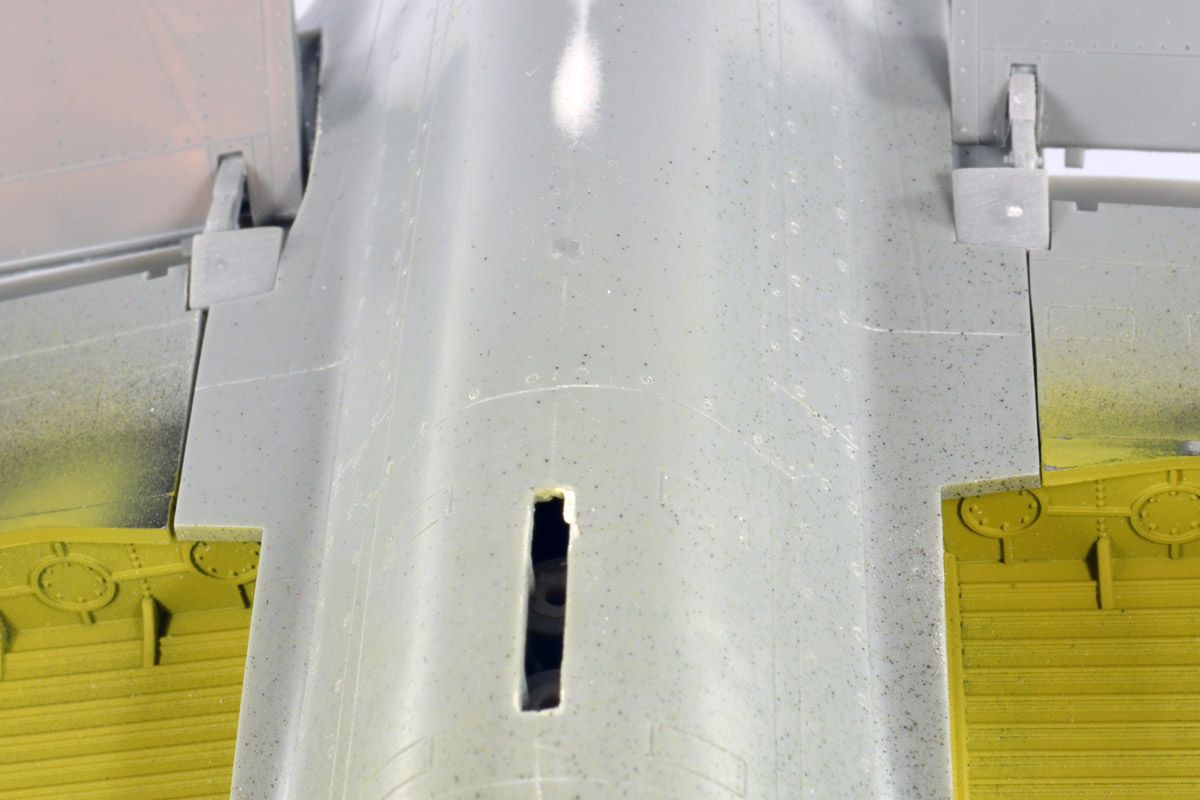 Lower wing root has slight gap when wings set and glued at proper dihedral, sooo... 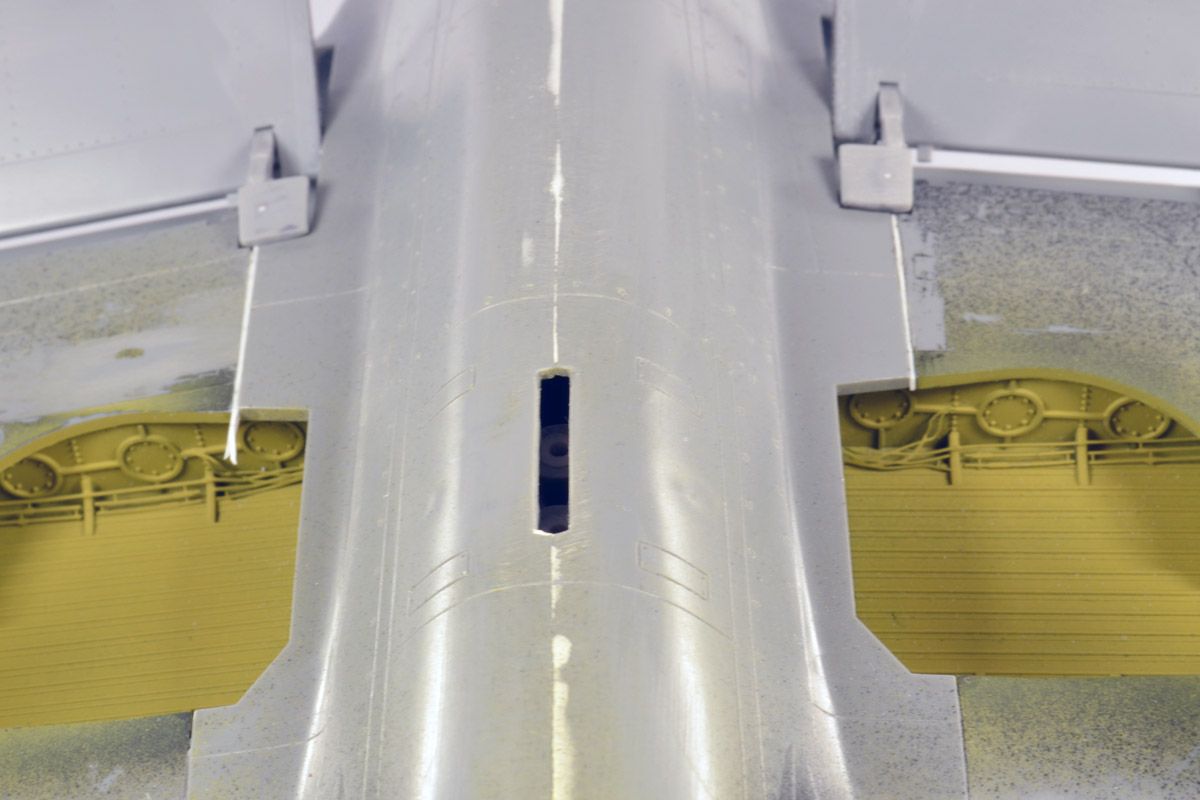 a little plastic card nested in the gaps. Trim and scribe to come. Big gap in center fuselage is where the center tank mount will be placed. 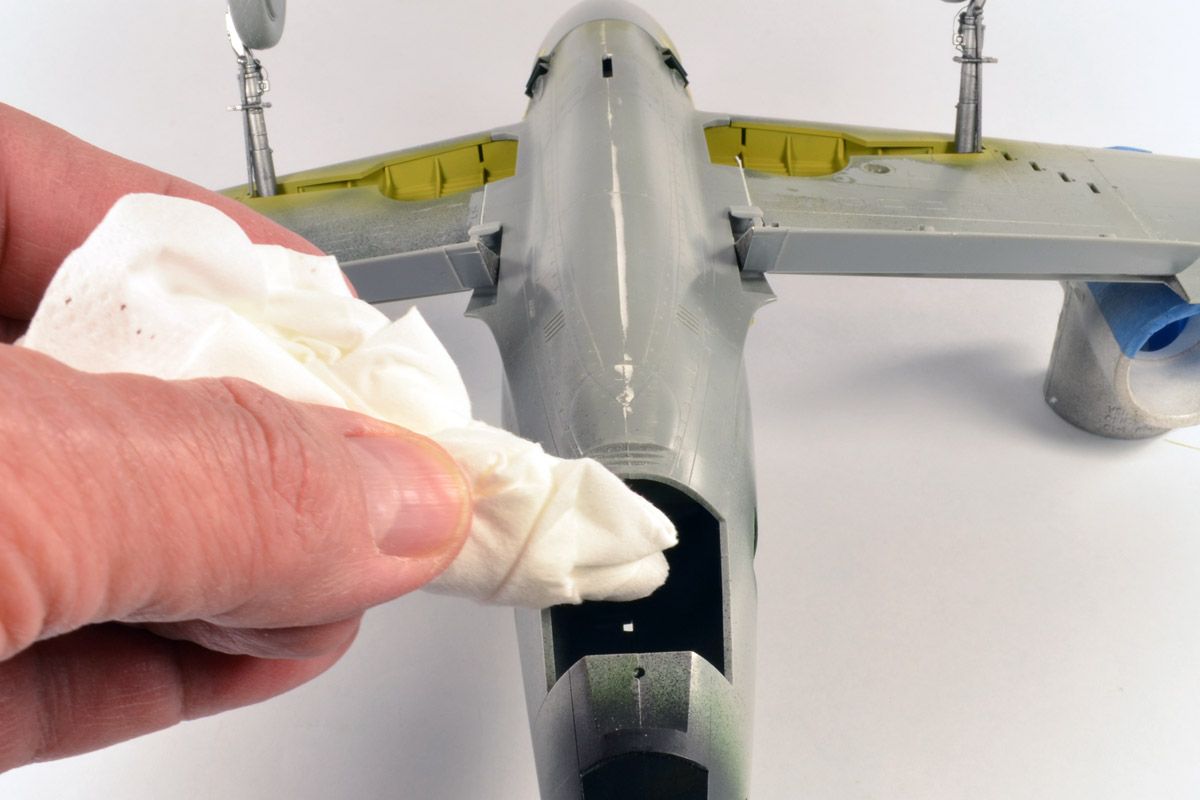 The turbine exhaust cover will be placed after painting complete. Concerned about paint particles making it to cockpit as the back of pit exposed. A little tissue stuffed behind pit will protect from paint. Stuffing tissue and Jugs...there seems to be some type of correlation. Not sure why, it's just a feeling. 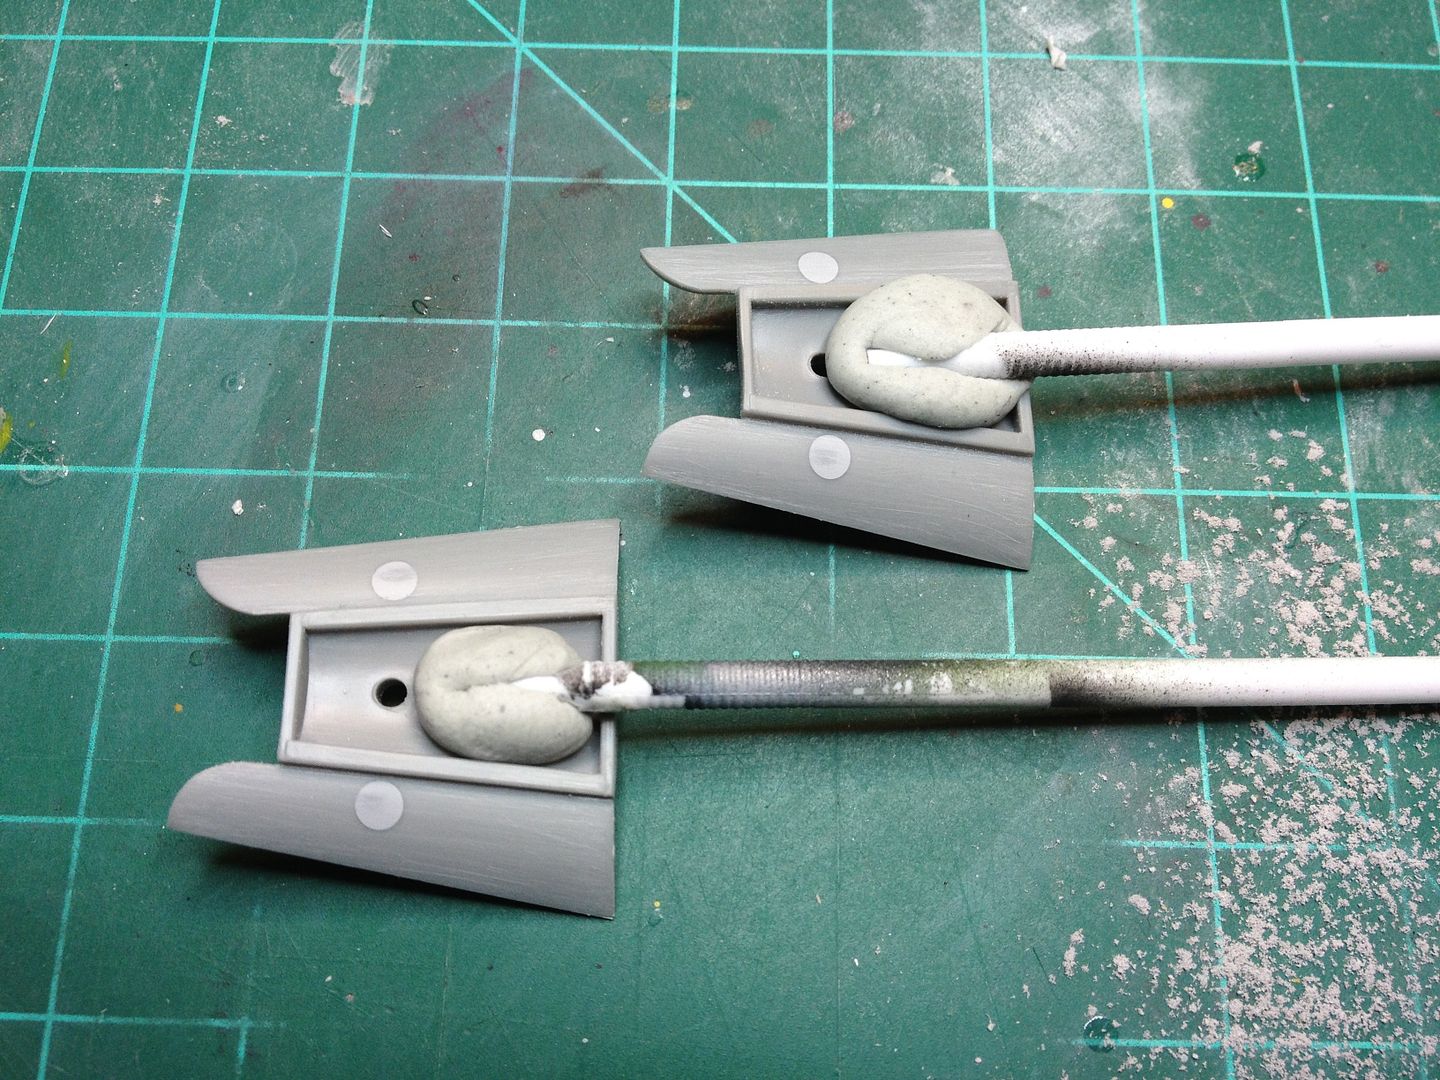 Ejector holes filled with Mr. Surfacer 500 and sanded. 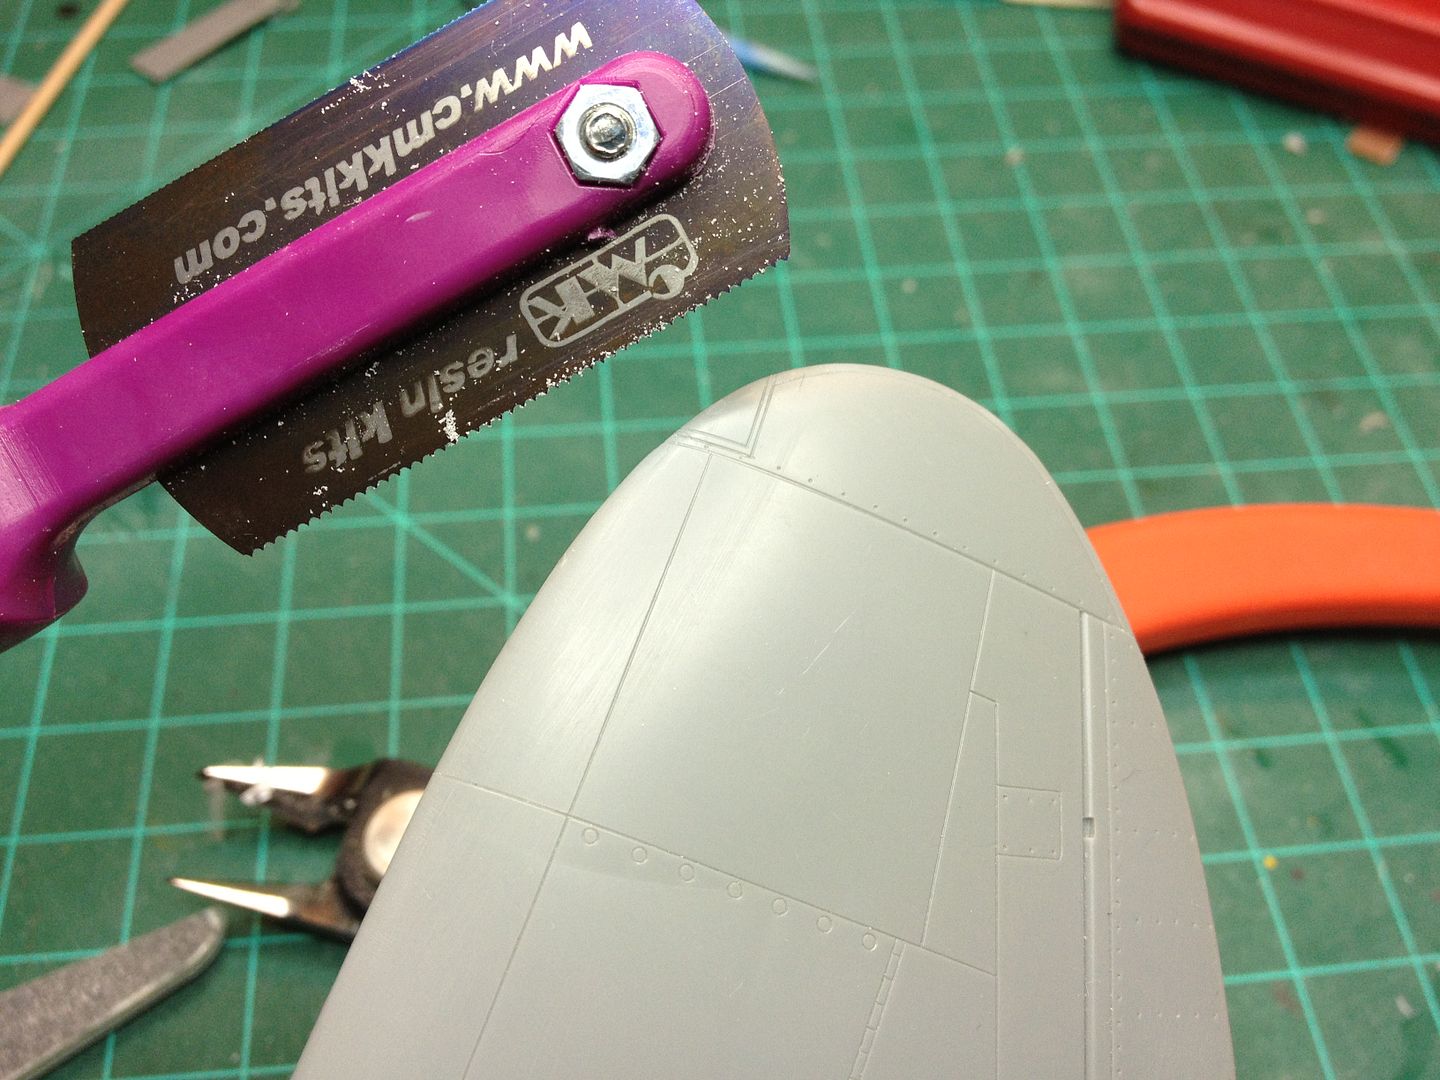 Cutting out the nav lights was truly a PITA. Will have to do same to "Slick Chick". Not looking forward to it. 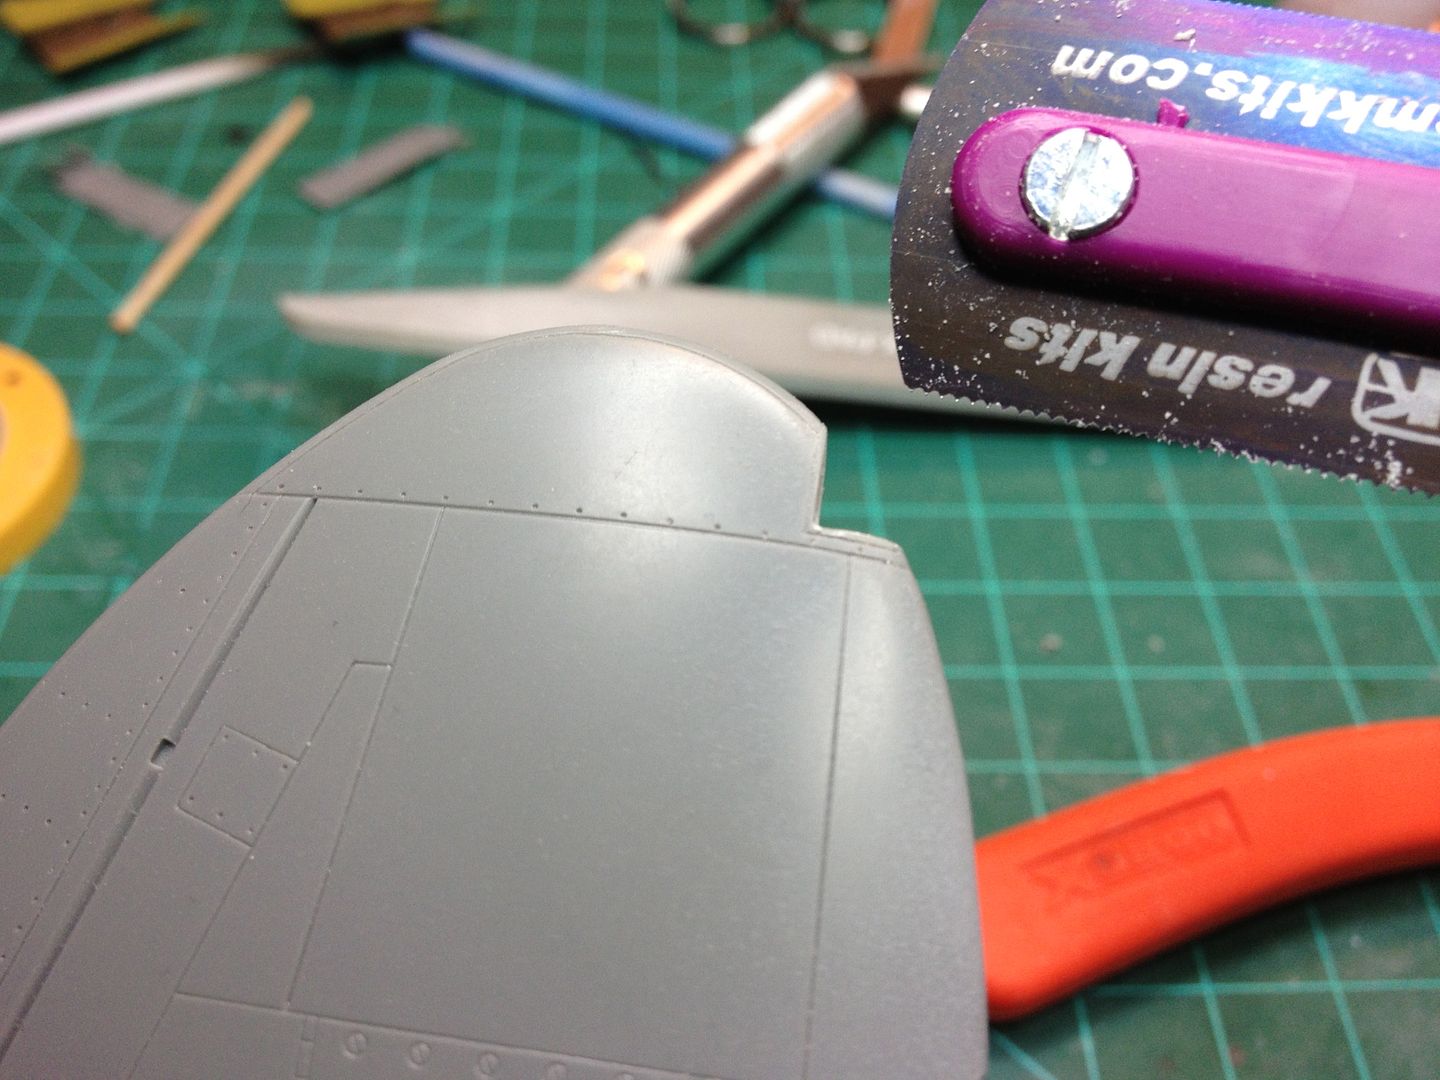 Nav light cut out and will sand to fit clear lens. |
|
|
|
Post by bbd468 on Jul 12, 2013 14:29:06 GMT -5
Outstanding Works BB! P-47D is my favorite allied WWII aircraft....I love Jugs too!!!   Bookmarked!! |
|
|
|
Post by Teabone on Jul 12, 2013 19:10:35 GMT -5
Bezoula
You continue to impress with your work, nice wiring job on the Soviet plane.
Bones
|
|
|
|
Post by Leon on Jul 12, 2013 20:23:56 GMT -5
Awesome work on the jugs BB  .Superb fix on the engine cowling  .More please!!! |
|
Thomas_M/
Full Member
  
Member since: May 2013
Don´t panic! I am German!
Posts: 217 
|
Post by Thomas_M/ on Jul 13, 2013 0:57:39 GMT -5
What a build! Rick, it is most interesting to follow you on this one! Great pics, awesome hints and tips! Rock on, dude!
|
|
|
|
Post by fightnjoe on Jul 13, 2013 21:46:06 GMT -5
most impressive work. slick work on the nose fix. looking forward to seeing more.
joe
|
|
|
|
Post by TRM on Jul 13, 2013 22:21:53 GMT -5
Always a sucker for a nice pair!!  Outstanding work!! Love the side by side build! Love the redundancy of writing 1mm down on both halves of the engine mount...  Keep up the great work!! |
|
BezoulaBuilds
Full Member
  
Member since: July 2013
Posts: 136 
|
Post by BezoulaBuilds on Jul 16, 2013 8:15:23 GMT -5
Always a sucker for a nice pair!!  Outstanding work!! Love the side by side build! Love the redundancy of writing 1mm down on both halves of the engine mount...  Keep up the great work!! ha, ha. in case one eye fails the good eye will pick up the correct measure. thanks for the kudos! |
|
|
|
Post by bullardino on Jul 19, 2013 6:30:37 GMT -5
Gotta love jugs  Great start, can't wait to see more  |
|
|
|
Post by deafpanzer on Jul 19, 2013 10:52:47 GMT -5
I love your jugs!!! Great thread and keep it coming please!
|
|
thug626
Senior Member
   
Member since: January 2013
Posts: 2,030
Jan 15, 2013 13:05:28 GMT -5
Jan 15, 2013 13:05:28 GMT -5
|
Post by thug626 on Jul 19, 2013 11:55:43 GMT -5
Ya gotta love a pair of jugs with big bones.  Nice work with the razor saw. Dave |
|
modelfreak72
Full Member
  
Member since: January 2012
Why worry, each of us is wearing an unlicensed nuclear accelerator on his back.
Posts: 1,479
Jan 28, 2012 23:21:46 GMT -5
Jan 28, 2012 23:21:46 GMT -5
|
Post by modelfreak72 on Jul 22, 2013 17:46:47 GMT -5
Hey Bezoula! Outstanding work so far! Your office is work is top notch, those engines are a work of art, and the doctor is in!  Ok if it's not too late and if you don't mind, I noticed that the control sticks are in backwards.  Again great work on the 47's!  |
|
venom1
Full Member
  
Member since: October 2012
Posts: 1,369
Oct 10, 2012 2:40:03 GMT -5
Oct 10, 2012 2:40:03 GMT -5
|
Post by venom1 on Jul 23, 2013 1:24:21 GMT -5
I'm tryin' ta think of some smart comment relating to "jugs"......... I got nuthin'.  I am however envious of the fact that you are able to have a large scale P-47 in each hand at the same time. Waitaminnit.  |
|
BezoulaBuilds
Full Member
  
Member since: July 2013
Posts: 136 
|
Post by BezoulaBuilds on Jul 31, 2013 15:21:40 GMT -5
Hey Bezoula! Outstanding work so far! Your office is work is top notch, those engines are a work of art, and the doctor is in!  Ok if it's not too late and if you don't mind, I noticed that the control sticks are in backwards.  Again great work on the 47's!  thank you for pointing out the control stick installation. I will try to correct. If not, our secret.  Thank you for the nice comments and coaching. |
|
BezoulaBuilds
Full Member
  
Member since: July 2013
Posts: 136 
|
Post by BezoulaBuilds on Jul 31, 2013 15:39:21 GMT -5
ENGINE INSTALL Weathering round one on the R2800's. Installed the Russian Jugs heart and dealt with the 4 piece cowling. "Slick Chick" is on hold for time being as I want to finish at least one by August. So into the HOLD BIN you go "Slick Chick" see you after my "Achtung Baby" build series is finished. 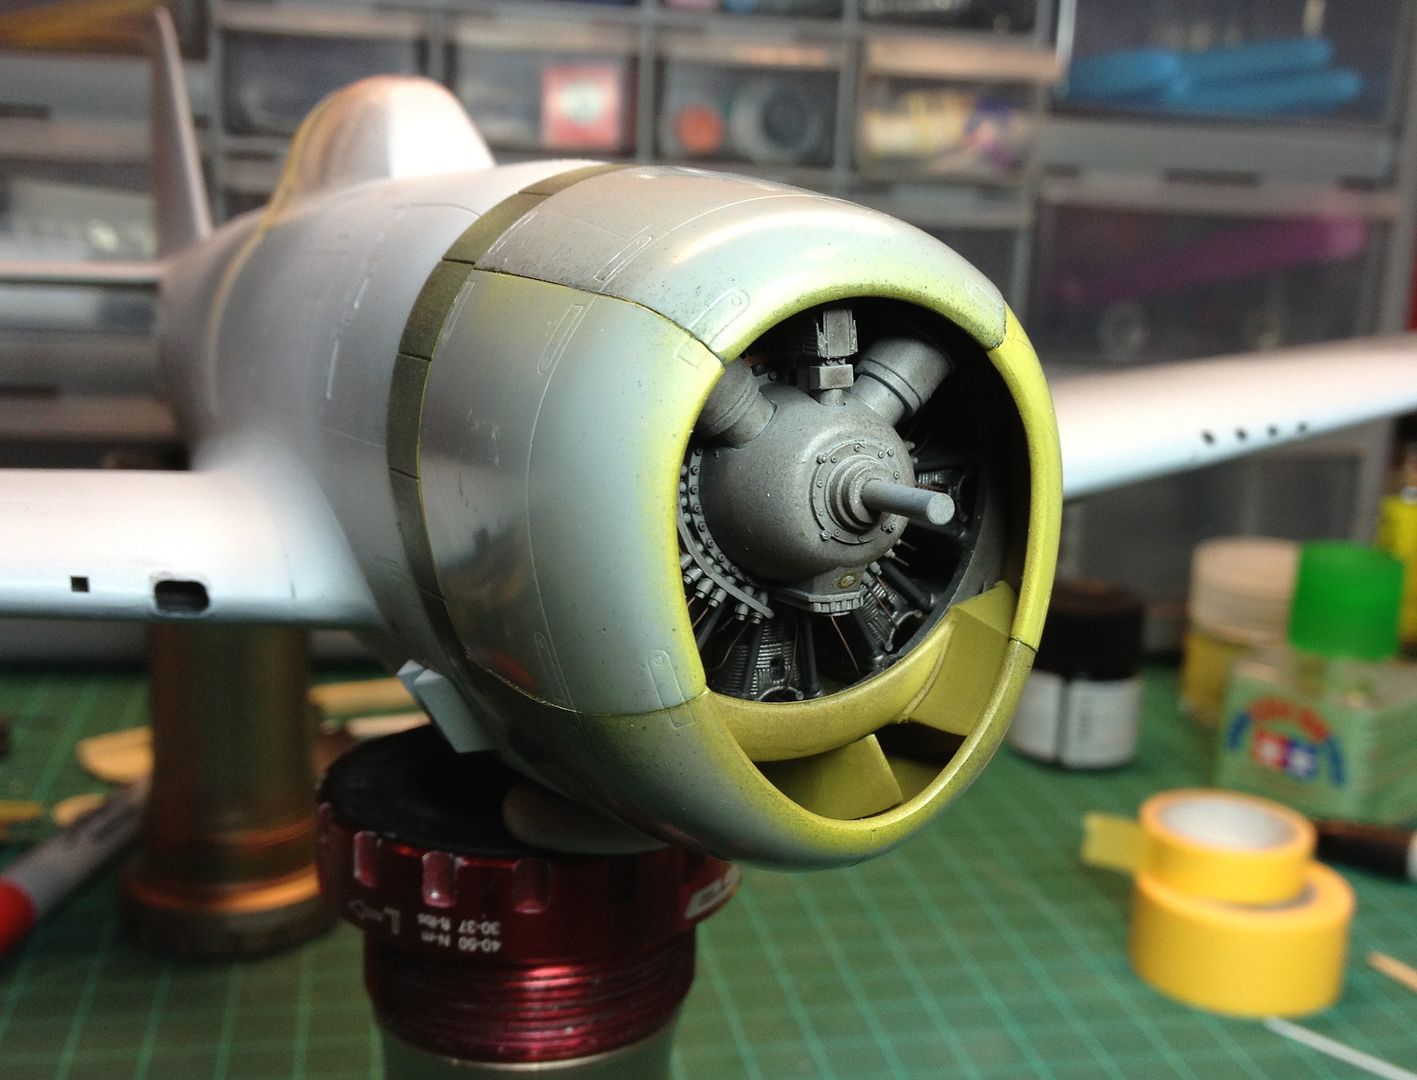 The 4 piece cowling was indeed a PITA to set and glue. 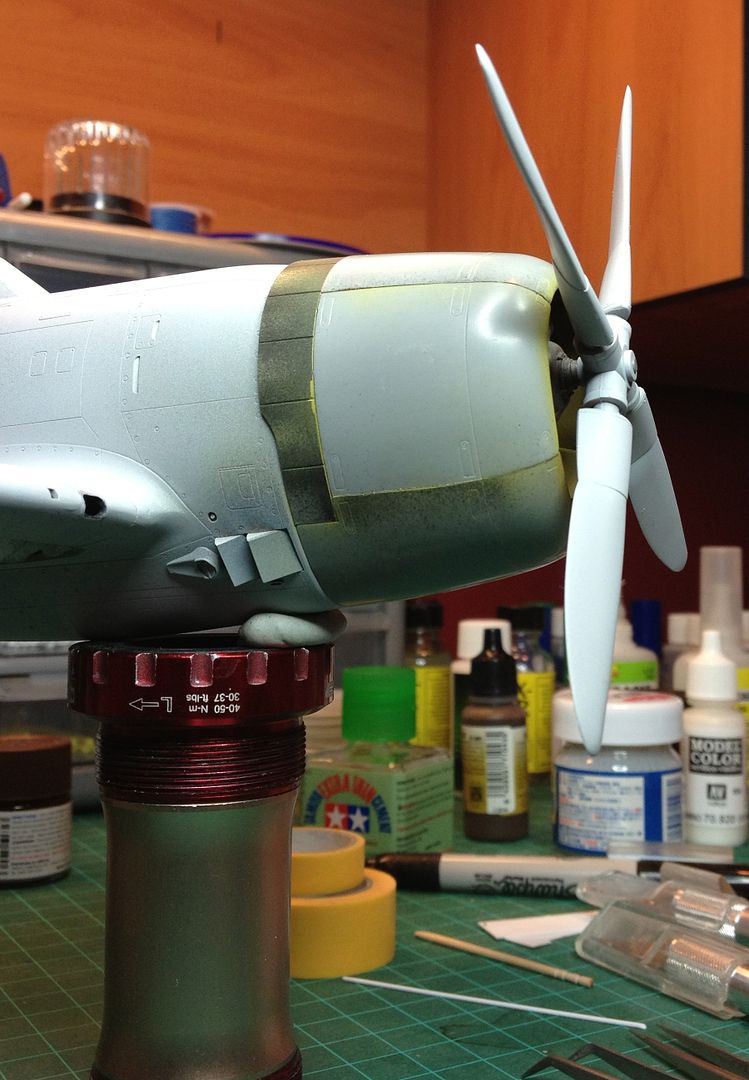 Cowling alignment at bottom stays good. I sit back and admire the engine and give myself an "atta boy" on getting the cowling alignment resolved with a real nice fit. Scanning around the desk I see... 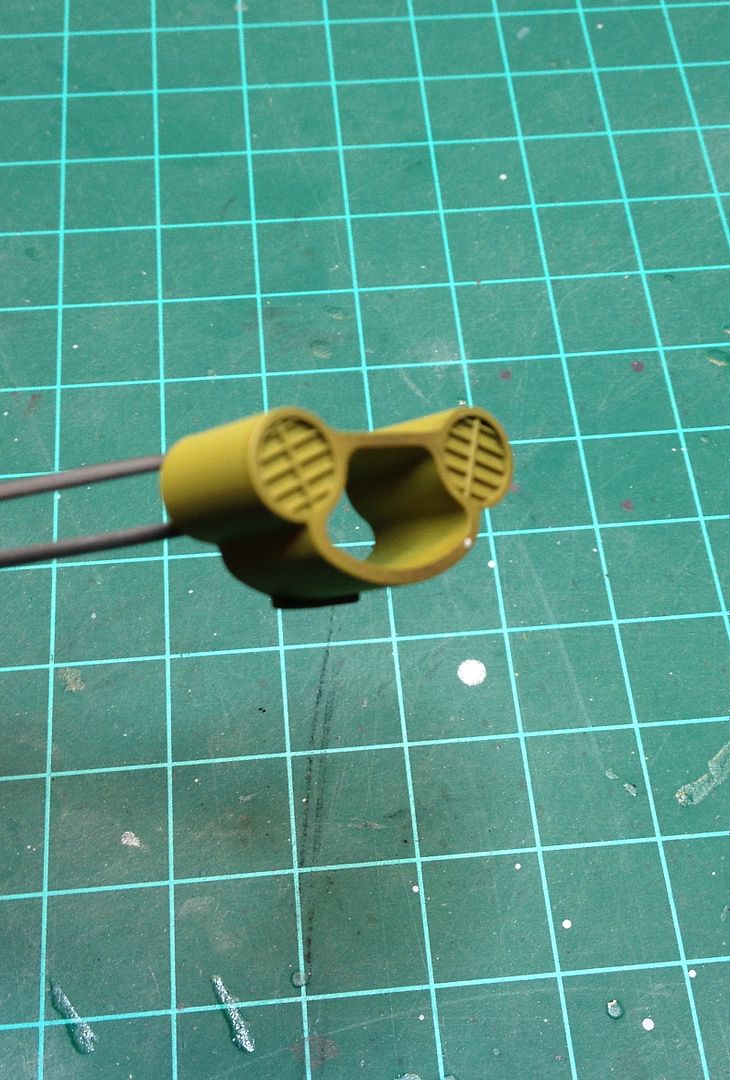 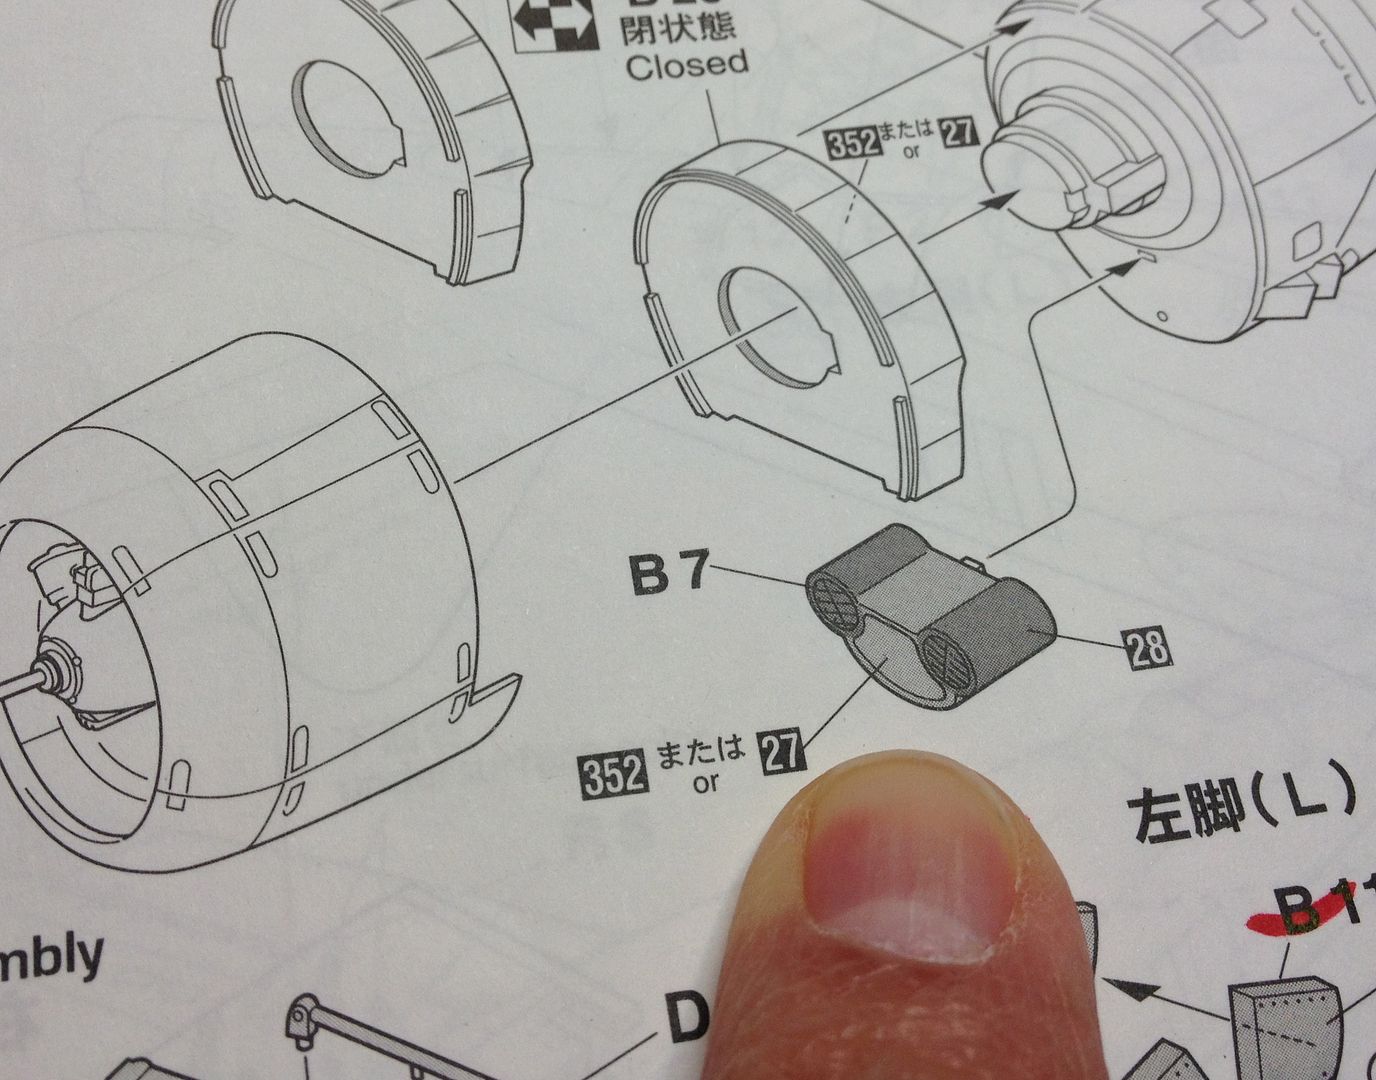 Are you kidding me!? Glue has already set . Truly considered cracking the engine off. The reality is, only I will know its missing. Flawed assembly will stay as is. 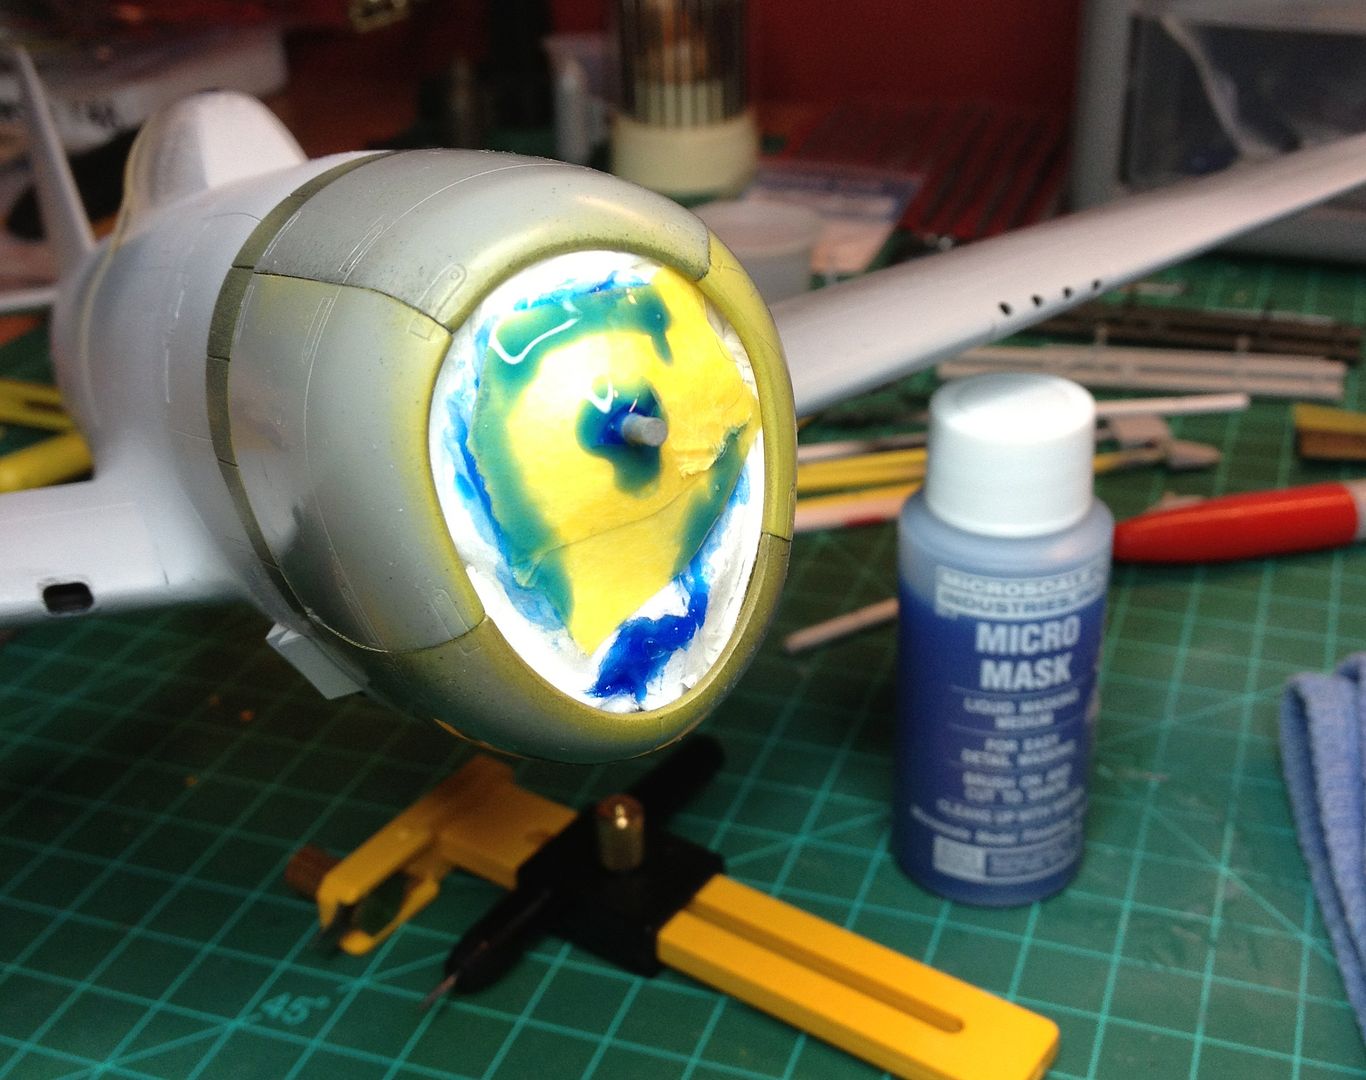 Mask engine with paper, tape and Micro Mask. Time to prime. 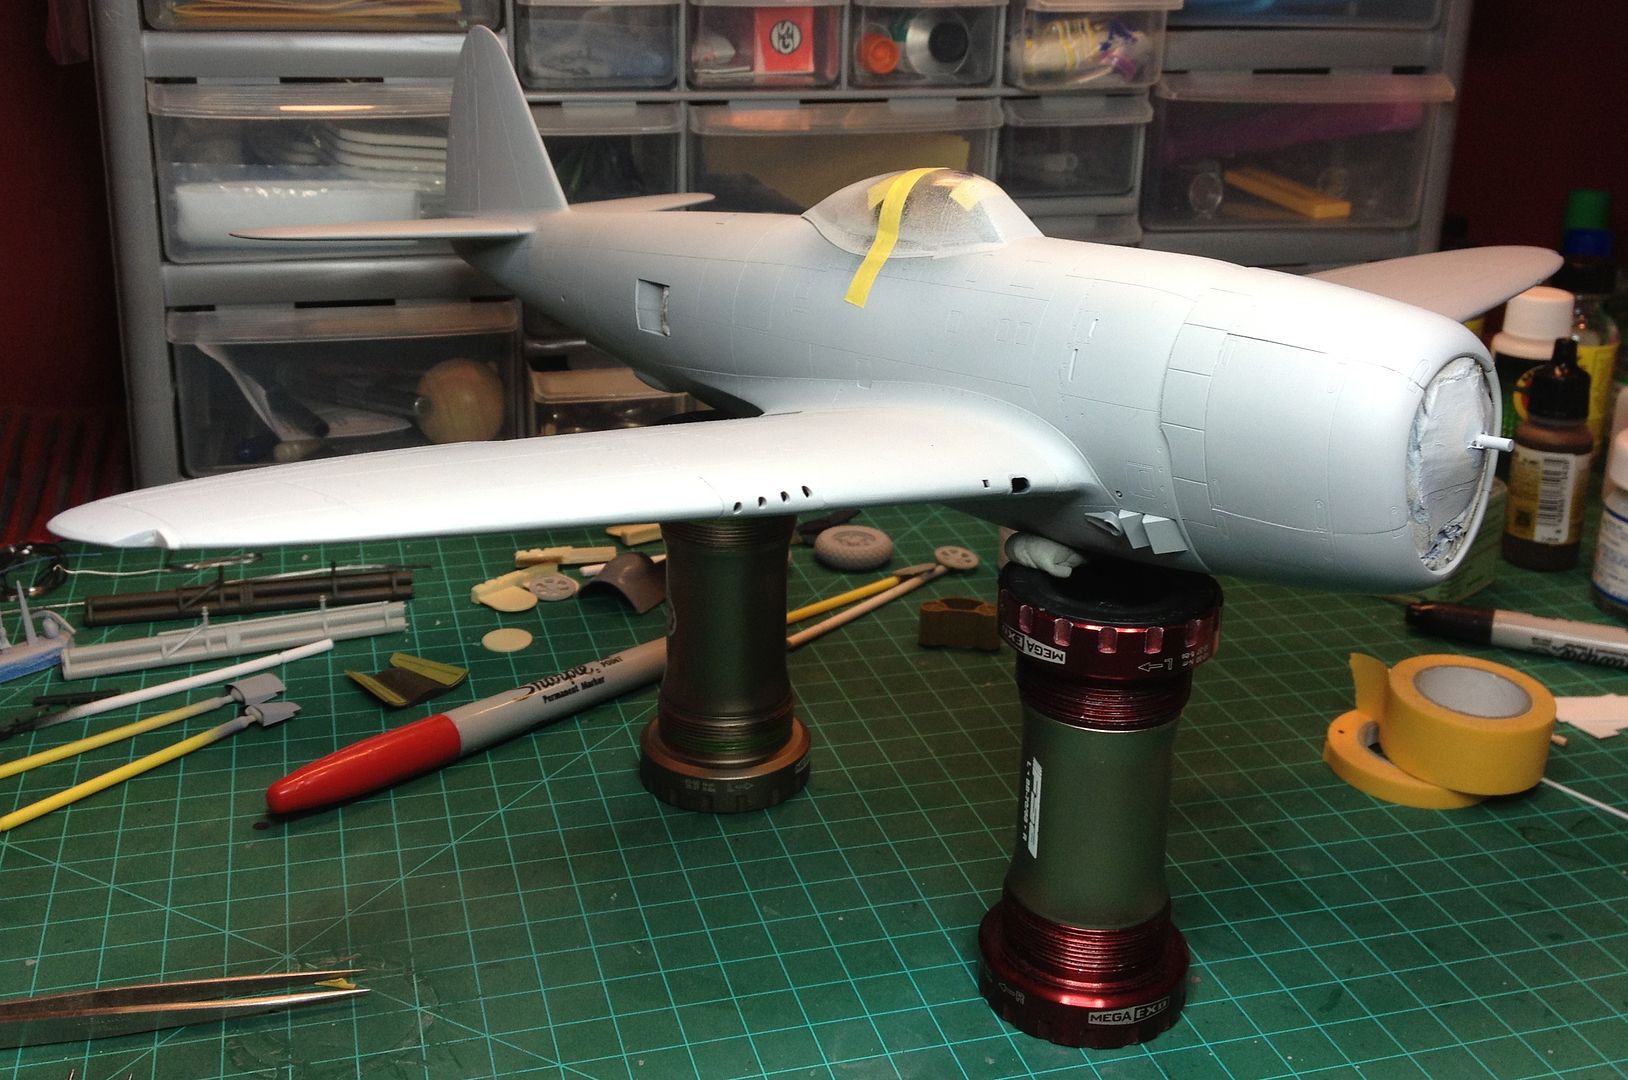 Primed with Mr Surfacer 1200. Canopy and windscreen masked. Gunsight and windscreen will be installed tomorrow then mask the pit and begin pre shading. 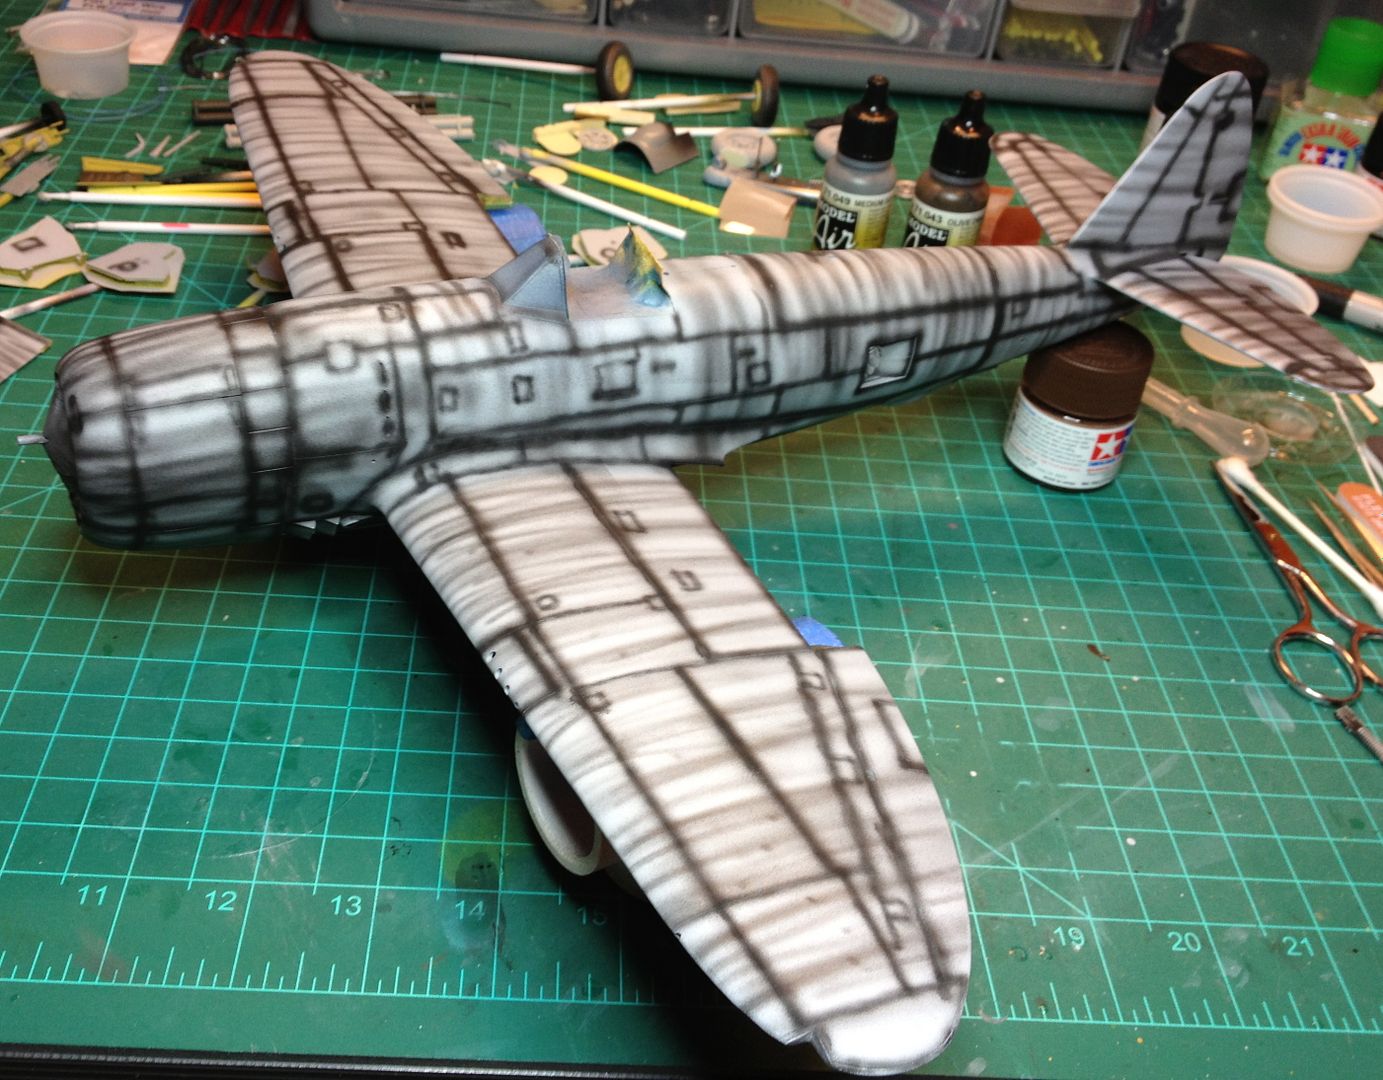 Pre shade done. 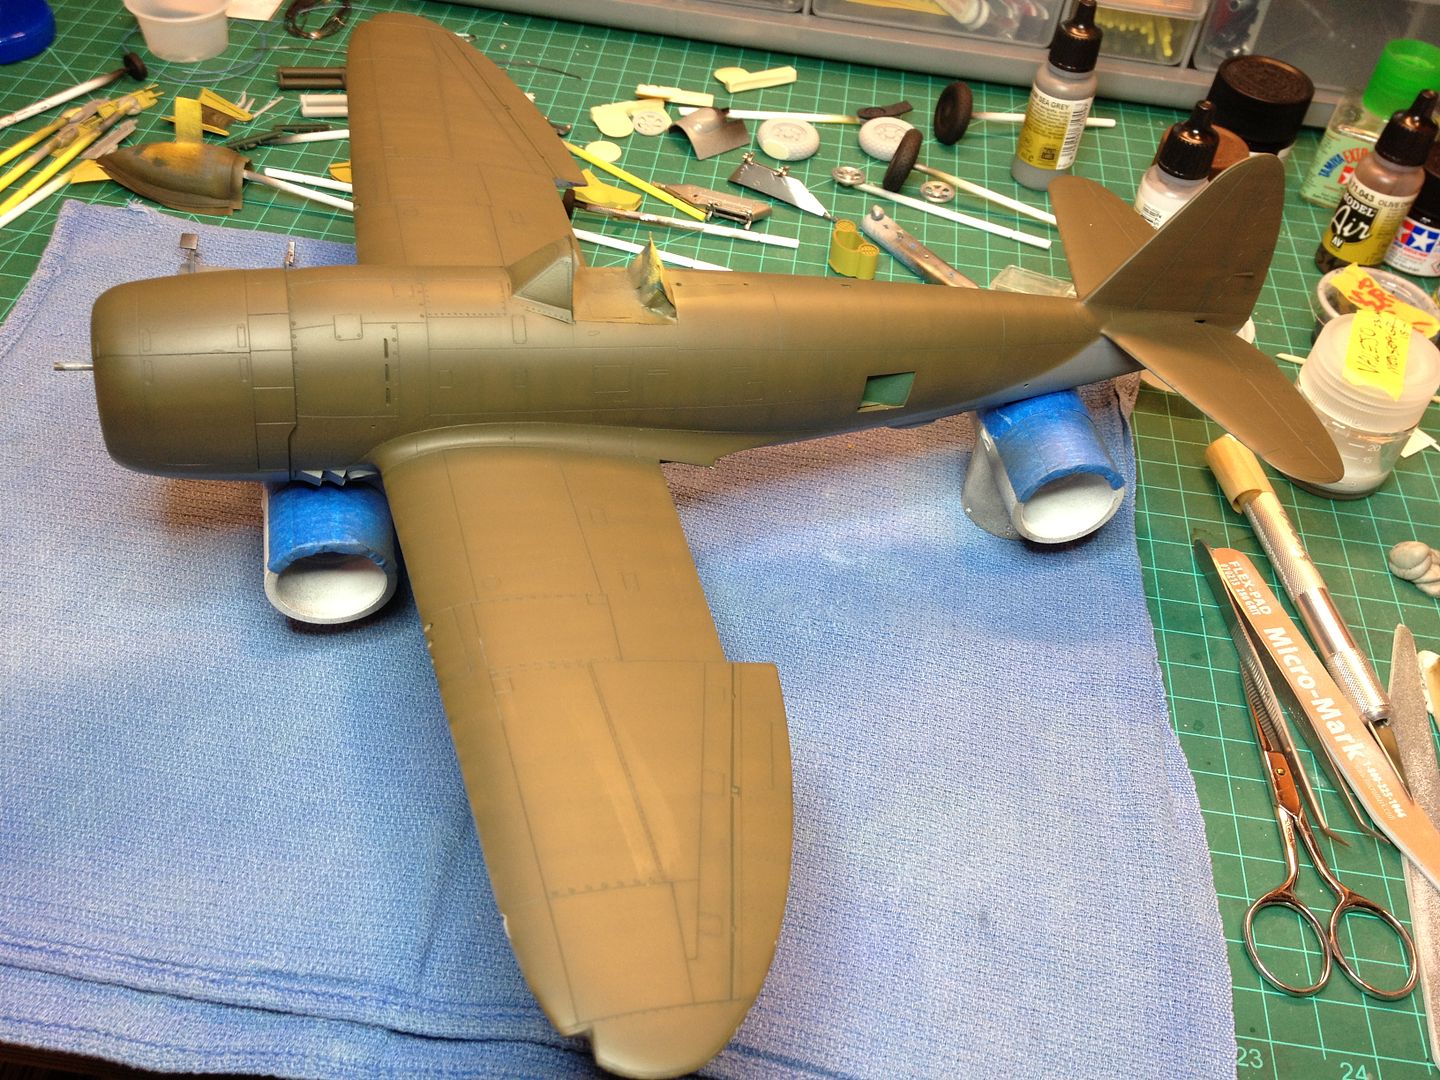 Breaking out my HS Evolution I applied Vallejo Medium Sea Grey 71.049 on lower surfaces....after a 24 hr cure I broke out the Simply Tacky putty and masked the demarcation then hit the upper surfaces with Vallejo Olive Drab 71.043. The placed the Jug in the fridge for 30 minutes and removed the putty. 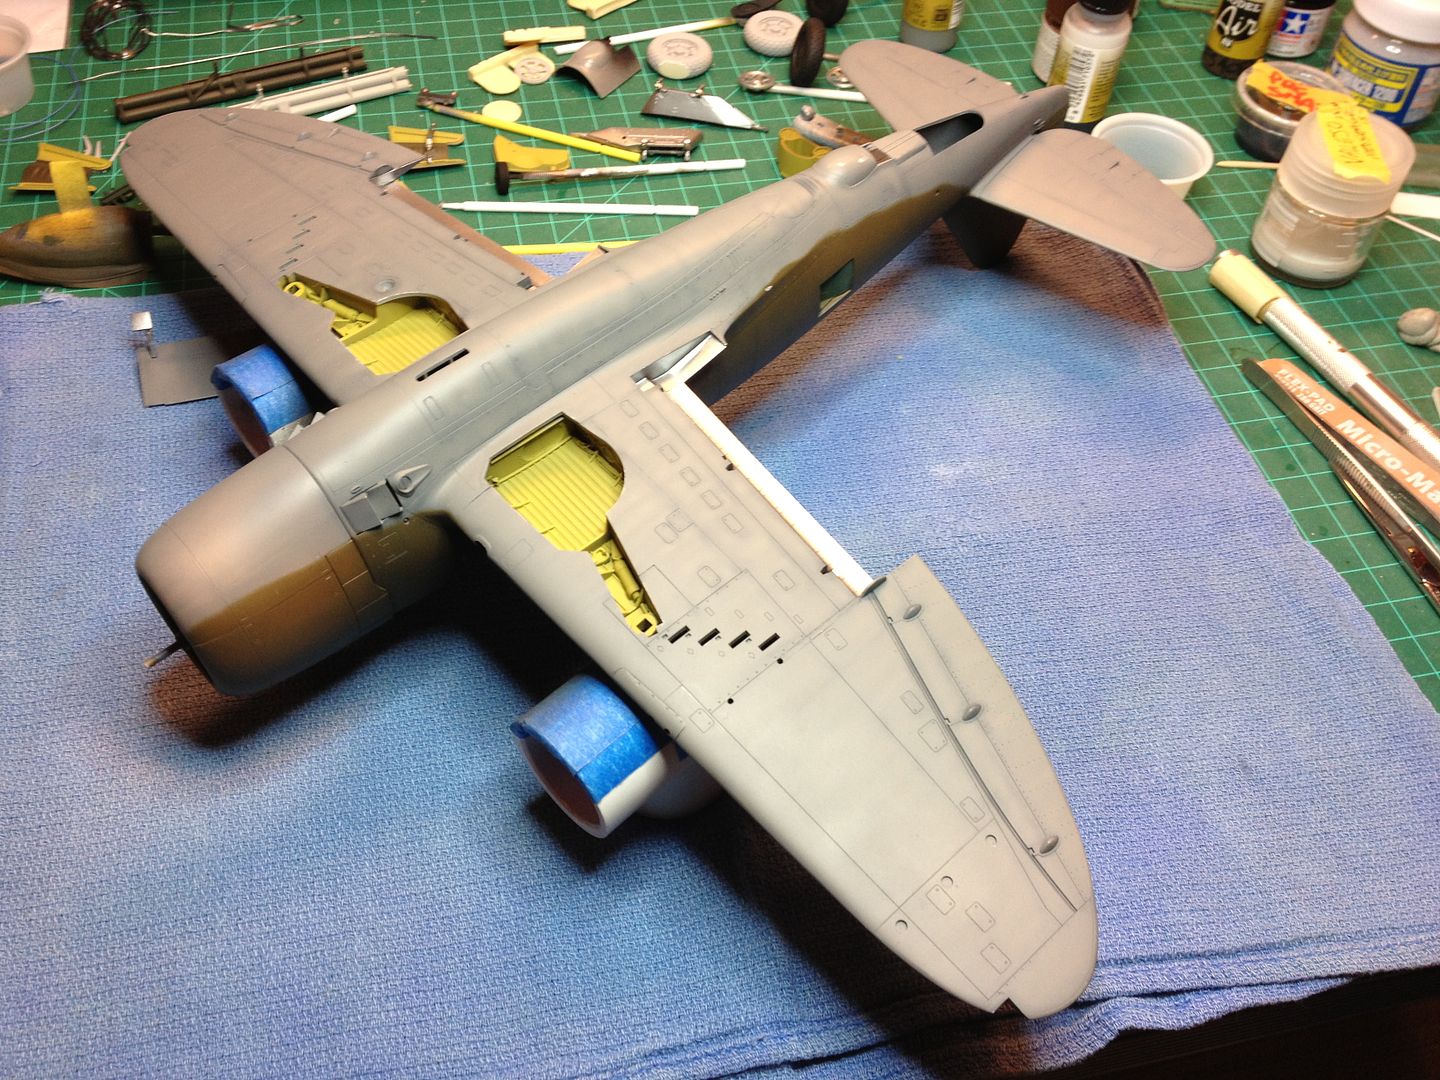 Me thinks I should have stopped with one less coat.
|
|
|
|
Post by tigrazor on Jul 31, 2013 15:59:20 GMT -5
Today I learned a new English word meaning "high quality" - RICK-A-LICIOUS...
|
|
BezoulaBuilds
Full Member
  
Member since: July 2013
Posts: 136 
|
Post by BezoulaBuilds on Jul 31, 2013 16:01:17 GMT -5
VARNISH AND MASKING
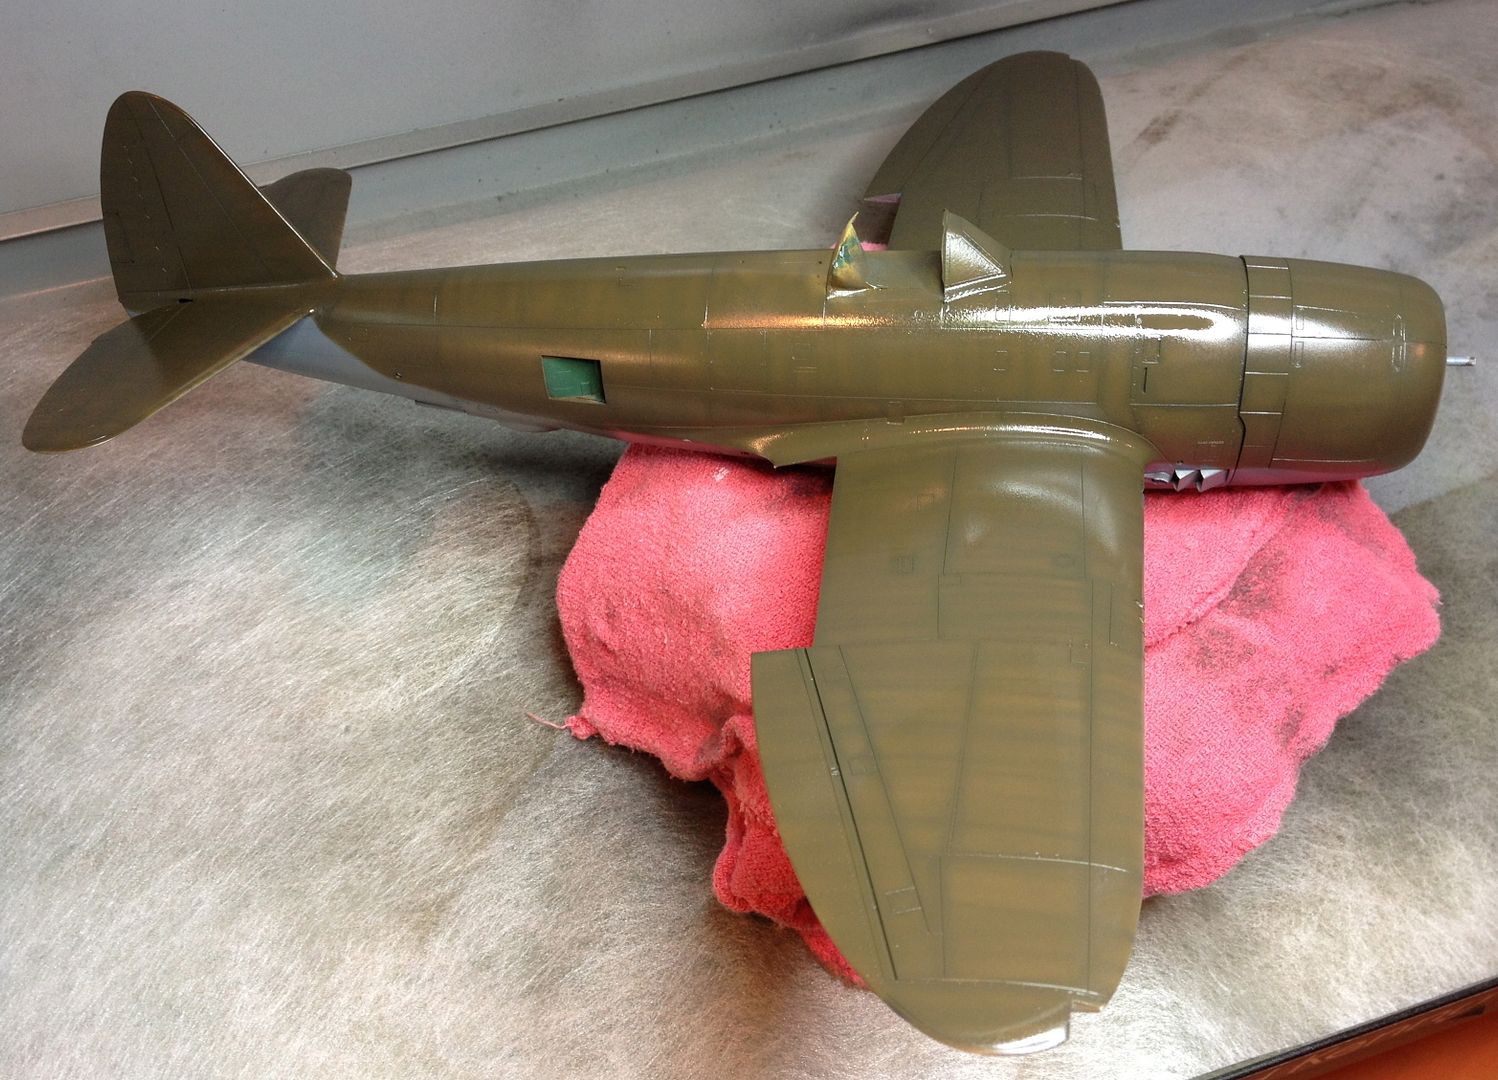
Applied Alclad Klear Kote the pre shade did show up better after the gloss and I suspect will fade after the sludge, wash and dull coats.
After 24hr cure I applied Scale Percision Mask for the USAAF National Insignias and blocked out serial number painted using Tamiya Deep Green XF-26 removed masks then freehanded the edges of insignias and serial number block. Masked and painted outline around the intercooler vents Vallejo Off White 70.820. 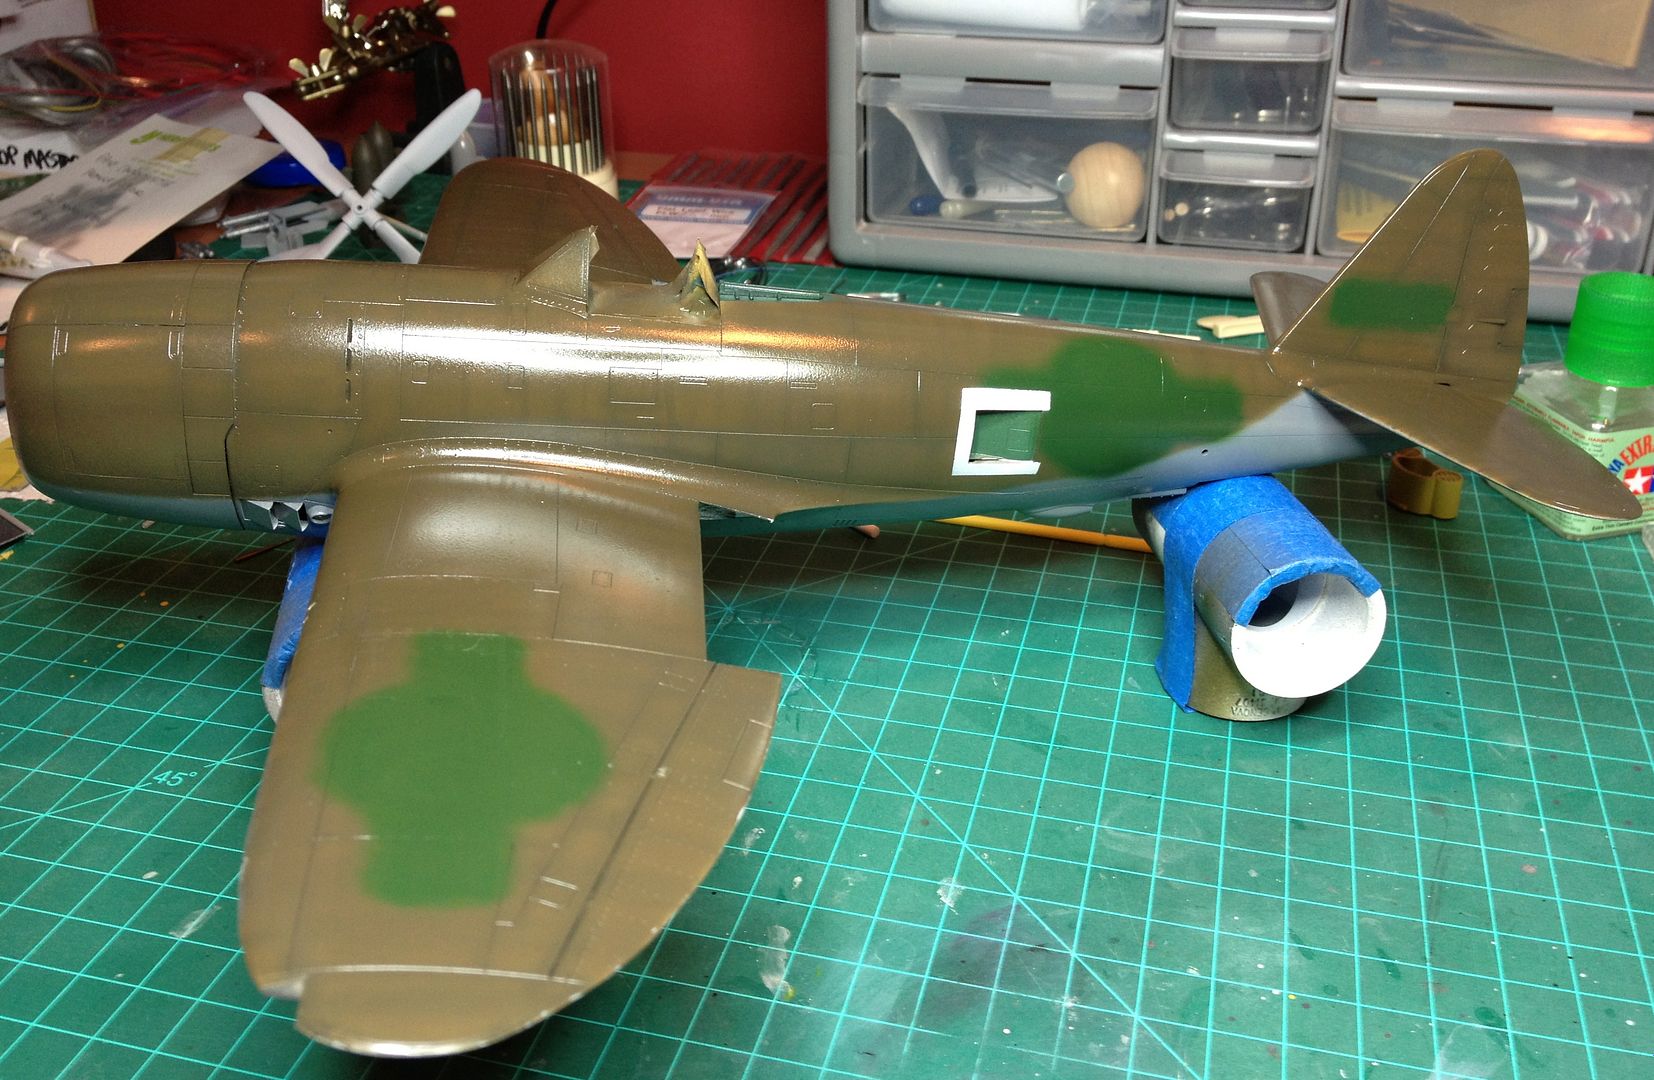 Underside USAAF National Insignia got same treatment using a mix of Tamiya Light Blue XF-23 and Neutral Grey XF-53 12:1. Then another coat of Klear Kote for decal prep. 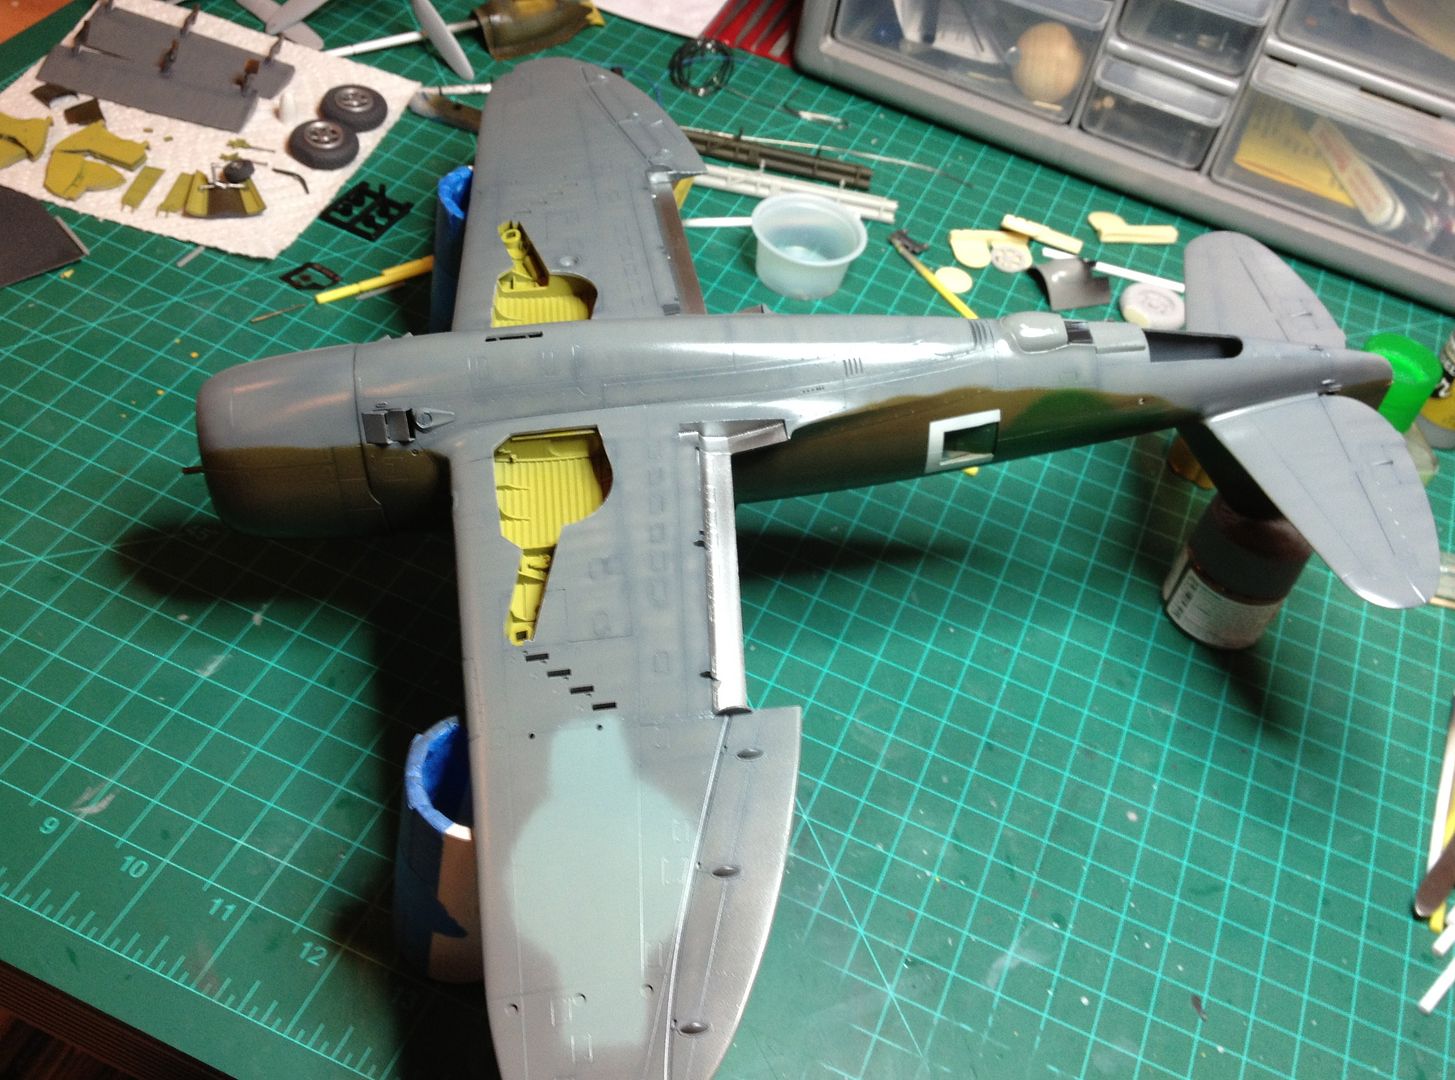 DECALS DECALS Decals gives this Jug a unique look. National markings and stencils applied. The P-47D-s were factory shipped from NY via the southern lend lease route. They were assembled near Basrah, Persia at the Abadan port and air base. They were flown by Russian pilots to the USSR on the Abadan-Teheran-Kirovabad route, about1500km. The planes were handed to the air regiment which trained the crews and deployed the planes to the units. A technical platoon (able to speak and understand English) checked the machines, removed radio and electronics not compatable with Russian military or air regiment. The soviet national insignia was painted by the platoon Next will be decal applications and a final gloss coat....then weathering. 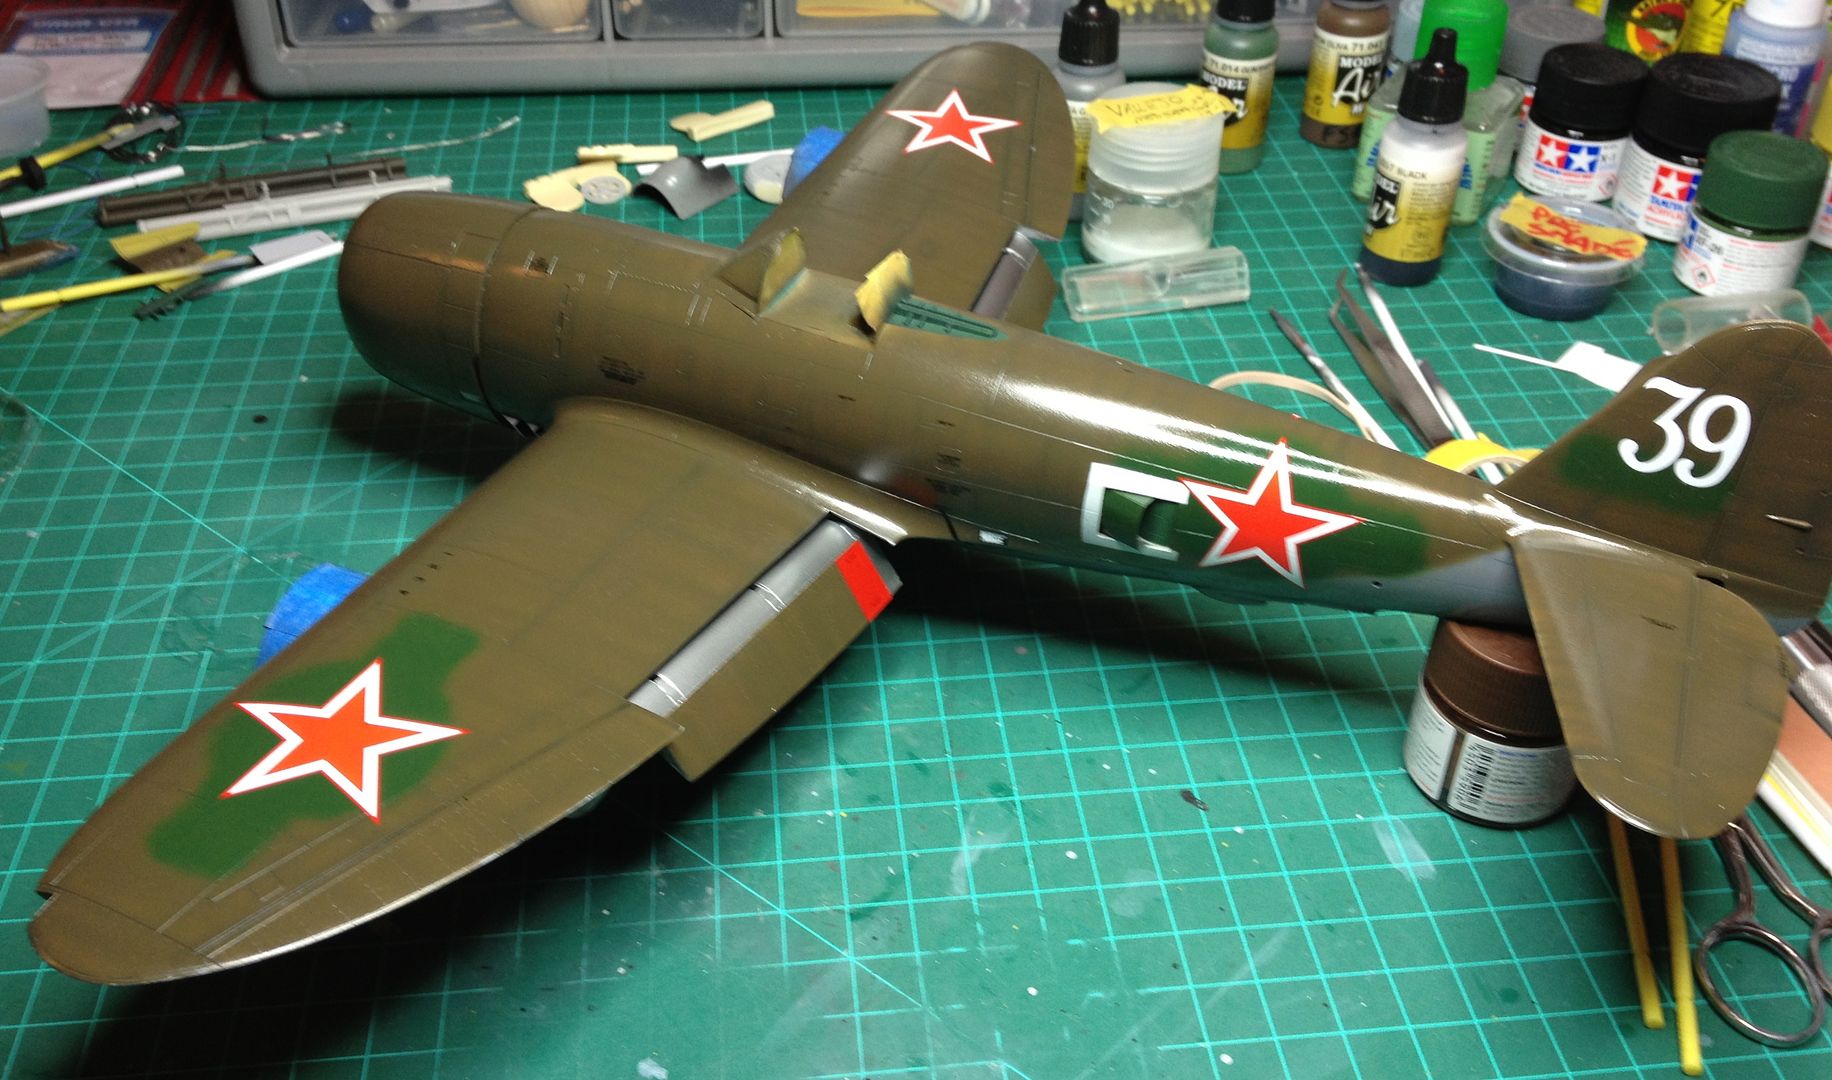 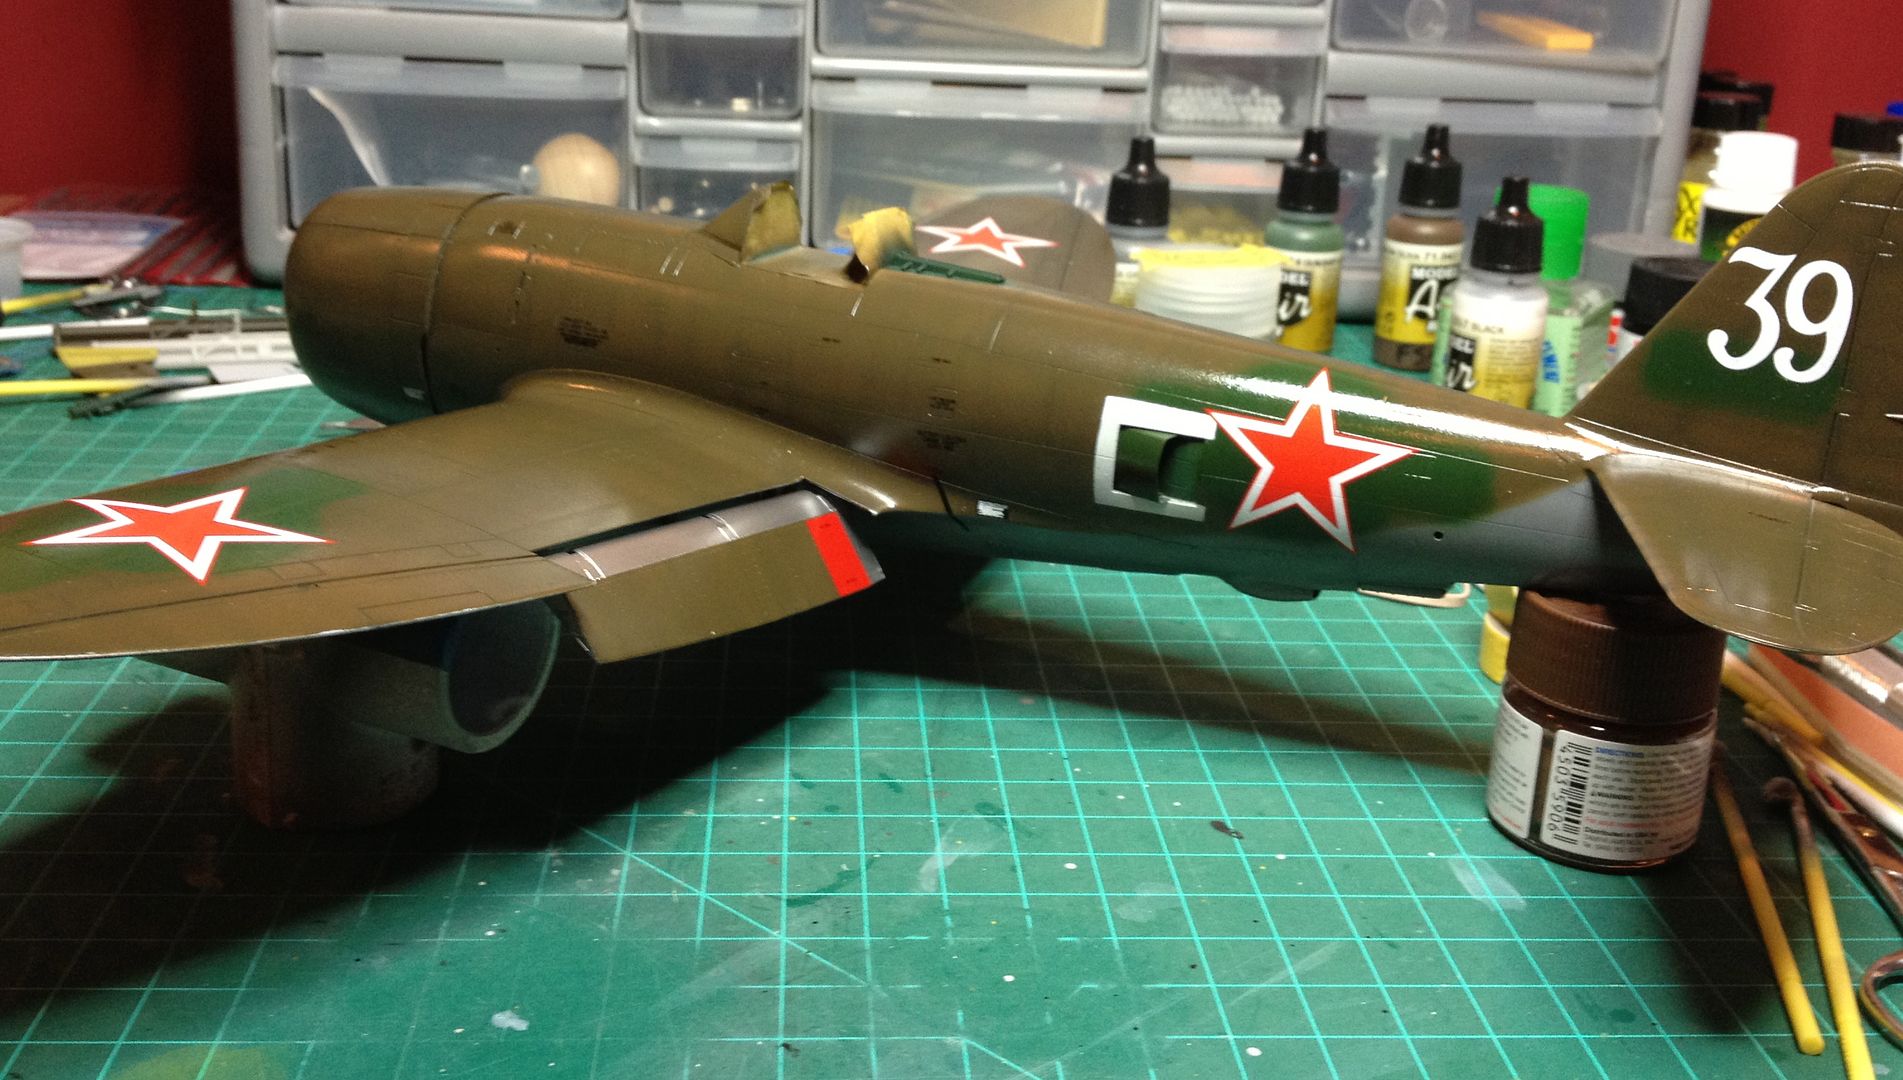 ![http://i1171.photobucket.com/albums/r555/rkranias/Jug%20Double%20Build/IMG_4461.jpg]()  SLUDGE IT TO ME! SLUDGE IT TO ME!
Flory Wash applied Black on upper surfaces and Dark Dirt on lower surfaces.
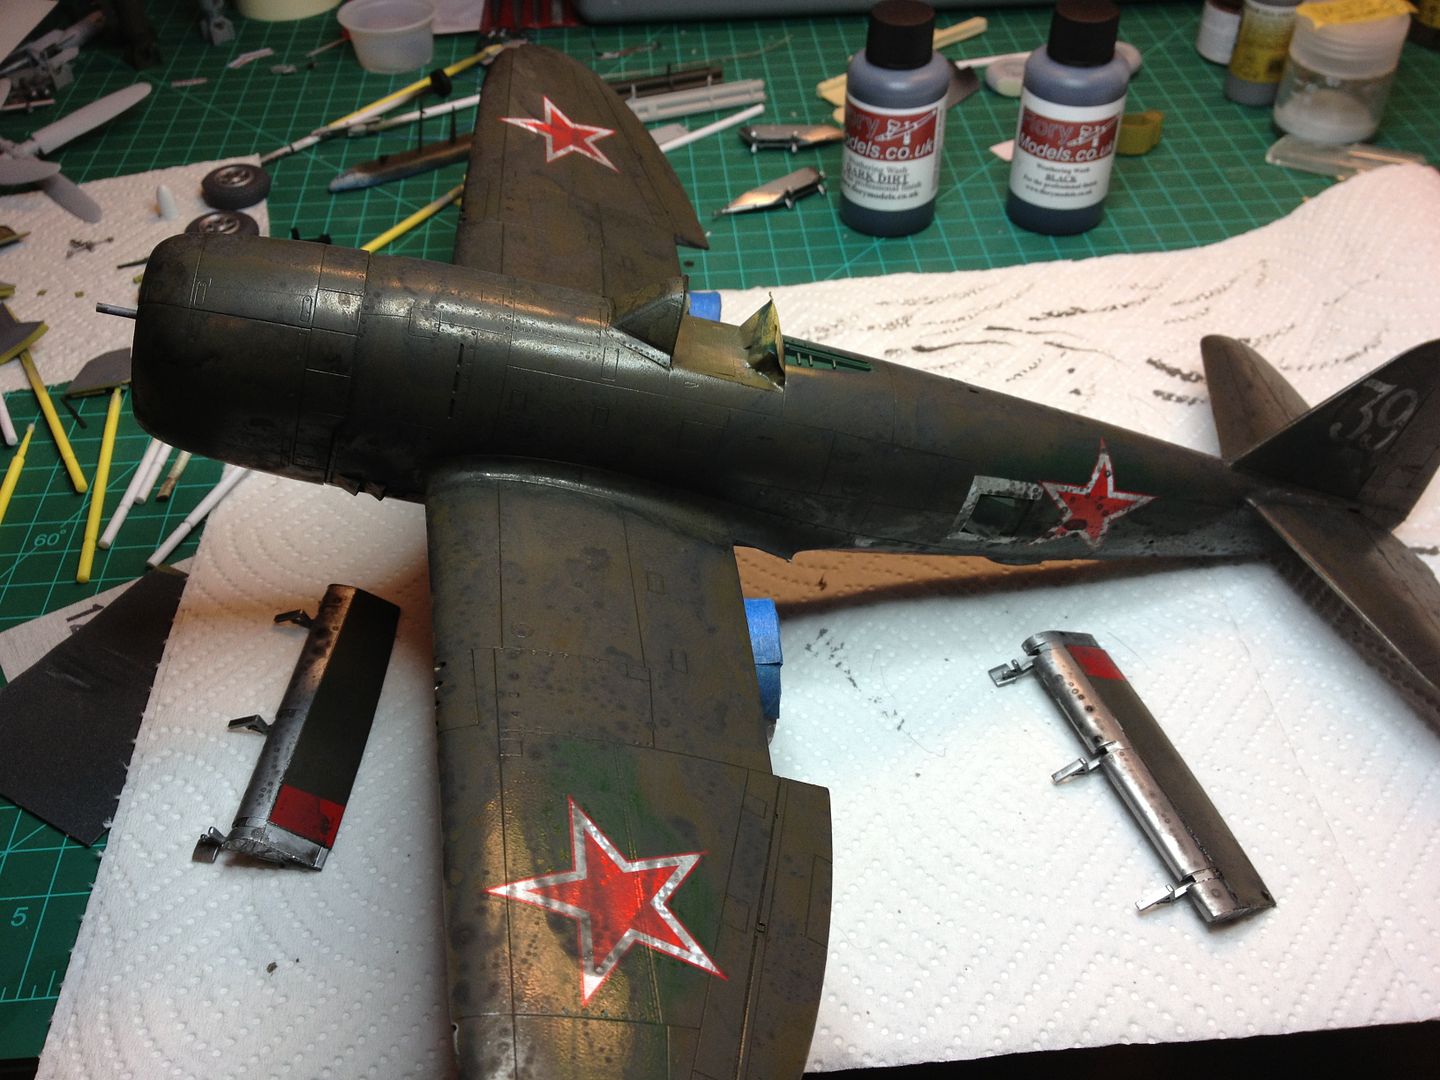
WEATHERING
Flory wash removed. Shameless plug...this stuff is great! I really, really like the results and ease of use. Highly recommended!
Undersides cleaned, weathered and shot with Alclad Matte Varnish.
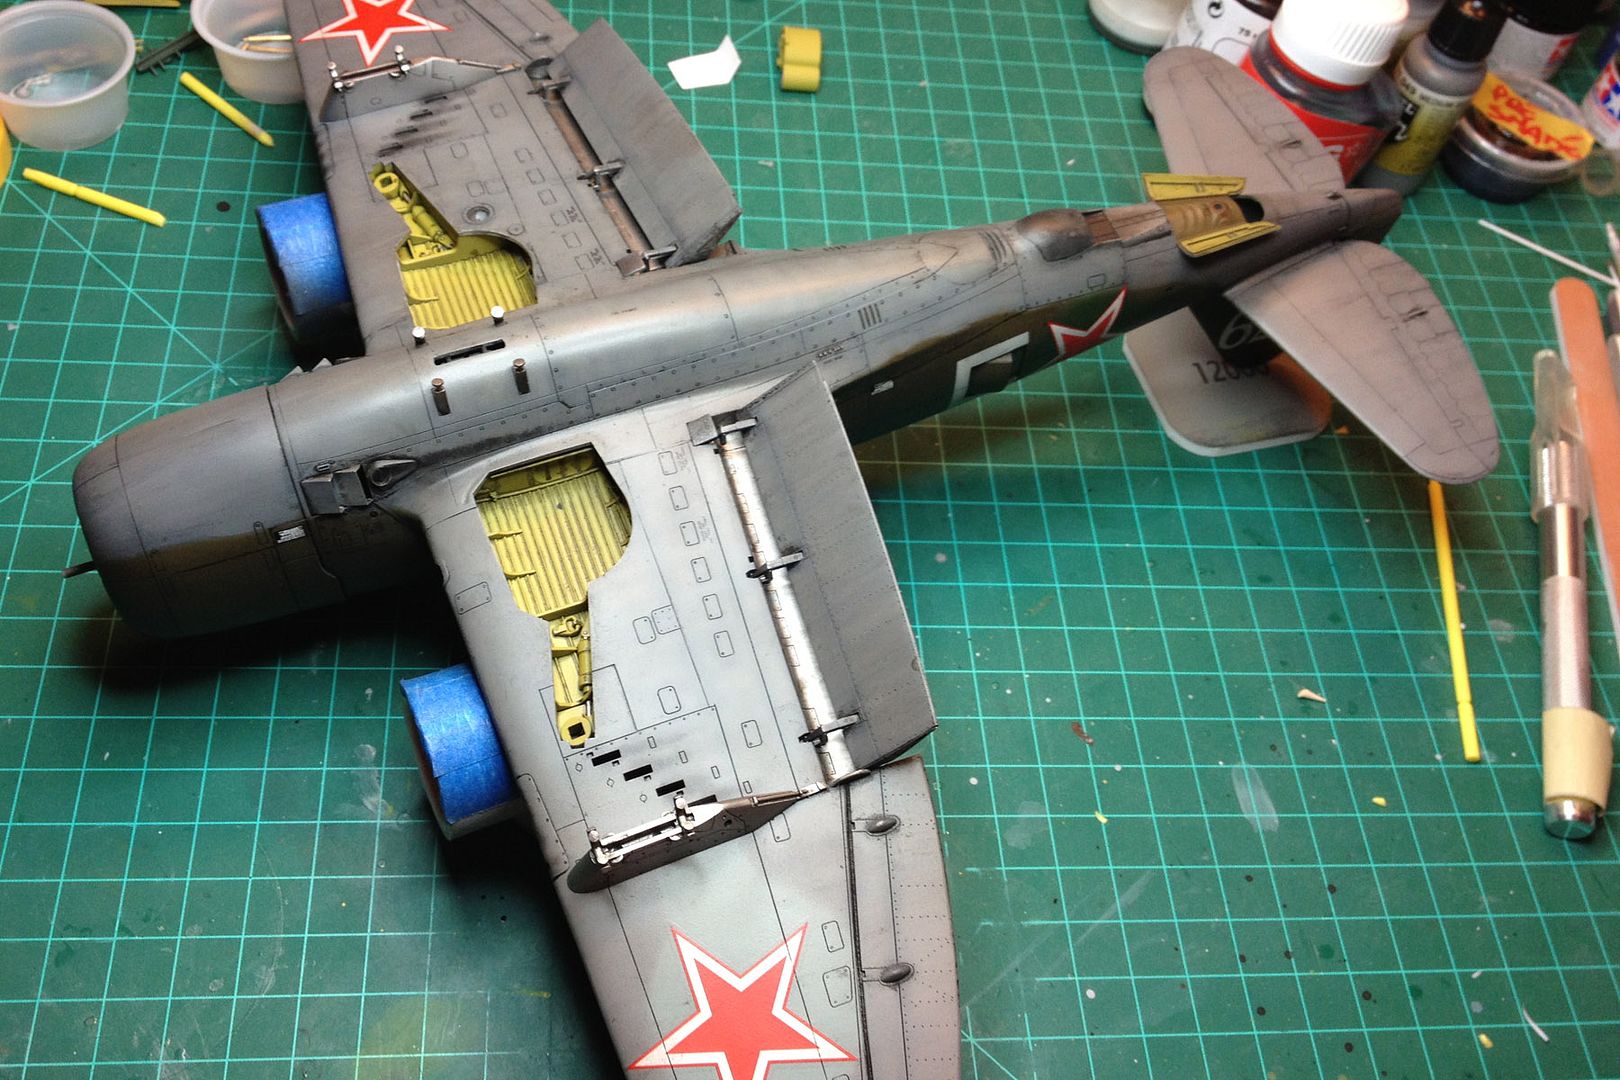
Pimp my ride! Topsides cleaned & varnished, canopy/pit masks removed.
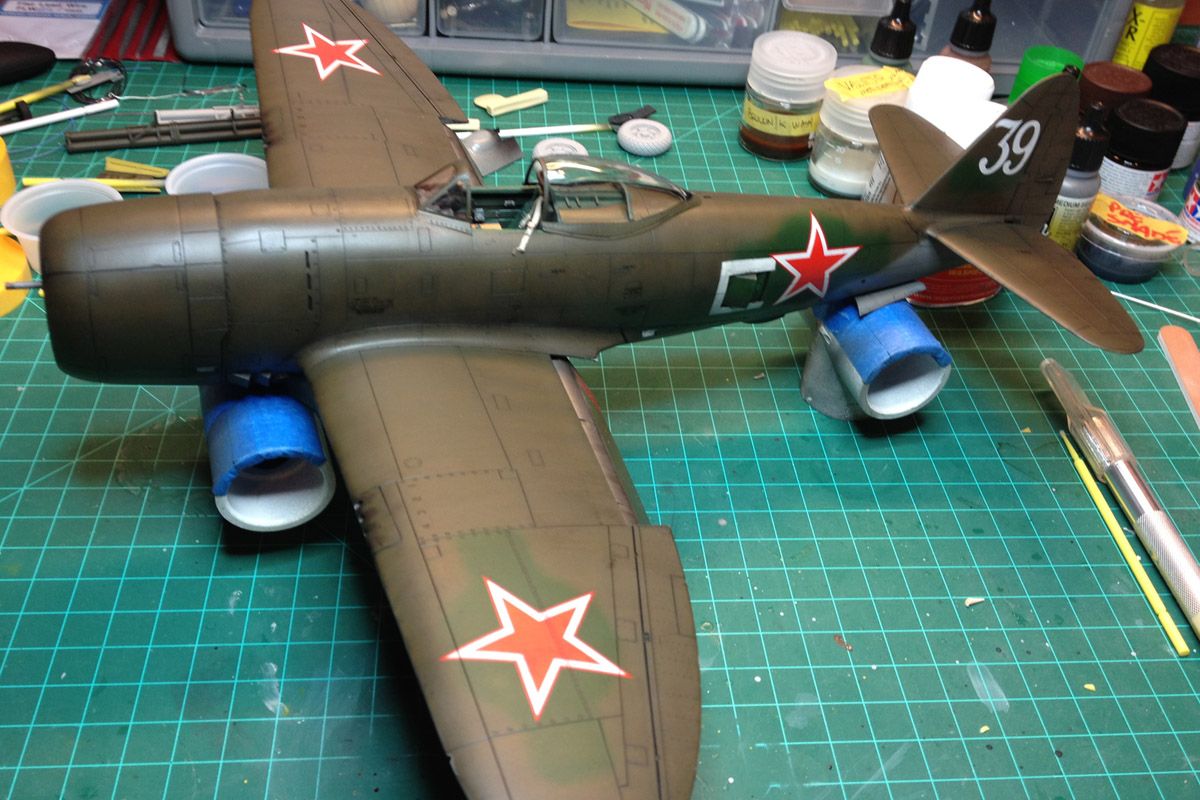
![]()
![]()
|
|
BezoulaBuilds
Full Member
  
Member since: July 2013
Posts: 136 
|
Post by BezoulaBuilds on Jul 31, 2013 16:14:02 GMT -5
Pit detail. The HGW belts are a pain to cut out. The results and flexibility are well worth it. Oxygen hose to be added later.  Detail shot of pit and landing flaps. I used MiG wash with directional rub on the natural metal finish of landing flaps. 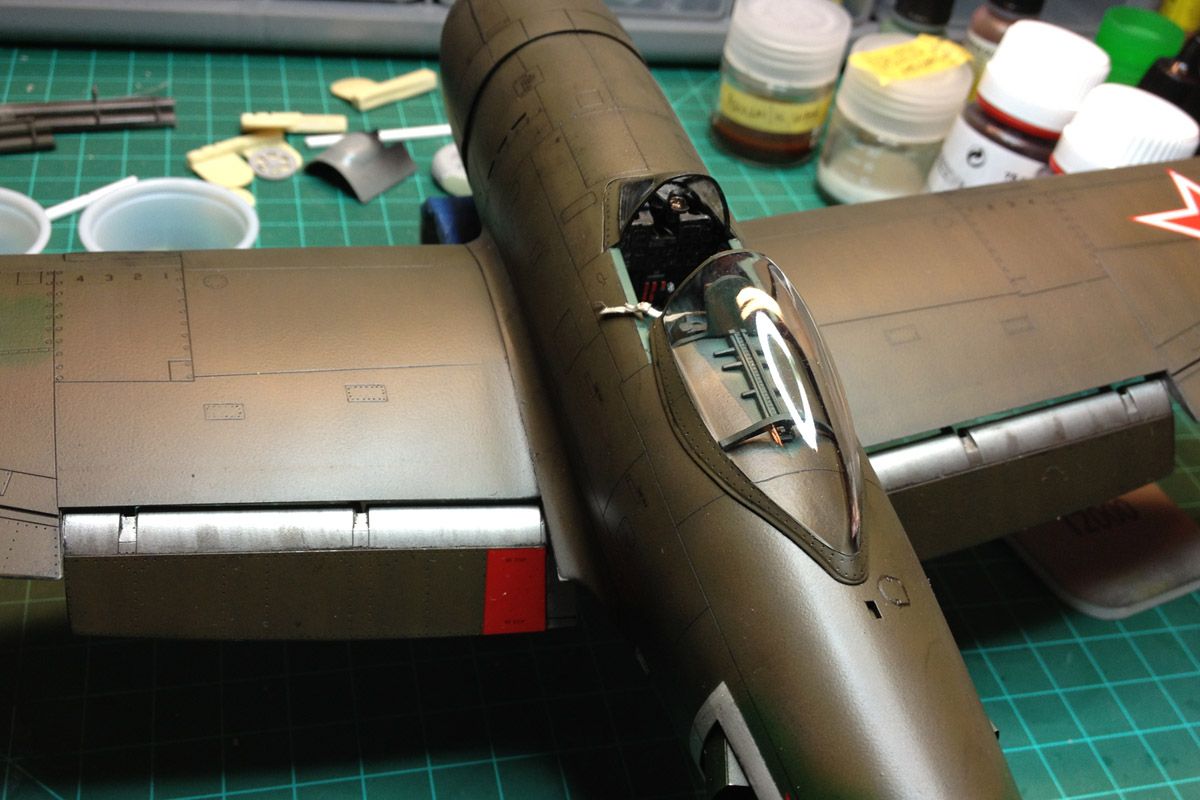 The R2800 weathered with a shot of semi gloss. Lessons learned on this cowling construction will be applied with "Slick Chick". This one was definitely a learning experience. 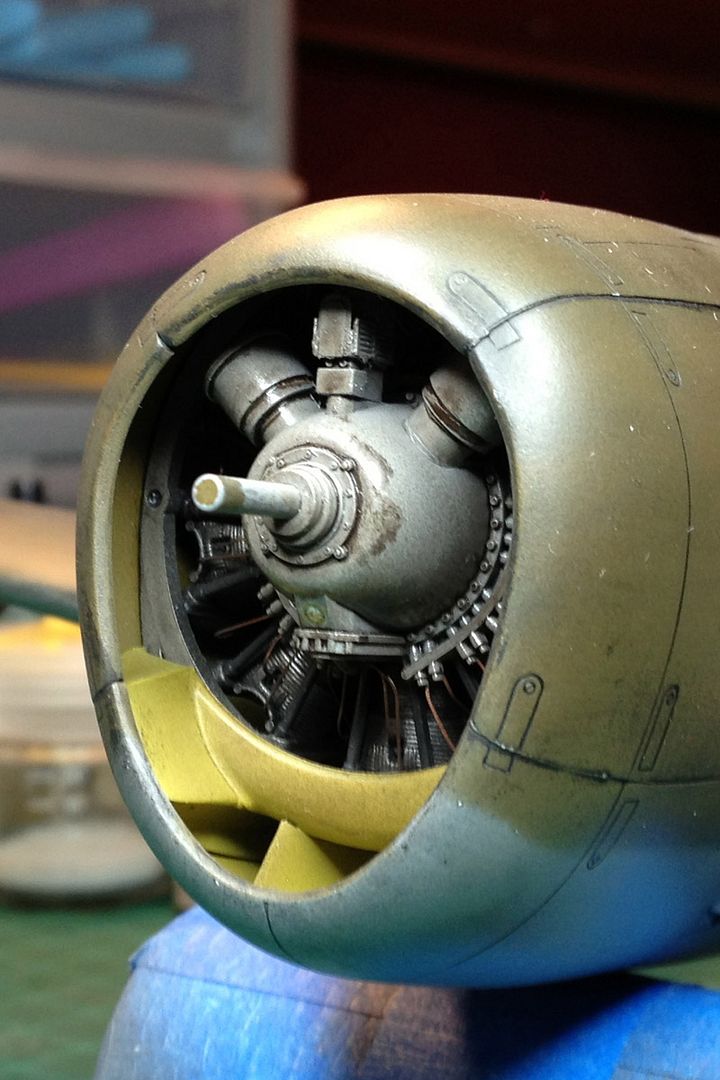 WHEELS WHEELSI used Barracudas new resin offering of P47 wheels. They simply blow away anything in the marketplace. The wheels with the white dish/cross tread pattern are for the Russian Jug (not weathered) and the spoked/block tread pattern wheels are for "Slick Chick" (Mig wash applied). In the background you can see Hasegawa's brass blast tubes. Primer black then Alclad Aluminum applied. 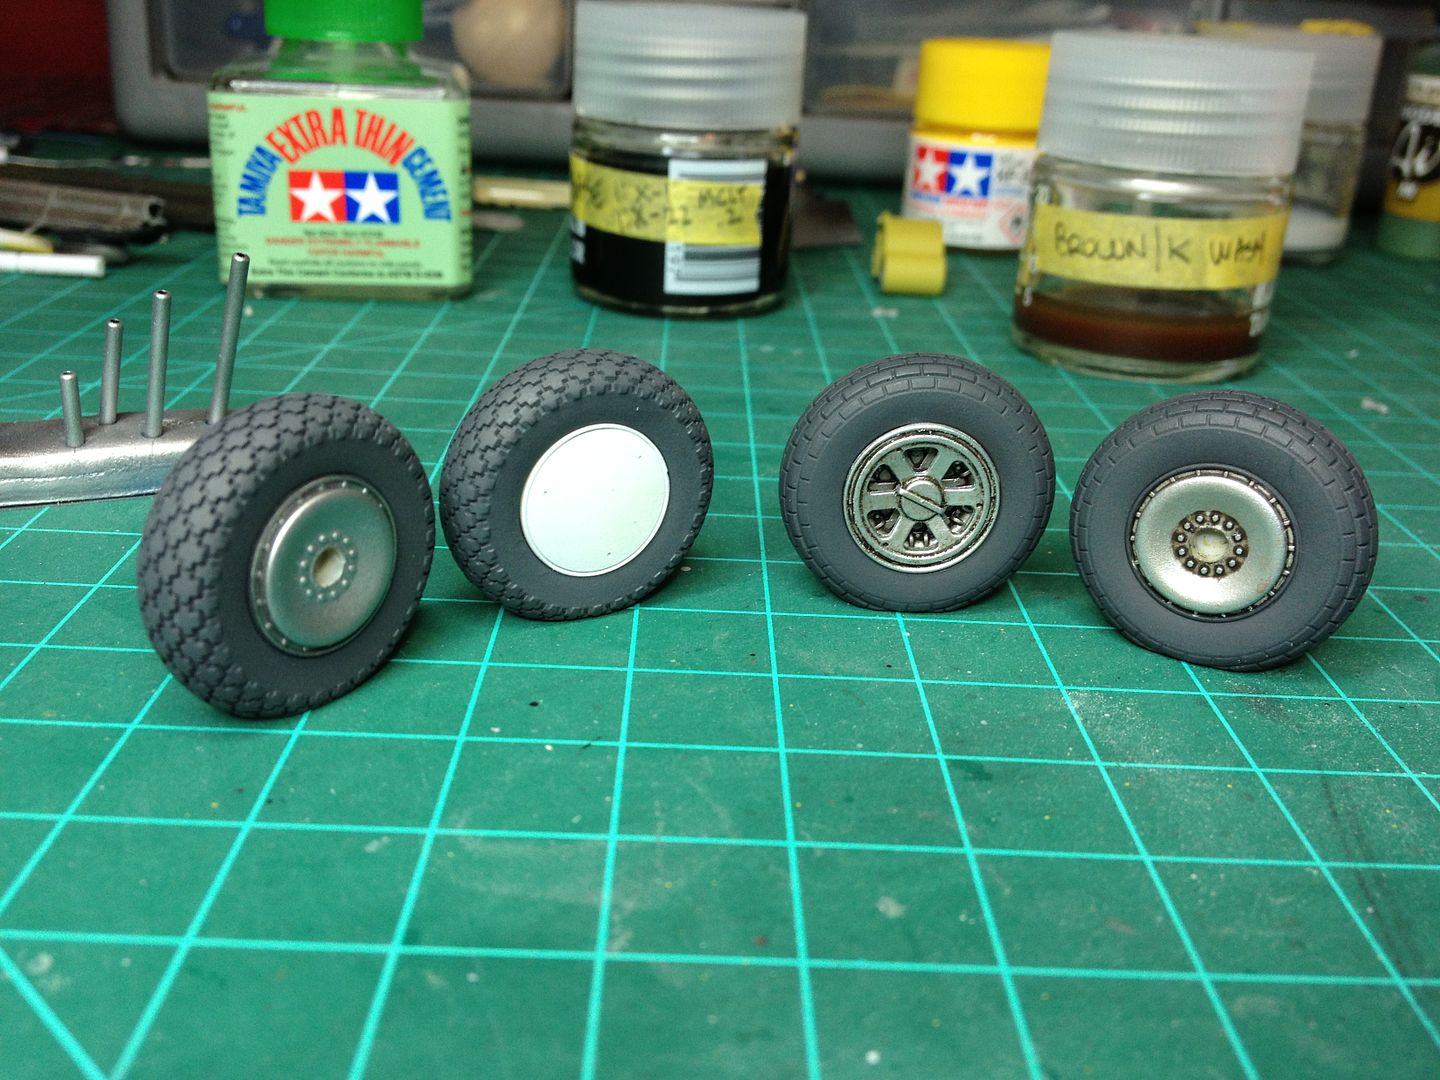 ![]() |
|
Deleted
Member since: January 1970
Posts: 0
Nov 22, 2024 13:28:48 GMT -5
Nov 22, 2024 13:28:48 GMT -5
|
Post by Deleted on Jul 31, 2013 17:58:06 GMT -5
What a Blast to watch!
|
|
|
|
Post by dupes on Jul 31, 2013 18:12:10 GMT -5
Wow man, this looks SPECTACULAR! Great stuff!
--> I know totally what you mean about losing a pre-shade under a coat of future. Hard to compensate for it, too.
|
|