losboz
Full Member
  
Member since: September 2013
Posts: 322 
|
Post by losboz on Oct 1, 2013 19:41:41 GMT -5
|
|
|
|
Post by wbill76 on Oct 1, 2013 20:10:33 GMT -5
Definitely looks like it had a bad day!  That's good though, looks like a proper wreck! |
|
M1Carbine
Senior Member
    November '23 Showcased Model Awarded
Member since: November 2012
Posts: 1,730
Nov 16, 2012 2:49:11 GMT -5
Nov 16, 2012 2:49:11 GMT -5
|
Post by M1Carbine on Oct 1, 2013 21:07:34 GMT -5
Fleabay................LMFAO
Looks like a good wreck if you ask me. Dio it all burnt and shot up with some US or Russian soldiers looking\picking through the wreck. throw some messed up stowage, tarps and crap and call it a done deal.
Bob
|
|
|
|
Post by dupes on Oct 1, 2013 22:11:16 GMT -5
Wow, that thing is TOAST! Like what you've done, though...great looking wreck.
|
|
|
|
Post by bbd468 on Oct 1, 2013 22:33:49 GMT -5
MAN, thats seen its better days! Im guessing no one got out alive.  I really like where your goin with this and ill be watchin!  |
|
AndyArgent.
Senior Member
    Aug 2013 MoM Winner
Member since: November 2011
Andy Bodge Argent - Aug 2013 MoM Winner
Posts: 1,746
Nov 17, 2011 17:09:43 GMT -5
Nov 17, 2011 17:09:43 GMT -5
|
Post by AndyArgent. on Oct 2, 2013 15:05:53 GMT -5
Looks great Loz.can't wait to see some more.
|
|
|
|
Post by Leon on Oct 2, 2013 15:08:32 GMT -5
Awesome job on the wreck Los.I really like this.  |
|
Deleted
Member since: January 1970
Posts: 0
Nov 24, 2024 5:26:32 GMT -5
Nov 24, 2024 5:26:32 GMT -5
|
Post by Deleted on Oct 2, 2013 16:26:46 GMT -5
WOW! Now that's some Battle Damage! Great work and looking forward to more!
|
|
|
|
Post by Deano on Oct 2, 2013 18:04:44 GMT -5
Thats one way of upgrading this kit without AM  looks the business , bring on the rust and soot! Deano |
|
|
|
Post by 406 Silverado on Oct 2, 2013 19:55:30 GMT -5
Gonna keep my eye on this one. The wreckage looks great. I love old kits for things like this.
|
|
paulh.
Senior Member
   
Member since: November 2011
build, fail, learn, succeed - ENJOY
Posts: 2,389
Nov 15, 2011 15:54:51 GMT -5
Nov 15, 2011 15:54:51 GMT -5
|
Post by paulh. on Oct 3, 2013 15:30:21 GMT -5
That wont be goin anywhere in a hurry!
Very nice job there LB
|
|
|
|
Post by `Boots` on Oct 4, 2013 9:37:13 GMT -5
Now thats what i call a good days wreckin`..........this is gonna look well cool weathered up Los.  |
|
|
|
Post by armorguy on Oct 5, 2013 1:05:42 GMT -5
Now we're talkin' wrecked and demolished ! Love it, what a mighty fine painting and weathering project !
|
|
|
|
Post by TRM on Oct 5, 2013 8:24:54 GMT -5
Sweeet!!! Off to make some popcorn for this!!!!
|
|
|
|
Post by bullardino on Oct 5, 2013 8:26:13 GMT -5
Ok, now tell me, what's the humble part? I can only see a stunning wreck in progress... BTW, you have all my attention  |
|
venom1
Full Member
  
Member since: October 2012
Posts: 1,369
Oct 10, 2012 2:40:03 GMT -5
Oct 10, 2012 2:40:03 GMT -5
|
Post by venom1 on Oct 8, 2013 9:44:58 GMT -5
Fantastic look so far! This is gonna be good!!  Cheers, Sam  |
|
noname
Full Member
   March 2012 / April 2013 MoM Winner
Member since: January 2012
I like building models
Posts: 726
Jan 29, 2012 9:24:03 GMT -5
Jan 29, 2012 9:24:03 GMT -5
|
Post by noname on Oct 10, 2013 18:20:49 GMT -5
You did a great job on wrecking that. Very realistic damage I would say.
|
|
|
|
Post by wing_nut on Oct 10, 2013 18:47:03 GMT -5
What a piece of crap! And excellent work making it look that way   |
|
danb.
Reviews member     March 2013 MoM Winner
Member since: November 2011
Posts: 2,808
Nov 17, 2011 9:22:52 GMT -5
Nov 17, 2011 9:22:52 GMT -5
|
Post by danb. on Oct 11, 2013 9:27:42 GMT -5
Great work Loz what a mess but in a good way  |
|
pt109
Full Member
  
Member since: April 2013
Stop staring at me! heheheh
Posts: 491 
|
Post by pt109 on Oct 14, 2013 11:20:07 GMT -5
I likie this one....!
Paul
|
|
losboz
Full Member
  
Member since: September 2013
Posts: 322 
|
Post by losboz on Oct 17, 2013 11:48:30 GMT -5
I don't plan on working this too hard so went to work with the salt and then started layering down Vallejo dunkelgelb and green stripy camo followed by more salt and more paint........ then more salt, more paint, bit of hairspray, more salt etc etc. You get the picture  Then onto main rust colours using Vallejo acrylics. Then I applied the kits decals 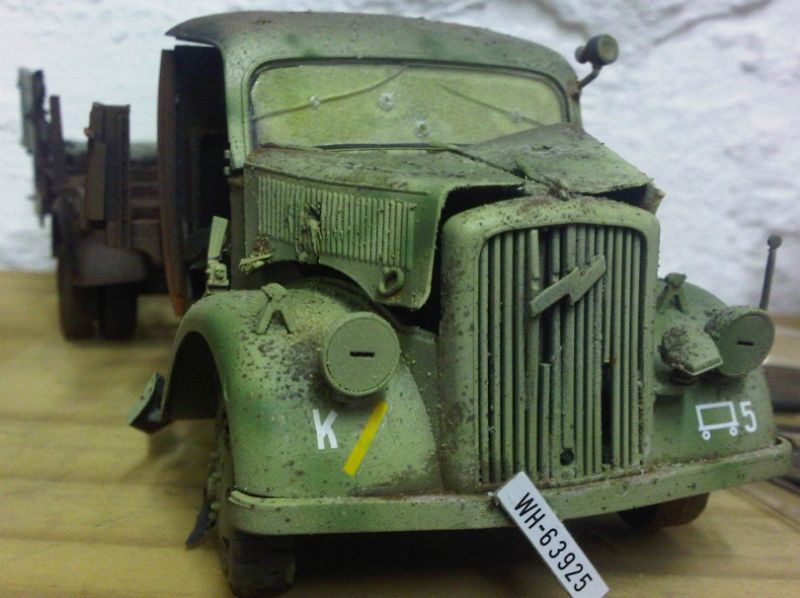 Lots of salt still needs clearing up as pics are revealing how grainy its left the finish 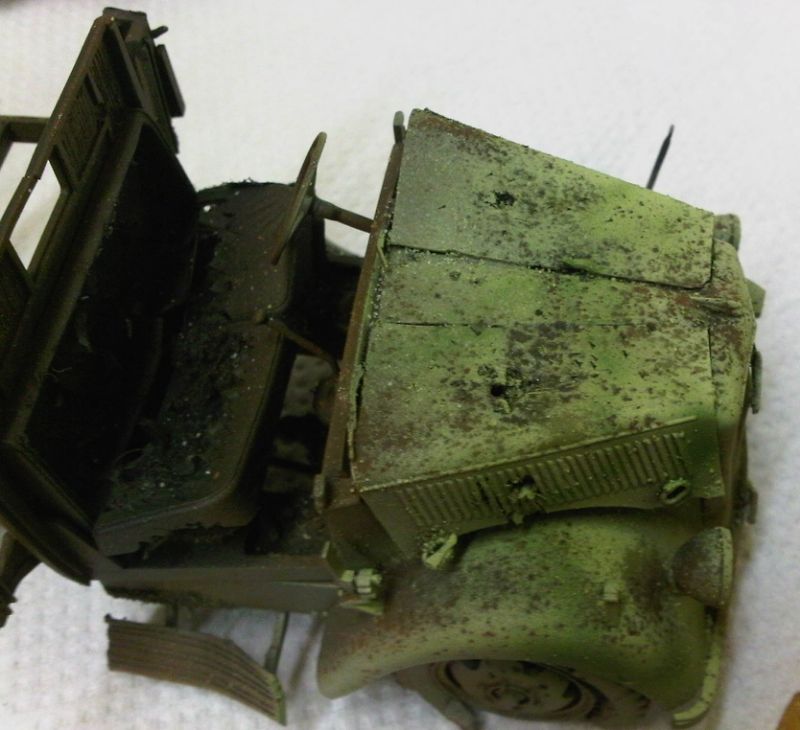 Thinking about it, seeing as most of the cab floor has gone and the interior completely devoid of paint I dont think there would be any of the seat cushion materiel left so this area will need a reworking. Will try and find appropriate seat springy type material in scale. Any suggestions ? 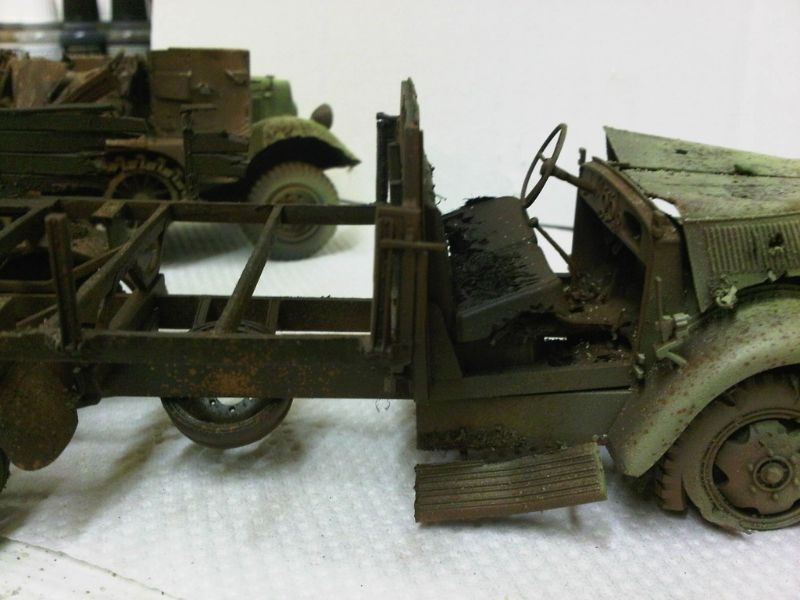 Also the windscreen/sheild is unlikely to have survived so that's going to have to go to  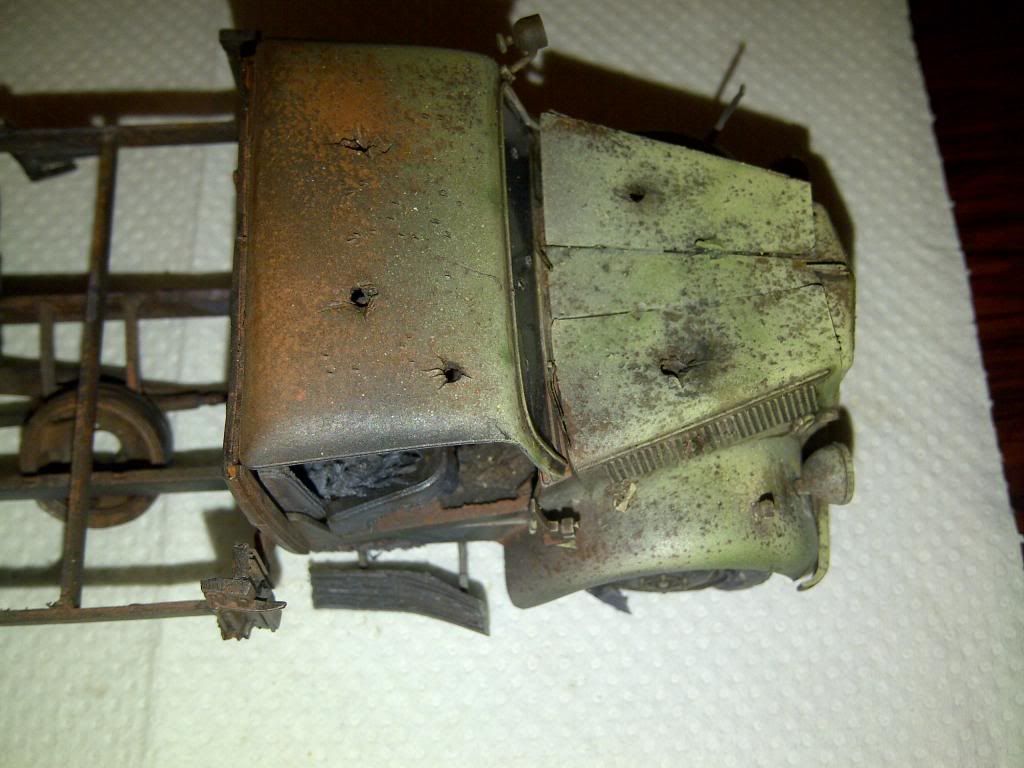 I am a bit limited with having a choice of just three Vallejo rust colours so will be investing in the Lifecolour rust set ASAP 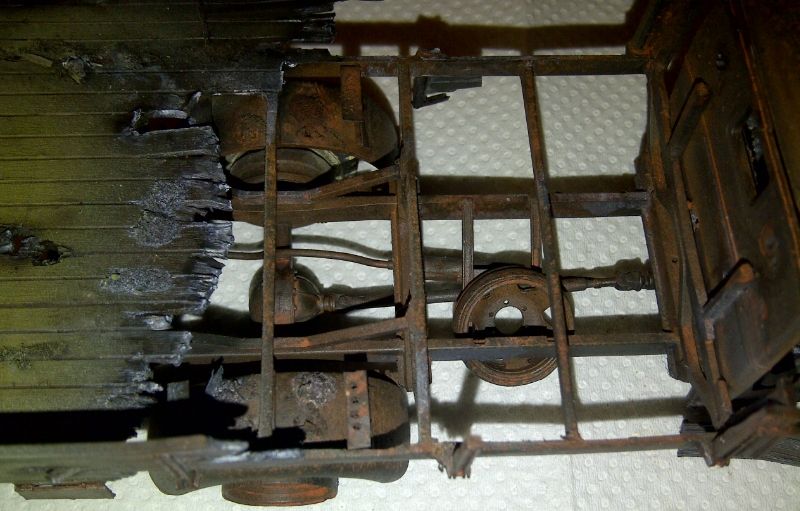 Much, much more work to go but great practice for future projects |
|
|
|
Post by bullardino on Oct 17, 2013 12:33:35 GMT -5
Great progress. The result is really convincing  |
|
|
|
Post by wbill76 on Oct 17, 2013 19:44:50 GMT -5
I'd imagine for the seat you'd probably have nothing left from that kind of fire but the frame. Don't know if these had spring coil cushions, but you could try to create some using coiled wire or solder using a drill bit or similar and then distorting them as needed? Nice progress on the burnt-out areas!
|
|
|
|
Post by Deano on Oct 17, 2013 21:09:48 GMT -5
Excellent results so far , shaping up nicely!
Deano
|
|
|
|
Post by Leon on Oct 18, 2013 21:39:55 GMT -5
Making great progress Los,keep it coming.  |
|
|
|
Post by bbd468 on Oct 20, 2013 12:04:50 GMT -5
Splendid results my man! Looks awesome.  |
|
|
|
Post by Mence on Oct 20, 2013 12:53:45 GMT -5
Wow, wish I could achieve this sort of finish.
|
|
|
|
Post by armorguy on Jan 5, 2014 12:22:37 GMT -5
This is one of those projects I like so much, great painting and also great results with the salt method !
|
|