Rick
Full Member
  
Member since: March 2013
what to build, what to build . . . Ok THAT one!
Posts: 854 
|
Post by Rick on Nov 12, 2013 0:10:35 GMT -5
Ran across this kit a couple weeks ago. Since I had been wanting to build Hartmann's uniquely painted BF109 for a number of years and been looking for the decals, I grabbed this one with barely a 2nd glance. Once I got home, I realized I had more than I had planned. I thought Hasegawa's combo kit meant multiple decals for some reason since it showed two of his aircraft on the box. I didn't realize till I opened it up that there were two BF109's in the box along withmarkings for 4 different aircraft, including the plane I was wanting to build. Happy day, no 3rd party purchase needed! I also had thought it was 1/48 scale due to the size of the box. Nope, they were 1/72 scale. Exactly the scale I was looking for. Happier day! A little history. Erich Hartmann served on the eastern front from mid 1943 until the end of the war. He and others then served over ten years in Russian prisons for war crimes fabricated to punish the Luftwaffe's elite flyers and many other soldiers. During the war, Hartmann shot down 352 aircraft to become the highest scoring fighter pilot in history. Some question the huge scores racked up by the German pilots in WWII. As far as I'm concerned, others can debate it, I'm here to build models to accurately depict as best as I can, the aircraft flown by notable pilots for historical accuracy. So here goes, hope I can do it justice. Hartmann flew the BF 109G-6 aircraft with it's distinctive black "tulip petal" nose markings for only a few months in late 1943. It and his call sign, Karaya 1, were recognized widely and Russian pilots began to avoid combat whenever it was spotted in the air. After several months and declining kill opportunities, the markings were removed so Hartmann would blend in other aircraft and regain the element of surprise. The box art shows a winter camouflaged 109 G-14 flown in early 1945 with a variation of the "tulip petal" markings. However, I will be building the kit as his earlier G-6 model in regulation German camouflage and with the original "black tulip" markings. This aircraft is not shown on the box: 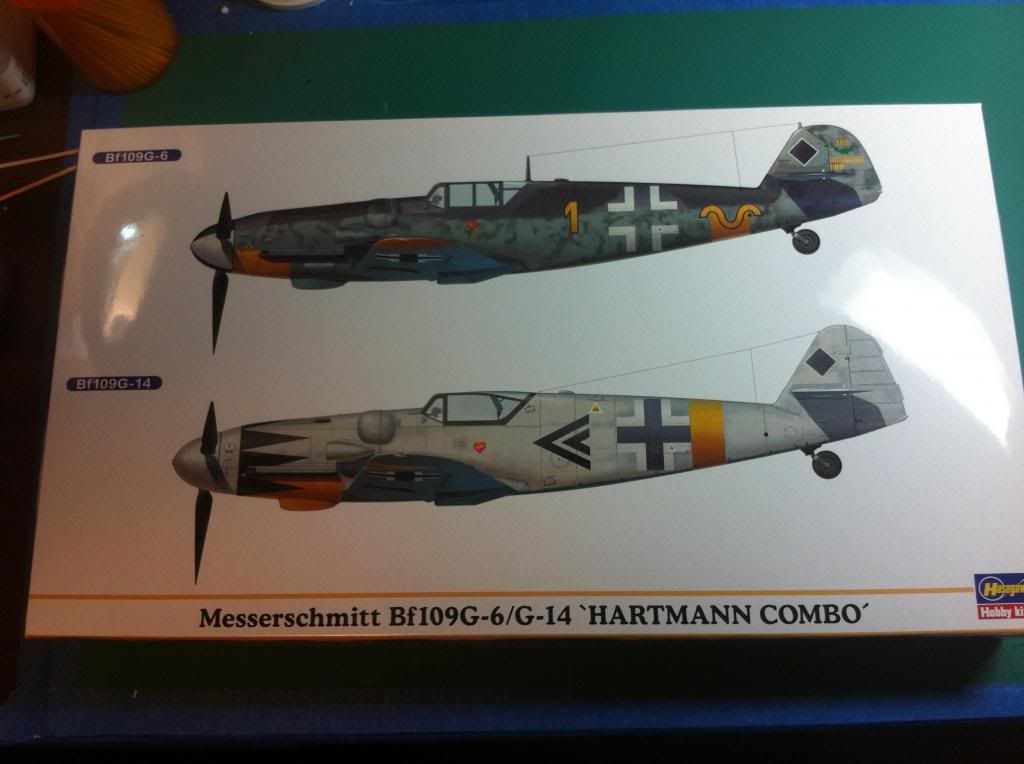 The sprues to make up one of the two fighters contained in the box. 109's were quite small aircraft: 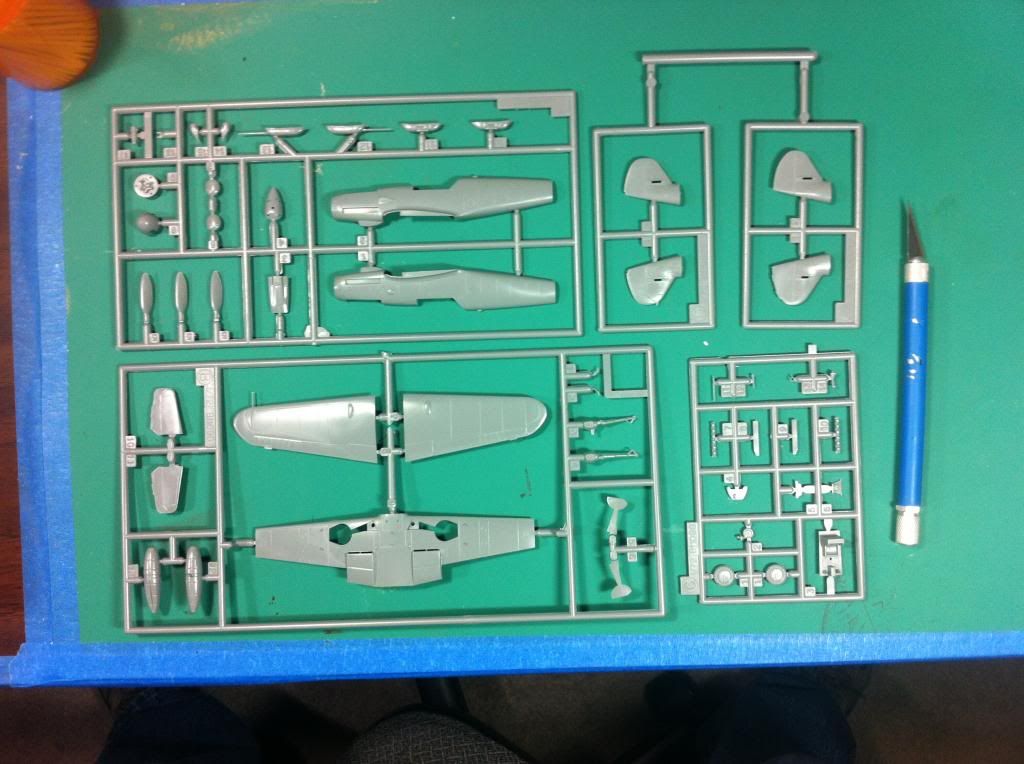 1/72 scale takes only a few parts to show a lot of progress. The fit is very good and no warpage or seam issues: 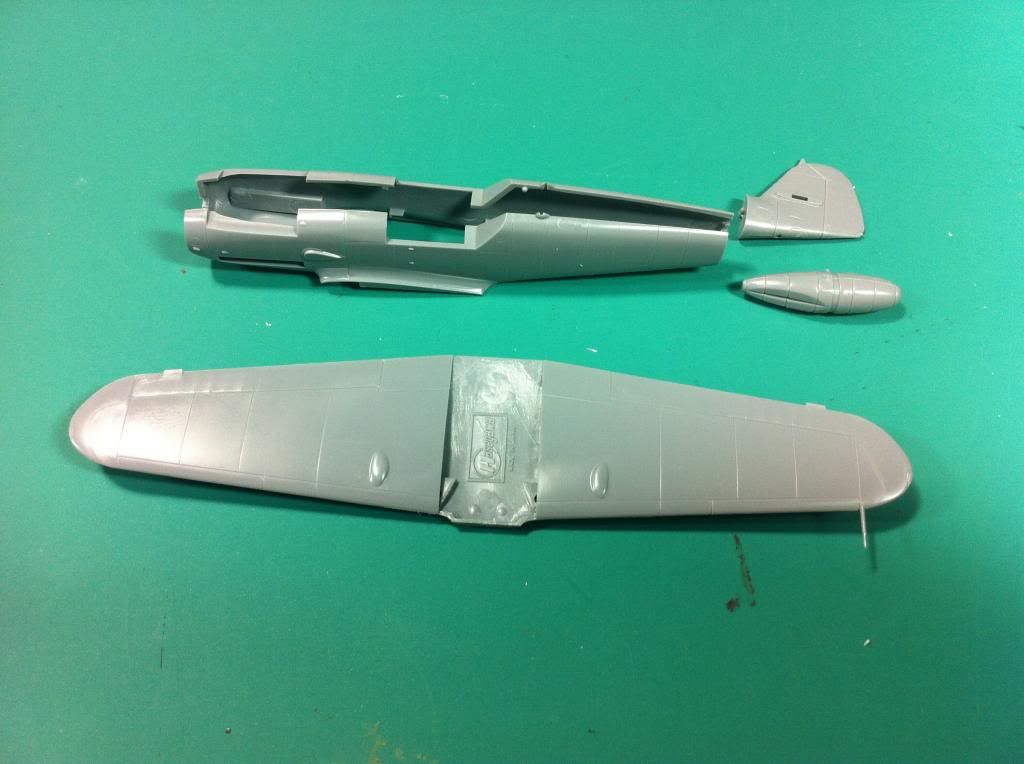 The cockpit has very little detail and my fat fingers and declining eyesight are no match for scratch building minute details that wouldn't be seen under the canopy anyway. I did find some photo etch harnesses in the spare parts box so I painted them Khaki and added them. A decal is included to represent the control panel. ![]() The wings were attached with no fit issues and no seams to fill. Gotta love it!  Next up will be fitting the magazine bulges, landing gear, and the few remaining bits and pieces. So far it's been a very easy build up to this point and do not foresee any issues going forward. I'll update as soon as I can make some meaningful progress. As always, thanks for looking in and please leave any suggestions. Rick |
|
|
|
Post by TRM on Nov 12, 2013 6:18:46 GMT -5
Looks like you are off to a great start Rick! Double-take on the last pic as I missed the 1/72 part above...LOL!! Looking good there...keep it coming!!!
|
|
|
|
Post by bullardino on Nov 12, 2013 6:21:36 GMT -5
Oh, a braille scale 109... I'm in  |
|
|
|
Post by wbill76 on Nov 13, 2013 9:59:40 GMT -5
Very cool! Looking forward to seeing more on this one Rick.
|
|
|
|
Post by bbd468 on Nov 13, 2013 10:38:21 GMT -5
SHAWEEEET!!! Im all in on this Rick!!! 
|
|
Rick
Full Member
  
Member since: March 2013
what to build, what to build . . . Ok THAT one!
Posts: 854 
|
Post by Rick on Nov 13, 2013 13:07:41 GMT -5
Thanks guys. Glad to have all along. Lot of distraction (work) this week. Hope to catch a few hours on the bench this week. Will update again soon.
Rick
|
|
|
|
Post by fightnjoe on Nov 14, 2013 18:39:16 GMT -5
looks like a good start to me.
joe
|
|
totalize
Full Member
  
Member since: February 2013
Don't take yourself too seriously. It's just plastic.
Posts: 260 
|
Post by totalize on Nov 14, 2013 18:50:34 GMT -5
Rick,
Nice build thus far. These two kits should look great side by side.
Dave.
|
|
Rick
Full Member
  
Member since: March 2013
what to build, what to build . . . Ok THAT one!
Posts: 854 
|
Post by Rick on Nov 14, 2013 23:29:12 GMT -5
Thansk Joe. Glad to have you along. Dave, interesting thought. Hmmm...I was thinking about finishing the 2nd 109 in Hartmann's wingman's markings. Add a base for both, an ID placard. Possibilities
|
|
Rick
Full Member
  
Member since: March 2013
what to build, what to build . . . Ok THAT one!
Posts: 854 
|
Post by Rick on Nov 23, 2013 8:42:30 GMT -5
Finally got to spend a bit of time on the bench last night and spray a bit of paint. Here's were Karaya 1 sits today:
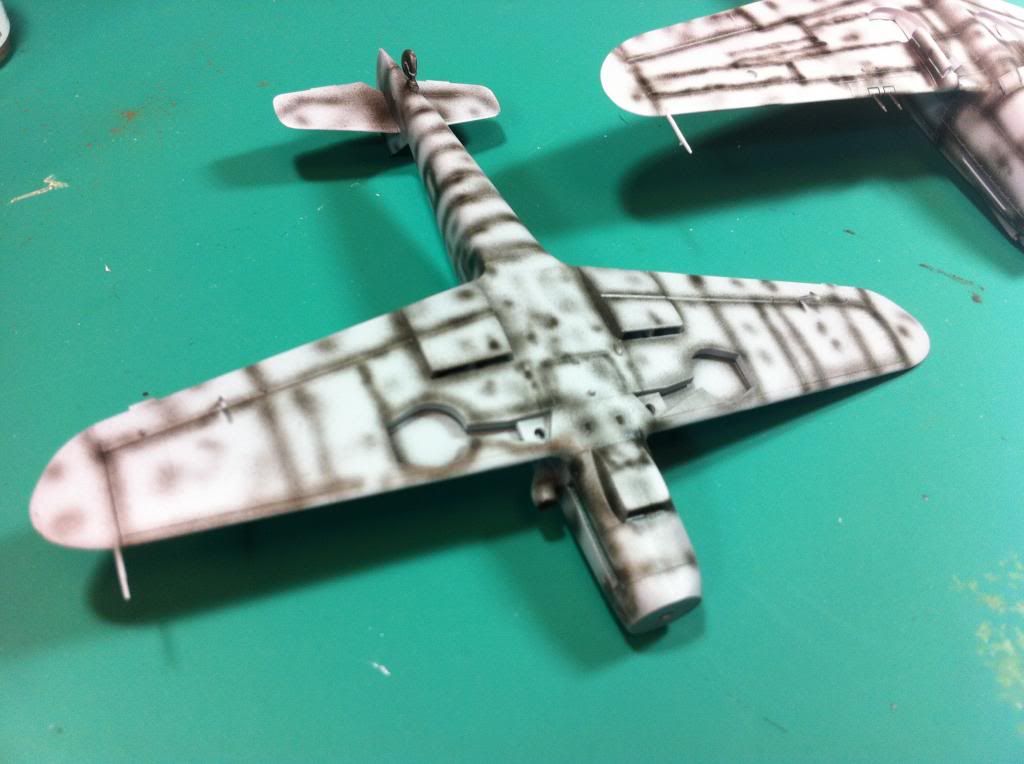
Primed with Mr Surfacer 1200 earlier and did some pre-shading with black on panel lines and some random squirta here and there to hopefully provide a bit of depth when the painting is all said and done.
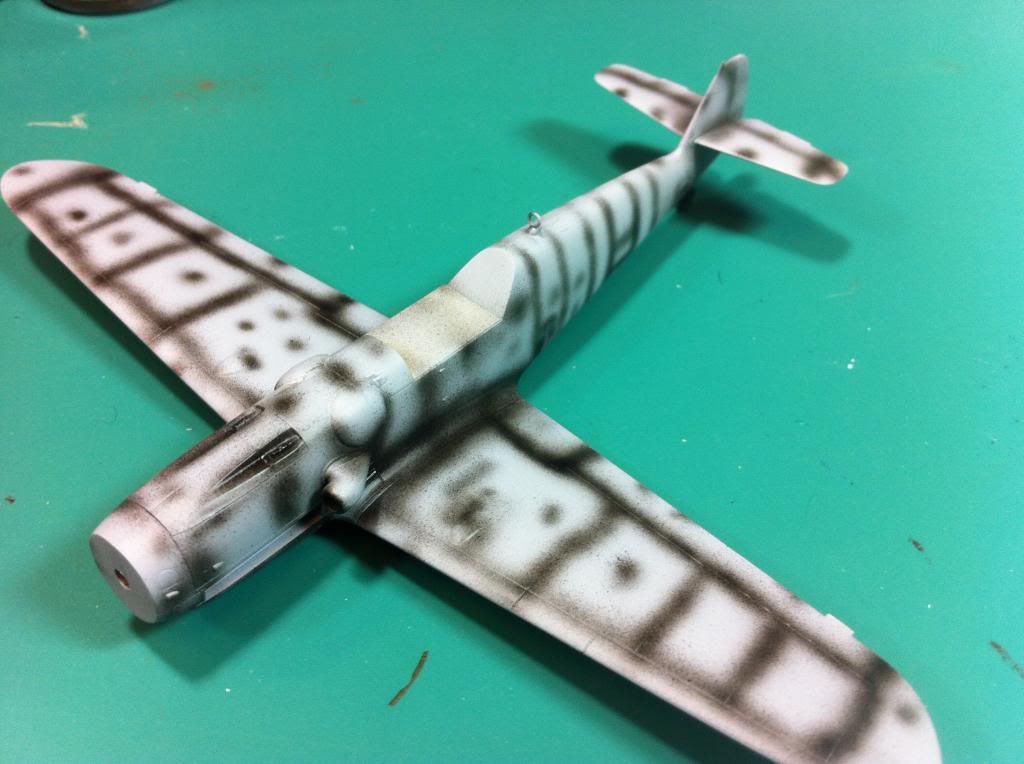
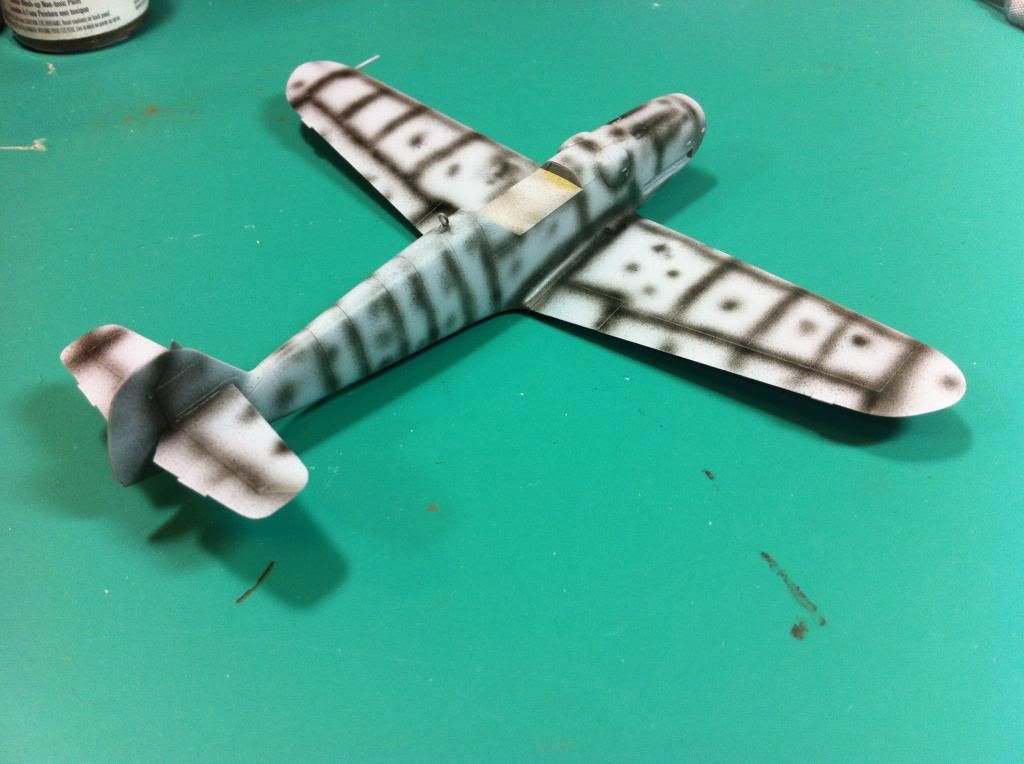
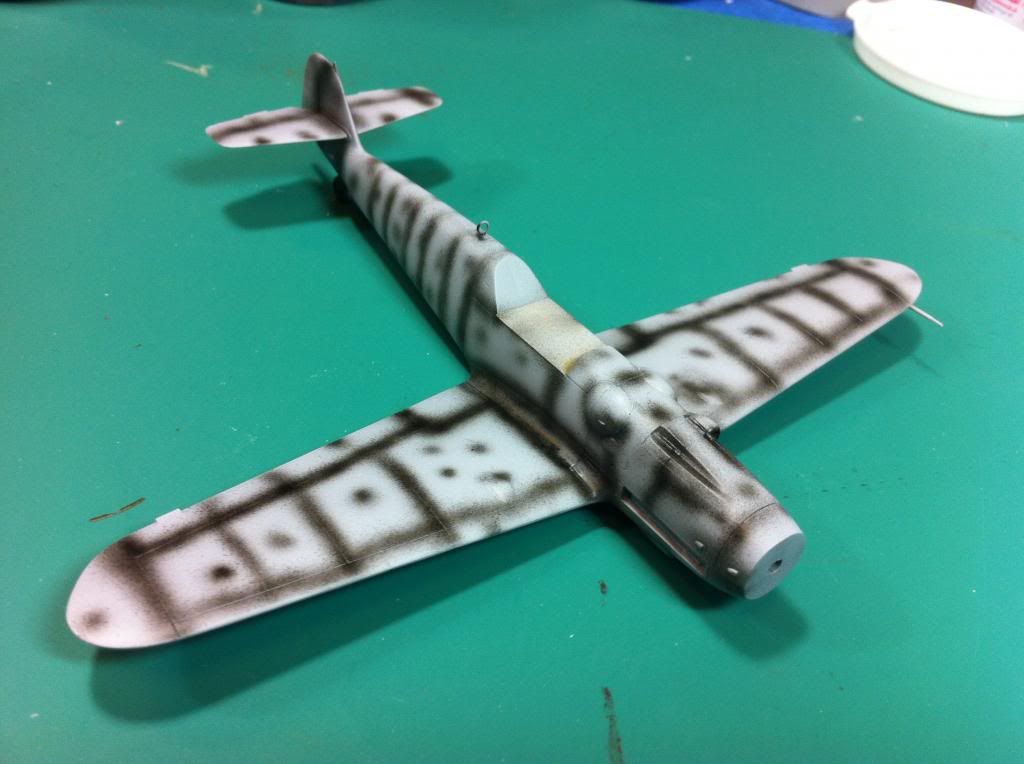
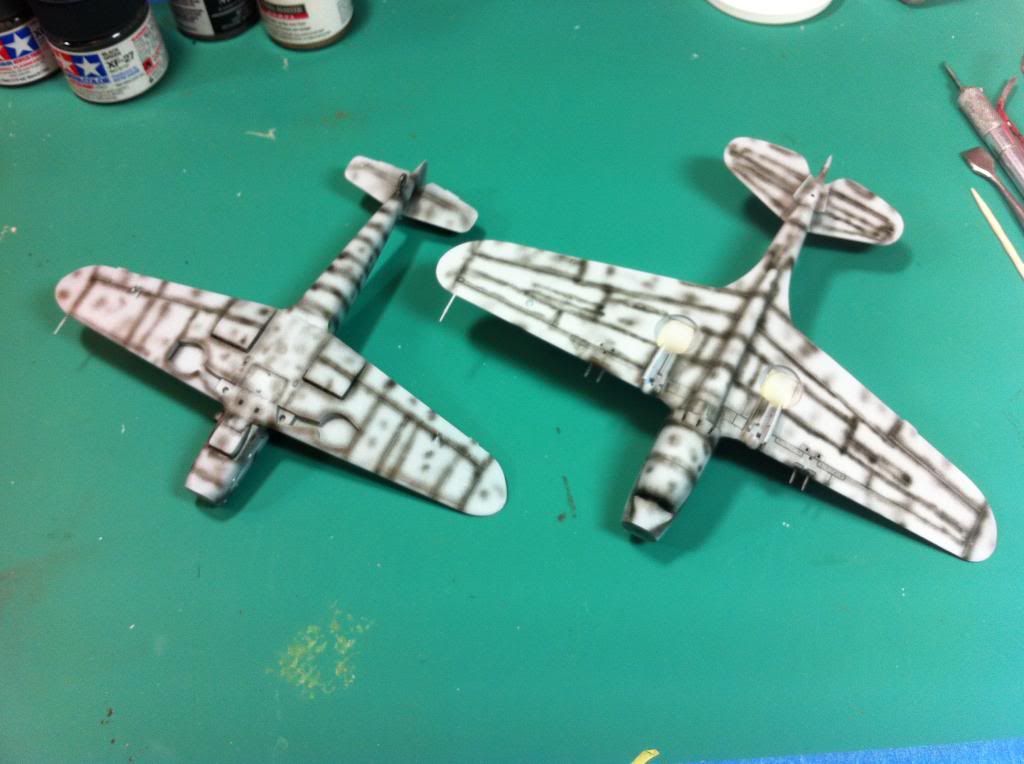
While doing the 109, I've been working on an Airfix P40b as well. Friendly adversaries shared the paint booth to help ramp up the productivity factor a bit.
Really shows just how small the 109 is when compared against another same scale kit.
And after a bit of dry time, a base coat of Model Master RLM 76 Lichtblau on the belly and up the sides. Pics are bit on the crappy side. Typical iPhone results.
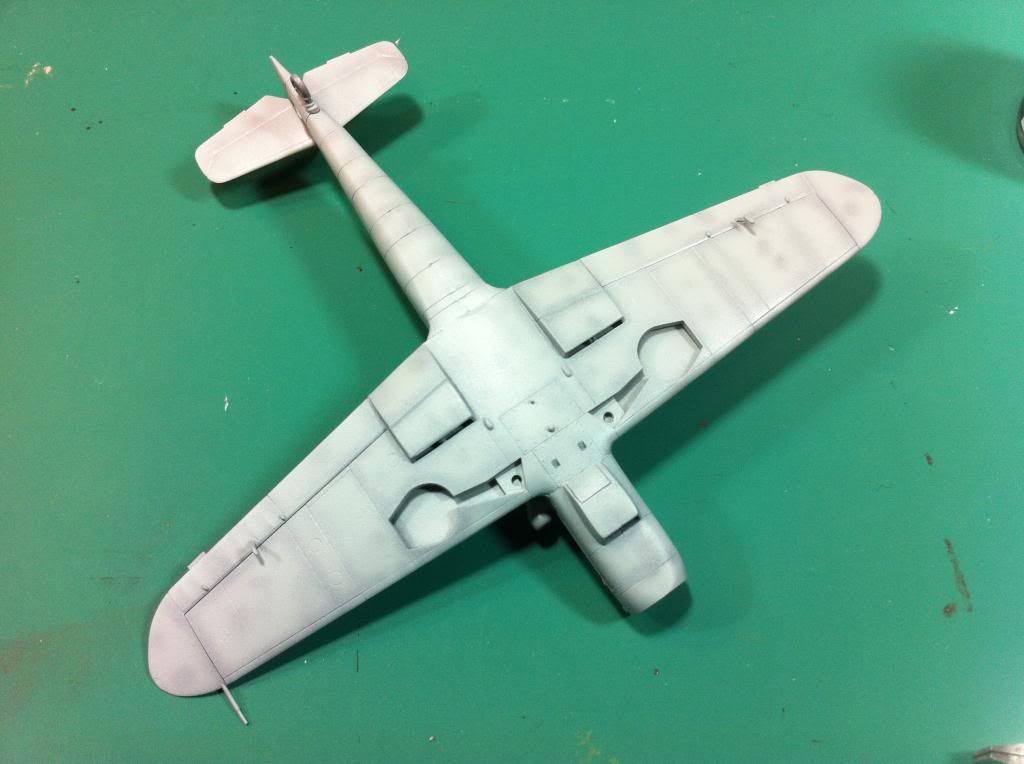

Up to the undersides, I've been using my old trusty Paasche single action AB. I caved into pressure to start using a Badger 150 dual action AB I won in a silent auction at a show a couple years ago. For the base coat, I guess it did OK but it's gonna take a lot of practice before I'll be willing to give mottled camo a try. I'll have some time for that since It will be a couple weeks before I can get to a real hobby shop to pick up the paints I'm missing that I'll need to work on the topside. Thanks for looking in. Any comments and suggestions are welcome.
Rick |
|
Deleted
Member since: January 1970
Posts: 0
Nov 27, 2024 22:41:12 GMT -5
Nov 27, 2024 22:41:12 GMT -5
|
Post by Deleted on Nov 23, 2013 8:45:40 GMT -5
Awesome work Rick!
|
|
|
|
Post by dupes on Nov 23, 2013 9:17:49 GMT -5
You aren't kidding about them being small! Every time I look at the one in my case next to the rest of the 1/72 birds I always think it's waaaaay underscale.
|
|
|
|
Post by deafpanzer on Nov 23, 2013 10:07:26 GMT -5
Great pre-shading job!!!
|
|
|
|
Post by bullardino on Nov 23, 2013 10:32:01 GMT -5
Nice preshading  |
|
destrozas.
Full Member
  
Member since: August 2012
Posts: 240
Aug 28, 2012 8:30:14 GMT -5
Aug 28, 2012 8:30:14 GMT -5
|
Post by destrozas. on Nov 24, 2013 10:57:37 GMT -5
nice job
|
|
|
|
Post by wbill76 on Nov 24, 2013 14:22:39 GMT -5
Another nice shading/paint update Rick, looking good.
|
|
Rick
Full Member
  
Member since: March 2013
what to build, what to build . . . Ok THAT one!
Posts: 854 
|
Post by Rick on Nov 24, 2013 18:45:15 GMT -5
Just a quick update for today. Managed to squeeze in a few minutes to get some paint into the wheel wells and the landing gear struts. A wash inside should add a bit of depth.
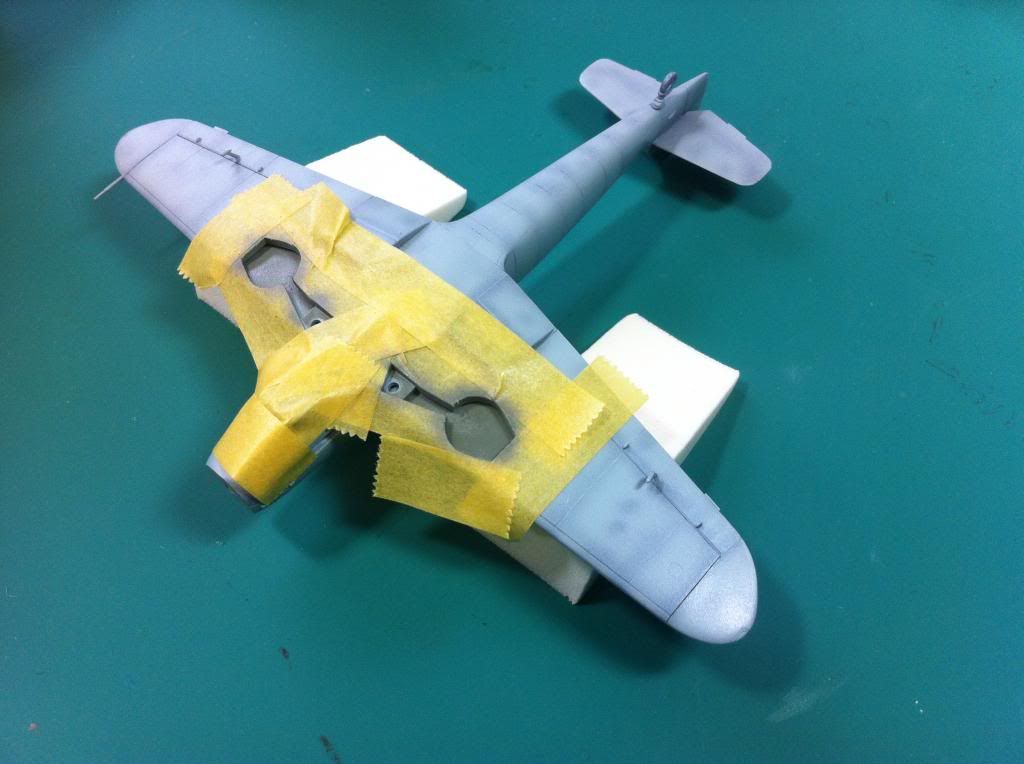

Not sure what happened to the color on the first shot. Had to be the lighting. All my lights are daylight balanced but I also sit in from of a window too. Hmm.
|
|
|
|
Post by bullardino on Nov 25, 2013 9:23:14 GMT -5
Hmm, looks like you moved the second pic  The first one, tho, looks very nice  |
|
Rick
Full Member
  
Member since: March 2013
what to build, what to build . . . Ok THAT one!
Posts: 854 
|
Post by Rick on Nov 25, 2013 12:50:57 GMT -5
OK, fixed the after shot. Hope that looks more like it. |
|
|
|
Post by Tojo72 on Nov 25, 2013 13:28:58 GMT -5
looking forward to see his unique markings
|
|
venom1
Full Member
  
Member since: October 2012
Posts: 1,369
Oct 10, 2012 2:40:03 GMT -5
Oct 10, 2012 2:40:03 GMT -5
|
Post by venom1 on Nov 27, 2013 2:13:28 GMT -5
Nice work so far Rick. That's the thing I love about Braille scale planes, they go together mighty fast!!  Cheers, Sam  |
|
|
|
Post by wouter on Nov 27, 2013 3:28:06 GMT -5
oh, I'm always in for a BF109 build. Great paintwork so far!
Cheers
|
|
Rick
Full Member
  
Member since: March 2013
what to build, what to build . . . Ok THAT one!
Posts: 854 
|
Post by Rick on Dec 17, 2013 20:43:12 GMT -5
Appreciate the comments. I've not abandoned this build by any means. Been away for lack of correct paint for a few weeks. Finally got the proper colors, now work and the holidays are playing havoc with bench time. While waiting on paint, I've been spending time and efforts trying to salvage my PT596 from a misguided original paint job. Taking some time off next 2 weeks so I should be catching up on the 109 paint job . . . and the PT boat . . . and the P40 . . . and the OV10 . . . and maybe even the P39. Geez, I need to get some stuff finished!
Rick
|
|
|
|
Post by bbd468 on Dec 17, 2013 21:07:35 GMT -5
Lookin good Rick, come on with the next installment....Erich is itchin to fly!  |
|
Rick
Full Member
  
Member since: March 2013
what to build, what to build . . . Ok THAT one!
Posts: 854 
|
Post by Rick on Jan 5, 2014 21:29:13 GMT -5
Just a quick update. I started adding the camo to the 109. Really had some paint struggles with it so I'm not very pleased with it right now. That and a few of my own mistakes added to it. The dappled camo on the German aircraft are not the easiest thing to pull off. I tried using the rolled blue tac to soften the lines, but didn't get the coverage I needed and the paint mix was to thick and didn't atomize like it needed to. I'm going to re-paint the wings and do some fuselage work to try to get a more acceptable spray pattern. I'm adding a few pics of the outcome so anyone that has been able to pull this off, please jump in or send a message with suggestions or tips to improve the dappled finish. Keep in mind, this is 1/72 scale so tiny is a key word here. 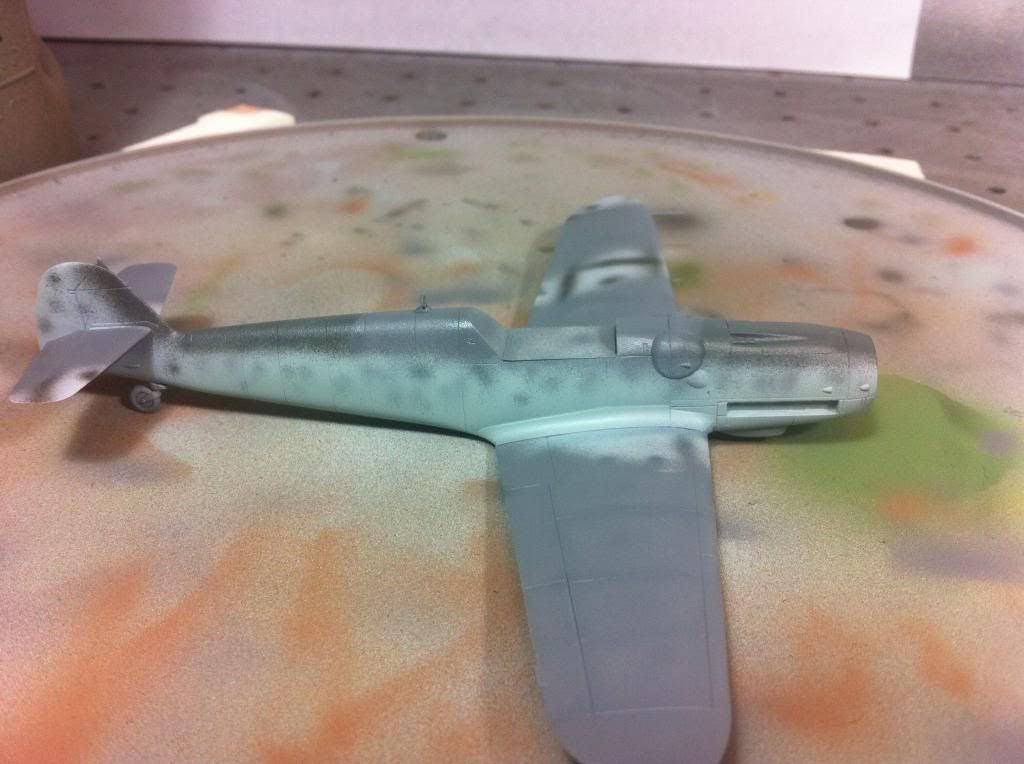 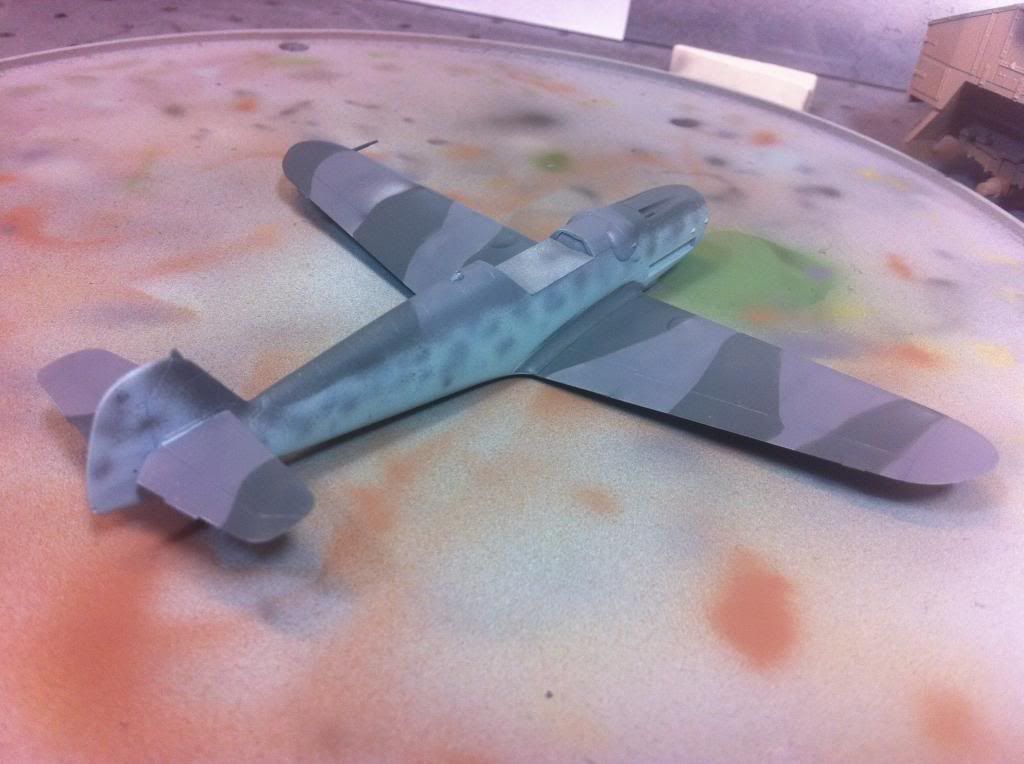 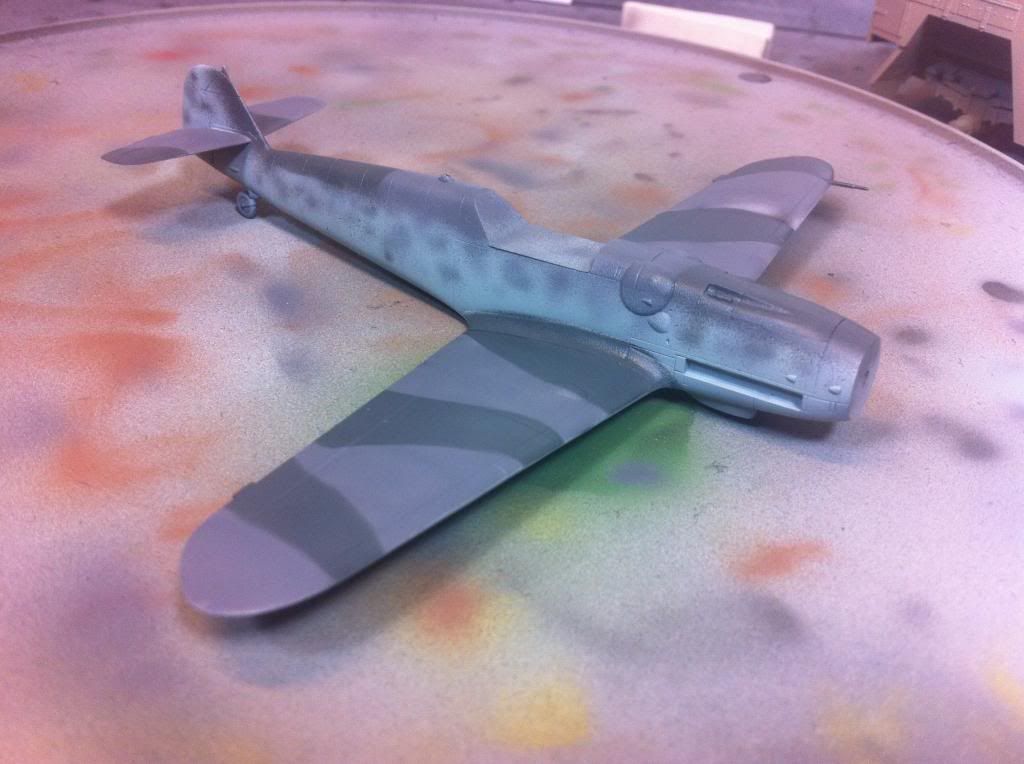 Thanks for looking in. Rick |
|
|
|
Post by deafpanzer on Jan 5, 2014 22:06:39 GMT -5
I like it!!!! Just little clean up on the overspray it would be perfect! You did very well with the spots...
|
|
Rick
Full Member
  
Member since: March 2013
what to build, what to build . . . Ok THAT one!
Posts: 854 
|
Post by Rick on Jan 5, 2014 22:49:46 GMT -5
Ned, thank you and welcome aboard. I appreciate your comments and suggestions. I may need to give this a try and see how it works out. I have several older kits to practice on. This was my second shot at the German camo so I'm still trying to learn it. All suggestions are worth looking into.
Deaf, as always thank you. That overspray was self induced. Forgot to put the blu tac on to mask when I gave the splotches a second shot. Paint was to thick and didn't atomize so it went everywhere. Gonna fix that issue when I touch it up.
|
|
Deleted
Member since: January 1970
Posts: 0
Nov 27, 2024 22:41:12 GMT -5
Nov 27, 2024 22:41:12 GMT -5
|
Post by Deleted on Jan 6, 2014 3:05:17 GMT -5
Hi Rick, looking good to me  I'd be tempted to re mask and add more mottle / colour where you think it's needed rather than start again. This is how the camo was built up on the real things, field units applying paint over factory finishes that is  |
|
|
|
Post by 406 Silverado on Jan 6, 2014 9:39:24 GMT -5
Very nice painting Rick. The pre-shade really helps on AC.
|
|
|
|
Post by bullardino on Jan 6, 2014 15:36:02 GMT -5
Being braille scale, I think mottling is spot on...
|
|


![]()


