venom1
Full Member
  
Member since: October 2012
Posts: 1,369
Oct 10, 2012 2:40:03 GMT -5
Oct 10, 2012 2:40:03 GMT -5
|
Post by venom1 on Jan 22, 2014 7:09:33 GMT -5
Howdy folks, Captain Tardy here! Thought it was time I gave you an update on something I started a couple of weeks back. I know, I know. As Bugs Bunny would say, "Fer shame, Doc!!"!  (rofl)Ennyhoo, better late than never, hey? (Well, that's my story, 'n I'm stickin' to it!!) So, time for another little helo to be added to the collection! This is my first foray into the world of HobbyBoss 1/72 helo's and I gotta say, it won't be the last!! This is such a great little kit! It has a few downsides, but if you are willing to overlook them, it makes for a great build. First the "cons" of the kit: The main rotor and tail rotor are both over scale, making it look a little odd to the trained eye. The main rotor head is too big, and the blades are a bit too long. The tail rotor also has blades that are too long and the chord is too short. It is also missing the rudder pedals in the cockpit, and from what I understand, the instrument shroud is the wrong shape. The "pros": The detail is lovely, with lots of nice engraved panel lines and rivet detail which will come up very nicely under some paint and washes. The fit is bloody marvelous! There is virtually no filler used anywhere on this kit. The entire nose section is cast in clear plastic which means no fiddling around with dodgy windscreens that don't fit. Huzzah!! Just mask up and away you go with the paint! Glasswork is all very crisp and clear. Rear cabin door can be posed open if you so desire, and if not, then the fit here is also exceptional. No square peg in a round hole here folks! The shape of the nose and intake section above the cockpit is apparently pretty much spot on, and is therefore the first Mi-2 in 1/72 to get it right. So, on with the build! This is the box art for the kit in question.... 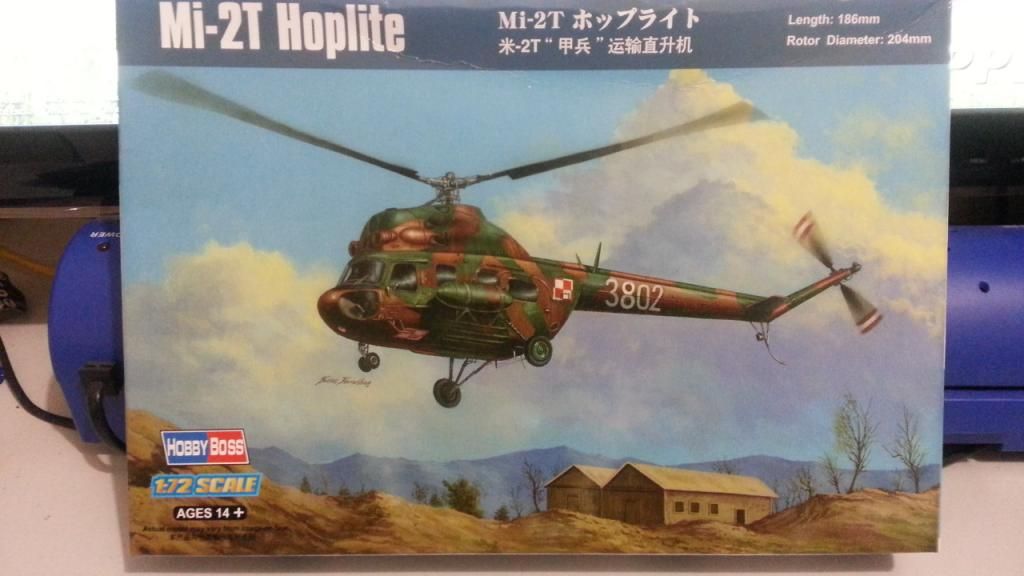 There are a few different Mi-2 versions available on the market now, including a gunship, so you have a bit of a choice.  Next up, we have painted the fuselage halves and the cockpit interior on the sprue as such. I have also assembled the instrument shroud. The instrument panel itself can be seen off to the right. This has fine raised detail which matches up nicely with the instrument decal. The interior colour on Russian aircraft seems to vary from airframe to airframe. In this case I have used Model Master Interior Blue/Green (2135). If you are modelling a specific airframe, check your references!! 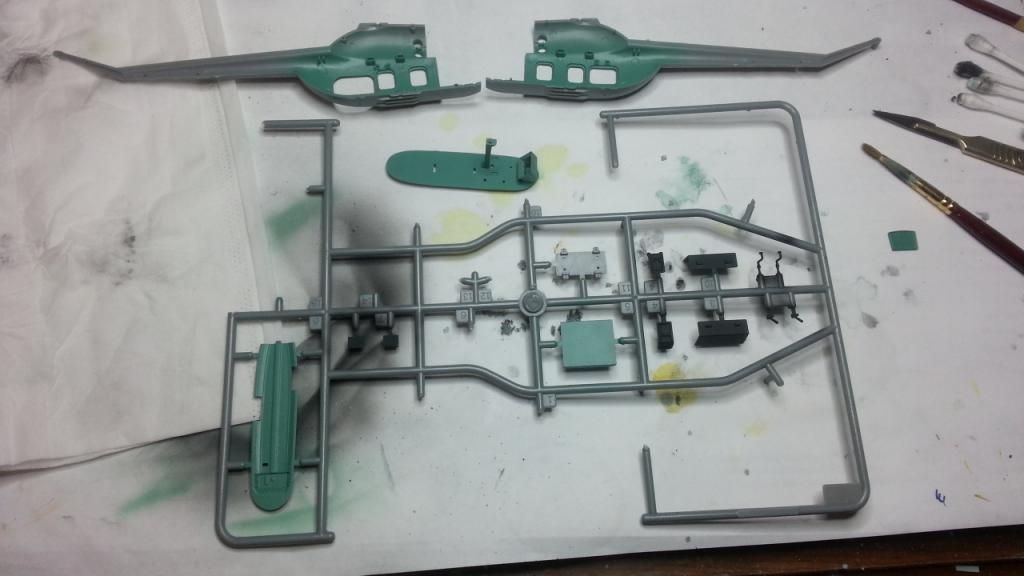 Here I have added the decals for the main instrument panel and overhead panel. Noice! 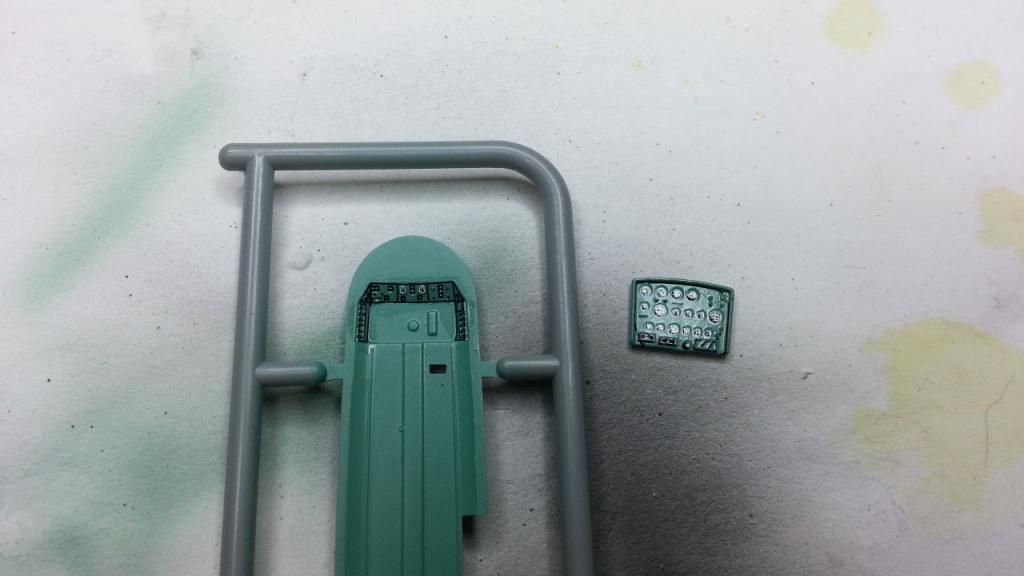 The cockpit dry fitted together... 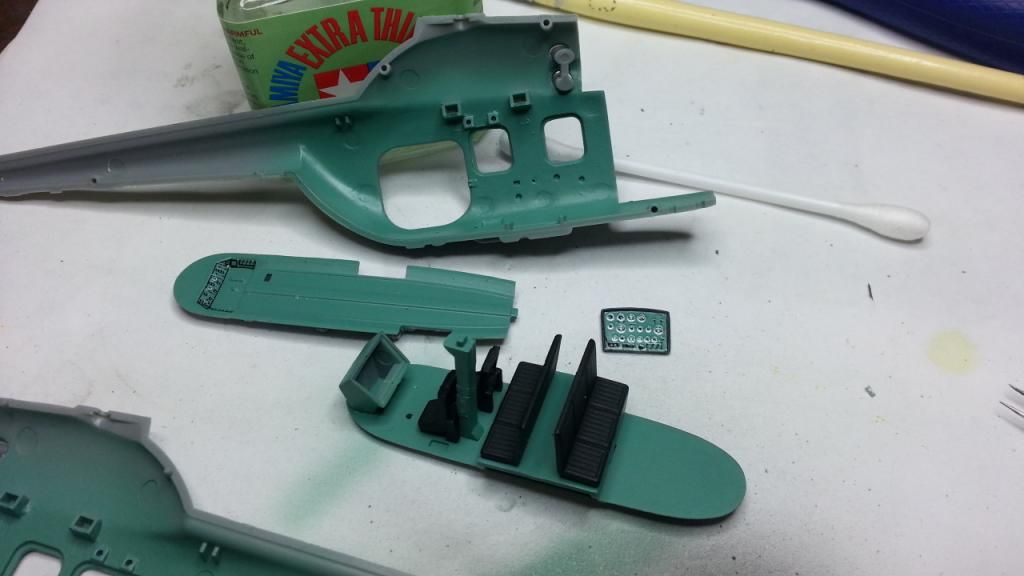 As this is going to be a heavily weathered/abandoned bird, it was time to start weathering the cockpit. Paint scratches/chipping.... 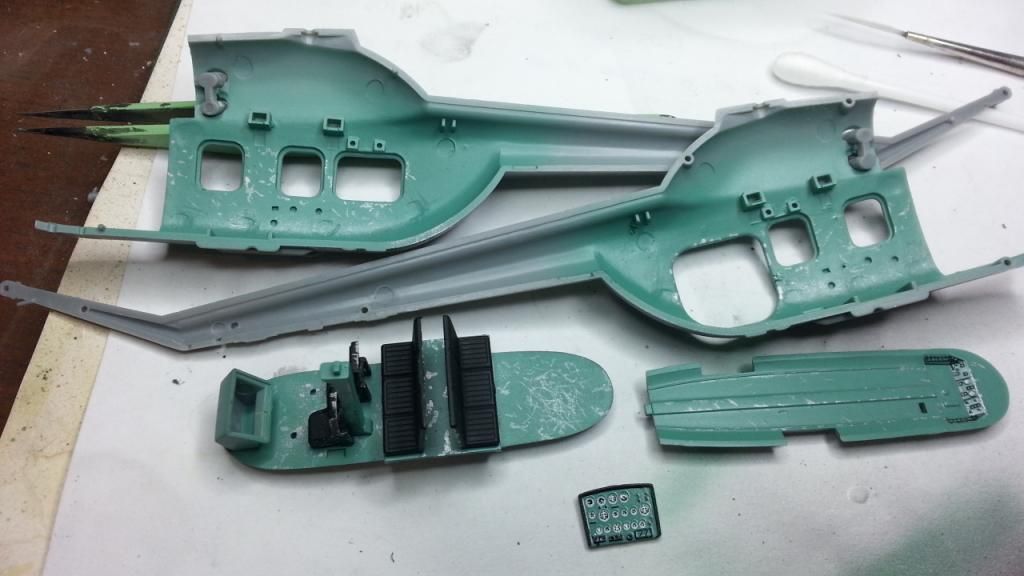 Next up, seatbelts were added from the trusty ol' Tamiya tape, followed by some washes to add a bit of dirt and grime..... 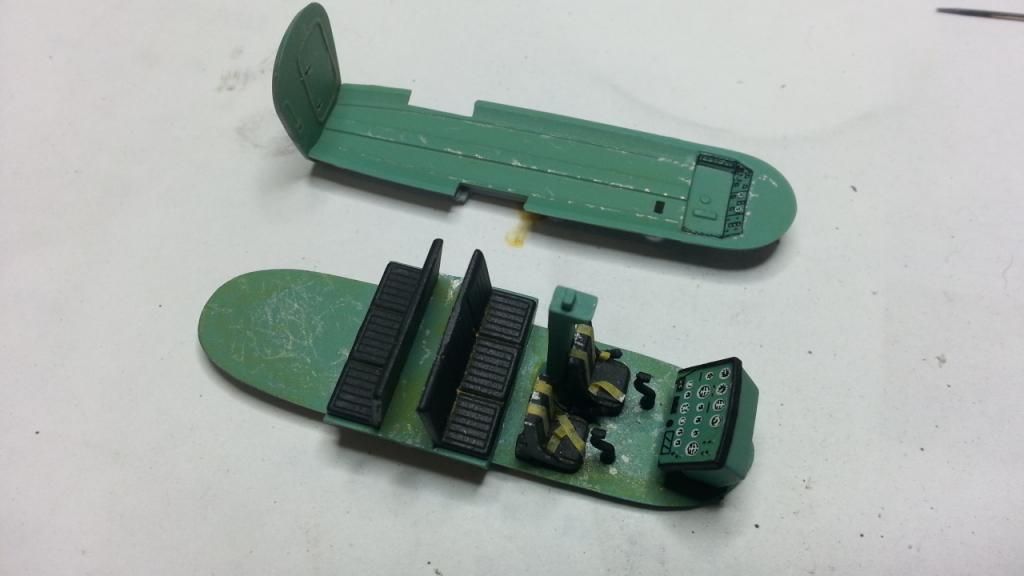 Followed by some oil dot weathering. 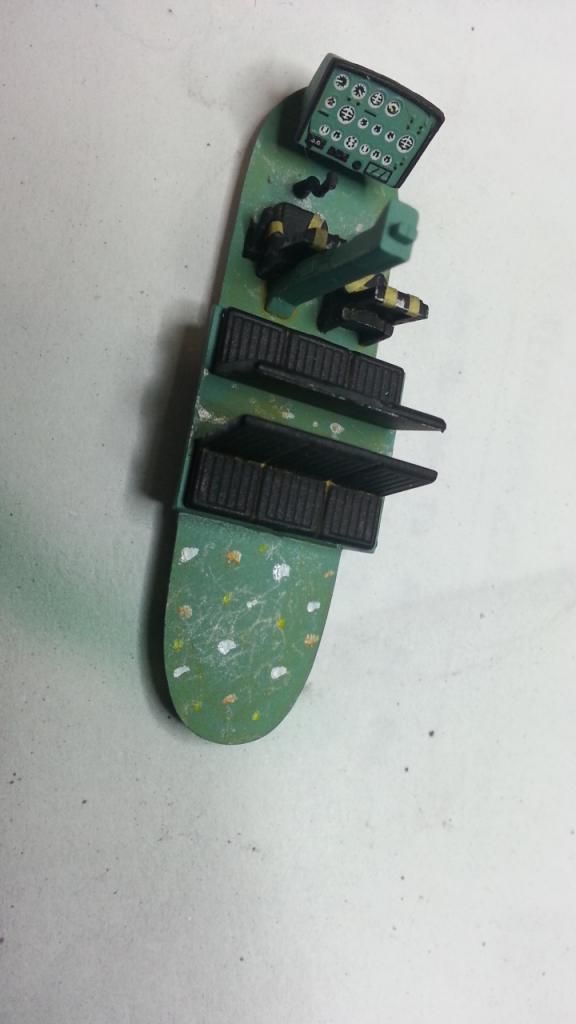 The end result. Probably can't really notice it on the screen. It is pretty subtle in real life.  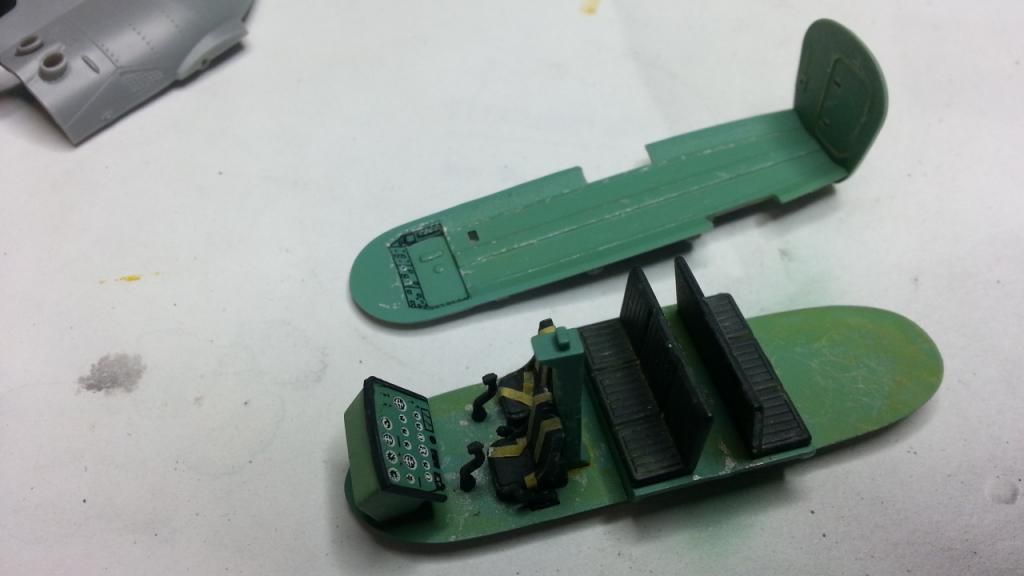 Cockpit installation before closing up.... 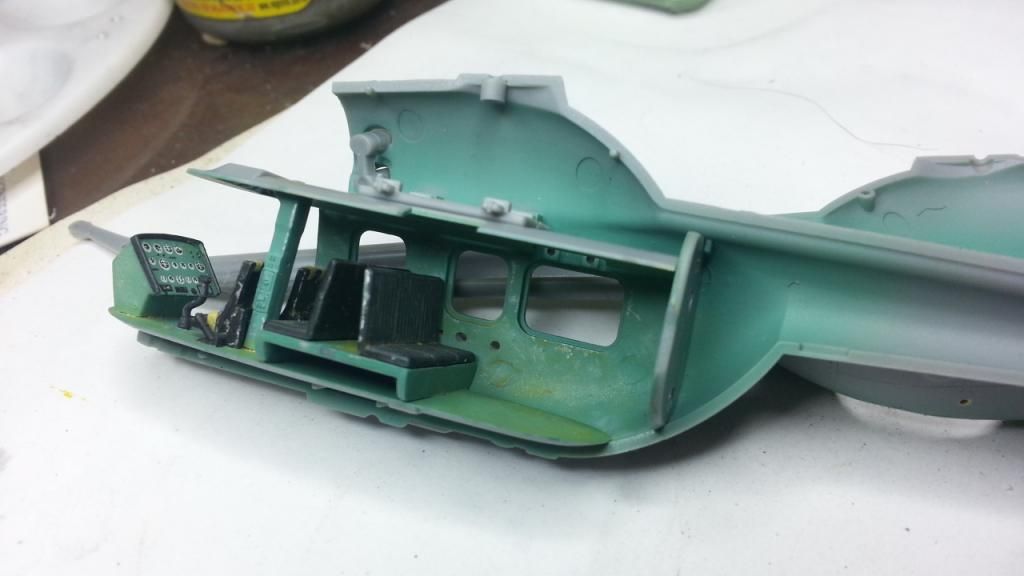  Time to close up!! 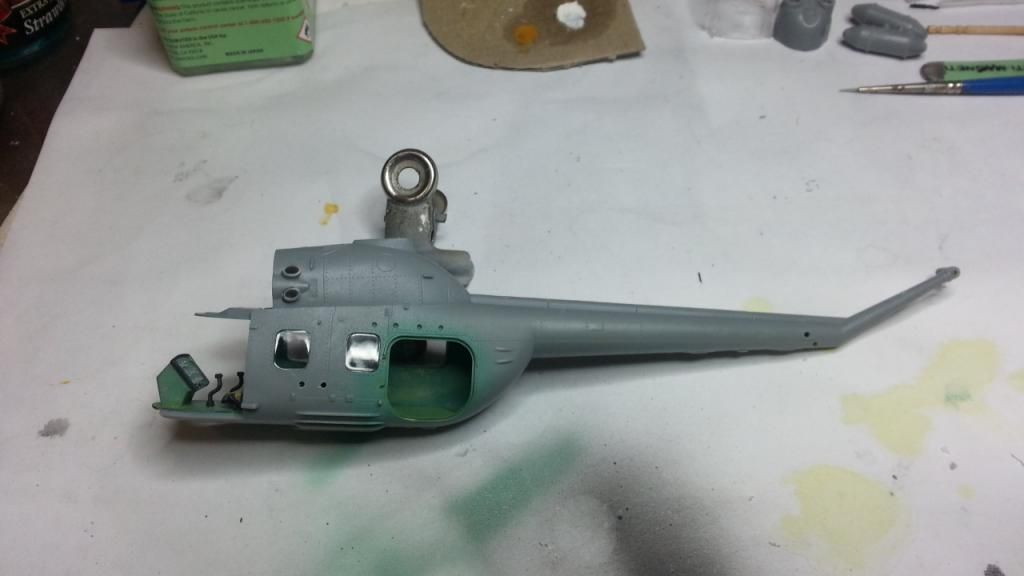 Judgement time. how well does the clear nose fit? Soo-poib!!  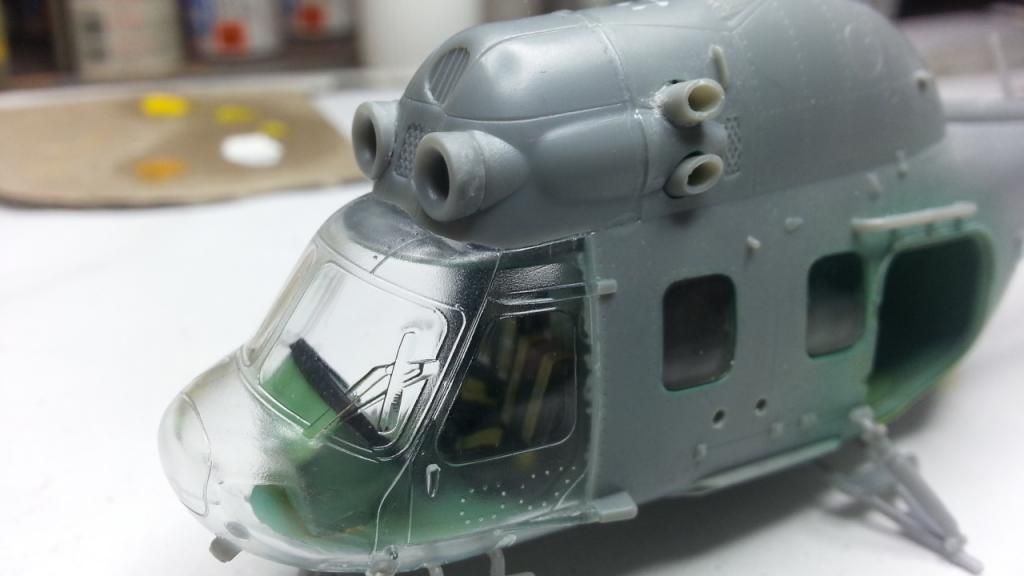 In fact everything fits like a glove! Gotta be happy...... Rest of the sticky-outy stuff was added on....  Test fit for the door. Look ma, no glue!!  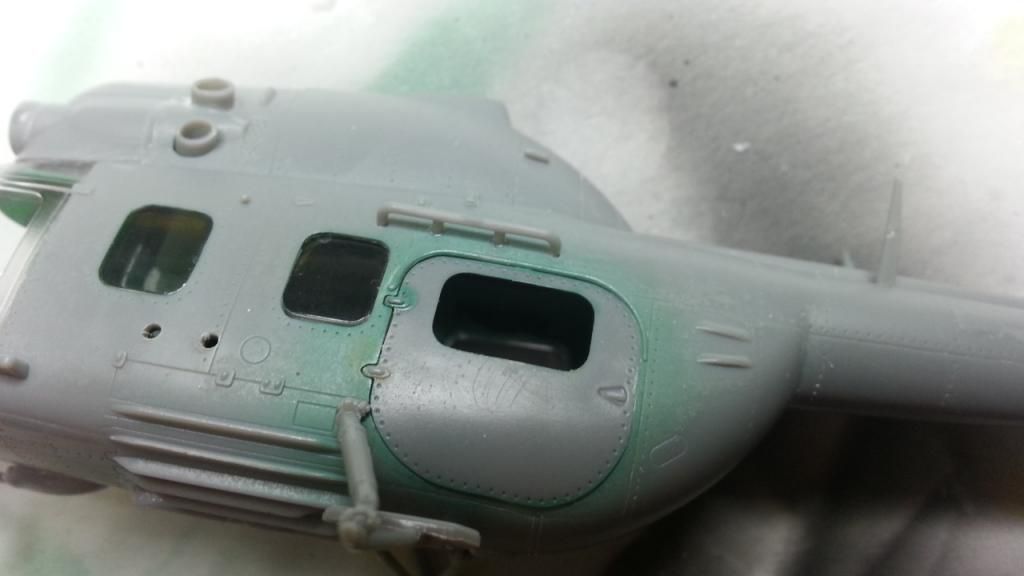 Finally, it was time to mask up! I resorted here once again to my trusty Bare Metal Foil. I reckon this stuff is the bees knees when it comes to masking canopies, and a lot less hassle than fiddly bits of tape. So here she is with all the see thru bits shinied up... 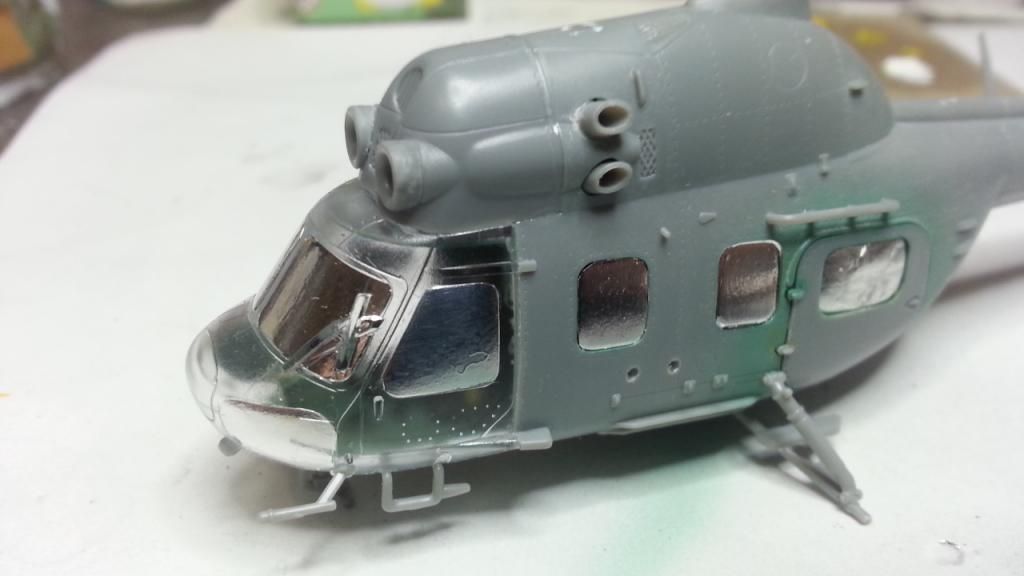 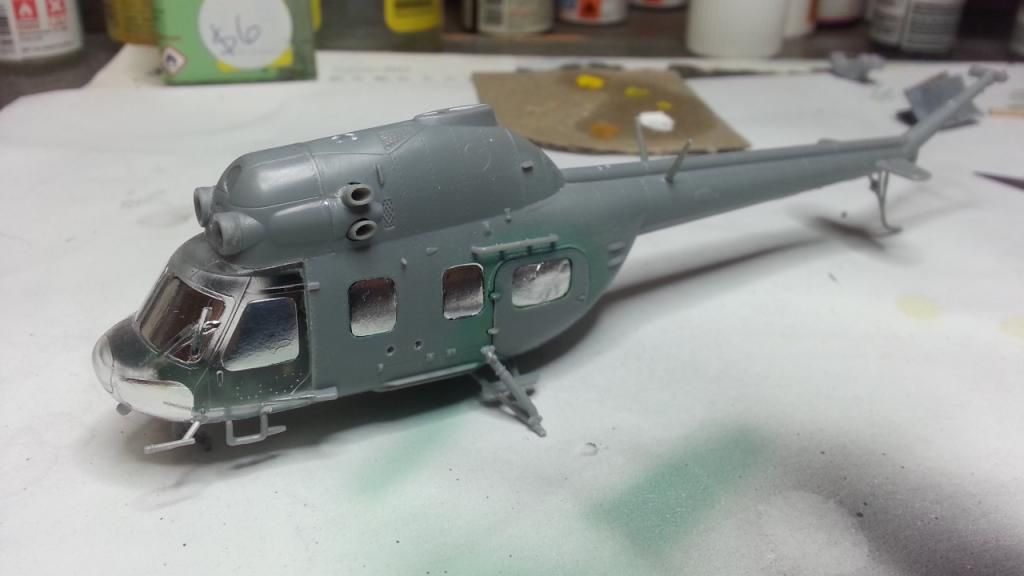 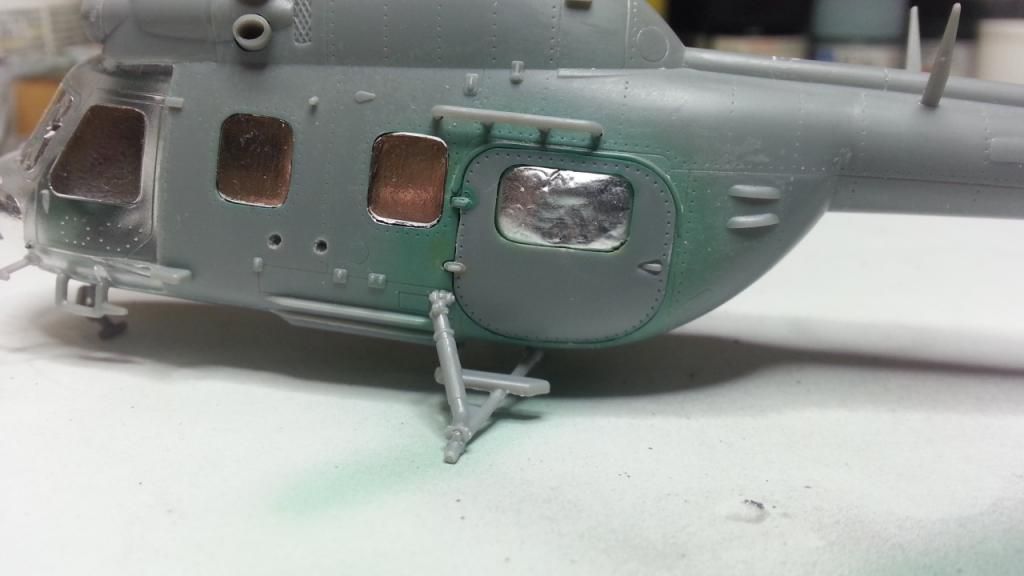 And so here is how she stands as of this evening, all masked up and ready for paint! 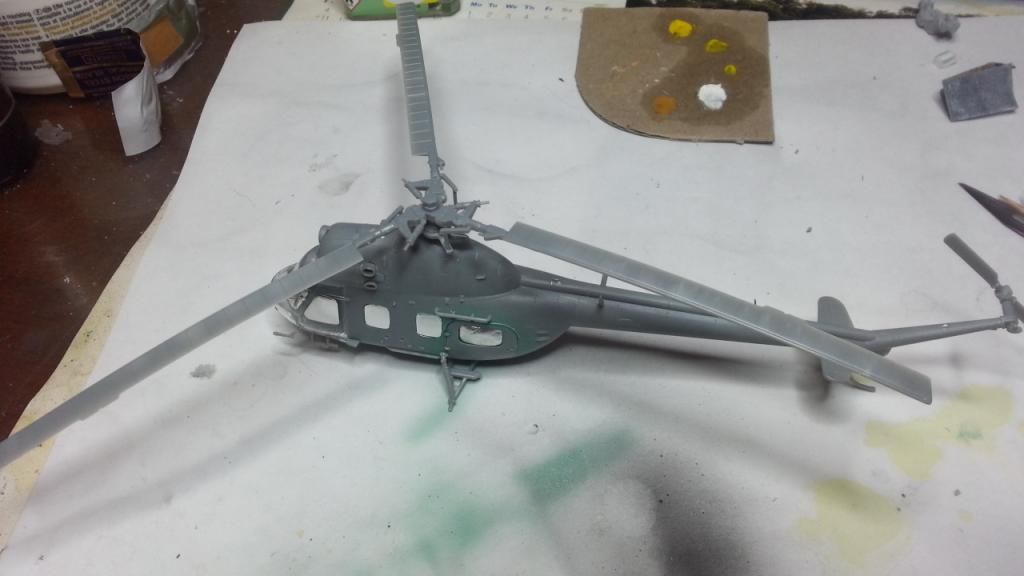 As I hinted at earlier, this will be an abandoned bird, so will be doing a lot of faded/weathered paintwork, as well as paint chipping. Will spray down the interior colour over the clear stuff first, followed by a primer coat of Tamiya Fine Primer, then some Tamiya AS-12 straight from the can. This will give me the foundation to begin the weathering process. Watch this space! Oh, by the way, does anyone know an effective way of weathering/chipping decals? Will look a bit naff if it is faded from here to oblivion with shiny new red stars on it!!  Cheers, Sam  |
|
|
|
Post by dupes on Jan 22, 2014 7:13:39 GMT -5
Wow! Looks great!
I've had very hit-or-miss results with their 1/72 kits, almost like there's more than one team putting them out.
|
|
|
|
Post by Deano on Jan 22, 2014 7:43:56 GMT -5
Excellent build , you've done a great job ... taking notes  |
|
|
|
Post by Leon on Jan 22, 2014 7:57:45 GMT -5
Looking really good Sam,keep up the good work.   |
|
|
|
Post by deafpanzer on Jan 22, 2014 15:00:54 GMT -5
This is one odd but cool looking helicopter! Great process so far... you have my attention now!
|
|
|
|
Post by wbill76 on Jan 22, 2014 20:33:56 GMT -5
Nice work Sam, the whirly-bird looks all set to be turned into a decaying/abandoned lonely thing.  |
|
|
|
Post by fightnjoe on Jan 23, 2014 16:30:06 GMT -5
sharp, clean and crisp. nice work so far.
as for the decals my only experiences are drybrushing over the decal with the base color and/or a little metal color to give it the look.
joe
|
|
|
|
Post by `Boots` on Jan 23, 2014 17:29:35 GMT -5
Great work Sam...........i like the BMF masking idea as well  , i agree with Dicky ref the decals fella  |
|
|
|
Post by imatanker on Jan 23, 2014 17:43:30 GMT -5
Yeah Sam. Nice build Buddy. The metal foil masking thing is great. How easily does it come off.?
|
|
venom1
Full Member
  
Member since: October 2012
Posts: 1,369
Oct 10, 2012 2:40:03 GMT -5
Oct 10, 2012 2:40:03 GMT -5
|
Post by venom1 on Jan 25, 2014 8:06:43 GMT -5
Thanks for looking in guys! Dupes - Yeah, HobbyBoss were very hit and miss early on in their career, but they have really got their act together over the last few years. OK, so their accuracy is still a little hit and miss (case in point - this kit!), but it is pretty hard to fault the buildability and detail level of their kits (the aircraft ones at least!). I have a number of HB 1/72 helo's in the stash and they all look like this one. Beautiful detail across the board, and initial test fits all prove to be an excellent fit! Maybe another foray into the HobbyBoss camp is required my friend.......  Deano Deano - Thanks buddy, hope I can continue to give you some noteworthy updates!  Leon Leon - Thanks pal!   Andy Andy - Glad you approve bud, hope I can keep your attention to the end!!  Bill Bill - Thanks mate, hopefully she will be full of abandonization by the end!!   Joe Joe - Thanks for the tip mate, will have to try that out, sounds like a good option.  Dicky Dicky - Thanks for the kind words cobber, hope I can continue to impress! Thanks for the decal suggestion too, hadn't thought of that! Will have to try that out as well and see how I go! 
Boots - Thanks buddy, yeah I'm a big fan of the BMF method for canopies on all but the simplest glasswork (ie, F-16, P-51, etc). Saves me a bucket load of time. Plus I am lazy. Ooops! Did I just say that out loud??  
Jeff - It comes off with very little fuss. I have had some old stuff that was difficult to remove, also some that was in situ for many months. They both left a bit of sticky residue behind. But generally no problems at all. Just gently lift a corner with a scalpel blade and then lift off with tweezers. Works a treat!!  OK guys, well I am currently masking up another kit so I can do some "bulk" spraying. When that is good to go I should have another update for you. Until then, happy modelling!! Cheers, Sam  |
|
destrozas.
Full Member
  
Member since: August 2012
Posts: 240
Aug 28, 2012 8:30:14 GMT -5
Aug 28, 2012 8:30:14 GMT -5
|
Post by destrozas. on Feb 2, 2014 3:45:05 GMT -5
looks great and those interiors are magnificent
|
|
venom1
Full Member
  
Member since: October 2012
Posts: 1,369
Oct 10, 2012 2:40:03 GMT -5
Oct 10, 2012 2:40:03 GMT -5
|
Post by venom1 on Mar 5, 2014 1:25:25 GMT -5
Howdy lads, apologies for my lack of updates here, have had a few projects on the go and it's hard to put aside the time for painting, so I generally try and have a few things ready to go. As it is, most of the next update was done with Tamiya spray cans!!  Haven't got a lot to show really. I needed to lay down the cockpit interior colour first (not shown), so that was airbrush time. Next up was some of Tamiya's magnificent Fine White Primer. I love this stuff, and highly recommend it if you haven't tried it yet. Here it is in all it's whitey goodness.... 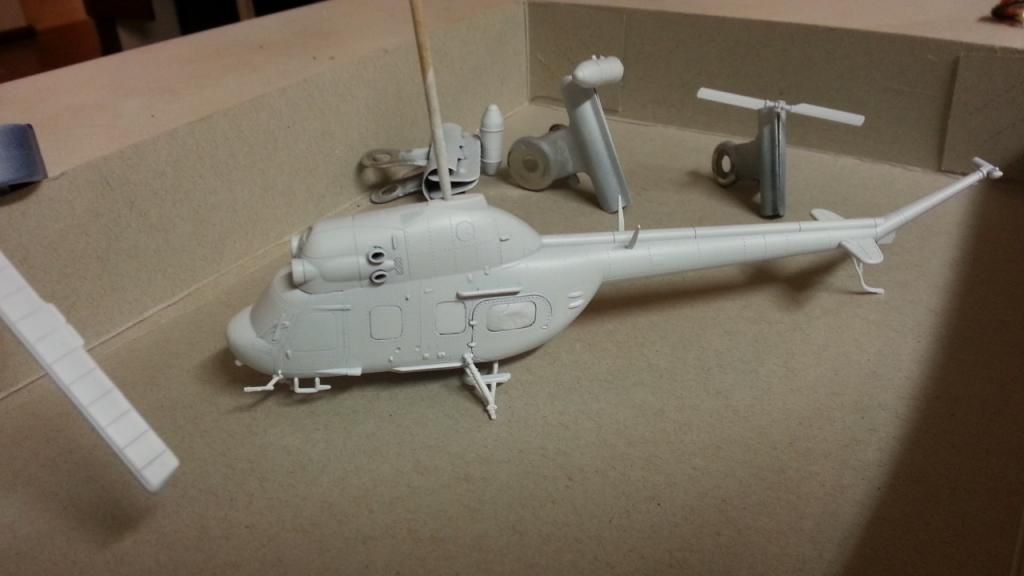 Following that, it was given a belting with Tamiya's AS-12 straight from the can. It ain't perfect, but it will do just dandy for my metal base colour for which to build the camo colour onto. Mmmm, shiiiiiiinyyyyy.. 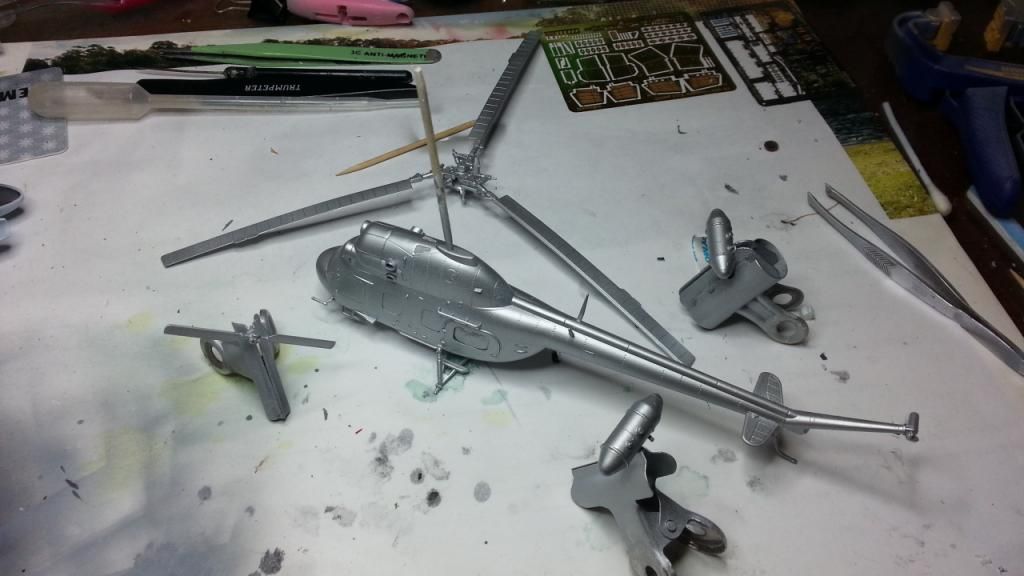 So there you go! Not too much done, but forward progress is better than none!!  Cheers 'til next time!! Sam  |
|
|
|
Post by Leon on Mar 5, 2014 3:35:18 GMT -5
Venom this is coming along a treat buddy.Looking really good.   |
|
|
|
Post by deafpanzer on Mar 5, 2014 8:00:27 GMT -5
 So shiny... so pretty! |
|
|
|
Post by wbill76 on Mar 5, 2014 21:07:29 GMT -5
Nice to see this one moving again Sam! Nice and shiny!
|
|
venom1
Full Member
  
Member since: October 2012
Posts: 1,369
Oct 10, 2012 2:40:03 GMT -5
Oct 10, 2012 2:40:03 GMT -5
|
Post by venom1 on Apr 28, 2015 3:16:53 GMT -5
Well folks, after more than a year of neglect, this old girl is finally up and running again! Yes it's been a long time, but I know we all have our fair share of shelf queens, so I don't feel tooo guilty!  Ennyweigh, on with the show.... As I said waaaaay back at the start, the aim is basically for this to be an abandoned bird. With that in mind, I used the Ammo chipping fluid then painted the base colours with the series of AKAN paints devised specifically for Russian helicopters. I then lightened up the base colours and laid down some further weathering to the paintwork. Once finished, I began chipping away the paint with a toothpick and a stiff brush. That left us here... 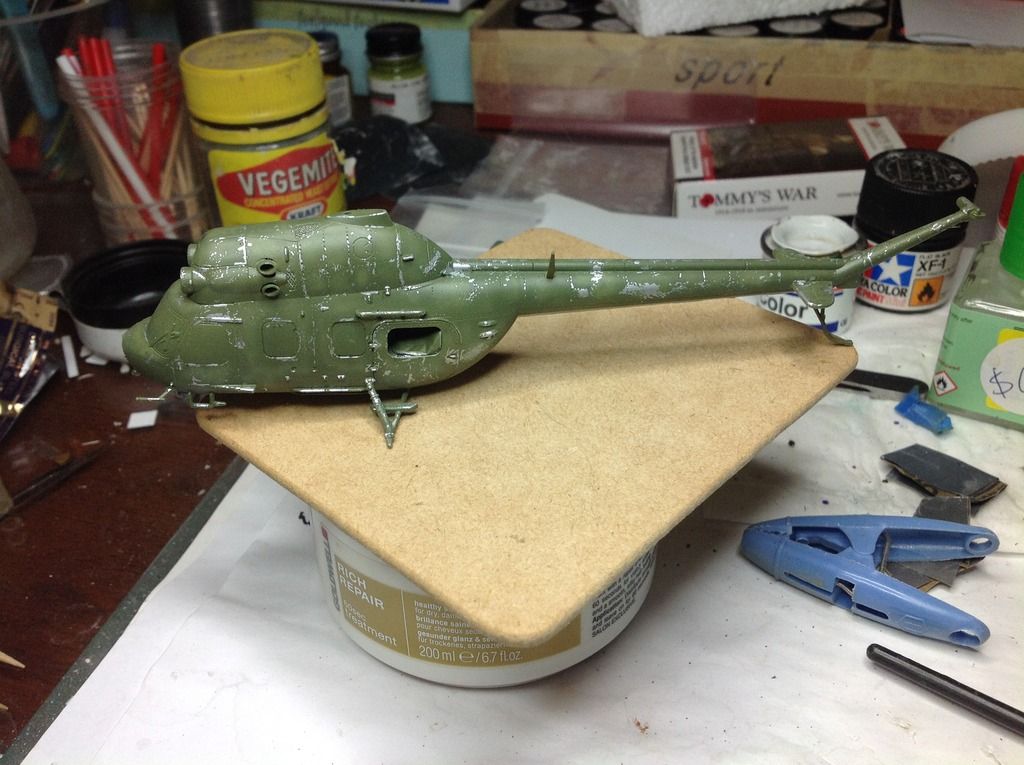 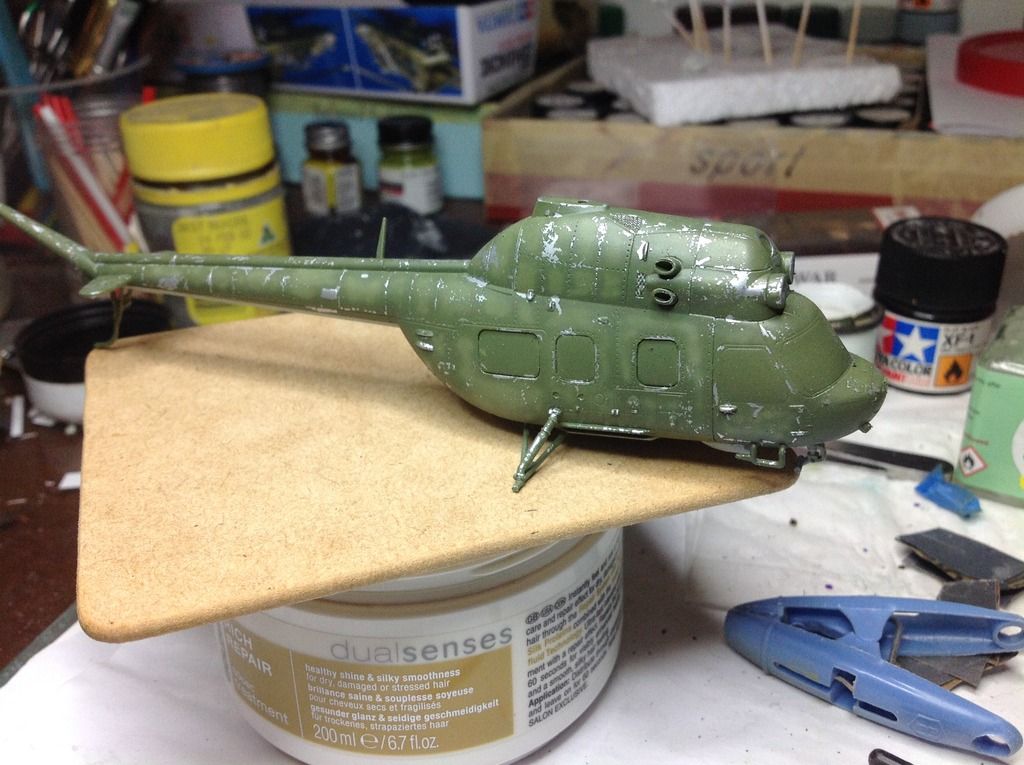 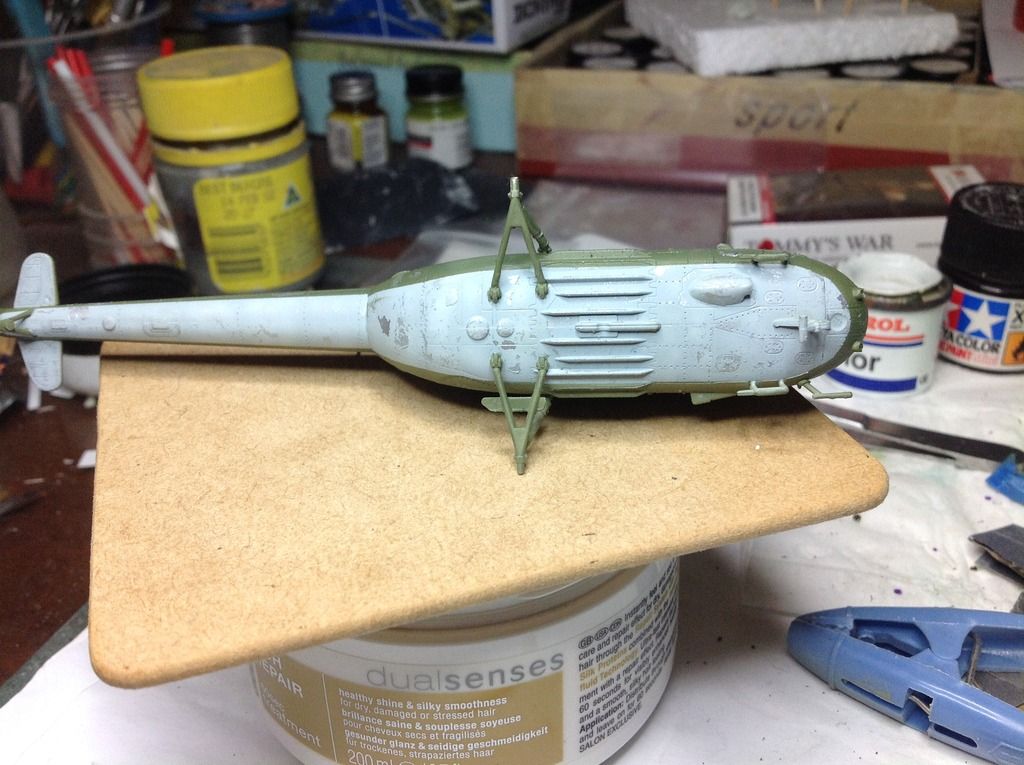 The next hurdle was the decals. Luckily there wasn't too many to contend with, and they all went down without a hitch. I laid down a couple of layers of Future before placing the decals to give them a nice glossy surface to adhere to... 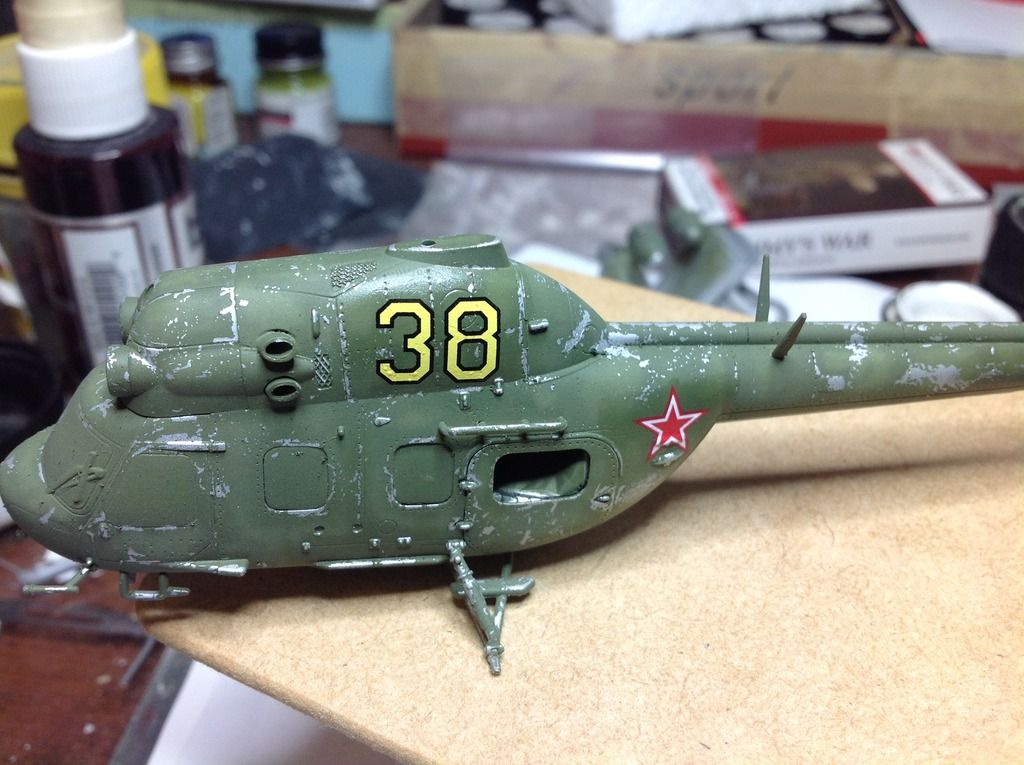 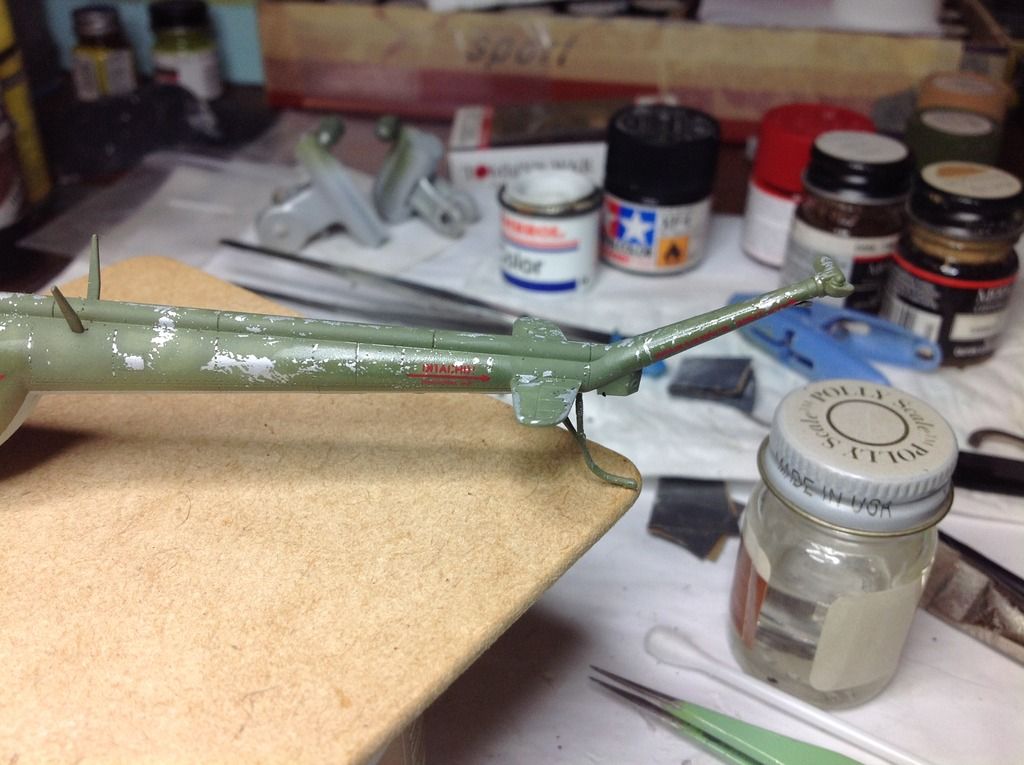 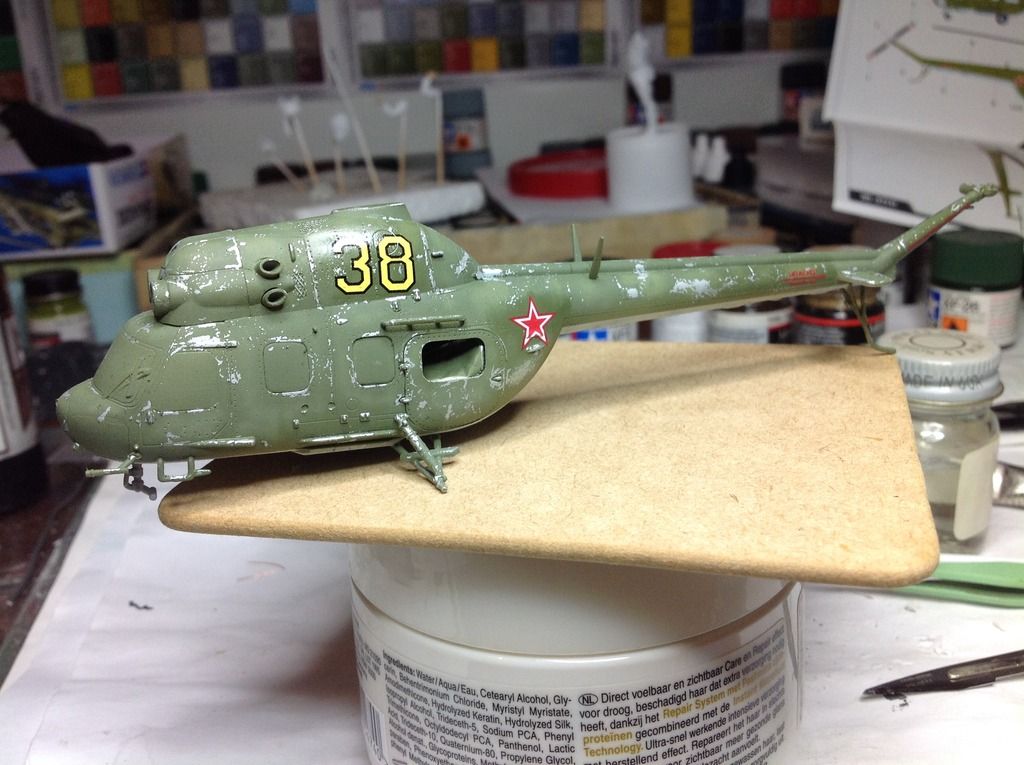 Obviously they needed to be chipped and weathered as well. Can't have them looking all shiny and new! I really wasn't sure how to do it, but decided I would try simply sanding them down with some fine wet and dry and see how that went. Was pretty nervous about it (only get one shot at this!) but in the end it worked a treat!  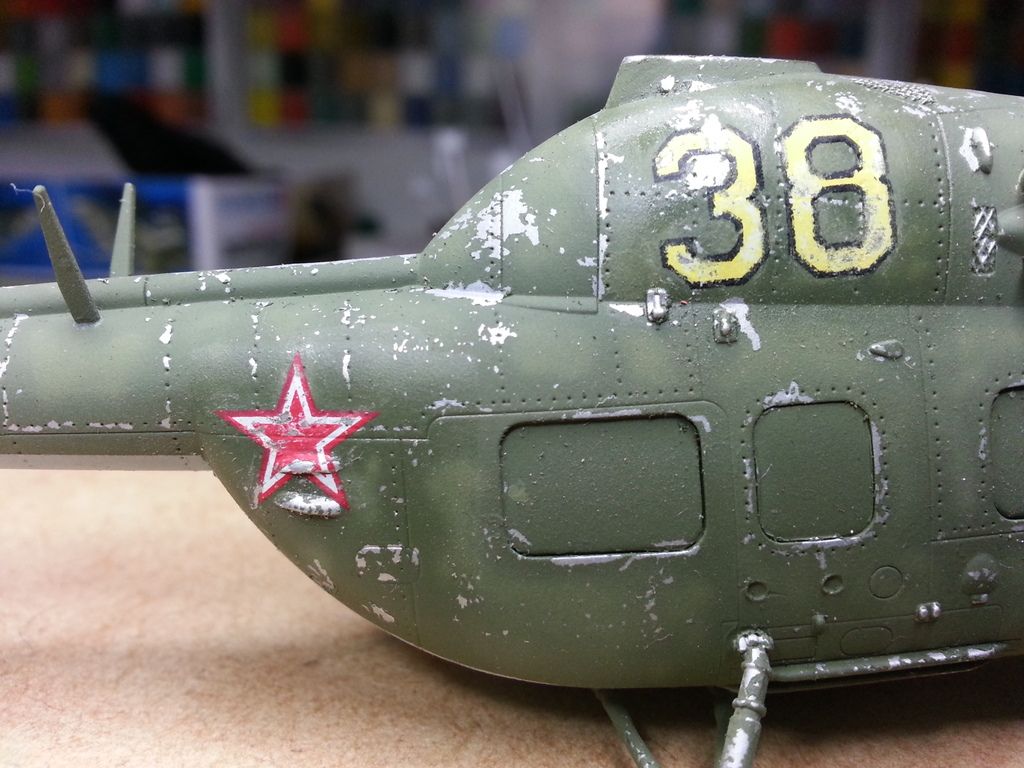 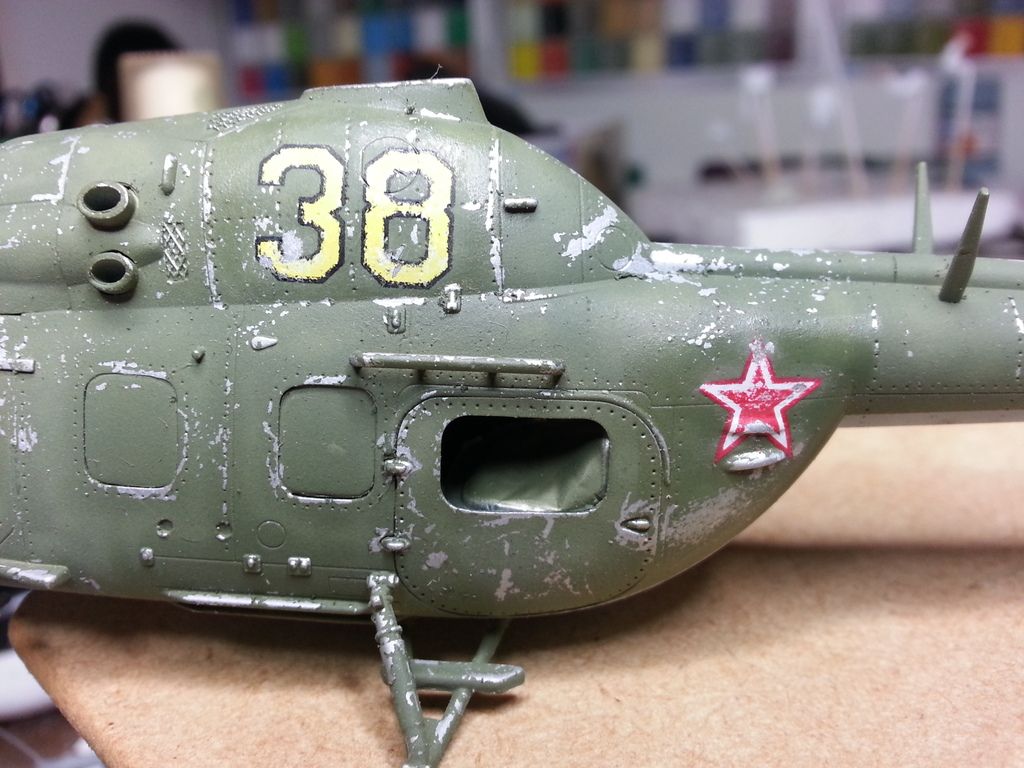 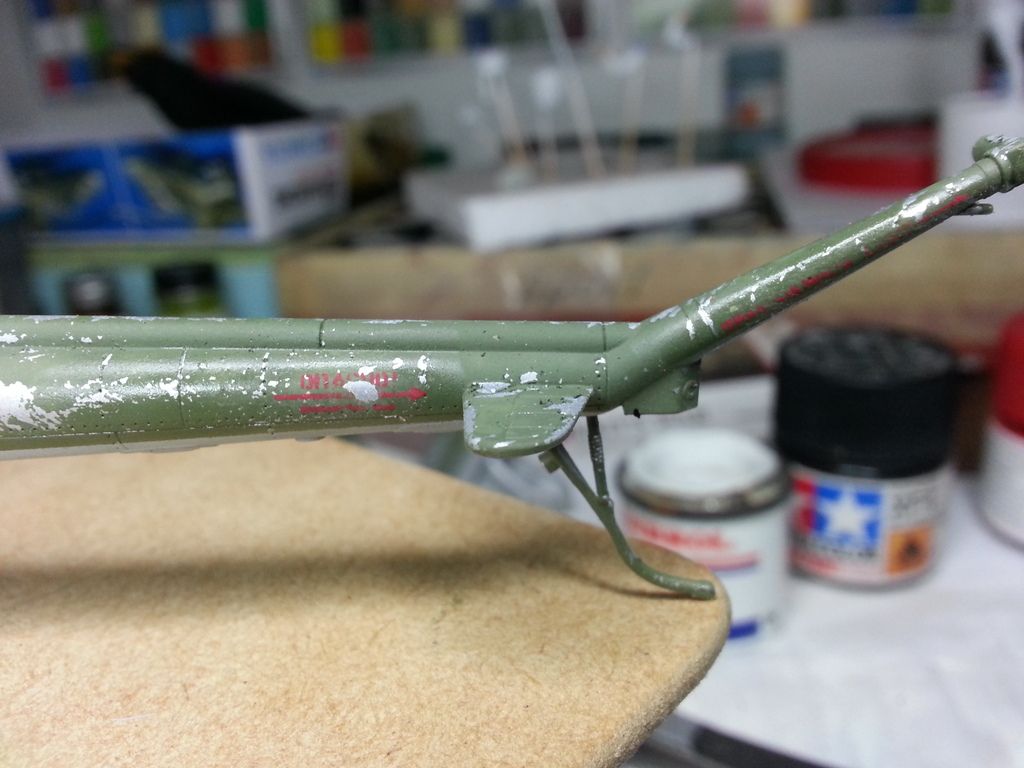 After that I sealed them in with more Future then hit them with a flat coat. Viola!! 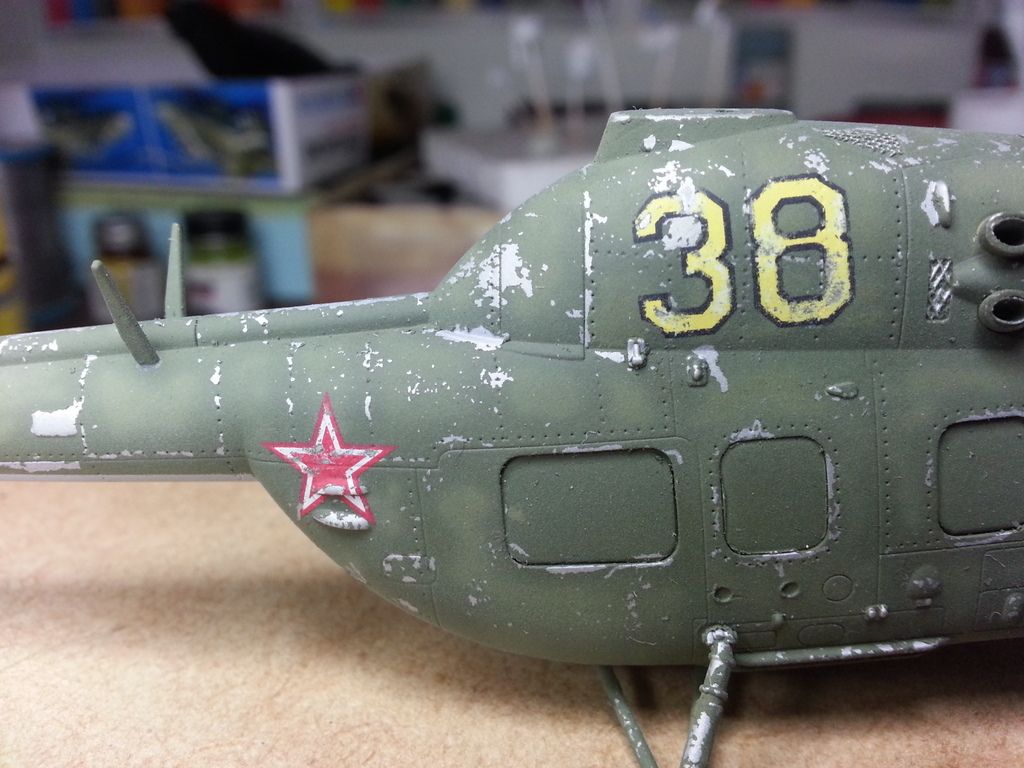 Next up was some oil weathering to add further variation to the paint colour and add to the aged look. A slight variation on my usual method was that I streaked the oil dots vertically instead of in circles. Came out looking pretty good.  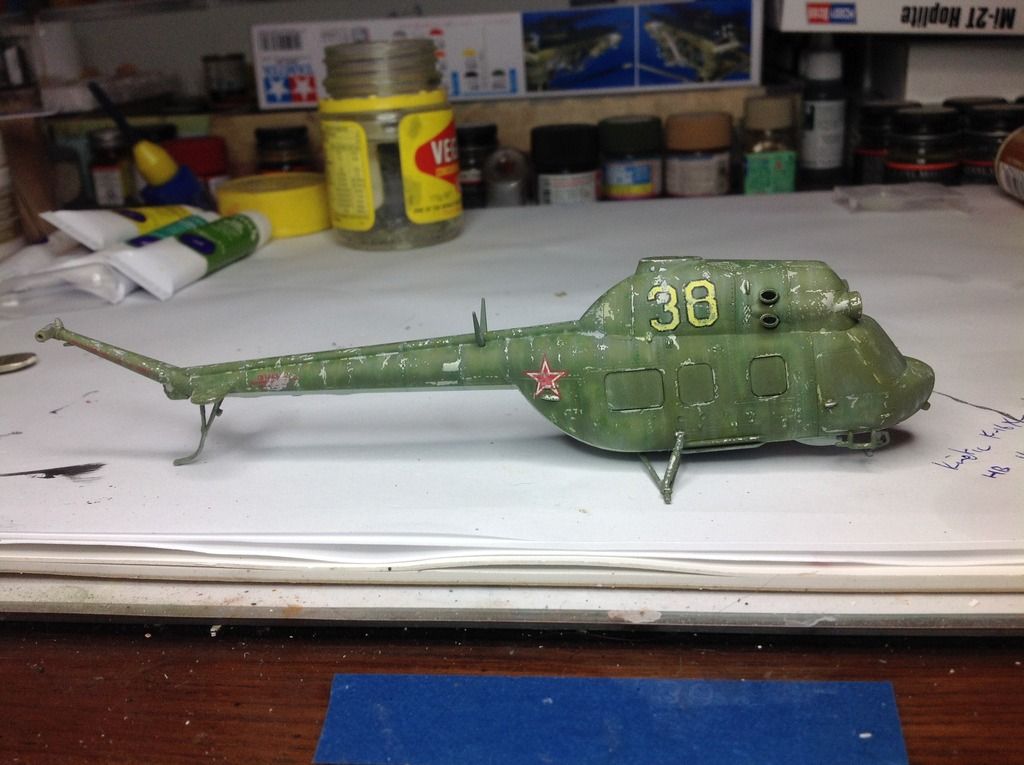 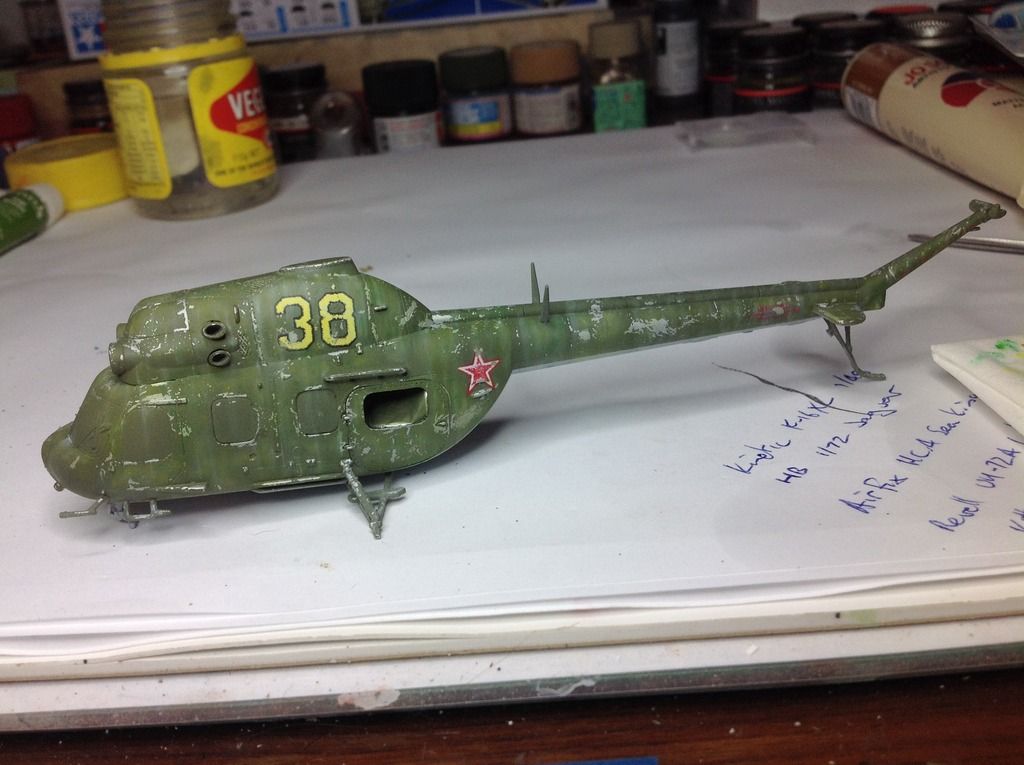 Next up was the removal of the masking. Got to say I was a bit apprehensive as I had used Bare Metal Foil and it had been in place for well over 12 months! Was pretty difficult to get off (came off mostly in small flakes rather than large pieces) but in the end it all worked out with muchly goodness!! The windows were a but marked but I was not overly concerned as the glasswork would all be misted up anyway. I also used my Ammo PLW sets to bring out the panel lines and rivet detail while I was at it.  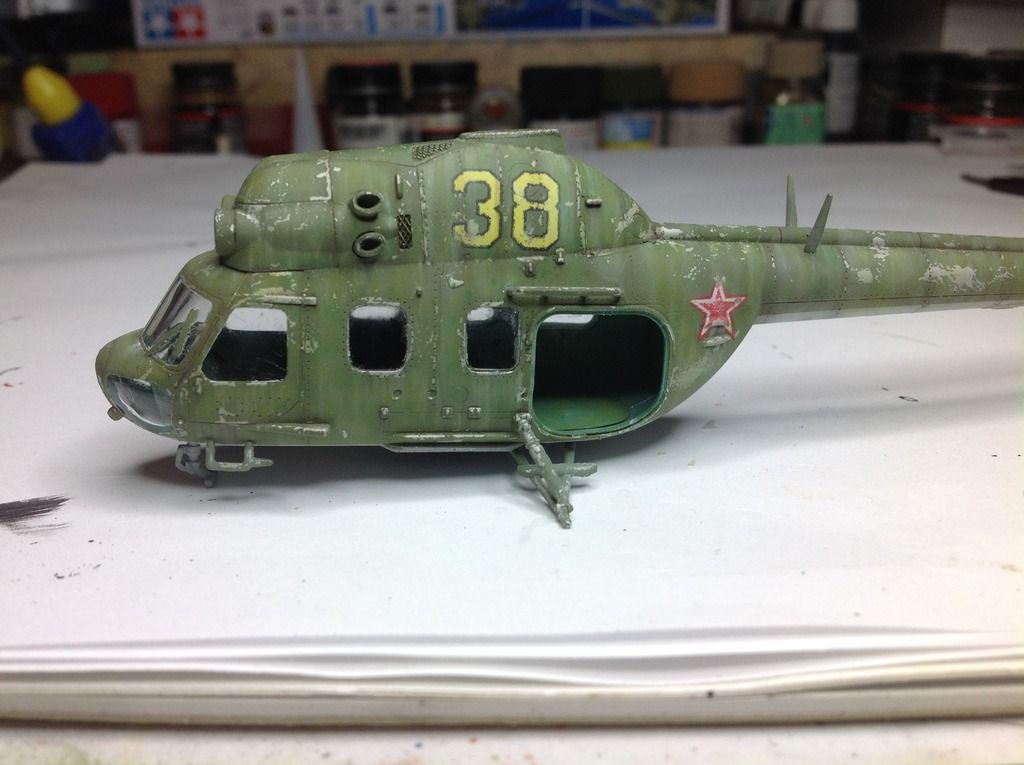 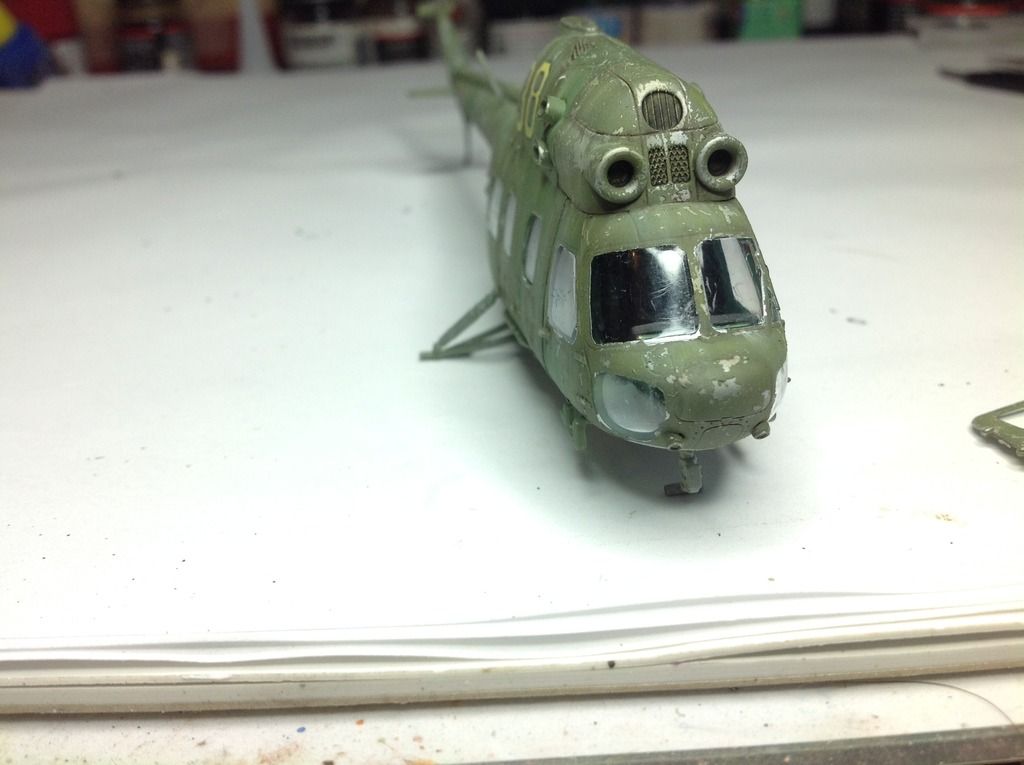 Next up was a flatcoat across all the glasswork to give it some extreme aging like the rest of the airframe. A decent coverage of Gunze Sangyo Clear Flat did just the trick! While I was at it, I drilled out the overly thick exhausts and then hand painted them with Model Master Metalizer Exhaust (funnily enough!). 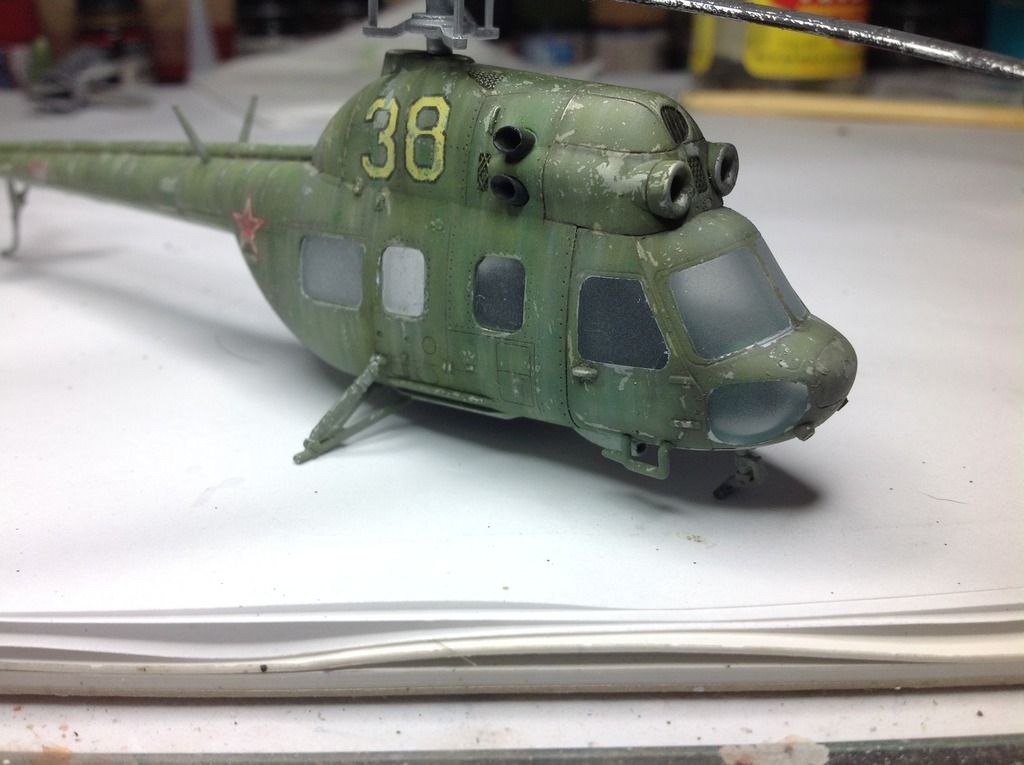 The main rotor was masked, and it and the tail rotor were pained flat black with dark grey highlights and then chipped to billy-o. The results were pretty good.  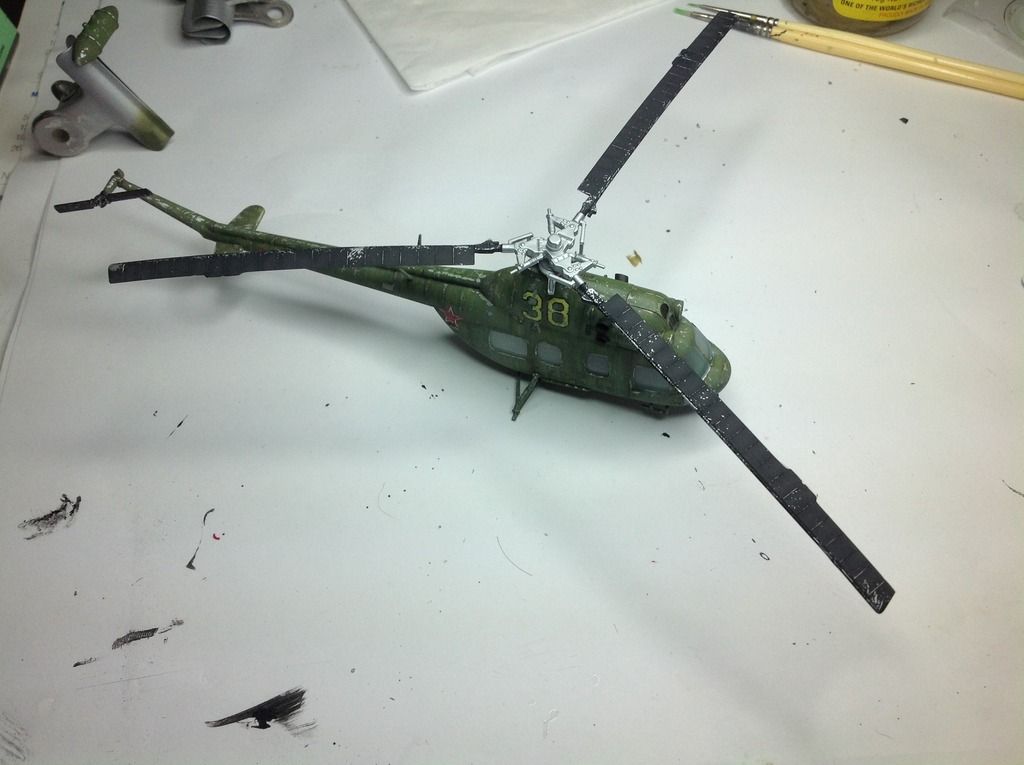  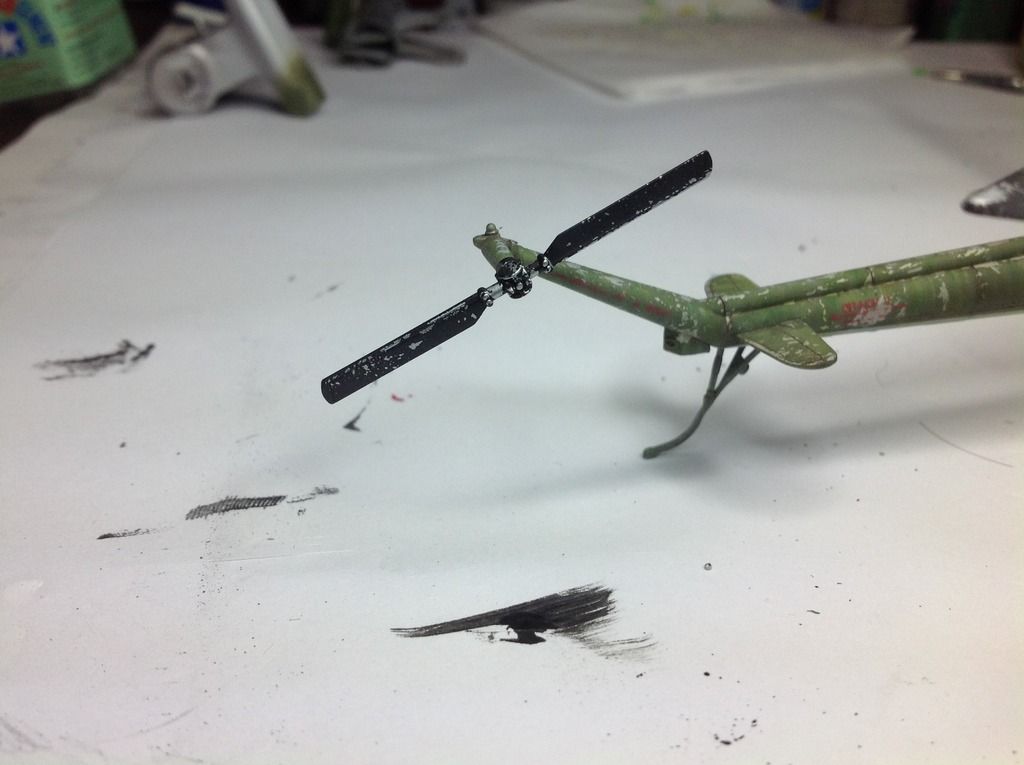 Once they were done, I got stuck into further weathering with more of the Ammo PLW goodies. I think I used the engine set for this, I think the oil is particularly convincing, don't you? I also did a wash around the glasswork to blend it in... 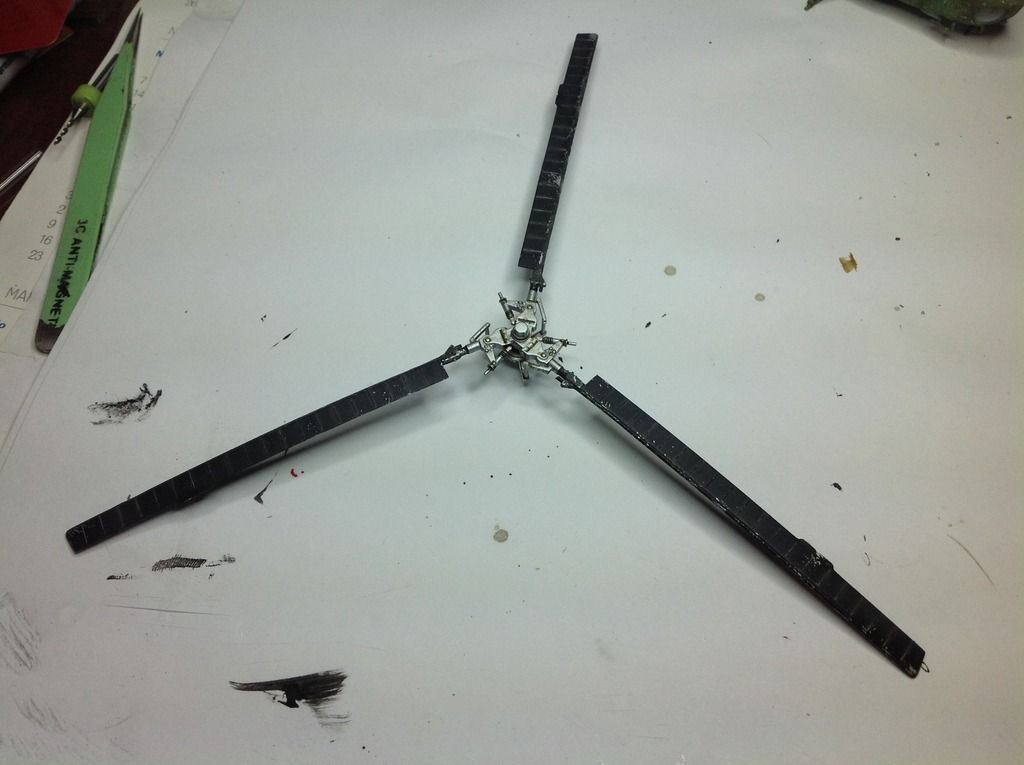 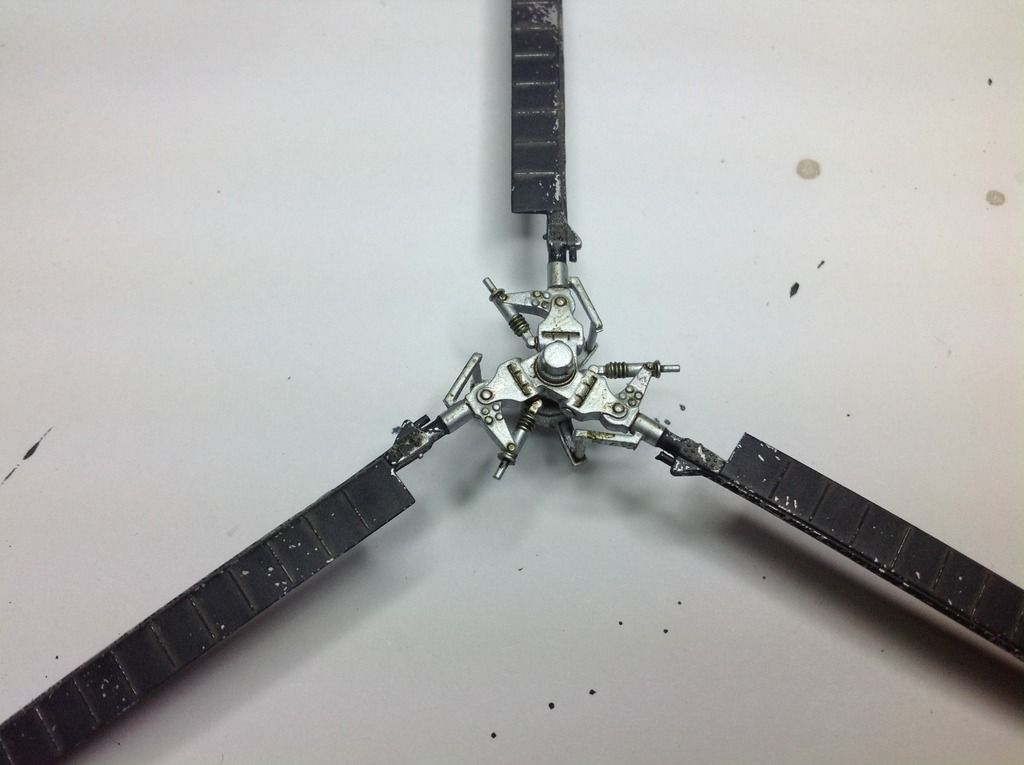 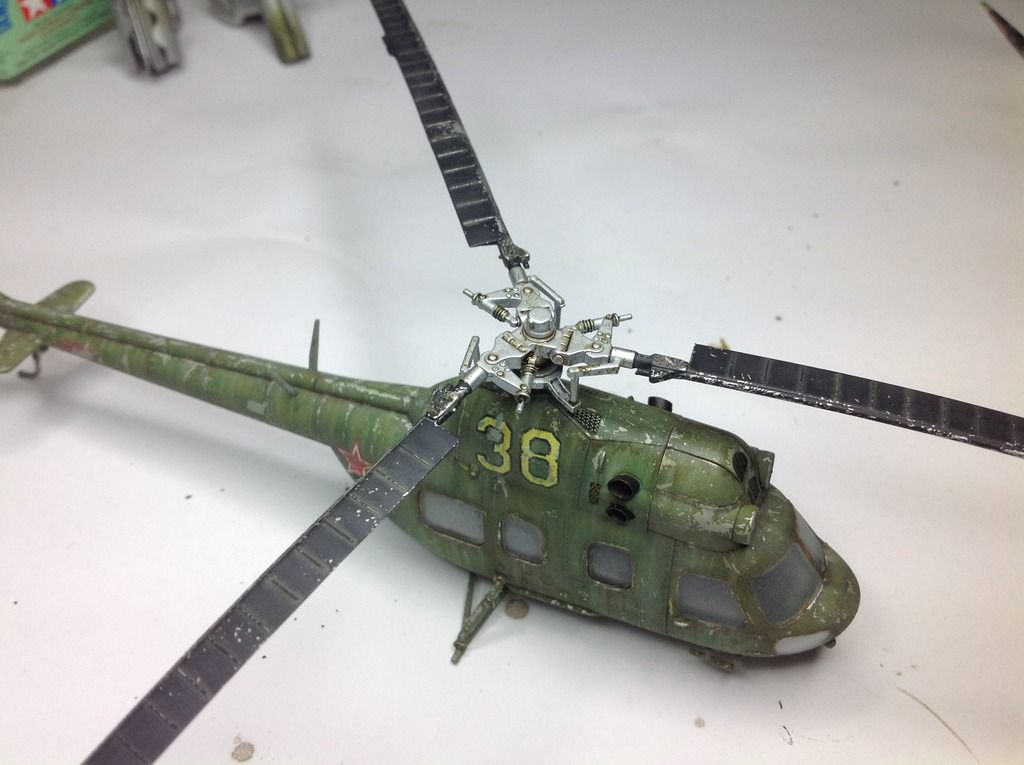 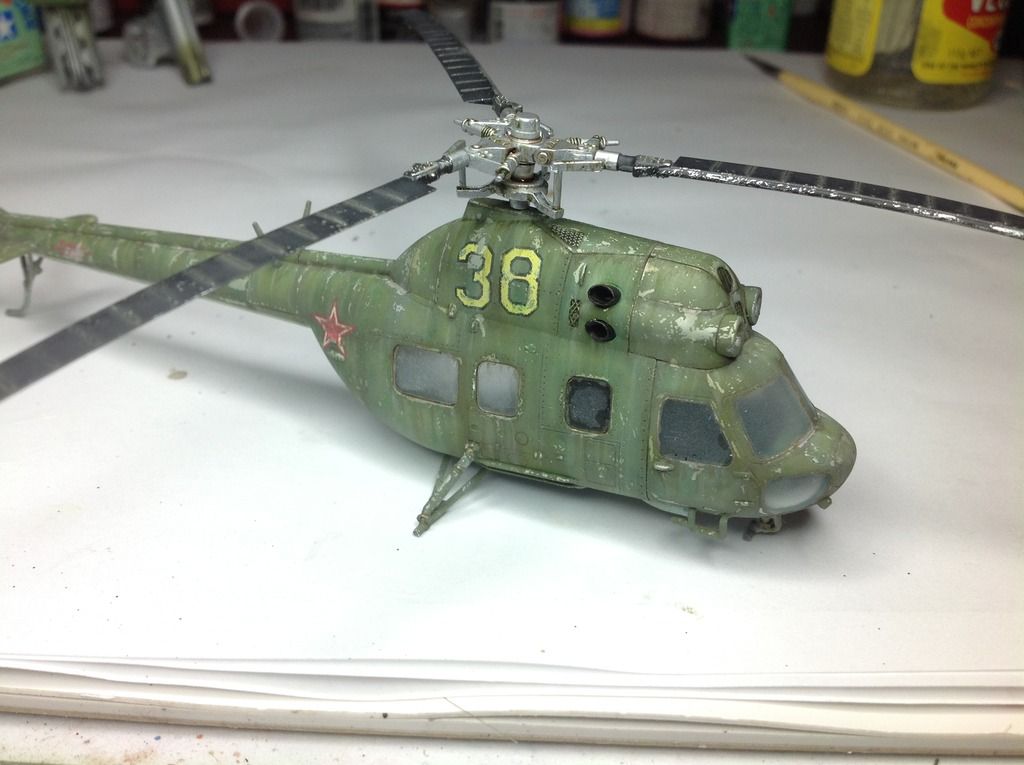 With that done, I decalled and weathered the tail rotor stripes... 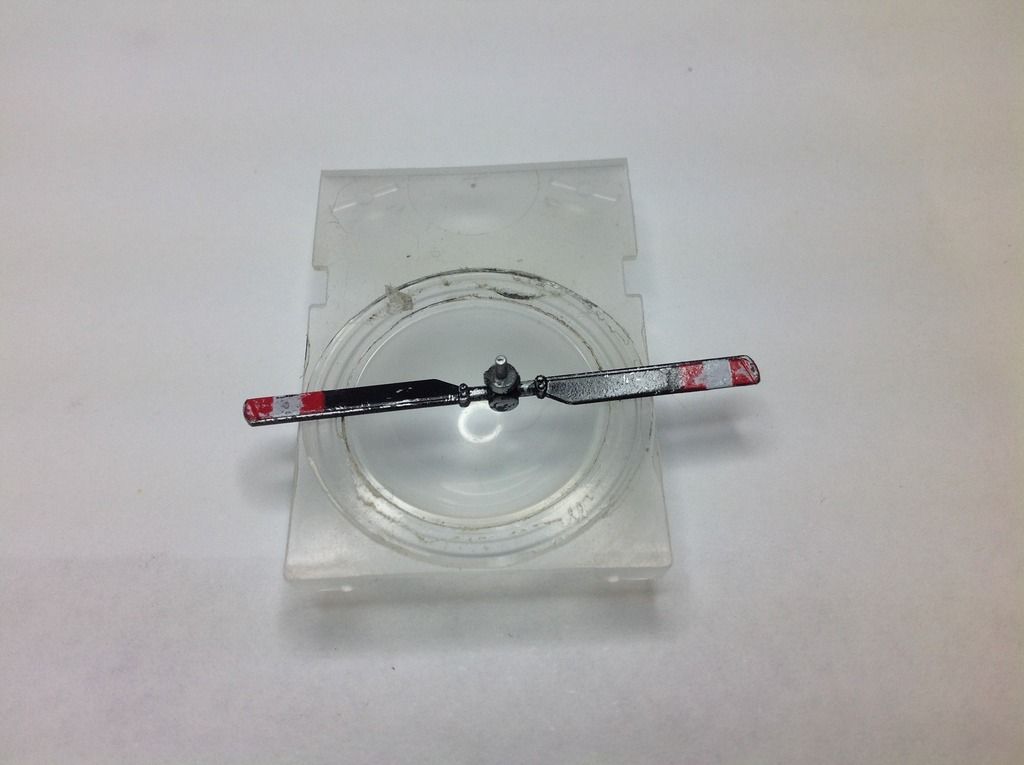 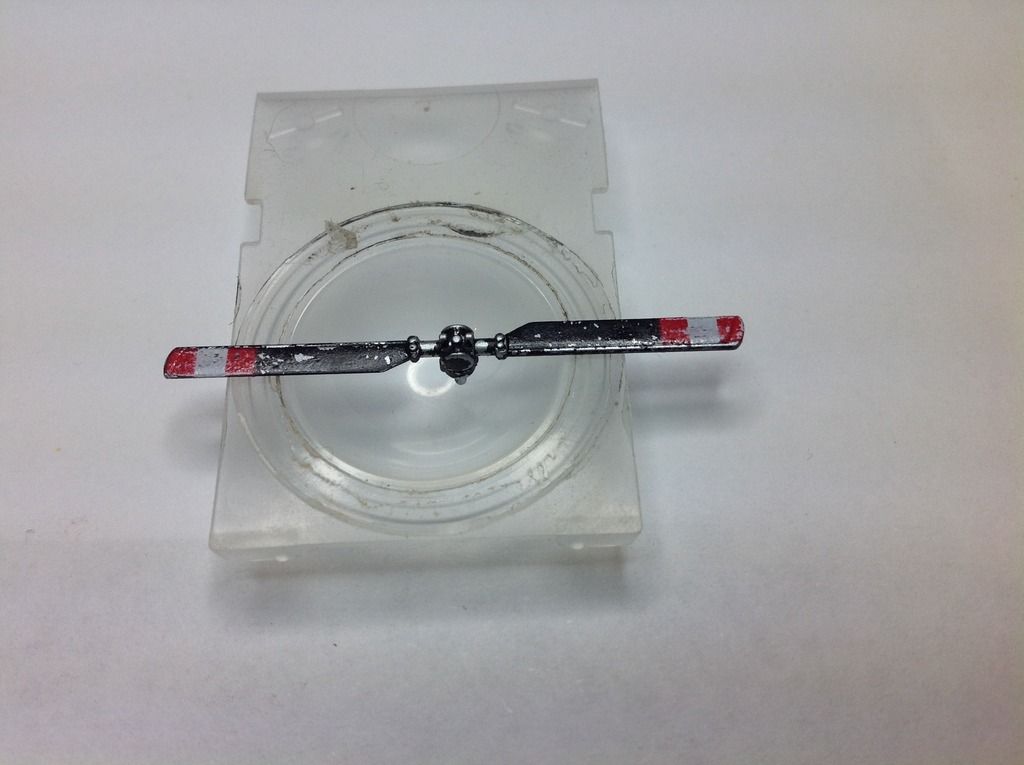 With not much left to do on the airframe, I decided to set about making a base to show this baby off. Standard pre-made base from the local hardware store, spray painted with a metallic colour rattle can, and printed out a suitable piece of Russian tarmac gives me this.... 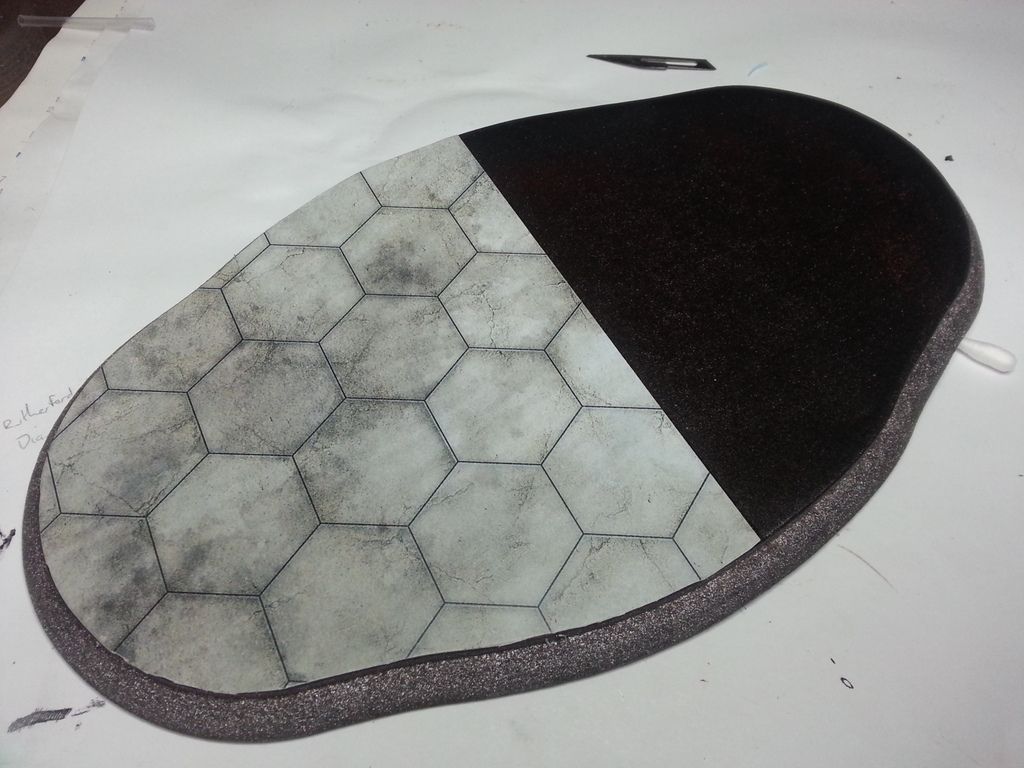 I then painted the earth area brown, and glued down a few "large rocks". 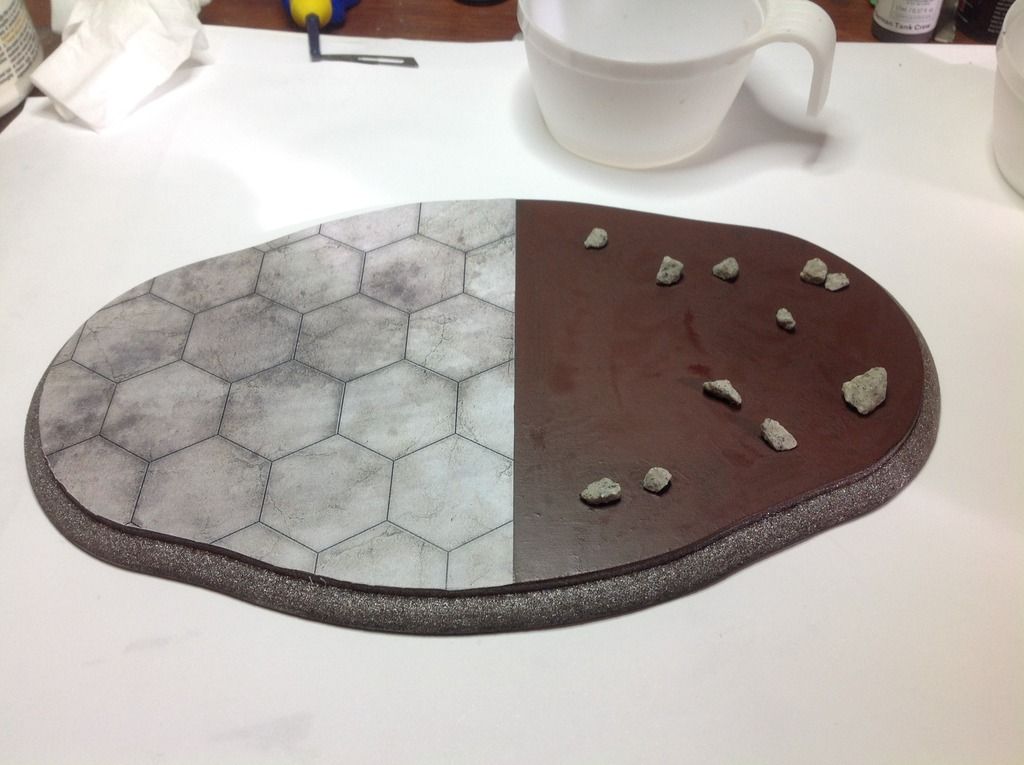 I then added my standard pre-coloured kitty litter grades of earth to the base, which was further weathered to give me this... 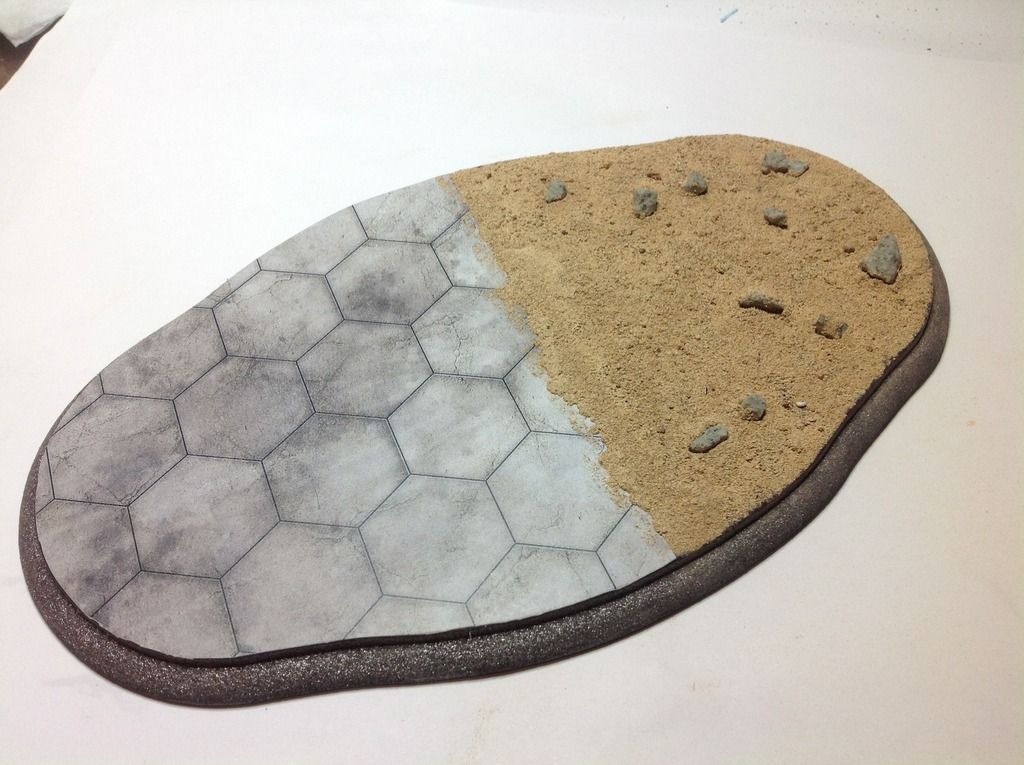 And this is where we are currently at. Tyres have been overly flattened and glued to the airframe. She is currently just sitting on the base at the moment, not fixed yet. Still have some work to but we are getting there. Want to add a lot of grasswork to the earth section, plus I would like to do lots of weeds growing up through the cracks. Want this thing to look completely forgotten! Still not sure exactly how to achieve weeds in the cracks but I'll.... ummm.... have a crack!!  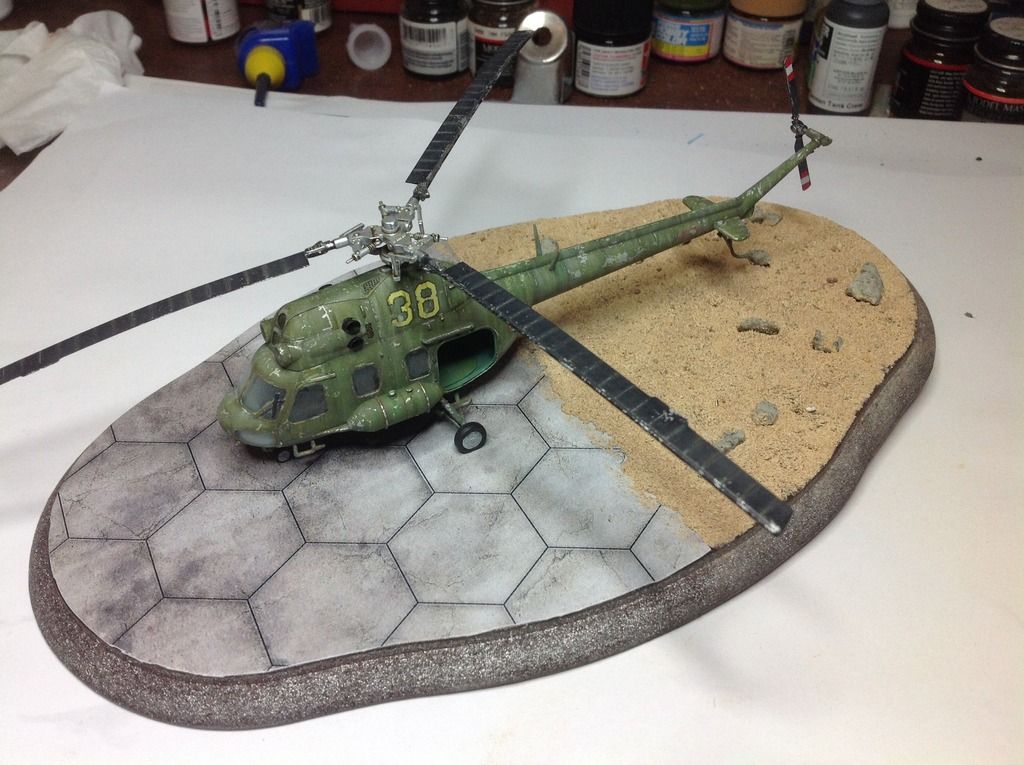 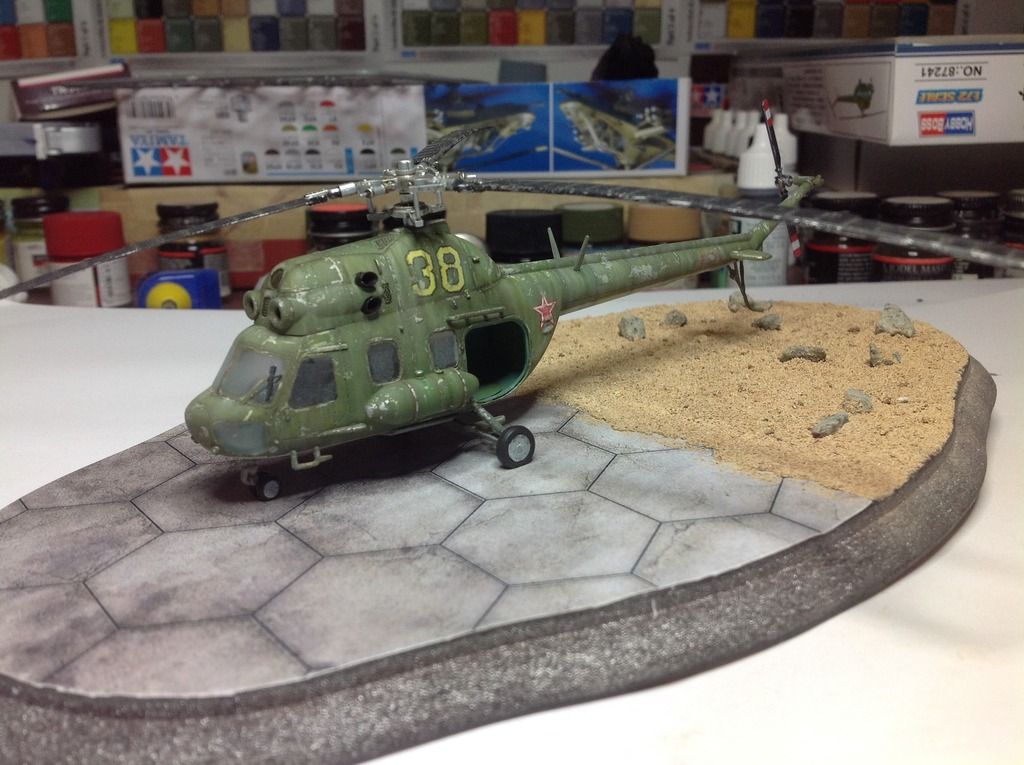 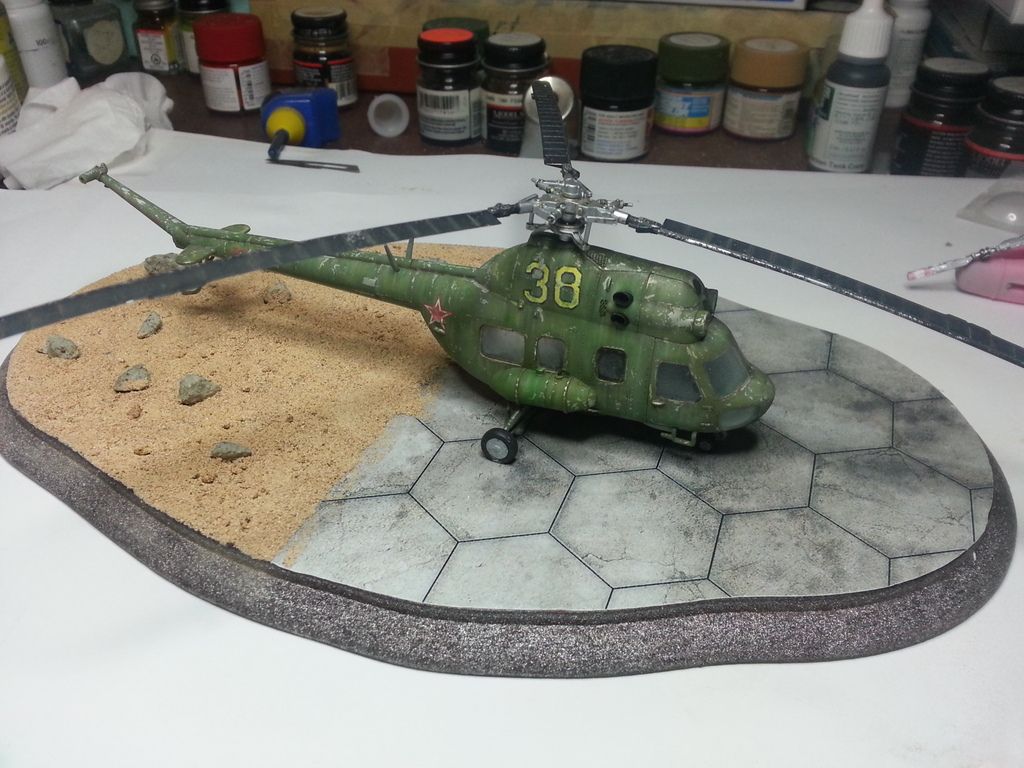 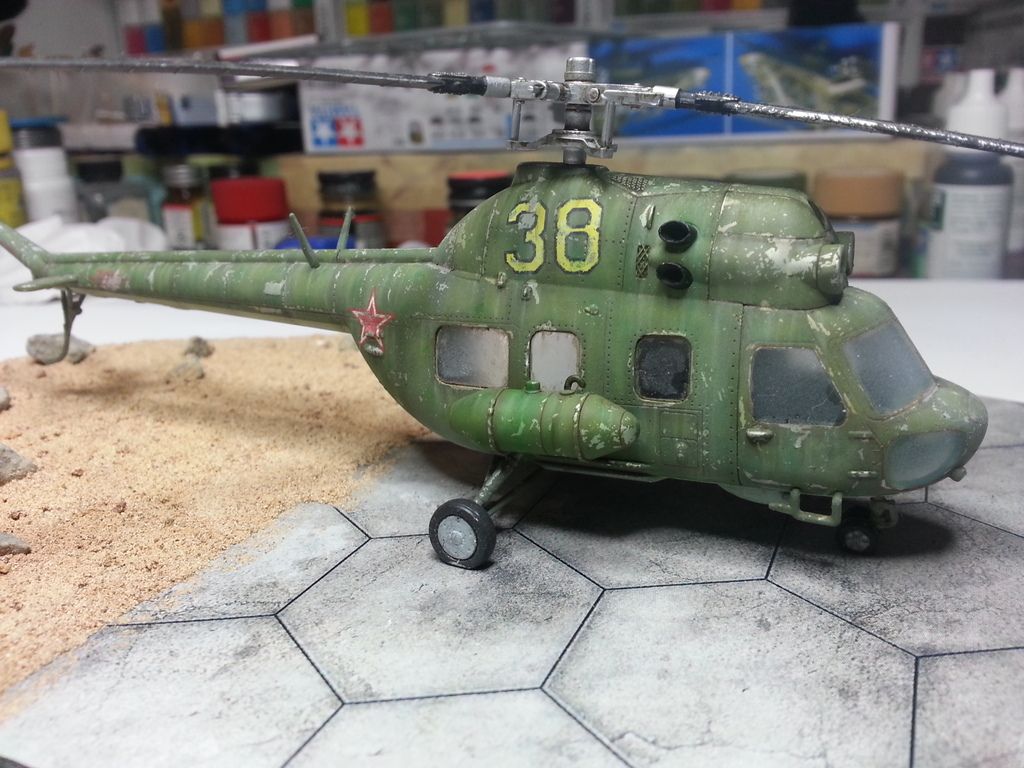 OK folks, well there we are. A long one, but hopefully a good one! I will try not to take too long to finish it, I want to have it done for the Nationals in Melbourne in June so it needs to be finished before then! Hope you like!!  Cheers, Sam  |
|
|
|
Post by Leon on Apr 28, 2015 4:36:07 GMT -5
WOW!!!!! Sam you've made some awesome progress.Chipping and weathering look fantastic.Looks like you captured the abandoned look perfectly.   |
|
|
|
Post by deafpanzer on Apr 28, 2015 9:48:37 GMT -5
HOLY COW! I love the chipping job... now it looks so Soviet!
|
|
|
|
Post by Deano on Apr 28, 2015 14:39:41 GMT -5
Great work Sam , always luved the weather beaten look !
|
|
madairbrush
Full Member
   November 2012 MoM Winner
Member since: May 2012
Cheers!! Matt
Posts: 488
May 30, 2012 14:22:05 GMT -5
May 30, 2012 14:22:05 GMT -5
|
Post by madairbrush on Apr 28, 2015 15:29:58 GMT -5
Great work, especially the chipping and weathering effects are fantastic.
|
|
|
|
Post by wbill76 on Apr 28, 2015 16:21:52 GMT -5
Very impressive effort so far on this one Sam! Love it!
|
|
venom1
Full Member
  
Member since: October 2012
Posts: 1,369
Oct 10, 2012 2:40:03 GMT -5
Oct 10, 2012 2:40:03 GMT -5
|
Post by venom1 on May 1, 2015 8:47:19 GMT -5
Leon - Thanks so much mate, I'm pretty happy with how she is turning out so far! Andy - She sure does mate! Deano - Thanks bud, me too! Matt - -Well thank you kindly, good sir! Bill - Glad you like it buddy! Well I don't have any progress on this to speak of, but I did have some groundwork goodies come in the mail today so I will be setting off on my Russian adventure once again!  Cheers, Sam 
|
|
venom1
Full Member
  
Member since: October 2012
Posts: 1,369
Oct 10, 2012 2:40:03 GMT -5
Oct 10, 2012 2:40:03 GMT -5
|
Post by venom1 on Jun 15, 2015 23:57:54 GMT -5
Well folks, my apologies for the lack of updates on this baby, but I was flat out getting it done in time for my trip to Melbourne for Model Expo the weekend before last. Now that that is done and dusted, I can finish this update! So, where were we?? Oh yeah, the base. This was a pretty drawn out affair for me, it was the first time I had done a base which was anything but flat grass or a straight piece of tarmac. It was a steep learning curve, but luckily I have a couple of good mates who have done this sort of groundwork business many times, so they threw me plenty of advice until I nailed it! I won't bore you with every step of the way, as many of you are very adept at this sort of thing already! Just a few choice photos to show the progression..... Here we have all the vegetation in place. As it comes from numerous sources, and the colours are just weird, it will all need a lick of paint. 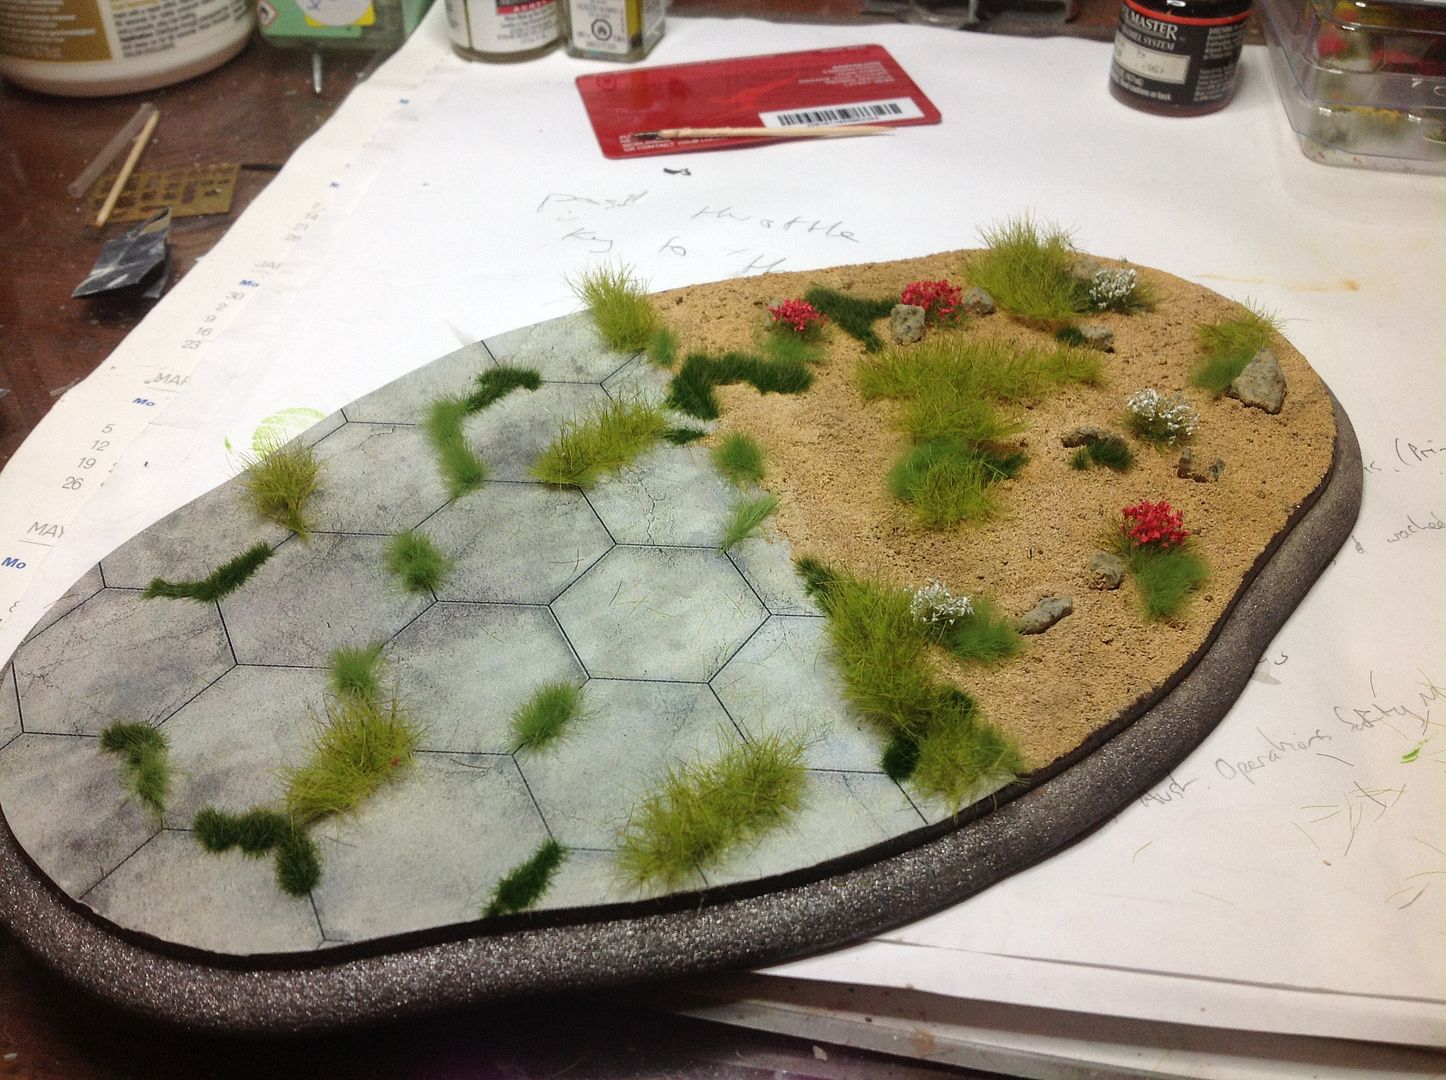 Bit of colour added.... 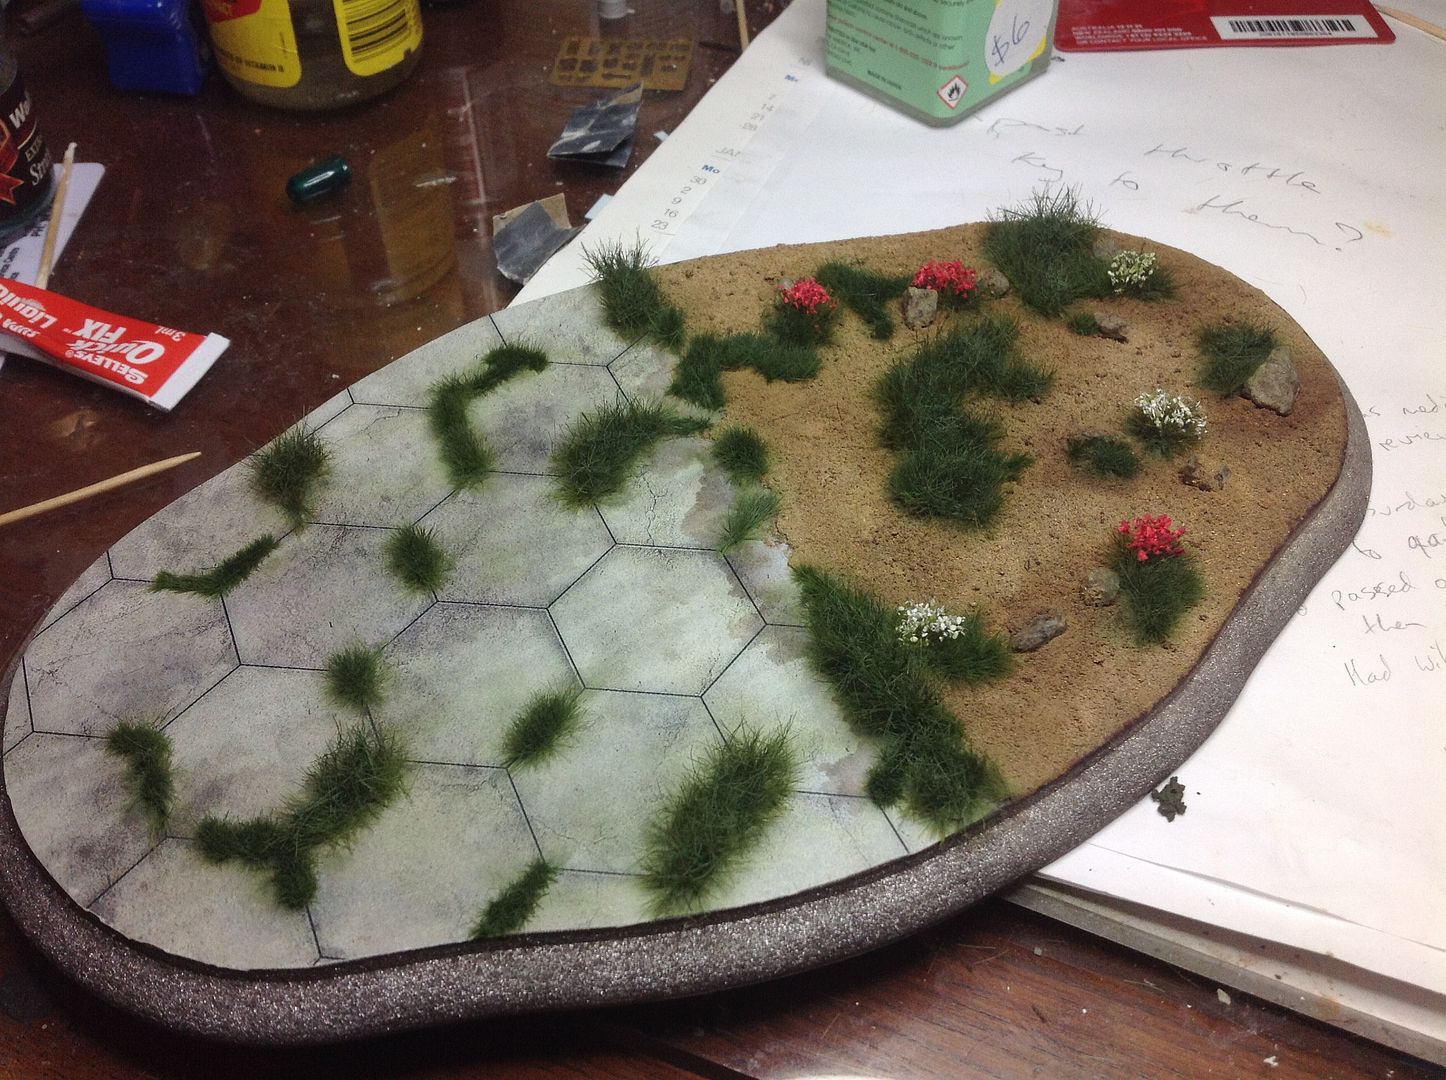 Weathering process about 3/4 of the way through. You can still see it needs more blending at the base of the bushes but we are getting there. You can also see some of the pigments I used in the weathering process. 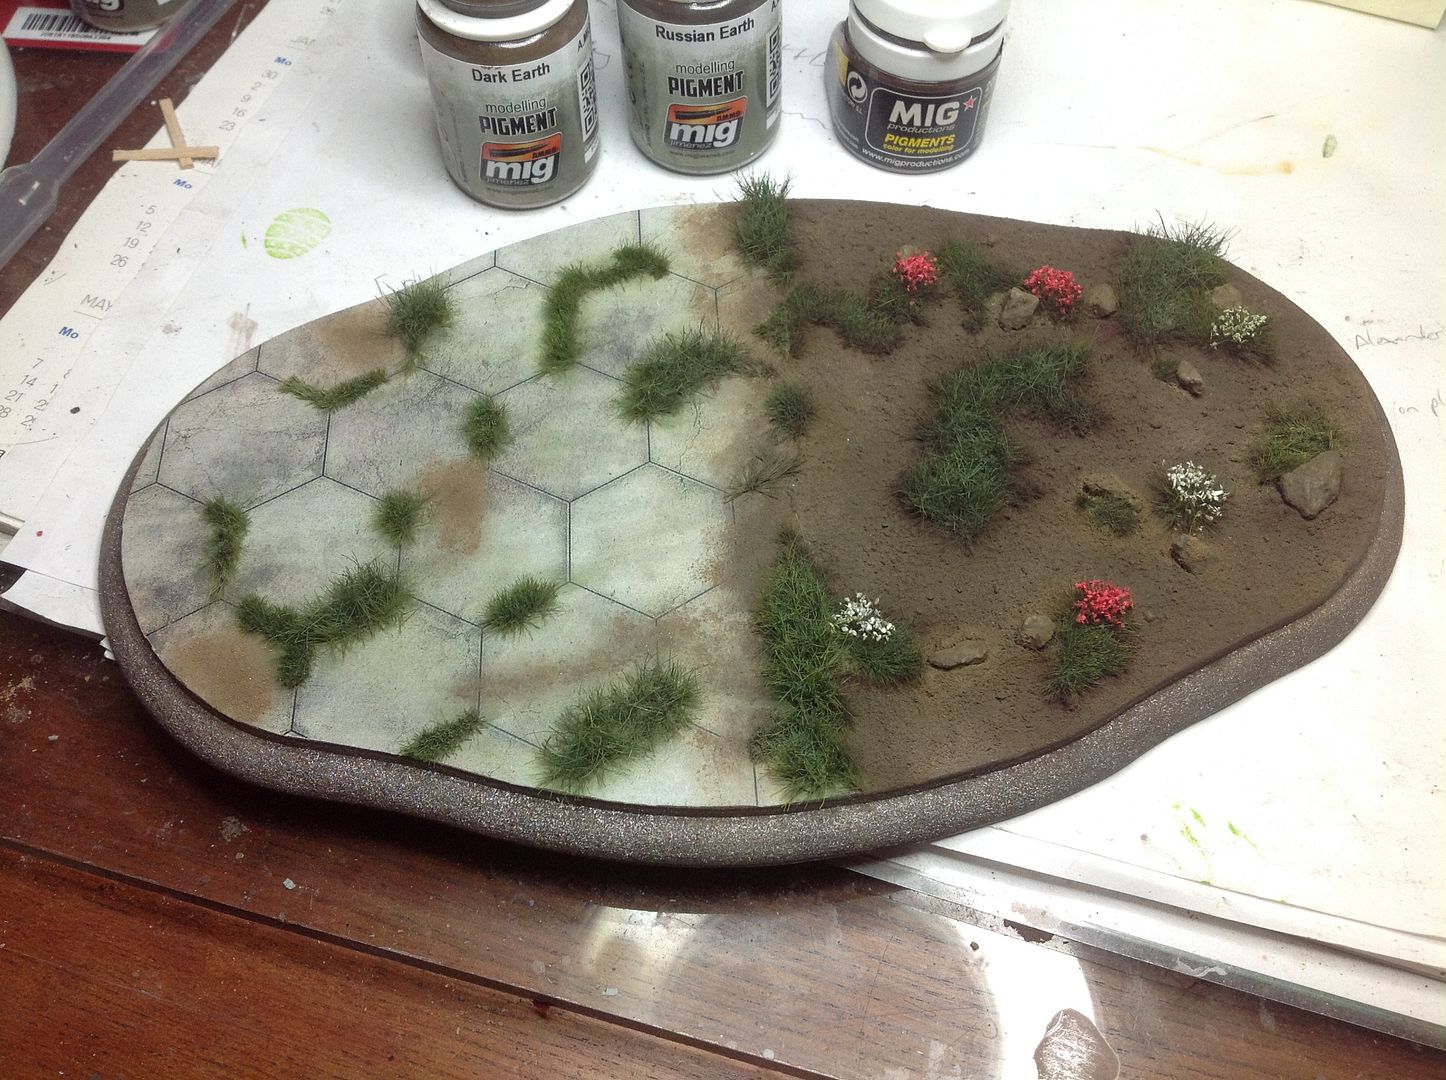 Next up was the drums. I decided to add one leaky one sitting on the tarmac, and one crushed one in the bushes. The next five pix show the painting and weathering process. The usual chipping fluid technique was done for the paint chipping. Mig pigments for the rust. Drums are from Black Dog. 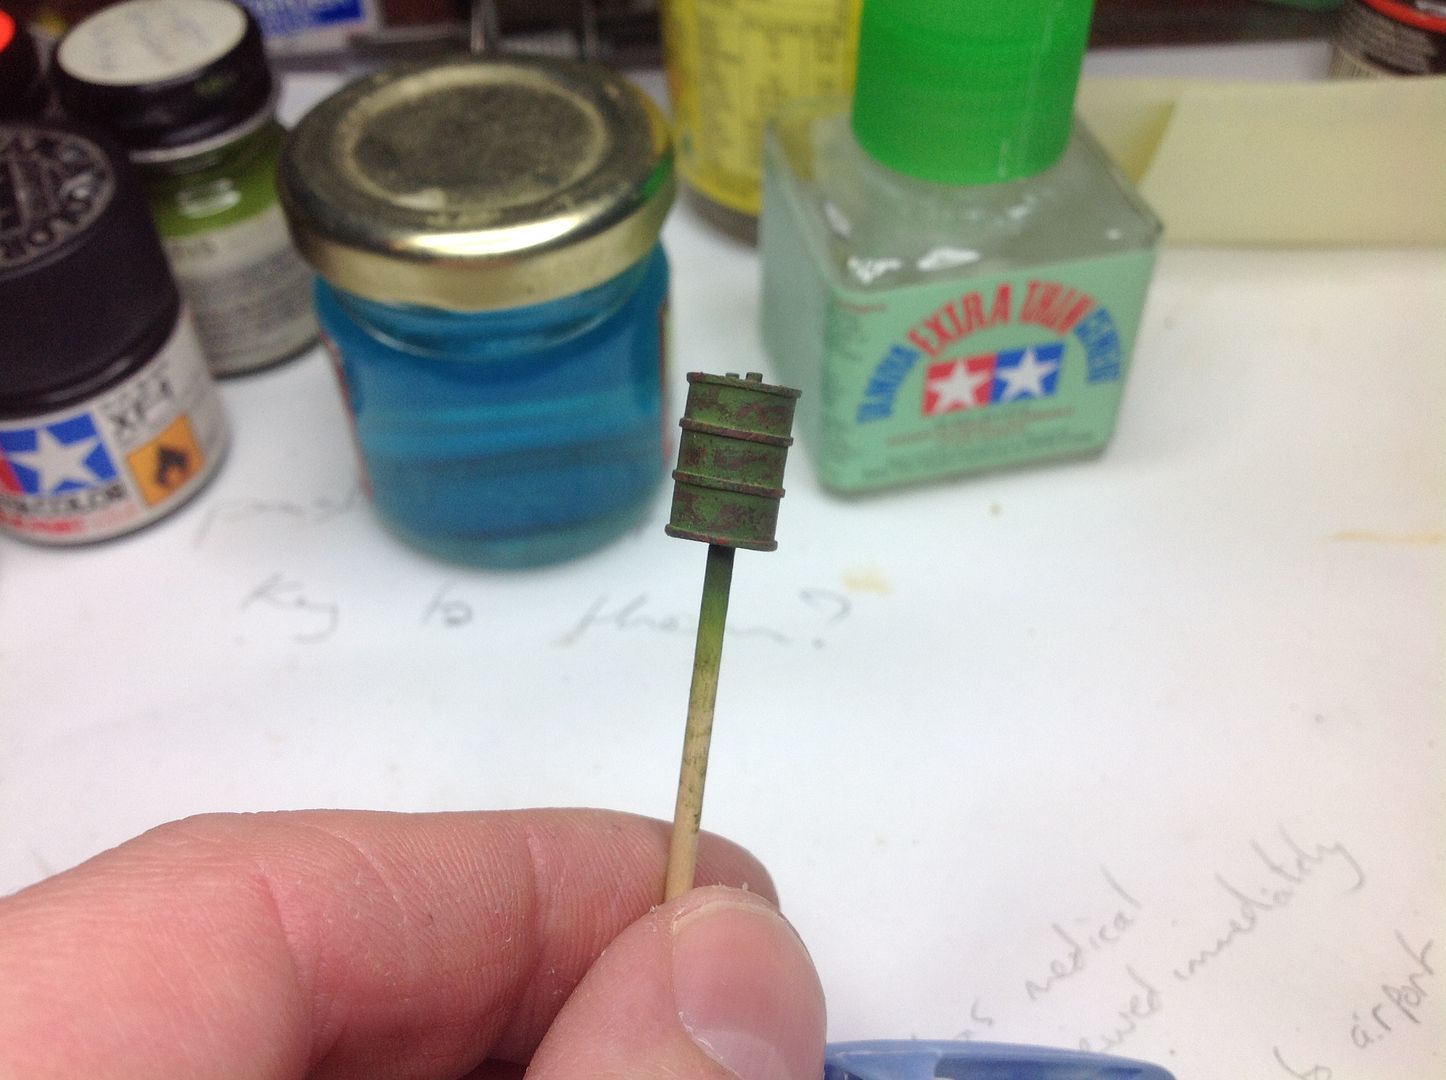 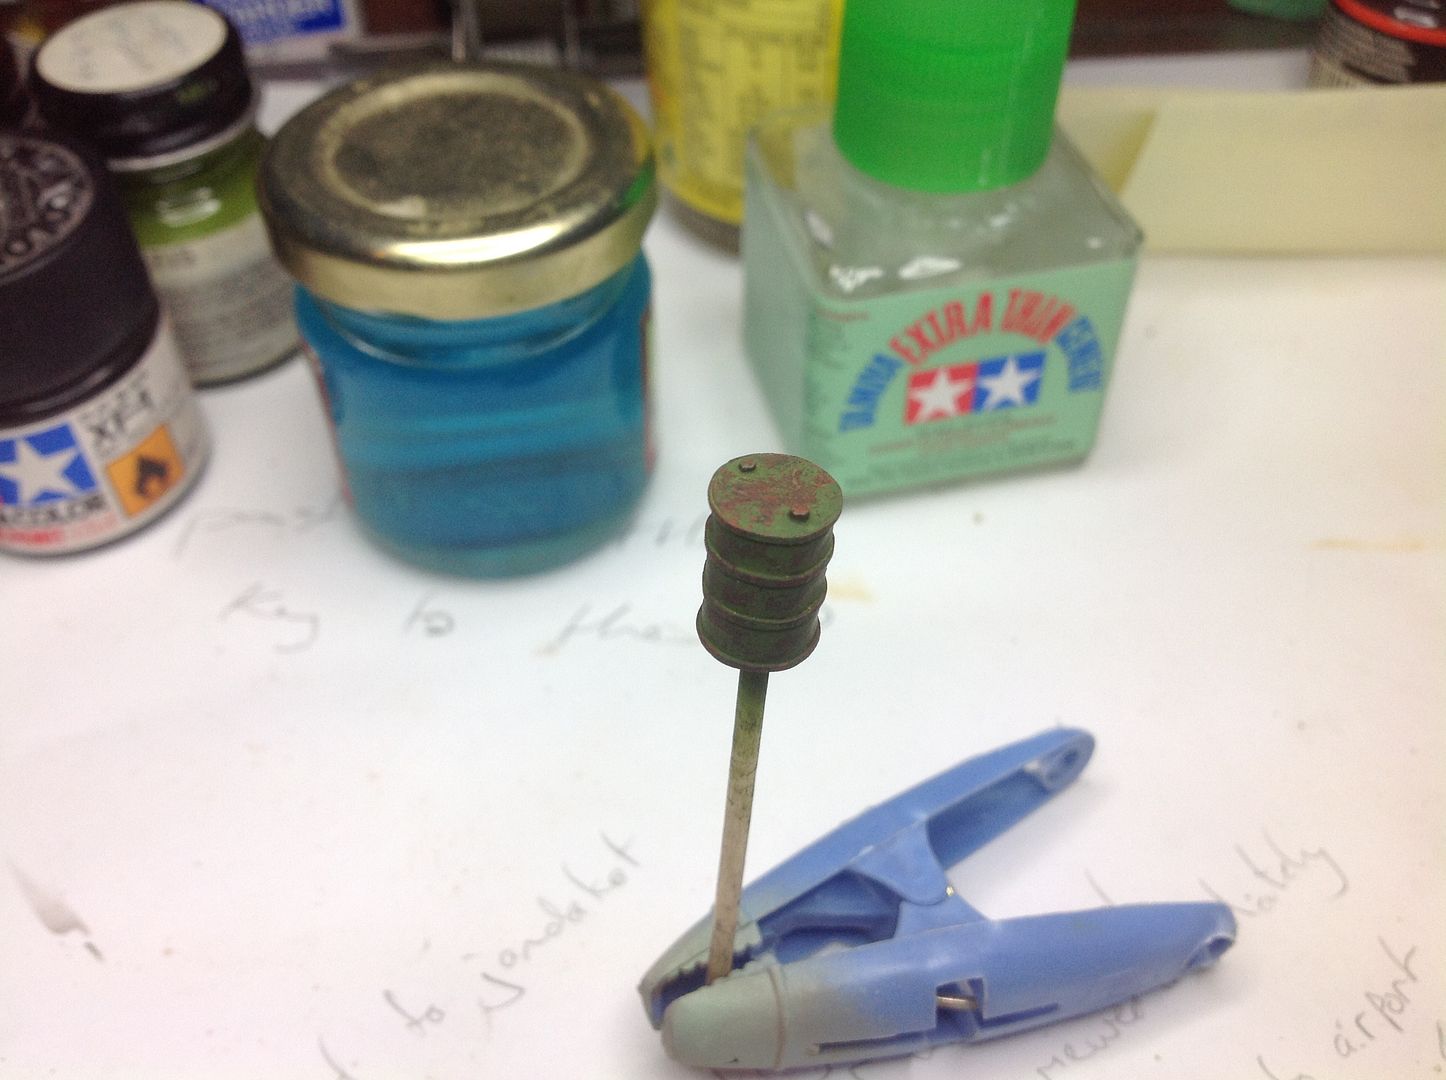 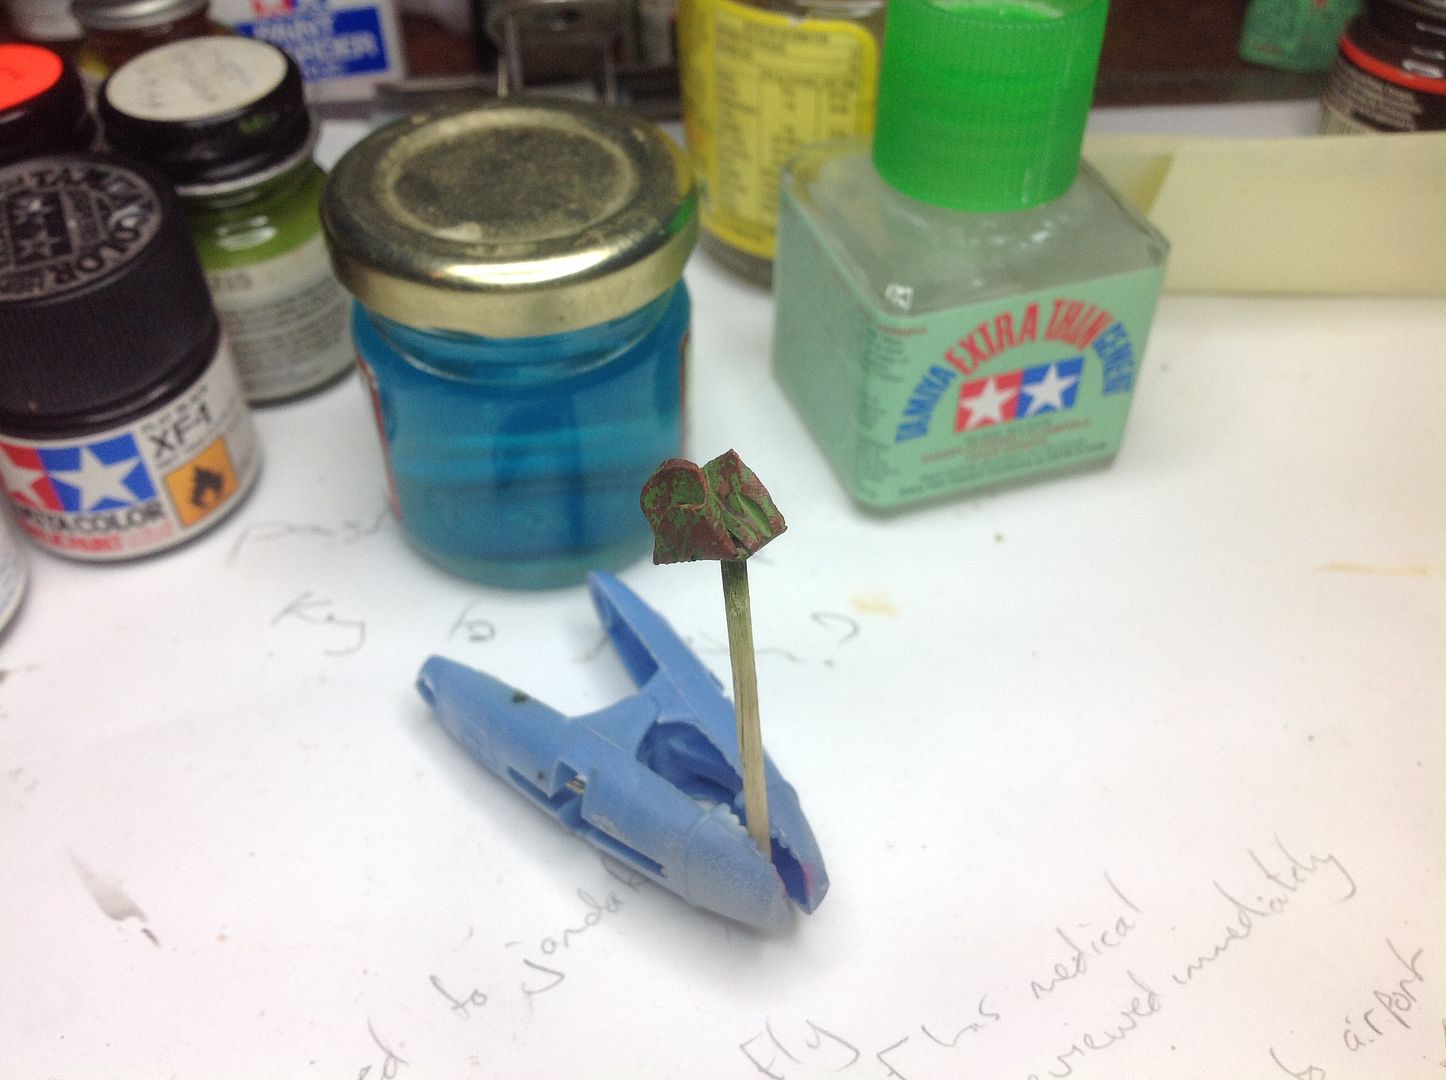 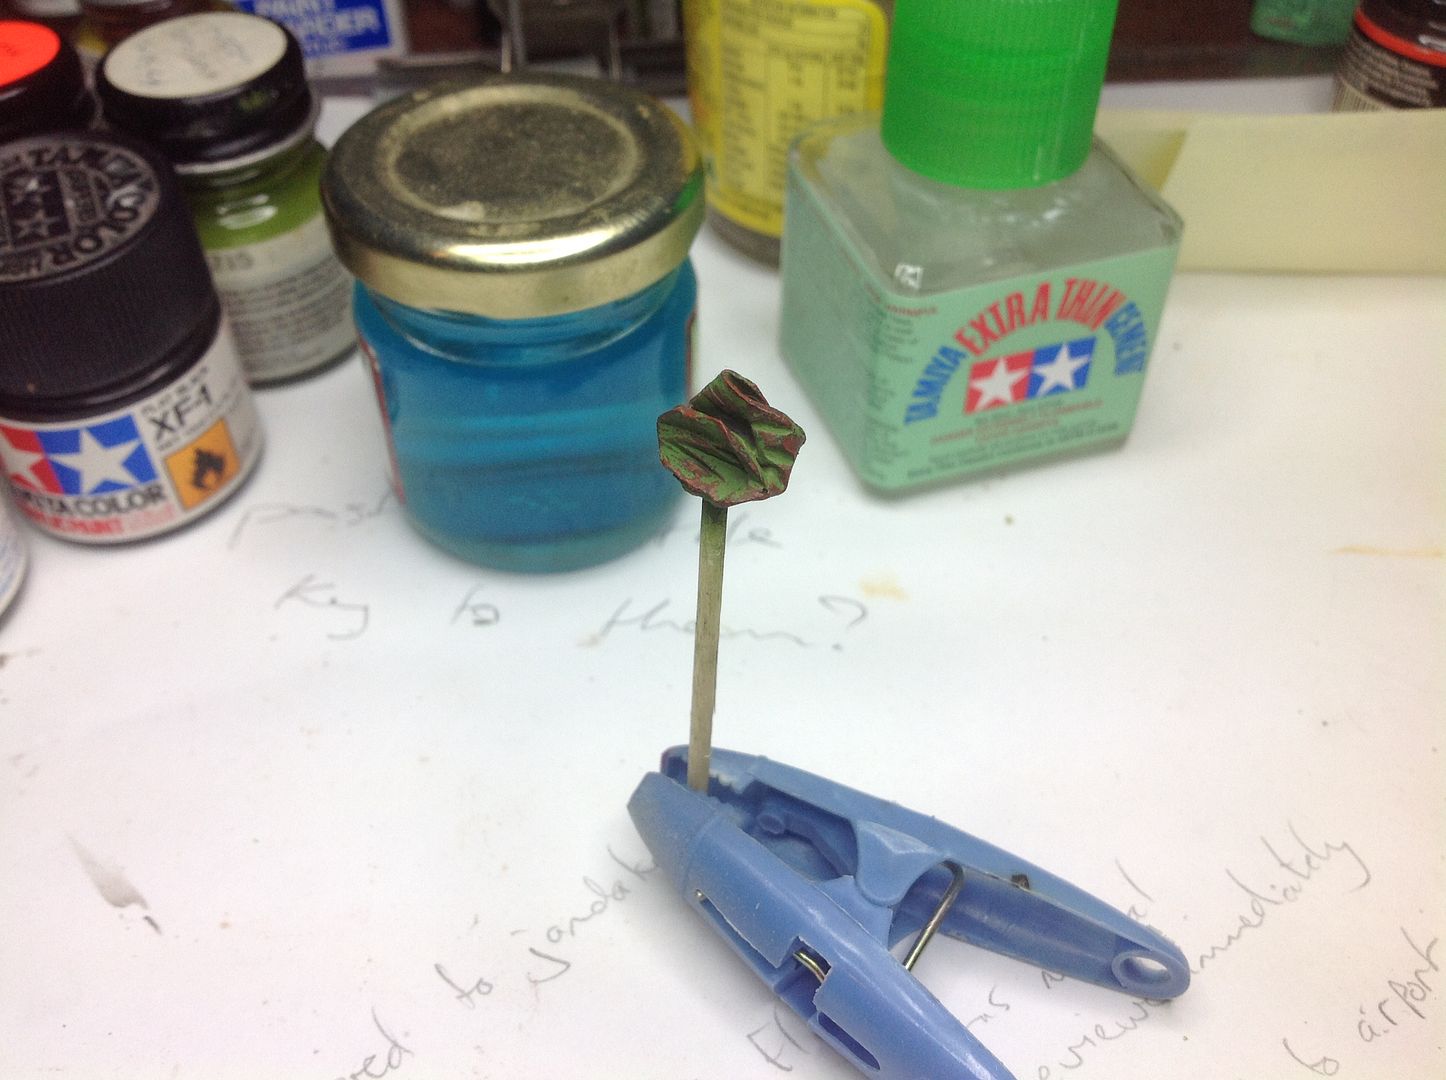 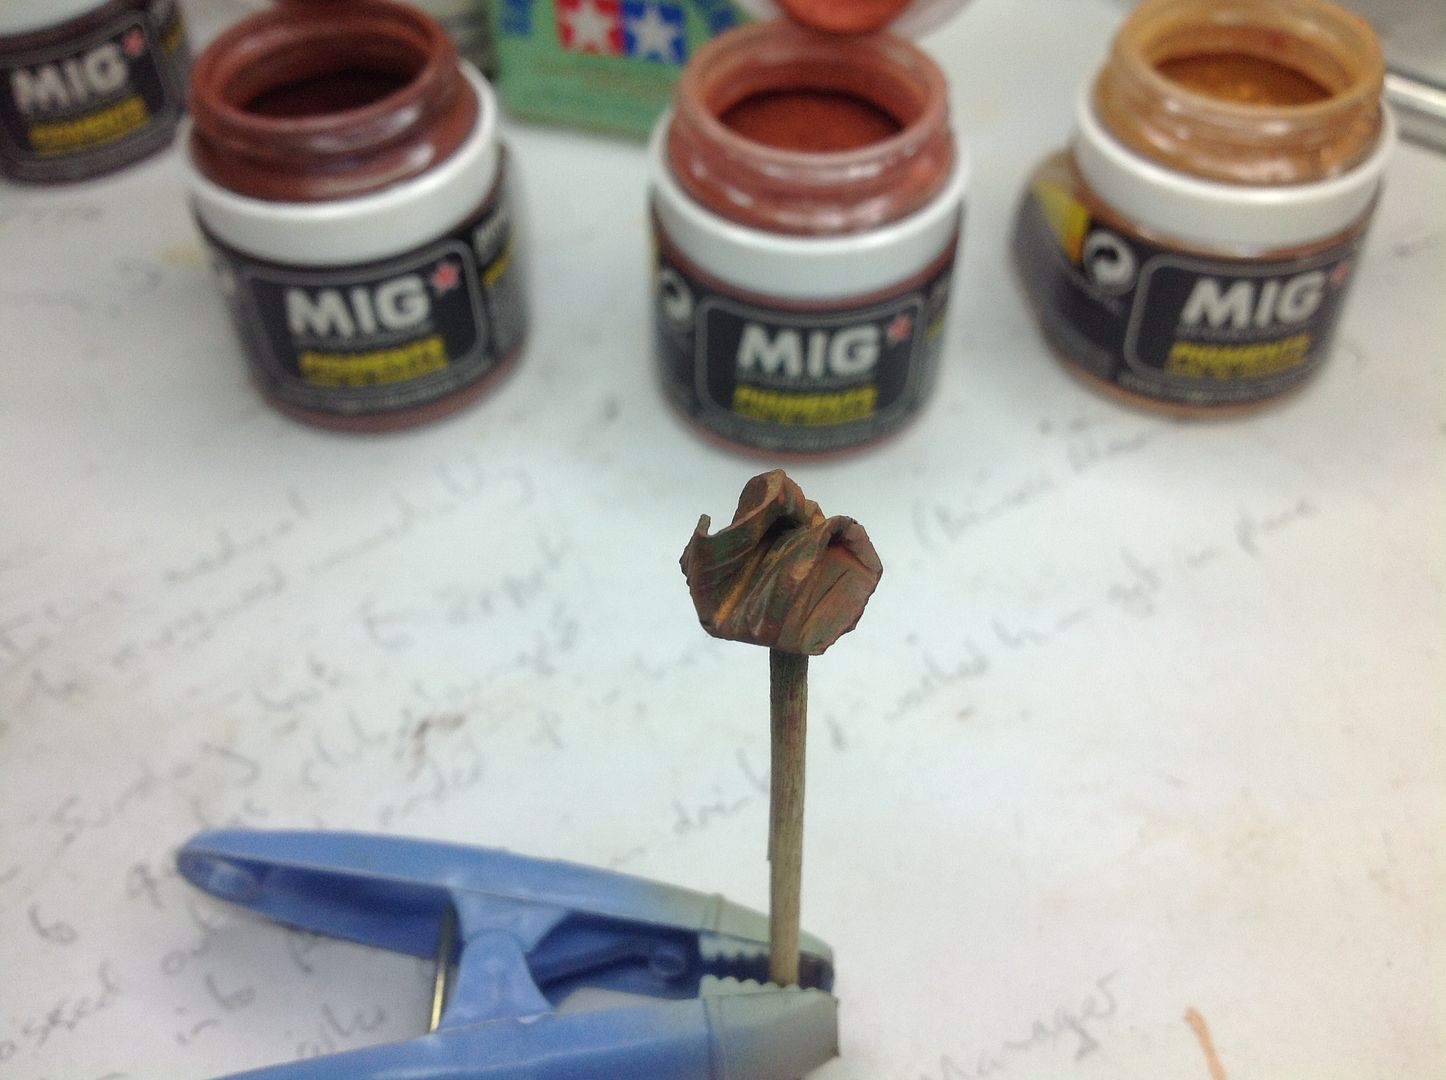 Here is the crushed drum on the base. Pretty happy with how it turned out!  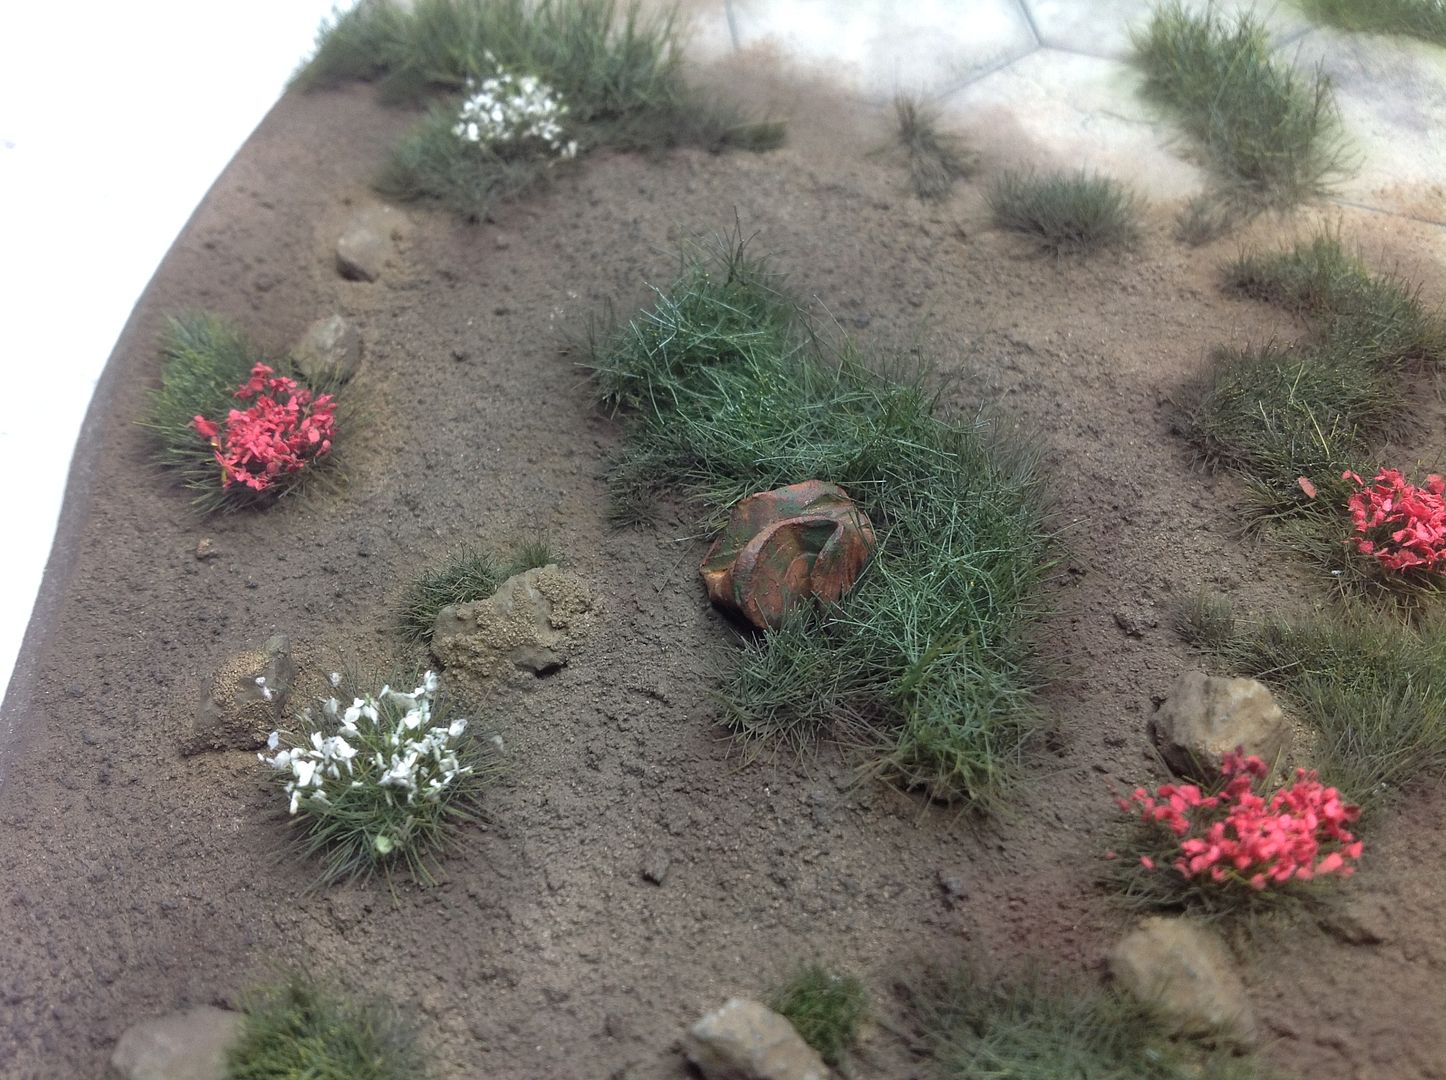 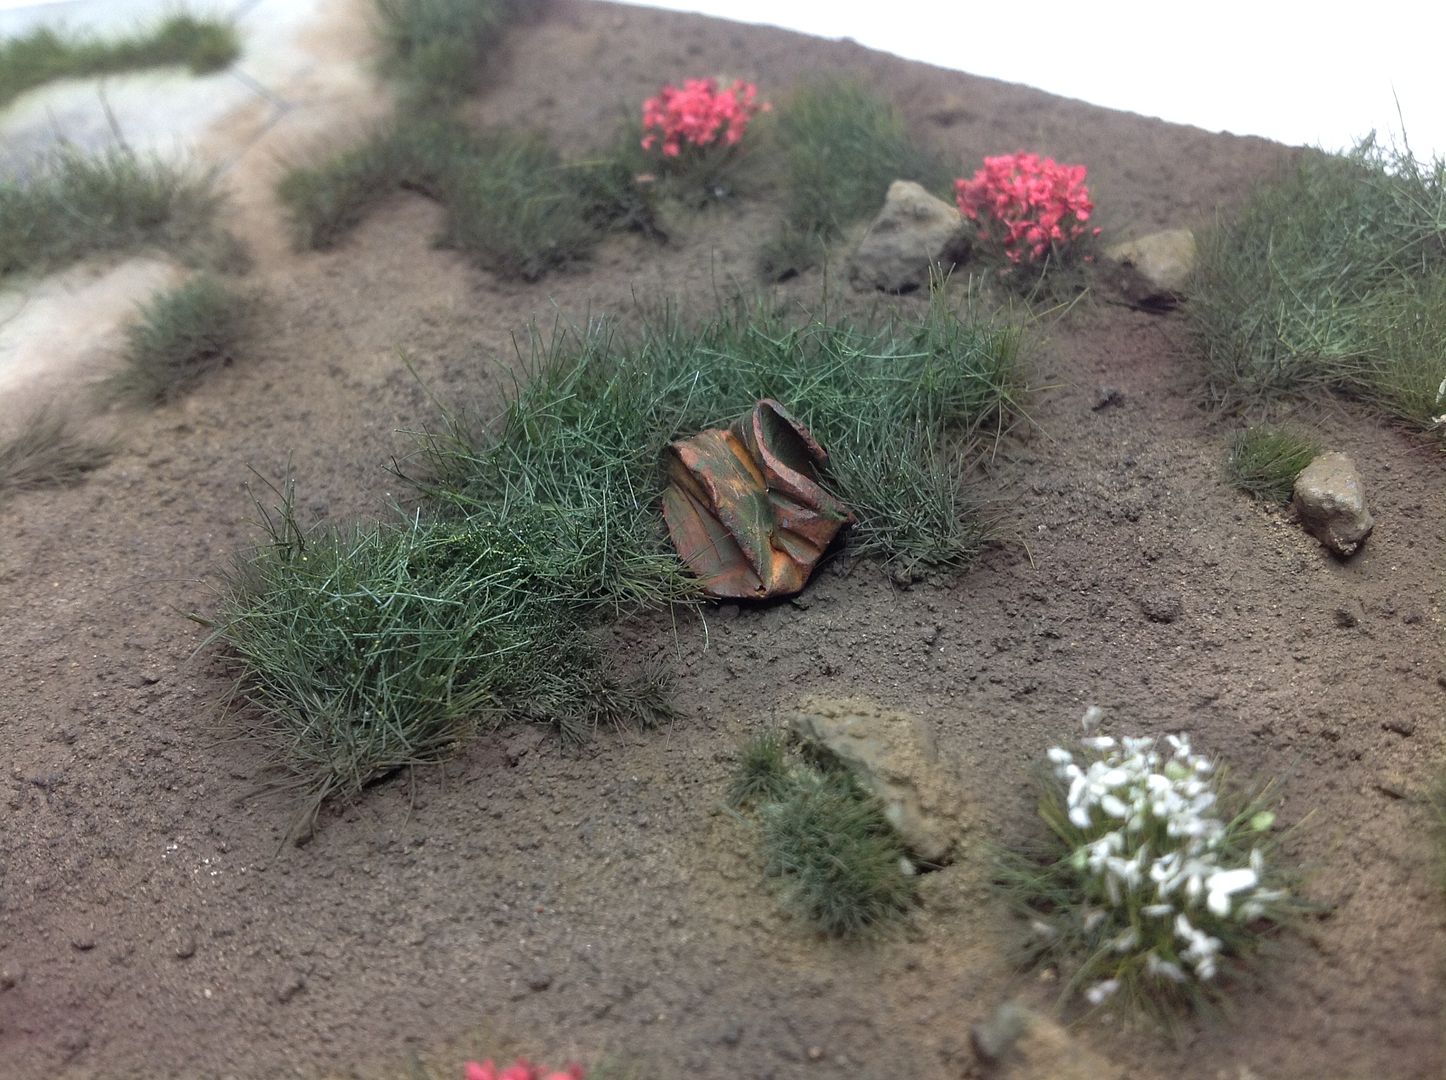 Here is the base pretty much completed. I have also added some leaf litter to add to the abandoned look. Pretty happy with the end result considering it was my first time on something of this scope!  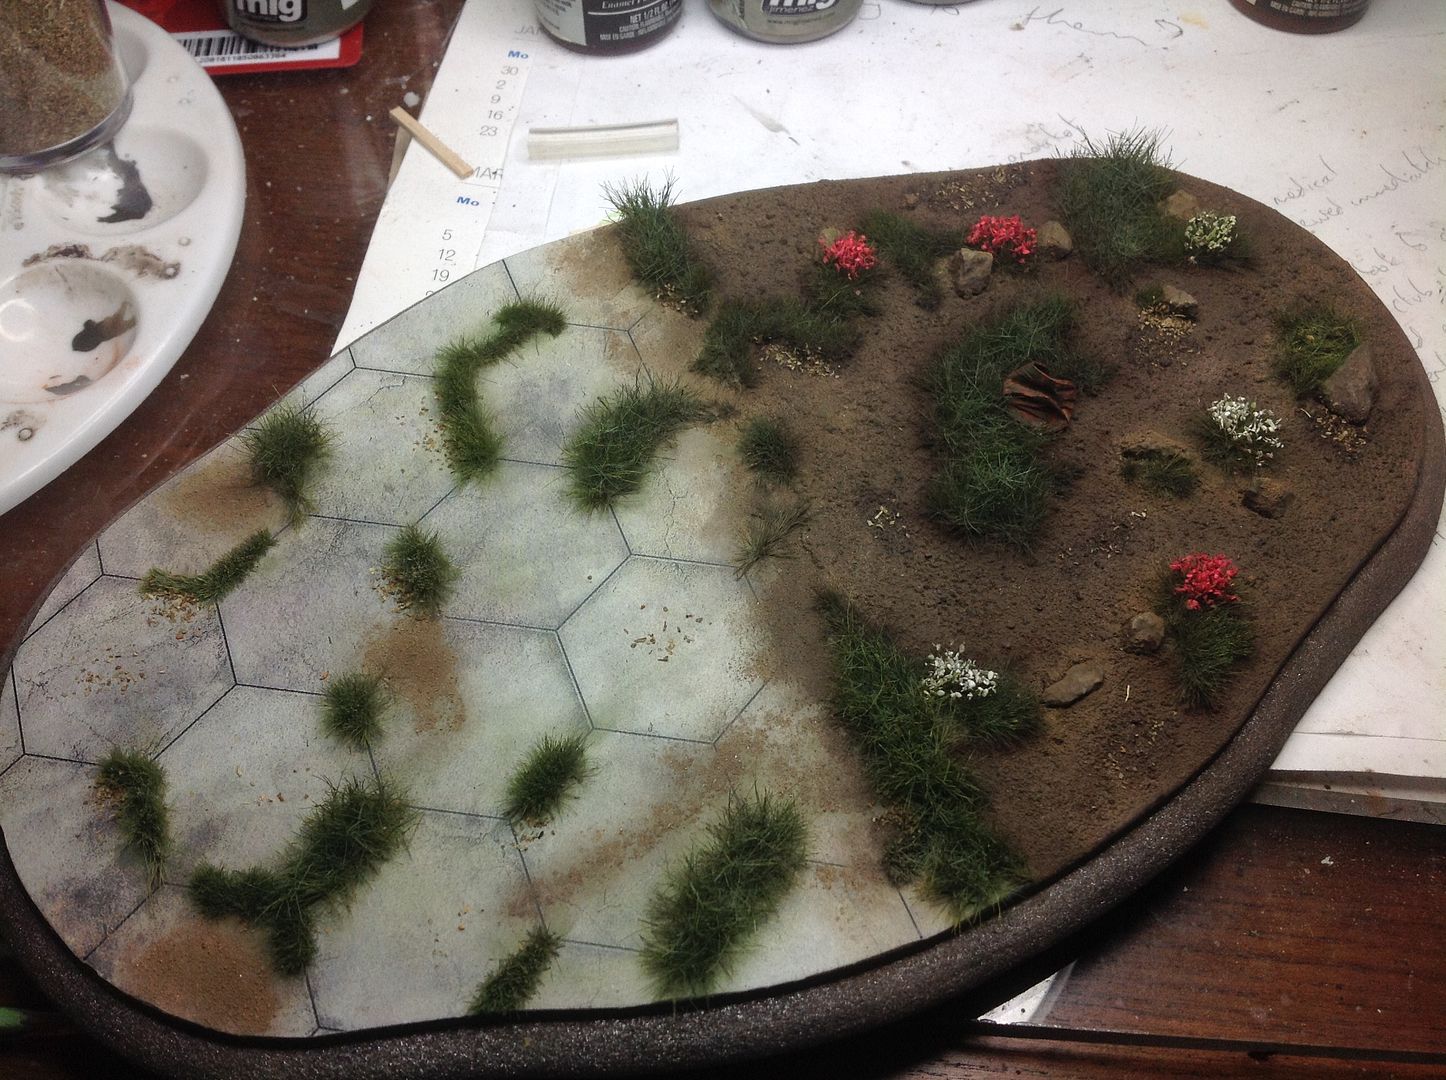 Next up was to start adding the tarps. Two I can do before fixing the helo to the base, but the last one will need to be done after fixing. First up, the tarp inside the cabin. This was done with facial tissue, wetted with a mix of white glue and water. Also added some leaf litter. 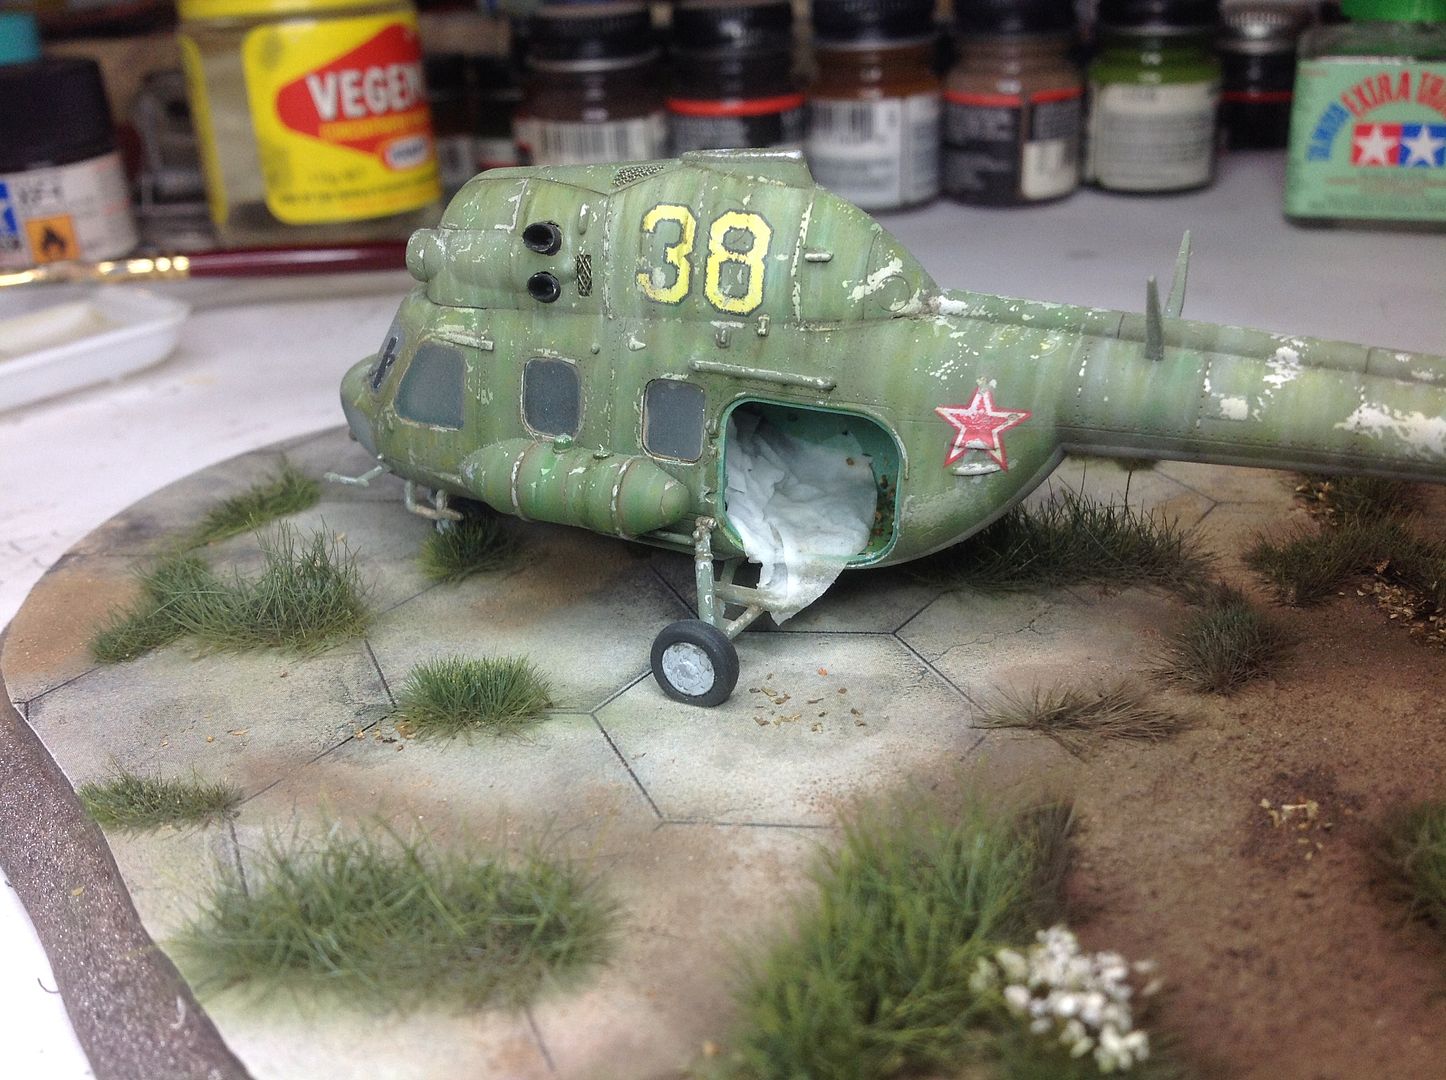 Same was done for the other side on the fuel tank. Timber planks still to be painted and weathered.... 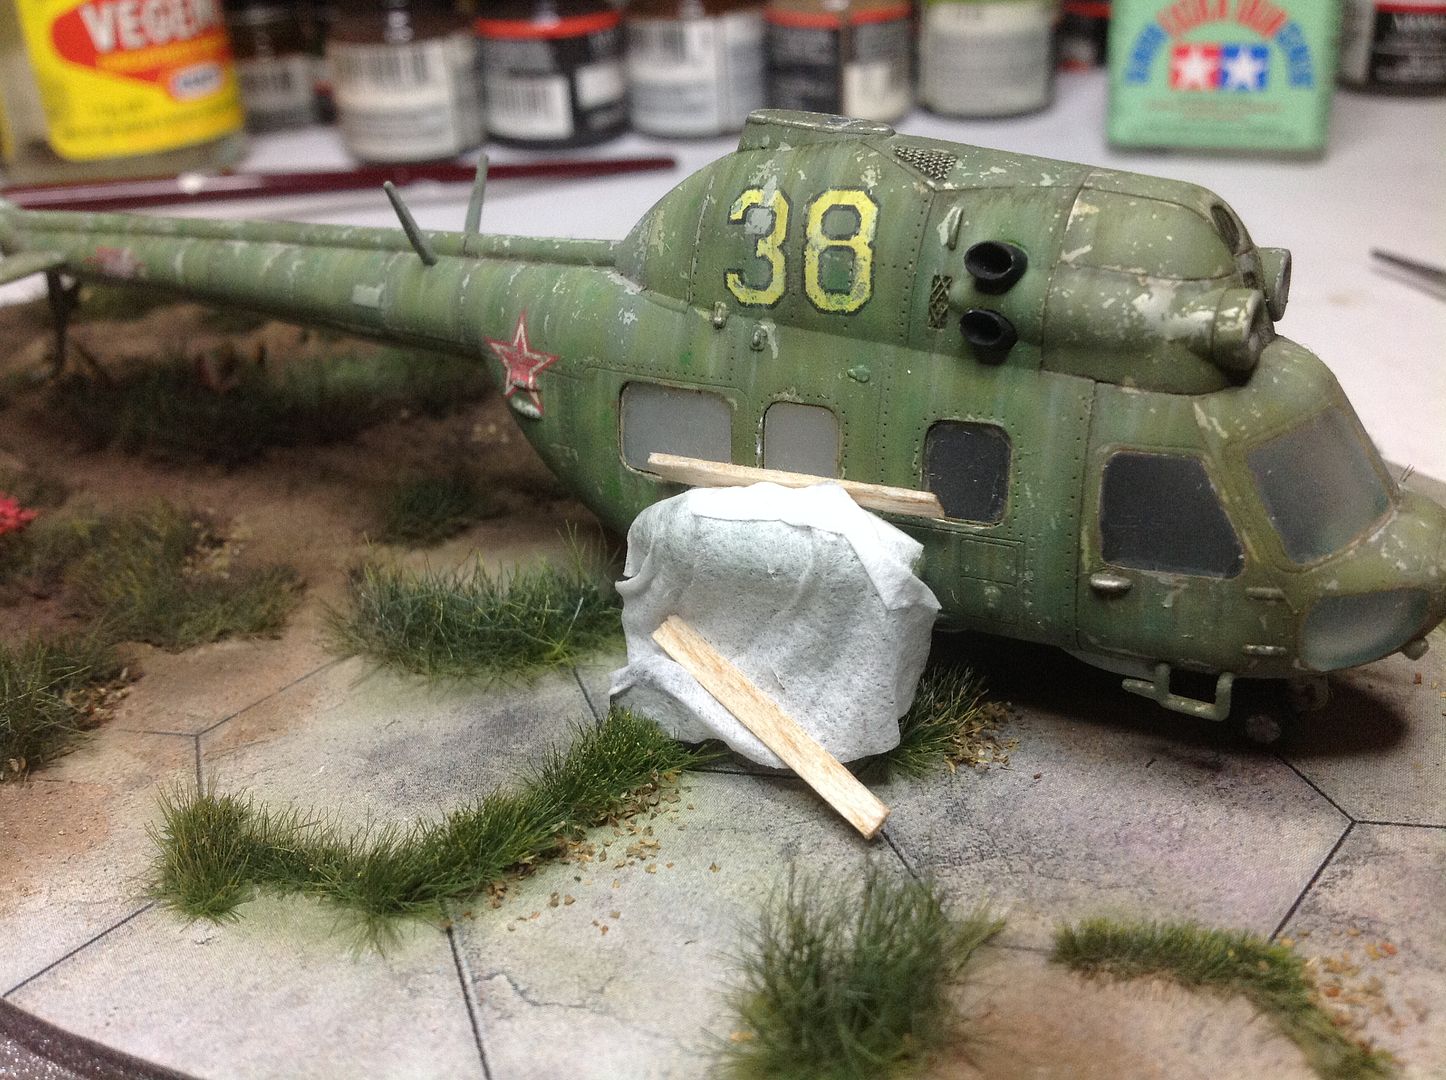 Once dry, the tarp was painted, weathered and additional leaf litter added. Blue colour was a custom mix, weathering was done using dry brushing and washes. 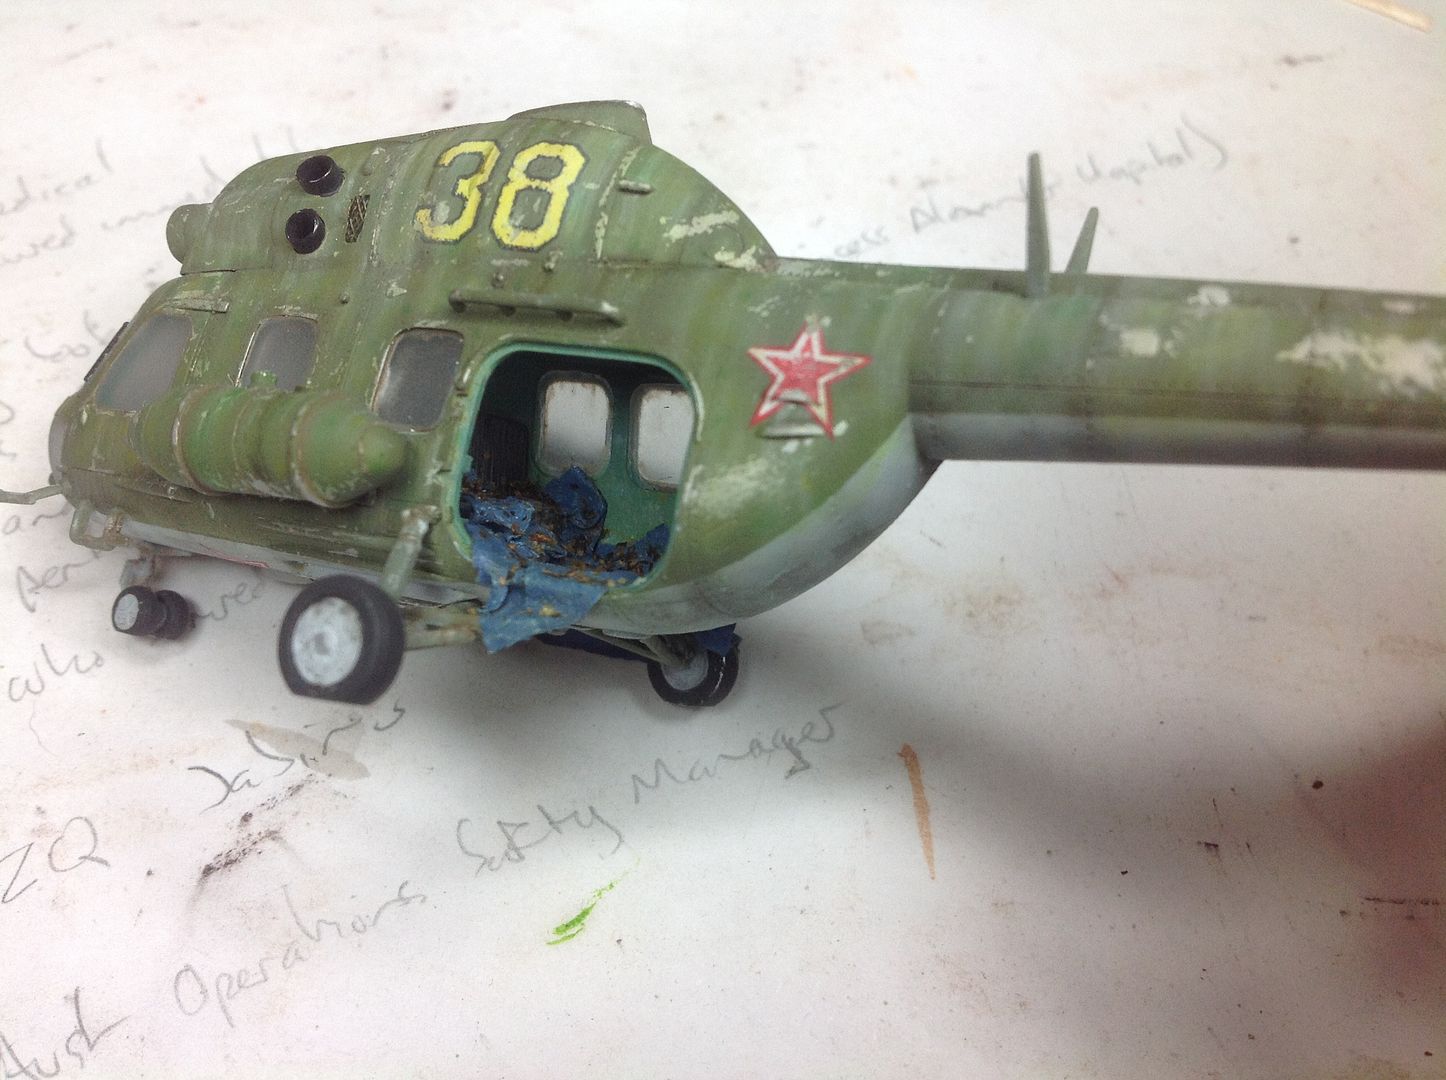 And here is the other side completed... 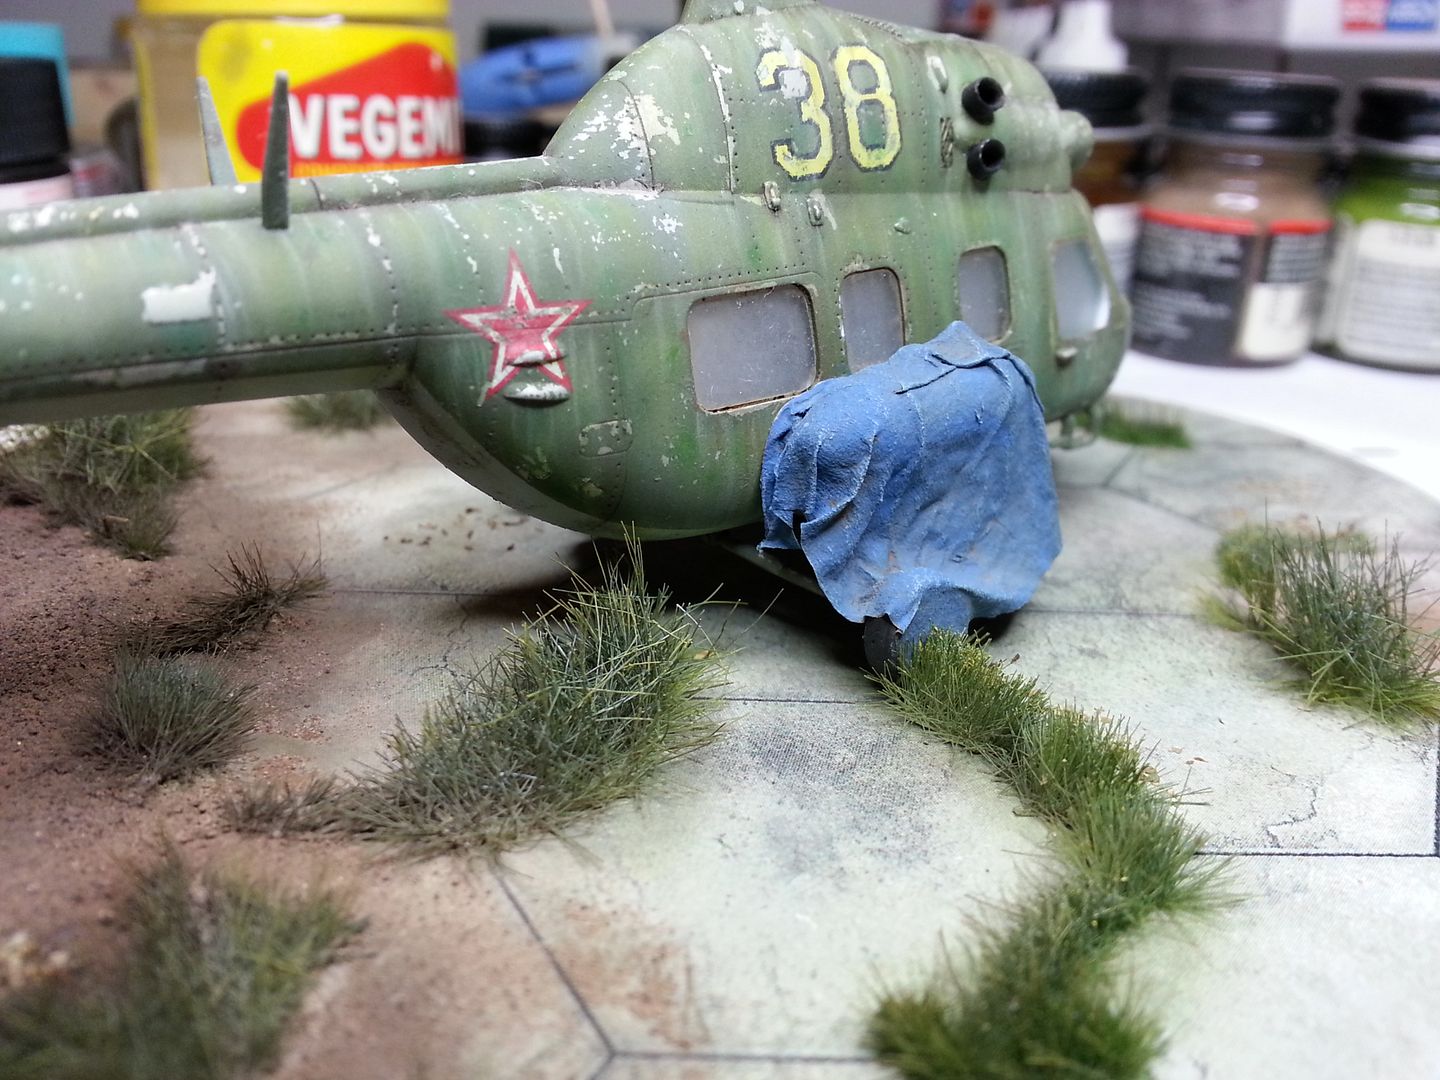 Next up was to deal with the timber planks. Found a pretty good YouTube tutorial and tried to replicate the colours as best I could with what I had. After base coat, I followed up with various washes. Pix speak for themselves....  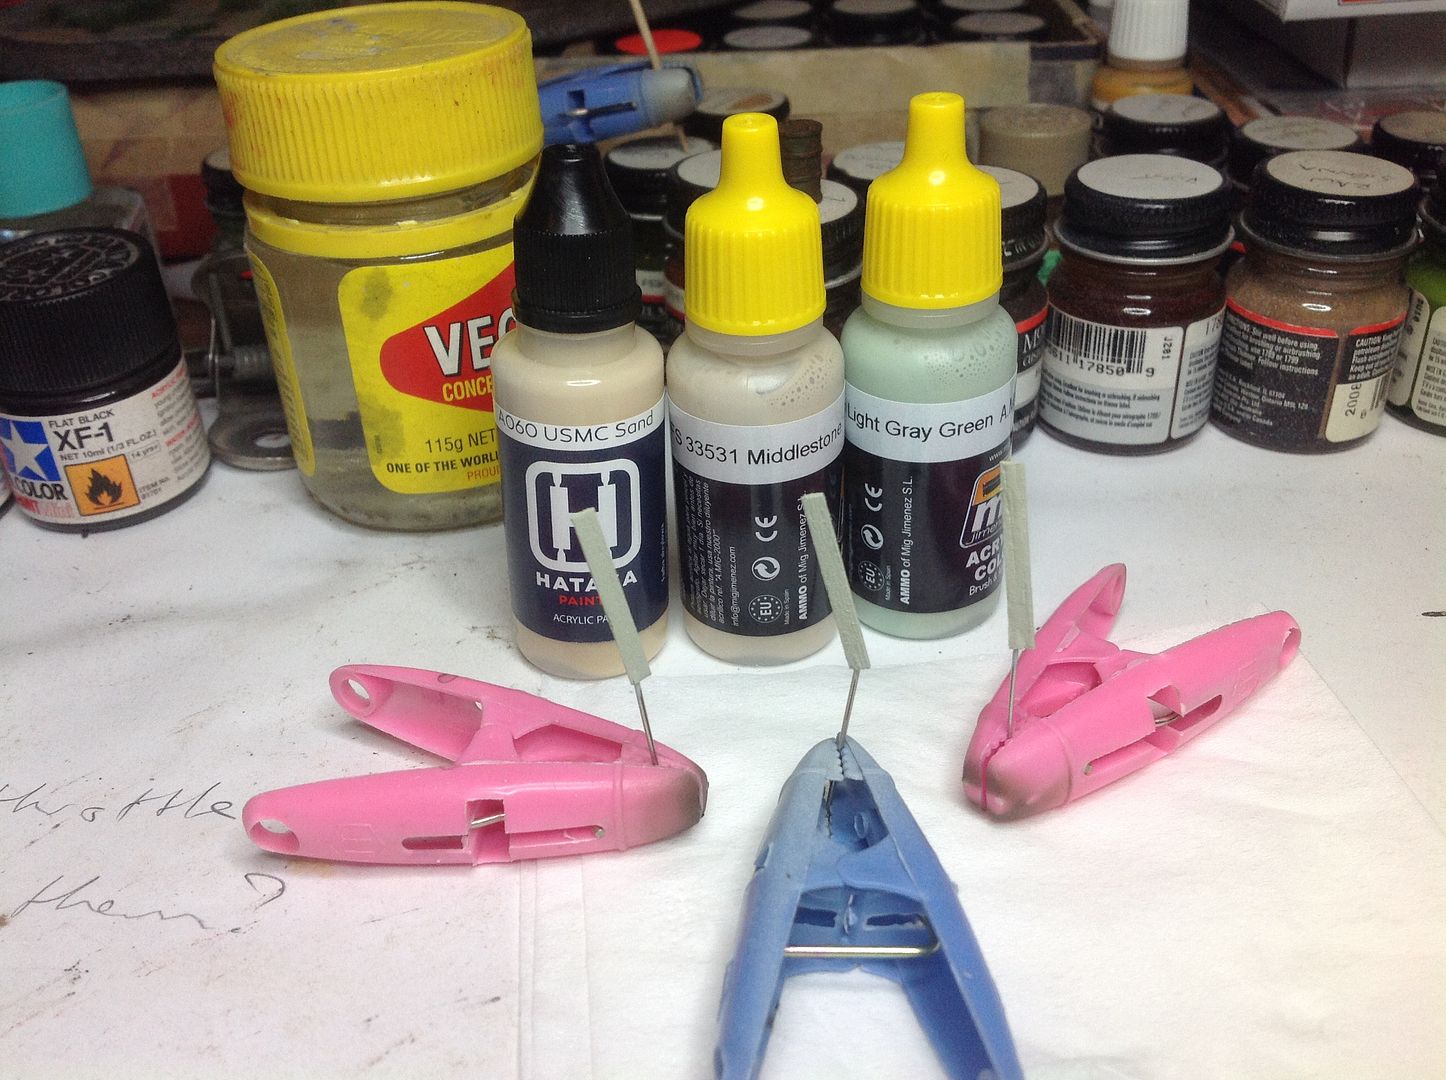 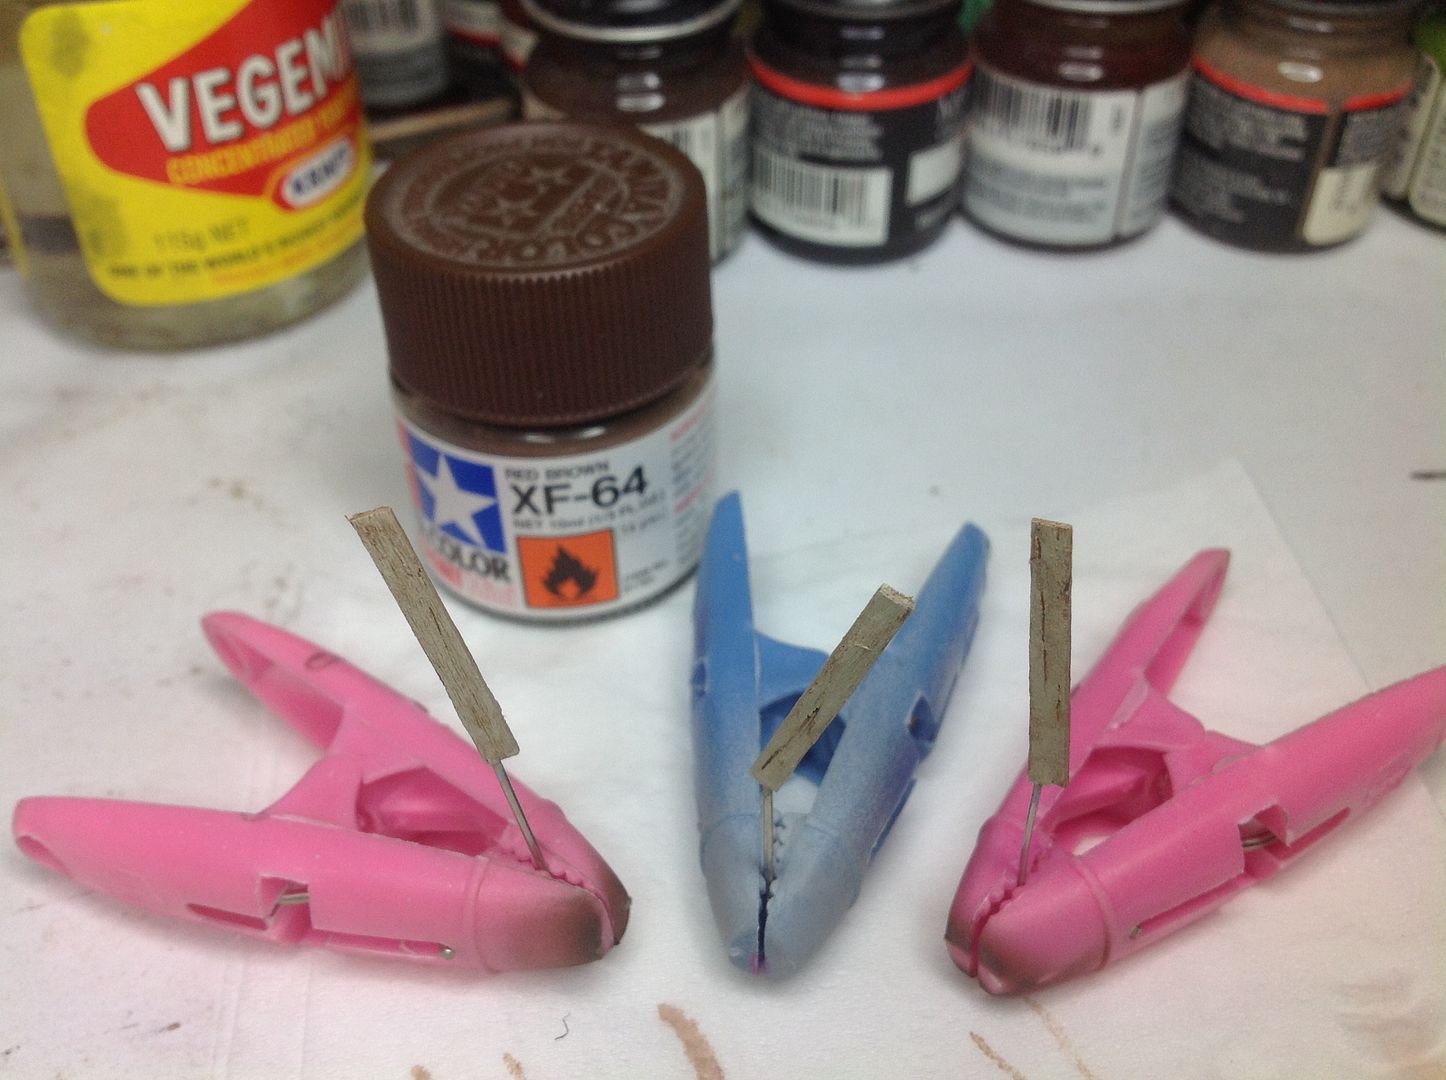 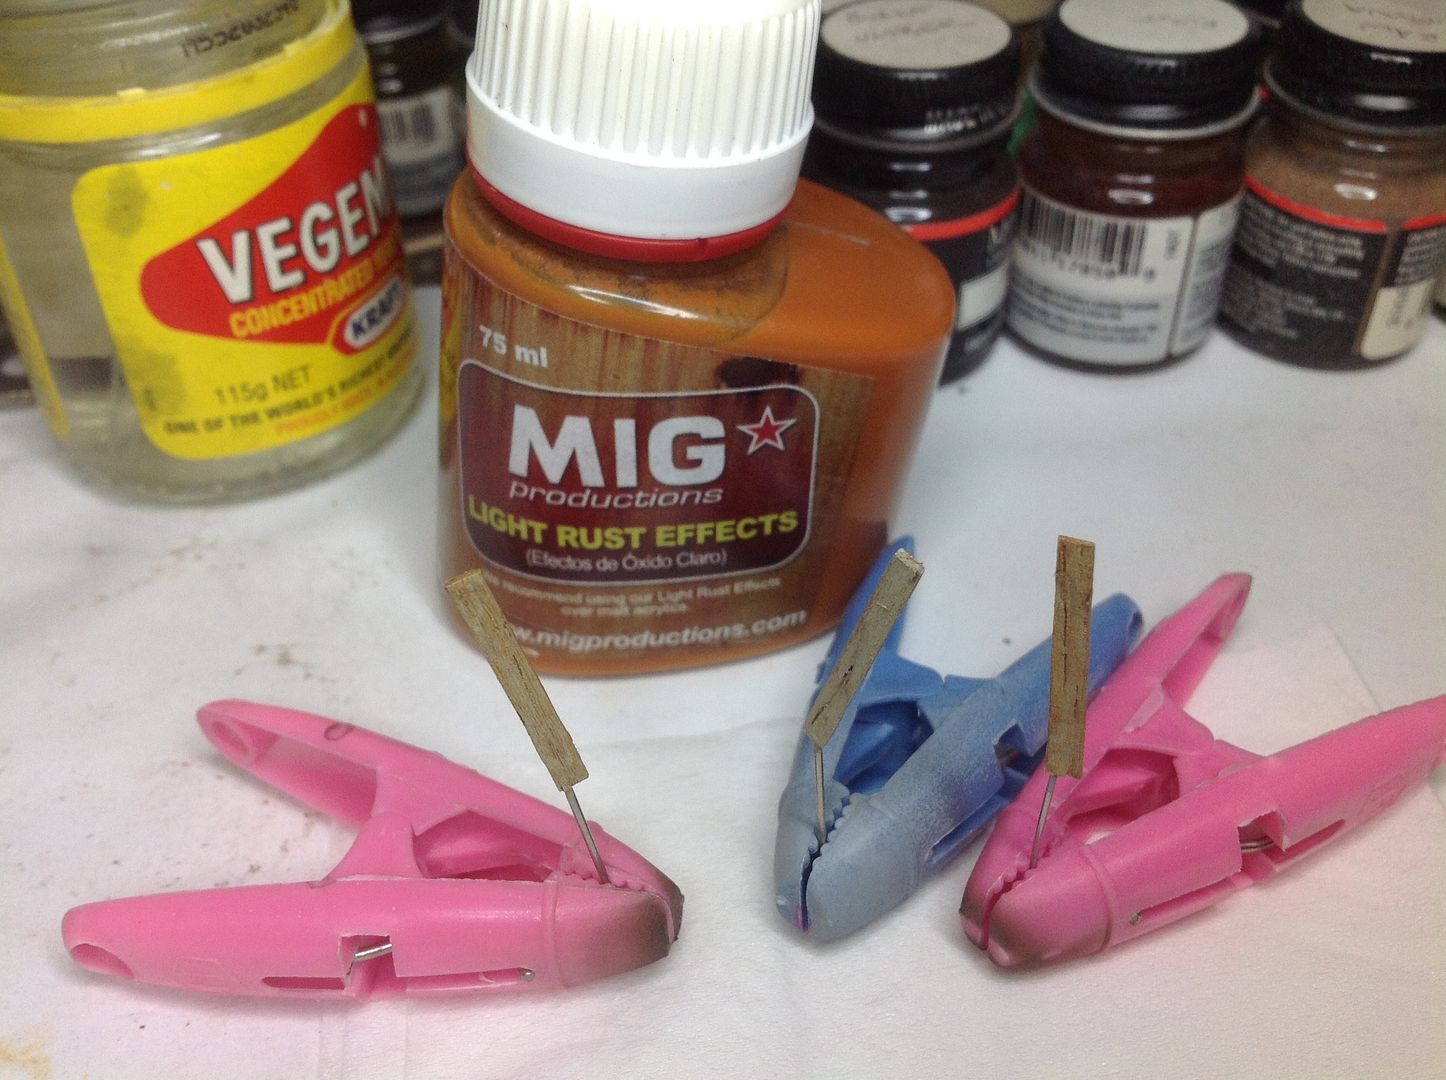 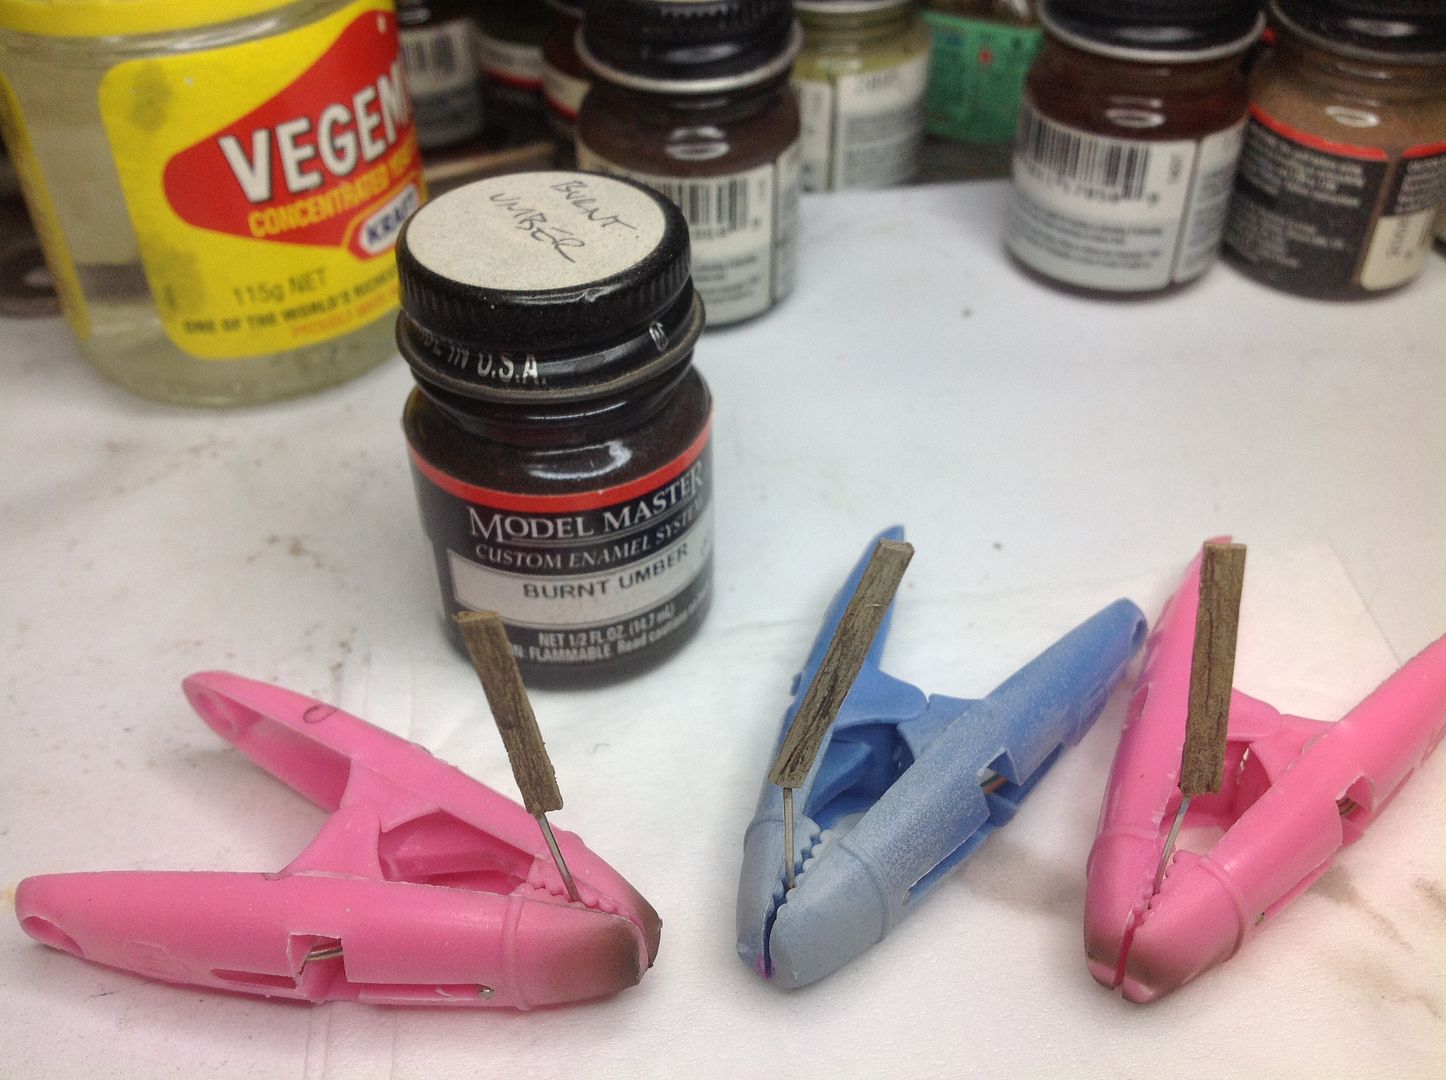 The end result. Pretty stoked with how they turned out!  Finished them up with a selective wash of AMMO Dark Streaking Grime on the ends that will touch the ground, to simulate moisture and rot. 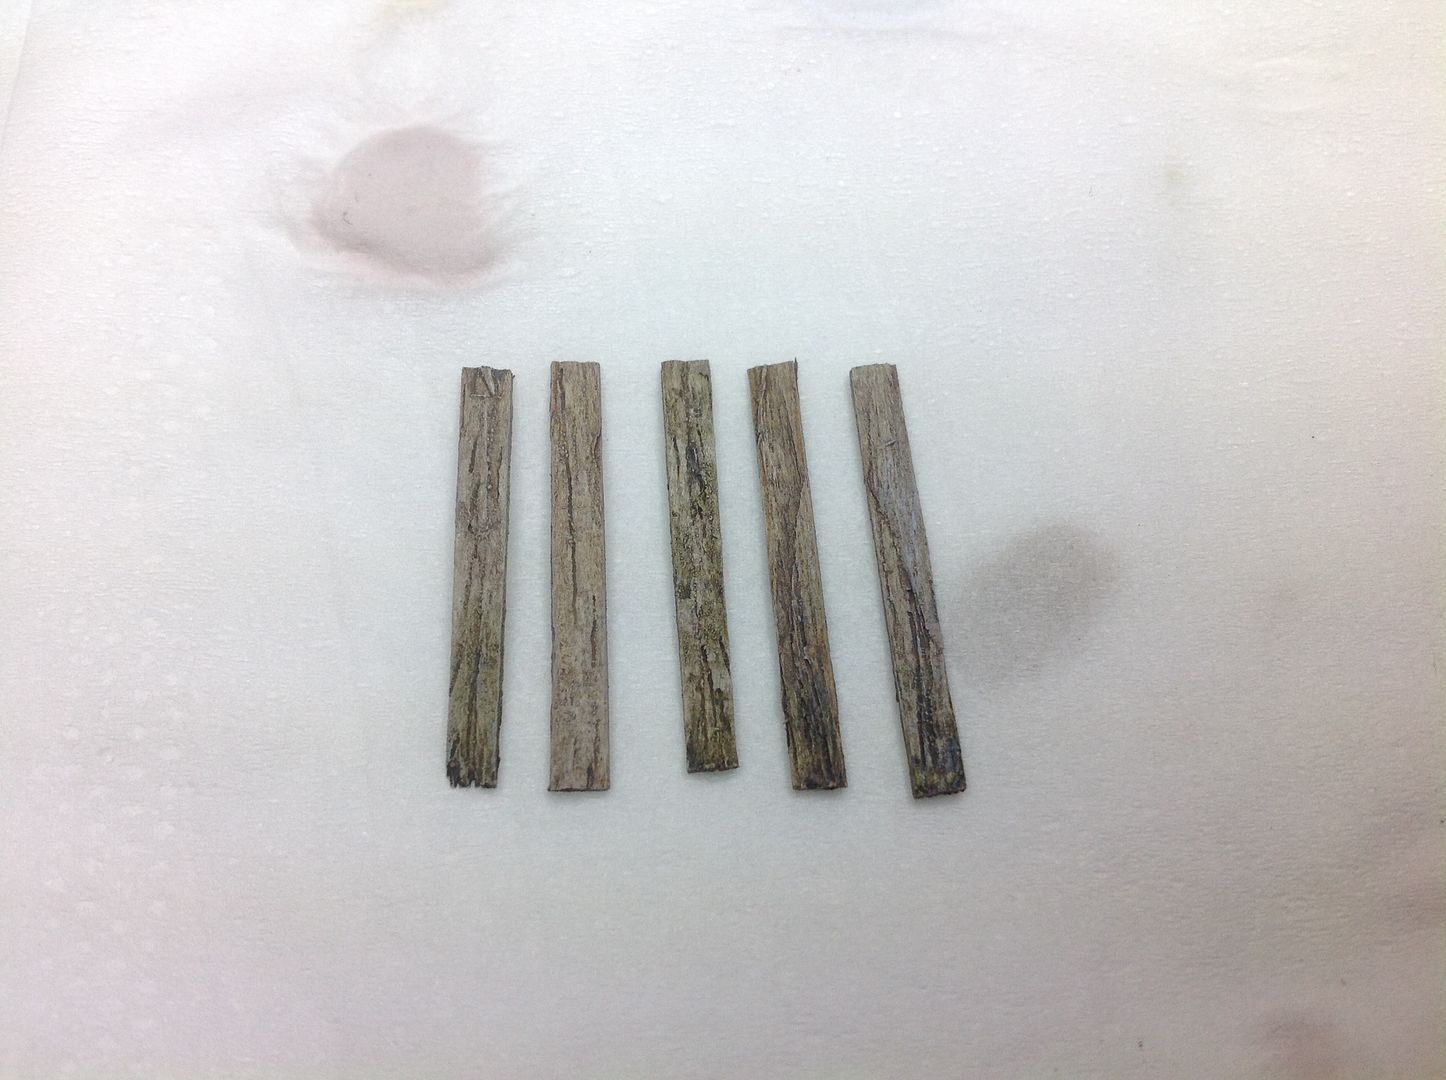 Completed planks in final position. Yay!  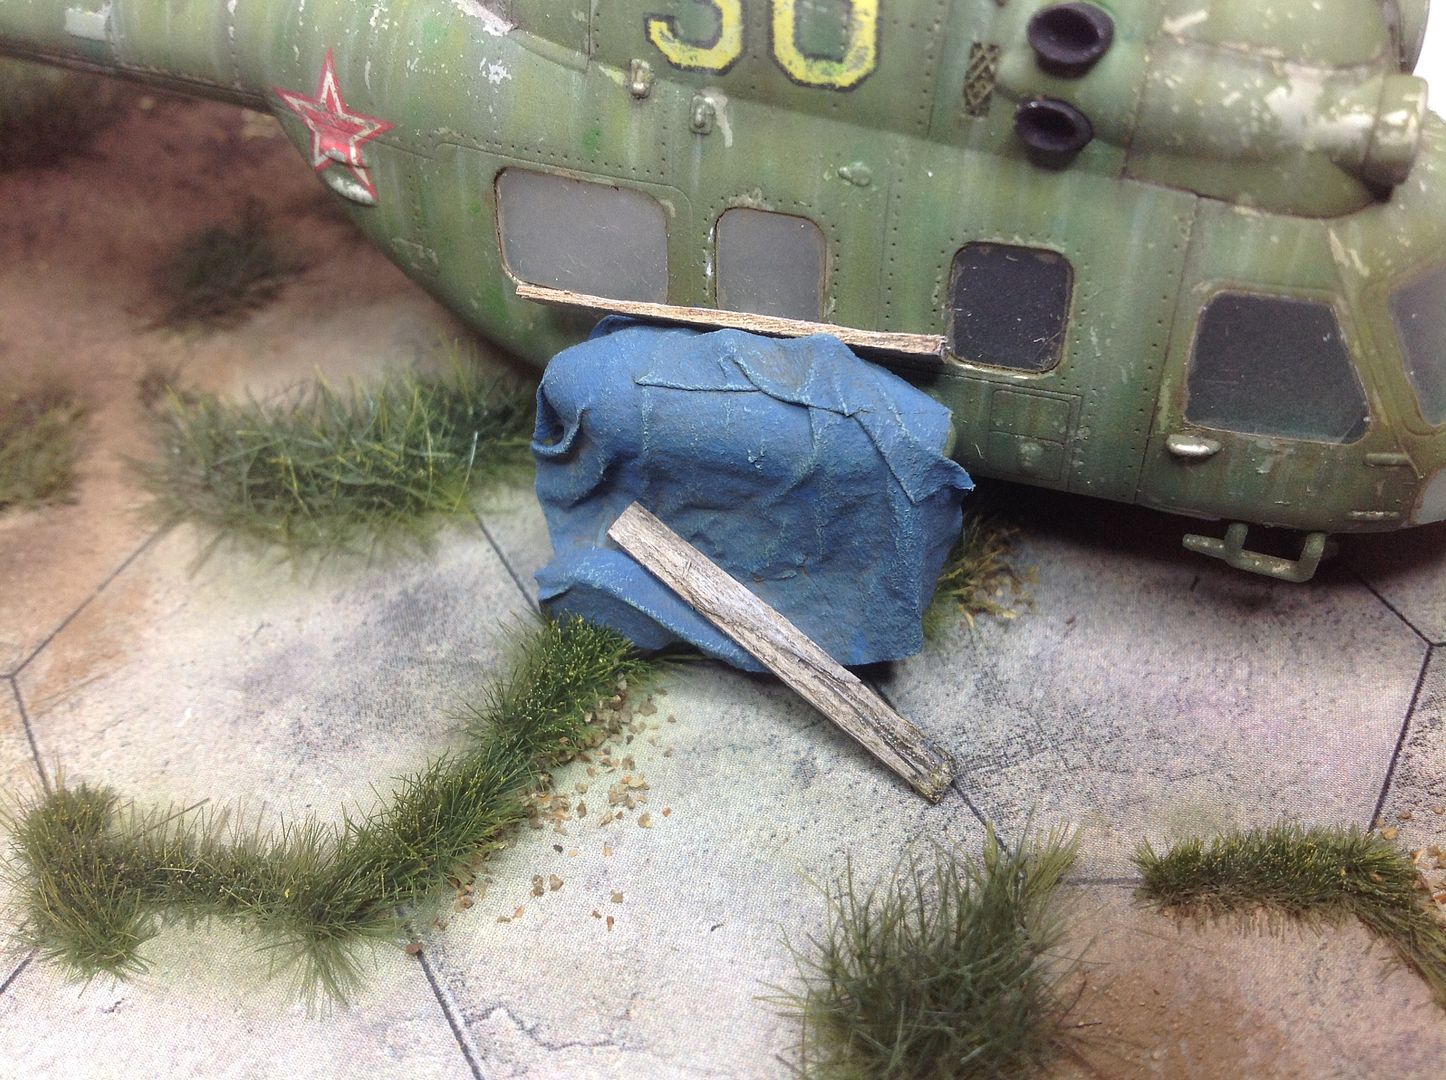 By this time the helo had been fixed to the base and it was time to do the final tarp. This is why I needed to complete the timber before I could do this. Painting and weathering was the same as the others, with heavier weathering due to it lying on the ground. Other plank was not placed there in the end, that was just me trying to find the best spot for it! 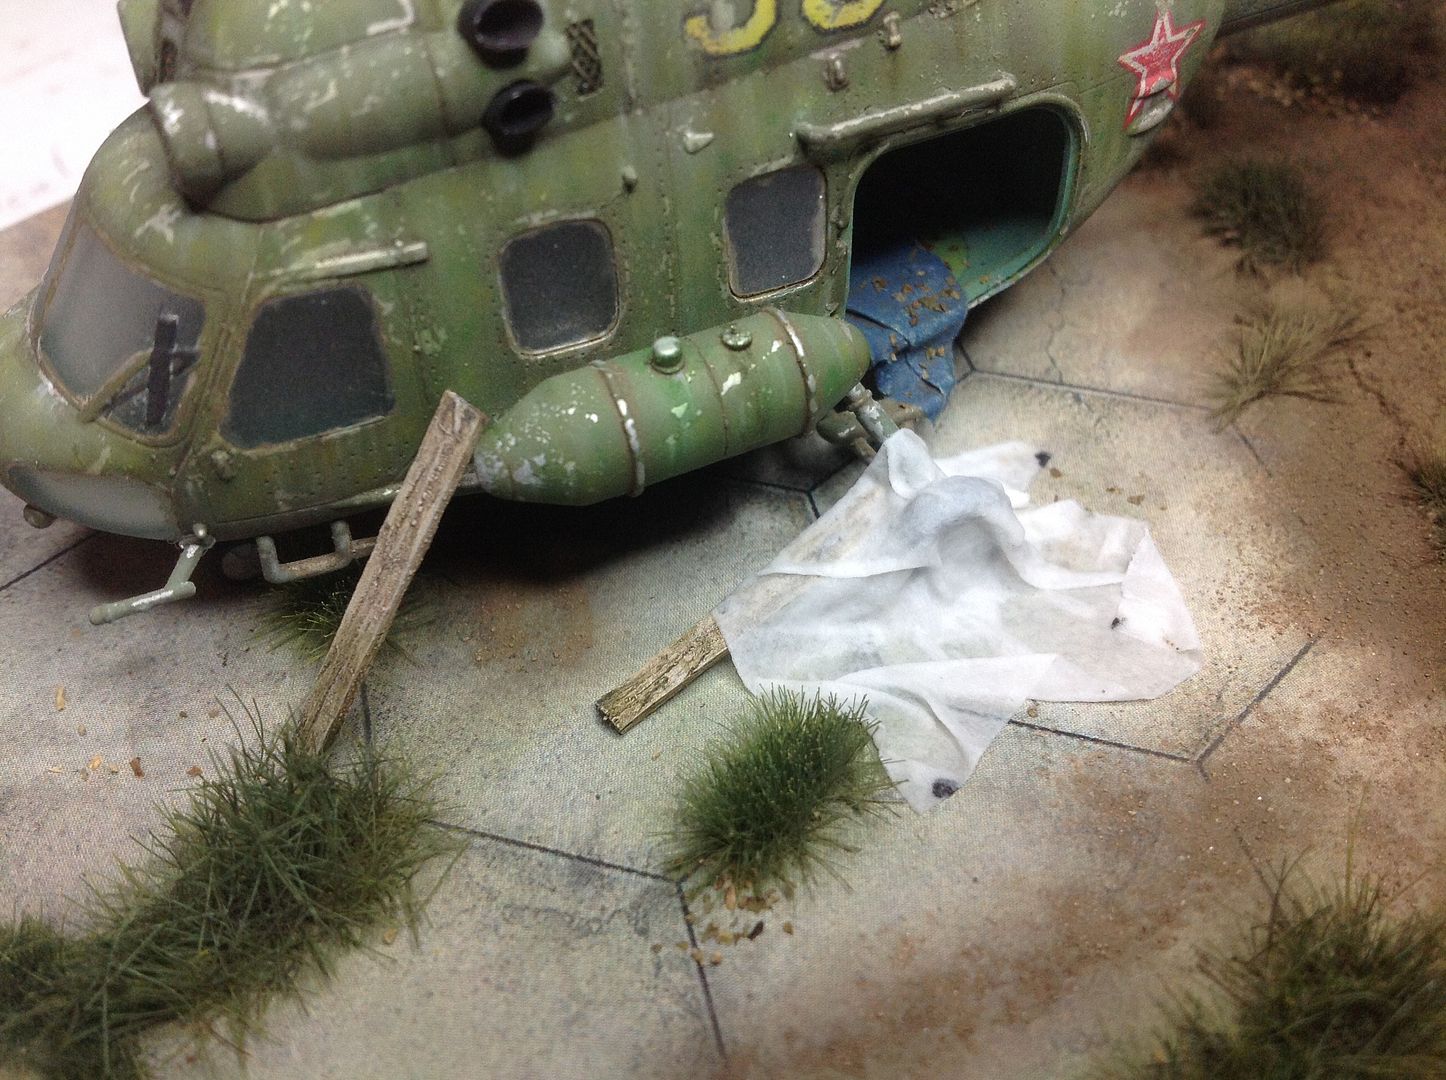 Another of the planks was destined here. Looks good I think!  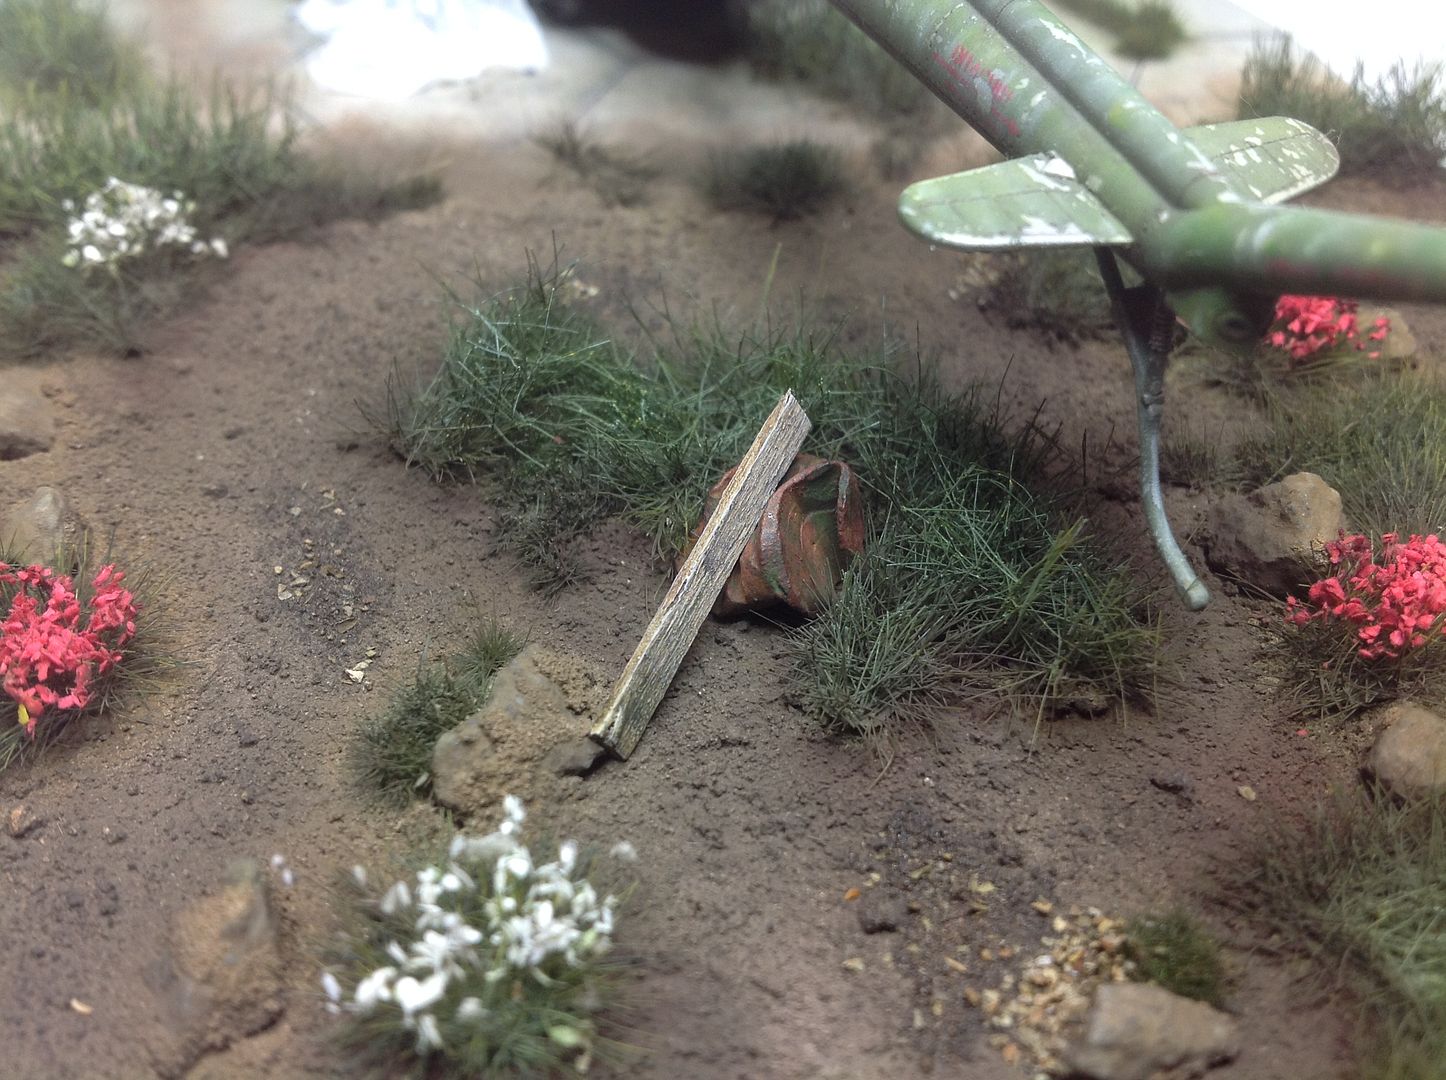 As one of the final touches, I decided to add an old alcohol bottle on the ground tarp, to give it that human touch. Bottle was from a resin set, painted in Russian Green and lots of Future, the label was made from a coloured bit of the back of a shopping docket. Only about 1mm square, and the colour works well to give the impression of a proper label. Very happy with this one too! 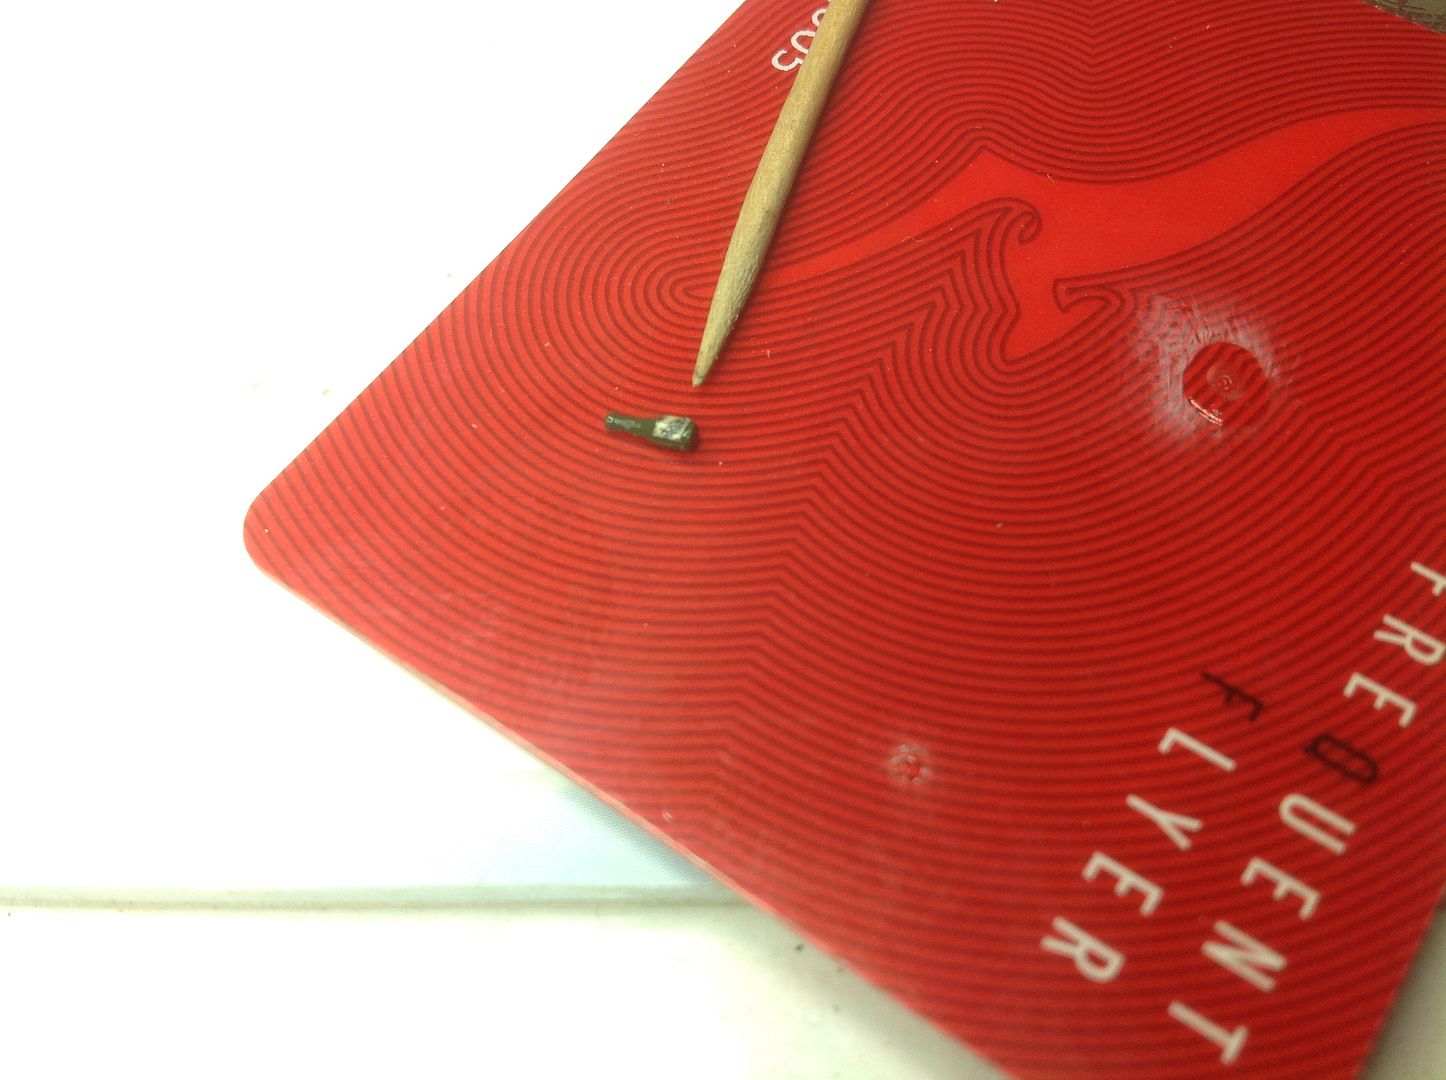 Finally, here she is in all her glory! Was absolutely stoked with the final result! Did some final weathering on the helo and base just to blend it in. Also added some oil stains on the leaky drum using the Fresh Oil from the AMMO weathering set for aircraft engines. Probably a few other bits and bobs in there that I have forgotten about. If you want to know anything, please ask! Enjoy......  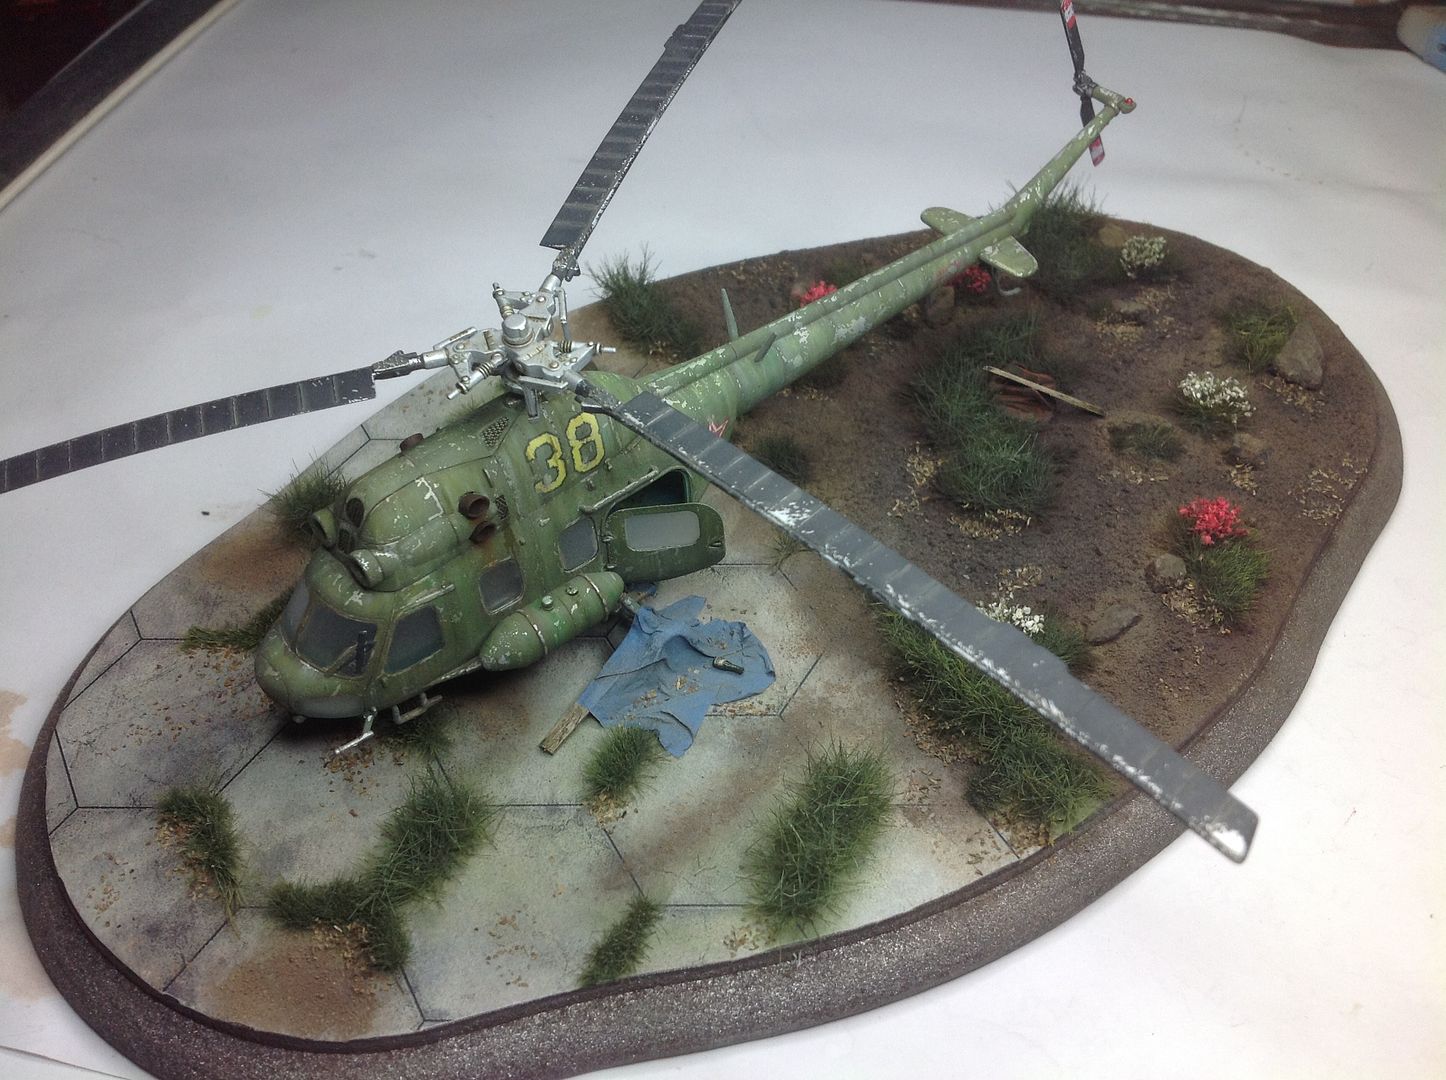 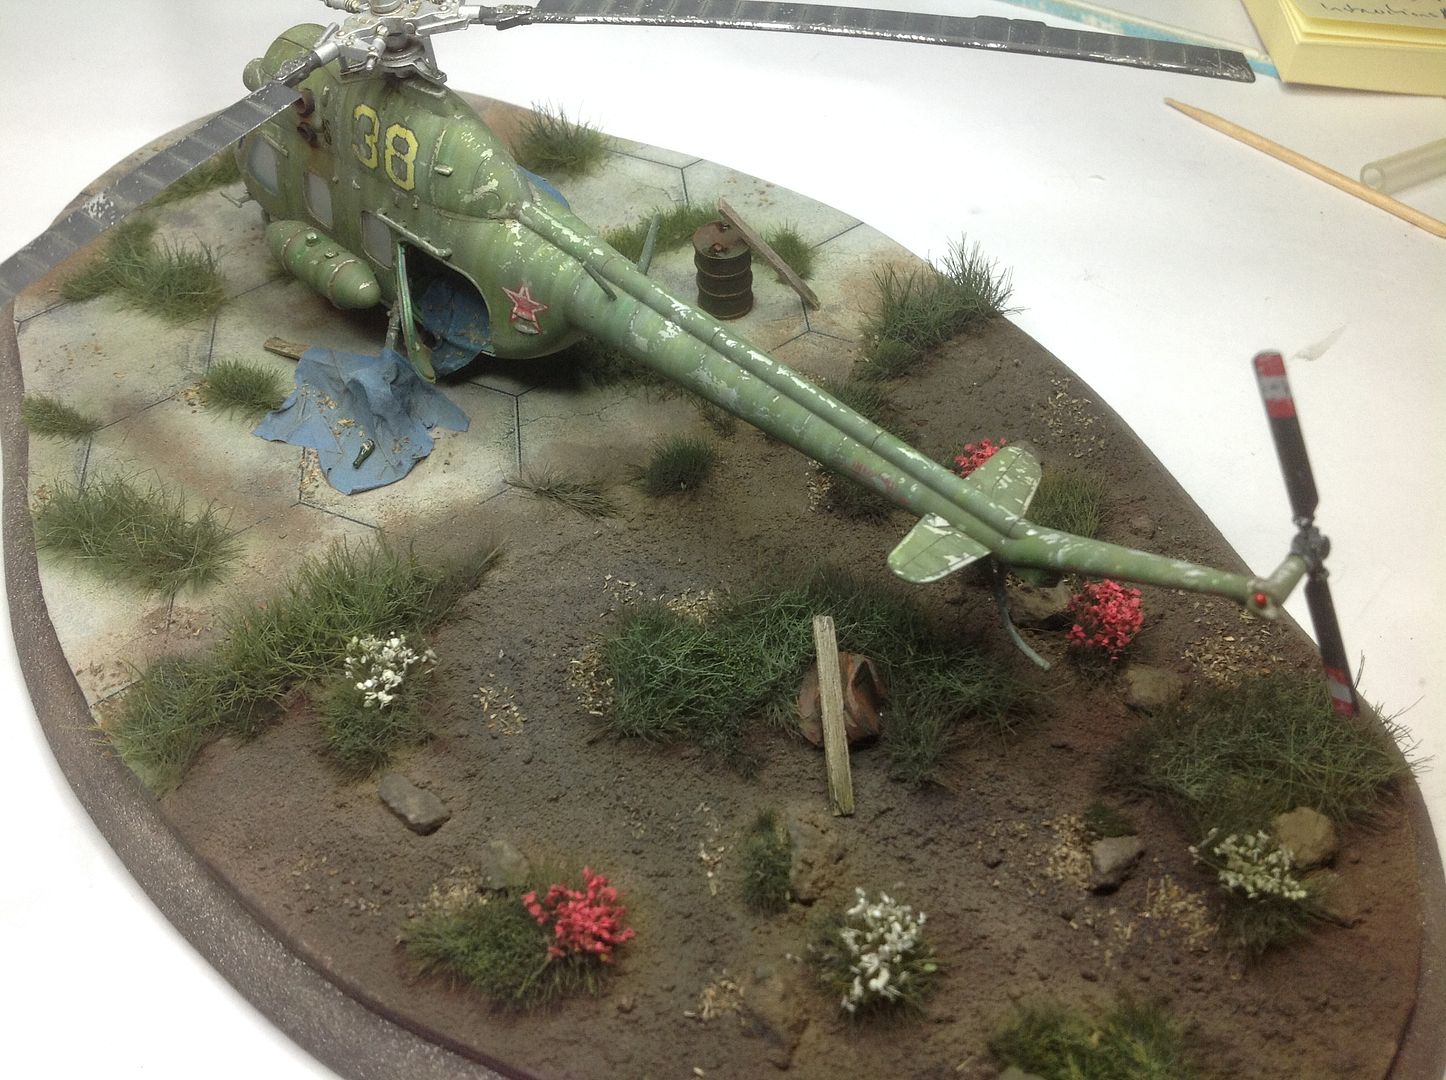 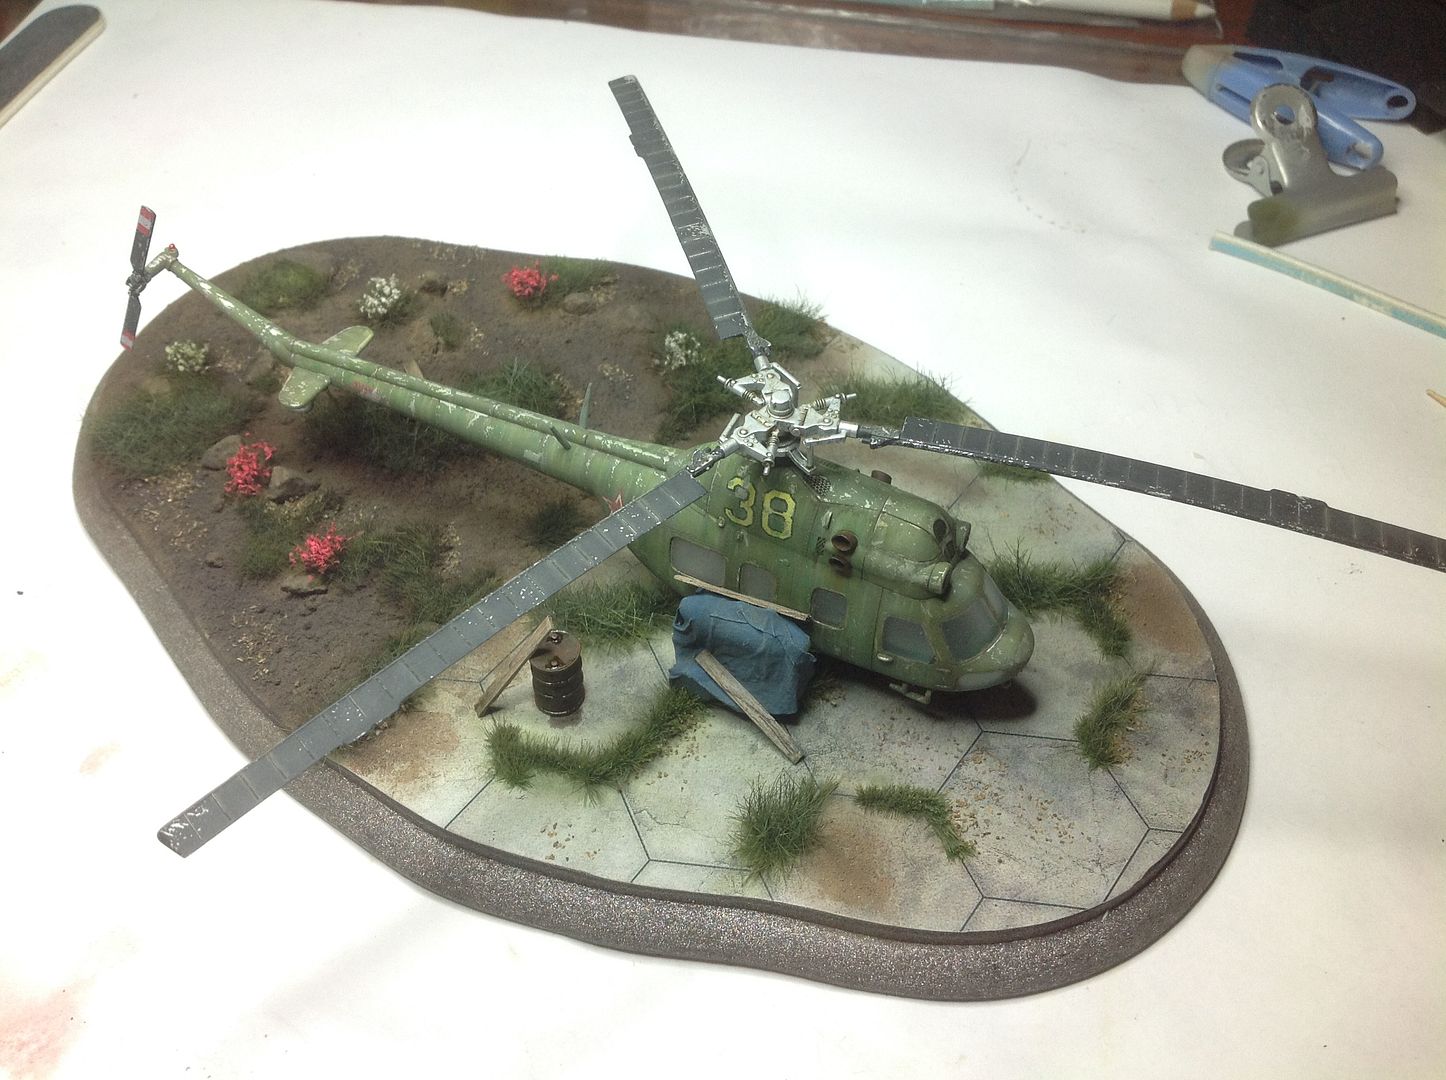 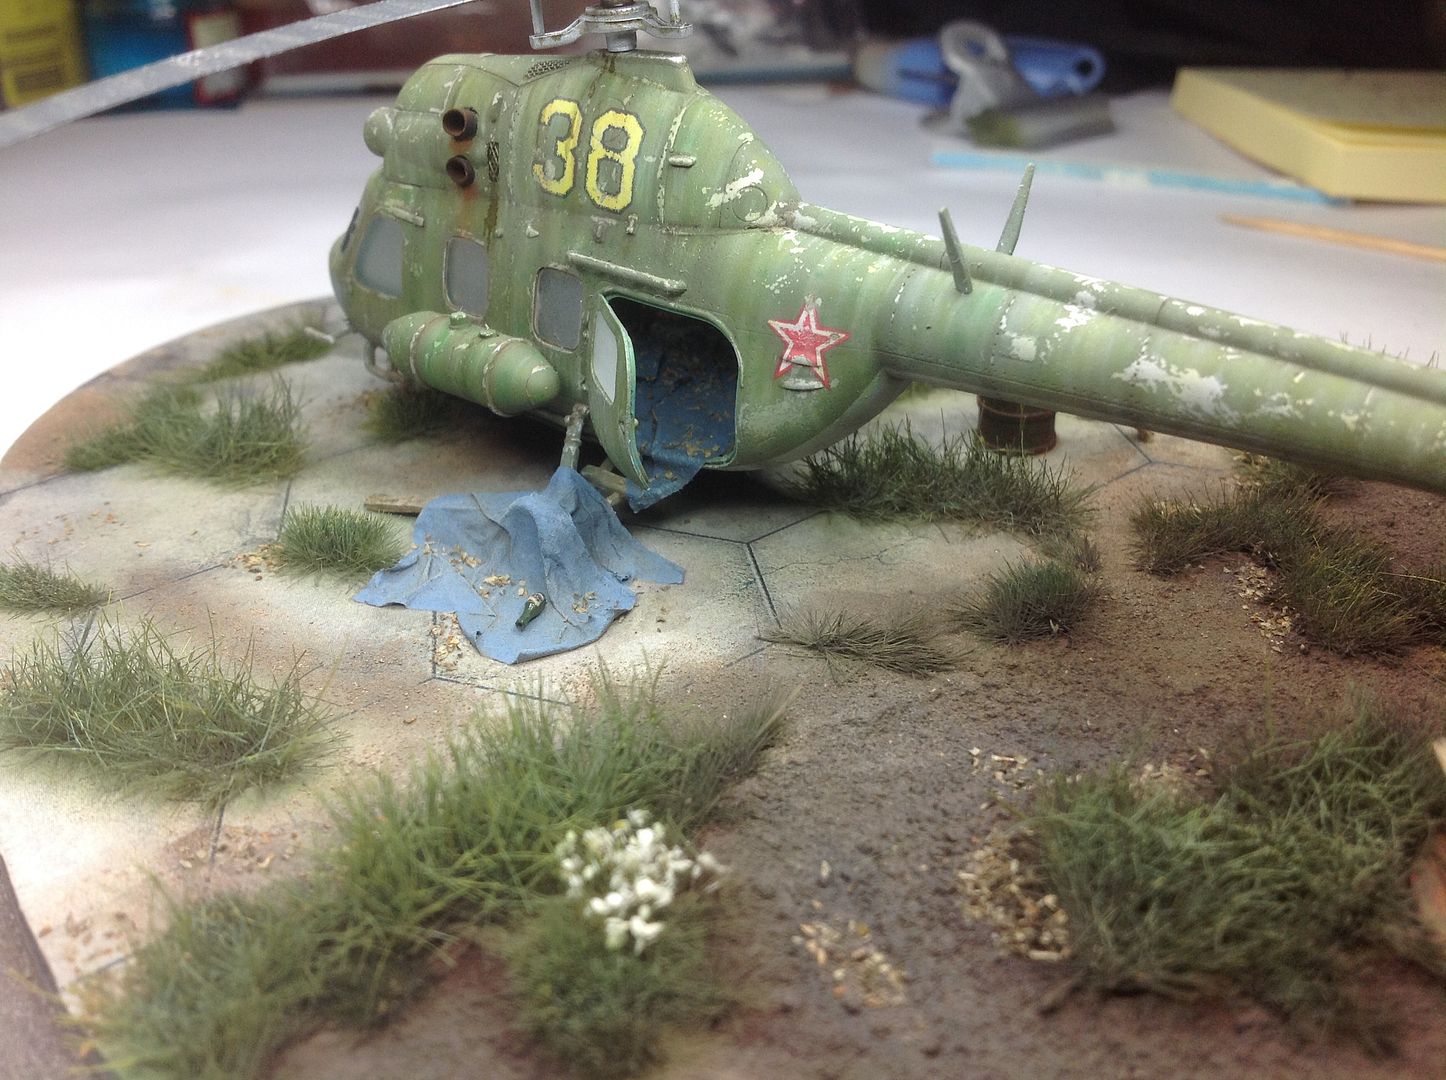 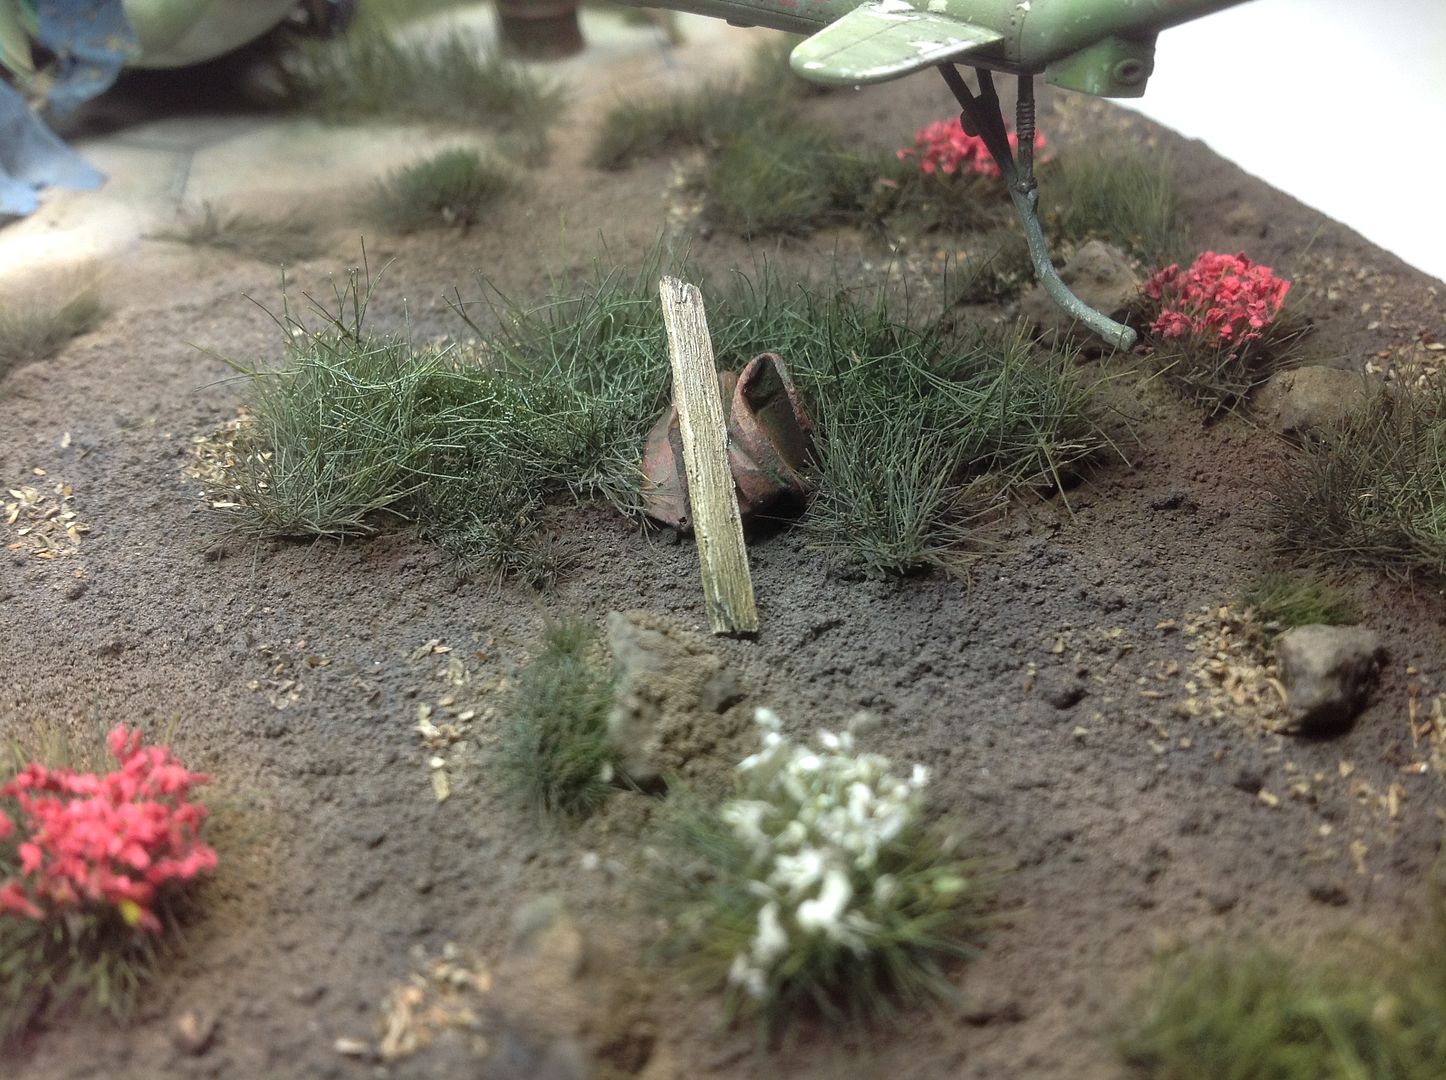 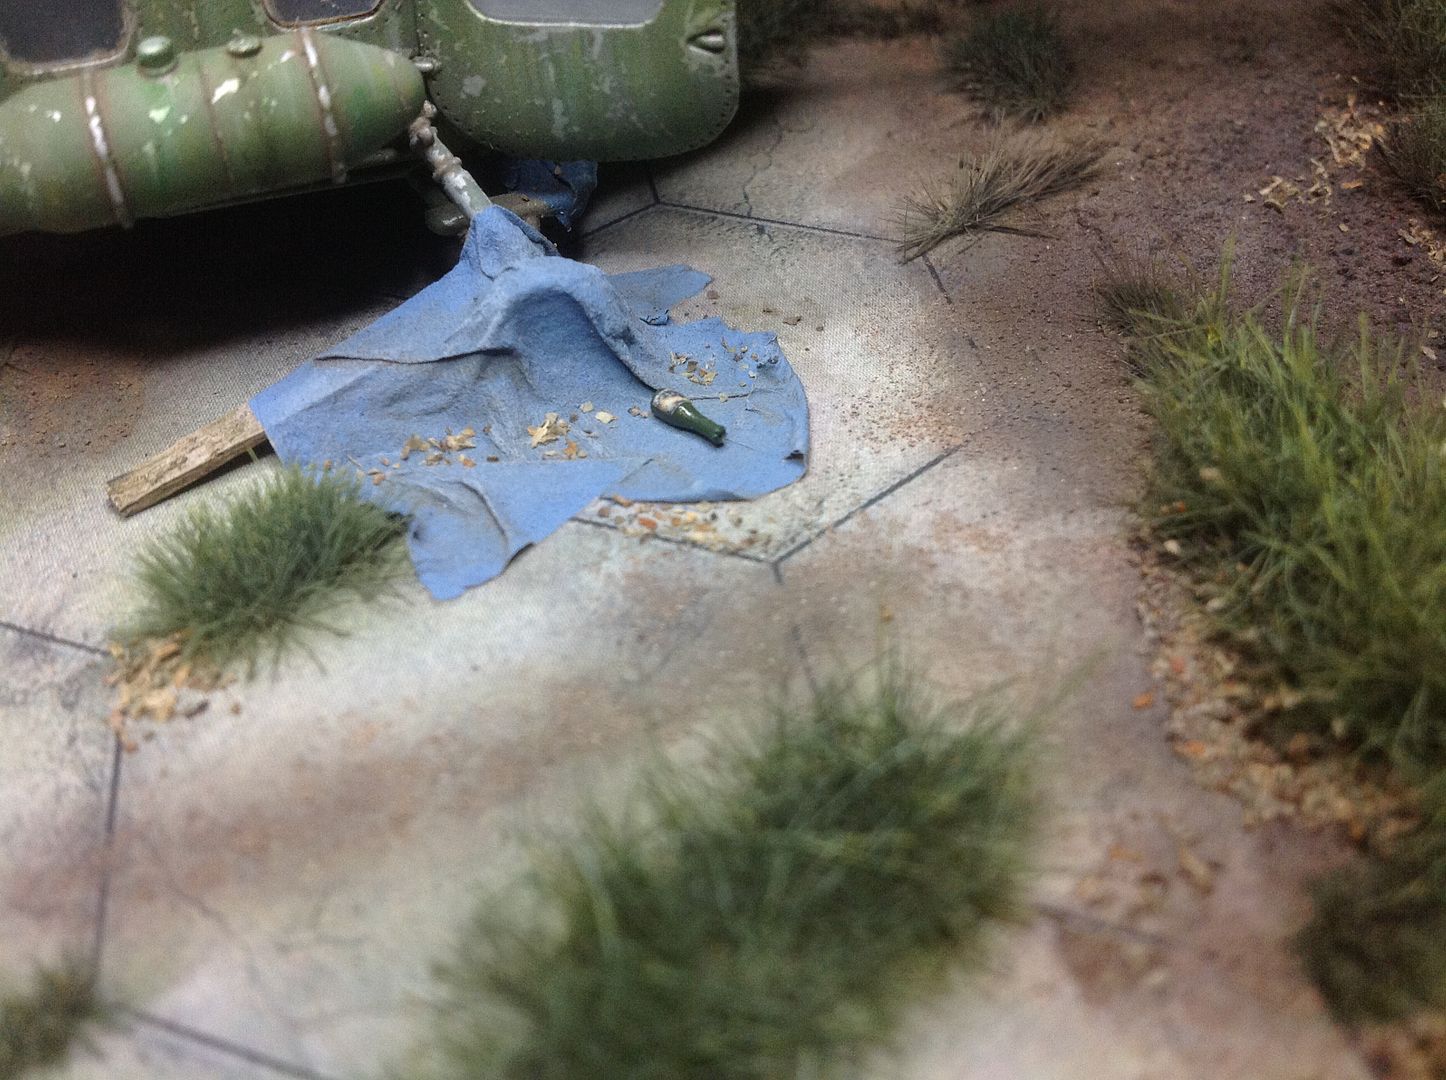 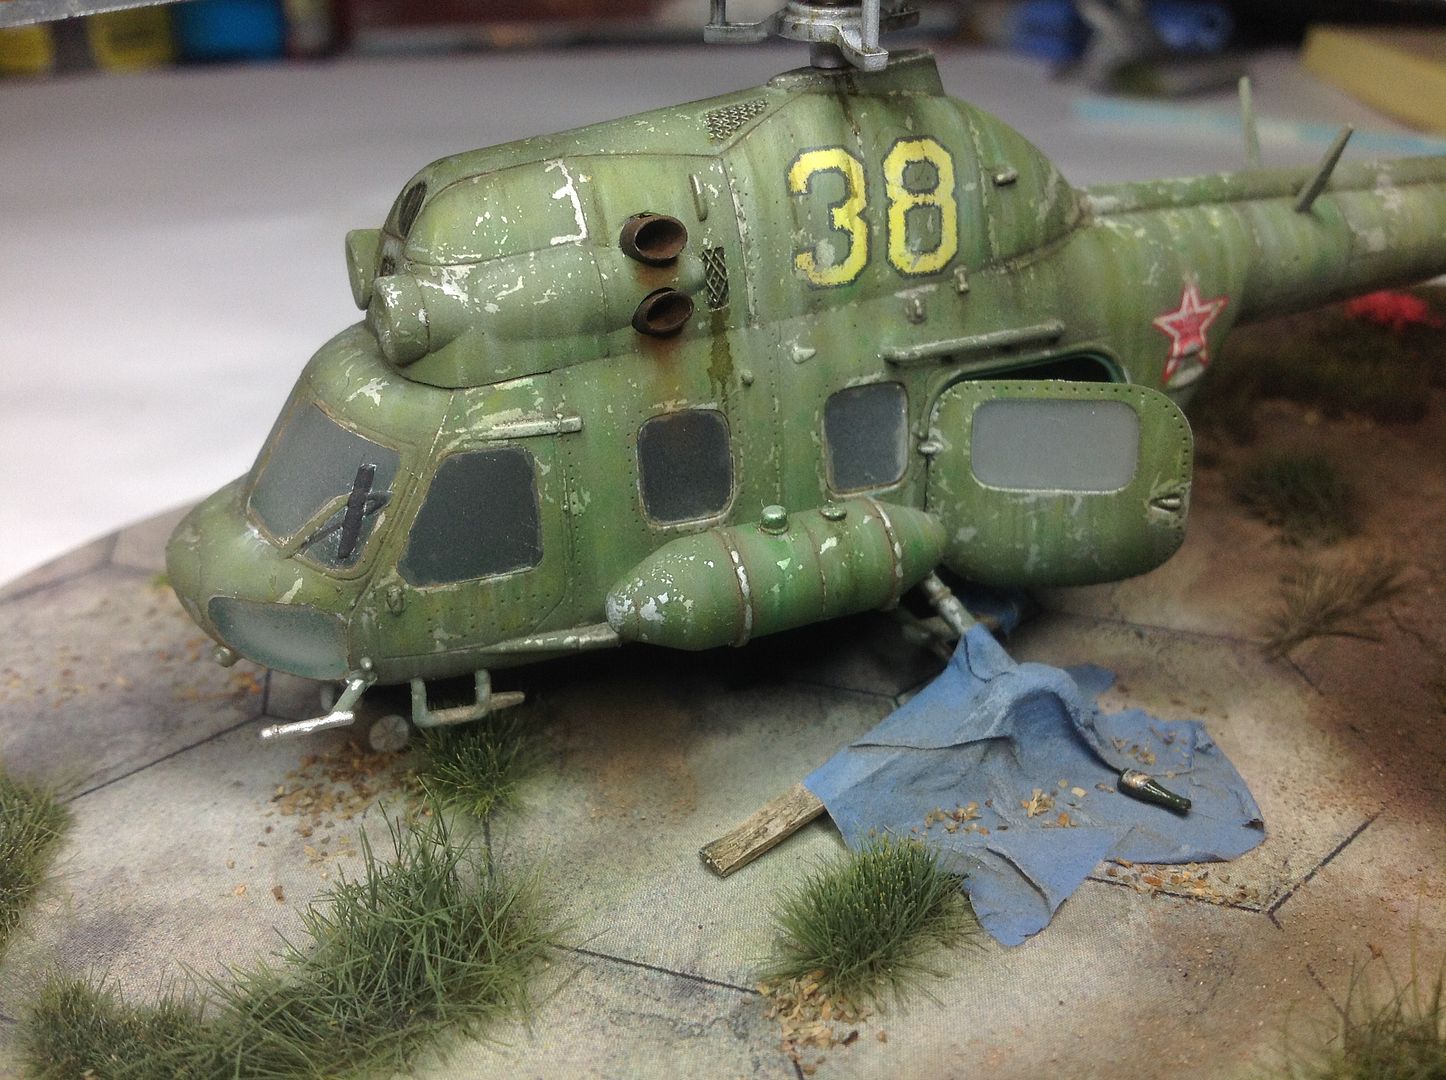 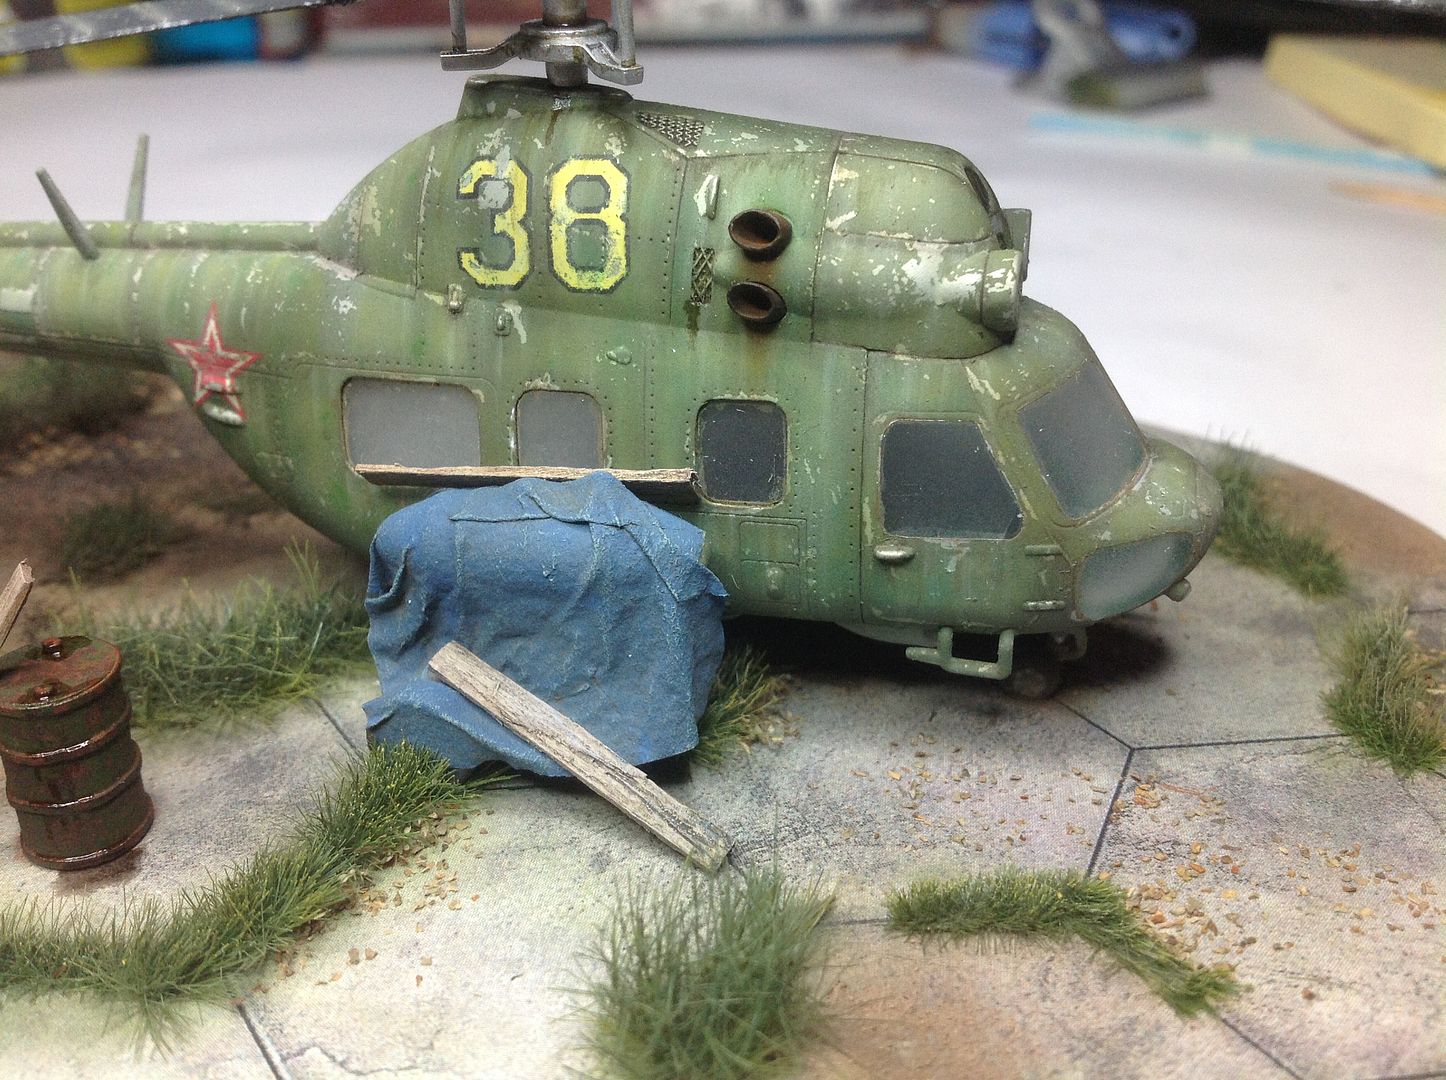 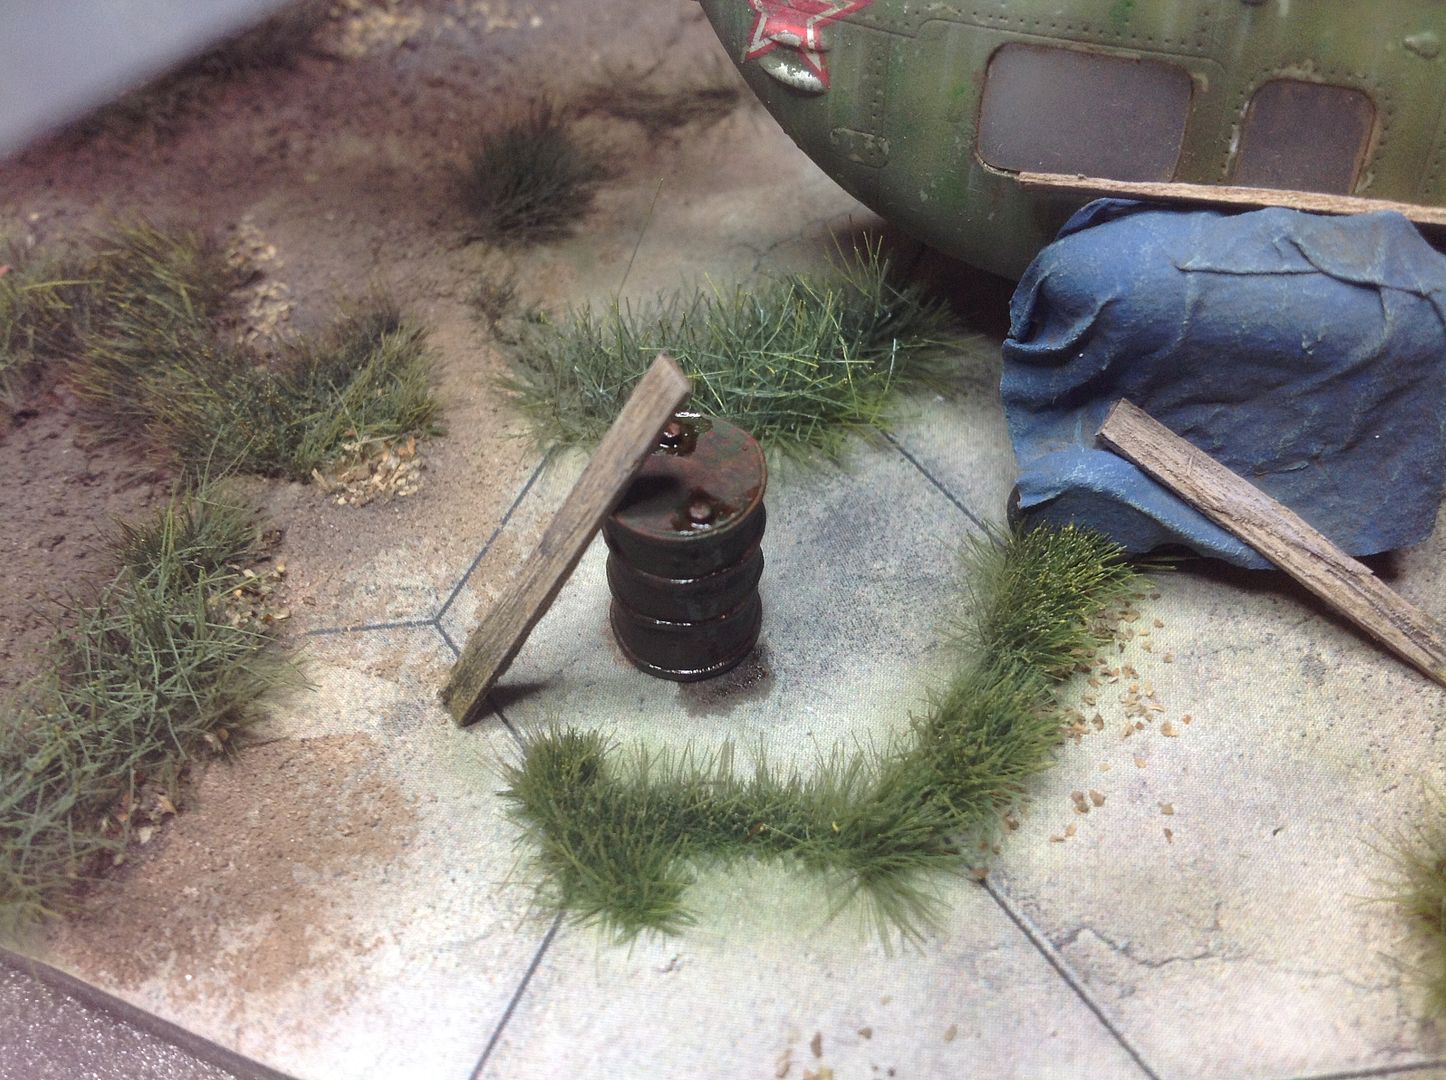 Well folks, it was a long journey (over 18 months from when I first started the kit.... With a big break in the middle!), but I am absolutely over the moon with the end result. There were a lot of "first time" things in here, so it was a steep learning curve at times, but I guess thats the sort of thing you do to become a better modeller huh? I took this girl to the Nationals in Melbourne the week before last and she won gold in her category so I must have done something right!! To top it off, Frank Morgan, the editor of ModelArt magazine (Australia's premier modelling magazine) asked me to do an article on her for the publication! Yay!!!    Righto then, on that note, I am done! Hope y'all enjoyed the ride, I look forward to starting something new.....  Cheers, Sam  |
|
|
|
Post by Leon on Jun 16, 2015 5:14:14 GMT -5
WOW!!!!! Awesome finish Sam and congrats on being asked to do an article her.Very well executed and you've captured the abandoned look perfectly.   |
|
|
|
Post by TRM on Jun 16, 2015 6:18:16 GMT -5
Congrats on the finish Sam!! And a big congrats on the gold!! Well done!
|
|
|
|
Post by wbill76 on Jun 16, 2015 19:47:17 GMT -5
Congrats on all fronts Sam! Both on getting it done, the gold, and the mag deal!  Certainly deserves to be in print after all the hard work you put in on her.  |
|
|
|
Post by deafpanzer on Jun 20, 2015 21:25:05 GMT -5
Freaking love the base!!!
|
|
venom1
Full Member
  
Member since: October 2012
Posts: 1,369
Oct 10, 2012 2:40:03 GMT -5
Oct 10, 2012 2:40:03 GMT -5
|
Post by venom1 on Jun 23, 2015 7:54:59 GMT -5
Leon, T, Bill, Andy, thanks so much for the kind words lads! She is a labor of love, that's for sure! Glad you all like my lil' ol' whirlybird!  Cheers, Sam  |
|
 (rofl)Ennyhoo, better late than never, hey? (Well, that's my story, 'n I'm stickin' to it!!)


 (rofl)Ennyhoo, better late than never, hey? (Well, that's my story, 'n I'm stickin' to it!!)


