losboz
Full Member
  
Member since: September 2013
Posts: 322 
|
Post by losboz on Jan 27, 2014 8:54:51 GMT -5
I started this build in March 2013 and its been a long road. This is Model Victoria's superb Fiat 626 and it is a beautiful resin kit 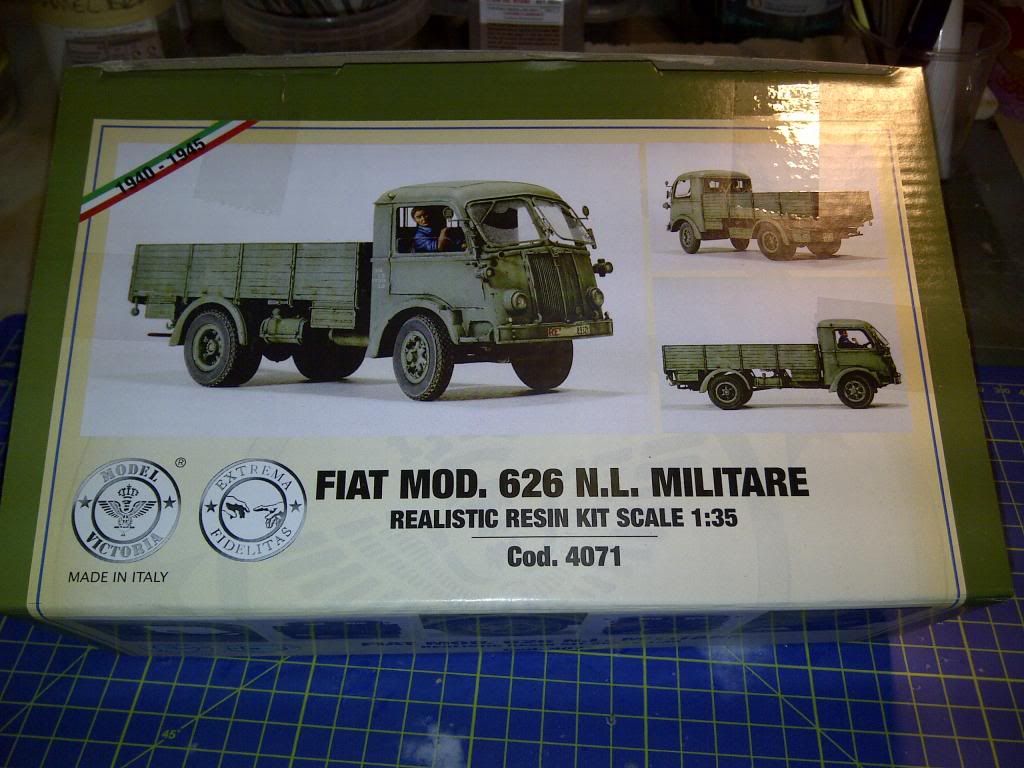 It arrived in a nicely presented and sturdy box and the contents were immaculately packaged with items separated in their own bags or wrapped in bubble wrap. This insured there were no breakages and no part was warped or damaged 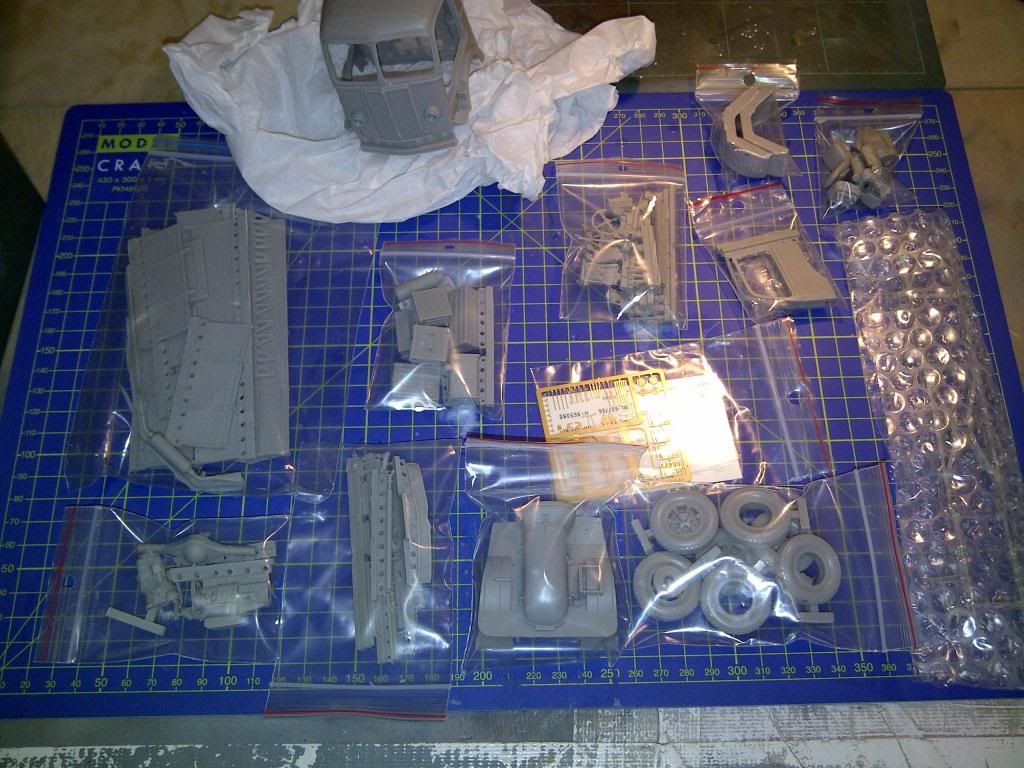 The instructions are crystal clear SBS photos of the actual model 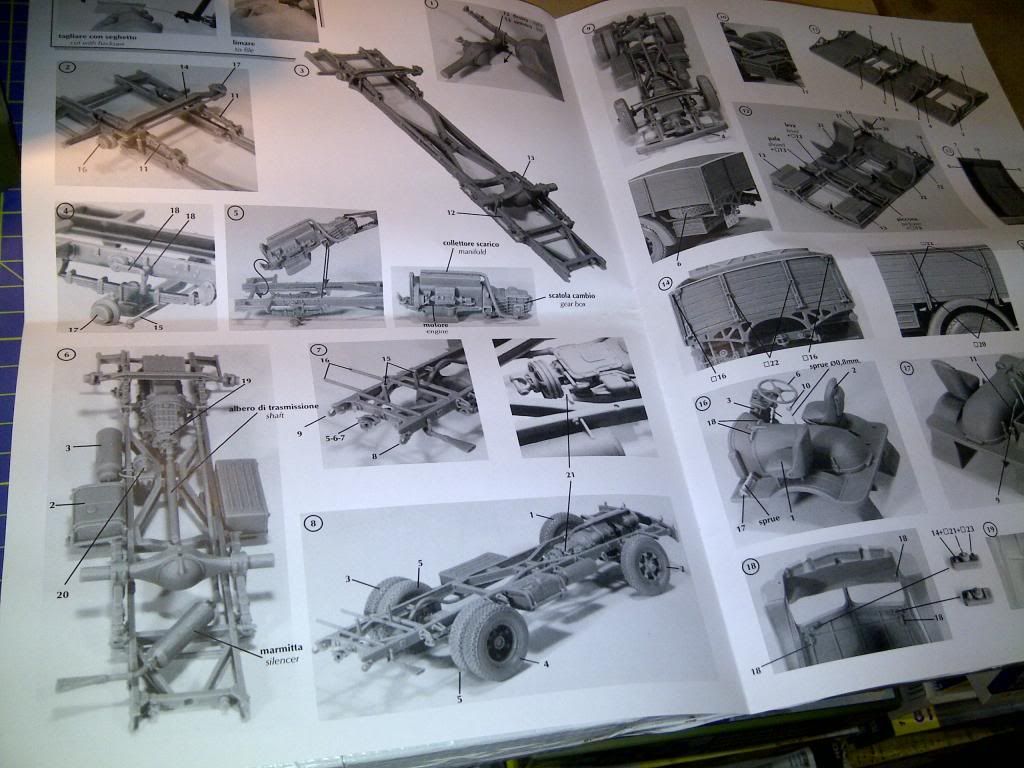 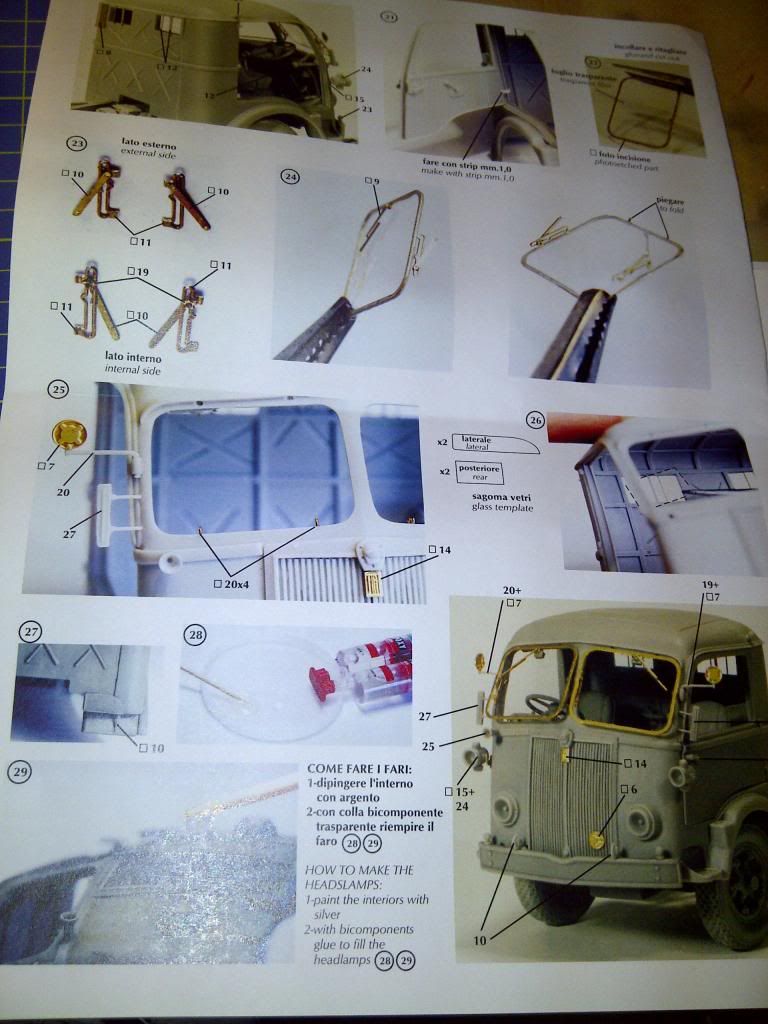 Painting guides and decals for both Italian and German versions 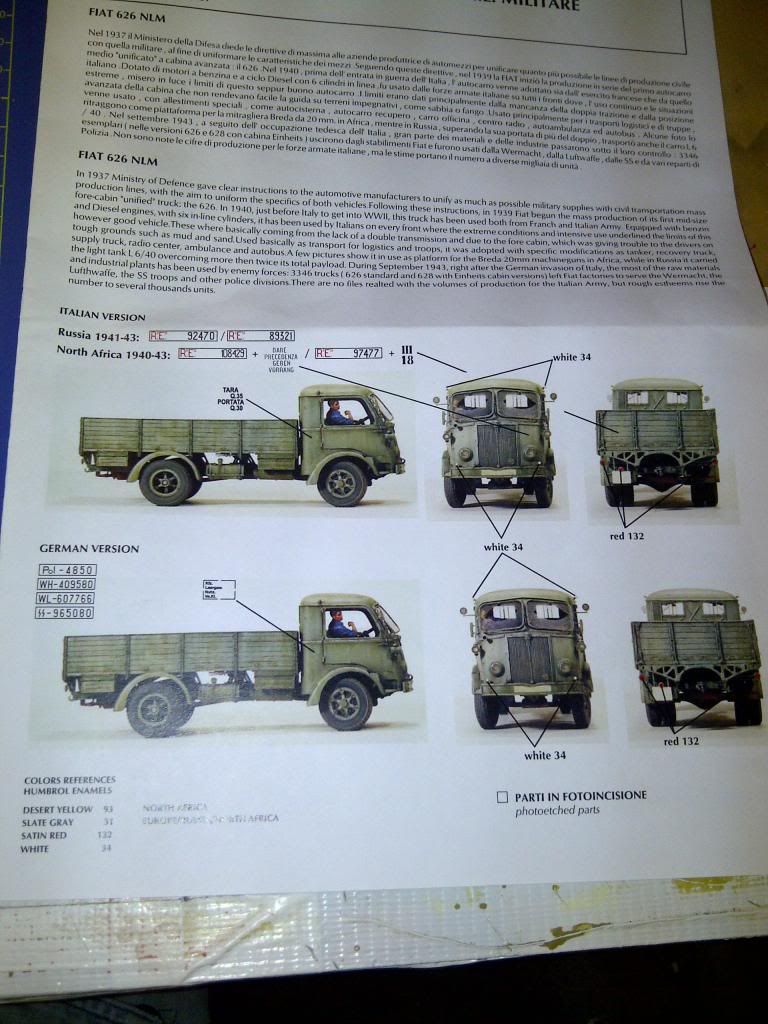 I started per instructions with the chassis 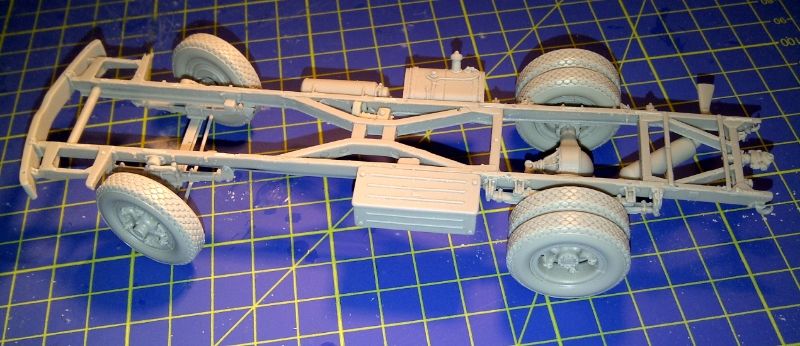 |
|
|
|
Post by bullardino on Jan 27, 2014 10:01:44 GMT -5
I jump in, Los.
Those trucks wandered around when I was a kid, even if the war had ended a long time before.
Great start, the chassis looks wonderful.
|
|
losboz
Full Member
  
Member since: September 2013
Posts: 322 
|
Post by losboz on Jan 27, 2014 10:16:38 GMT -5
All parts required very little clean up, if any and it all snapped together effortlessly. The tyres are beautifully rendered and the cab comes in one piece 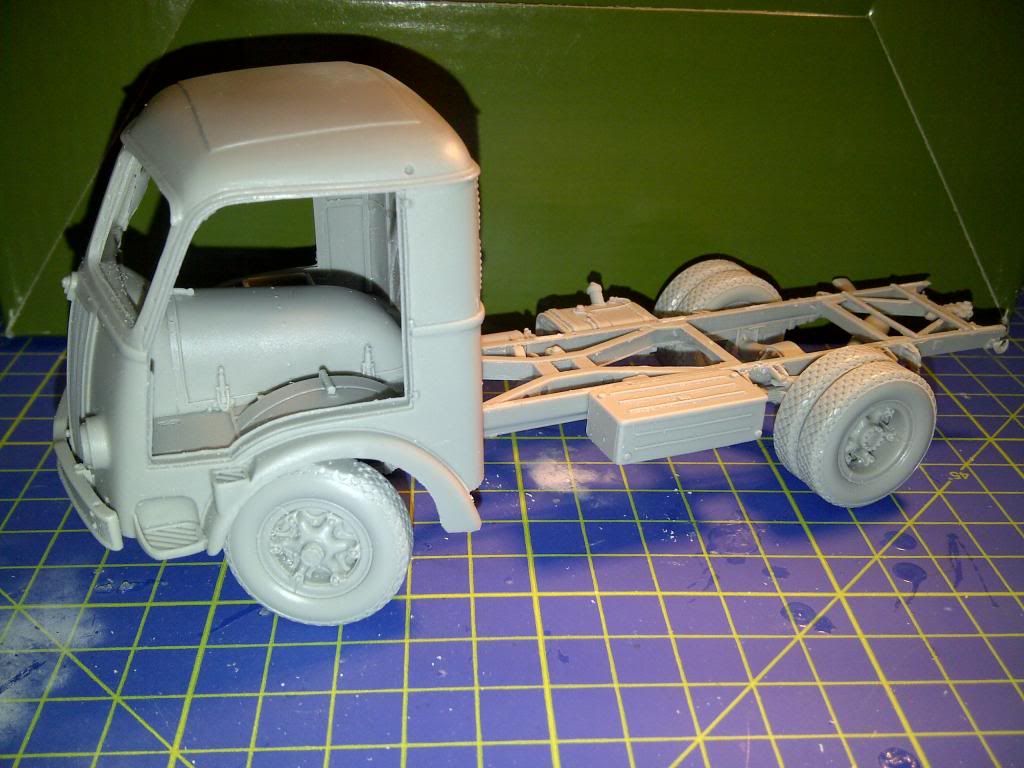 Once the main components were completed they received a thorough degrease and were left to dry. Then they were primed with Halford's rattle can grey primer. I was going to use the hairspray method to show worn parts in primer so the next coat was a Vallejo dark hull red and chocolate brown mix. 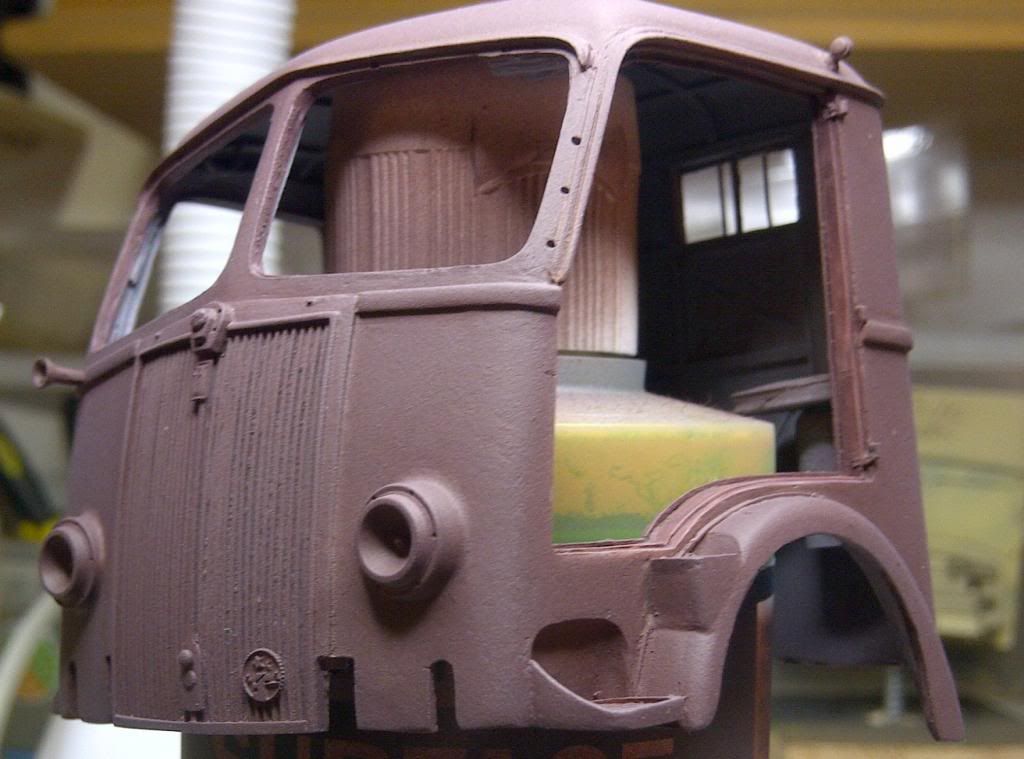  The wooden cargo elements were given various acrylic washes of new and old woody colours which would form the naturally weathered wood under the dark yellow base coat 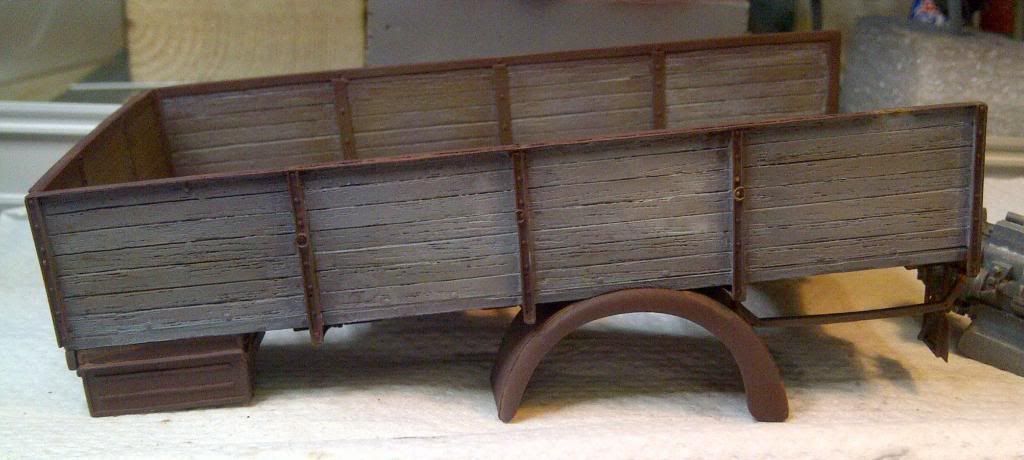 Next step was the Dunkelgelb base coat. I had successful results with the Vallejo modulation set before this project so I mixed a combination of all but the dark base colours. Firstly a base and light base mix to the lower parts of the model followed by a light base to the upper areas of the cab and lastly a very light highlight coat to all the upper areas air brushed from above. I then added one thin coat of HS and applied an olive green camouflage pattern. I didn't want it to be a particularly busy pattern but tried to imitate a quick hand sprayed affair. I forgot to take pics after the modulation painting stage as I must have been too eager to get chipping ! 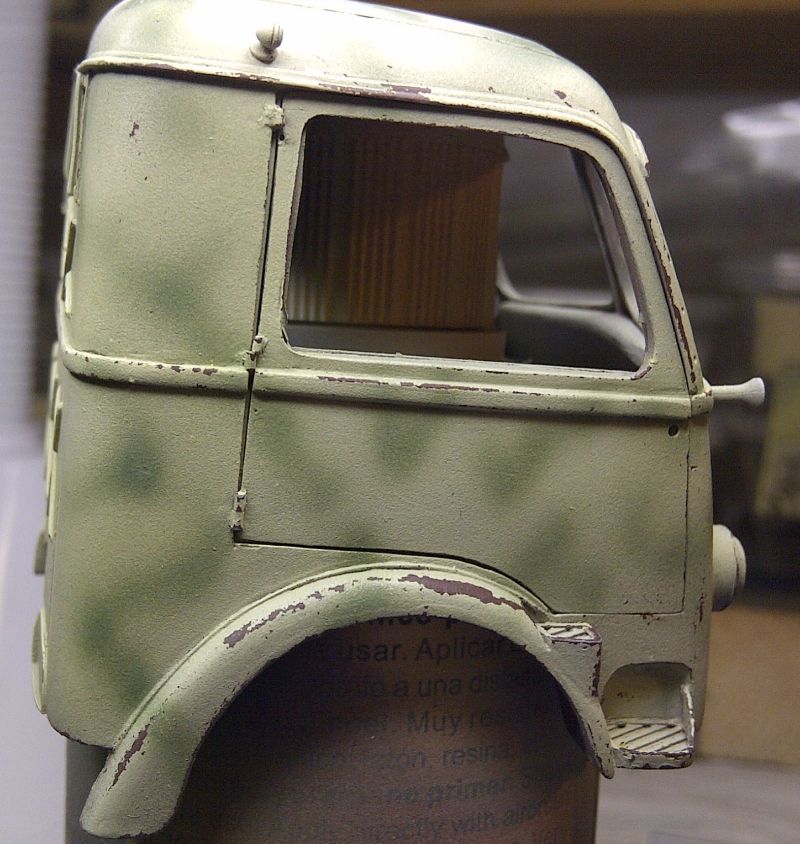 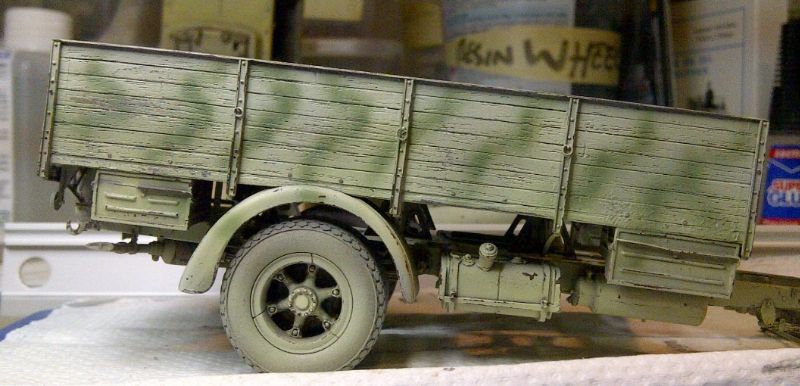 One thing I did boo boo on was that this was unusually a right hand drive (like what us Brits drive  ) and I set about chipping the left hand door entrance areas far more. This was rectified in later stages. I then airbrushed gloss varnish to the number plate and cab areas to receive the kit decals. Once the decals were applied the whole model received a coat of satin varnish to protect all the exterior paint steps so far ![]() 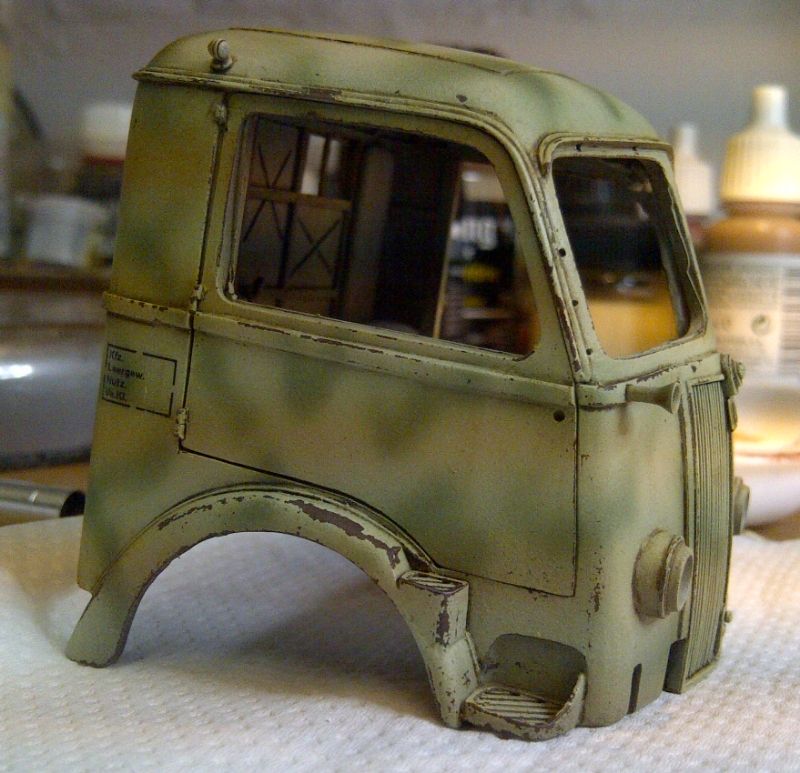 The cargo area metalwork received some heavily diluted acrylic rust colours in places 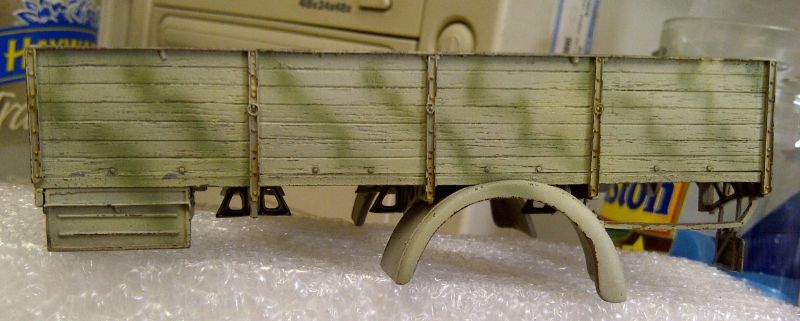 |
|
|
|
Post by bullardino on Jan 27, 2014 10:19:55 GMT -5
Fantastic job.
They used right hand drive as convoys had to follow the road side at night without lights on, so the driver had to be as close to it as he could.
|
|
losboz
Full Member
  
Member since: September 2013
Posts: 322 
|
Post by losboz on Jan 27, 2014 10:22:11 GMT -5
I jump in, Los. Those trucks wandered around when I was a kid, even if the war had ended a long time before. Great start, the chassis looks wonderful. Cheers Luigi, this is one still in use...................just   |
|
|
|
Post by bullardino on Jan 27, 2014 10:27:30 GMT -5
Looks like it has seen better times  626 and Leoncino were the two most common trucks during my childhood  |
|
losboz
Full Member
  
Member since: September 2013
Posts: 322 
|
Post by losboz on Jan 27, 2014 10:36:31 GMT -5
Got some nice ref pics in Italian use during the war but not so many in German use link![]() Most of the Normandy pics show the 626 in numerous pices apart from this one during the Falaise gap battles 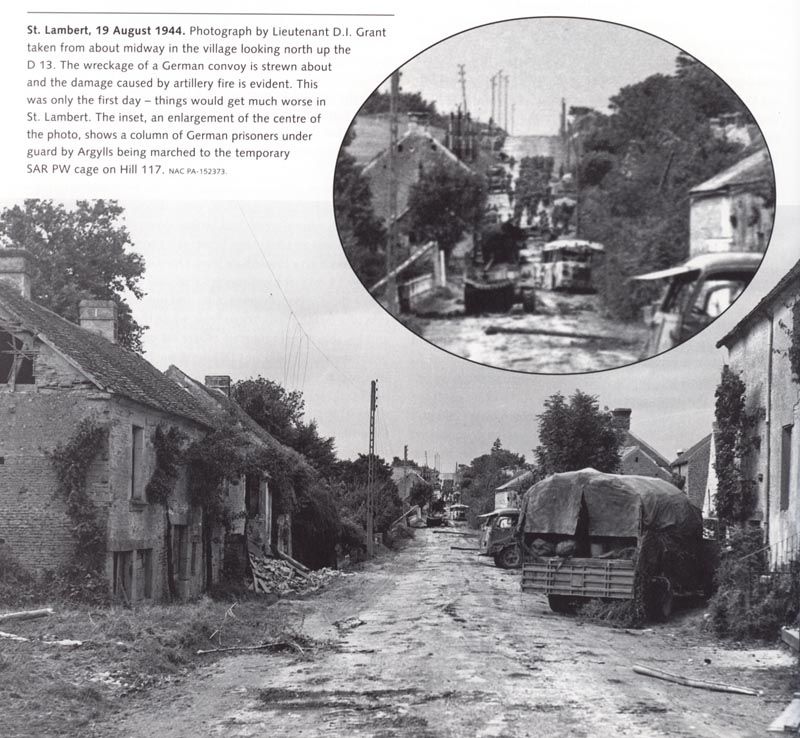 |
|
losboz
Full Member
  
Member since: September 2013
Posts: 322 
|
Post by losboz on Jan 27, 2014 10:57:18 GMT -5
Next up for paint was the engine. Only the sump will really be visible once completed so I didn't go overboard here 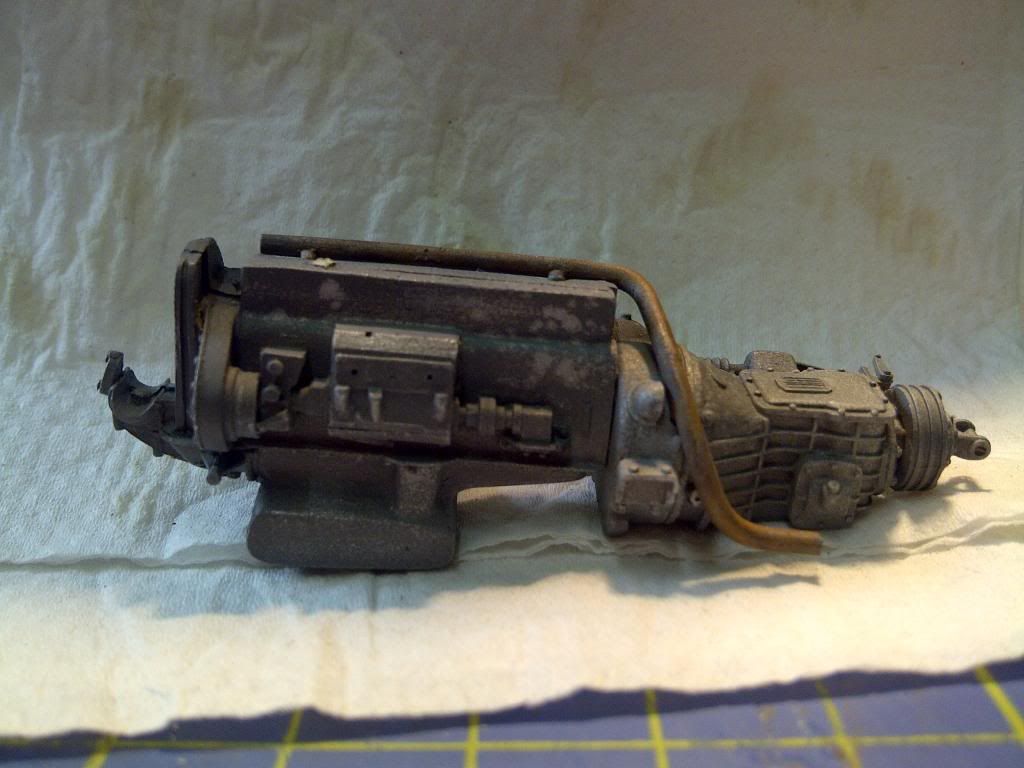 The cab and loadbed where treated to some MIG filters and pin washes with MIG brown and black washes. The propshaft, tyres, instruments, exhaust and steering wheel were all hand painted with acrylics and the seats given a base coat of Vallejo leather followed by oils. The chassis and inner cab were then treated to various applications of acrylics, oils and pigments 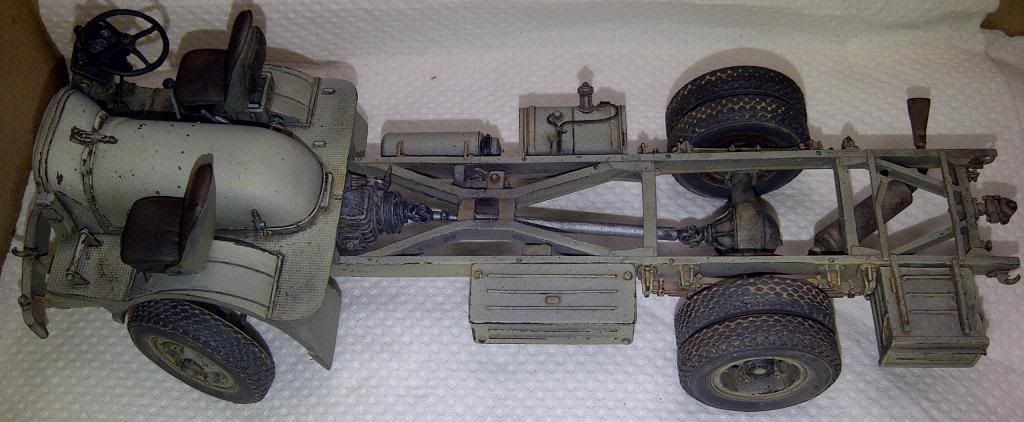 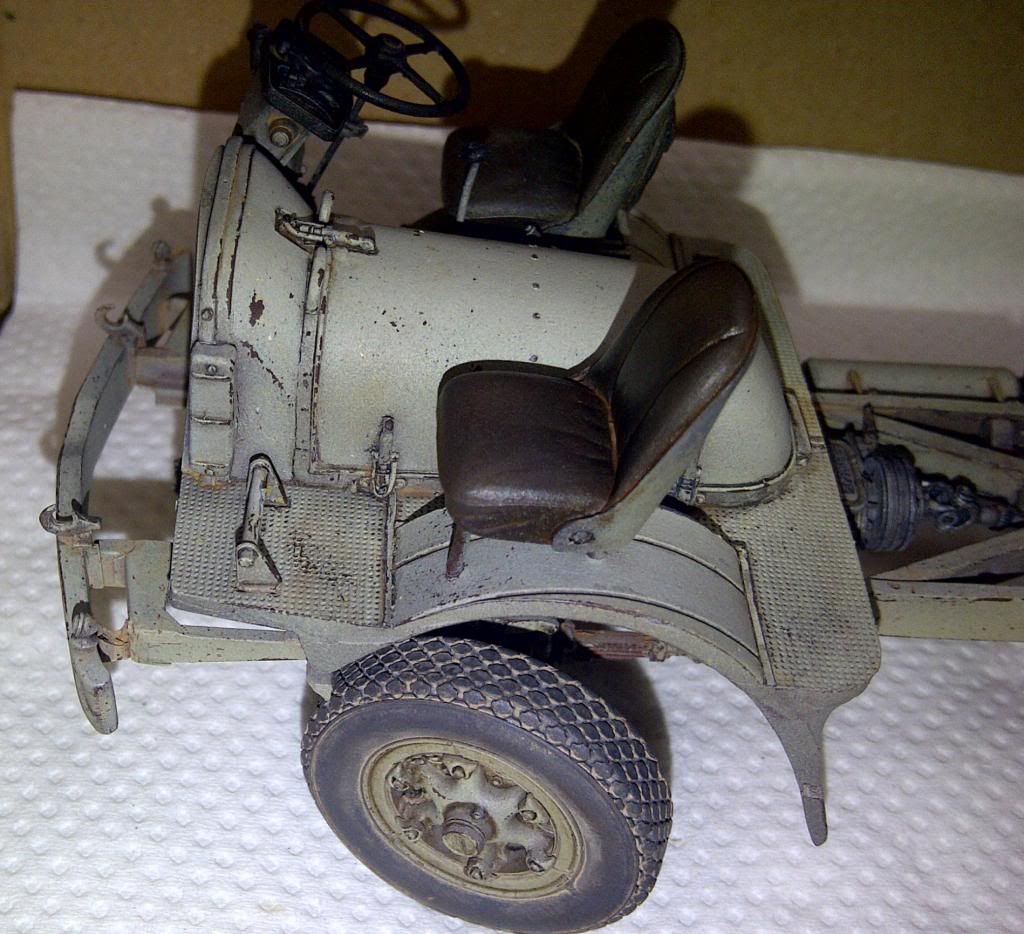 The load bed got the same treatment 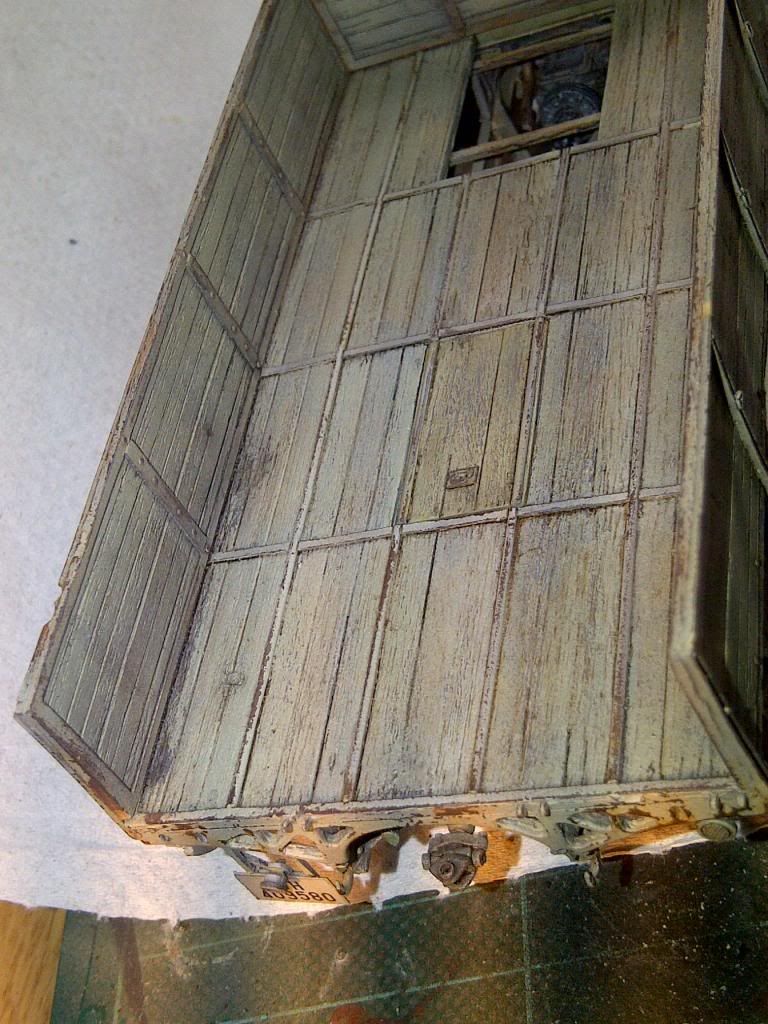 And until June 2013 she became a shelf queen albeit in a nice dust free storage box  |
|
losboz
Full Member
  
Member since: September 2013
Posts: 322 
|
Post by losboz on Jan 27, 2014 12:53:28 GMT -5
So after procrastinating about getting this back on track summer comes along and I start by attaching the large sub-assemblies. At this point I only go and drop her whist attaching the cab to the body     Even though it was only a short fall it did a fair bit of damage  The cab parted with the chassis, the trackrod parted with the wheel hubs and various small items broke off never to be seen again ! After checking there was no major paint damage and consoling myself that things weren't too bad I decided that I would crack on and put her back together but all was not well  Further investigation revealed the track rod had lost a portion, a chassis rail had snapped and one front wheel had snapped off with the locating lug inside  The steering linkages would require a complete overhaul and various items would need to be found amongst the fibres ! I was so pissed at myself for this that I just couldn't commit to fixing her and diverted to other projects to avoid the whole repair process. I did slowly start repairs but it took until the end of 2013 until I was totally satisfied and happy with progress. To say the repairs were a challenge for me is an understatement and my mojo took leave for a while. The trackrod had snapped off at both hubs and small sections succumbed to the carpet monster so this was the hardest part to remedy. Numerous small inner and outer cab items are now reconciled with the cab and the cab interior has been re attached. I am pretty sure it fits a little better now. Both seats were attached to the inner cab this time (Only the drivers seat was added originally) and I now realise why I had planned it that way ! The rear squab seat behind the passenger seat hinders a straight forward fitment with both seats fitted to the inner cab. I had a few tense moments (along with more than a few choice words) getting them to locate but it is possible (not recommended though ! ) A few of the repairs are not perfect and although a lot are hidden I needed to ensure that I did the very best I could to getting it looking its best again Luckily the front axle ends have small nodules top and bottom to allow the hubs to locate without the need for gluing and to my relief all the hub locating recesses remained intact. I had original drilled out the track control ball joints so I could articulate the steering but as the whole fitment is now a lot looser I have had to glue the hubs to the axles. This will also insure there is no stress on the repaired track rod as this is now extremely fragile So this is where we are up to now 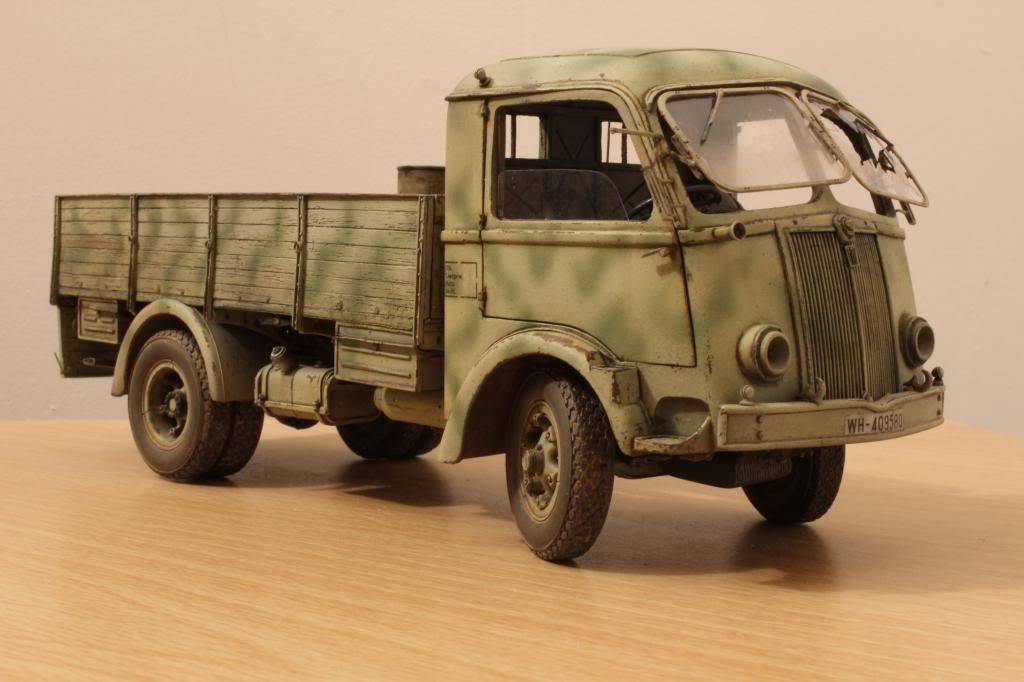 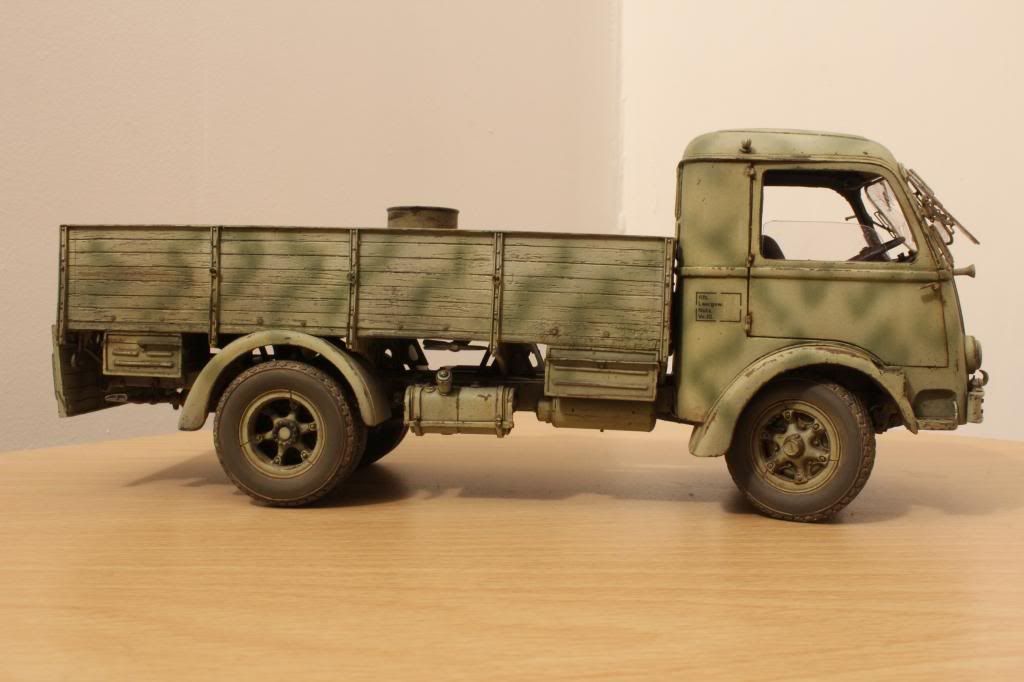 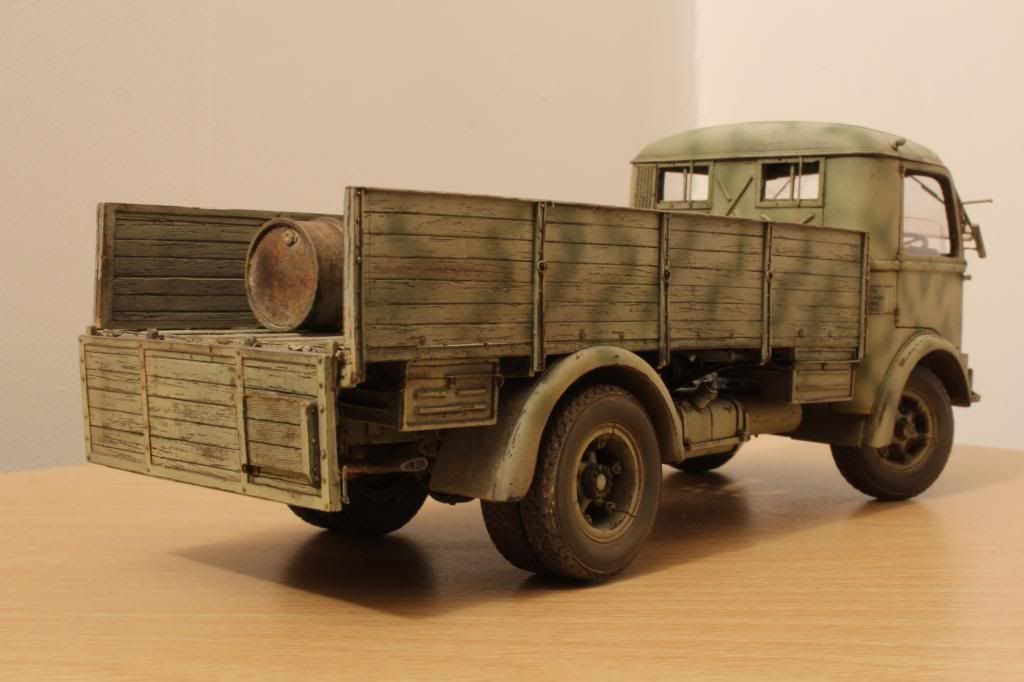 Its been a tough build but I am nearing the end and am determined to make this one of my first completed builds Los |
|
Deleted
Member since: January 1970
Posts: 0
Nov 22, 2024 14:36:42 GMT -5
Nov 22, 2024 14:36:42 GMT -5
|
Post by Deleted on Jan 27, 2014 13:21:23 GMT -5
damn fine model even with the trials and tribulations you've had old chap
|
|
|
|
Post by bullardino on Jan 27, 2014 13:55:08 GMT -5
Mighty fine, can't wait to see more  |
|
Deleted
Member since: January 1970
Posts: 0
Nov 22, 2024 14:36:42 GMT -5
Nov 22, 2024 14:36:42 GMT -5
|
Post by Deleted on Jan 27, 2014 18:35:56 GMT -5
Beautiful, simply beautiful.
G
|
|
|
|
Post by wbill76 on Jan 27, 2014 20:51:04 GMT -5
Very cool! The Germans used anything they could get their hands on no matter where the source. You've captured the look on this one for sure Los.
|
|
|
|
Post by deafpanzer on Jan 28, 2014 0:14:29 GMT -5
WOW! Just WOW! Beautiful build... everything looks great even the fuel drum. The windshield look damn good too.
|
|
Smudge
Reviews member    
Member since: March 2012
...The 'other Smudge' not the 'Sniper Smudge' LOL
Posts: 613
Mar 8, 2012 4:29:18 GMT -5
Mar 8, 2012 4:29:18 GMT -5
|
Post by Smudge on Jan 28, 2014 7:58:07 GMT -5
Hi Los That turned out just great well done mate. A new one on me but apparently Fiat provided 3300 for the Germans during WWII and even France took delivery of 700 pre 1940. Many of those would have been used by the Germans in NWE I guess? There's quite a few photos (and colour artwork) here on Oliver Messing's site www.german.o5m6.de/ the 626 is halfway down the left toolbar. Pics mainly in Italy, Russia, Yugoslavia and North Africa. Smudge |
|
losboz
Full Member
  
Member since: September 2013
Posts: 322 
|
Post by losboz on Jan 30, 2014 5:30:49 GMT -5
Thanks guys, glad you like it Dicky Having only built this one resin kit to date I would be mightily disappointed if this wasn't the norm, but it sounds like it isn't  Smudge Smudge Wow 3300 ! Didn't realise they built them specifically, just assumed they were utilised from units using them in North Africa, Italy etc I have finally found and added appropriate sized headlight masks, re-worked the shattered passenger side screen and started on stage one of the weathering. Starting from light to dark i have applied initial light coloured pigments, rust (the fantastic lifecolor rust set) and oils. Forgive the camera phone quality pics 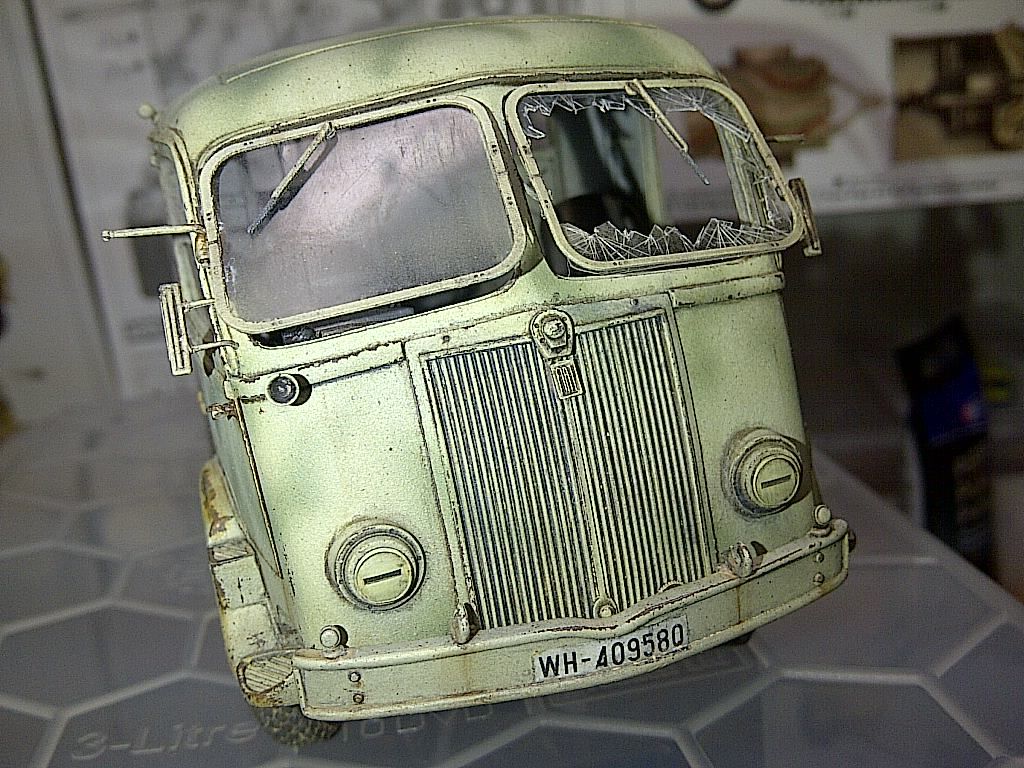 By accident I think I might have created a bird poop (thanks armourguy  ) on the door so I will be embellishing this in later stages with an aerial impact on the side window  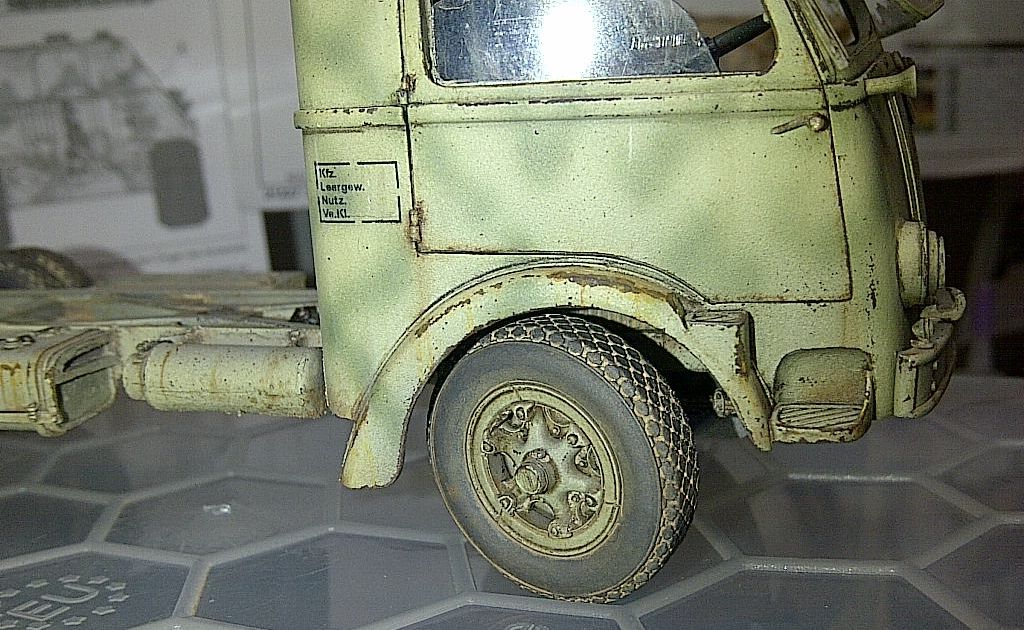 Los |
|
AverageJoe
Full Member
  
Member since: May 2013
1/72 & 1/35
Posts: 170
May 11, 2013 12:04:46 GMT -5
May 11, 2013 12:04:46 GMT -5
|
Post by AverageJoe on Jan 30, 2014 5:47:17 GMT -5
Wow, brilliant work  |
|
|
|
Post by bullardino on Jan 30, 2014 14:30:57 GMT -5
Awesome, the broken windscreen looks fantastic  |
|
Tony Thunder
Full Member
  
Member since: January 2012
Posts: 591
Jan 30, 2012 18:22:10 GMT -5
Jan 30, 2012 18:22:10 GMT -5
|
Post by Tony Thunder on Jan 30, 2014 15:11:39 GMT -5
Yep! Thats only superb in my opinion!  |
|
|
|
Post by wbill76 on Jan 30, 2014 21:07:33 GMT -5
Got to love that window...and the accidental bird poop is the perfect excuse, have to remember that one!  |
|
Deleted
Member since: January 1970
Posts: 0
Nov 22, 2024 14:36:42 GMT -5
Nov 22, 2024 14:36:42 GMT -5
|
Post by Deleted on Jan 30, 2014 22:06:06 GMT -5
That is impressive Los !
That shattered windscreen looks perfect .
|
|
Smudge
Reviews member    
Member since: March 2012
...The 'other Smudge' not the 'Sniper Smudge' LOL
Posts: 613
Mar 8, 2012 4:29:18 GMT -5
Mar 8, 2012 4:29:18 GMT -5
|
Post by Smudge on Jan 31, 2014 4:53:43 GMT -5
Hi Los
Thats 'smashing' mate, excellent work on the glazing.
Smudge
(The other one)
|
|
Deleted
Member since: January 1970
Posts: 0
Nov 22, 2024 14:36:42 GMT -5
Nov 22, 2024 14:36:42 GMT -5
|
Post by Deleted on Jan 31, 2014 8:00:36 GMT -5
That's an amazing looking kit and you have done a truly masterful job on it.
Shame about the drop, but she had to earn her chips and scratches, and looking you wouldn't know it had happened.
|
|
Gordon Ferguson
Junior Member
 
Member since: April 2012
Posts: 85
Apr 3, 2012 10:22:22 GMT -5
Apr 3, 2012 10:22:22 GMT -5
|
Post by Gordon Ferguson on Jan 31, 2014 9:10:04 GMT -5
That's a superb job you have done there.
Been thinking of purchasing this kit for awhile now , but having had some major disappointments with resin kits in the past was a bit wary of shelling out that much money but seeing what you achieved with it is inspirational
|
|
losboz
Full Member
  
Member since: September 2013
Posts: 322 
|
Post by losboz on Jan 31, 2014 22:51:23 GMT -5
Cheers for the kind words fellas Its taken a fair chunk of time but I'm happy I stuck with It  Gordon Gordon You wont be dissapointed with it, its a really nice piece of kit so what are ya waiting for  Continued with more weathering steps which included working darker oils and pigments into the model. I often rush the whole weathering process so with advice from you guys on the site and info picked up in modelling mags I decided to slow it right down and work on selected areas only moving on to other areas step by step. This means continuously revisiting parts of the model but I realise now the beauty of oils is that blending can be created over a far longer period of time and its so easy to re-start a whole area if need be or remove work that on inspection looks a bit 'dodgy'. The camera never lies and tis a great tool for spotting areas to 'revisit'  I can see plenty of those since taking these pics  I still might have to 'tone down' some of the darker stains and I decided I didn't want to go too heavy with pigments as I liked the way the wheels and running gear were looking. . AK fuel stains were used for spilt fuel on the tank and a drop mixed with black oil to imitate weeping axle oil I used a newly purchased Abteilung 502-German Three-Tone Fading oil to highlight parts of the roof and various places that would catch the light. My next step is to make one more brief pass with a final darker set of dirt and stains and then its onto the load bed. Slowly getting accustomed to the cameras best settings but need to purchase some lighting. I warmed them up a bit on photobucket but they still look a bit 'milky'. A feathered jabo has indeed struck icky terror into the drivers window 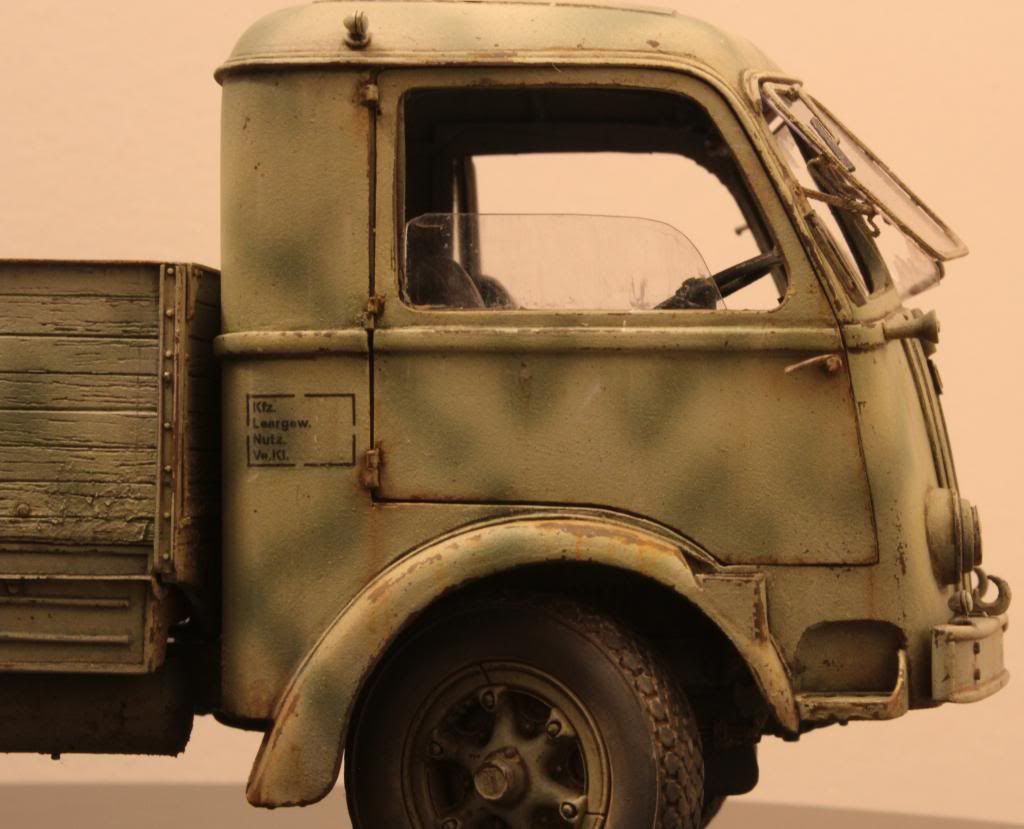 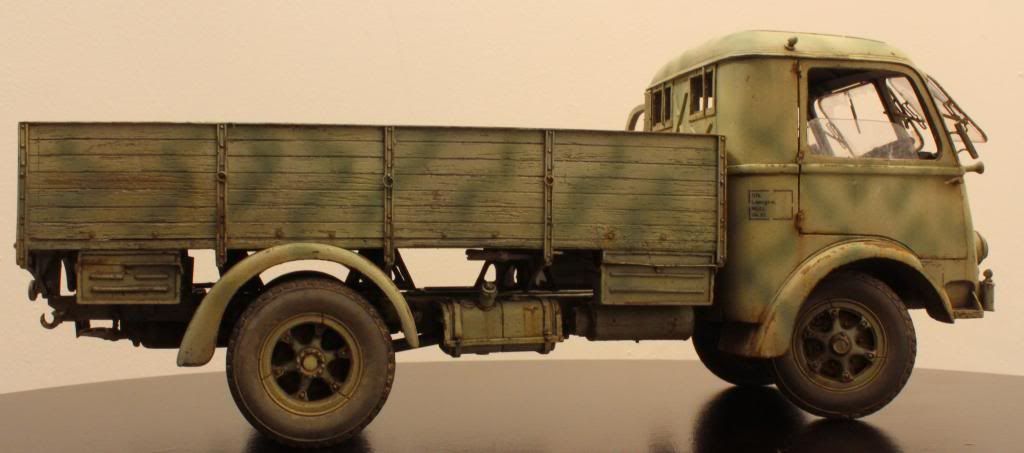 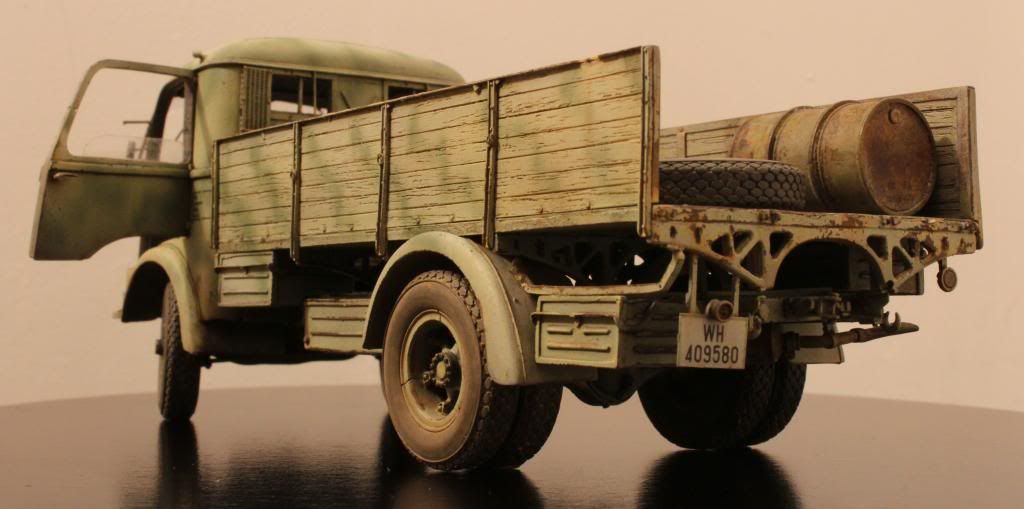 To show the door open a strap was modeled into the cab with plastic card whilst constructing the cab so all I had to do was carefully hollow out a slot for it in the door side and glue it into place. This way I avoided having to resort to gluing very small contact points at the hinges plus the card was flexible enough for the door to be tweaked into place  i just hope I don't accidentally un-tweak it  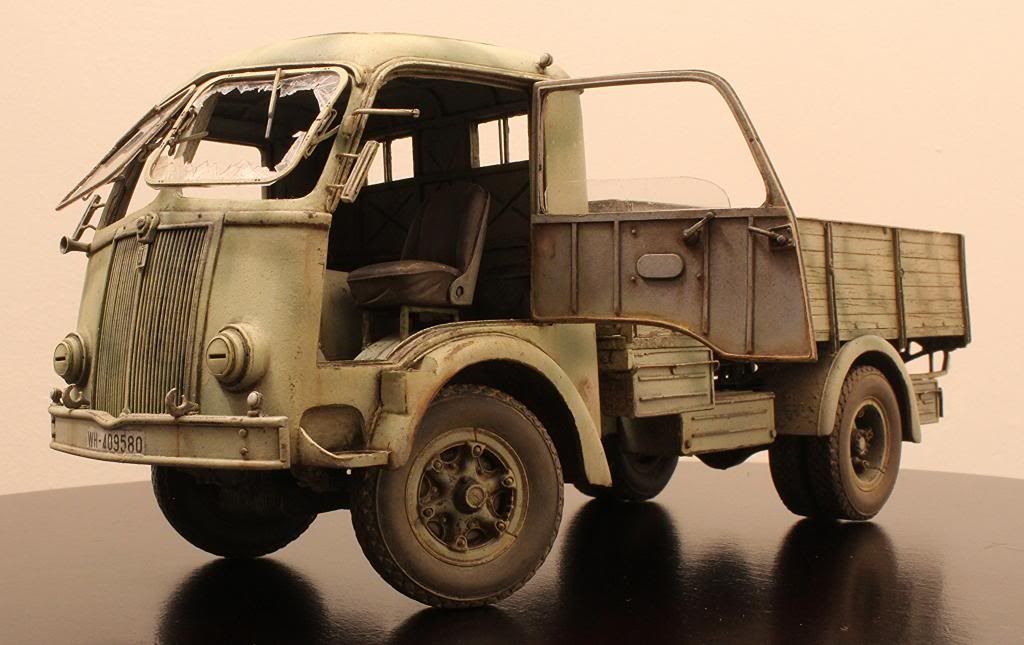 For now Los |
|
Deleted
Member since: January 1970
Posts: 0
Nov 22, 2024 14:36:42 GMT -5
Nov 22, 2024 14:36:42 GMT -5
|
Post by Deleted on Feb 1, 2014 0:57:30 GMT -5
Your the final judge and it looks perfect as is IMO but I'm sure anything you do will further enhance the look .
|
|
bigjohn
Reviews member    
Member since: December 2011
John Hale
Posts: 3,438
Dec 21, 2011 2:17:45 GMT -5
Dec 21, 2011 2:17:45 GMT -5
|
Post by bigjohn on Feb 1, 2014 6:03:23 GMT -5
Looking mighty fine as is! Good call on slowing down and taking your time with the weathering, the results are paying off!
|
|
Deleted
Member since: January 1970
Posts: 0
Nov 22, 2024 14:36:42 GMT -5
Nov 22, 2024 14:36:42 GMT -5
|
Post by Deleted on Feb 1, 2014 8:01:00 GMT -5
looks superb great weathering really brings out all those fine details
|
|
mel.
Full Member
  
Member since: March 2012
Posts: 206
Mar 11, 2012 21:33:07 GMT -5
Mar 11, 2012 21:33:07 GMT -5
|
Post by mel. on Feb 1, 2014 9:11:11 GMT -5
Excellent job throughout!
|
|
AndyArgent.
Senior Member
    Aug 2013 MoM Winner
Member since: November 2011
Andy Bodge Argent - Aug 2013 MoM Winner
Posts: 1,746
Nov 17, 2011 17:09:43 GMT -5
Nov 17, 2011 17:09:43 GMT -5
|
Post by AndyArgent. on Feb 1, 2014 11:54:55 GMT -5
Doesn't get much better than this mate.Superb.
|
|