Post by venom1 on Mar 11, 2014 1:07:48 GMT -5
Okey-dokes folks, time for me to start another thread as I don't have enough builds on the bench yet.... 

Truth be told, I have a lot of PE sets floating about and haven't really used that many. With the number of Big Ed sets I have gathering momentum, I thought I should cut my teeth on something fairly straight forward that consists of more than just a couple of seatbelts and RBF tags, so here we are!
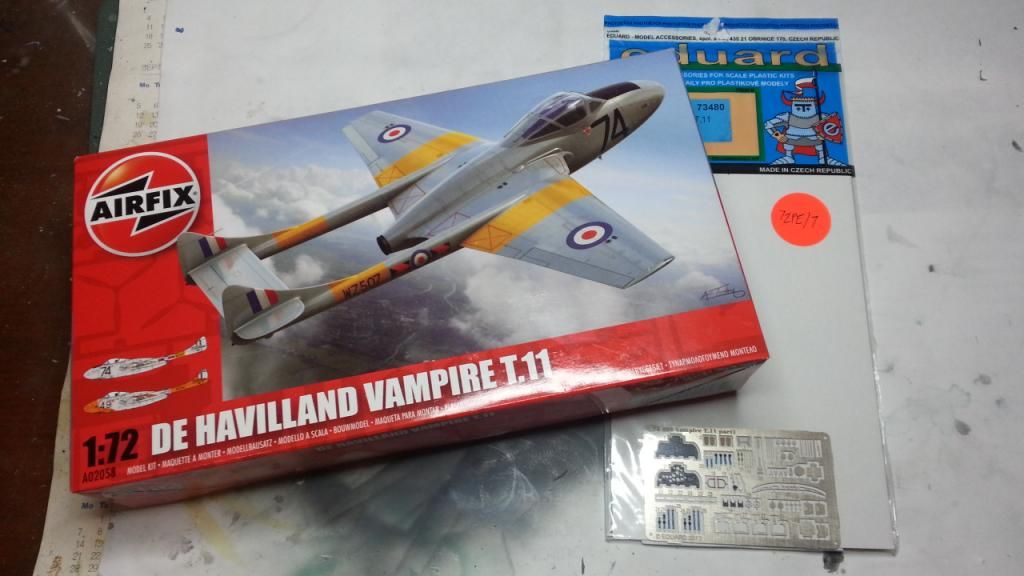
This build, as the title suggests, will be Airfix's lovely little Braille scale Vampire, along with an Eduard etched set, including prepainted IP and stuff (another first for me). Here 'tis....
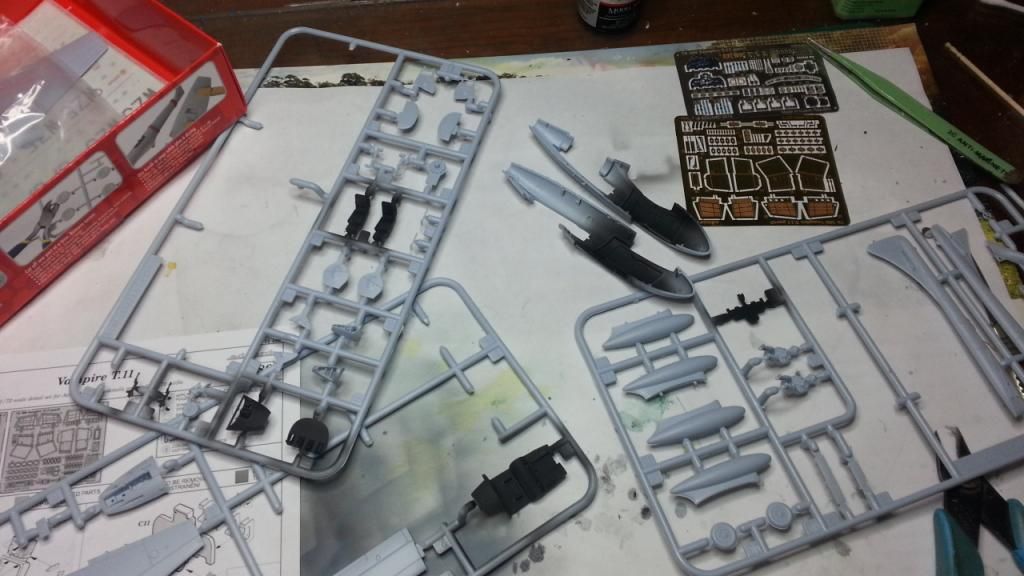
So, first up was to hit the cockpit stuff with some MM Enamel flat black, as such...
So, in for a penny, in for a pound, I dived straight in and tackled the instrument panel. As the kit IP is just a decal, you get a nice flat panel as a starting point which is great. The two sights needed their detail sanded off to make way for the PE stuff, and they were then glued on to the IP. Four sets of rudder pedals needed to be bent up and were then attached to the rear of the panel. The IP itself is a two piece affair, with the instrument faces going on first, followed by the panel (with holes for the instruments to show through) on top of that. Both were attached with Future. There is also a trim wheel attached to the side of the console between the pilots. The sight faces were then attached and we are left with this litle doozy....
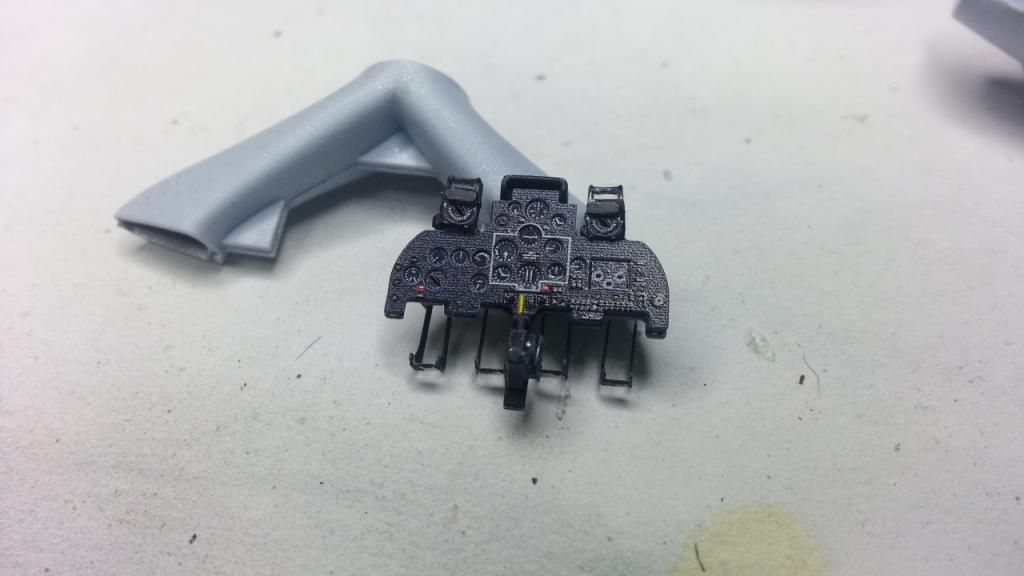
Not too bad for a first crack!!
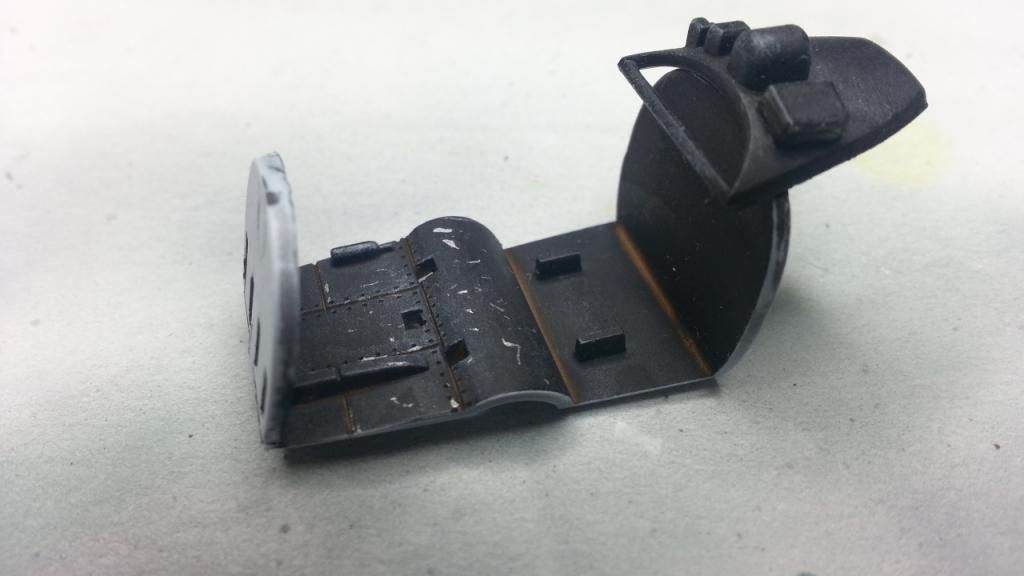
The main tub was then assembled and weathered with some scratches and dirt to give a jolly good lived in look. The box on the rear shelf is PE from the Eduard set. Still all needs a flat coat to finish it off and dull down the silver.....
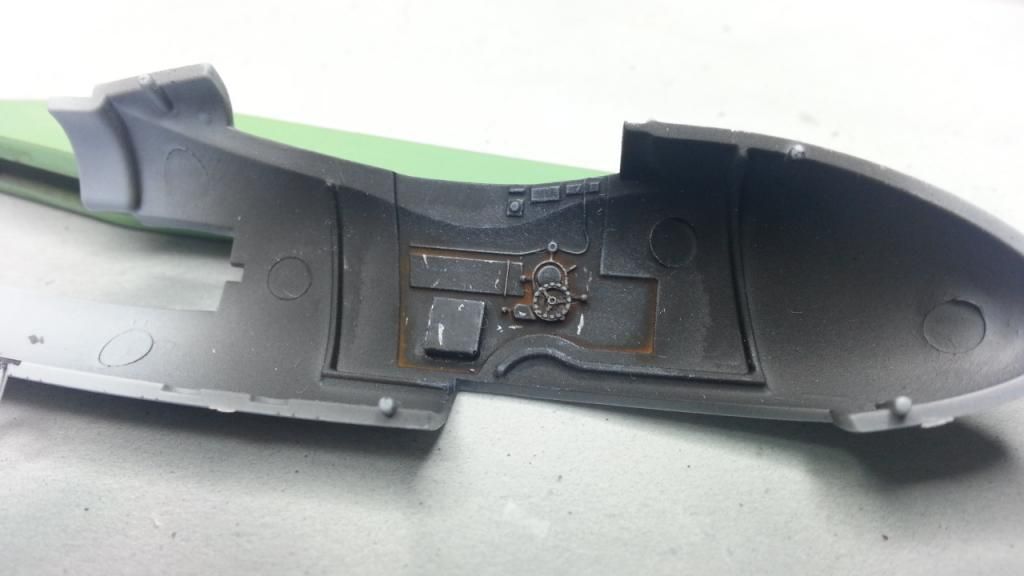
Both cockpit halves were then dealt with. Relevant PE was added where needed, then detail painting and weathering. Left side first, trim wheel and lower left box thingy are PE, rest is kit....
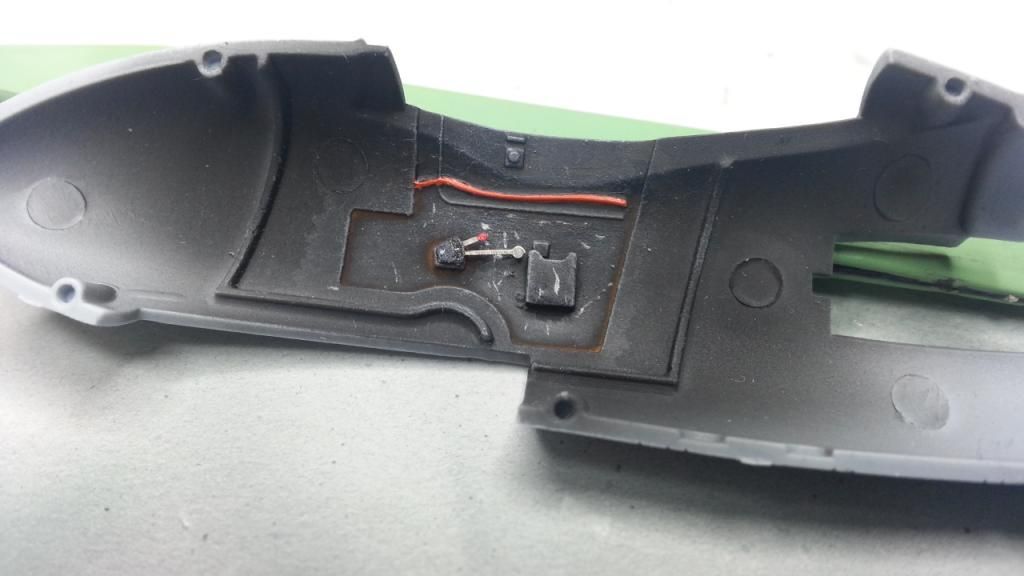
Right side next, lever quadrant is PE, still need to paint the shiny levers! Map case(?) next to that is also PE. Yes this kit is small, that green thing behind the kit is my set of tweezers!!

Seats then had the padding painted then weathered with chips and dirtied up a bit....
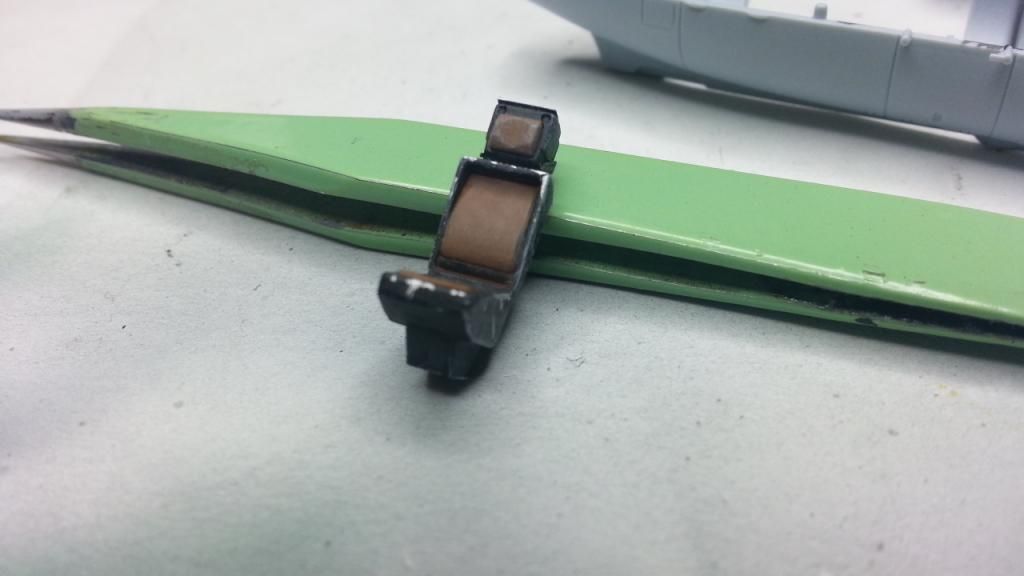
And this is where we are of last night! PE bitz 'n bobz have been added and she is looking pretty busy now. Still needs more weathering plus a flat coat to blend the shiny new belts in with the rest of the seat, but she is starting to look the part....

So there we are folks, off to a cracking start! Having a blast with this fancy PE gizmology, some of the stuff is very small and fiddly, but worth the effort! Hopefully I will be able to bring you some more updates soon.
Cheers,
Sam


Truth be told, I have a lot of PE sets floating about and haven't really used that many. With the number of Big Ed sets I have gathering momentum, I thought I should cut my teeth on something fairly straight forward that consists of more than just a couple of seatbelts and RBF tags, so here we are!
This build, as the title suggests, will be Airfix's lovely little Braille scale Vampire, along with an Eduard etched set, including prepainted IP and stuff (another first for me). Here 'tis....

So, first up was to hit the cockpit stuff with some MM Enamel flat black, as such...

So, in for a penny, in for a pound, I dived straight in and tackled the instrument panel. As the kit IP is just a decal, you get a nice flat panel as a starting point which is great. The two sights needed their detail sanded off to make way for the PE stuff, and they were then glued on to the IP. Four sets of rudder pedals needed to be bent up and were then attached to the rear of the panel. The IP itself is a two piece affair, with the instrument faces going on first, followed by the panel (with holes for the instruments to show through) on top of that. Both were attached with Future. There is also a trim wheel attached to the side of the console between the pilots. The sight faces were then attached and we are left with this litle doozy....

Not too bad for a first crack!!

The main tub was then assembled and weathered with some scratches and dirt to give a jolly good lived in look. The box on the rear shelf is PE from the Eduard set. Still all needs a flat coat to finish it off and dull down the silver.....

Both cockpit halves were then dealt with. Relevant PE was added where needed, then detail painting and weathering. Left side first, trim wheel and lower left box thingy are PE, rest is kit....

Right side next, lever quadrant is PE, still need to paint the shiny levers! Map case(?) next to that is also PE. Yes this kit is small, that green thing behind the kit is my set of tweezers!!


Seats then had the padding painted then weathered with chips and dirtied up a bit....

And this is where we are of last night! PE bitz 'n bobz have been added and she is looking pretty busy now. Still needs more weathering plus a flat coat to blend the shiny new belts in with the rest of the seat, but she is starting to look the part....


So there we are folks, off to a cracking start! Having a blast with this fancy PE gizmology, some of the stuff is very small and fiddly, but worth the effort! Hopefully I will be able to bring you some more updates soon.

Cheers,
Sam


