|
|
Post by tobias5555 on Jul 31, 2014 10:39:40 GMT -5
Good update.
|
|
|
|
Post by wbill76 on Jul 31, 2014 12:39:51 GMT -5
Looking good as always Bill you are another of those good painter guys. I have the same observation about oil and the slow drying time. I have always been afraid of the enamels drying and not blending well before I'm finished, do you always use enamel?
Bones
Thanks Bones! I typically will use enamels for my dot filters. I lay out the bottles and brushes so I can add the dots quickly, work in small sections at a time, and have developed a pretty solid method as a result. Did take some practice and each build is going to be a little different depending on the surfaces/paint colors but that's pretty much all there is to it.  |
|
|
|
Post by wbill76 on Jul 31, 2014 12:41:41 GMT -5
DF, hope that didn't give you any nightmares!  Rob Rob, thanks for the comments and support, almost home with this one.  T T, bestest best FUN, couldn't agree more!  Tobias Tobias, thanks for the comments as well.
|
|
|
|
Post by wbill76 on Jul 31, 2014 17:24:37 GMT -5
Next step in the weathering process is the pin wash to bring out the details. I used a highly thinned mix of MM enamel Burnt Umber and a fine point 10/0 brush to apply it. Then used the same brush and some clean thinner and cleaned up the excess, fine tuned it here and there, etc. Takes some time to pull it off but worth it. 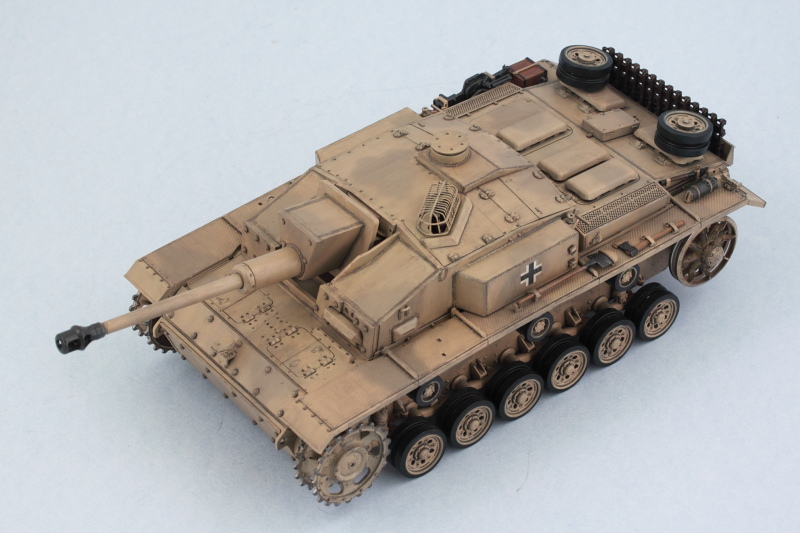 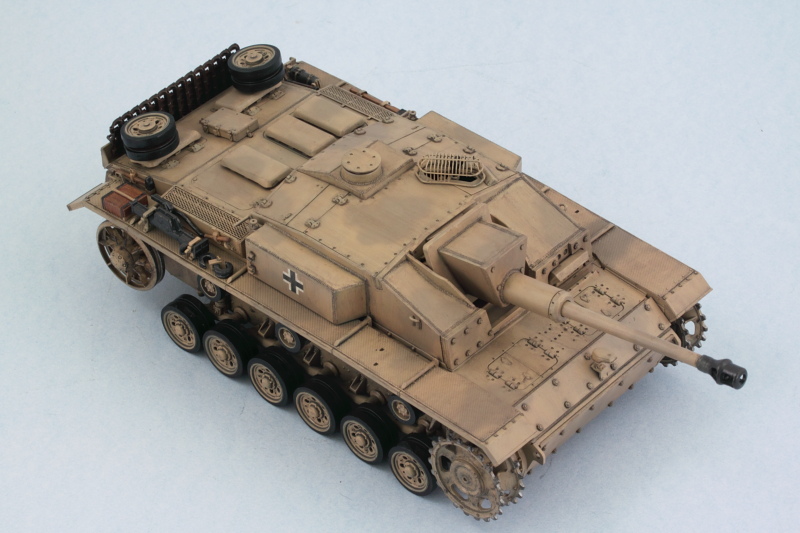 Will let that sit overnight and check it with 'fresh eyes' to see if there's any additional points/adjustments that need attention before moving on to the pigment weathering. |
|
|
|
Post by Leon on Jul 31, 2014 17:52:58 GMT -5
Dot filters and pin wash look great Bill.Very nice subtle tones.  |
|
DeafStuG
Full Member
  
Member since: May 2013
..
Posts: 1,283 
|
Post by DeafStuG on Jul 31, 2014 18:49:50 GMT -5
Nice weathering so looks good.
|
|
|
|
Post by TRM on Jul 31, 2014 18:54:56 GMT -5
Right at the finish line!! Looking sweet as usual!!!
|
|
|
|
Post by Teabone on Jul 31, 2014 19:08:18 GMT -5
Looking good as always Bill you are another of those good painter guys. I have the same observation about oil and the slow drying time. I have always been afraid of the enamels drying and not blending well before I'm finished, do you always use enamel?
Bones
Thanks Bones! I typically will use enamels for my dot filters. I lay out the bottles and brushes so I can add the dots quickly, work in small sections at a time, and have developed a pretty solid method as a result. Did take some practice and each build is going to be a little different depending on the surfaces/paint colors but that's pretty much all there is to it. 
Bones |
|
|
|
Post by wbill76 on Aug 1, 2014 12:02:44 GMT -5
Thanks Leon, Jeremy, and T! Today should, hopefully, see it all finished. Fingers crossed.  Bones Bones, I hear you there. I have some tubes of oil paints that I bought as well (small ones though) that have barely been touched. The oils do provide a longer working time but require greater care in the amounts you use and how you blend them, so trade-offs are always going to be there one way or the other. Pick your poison!  |
|
|
|
Post by wbill76 on Aug 1, 2014 20:18:29 GMT -5
Got all the pigment weathering done today. The first step was to seal in all the previous weathering work with some Testors MM Lusterles Flat in the spray can. 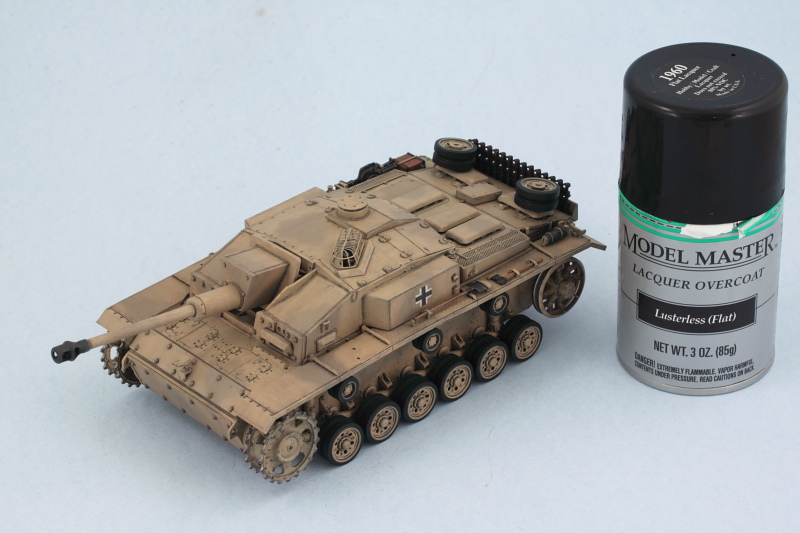 I used Mig Productions Gulf War Sand and applied it as a wet mixture first to the lower hull and suspension. Adding a drop of liquid dish washing soap to ordinary tap water breaks the surface tension and allows it to flow easily. Left to air dry, it looks like a mess at first but this is just a foundation. 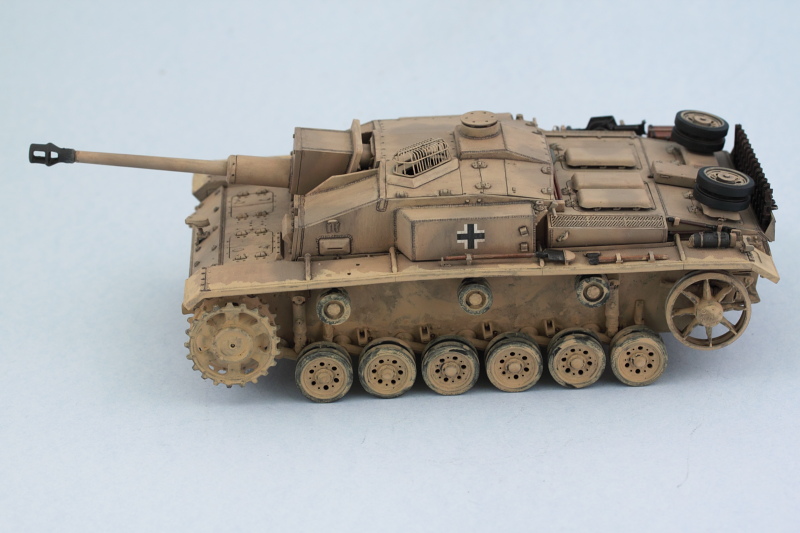 Using stiff bristled brushes to remove the excess, further adjustments were done with some dry q-tips as well to get the look I was after. 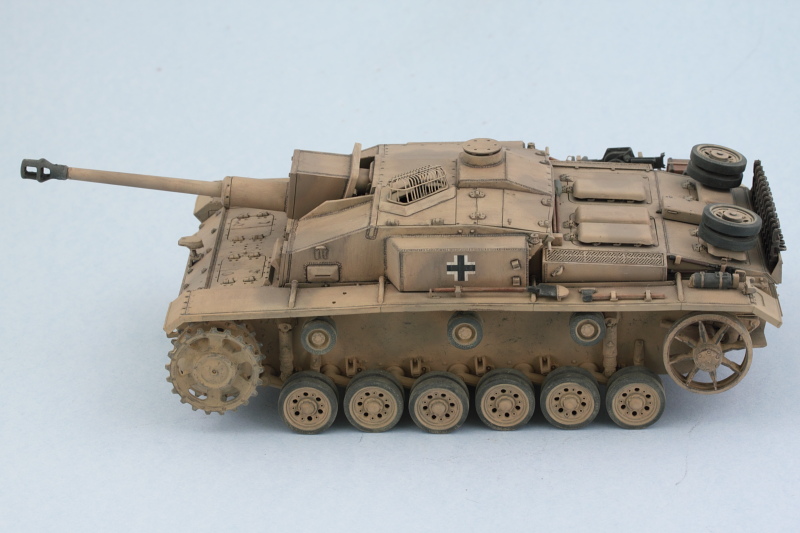 The tracks received the same wet pigment treatment followed by stiff brushes. One of the advantages of workable tracks is the flexibility in weathering prior to installation. 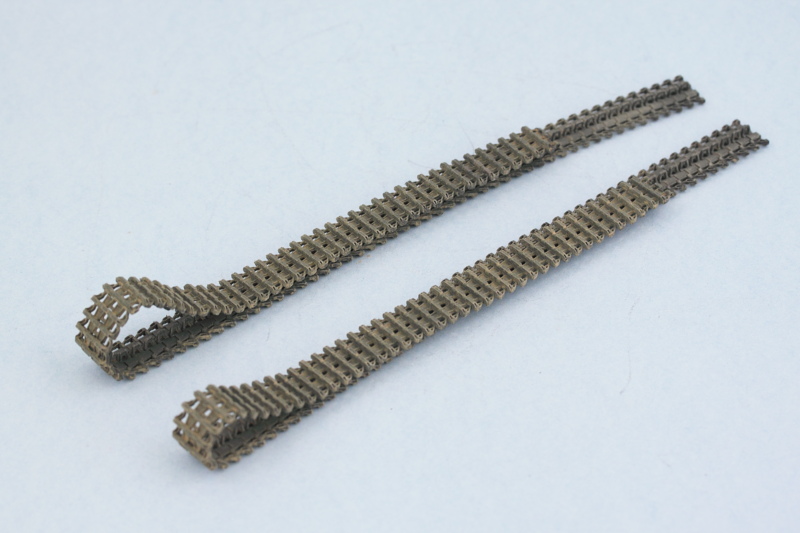 Tracks were then installed to both sides and the sprockets and idlers permanently glued in place to create the necessary sag/tension on both sides. 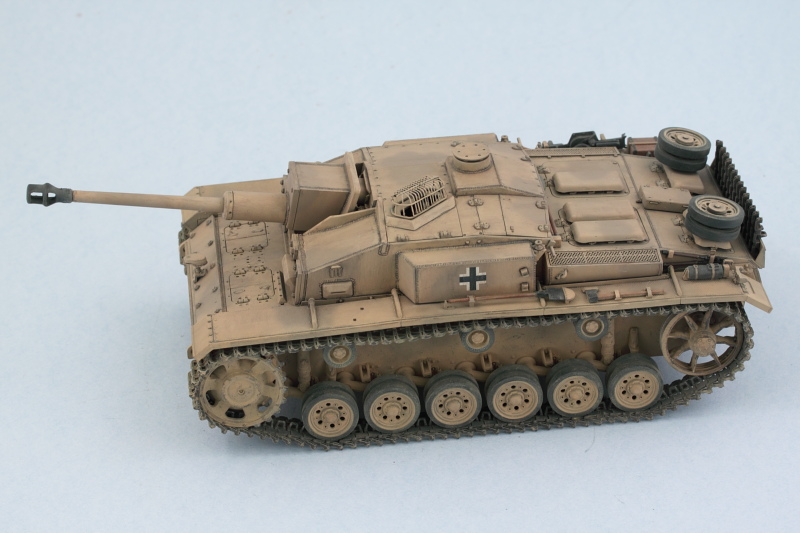 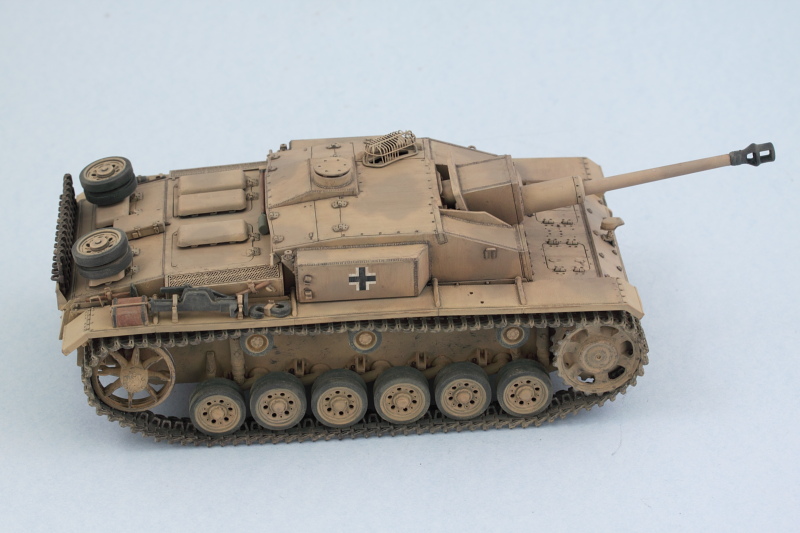 Just a few small details remain before this one is all done! |
|
|
|
Post by Leon on Aug 1, 2014 21:14:41 GMT -5
Great job on the pigments Bill.Almost home on this one.  |
|
|
|
Post by TRM on Aug 1, 2014 22:51:30 GMT -5
Just awesome seeing the sneakers get on to this one Bill!! Well done on the weathering!!
|
|
|
|
Post by wouter on Aug 2, 2014 1:46:26 GMT -5
very nice work there Bill, glad to see her shoes fitted
Cheers
|
|
|
|
Post by wbill76 on Aug 2, 2014 14:02:04 GMT -5
Thanks Leon! Today should see the finishing touches done for sure. T, sneakers on, ready to sprint across the desert! Just watch out for the coyotes...  Wouts Wouts, thanks for stopping by and for the comments as well.  |
|
|
|
Post by wbill76 on Aug 2, 2014 16:50:03 GMT -5
One of the last remaining details that I deliberately left to the very end was the tow cables. The Dragon kit supplies some braided steel wire for this but it's extremely stiff/stubborn to work with. I replaced it with my go-to substitute, crochet rope/thread. 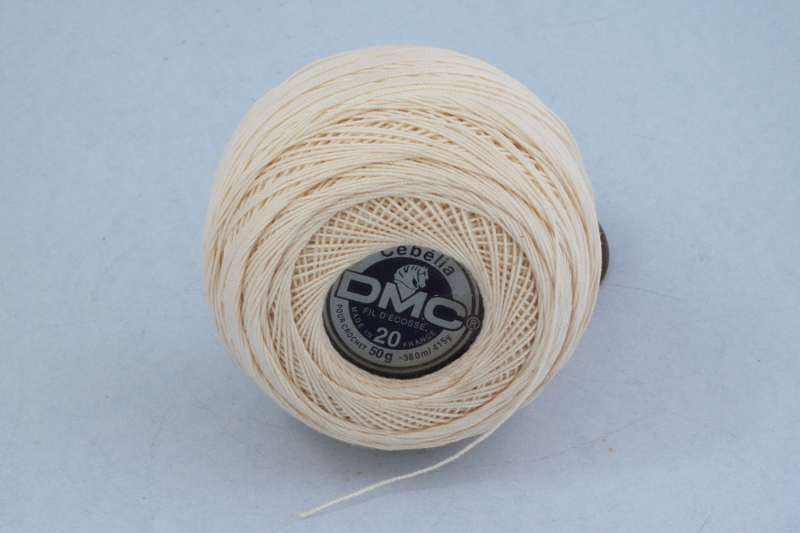 This stuff is very cheap at any Michael's/Hobby Lobby and a single roll will last a very, very long time. It's also handy for tie-down ropes for stowage. For tow cables, I cut a long length from the spool and then dip it into some Future so it will stiffen and take paint better. It also prevents any 'fuzzing' of the line as well. Once it dries, simply cut to the length needed, in this case 110mm per cable, and attach with CA glue to the cable ends. Since the cables don't have any real clamps at the loop end, only the 'guides' on the sponson sides, the cables always appear sloppy in the reference photos of these vehicles, so I used the thread's flexibility to my advantage and draped the cables accordingly before carefully gluing them down in the sponson guides. That's why these were saved to the very end, so they could interact properly with all the other stuff on the fenders. 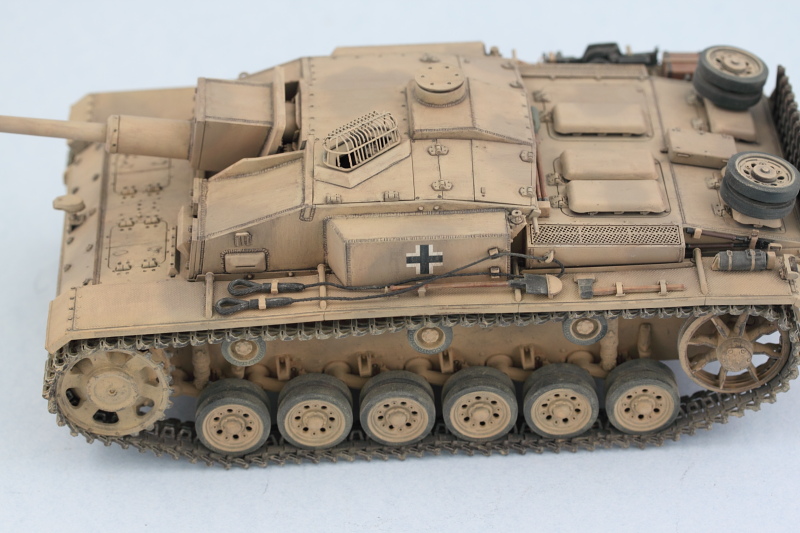 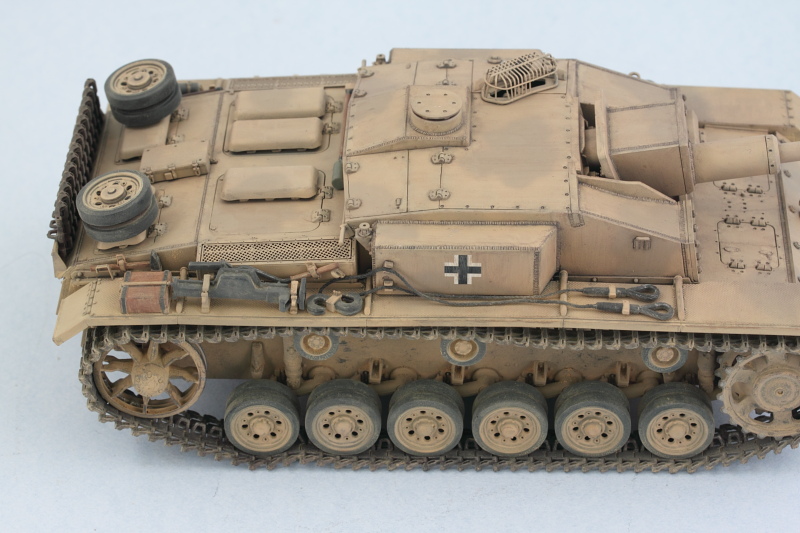 Once in place, the cables were lightly dusted with pigments to blend them in with the rest of the vehicle. The final little detail was the install of the rear Notek convoy light, this was provided in the kit as a clear cylinder that I painted with Tamiya Clear Smoke and installed into its holder on the rear fender. Then it was time for the walk-arounds to make sure I hadn't missed anything or make any last minute adjustments. 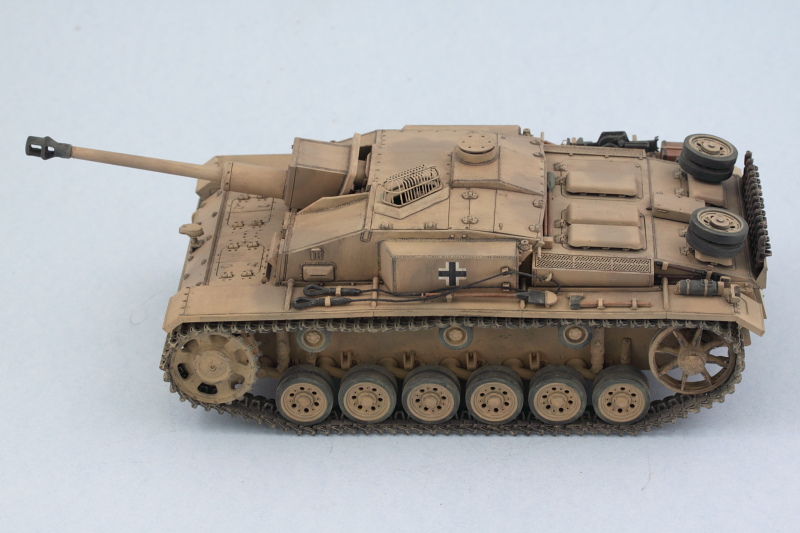 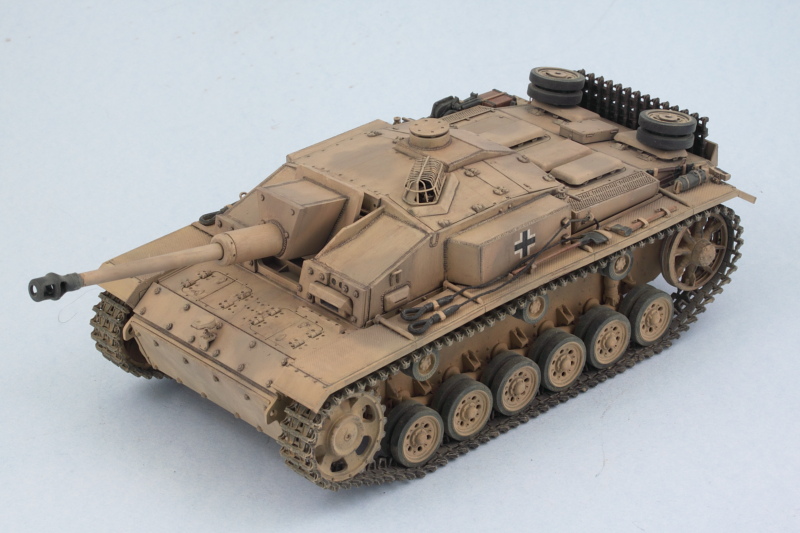 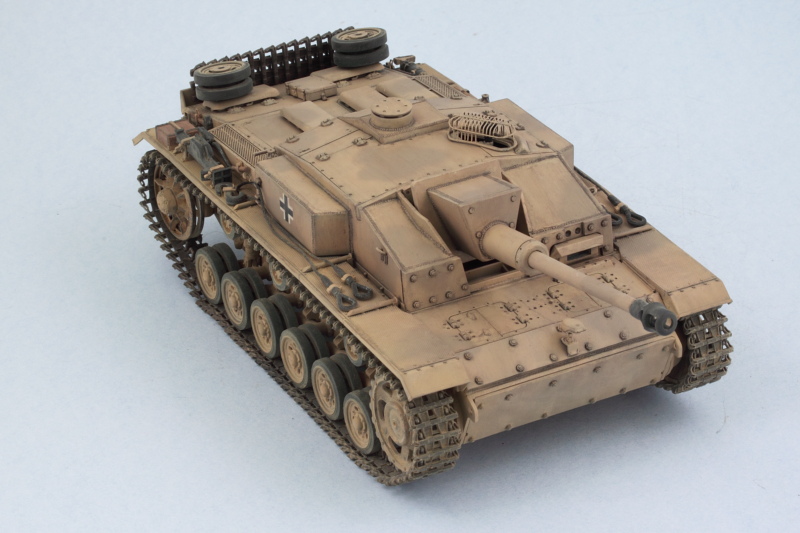 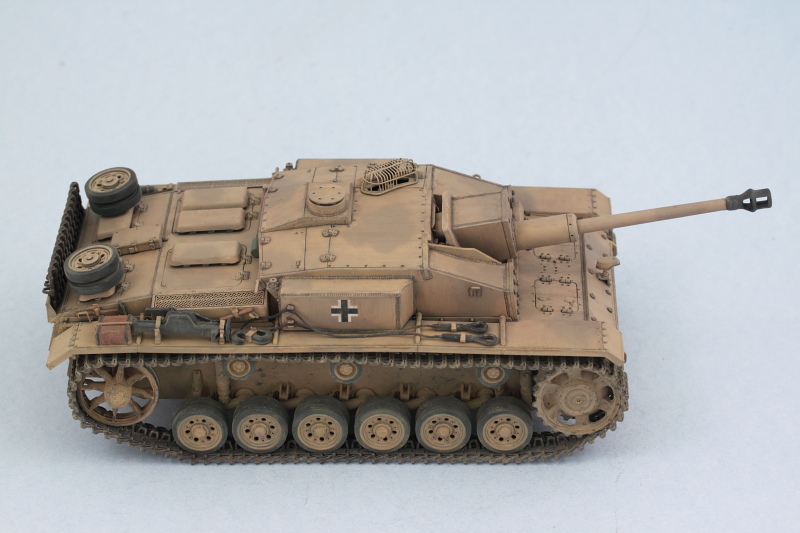 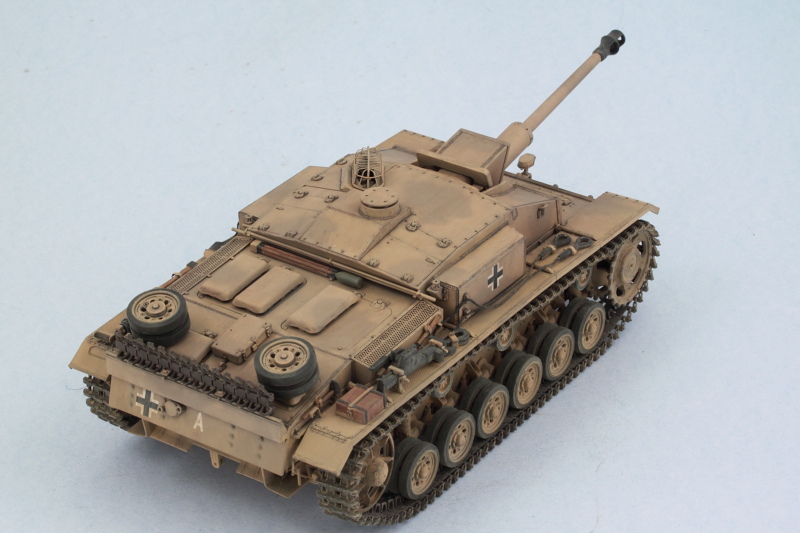 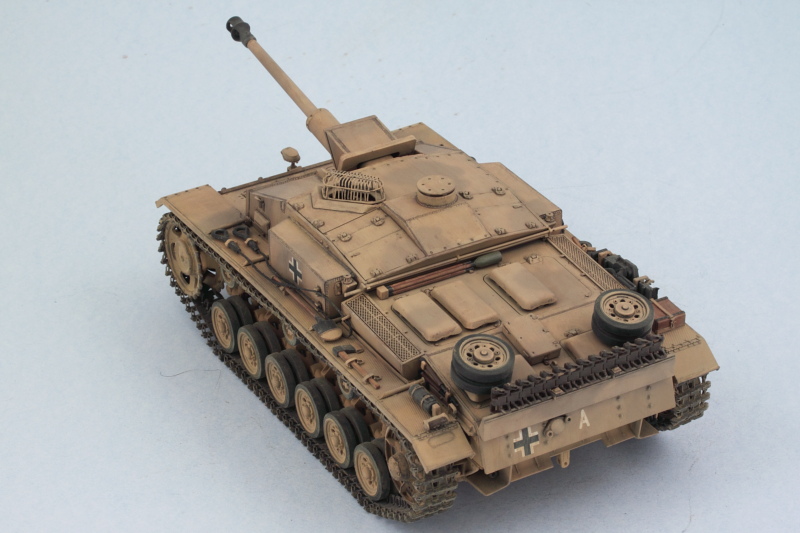 |
|
|
|
Post by TRM on Aug 2, 2014 16:59:04 GMT -5
Very nice Bill!! Well done all around! Like the cable supplies!! Great alternative!! I hear the harbor master calling!!  |
|
|
|
Post by wbill76 on Aug 2, 2014 17:16:00 GMT -5
Very nice Bill!! Well done all around! Like the cable supplies!! Great alternative!! I hear the harbor master calling!!  Sure hope they don't have to send the Shore Patrol out!  Thanks for following along T.  |
|
bigjohn
Reviews member    
Member since: December 2011
John Hale
Posts: 3,438
Dec 21, 2011 2:17:45 GMT -5
Dec 21, 2011 2:17:45 GMT -5
|
Post by bigjohn on Aug 2, 2014 17:17:14 GMT -5
Nice work Bill. Nice job on the cables as well!
|
|
|
|
Post by wbill76 on Aug 2, 2014 17:35:06 GMT -5
Thanks BJ! Cables were an exercise in patience but definitely worth it.
|
|
|
|
Post by deafpanzer on Aug 2, 2014 23:39:36 GMT -5
STUNNING StuG you got there!!! Great substitute using the thread instead of those stiff nasty looking cables from Dragon! You know how much I enjoy DAK subjects and this is something you should be proud of this build....
|
|
|
|
Post by wbill76 on Aug 3, 2014 10:46:39 GMT -5
STUNNING StuG you got there!!! Great substitute using the thread instead of those stiff nasty looking cables from Dragon! You know how much I enjoy DAK subjects and this is something you should be proud of this build.... Thanks Andy! I know you've got a soft spot for the DAK, no question there...  . I still don't know why Dragon continues to supply the stiff steel wire...or even more so why they insist on providing it as a tightly wrapped circle that gives it even more spring/tension. I suppose it's a cheap thing to get/supply so they just toss it in to add 'value' to the overall kit I suppose.  |
|
|
|
Post by Leon on Aug 3, 2014 10:58:00 GMT -5
Really like your idea on the tow cables Bill.They look great.   |
|
|
|
Post by wbill76 on Aug 3, 2014 15:34:46 GMT -5
Thanks Leon! It's been my go-to method for tow cables for a while now and works great for smaller diameter stuff. Larger cables like what you see on Panthers or Tigers of course would need something a little more robust.  |
|
afvfan
Senior Member
   
Member since: December 2012
Bob
Posts: 1,772
Dec 10, 2012 17:32:38 GMT -5
Dec 10, 2012 17:32:38 GMT -5
|
Post by afvfan on Aug 3, 2014 23:46:01 GMT -5
Nice job, Bill.
|
|
Tojo72
Forum Moderator      Sept '24 Showcased Model Awarded
Member since: November 2012
Posts: 5,319
Member is Online
MSC Staff
|
Post by Tojo72 on Aug 4, 2014 8:59:52 GMT -5
Another great build Bill, good tip on the cables
Sent from my SM-N900V using proboards
|
|
|
|
Post by wbill76 on Aug 4, 2014 13:06:30 GMT -5
Thanks Bob and Anthony! Had a lot of fun working with this little 'special' vehicle.  |
|
elco
Full Member
   July & Oct 2014 MoM Winner
Member since: May 2013
MOY 2014 Winner
Posts: 660 
|
Post by elco on Aug 4, 2014 13:24:07 GMT -5
Looking nice and subtile here Bill, very nice build with good balanced weathering!
|
|
|
|
Post by wbill76 on Aug 4, 2014 13:35:04 GMT -5
Thanks Elco!
|
|
|
|
Post by armorguy on Aug 4, 2014 15:13:52 GMT -5
I already commented on FB and I'll do the same here !
Subtle and well balanced, 11/10 !
Best regards ! AG.
|
|
|
|
Post by wbill76 on Aug 4, 2014 20:43:34 GMT -5
Thanks AG! I'll take an 11 any day!  |
|