Post by TRM on Jul 13, 2014 10:18:49 GMT -5
Hey guys!
Thought I would start up a little thread on this one; Perfect Scale Modellbau's Pionierpanzer 1(PiPz 1) mit Inneneinrichtung - Leopard 1 AEV 1 with interior 1/35 resin kit! Pheeew!
Basically in short, I will be having at this Leopard 1 AEV from PSM...LOL!!
I do have too many things on the move but trying to help out a friend. I won't be starting this right away but wanted to have a place to park things once I do.
So just to keep things interesting, a couple box shots...
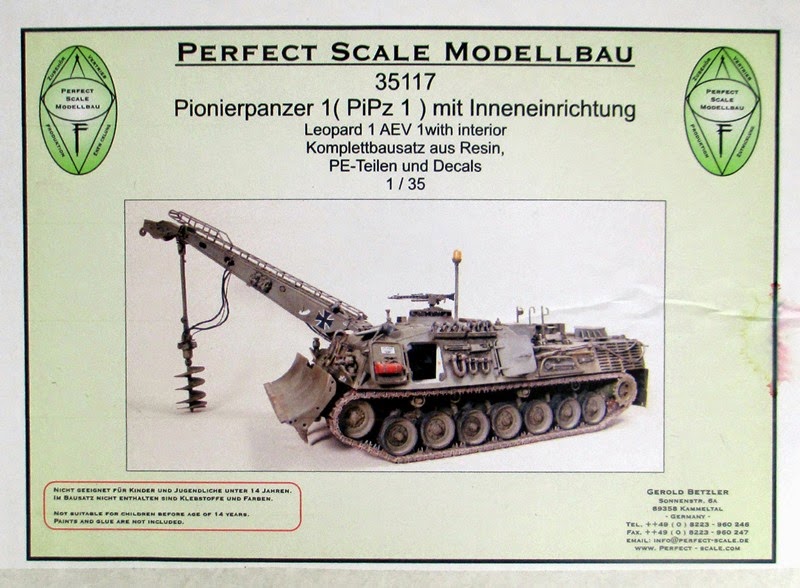
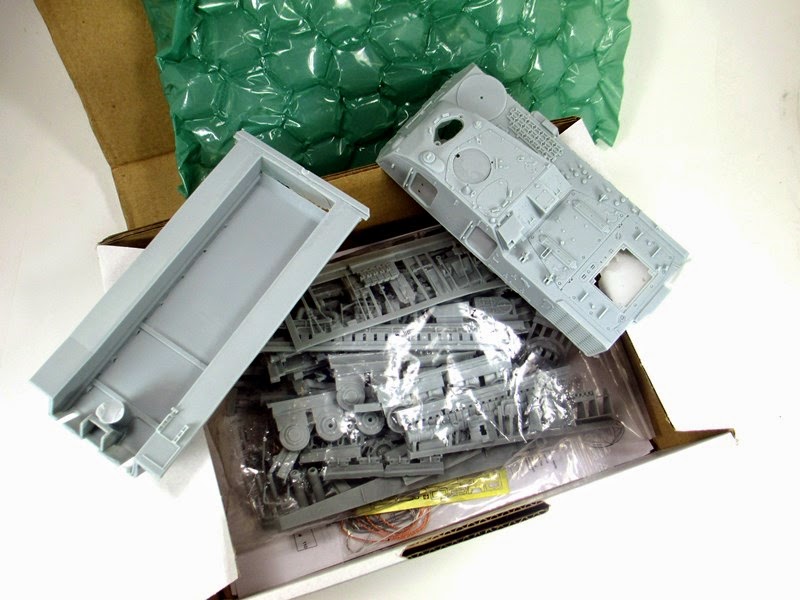
This a good size kit, with that, this won't be done in one night! LOL!!
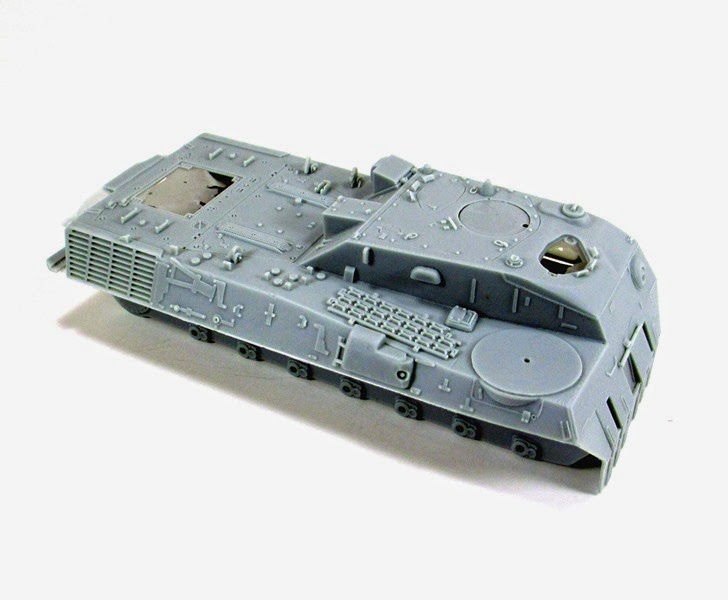
So far the details look pretty crisp! I am looking forward to digging in my heels on this when the time comes!

I do have to give a bit of thanks to Mike Shackleton and the Leopard
Club here and it most likely won't be the last...LOL!! Mike has been
great in answering a couple AEV Noobe questions for me! Not to mention,
I have made and early decision on the scheme and I like the Gelbolive
suggested by him. This will give me the best opportunity to really play
around with weathering after the fact!
This is not going to be a speed build by all means but I should be able to move along with it just the same!
First...If you have a chance and have not seen it already, Darren Baker posted a short in-box showing of this kit here: www.armorama.com/modules.php?op= ... t&id=10291 All the the parts for the kit are laid out so if you are interested you can check out what comes in the box!
Not to drag on with a bunch of useless words,(I know...I already did!) it is time to dig in and get moving!
As
part of this build I will more or less review what I see with the kit
as I go...I could have just said "build/review" and called it a day! |
|)
Let me start by covering one thing about this kit; the
instructions. If you are putting this kit on your must have list or
thinking you might want to pick it up, be aware that the instructions
are somewhat daunting.

The
photographs are not exactly the clearest and and the arrows don't point
to the exact location that the part is intended for. It is best that
you compile a few good reference photos of this vehicle before you start
and thing will be much clearer as you go.
So following the
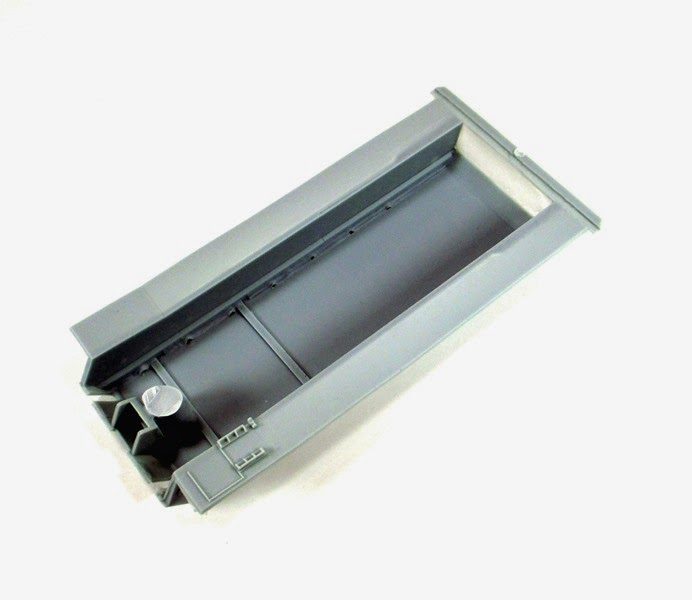
instructions, the Tub was first out of the box. As you seen in the
first pictures I posted, there is a large casting plug at the front of
the lower hull. This does not need to be removed, but does need to be
trimmed down before attempting to fit the floor.

There
are two inner sleeve parts that will need to be installed at the front
of the hull, these close off the openings for the support arms for the
dozer blade. As you can see in the picture, I needed to hone out the
hull a bit to get these to seat correctly. In addition, I needed to
sand the parts themselves so they lined up square. Per the
instructions, for this and many other locations, the suggestion of the
use of filler/putty was given.
I have been able to go to town and clean up a few parts as I get ready to start getting things together.

The
interior is not too bad. There is some rough edges inside but with a
quick dry fit of the top and bottom sections, there is a little bit of a
limited view inside and depending on your level of anal retentiveness,
alteration can be made...but certainly not needed.

I
don't plan on gluing all the interior parts down yet as I want to make
my life a bit easier with the painting...but I do want to place a couple
of them just the same. First would the outside storage locker that can
be shown open when done and the rack for the radios.

The
first little bump in the road is the handle for the side on one of the
shelving units. The kit supplied part is larger than the pre-cast
holes.

A simple fix....

Things are coming together now.

The floor plating has some nice tread to it and fit well first time out. The driver controls and the seat mounts fit nice...

Next step will be a little interior painting I think. Then I can start to glue some parts!!
I still have more to bring over from the other site...patience!!
Thought I would start up a little thread on this one; Perfect Scale Modellbau's Pionierpanzer 1(PiPz 1) mit Inneneinrichtung - Leopard 1 AEV 1 with interior 1/35 resin kit! Pheeew!
Basically in short, I will be having at this Leopard 1 AEV from PSM...LOL!!
I do have too many things on the move but trying to help out a friend. I won't be starting this right away but wanted to have a place to park things once I do.
So just to keep things interesting, a couple box shots...
This a good size kit, with that, this won't be done in one night! LOL!!
So far the details look pretty crisp! I am looking forward to digging in my heels on this when the time comes!
I do have to give a bit of thanks to Mike Shackleton and the Leopard
Club here and it most likely won't be the last...LOL!! Mike has been
great in answering a couple AEV Noobe questions for me! Not to mention,
I have made and early decision on the scheme and I like the Gelbolive
suggested by him. This will give me the best opportunity to really play
around with weathering after the fact!
This is not going to be a speed build by all means but I should be able to move along with it just the same!
First...If you have a chance and have not seen it already, Darren Baker posted a short in-box showing of this kit here: www.armorama.com/modules.php?op= ... t&id=10291 All the the parts for the kit are laid out so if you are interested you can check out what comes in the box!
Not to drag on with a bunch of useless words,(I know...I already did!) it is time to dig in and get moving!
As
part of this build I will more or less review what I see with the kit
as I go...I could have just said "build/review" and called it a day! |
|)
Let me start by covering one thing about this kit; the
instructions. If you are putting this kit on your must have list or
thinking you might want to pick it up, be aware that the instructions
are somewhat daunting.

The
photographs are not exactly the clearest and and the arrows don't point
to the exact location that the part is intended for. It is best that
you compile a few good reference photos of this vehicle before you start
and thing will be much clearer as you go.
So following the
instructions, the Tub was first out of the box. As you seen in the
first pictures I posted, there is a large casting plug at the front of
the lower hull. This does not need to be removed, but does need to be
trimmed down before attempting to fit the floor.
There
are two inner sleeve parts that will need to be installed at the front
of the hull, these close off the openings for the support arms for the
dozer blade. As you can see in the picture, I needed to hone out the
hull a bit to get these to seat correctly. In addition, I needed to
sand the parts themselves so they lined up square. Per the
instructions, for this and many other locations, the suggestion of the
use of filler/putty was given.
I have been able to go to town and clean up a few parts as I get ready to start getting things together.
The
interior is not too bad. There is some rough edges inside but with a
quick dry fit of the top and bottom sections, there is a little bit of a
limited view inside and depending on your level of anal retentiveness,
alteration can be made...but certainly not needed.
I
don't plan on gluing all the interior parts down yet as I want to make
my life a bit easier with the painting...but I do want to place a couple
of them just the same. First would the outside storage locker that can
be shown open when done and the rack for the radios.
The
first little bump in the road is the handle for the side on one of the
shelving units. The kit supplied part is larger than the pre-cast
holes.
A simple fix....
Things are coming together now.
The floor plating has some nice tread to it and fit well first time out. The driver controls and the seat mounts fit nice...
Next step will be a little interior painting I think. Then I can start to glue some parts!!
I still have more to bring over from the other site...patience!!


