acehawkdriver
Junior Member
 
Member since: July 2014
Posts: 31 
|
Post by acehawkdriver on Jul 22, 2014 16:40:45 GMT -5
Hello all! Glad to see this GB is still going on here. I was able to finish up another build pretty quick and have gotten started on the DUKW.
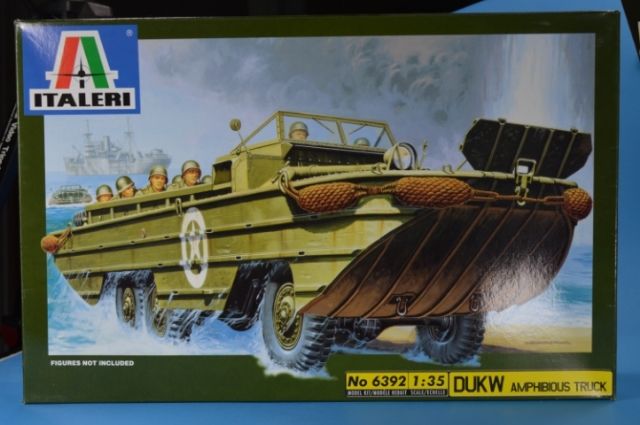
She looks pretty good out of the box. I haven't seen any issues yet at least.
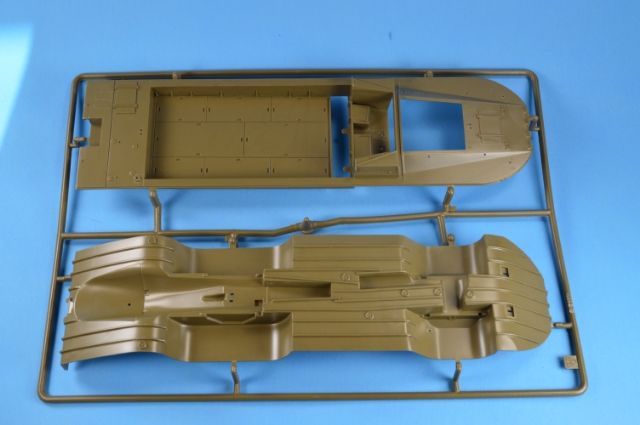
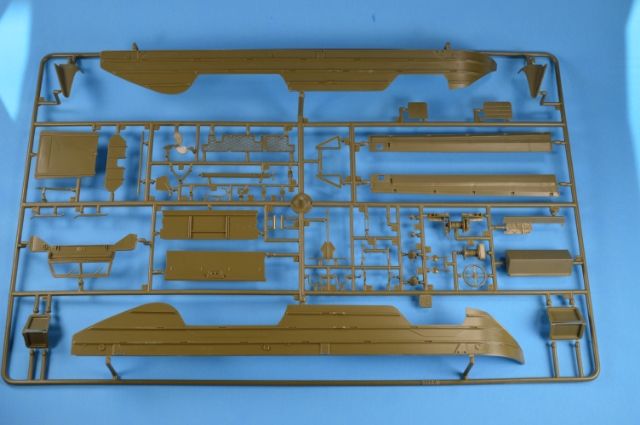
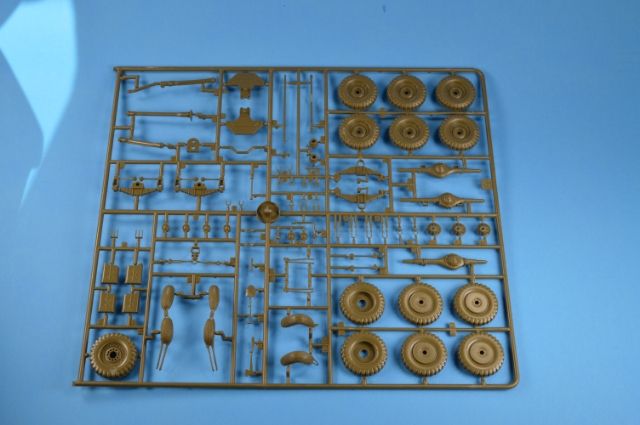
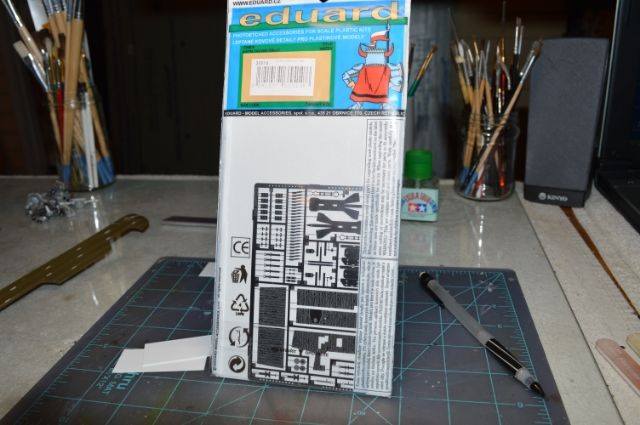
To jazz it up a little bit I decided to add...
|
|
|
|
Post by deafpanzer on Jul 22, 2014 16:42:34 GMT -5
Oh yeah baby!!!! This is going to be blast following this. You will like that PE set. Headlight guards were probably feisty ones...
Have fun!!!
|
|
|
|
Post by TRM on Jul 22, 2014 16:44:25 GMT -5
Oh no...another Duck!! LOL!! Very cool!! Count me in!! Sorry Andy, it might not go as long as yours did!!  |
|
acehawkdriver
Junior Member
 
Member since: July 2014
Posts: 31 
|
Post by acehawkdriver on Jul 22, 2014 16:51:24 GMT -5
To get things started rolling, I used .020 sheet stock cut into strips to fill the drain holes, 28 of them if counted correctly and sanded them down. I had to apply a little filler on a few of them but it wasn't anything terrible.
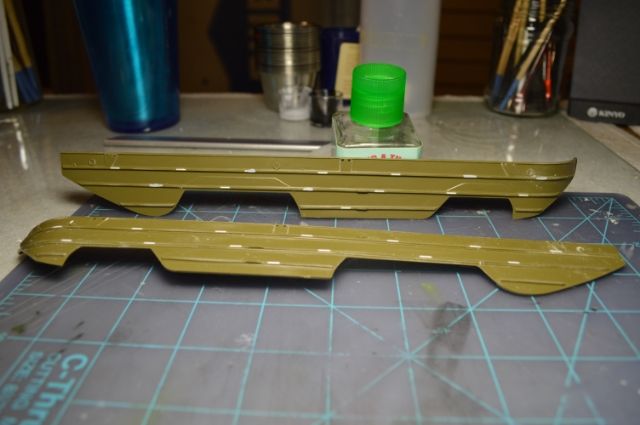
The majority of my reference photos showed DUKWs with the skirts installed over the wheel wells. I used .020 sheet stock taped to the back of the hull sides, and traced the outline. I test fit these a lot along the way sanding a little at a time to get the fit right. Strip stock was used to add the detail work. I'm leaving them separate until I have the wheels installed.
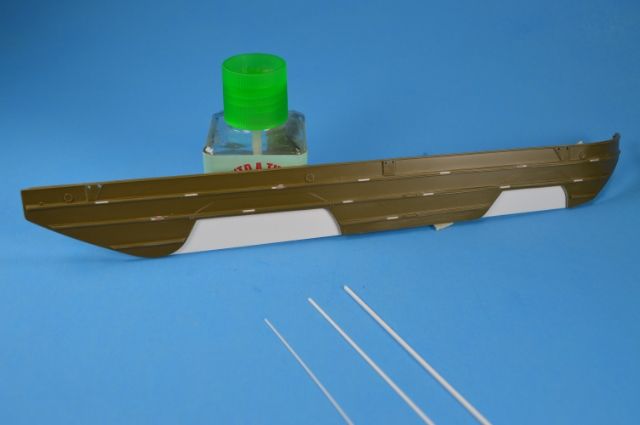
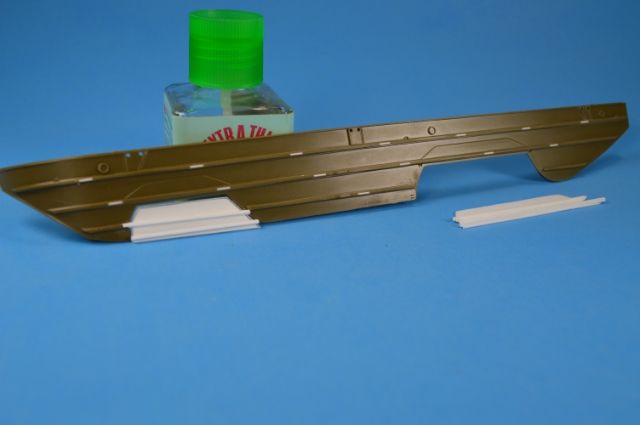
I'll have to sand the skirts to match the bottom of the hull once installed. I tried to do it with them taped in place but it began driving my blood pressure up, hence the uneven bottoms on the skirts. 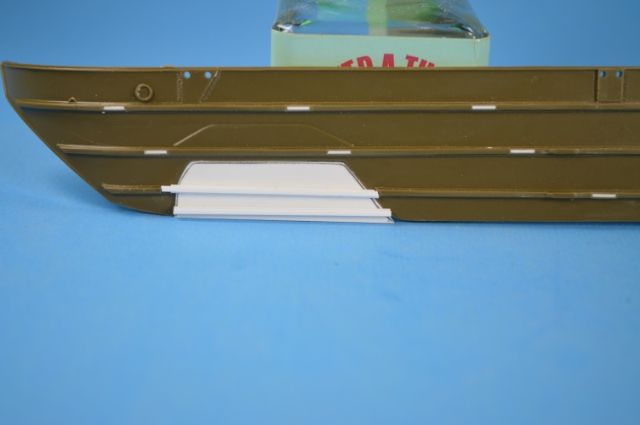
|
|
|
|
Post by Leon on Jul 22, 2014 16:52:33 GMT -5
Off to a good start and nice scratch work on the skirts.  |
|
acehawkdriver
Junior Member
 
Member since: July 2014
Posts: 31 
|
Post by acehawkdriver on Jul 22, 2014 16:54:29 GMT -5
Andy: Starting to dive into the PE set now. Looks really nice. I didn't realize that the set came with masks so that was a nice bonus.
TRM: Yep another Duck! I promise I'll try not to take 48 pages of posts to get through this one though. We have neither the time nor the resources to go on vacation so this one won't go to Florida!
|
|
acehawkdriver
Junior Member
 
Member since: July 2014
Posts: 31 
|
Post by acehawkdriver on Jul 22, 2014 17:04:36 GMT -5
Leon: Glad to have you stop in! We posted at the same time.
I've gotten a little bit accomplished and promise this will be the last picture post of the evening. I was monkeying with and idea to add a little detail outside of the PE set and got a little carried away. It's been a long time since I've tried to add this amount and we'll see how painting goes as to whether or not this will be shown.
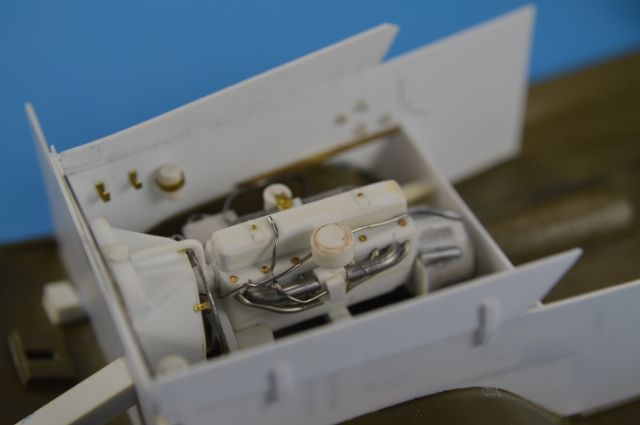
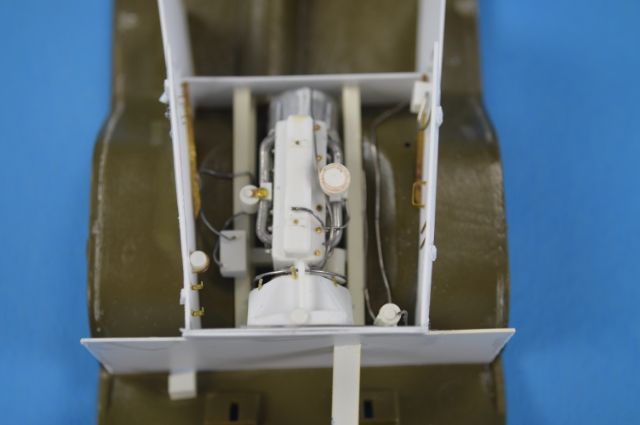
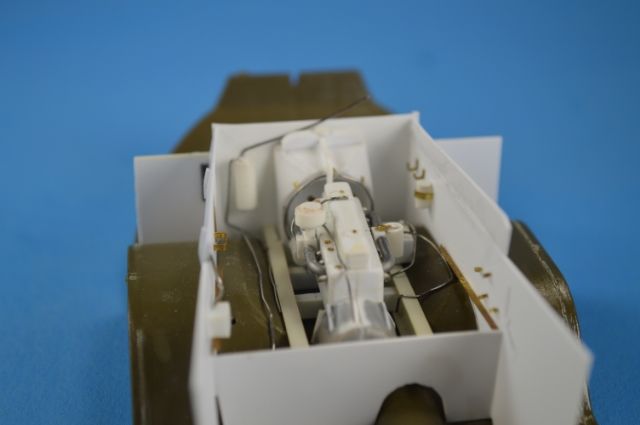
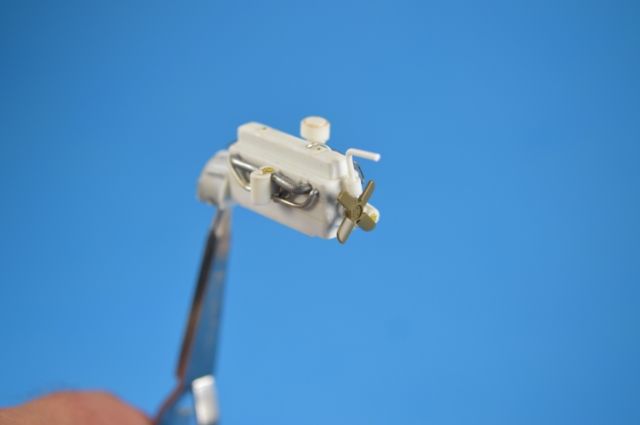
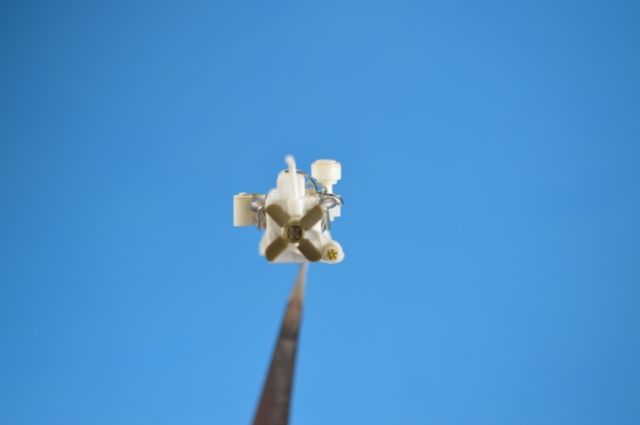
The engine itself is 3mm x 4mm strip stock. six pieces sandwiched together. Various sizes of solder, styrene rod, and tube were added. I had some leftover PE nuts from another set and added those, as well as a couple other pieces for detail. 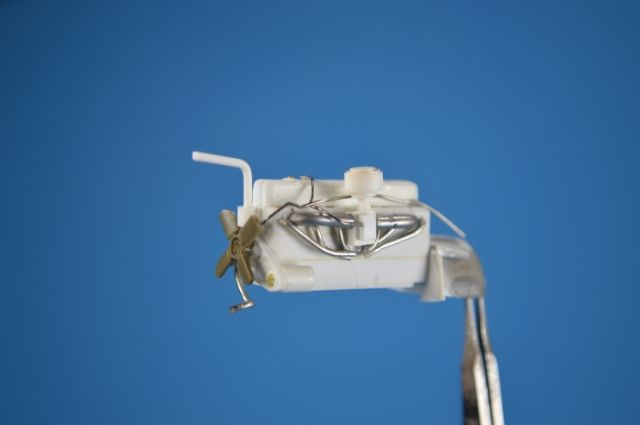
Just a little detail added to the engine compartment interior. Utilizing some spare PE and various size solder. 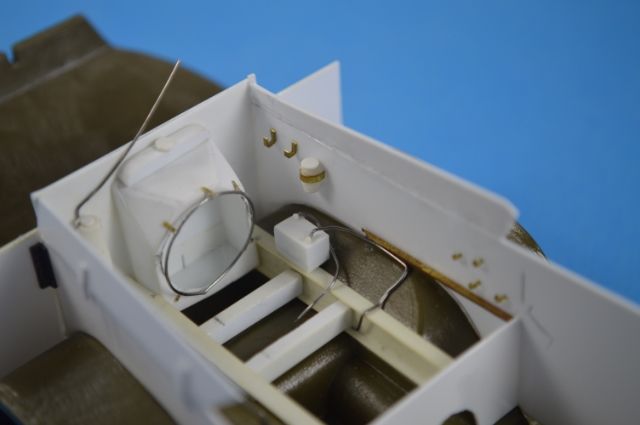
Sorry for the long few posts. Had quite a few pictures but hadn't figured out how to post them until now. Thanks for looking in!
|
|
|
|
Post by Leon on Jul 22, 2014 17:09:31 GMT -5
Great work on the scratched engine and wiring.  |
|
Tojo72
Forum Moderator      Sept '24 Showcased Model Awarded
Member since: November 2012
Posts: 5,345
Member is Online
MSC Staff
|
Post by Tojo72 on Jul 22, 2014 17:57:02 GMT -5
Looks god so far,hopefully you can finish yours quicker then Andy did his.
|
|
|
|
Post by deafpanzer on Jul 22, 2014 20:11:13 GMT -5
Oh man!!! Excellent scratch building there!!!
|
|
|
|
Post by dupes on Jul 22, 2014 21:02:45 GMT -5
Looks great, man! Didn't someone else do one of these fairly recently around here...?  |
|
|
|
Post by bullardino on Jul 23, 2014 3:21:58 GMT -5
Oh, here we go again. This duck looks quite faster than Andy's one, tho  |
|
|
|
Post by wbill76 on Jul 23, 2014 14:59:31 GMT -5
Off to a great start Ace! Looking forward to more on this one. Definitely going to beat Andy's 'speed' record at this pace.  |
|
acehawkdriver
Junior Member
 
Member since: July 2014
Posts: 31 
|
Post by acehawkdriver on Jul 24, 2014 10:20:09 GMT -5
Leon: Thanks! Tojo72: Thanks! I was going to challenge Andy to a duel to see who could complete it first, but it just didn't seem fair....  Andy: Thanks! I'm really digging this Eduard PE set. First time I've used one by Eduard. Dupes: Thanks! I promise this one won't go to Florida. Heck, we haven't been on a vacation for a long time. I couldn't imagine the DUKW going on one. Luigi: I'll try and break Andy's record time on here. Bill: Thanks! I've always admired the DUKW for some reason and this one, so far, seems to be going smoothly. |
|
acehawkdriver
Junior Member
 
Member since: July 2014
Posts: 31 
|
Post by acehawkdriver on Sept 1, 2014 21:20:13 GMT -5
It's been a little while since I posted last. Life has kept us busy. With that and the heat it's been short bursts of time at the bench. I've been plugging away slowly (but not at Andy's pace  ). ).
The Eduard PE set has been easy and fun to work with. The driver's compartment is nearly complete at this point. I will use some millput to give the seats a little more texture but that will have to wait for a cooler, less humid, day.
Here's where the DUKW stands as of this evening. Solder wiring was added from the back side of the instrument panel leading into the engine compartment, a small round pedal was added to the right of the gas pedal, small styrene discs were sandwiched together and placed inside of the brackets on the right side, and a searchlight (I'm assuming) was scratch built from a 1/72 bomb, styrene tube, rod, and spare PE.
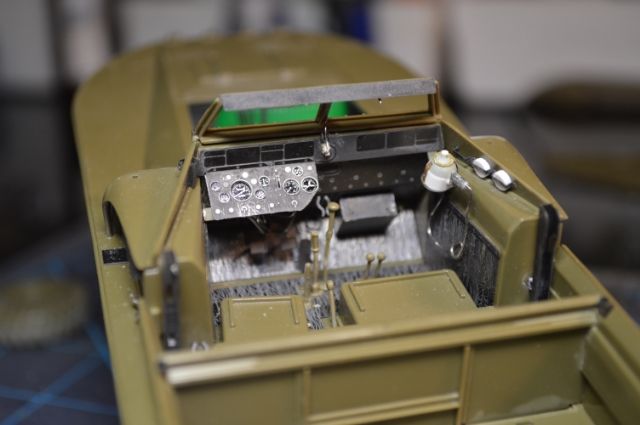
I re-worked the top of the radiator since it looked too big to me. It was sanded down and the cap put back in place. The metal ring around the fan opening into the radiator was also re-worked as it looked to big as well. Brass tube and styrene rod were added below the PE screen behind the driver's compartment. Styrene sheet was formed using a wooden dowel and a lighter to extend the housing at the base. Another spare's box part was added for a little gizmology.
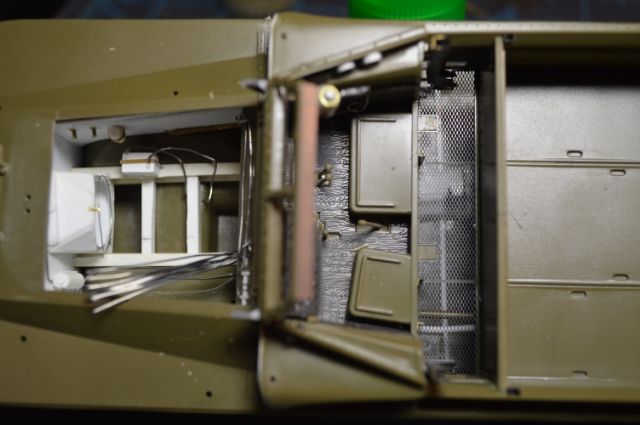
Detail and wiring was added to back side of the instrument panel using solder, styrene rod, and leftover PE parts from another kit. The styrene strip on the front sides has been added to help fill a gap on each but needs to be re-worked to smooth it out. The PE louvers have been installed with solder tie downs added to either side of the hull aft of the louvers.
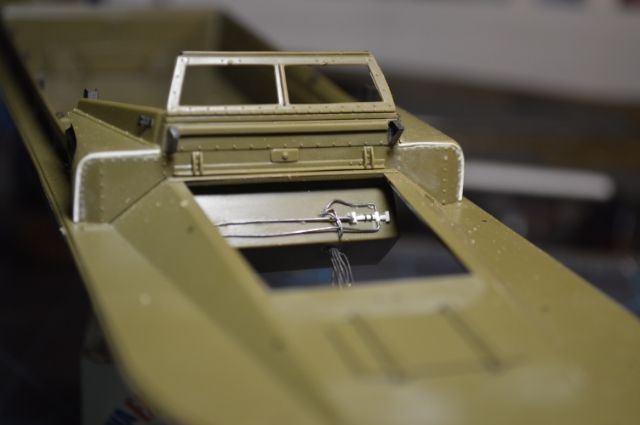
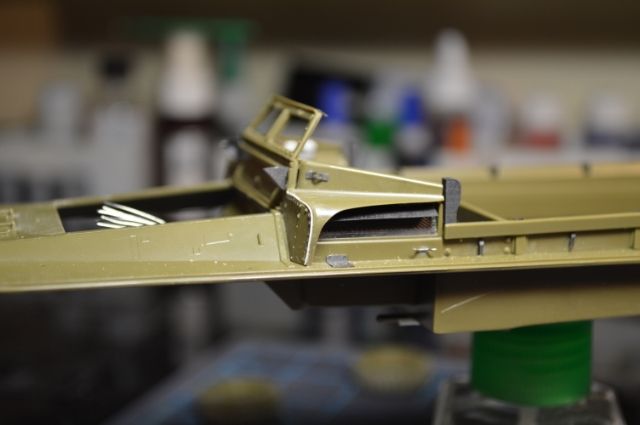
The drivetrain has been started on the lower hull as well.
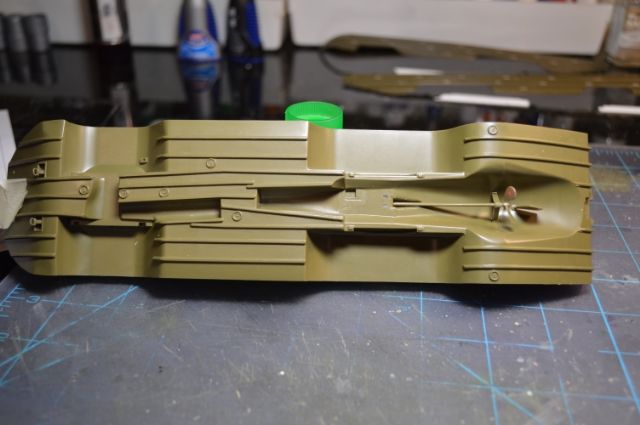
Sorry for the lackluster quality of the photos. It was a rush job while my wife was getting our 2 1/2 year old ready for bed. Hopefully it won't be as long between updates next time.
Comments and criticisms are always welcome! |
|
|
|
Post by Leon on Sept 2, 2014 3:55:00 GMT -5
Making good progress Ace,Nice work on the interior and details.  |
|
|
|
Post by bullardino on Sept 2, 2014 10:54:48 GMT -5
I need a clapping emoticon. A standing ovation one would be even fitter for this build.
|
|
|
|
Post by deafpanzer on Sept 2, 2014 22:28:21 GMT -5
Looking fantastic already Andy! Oops I meant Ace!!! LOL Nice touch adding that spot light!!!
|
|
acehawkdriver
Junior Member
 
Member since: July 2014
Posts: 31 
|
Post by acehawkdriver on Sept 19, 2014 8:20:31 GMT -5
Sorry I haven't been back on here. I've been plugging away in short bursts again. Hopefully will have some more photos this weekend.
Leon: Thank ya sir!
Luigi: Thanks!
Andy: Thanks!
Would anyone have any pictures, or a good link, for the DUKW's engine compartment? I've done a web search but I'm seeing multiple colors being used for the actual engine. I've seen red and black, interior white (like the compartment itself), and a gloss green. Can't seem to find any others and figured I would ask the experts on here!
|
|
|
|
Post by deafpanzer on Sept 21, 2014 0:56:57 GMT -5
I have the DUKW book but all pics are in B&W... recall seeing several pics of the engine itself. I am in Maine right now and I won't be home for another week.
|
|
acehawkdriver
Junior Member
 
Member since: July 2014
Posts: 31 
|
Post by acehawkdriver on Sept 22, 2014 13:41:49 GMT -5
No problem Andy. I figured since the DUKW was built around the CCKW, I could see what information I could find on it. Apparently, a color called "Wet Olive Drab" was used out of the factory. Most of the DUKW's that I've seen online have been restored and I'm always leary of using it too much as a basis.
I managed some more work on the DUKW this weekend. I'm hoping I can manage some more time at the bench tonight. Hopefully will have some pictures as well.
|
|
acehawkdriver
Junior Member
 
Member since: July 2014
Posts: 31 
|
Post by acehawkdriver on Sept 23, 2014 21:18:15 GMT -5
I've managed a little bit of time at the bench between the weekend and last night. A little bit of progress has been made with the DUKW. Here's where she stands this evening.
The sidewalls, seats, steering column, anchor, and the skirts for the wheel wells have been primed. It took a couple round of filling, sanding, and priming to ensure the drain holes in the side walls were filled properly.
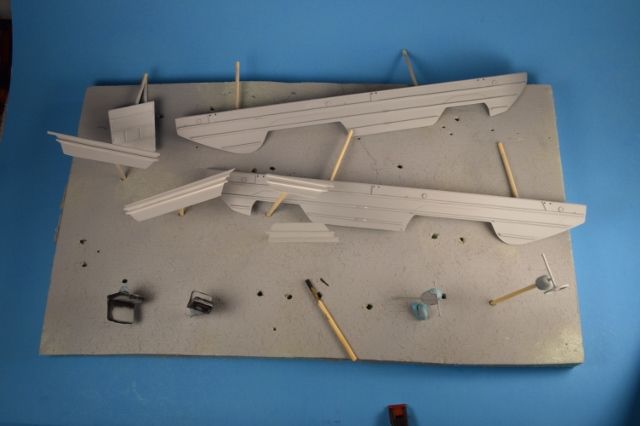
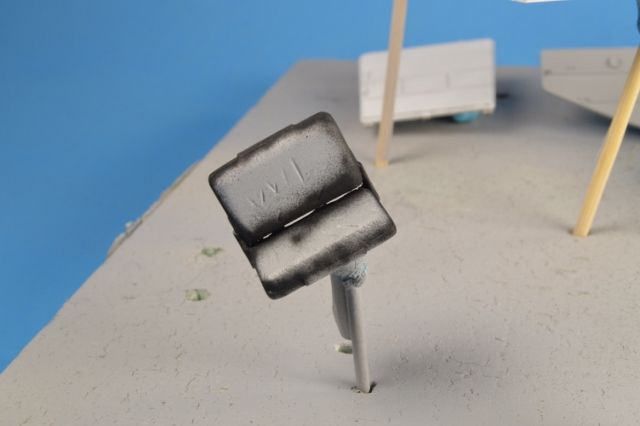
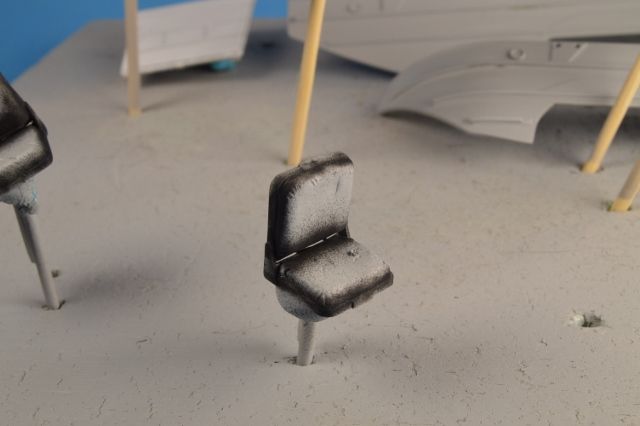
I used a thin Milliput to form a better looking seat cushion for each of the seats. I may end up having to sand the larger of the two seats down since the depressions look a little deep, but that can be done later if need be.
The engine bay needed a little work. I sanded down the top of the radiator as it looked a little bit to me. The metal ring around the radiator opening was replaced with smaller gauge wire since it looked a bit too large to me as well. It was primed and now has the basecoat on.
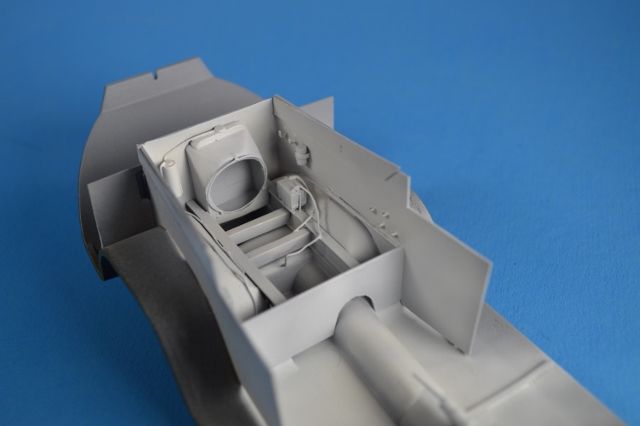
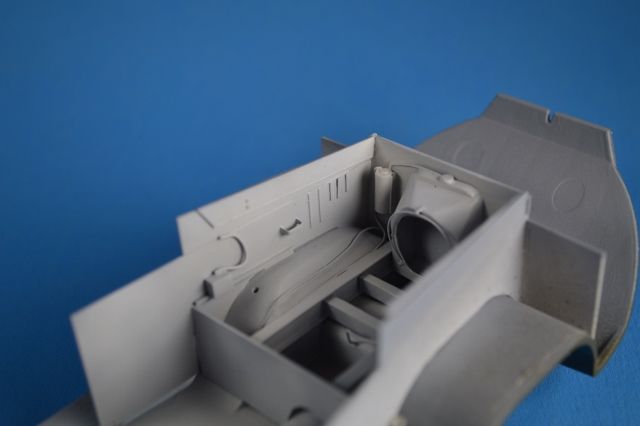
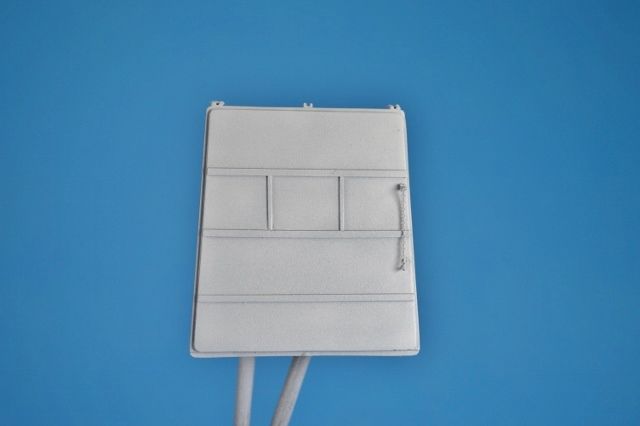
Detail was added to the interior side of the engine compartment door. Strip was added for detail and a small leftover PE chain, with a leftover PE nut was added.
|
|
|
|
Post by TRM on Sept 23, 2014 21:31:30 GMT -5
Nice job!! Looking good under the primer!!! Keep plugging away on this one!!
|
|
acehawkdriver
Junior Member
 
Member since: July 2014
Posts: 31 
|
Post by acehawkdriver on Sept 23, 2014 21:32:25 GMT -5
So the previous post wasn't a page long itself, I'll post the remainder of the progress photos here. I managed to get a little work done on the engine itself.
This is where it stood as of Friday. Since then, I've removed the line that runs to the radiator. I figured it will be easier to measure and put it in place once the engine is installed.

After primer, I used Tamiya flat black as a basecoat. After some research I was able to put an initial top coat of a mixture consisting of Dark Green, Olive Drab, and Radome Tan. This was allowed to dry and I applied Mig's Chipping Solution. Another topcoat of a mixture consisting of Tamiya cockpit green, white, and buff was then sprayed. I used the Chipping Solution to slowly remove (it took a lot of work to remove the Tamiya paints with it) the top coat.
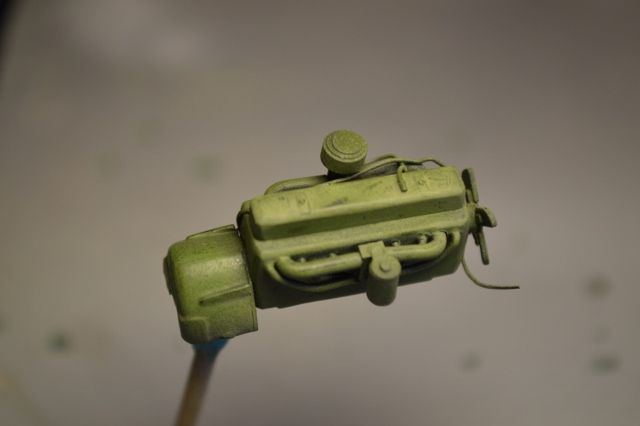
The details were painted using Vallejo Black-Grey and drybrushed with Vallejo Light Rubber. The belt was painted Vallejo Black. A wash of raw umber artist oils was used and Radome Tan used to lightly drybrush the engine.
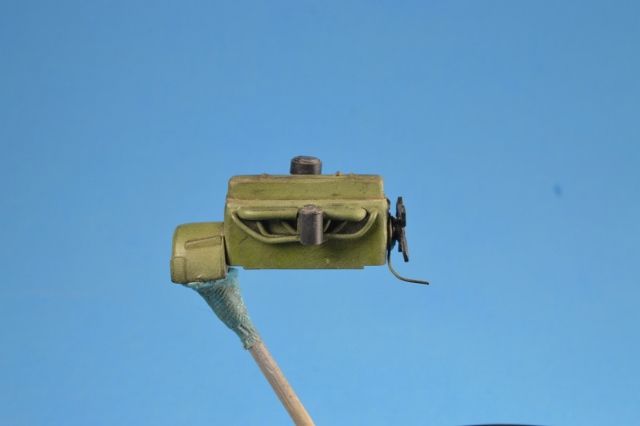
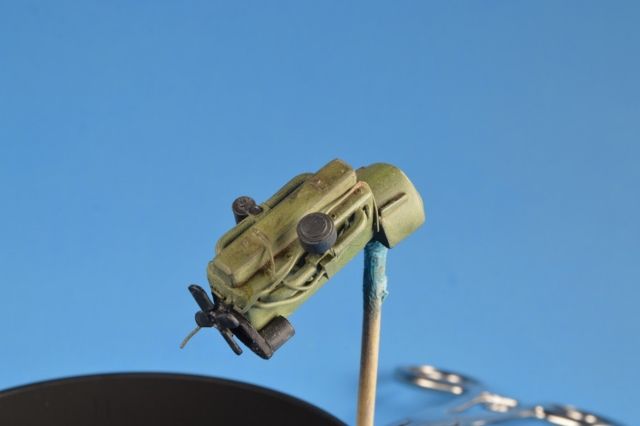
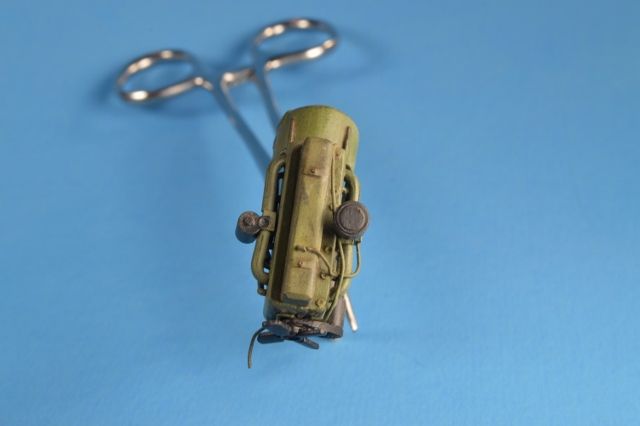
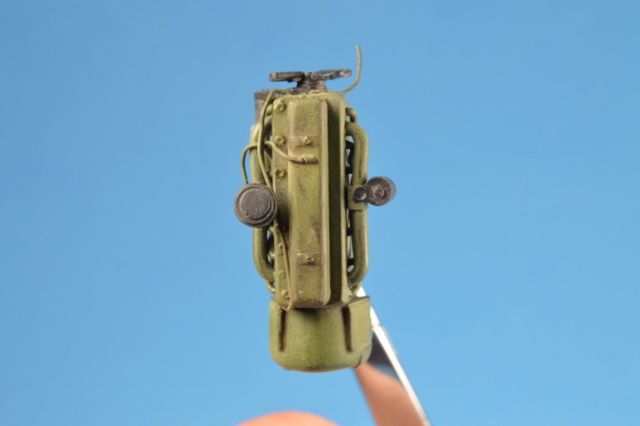
That's it for now. Hopefully I didn't overload anyone's computer with all the pics!
Comments and criticisms are always welcome! |
|
acehawkdriver
Junior Member
 
Member since: July 2014
Posts: 31 
|
Post by acehawkdriver on Sept 23, 2014 21:33:20 GMT -5
TRM: Thanks! It's been interesting and fun so far.
|
|
|
|
Post by deafpanzer on Sept 24, 2014 22:43:17 GMT -5
Looking real good... keep it coming! One day you will put my duck into shame believe me if you are keeping up with the detail work...
|
|
acehawkdriver
Junior Member
 
Member since: July 2014
Posts: 31 
|
Post by acehawkdriver on Sept 25, 2014 12:41:41 GMT -5
Andy: Thanks! It's tough to get started on some of it. I'm either crazy or I really enjoy it (don't ask my wife which one). Hopefully I'll be able to get a little time at the bench tonight, if nothing else, over the weekend. Hope Maine was a good trip for you!
|
|
|
|
Post by bullardino on Oct 1, 2014 14:11:24 GMT -5
Great job so far  |
|
acehawkdriver
Junior Member
 
Member since: July 2014
Posts: 31 
|
Post by acehawkdriver on Oct 3, 2014 12:08:47 GMT -5
Thanks bullardino!
|
|