TomN.
Full Member
  
Member since: August 2013
Posts: 143 
|
Post by TomN. on Aug 19, 2014 18:01:39 GMT -5
Fantastic work Gordon, I just love this model.
For some reason I'm picturing an empty potato chip bag stuffed down there...
Tom
|
|
Gordon Ferguson
Junior Member
 
Member since: April 2012
Posts: 85
Apr 3, 2012 10:22:22 GMT -5
Apr 3, 2012 10:22:22 GMT -5
|
Post by Gordon Ferguson on Aug 22, 2014 11:21:18 GMT -5
No crisp packet, yet, but a few bits have been added .......... Not really sure how much will be seen on finished model but it was a bit of fun ........ And after all that's what we do this for 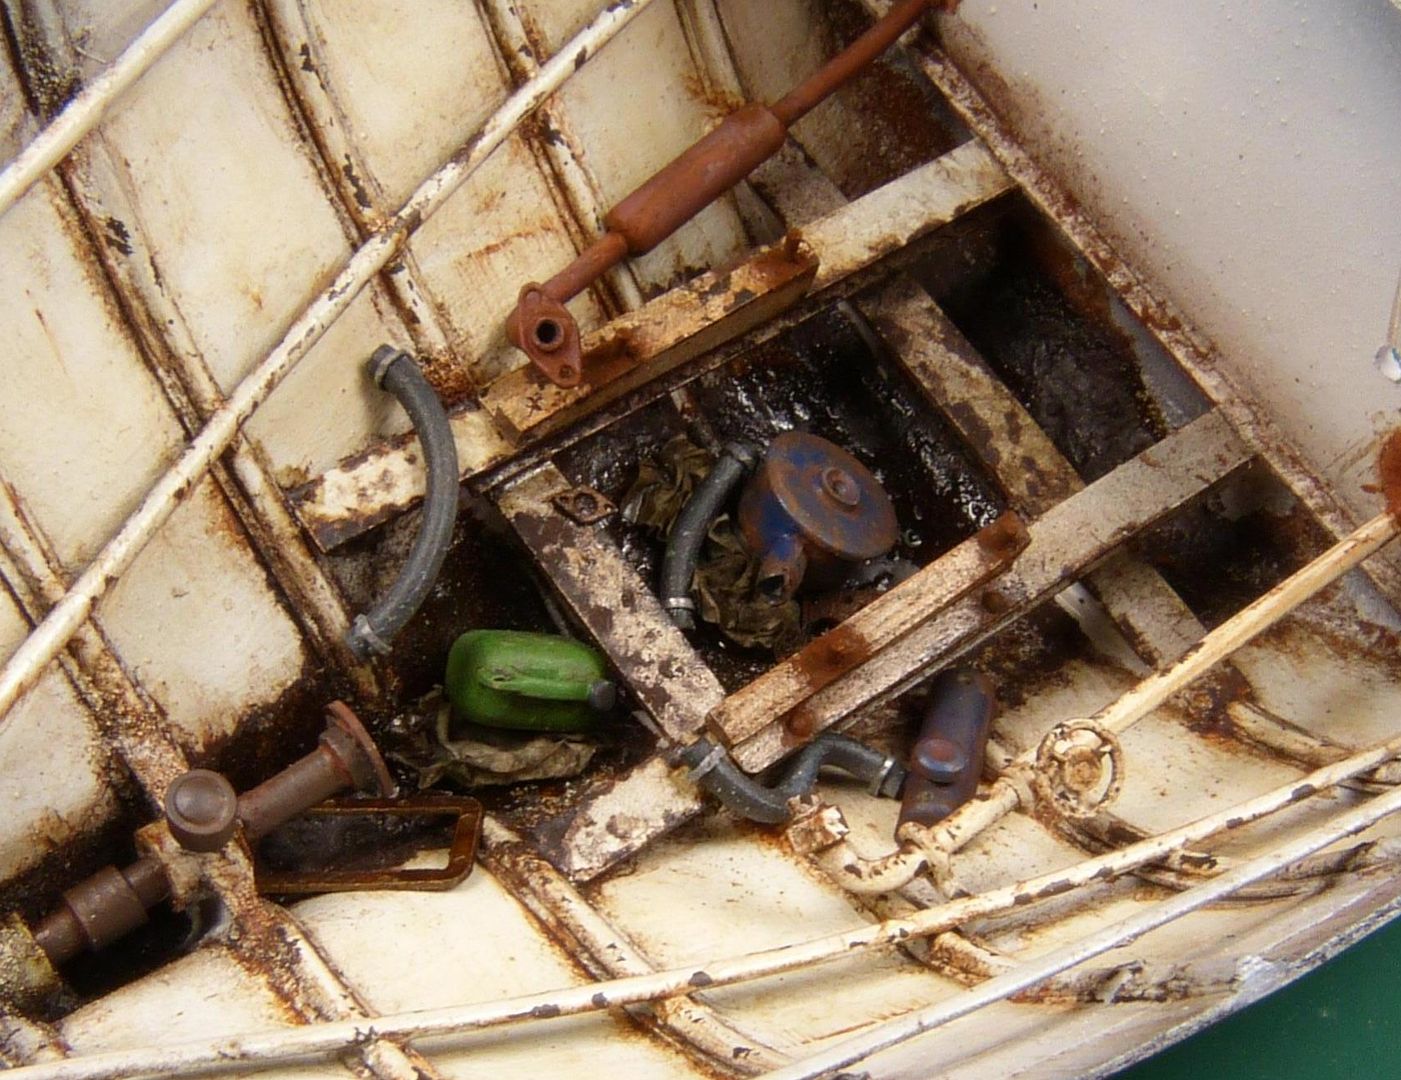 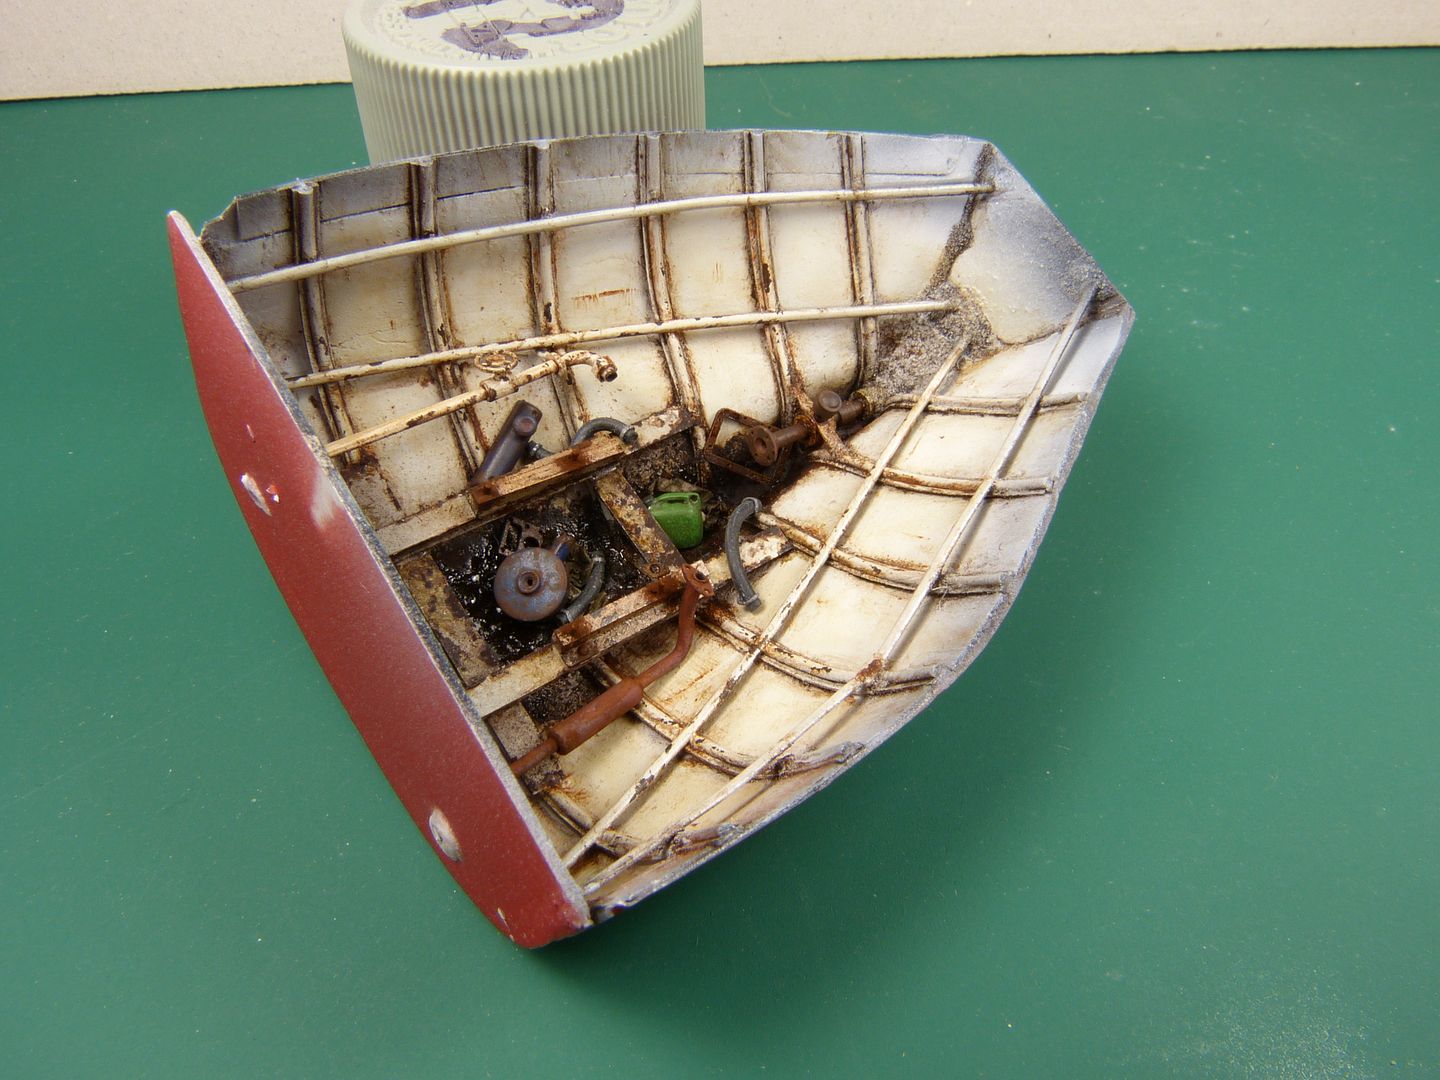 |
|
|
|
Post by deafpanzer on Aug 22, 2014 12:02:06 GMT -5
Loving it... everything!!!
|
|
|
|
Post by kaytermarram on Aug 22, 2014 13:07:53 GMT -5
Woah, this is SO COOL! Sadly I do not know what to say more... Anyway if one see this detailing later or not, you know it is there. And if there is any chance to take a second look a bit deeper the viewer will be really surprised watching stuff he had not expected. MORE PLEASE!!
Frank
|
|
|
|
Post by wbill76 on Aug 23, 2014 19:29:45 GMT -5
Nice collection of bits and junk there for sure...just like on the real thing, even if not seen, you know it's got to be there.  |
|
Gordon Ferguson
Junior Member
 
Member since: April 2012
Posts: 85
Apr 3, 2012 10:22:22 GMT -5
Apr 3, 2012 10:22:22 GMT -5
|
Post by Gordon Ferguson on Aug 24, 2014 10:33:50 GMT -5
Started on the wheelhouse, all effects are just paint no hair spray or salt techniques,as on my last couple of builds think I used too many techniques so when it went wrong was not sure what the real problem was. For a derelict boat reasonably happy with the look ....... However any advice would be appreciated on "mapping technique" which I interpret as painting in some of your top colour back into your painted chips ....... I have tried to do this but they tend to look a bit like dots rather than angular shapes, this is 1/48 so it's all a bit small ..... Anybody got advice for me ? 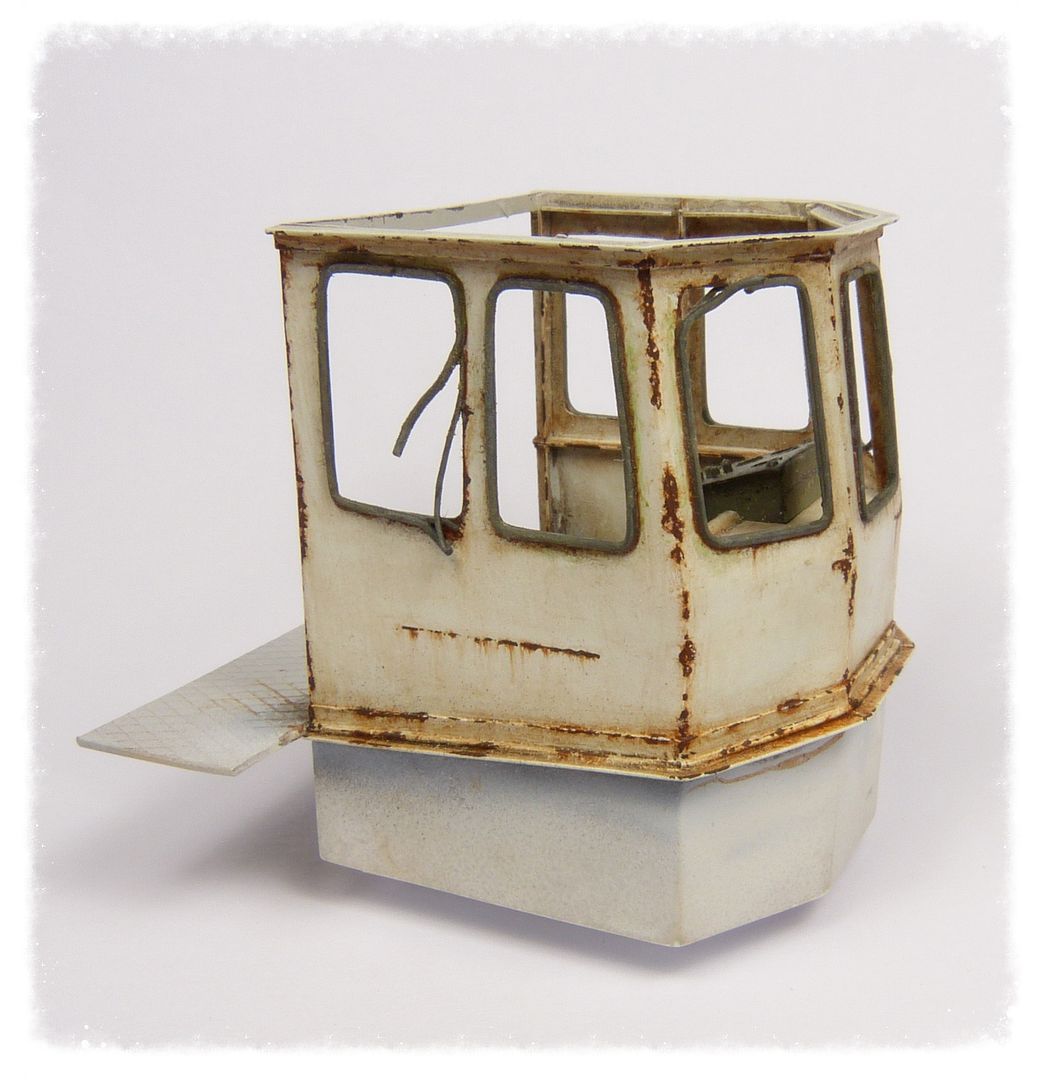 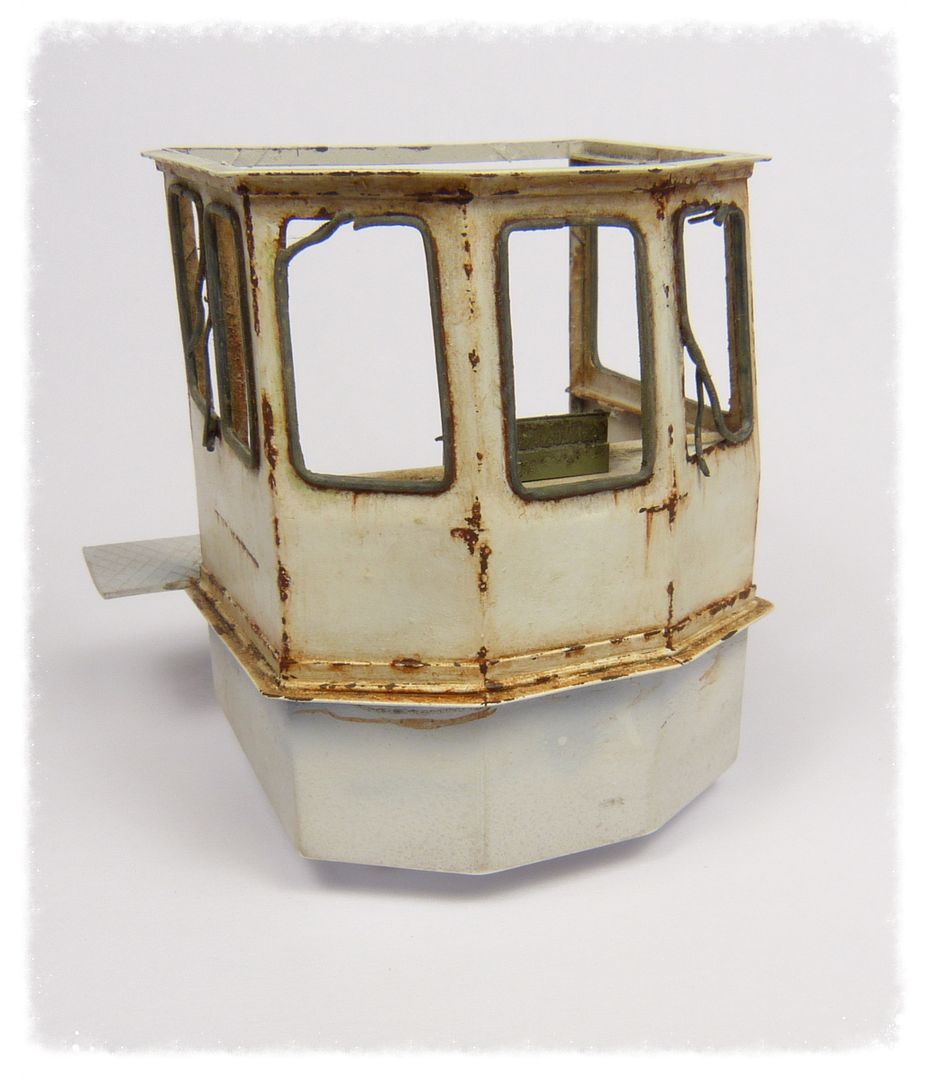 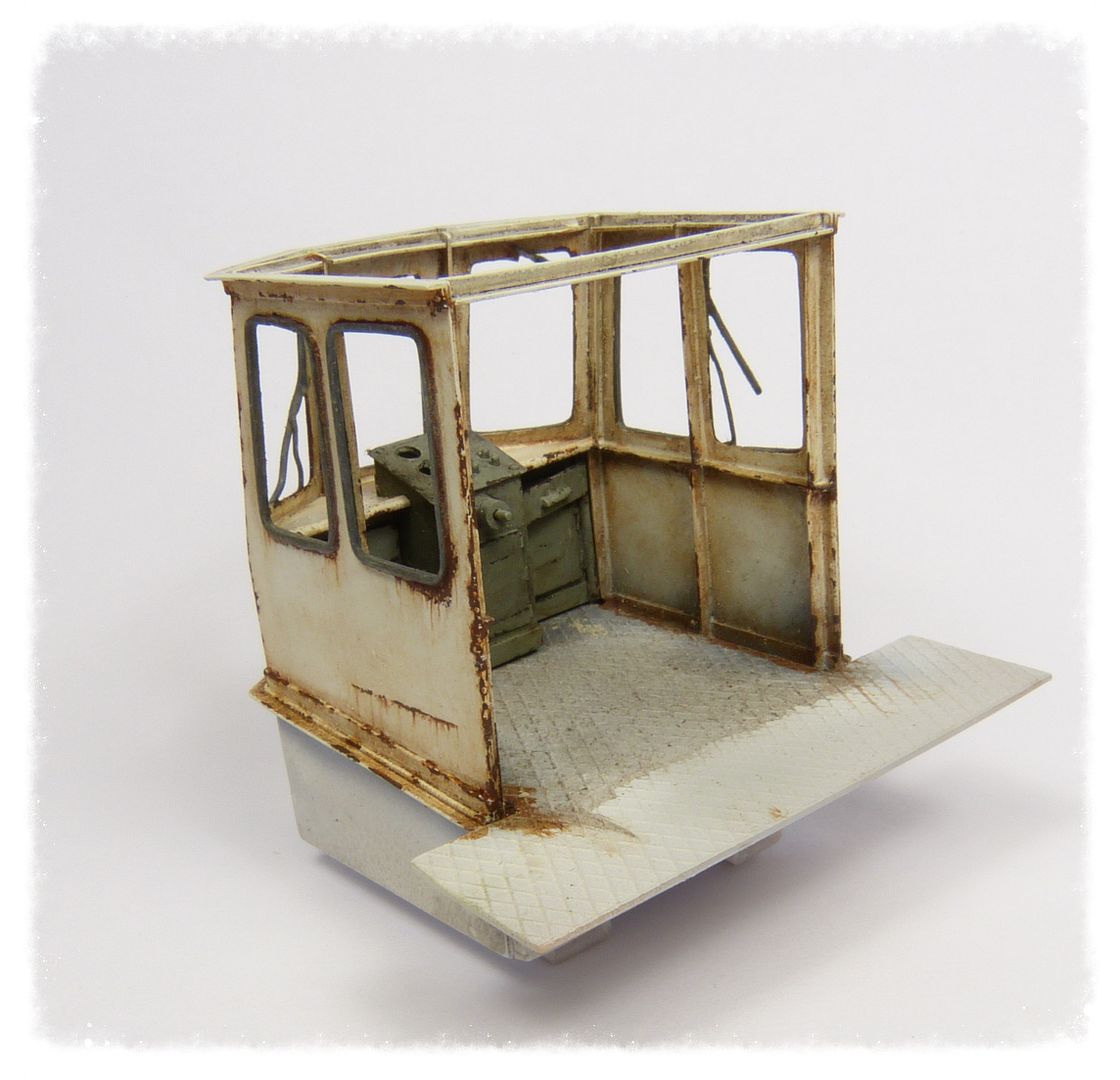 |
|
johnt
Full Member
   Feb 2012 MoM and 2012 Model of the Year Winner
Member since: November 2011
Posts: 1,174
Nov 15, 2011 5:38:32 GMT -5
Nov 15, 2011 5:38:32 GMT -5
|
Post by johnt on Aug 25, 2014 9:13:13 GMT -5
Hi mate
I have never been completely sure what the mapping technique really was, but I thought it was adding detail back into an area such as a paint chip. I thought it could be any colour, so perhaps lighter patches of rust inside a darker chip.
Having said that I think the wheel house rust looks good to me. Really small chips can be painted with a sharp toothpick, if you wanted to go smaller.
Cheers
JT
|
|
|
|
Post by kaytermarram on Aug 27, 2014 14:35:23 GMT -5
Perfectly done! This looks really real, so to say, and I can only repeat: Top work. Maybe tell a bit how you have achieved these effects and what you used as colours and stuff like that!
Frank
|
|
Gordon Ferguson
Junior Member
 
Member since: April 2012
Posts: 85
Apr 3, 2012 10:22:22 GMT -5
Apr 3, 2012 10:22:22 GMT -5
|
Post by Gordon Ferguson on Aug 28, 2014 15:01:17 GMT -5
Frank, I did not take any SBS picture when I was doing this chipping, but will do so when I start the hull at the week-end. It's a technique which I like but am ver far from mastering suggest you have a look through Scratchmod's posts and keep an eye on JohnT rusty Ford thread .... These guys are masters of their trade and you will pick up a lot of hints from them .
As I say will post some SBS pictures showing how I do it and colours etc in next few days, in the meantime the other bit of advice I would give is to collect as many reference pictures as you can as it is really important to understand the environment you are trying to recreate ....... Chipping and rusting happens in lots of different ways depending on use , climate , age etc.
|
|
|
|
Post by 406 Silverado on Aug 29, 2014 8:53:35 GMT -5
Man that chipping looks perfect.
As for that mapping, it's personal preference and we all do it different. I do plan on doing some SBS stuff on chipping and rust in the very near future.
|
|
|
|
Post by 406 Silverado on Aug 29, 2014 10:58:52 GMT -5
Not sure if this is what you mean by mapping for chipping! Like I said, I will try to get some how-to's posted on this technique soon.   |
|
Gordon Ferguson
Junior Member
 
Member since: April 2012
Posts: 85
Apr 3, 2012 10:22:22 GMT -5
Apr 3, 2012 10:22:22 GMT -5
|
Post by Gordon Ferguson on Aug 29, 2014 11:10:31 GMT -5
It's interesting that a technique that is often mentioned, mapping appears to have no really clear meaning . Rob looking at you picture that's pretty much my interpretation of it , if we forget specific colours and just operate in tones where the dark tone is the rust/chip mark , the lightest tone is the top colour then the mapping is the mid tone that you placed between the dark and the light ..... In this case a grey.
About the only thing that appears not to included in your picture are , and let's keep to the "mapping" analogy are Islands of smaller paint spots within the sea of chips ,God this getting complicated :-) it these smaller paint specks I have difficulty painting as in real life they seems to be angular with sharp corners and straight edges not dots you tend to get painting with a brush ........ Going to try JohnT idea with toothpicks as I can see that working.
Hope this ramble makes some sense to someone out there
|
|
|
|
Post by deafpanzer on Aug 29, 2014 13:23:57 GMT -5
Rob my buddy, you are one sick man... stunning work there!
|
|
|
|
Post by kaytermarram on Aug 29, 2014 14:30:01 GMT -5
Rob, this is a joy to watch. And please do these articles, you can never have enough information on these specific themes. Btw, the pics of the tank are very inspirational and a bit self-explaining. To me, the main point in the whole theme of weathering is the understanding HOW objects weather, rust, where on them this happens and why. The technics to achieve this are all learnable, but the why´s are important!
Frank
|
|
|
|
Post by Leon on Aug 29, 2014 20:28:28 GMT -5
Nice work on the rustification and chipping on the wheelhouse Gordon.It looks real from where I'm sitting.  |
|
Gordon Ferguson
Junior Member
 
Member since: April 2012
Posts: 85
Apr 3, 2012 10:22:22 GMT -5
Apr 3, 2012 10:22:22 GMT -5
|
Post by Gordon Ferguson on Aug 31, 2014 13:35:58 GMT -5
Went back and redid the weld lines on hull, sanded down my original attempts and replaced with Archer resin decal weld lines, these are the thinnest Archer do 0.015 arc weld beads. took the opportunity to change the run of the weld lines at the same time. Early days on the hull weathering, sorry about quality of pictures ...... Combination my lack of skill and difficulty of photographing black!    |
|
|
|
Post by TRM on Aug 31, 2014 13:43:21 GMT -5
Think you are nailing this one Gordon! Very indicative of what you would see happen to this!! Great job!
|
|
|
|
Post by deafpanzer on Aug 31, 2014 14:17:41 GMT -5
WOW! Stunning! How do we know that Scratchmod Rob hasn't hacked Gordon's account?!?!? Can't wait to see more... please!  |
|
|
|
Post by wbill76 on Aug 31, 2014 19:11:22 GMT -5
Archer welds look the part for sure. Nice v2!
|
|
|
|
Post by Leon on Aug 31, 2014 21:51:11 GMT -5
I second the Archer welds Gordon.They really look good.
|
|
|
|
Post by kaytermarram on Sept 1, 2014 10:35:27 GMT -5
Weld line DECALS... What a cool idea to use them. Looks extremly crisp, perfect job!
Frank
|
|
|
|
Post by 406 Silverado on Sept 1, 2014 10:42:38 GMT -5
Looks great Gordon, love the new weld lines.
|
|
Foenetik
Full Member
   November '24 Showcased Model Awarded
Member since: March 2014
Posts: 610 
|
Post by Foenetik on Sept 1, 2014 14:45:25 GMT -5
awesome job so far!
|
|
|
|
Post by bullardino on Sept 2, 2014 10:50:47 GMT -5
Awesome and inspiring. What paints did you use for the rust?
|
|
Gordon Ferguson
Junior Member
 
Member since: April 2012
Posts: 85
Apr 3, 2012 10:22:22 GMT -5
Apr 3, 2012 10:22:22 GMT -5
|
Post by Gordon Ferguson on Sept 2, 2014 15:57:33 GMT -5
Luigi, The rust on the wheel house was done using Vajello chipping colour to paint in the basic chips followed by spot washes with MIG oils, mostly dark rust. The rust on the hull ? I played with this so much I am not really sure how I got there, which is a problem because I have only done one side so have to be able to replicate on the other. Basically the hull was painted with a mix of Tamiya gloss and matt back, wanted a sort of sheen/ satin finish . a number of thin coats were applied working in a vertical spray pattern and altering the gloss/ matt ratios to give a streaked effect. Lifecolor dark rust was painted along the weld lines, the Lifecolor was cut back with some water and their medium to produce more a glaze than a solid colour.. Some additional rust staining was done with MIG oils at top of hull under the the rubbing board, left for and hour and then dragged down in spots with a brush dampened in thinner. When dry a thin wash of Life colour white oxide was brushed all over hull, and again left to dry. Finally a seriously thinned coat of MIG dark rust was brushed all over hull ...... This was basically 95% low odour thinner and 5% Oil. This is the real experimental bit , this mix was scrubbed onto the hull, the thinners appear to break through the acrylic lifecolour film, I think in a similar way to the effect John Tolcher gets with Tamyia paints and Windex, I applied one coat of the mix scrubbing with a stiff brush, forced dried with hair dryer to review effect and then reapplied the thinner several times to areas that I want more wear on. The attached picture is a very cruel close up , this only about a 2" square in real life but hopefully you can see the effect of the scrubbing and the fact the remains of the white oxide wash has been stained with the rust wash. As always it takes three times longer to describe than it does to do, will do other side of hull in a couple of days to see if my description above replicates the finish I already have . Hope this of some help ?  |
|
|
|
Post by bullardino on Sept 3, 2014 2:59:15 GMT -5
Really helpful, thanks a lot for taking the time to explain  |
|
|
|
Post by kaytermarram on Sept 3, 2014 13:12:48 GMT -5
Yep, exactly what I would like to say, perfect explanation and man, does this look good!
Frank
|
|
Marcel du Long
Full Member
  
Member since: August 2013
Posts: 331
Aug 22, 2013 13:25:03 GMT -5
Aug 22, 2013 13:25:03 GMT -5
|
Post by Marcel du Long on Sept 9, 2014 14:01:40 GMT -5
Just lovely.
Marcel
|
|
|
|
Post by kaytermarram on Oct 3, 2014 12:16:17 GMT -5
Hi Gordon, any progress here??
Frank
|
|
WigWag Workshop
Reviews member    
Member since: May 2012
"Keep The Glue On The Styrene"
Posts: 720
May 22, 2012 7:25:45 GMT -5
May 22, 2012 7:25:45 GMT -5
|
Post by WigWag Workshop on Oct 3, 2014 16:17:37 GMT -5
I didn't know Revell made metal kits  Seriously though, that is some outstanding rust effects! I am totally blown away, has I know how difficult white can be, you sure did nail it. -Steven |
|