charleygnarlyp290
Full Member
  
Member since: October 2014
Posts: 137 
|
Post by charleygnarlyp290 on Oct 29, 2014 22:56:35 GMT -5
Here is my first kit thread on this forum. Hope you all enjoy it. I have never built a Hobby Boss kit and saw this one at my local shop. The price was great, and the reviews I read were positive, so I snatched it up. 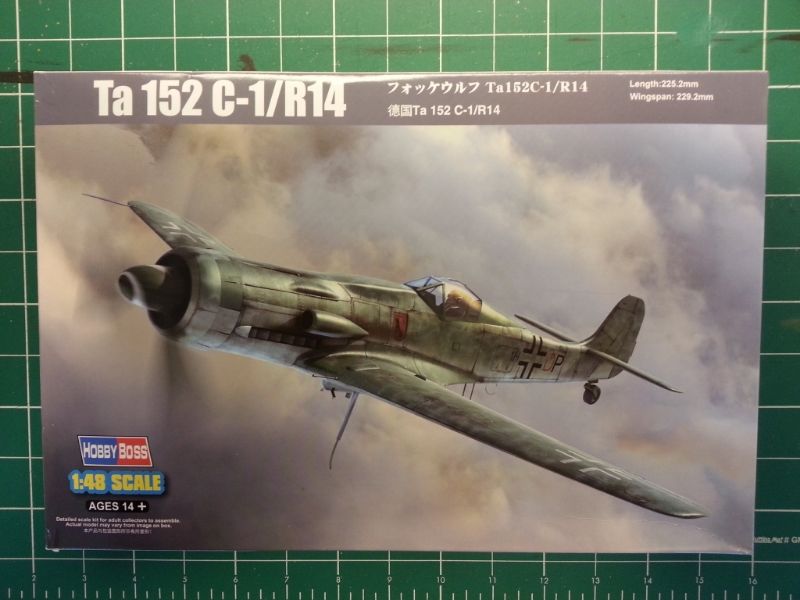 Following the kit instructions, I tackled the cockpit first. it all went together really well. The kit offers styrene rudder pedals, or photo etch. i was going to use the styrene pedals just for the ease of it, but seeing as how they were ultra delicate, I broke one cutting it off the sprue. No sweat... I cut off the PE versions and whipped them into shape and glued them on. Worked like a champ. Next I painted all of the parts with the handy-dandy airbrush and started assembling them (once they were dry, of course!) The instrument panel comes in two pieces, so I applied the decals to both parts of the panel and gave them a good does of Solvaset. They settled in real good. While that dried, I painted the controls on the side of the cockpit tub and set that aside and started on the PE seat belts. The belts are quite small, but even with my largish mitts, I was able to get the parts assembled and painted. While all of that stuff was curing and drying, I assembled the motor. It is pretty basic as far as parts count, but it looks really good, but most of it is not going to be visible. I gave the cockpit a quick brown wash and then a black wash. then a bit of drybrushing and chipping and its done.  |
|
|
|
Post by TRM on Oct 30, 2014 5:52:58 GMT -5
Nice work on the innards Charley!
|
|
|
|
Post by deafpanzer on Oct 30, 2014 10:33:18 GMT -5
Interior looks sharp... pulling my chair in!
|
|
|
|
Post by wbill76 on Oct 30, 2014 16:57:58 GMT -5
Looking good so far!
|
|
threadbear.
Full Member
  
Member since: December 2011
Recovering my modelling enthusiasm!!'
Posts: 138
Dec 18, 2011 8:31:37 GMT -5
Dec 18, 2011 8:31:37 GMT -5
|
Post by threadbear. on Feb 2, 2015 4:30:32 GMT -5
Good work on the cockpit.
|
|
|
|
Post by wing_nut on Feb 3, 2015 13:27:31 GMT -5
Great start, looking forward to more. Maybe a mod can move this to the Axis section. I am reasonably sure we didn't fly these  |
|
|
|
Post by Leon on Feb 3, 2015 16:39:09 GMT -5
Nice work on the cockpit and motor Charley.  |
|
|
|
Post by Tojo72 on Feb 3, 2015 16:43:24 GMT -5
It's one of the better looking fighters.Should be good.
|
|
Rick
Full Member
  
Member since: March 2013
what to build, what to build . . . Ok THAT one!
Posts: 854 
|
Post by Rick on Feb 4, 2015 6:35:28 GMT -5
Welcome aboard mr gnarly. Very nice office work. Looking forward to seeing you fill out the rest of this one.
Rick
|
|
charleygnarlyp290
Full Member
  
Member since: October 2014
Posts: 137 
|
Post by charleygnarlyp290 on Mar 1, 2015 0:29:44 GMT -5
Cripes... it's been forever since I posted here. Well, as far as this kit goes, I am done. i will use this post to catch up with some construction stuff, painting and the finished product. The actual construction of this kit was a snap. I generally haven't really enjoyed aircraft models in the past due to fit issues and such. Not so with this kit. Every bit of it went together flawlessly. I had very little seam work to do. The fuselage fit together so well in fact, the only clean up was a bead of plastic from the cement dissolving the plastic. A quick scrape of the xacto and it was gone and the seam was smooth. 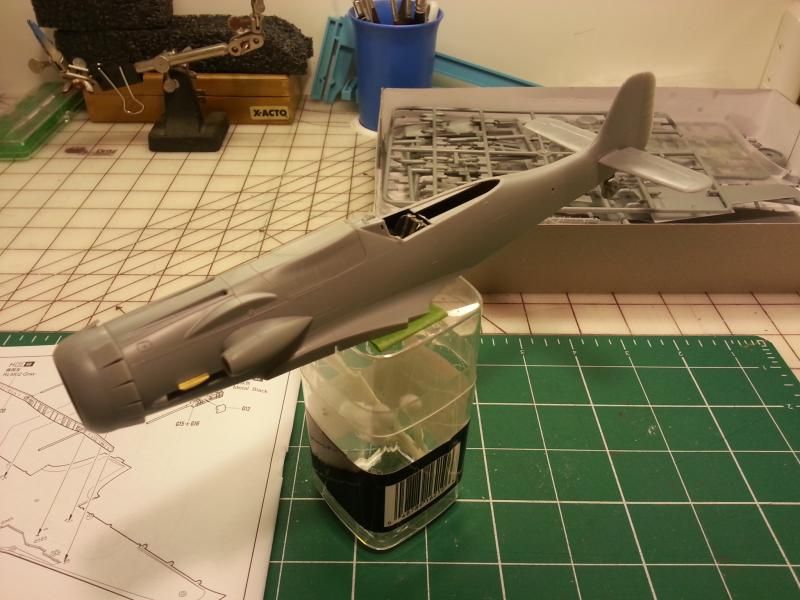 Like the fuselage, the wings also went together well. Attached them with no problems. 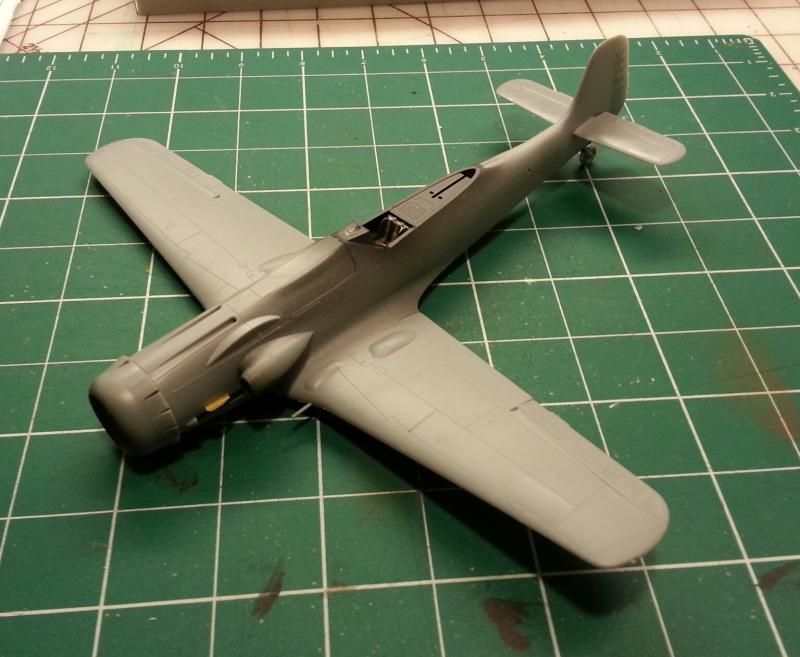 For the canopy, I decided to paint it in place. I used some painters masking tape and created my own masks, then affixed the canopy parts to the plane. 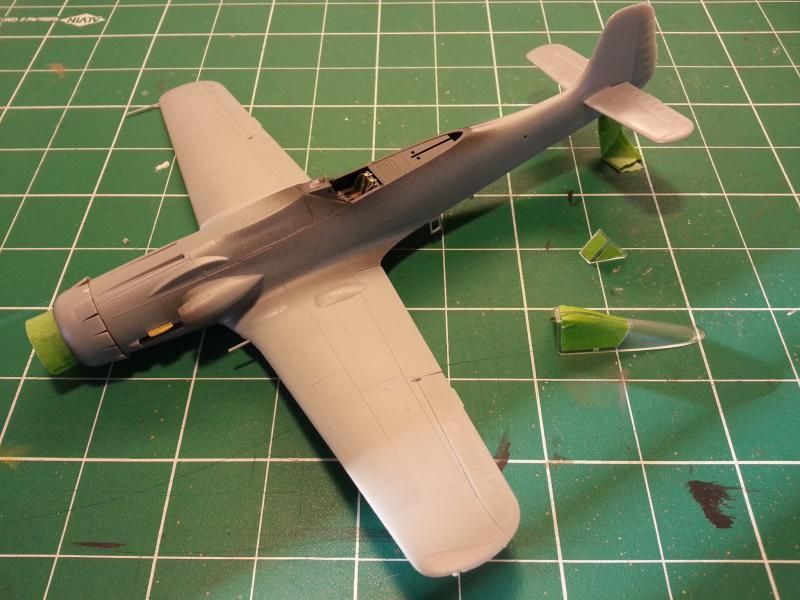 I masked the rest of the parts that needed it and got ready to paint the bottom. 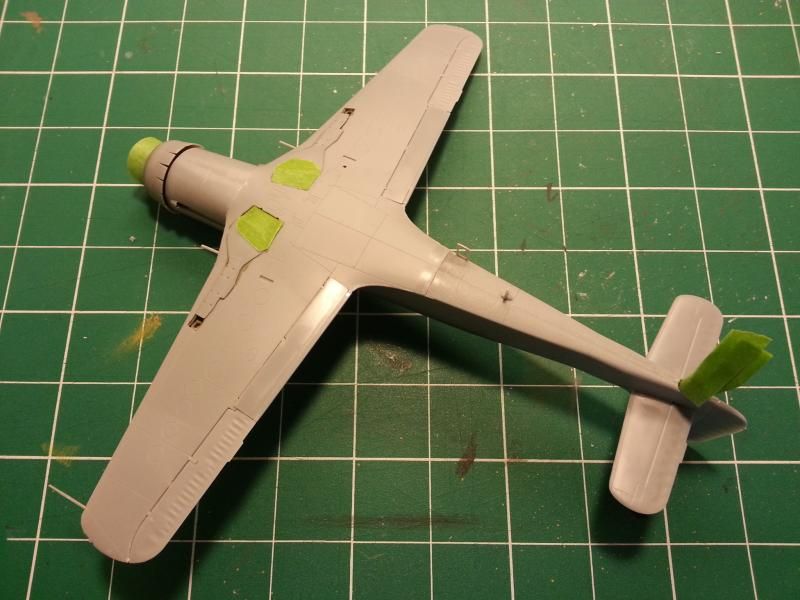 After I sprayed the bottom, I applied the first upper, camo color. To get the type of edge I wanted I used blue tack putty.  After the first color cured for a few days, I used the blue tack again to outline the next upper surface color. 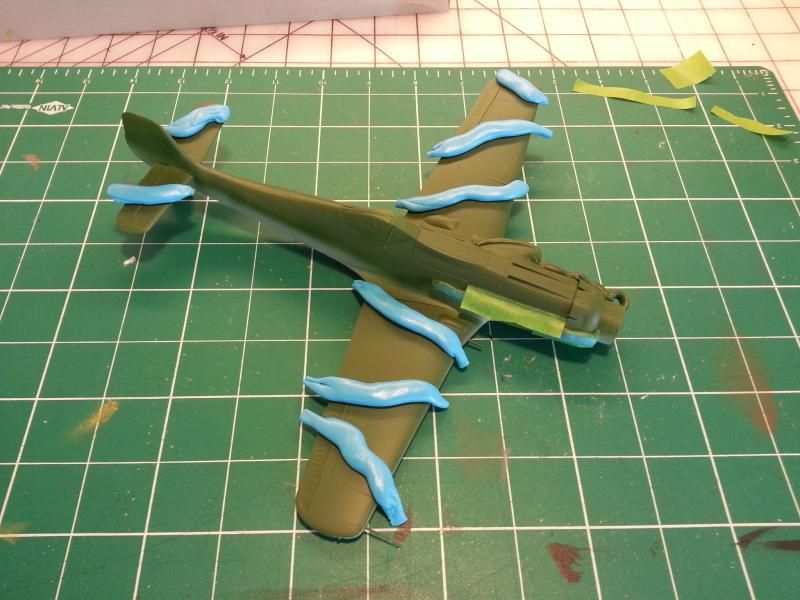 Then came the upper swirly pattern, then the bottom swirlies. This is the first time I have done an airbrush pattern this fine. 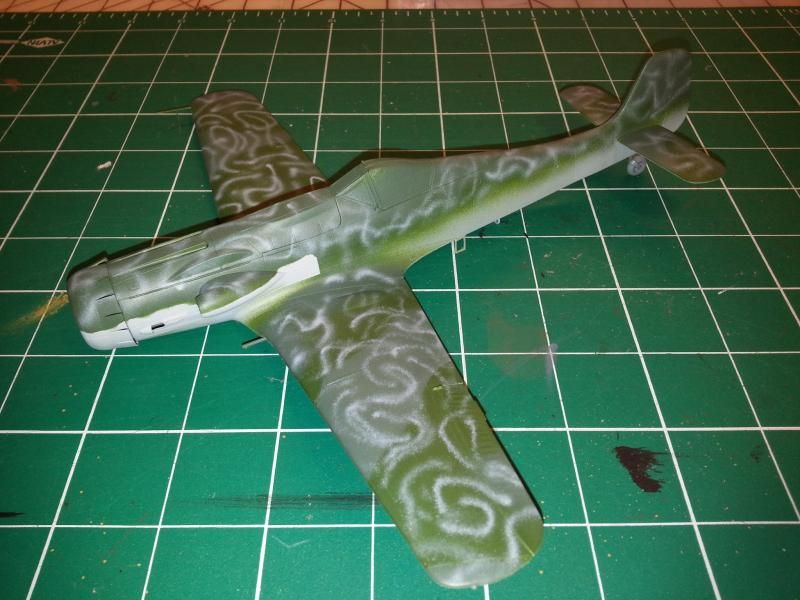 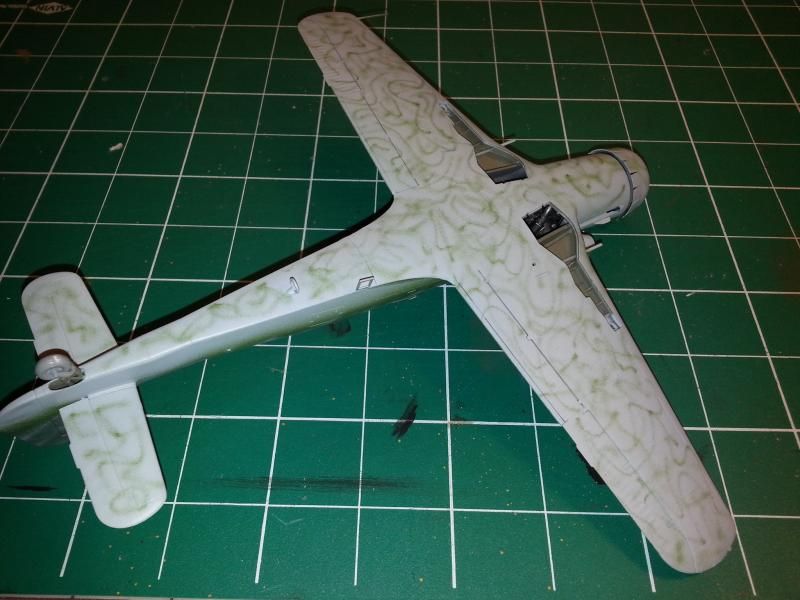 After the paint was all dry, I gave the model a coat of Future and applied the decals. They went on pretty easily. In the photo you can see my arsenal of decal application tools and fluids. 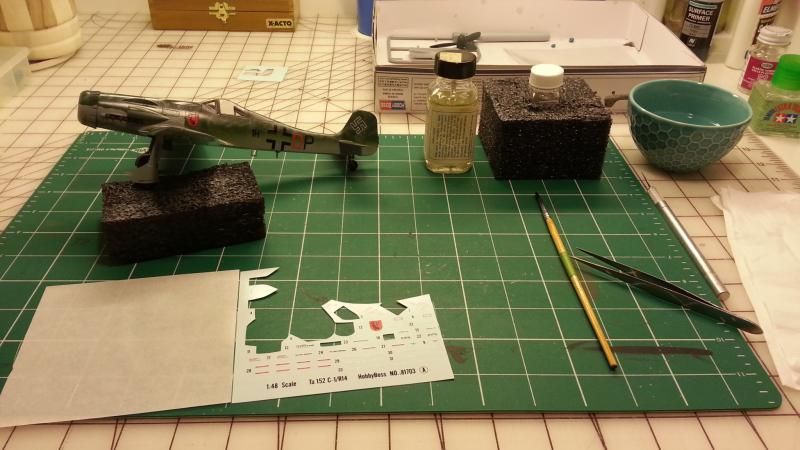 After the decals set for a few days, I gave it another coat of Future. When that was dry, I gave it a wash to highlight the details and called it good. I didn't do much in the way of weathering since these planes didn't see any action due to their late entry into the war. I still may give it a flat coat, but haven't decided yet. 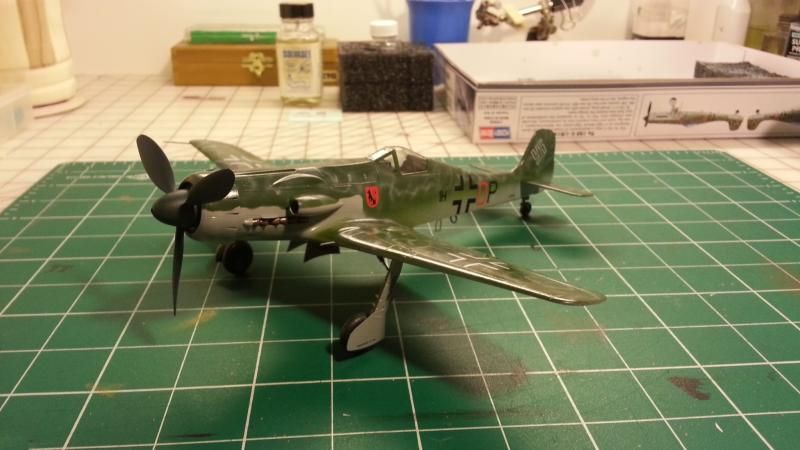 Here are a few pics of the finished product.  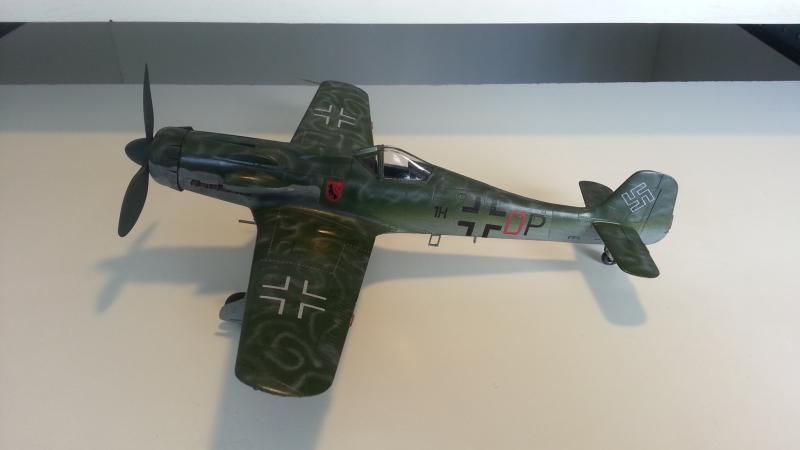 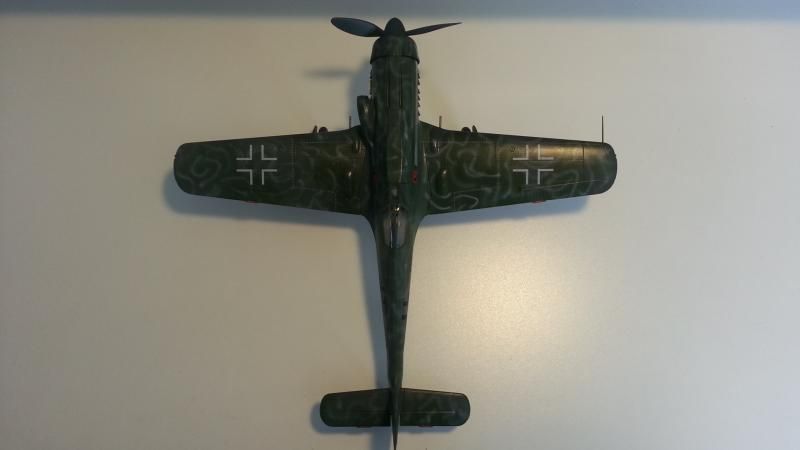  My overall experience with this kit was very favorable. Because of this, I will definitely be building more aircraft, since I know I will likely enjoy it. |
|
|
|
Post by Leon on Mar 1, 2015 5:59:40 GMT -5
Fantastic finish Charley! The camo looks great.
|
|
Rick
Full Member
  
Member since: March 2013
what to build, what to build . . . Ok THAT one!
Posts: 854 
|
Post by Rick on Mar 1, 2015 6:34:29 GMT -5
Very nice charley. Never tried the freehand camo myself. You did a great job of it.
Rick
|
|
|
|
Post by dupes on Mar 1, 2015 11:16:55 GMT -5
Sweet looking build!
|
|
|
|
Post by deafpanzer on Mar 1, 2015 11:24:24 GMT -5
AWESOME camo on it... it would have drove me crazy if I tried to do the same thing!
|
|
|
|
Post by wbill76 on Mar 1, 2015 19:21:45 GMT -5
Nice work on the swirly pattern.
|
|
charleygnarlyp290
Full Member
  
Member since: October 2014
Posts: 137 
|
Post by charleygnarlyp290 on Mar 2, 2015 9:18:41 GMT -5
Thanks, people. Have a long way to go on some things, but as I go along I continue to hone my skills.
|
|
|
|
Post by JimD on Mar 2, 2015 9:28:40 GMT -5
Great stuff. Really love the sleek lines of this airplane. It looks like the Hobby Boss kit is a nice one. I've never seen this camo pattern either. Really like it.
|
|
bbrowniii
Full Member
  
Member since: March 2012
If you are not part of the solution, you are part of the precipitate.
Posts: 1,239
Mar 25, 2012 22:08:04 GMT -5
Mar 25, 2012 22:08:04 GMT -5
|
Post by bbrowniii on Mar 2, 2015 10:12:37 GMT -5
Really great job, Charley. You really whipped that into shape!
|
|
charleygnarlyp290
Full Member
  
Member since: October 2014
Posts: 137 
|
Post by charleygnarlyp290 on Mar 3, 2015 9:30:06 GMT -5
Thanks again chaps.
As for the camo pattern, i had never seen it either. And in looking at the paint instructions that came with the kit, I was was a little concerned, but figured I need to continue to work on the airbrush skills, so had a go.
|
|
|
|
Post by Tojo72 on Mar 3, 2015 10:36:20 GMT -5
Wow that mottled camo came out great.
|
|