petros
Full Member
  
Member since: February 2014
Posts: 361 
|
Post by petros on Dec 28, 2014 8:53:19 GMT -5
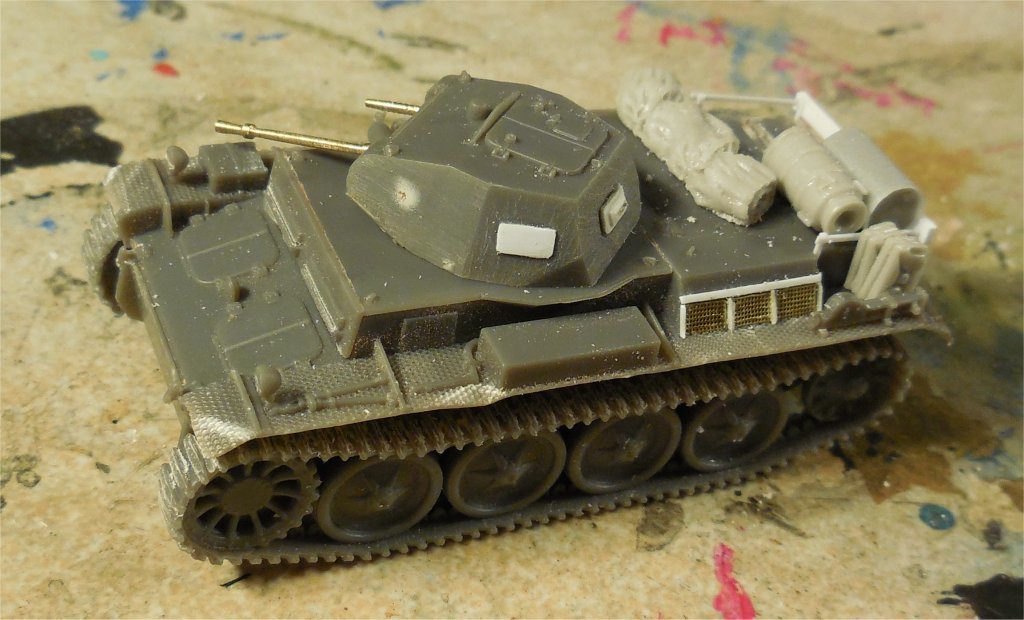
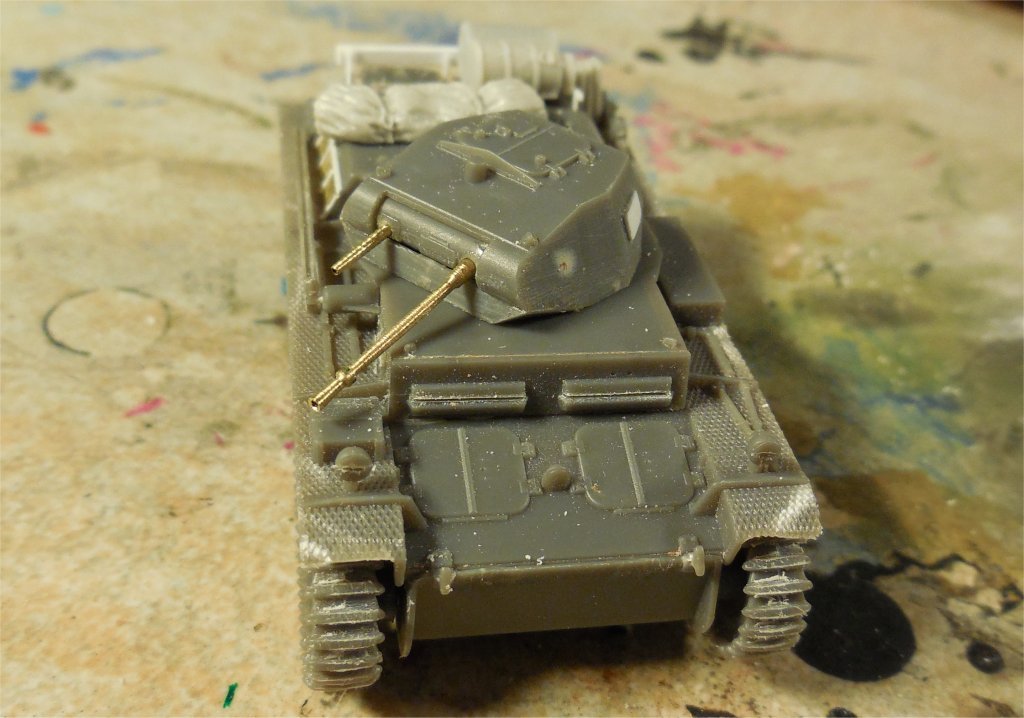
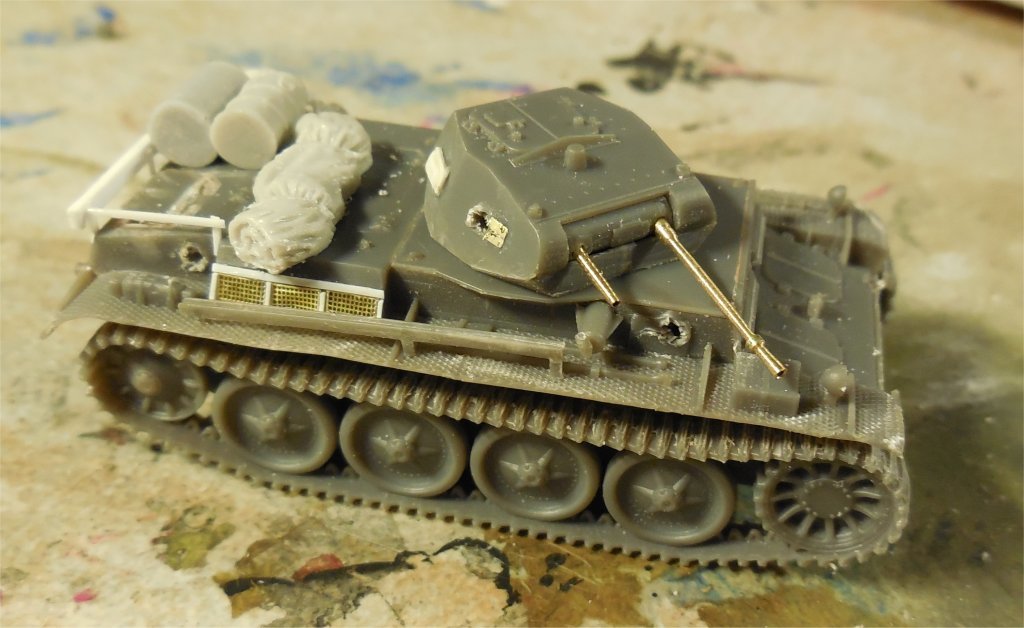
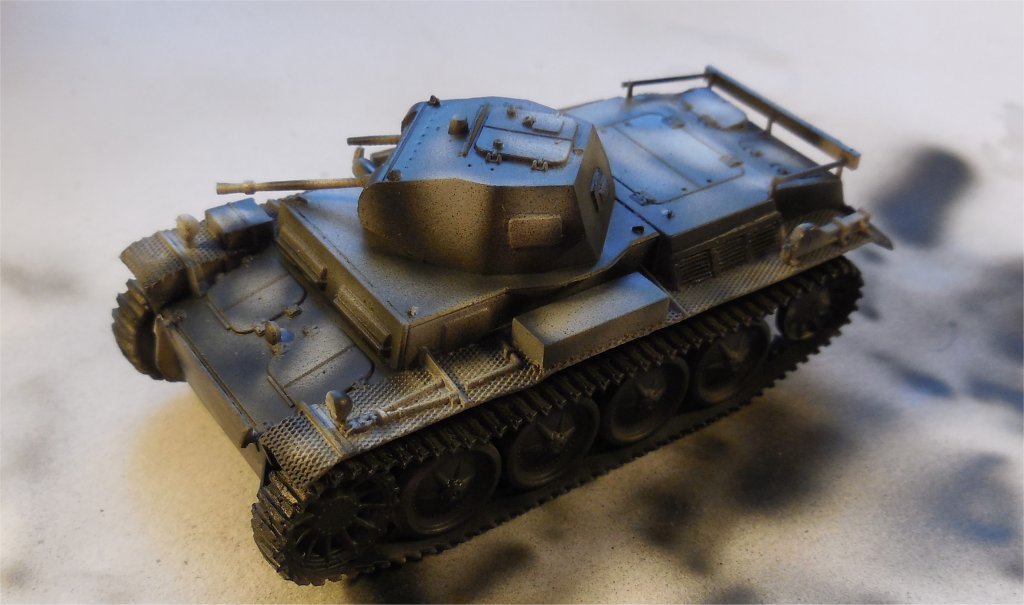
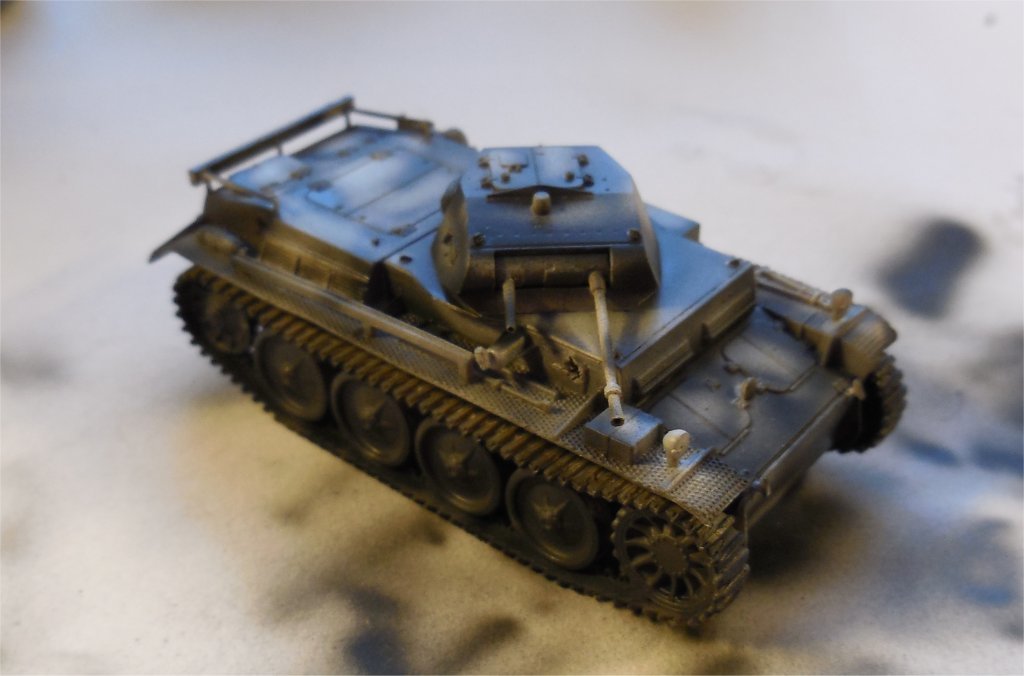
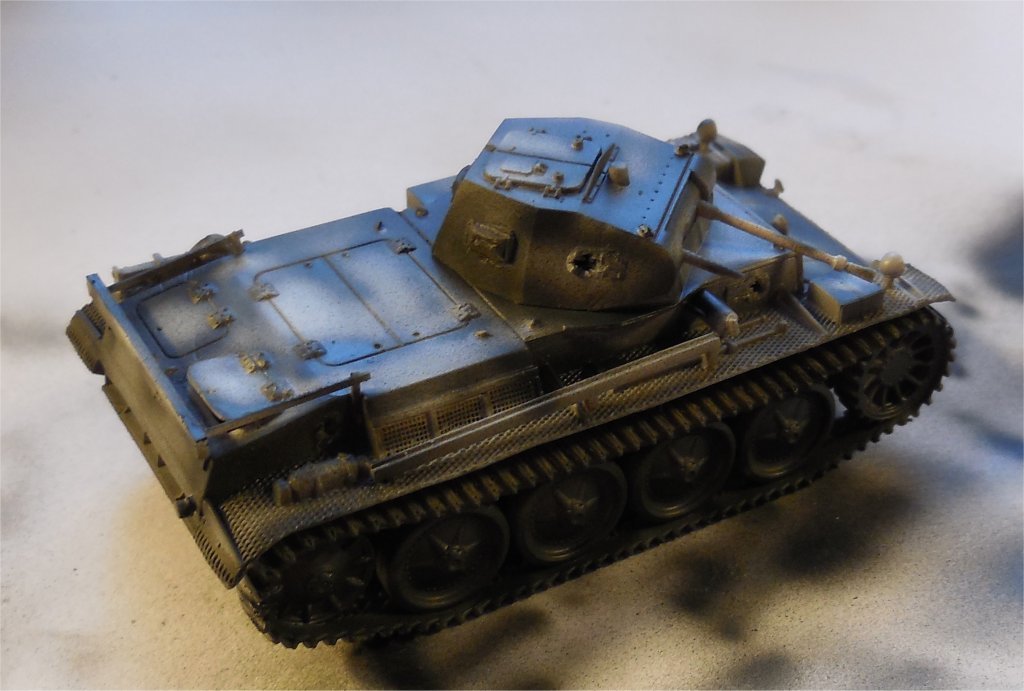
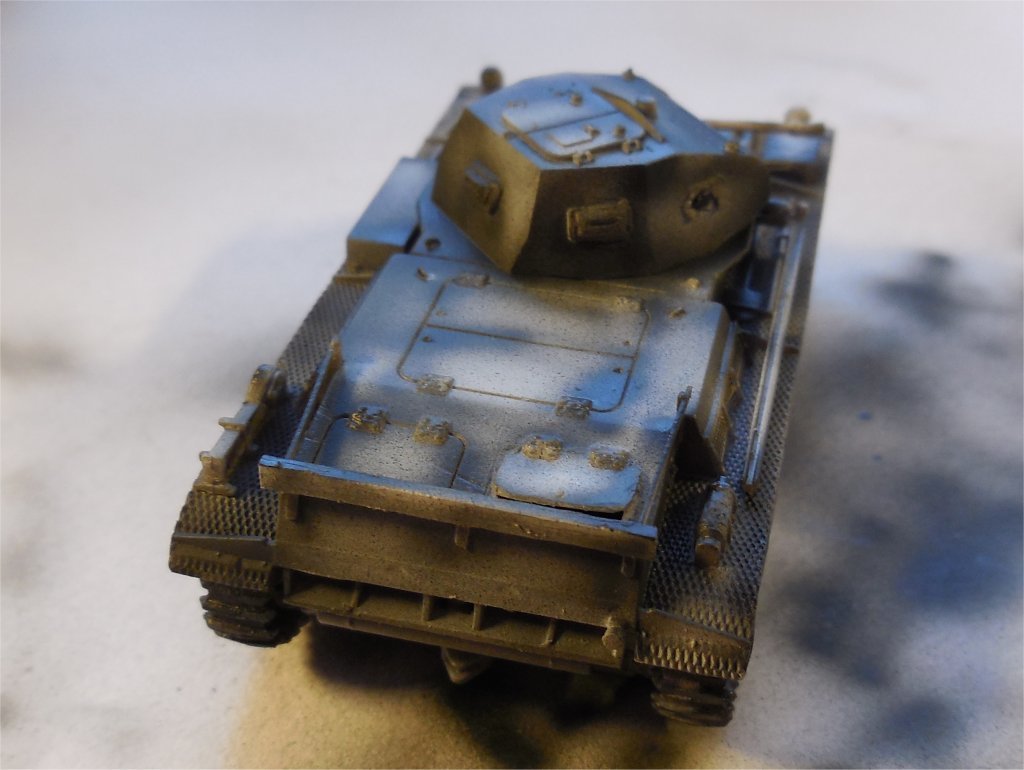
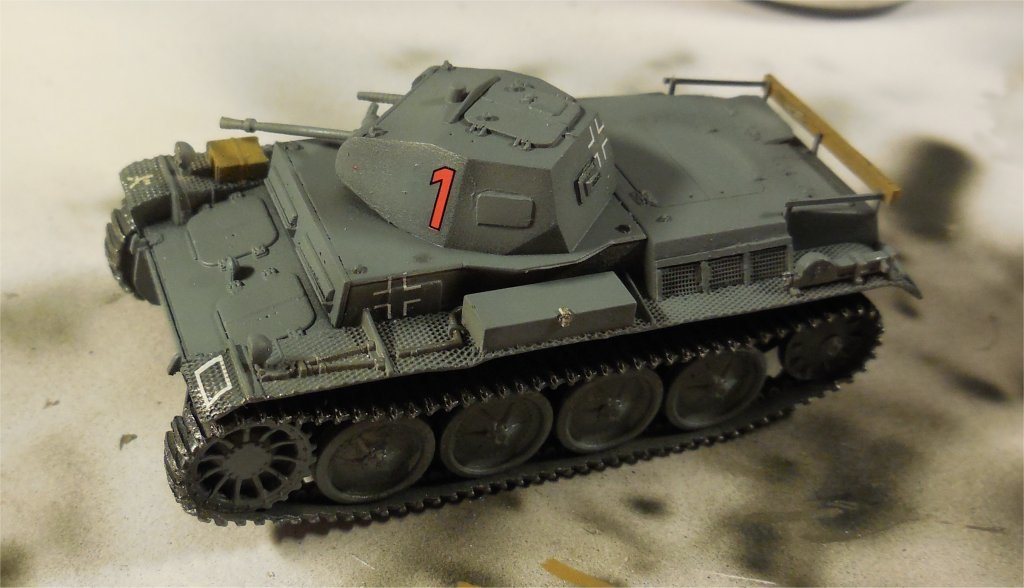
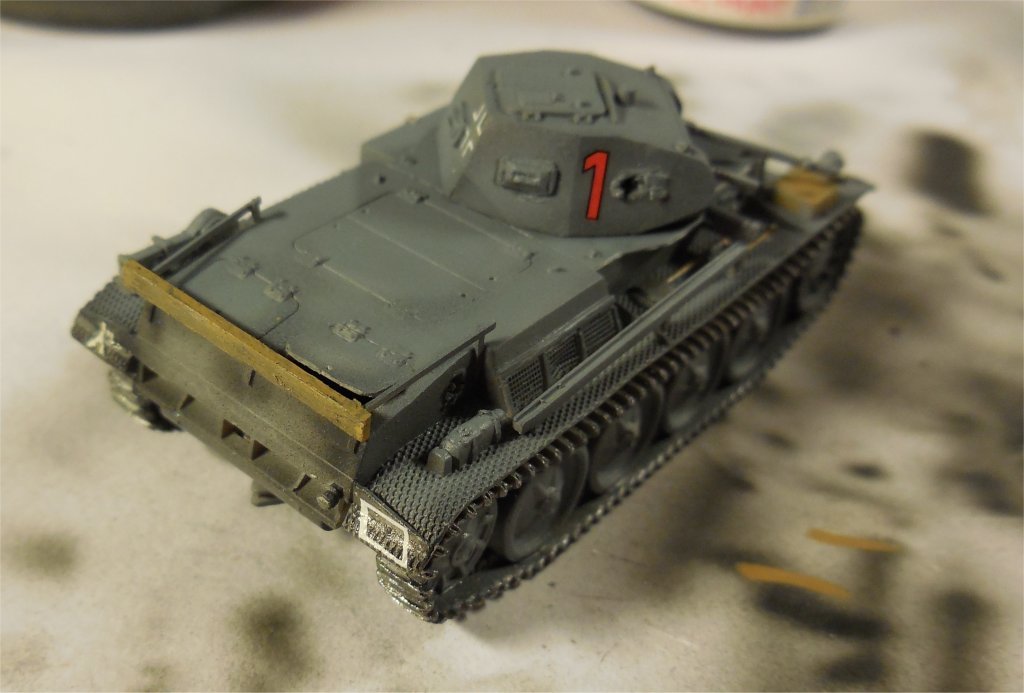
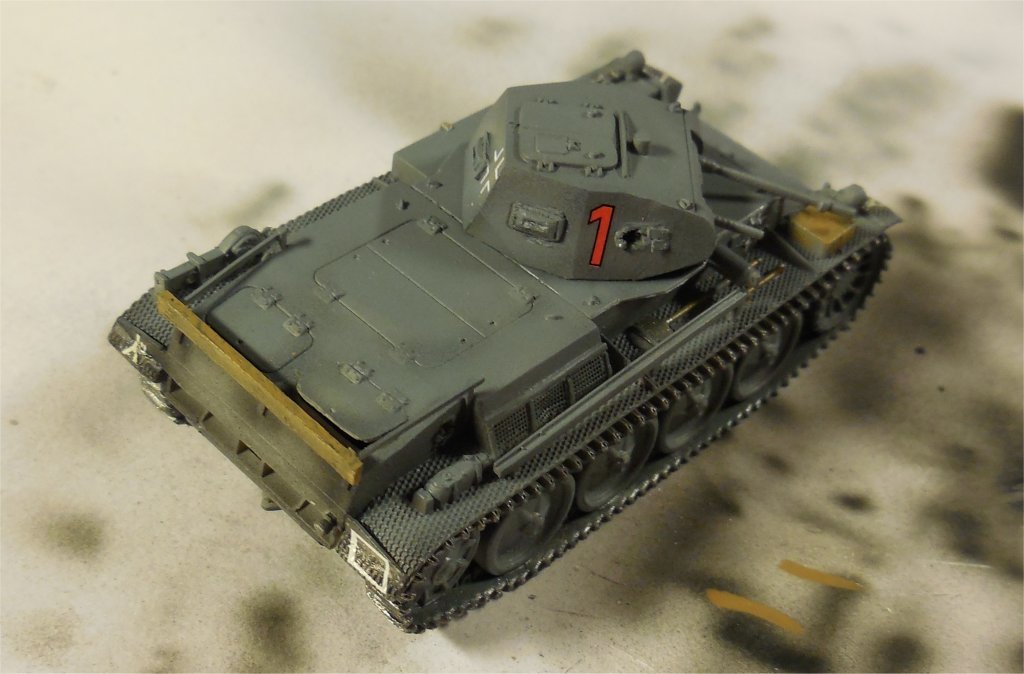
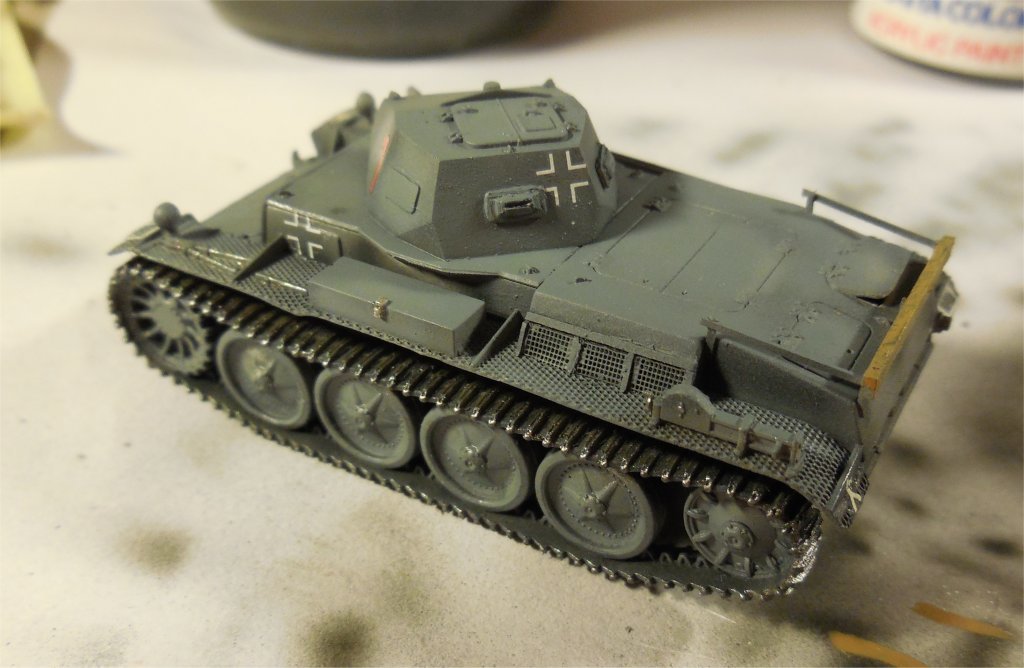
To accompany my soviet Renault FT 17 in my planned diorama, I picked up the Pz.IID kit from First to fight. The kit left me some mixed feelings. On the positive side, fit, upper hull, and turret are well detailed, well produced and fit very well. On the negative, the tracks are one piece with the wheels, so not much detail on tracks themselves, and the wheels are single fat ones, instead of fine double ones. Also, the hull walls behind the track have no details. I glued the turret upper and lower parts together, and also added the front plate and upper plates to the hull, rest is just holding together so far (including the rear part and exhaust). As I damaged the plastic barrel while drilling it out (both 20mm and 7.92 are cast with the mantlet together), I just turned new barrels for me with my usual technique with a Proxxon in a drill stander and wooden back support, using different files. MG-34 barrel, made of a 1mm out/0.5mm inside tubing, was textured by a rough file to get a convincing MG look, while the main barrel is multipart - its body is made of a solid brass rod, with the flash suppressor turned from 1.5mm brass tube and attached on a pin left on the body part. Some small parts like lights, tools or antenna "groove" are not yet attached. Some vision slits are not very well defined, but were engraved a bit better. Also, fenders were thinned alot, mainly getting some taper to get a sharp outer edge. The tank will be quite dirty to match the dirt on FT-17, and would be knocked out with 3 37mm hits. At first, it was immobilized by a shot through its right side upper rear. It started turning a turret to the right, but was then hit on the turret side by another shell, penetrating near the vision slit. Then, another shell was put to the right side, through the driver's compartment. There were no survivors, so the hatches stay closed. That is only planned damage, and still needs to be inflicted  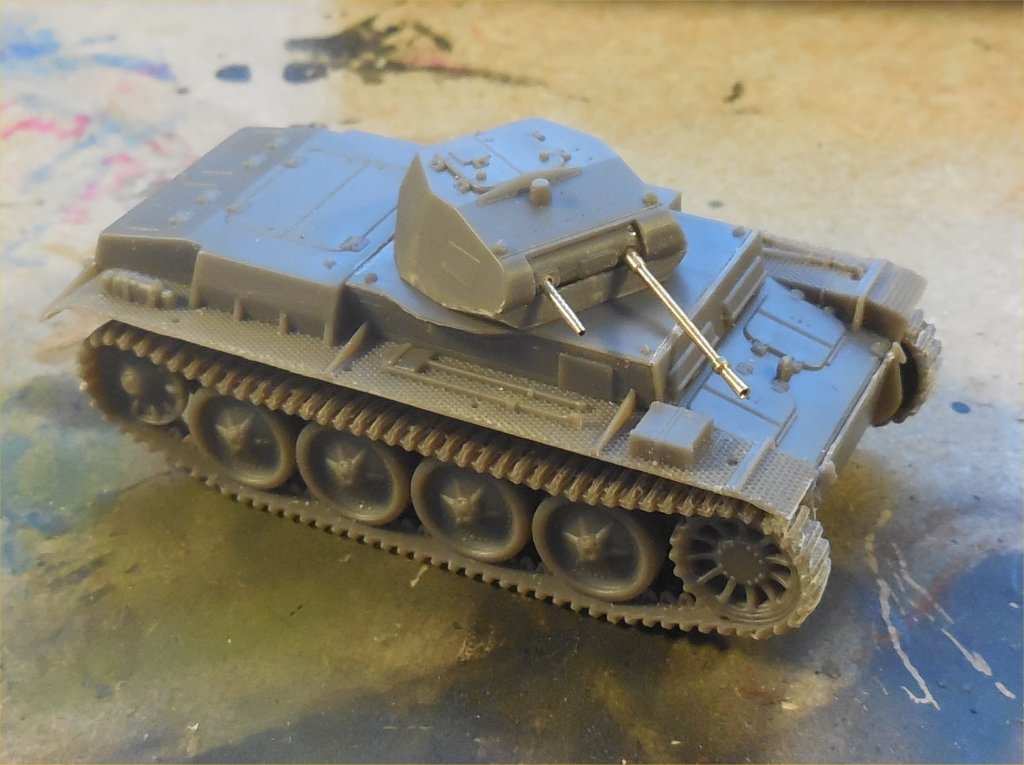 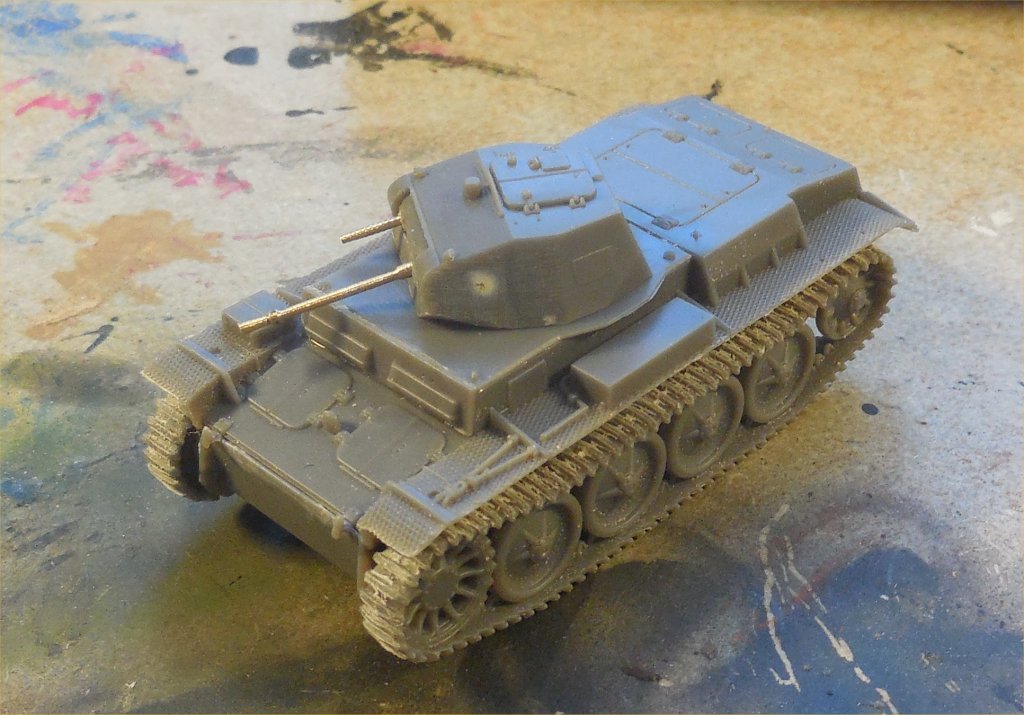  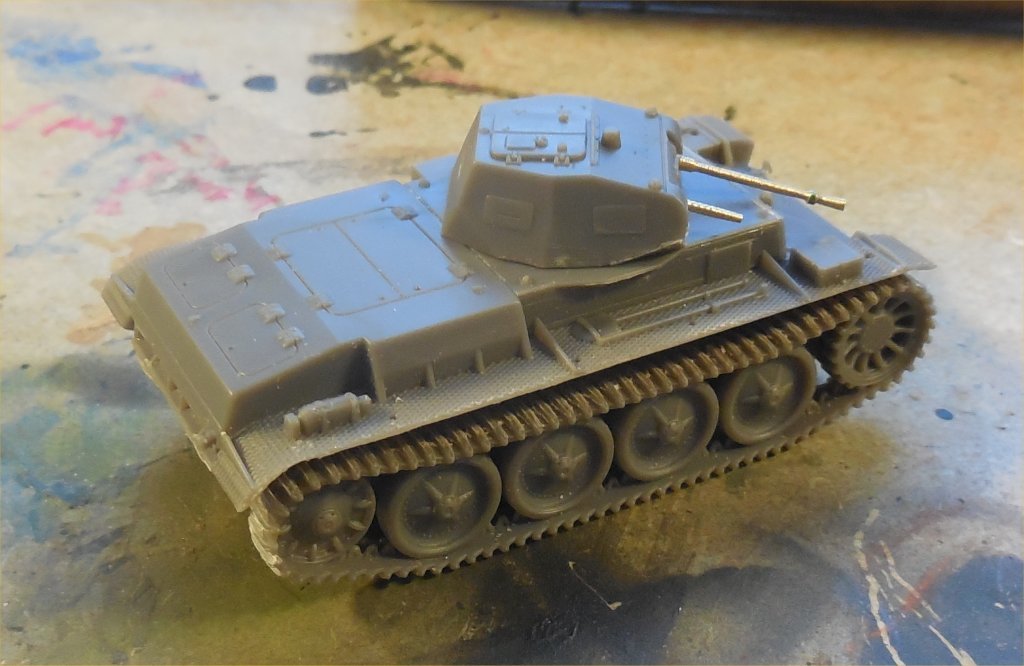 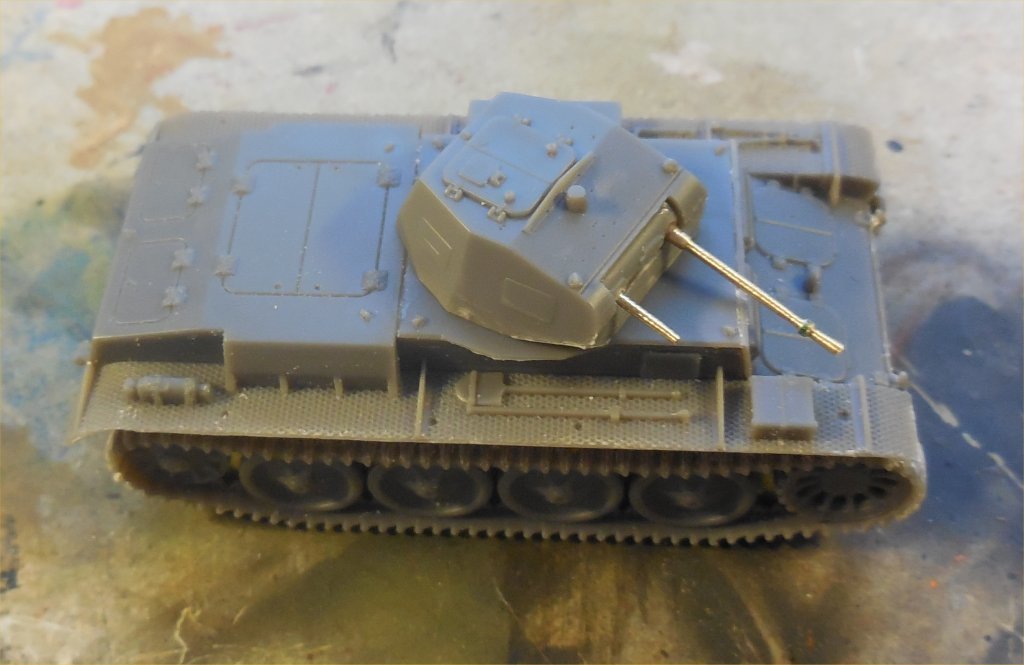 |
|
|
|
Post by Leon on Dec 28, 2014 9:15:01 GMT -5
WOW! Nice work on the turned barrels Petr.
|
|
|
|
Post by TRM on Dec 28, 2014 9:46:51 GMT -5
Another fine min-creation Petr!! Excellent work on the barrels and the F2F kit as a whole!!
|
|
petros
Full Member
  
Member since: February 2014
Posts: 361 
|
Post by petros on Dec 28, 2014 9:55:23 GMT -5
WOW! Nice work on the turned barrels Petr. Thanks! Its however very easy to do and everyone can do it. Takes some time, but can get great results. Works for ship masts, gun barrels, etc. Tools needed: Proxxon/Dremel/something similar, fitted with a usual collet or chuck Something to hold it - either a vice for horizontal mounting, or a drill/machining stand for vertical mount. Another vice - either usual desk mounted one, same as above, or a machine vice attached to the milling stand. Piece of scrap wood/plywood. Set of files, metal or diamond covered. Callipers. Small saw for brass (I use CMK razor saw, very fine). Color markers which write on brass Brass or aluminium rod or tubing, slightly more or equal then the thickest diameter of your piece, and longer on both ends then the thing you want to get, so it can be held. Use the markers to put the marks on the brass rod, so you know where to leave a stand out ring, and where to take off material. Take the wood piece, and drill a hole identic or minimally larger then the brass rod you would be processing. Fix this wood piece in your vice so that that hole would be coaxial with the proxxon rotation axis. Span the brass rod to the proxxon. The area of the rod where you would be filing off the metal should be at least 2 mm out of the collet, so you would not damage your motor tool while sanding. You need to align the machine tool so, that the other end of the brass rod would enter the hole in the wood piece - this hole would hold the other end of the brass piece and prevent its bending or breakage. Use low speed, and carefully file the turning rod with your files, put no pressure!. Be careful not to get your fingers into the turning parts! Wear goggles - the part can shear! From time to time, stop the machine, and measure the profile with the callipers. In 10-20 minutes you get a nice looking barrel or mast. |
|
|
|
Post by wbill76 on Dec 28, 2014 17:05:49 GMT -5
Nice work on the barrel replacements Petr, looking good!
|
|
petros
Full Member
  
Member since: February 2014
Posts: 361 
|
Post by petros on Jan 30, 2015 8:13:29 GMT -5
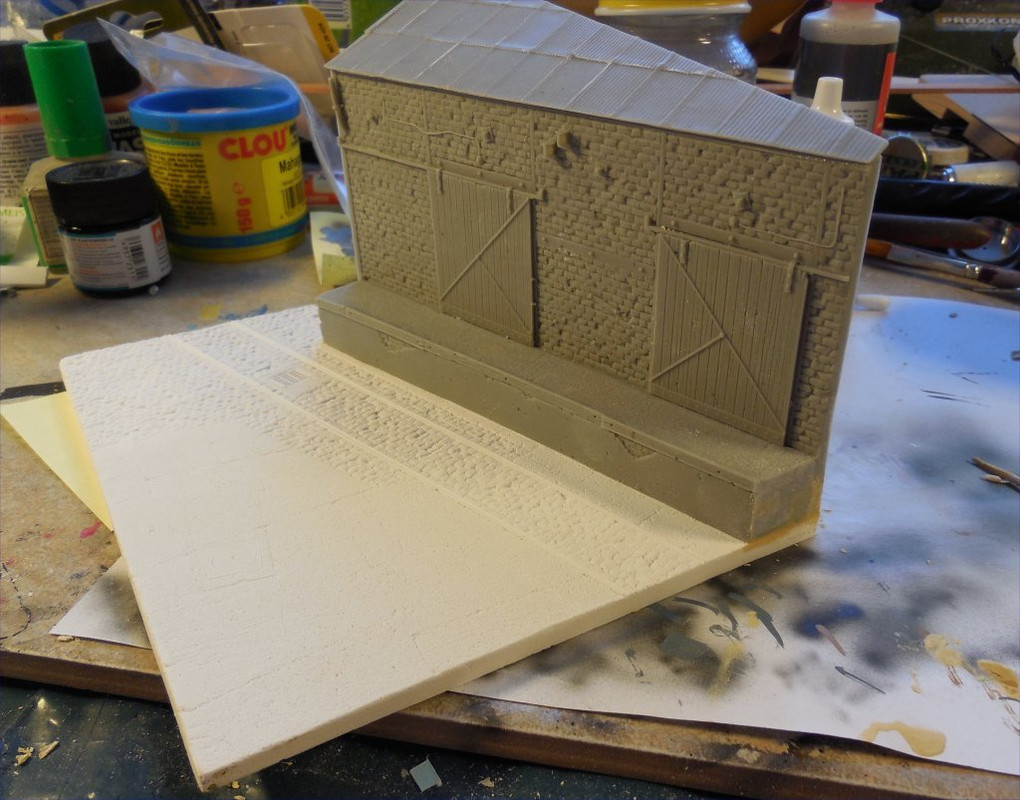
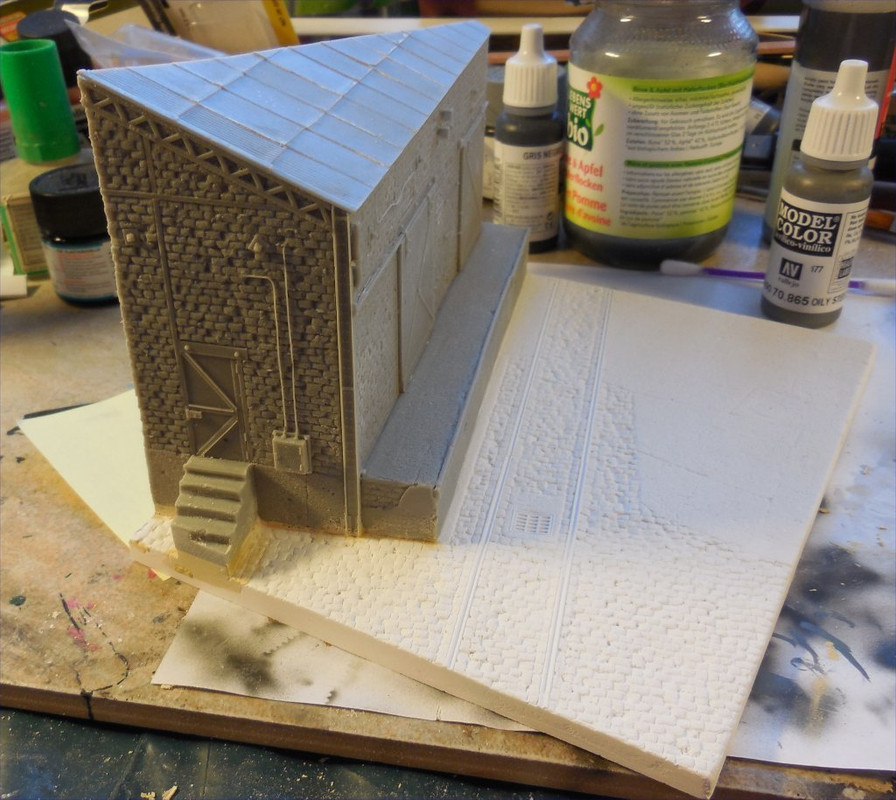
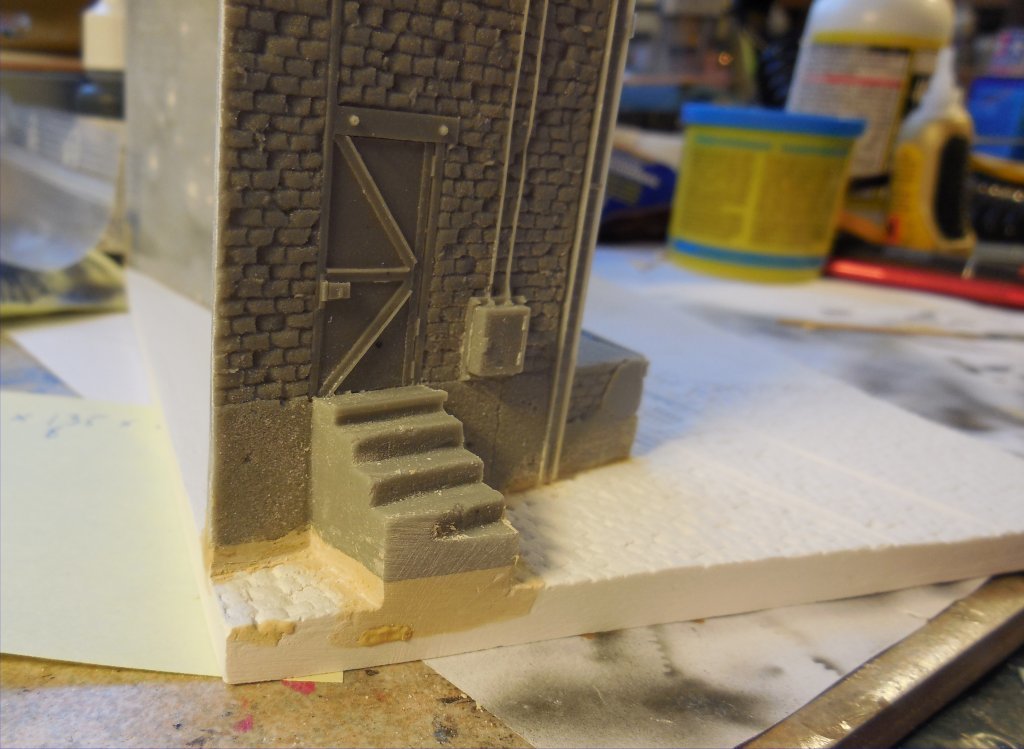
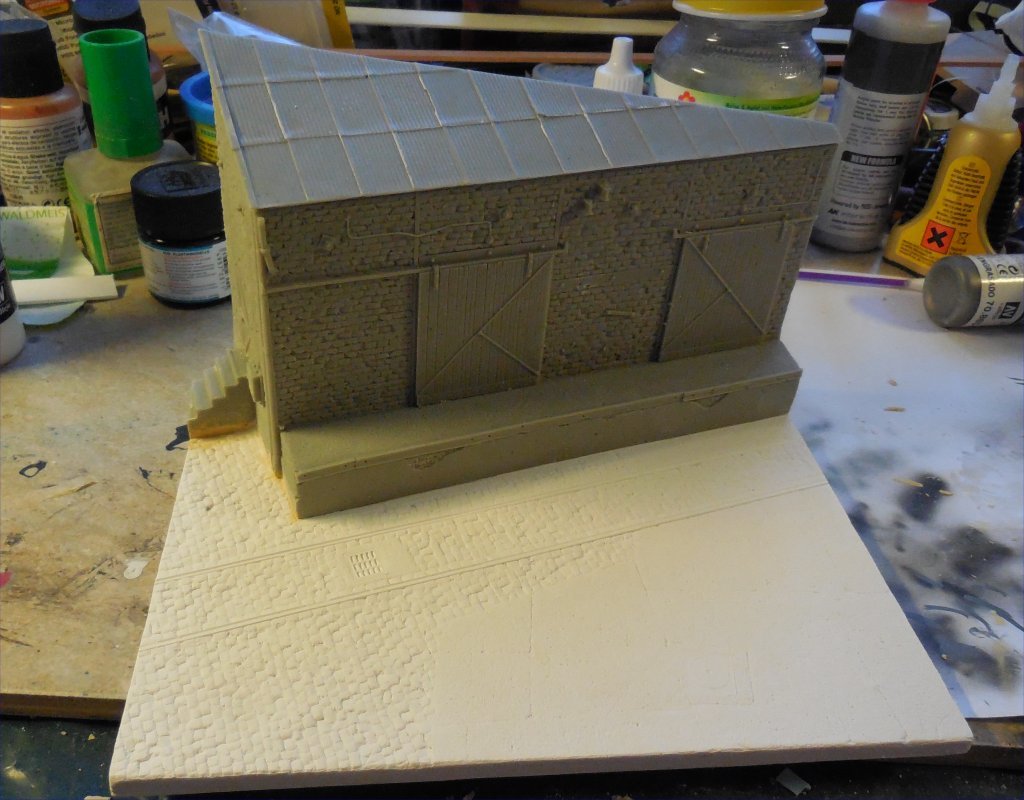
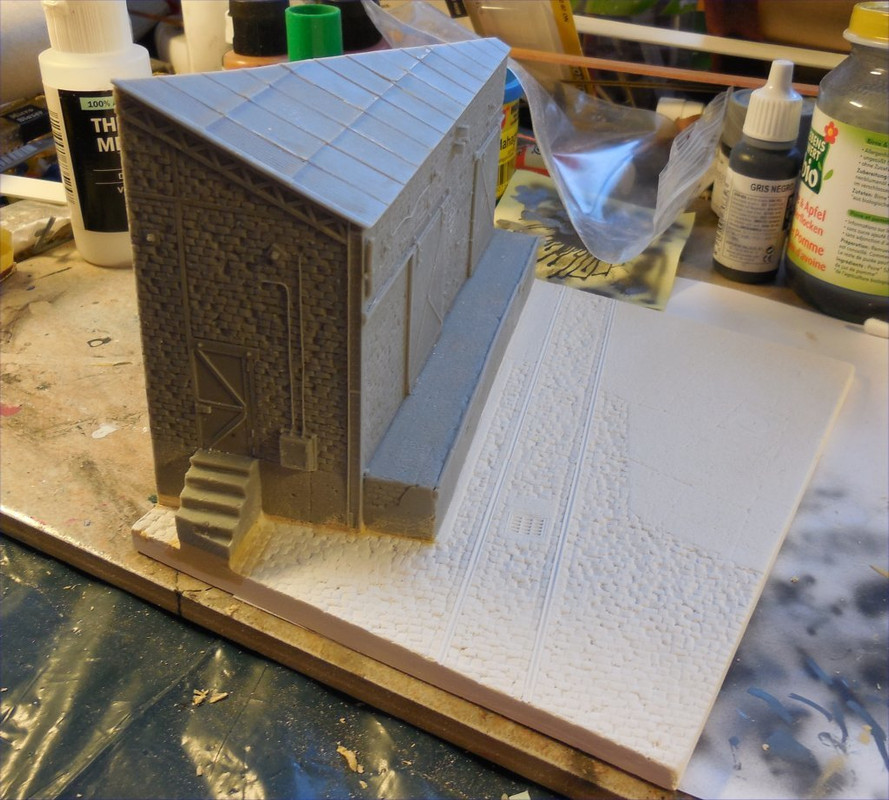
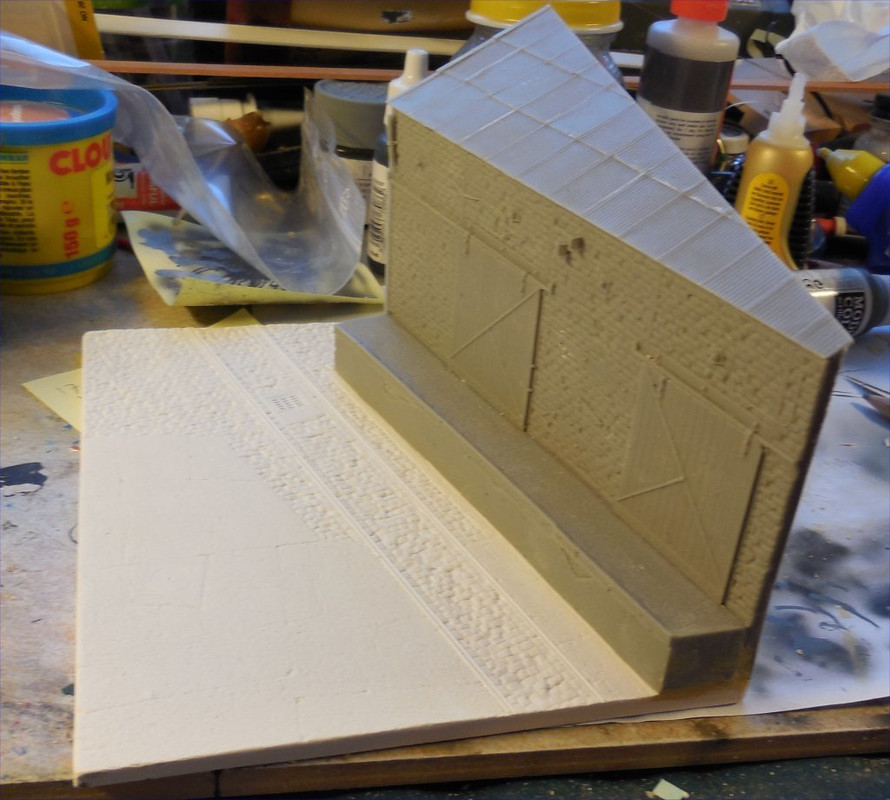
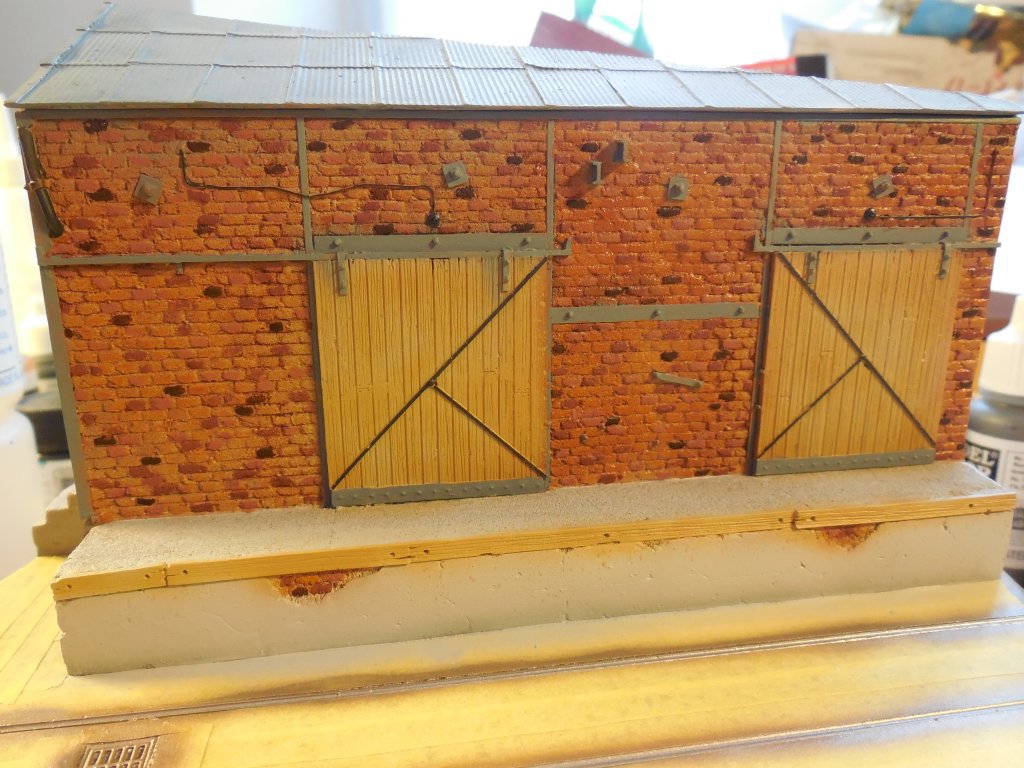
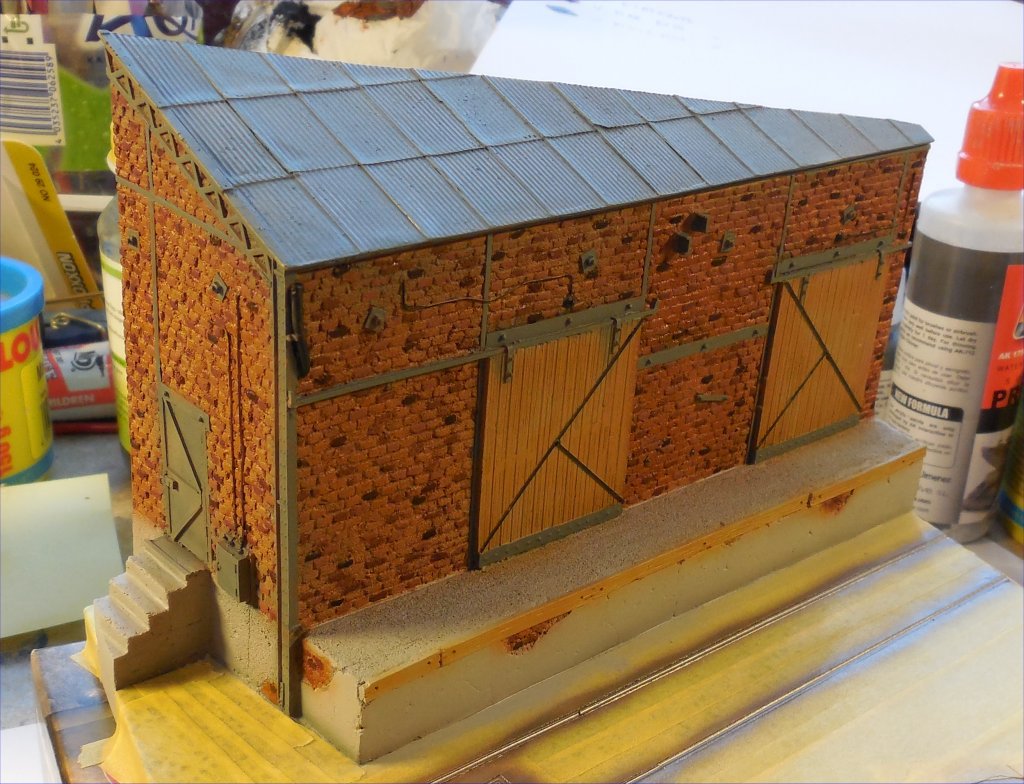
Pz.II is still in detailing, shot damage is modeled, I am replacing visors with scratch build ones, and detailing the antenna. I also opened one of the engine hatches a bit which is just above the shot hole - blown out by explosion or by bent metal parts... Would probably start painting on the weekend. My base for the diorama arrived today, so I did a test placement. The Add on parts base is nicely detailed, plaster base is gorgeous and needs no work at all, but the resin needs some sanding and some bubble filling. Also, the train platform and the ladder are tapering in their lower part, probably due to resin shrinking, so would need some filler to blend them to the base. By now, only minimal sanding has been done, and tape was holding the parts. 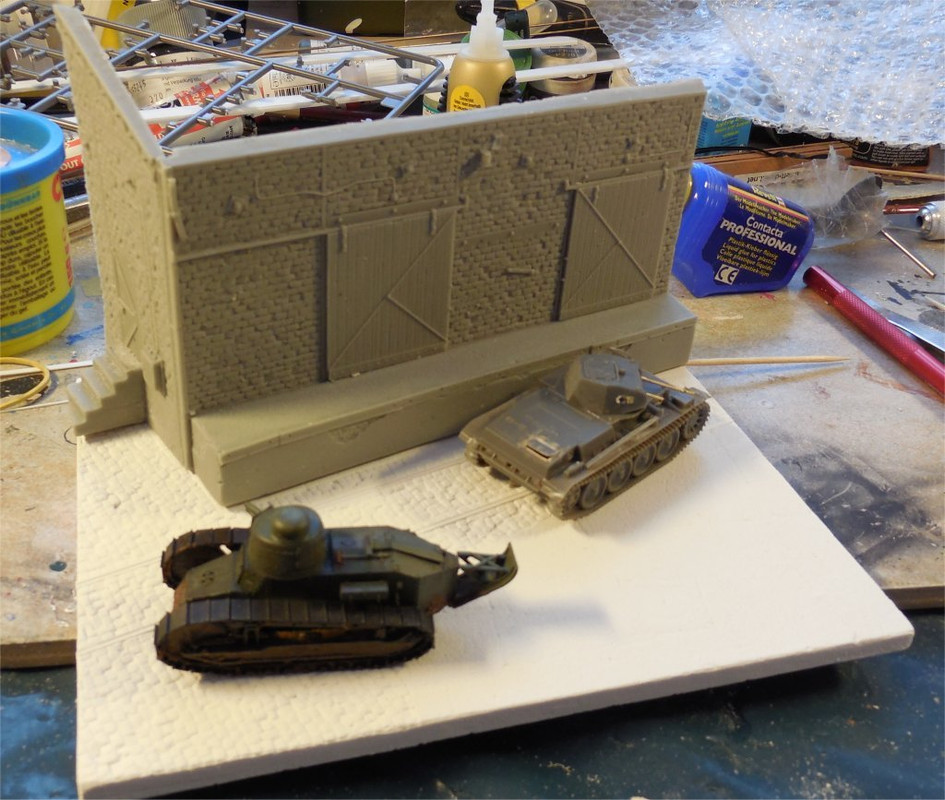 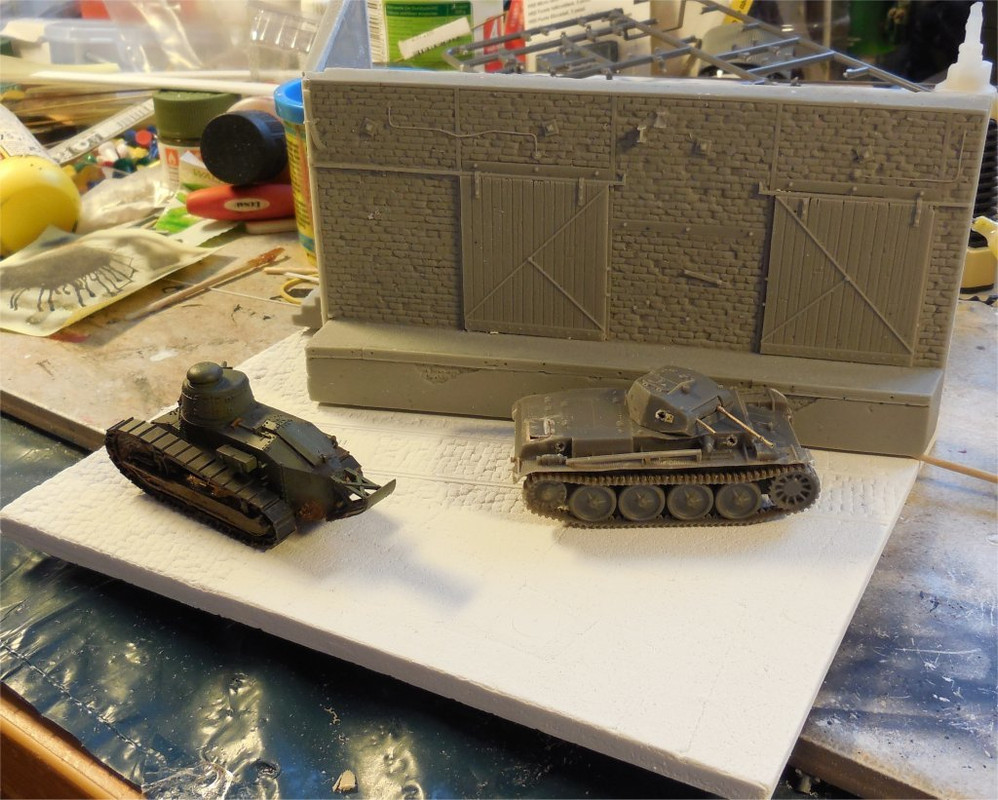 |
|
|
|
Post by TRM on Jan 30, 2015 8:23:21 GMT -5
Great looking scene Petr! Factory walls adds a lot. The painting fun should start soon!!  |
|
|
|
Post by deafpanzer on Jan 30, 2015 11:24:08 GMT -5
Great start on the base!!!
|
|
petros
Full Member
  
Member since: February 2014
Posts: 361 
|
Post by petros on Jan 30, 2015 17:54:02 GMT -5
|
|
|
|
Post by wbill76 on Jan 31, 2015 17:53:00 GMT -5
Nice work dressing up the Pz II there Petr, looking good!
|
|
petros
Full Member
  
Member since: February 2014
Posts: 361 
|
Post by petros on Feb 1, 2015 7:47:42 GMT -5
|
|
|
|
Post by deafpanzer on Feb 1, 2015 14:31:04 GMT -5
Looking good... pre-shading trick is just great! Looking forward to the update...
|
|
petros
Full Member
  
Member since: February 2014
Posts: 361 
|
Post by petros on Feb 1, 2015 16:45:13 GMT -5
|
|
|
|
Post by TRM on Feb 1, 2015 16:49:31 GMT -5
Catching up on this one...looking great Petr!! Nice to see the color on the little Panzer!!
|
|
|
|
Post by Leon on Feb 1, 2015 19:32:01 GMT -5
Looking really good Petr.
|
|
petros
Full Member
  
Member since: February 2014
Posts: 361 
|
Post by petros on Feb 7, 2015 7:25:09 GMT -5
|
|
|
|
Post by Leon on Feb 7, 2015 7:50:09 GMT -5
Nice work on the base Petr! A lot of nice detail on the building.  |
|
petros
Full Member
  
Member since: February 2014
Posts: 361 
|
Post by petros on Feb 7, 2015 9:05:59 GMT -5
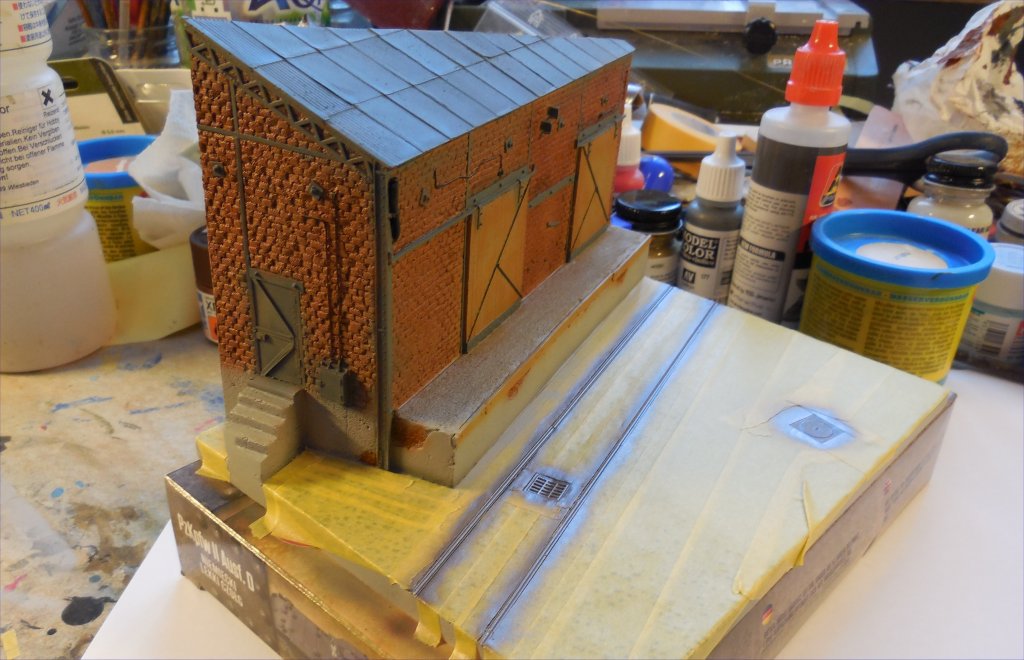
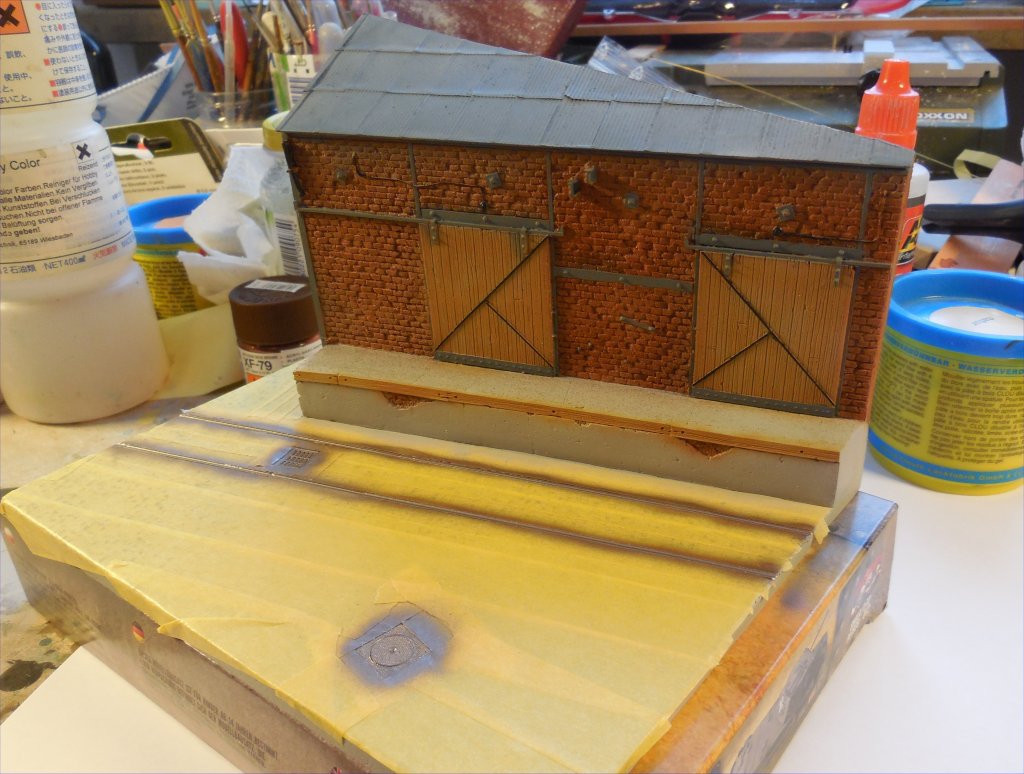
Started the spray works, at first freehand for general areas. Not yet ready, as my daughter woke up from her afternoon sleep, would continue in the evening. 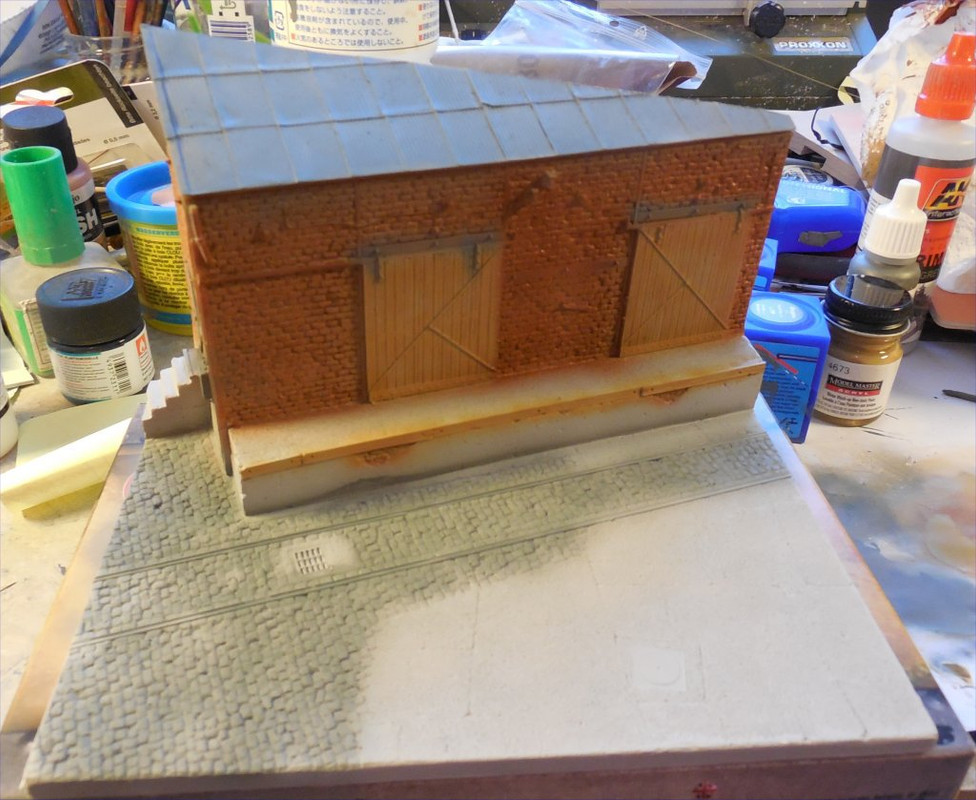 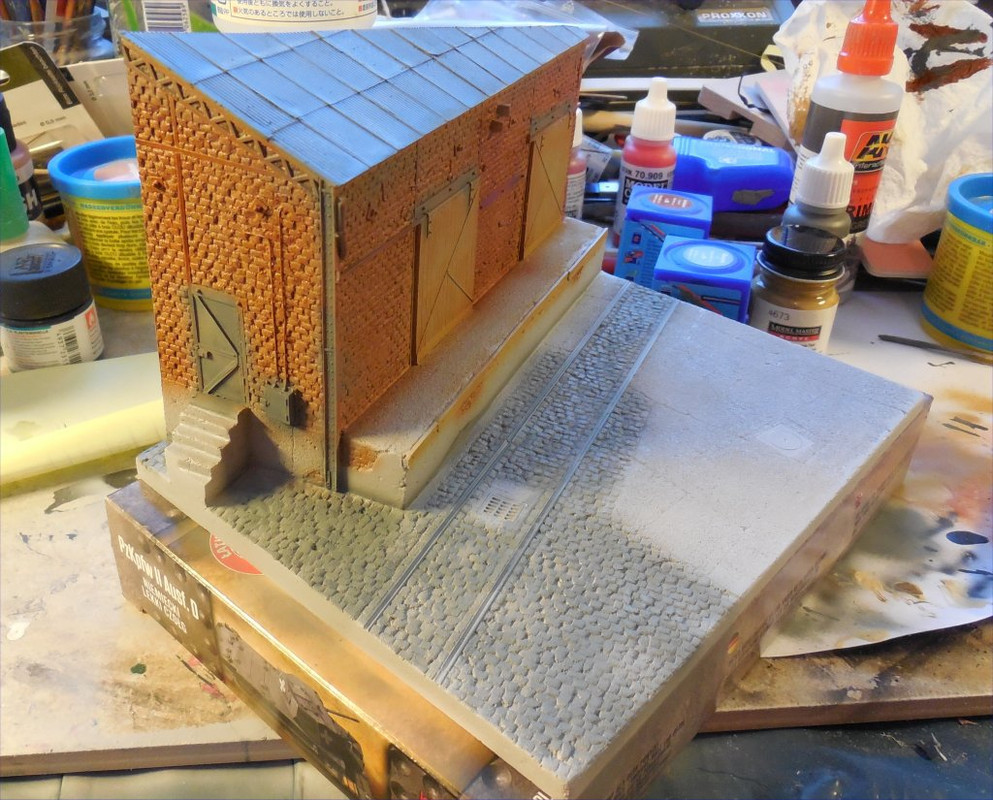 |
|
|
|
Post by Leon on Feb 7, 2015 9:12:42 GMT -5
Nice start on the painting Petr!  |
|
DeafStuG
Full Member
  
Member since: May 2013
..
Posts: 1,283 
|
Post by DeafStuG on Feb 7, 2015 10:50:42 GMT -5
Looks good.
|
|
petros
Full Member
  
Member since: February 2014
Posts: 361 
|
Post by petros on Feb 8, 2015 7:27:41 GMT -5
|
|
S e r z h--Rest In Peace
Full Member
  
Member since: November 2014
RIP- December 2023
Posts: 650 
|
Post by S e r z h--Rest In Peace on Feb 8, 2015 7:35:53 GMT -5
Looks very believable!
|
|
petros
Full Member
  
Member since: February 2014
Posts: 361 
|
Post by petros on Feb 8, 2015 8:22:14 GMT -5
|
|
madairbrush
Full Member
   November 2012 MoM Winner
Member since: May 2012
Cheers!! Matt
Posts: 488
May 30, 2012 14:22:05 GMT -5
May 30, 2012 14:22:05 GMT -5
|
Post by madairbrush on Feb 8, 2015 9:18:18 GMT -5
I love that base. Looks really awesome.
|
|
petros
Full Member
  
Member since: February 2014
Posts: 361 
|
Post by petros on Feb 8, 2015 16:56:58 GMT -5
So, light grey wash is done. I used AK Interactive grey primer diluted with water for it, applying it with a wide flat brush while the surface was horizontal. Brick colors are much less pronounced now, and look weather beaten, exactly the effect I wanted. 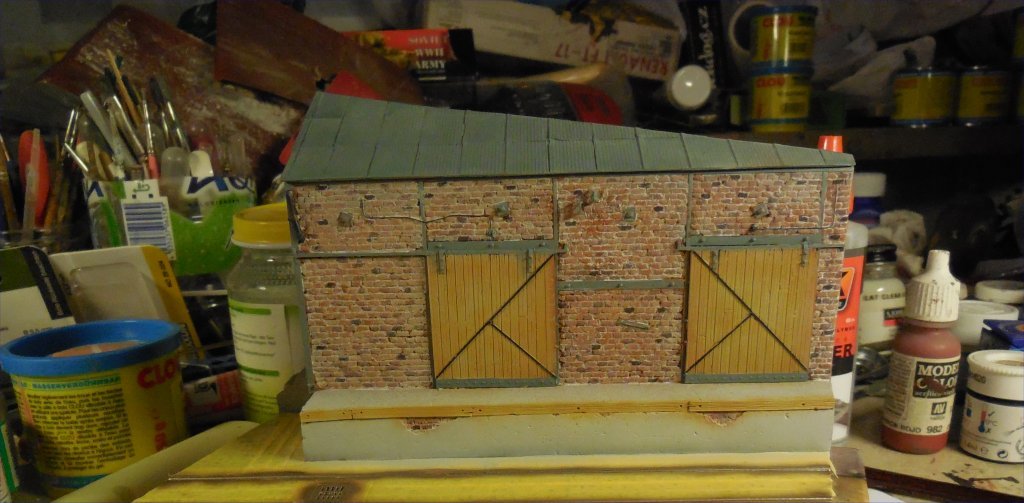 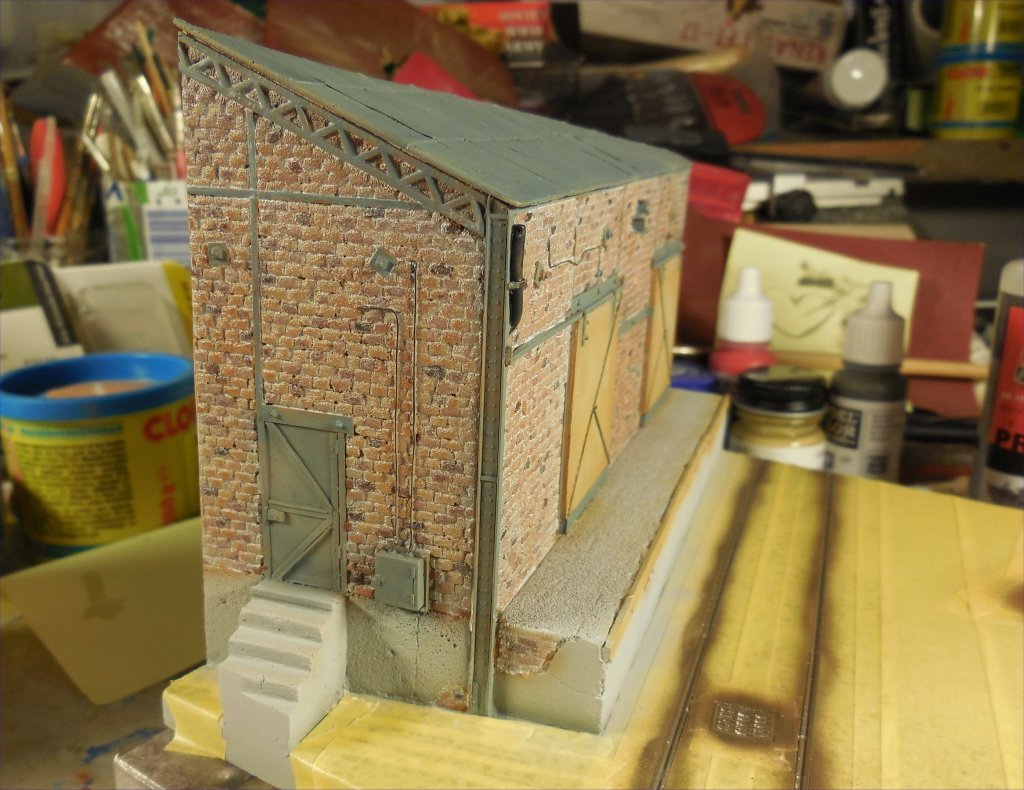 |
|
|
|
Post by Leon on Feb 8, 2015 17:22:03 GMT -5
Nice work on the bricks Petr! They look fantastic.
|
|
petros
Full Member
  
Member since: February 2014
Posts: 361 
|
Post by petros on Feb 13, 2015 8:15:09 GMT -5
Painted and weathered the roof, cared about the rails, rusted metal parts on the house, and started cleaning up the street. Would handle the cobblestones similar to bricks soon. 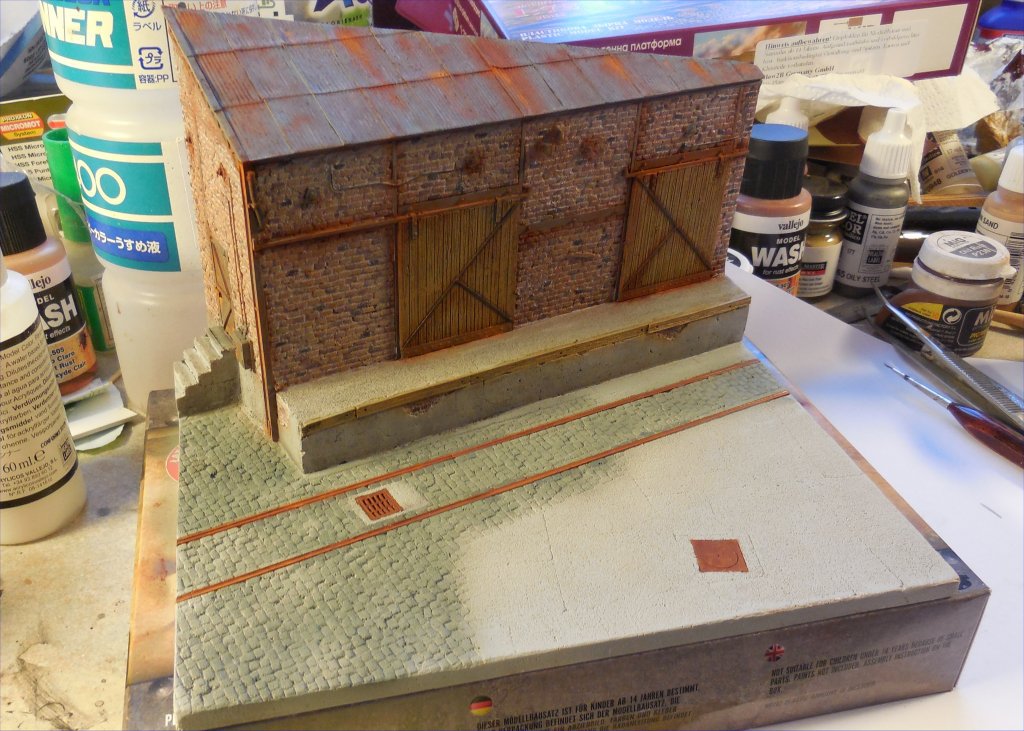  |
|
|
|
Post by TRM on Feb 13, 2015 8:17:48 GMT -5
Some brilliant work there Petr!! The painting of the bricks looks fantastic! This one is coming together quite nicely!!
|
|
petros
Full Member
  
Member since: February 2014
Posts: 361 
|
Post by petros on Feb 13, 2015 15:14:51 GMT -5
Individual cobblestone highlights. Base was tamiya light grey thinly and irregularily sprayed over AK interactive grey primer. Highlights are done with Vallejo green grey, revell hellgrau, blaugrau and steingrau, and tamiya sky grey. I explicitely did not try to paint stones ideally. Heavy washing with drybrush and pigments would tone that down anyways, and where have you seen a regularily colored cobblestone anyways? Not on a street just in front of my window anyways! 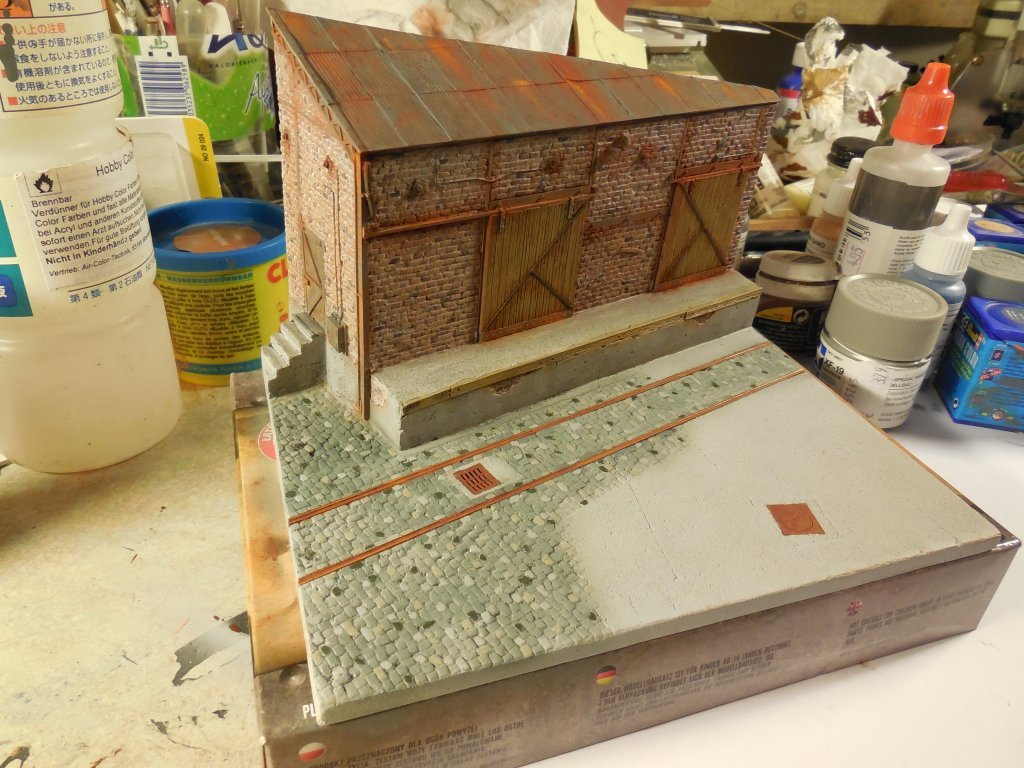 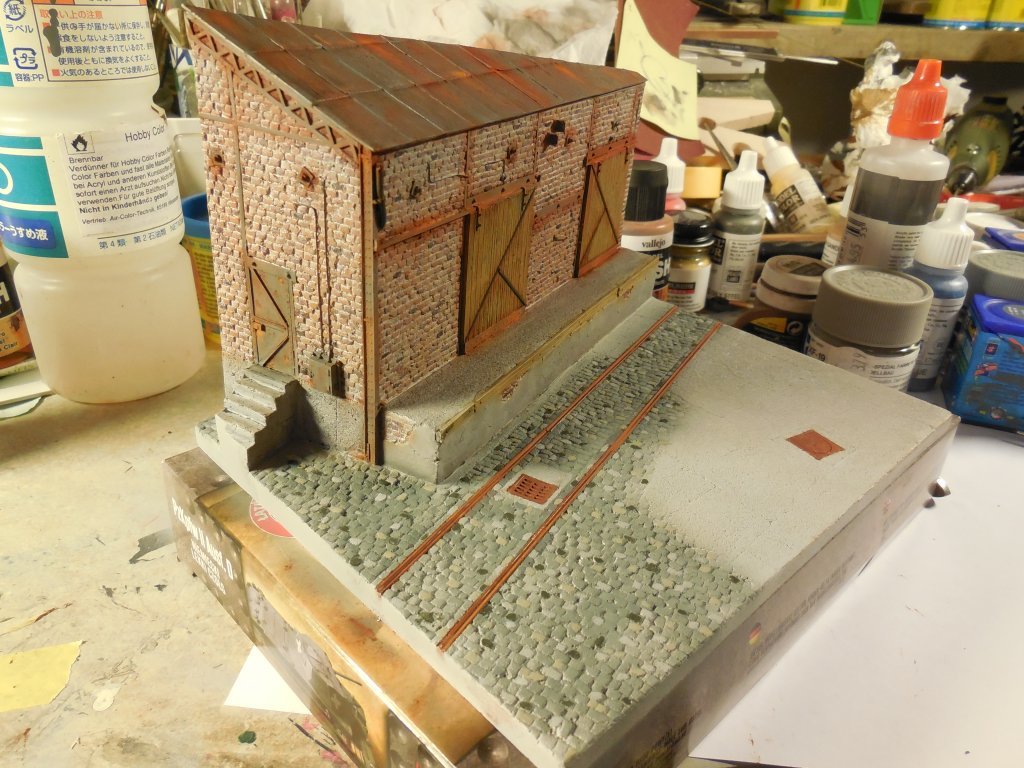 |
|
petros
Full Member
  
Member since: February 2014
Posts: 361 
|
Post by petros on Feb 13, 2015 16:49:49 GMT -5
Put 3 washes on the base. First two with black grey from vallejo diluted with water, while the third one with Mig Black smoke pigment, also in water. 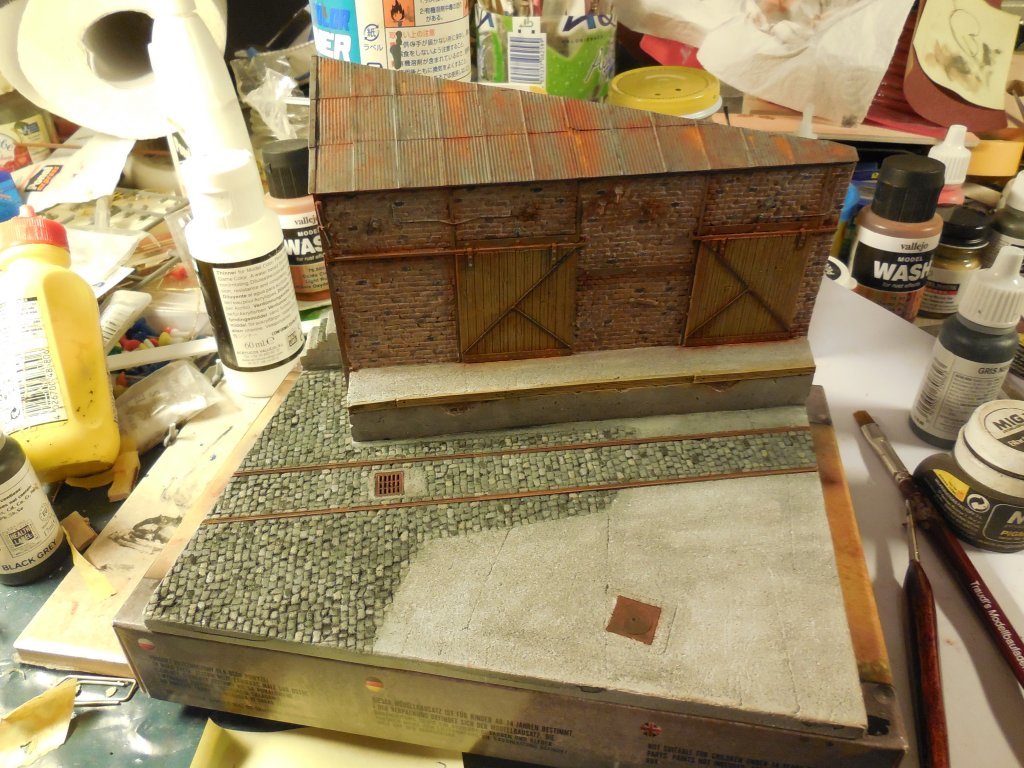 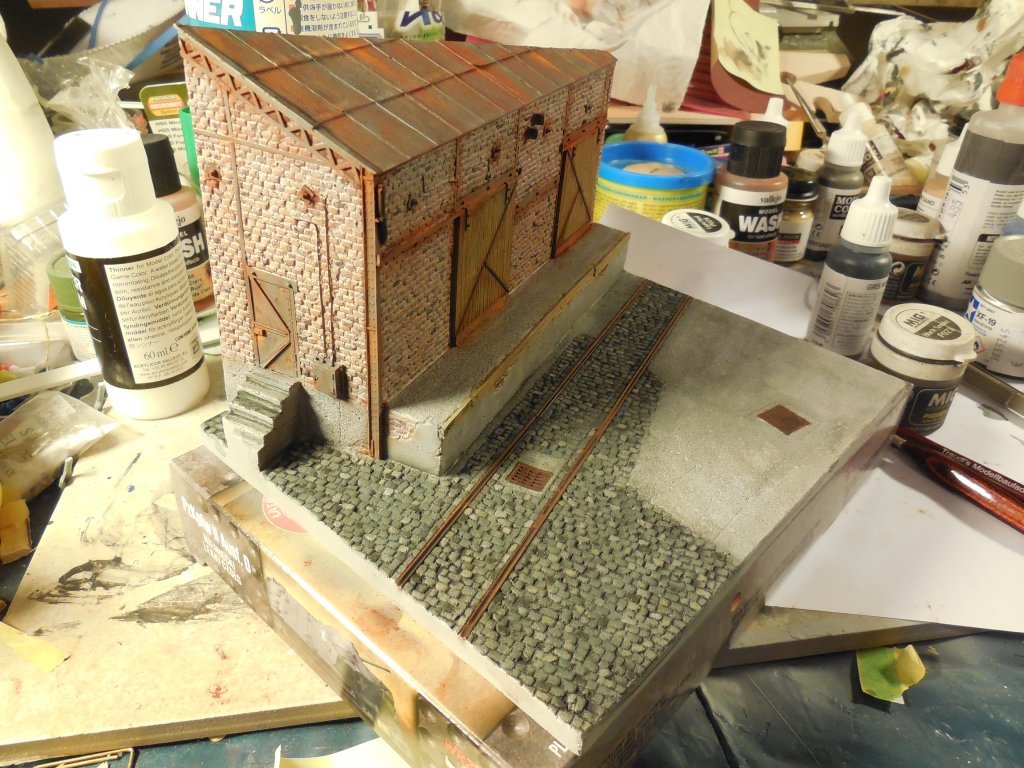 |
|


