reserve
Senior Member
   
Member since: July 2012
Si vis pacem para bellum
Posts: 2,372
Jul 11, 2012 9:11:45 GMT -5
Jul 11, 2012 9:11:45 GMT -5
|
Post by reserve on Dec 29, 2014 12:18:13 GMT -5
My girl Nancy, bless her, has hidden all my carpentry tools until the second week of next year as a means of enforcing a house remodel break. She sez I'm getting too vacant eyed and grumpy. Just a few punch list type items upstairs and about 1,000 square feet to sheetrock (50 sheets maybe) and finish and this whole mess will be done and therefore the next owner's problem. Since I've the time I decided to start fooling with the 38(t) diorama that some of you may recall from the Armor thread. Here's where I left it 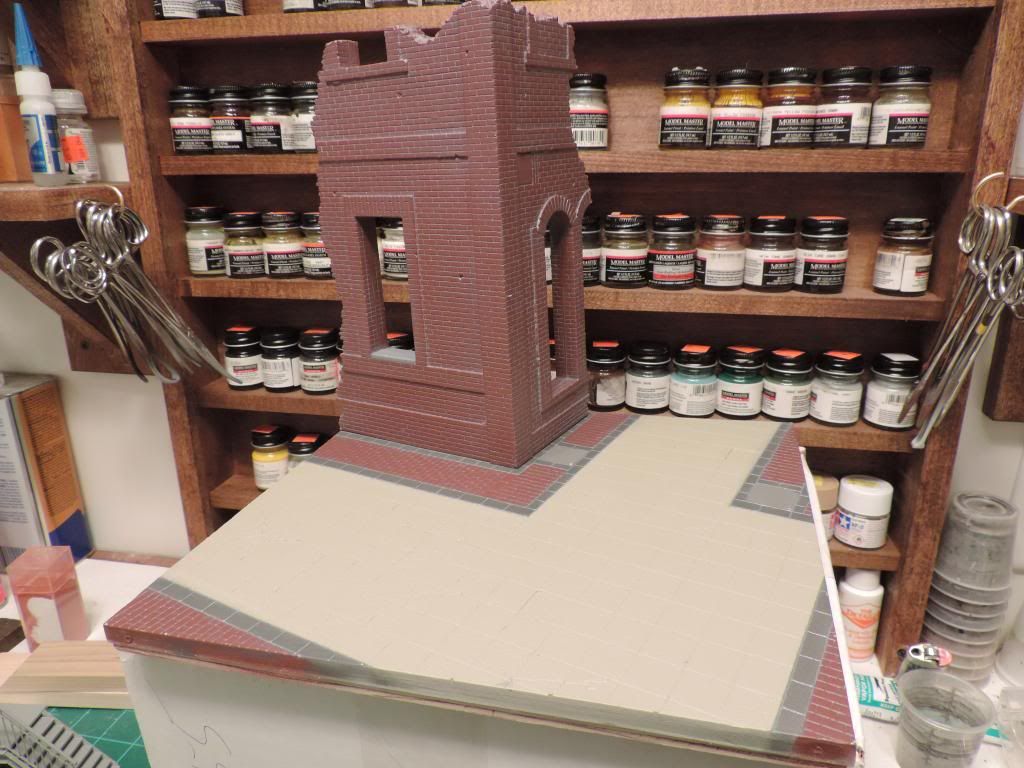 And here's where it is now 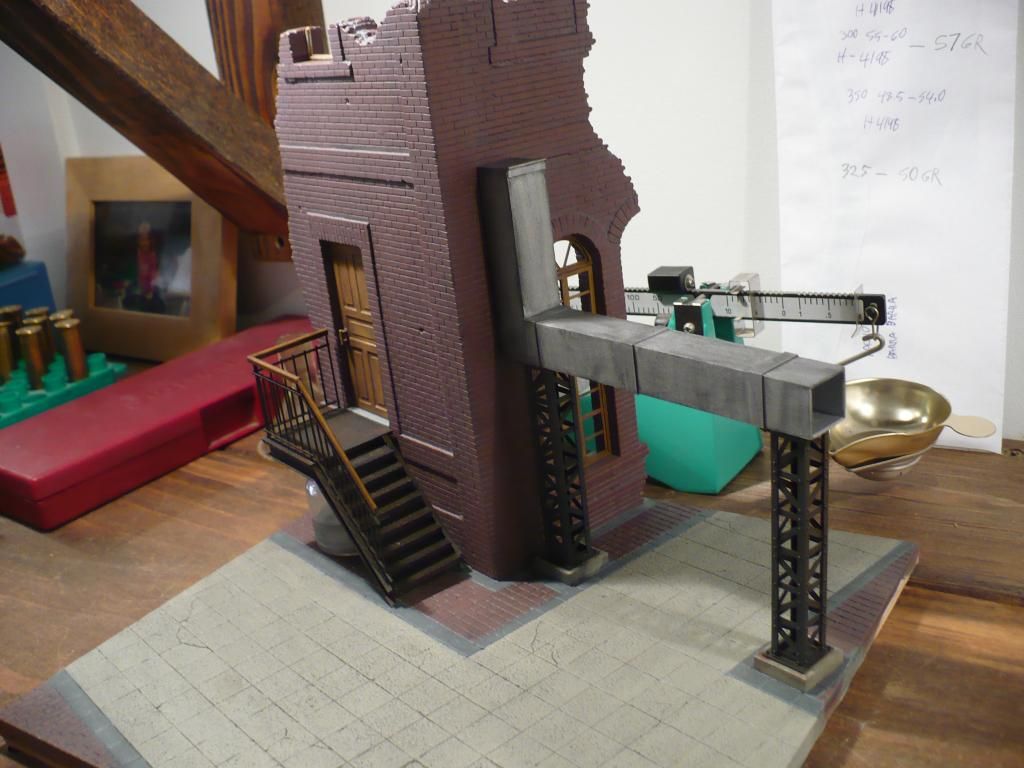 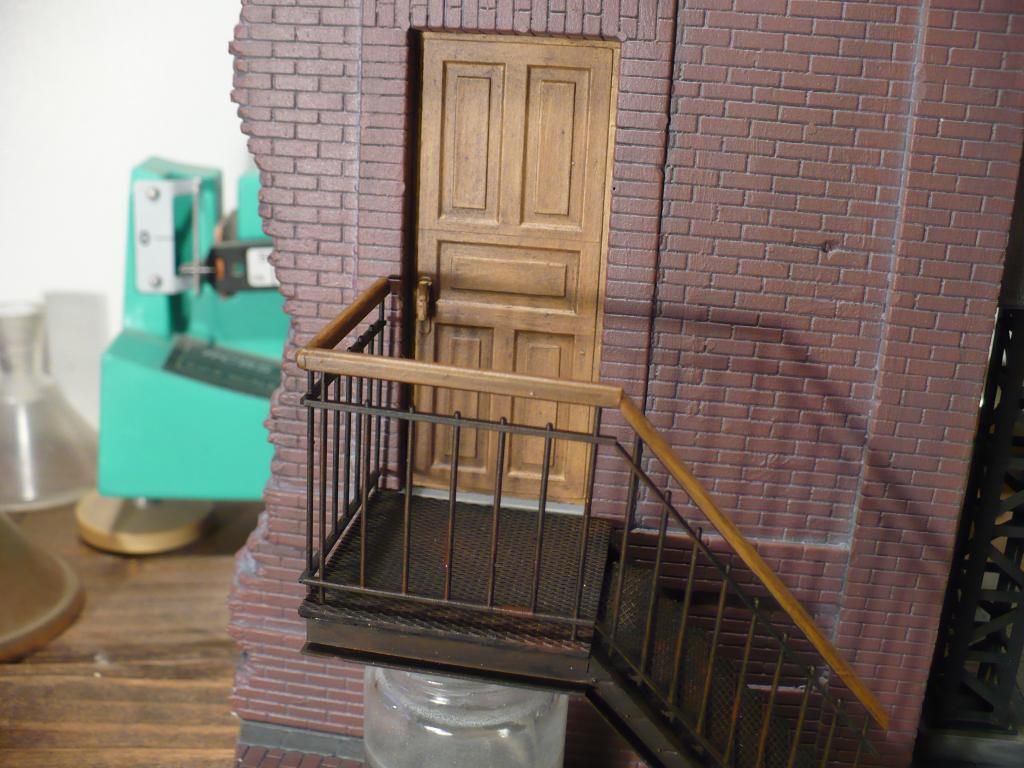 Sorry for the lousy pictures I'm not much good at them yet. I've begun weathering the base and building; got some black oils on for grime and subtle streaking...not over sure where to go from here but I'd think rubble, dust and dirt ought to be next. Any ideas will be welcome Regards, Mark |
|
|
|
Post by deafpanzer on Dec 29, 2014 12:44:44 GMT -5
Man, great start on the diorama!!! Hang in there with all of those remodeling projects going on...
|
|
|
|
Post by TRM on Dec 29, 2014 12:56:23 GMT -5
Well done so far Mark!! Looking really good! Best of luck on the remodeling!!
|
|
|
|
Post by Leon on Dec 29, 2014 17:01:01 GMT -5
The dio is starting to shape up nicely Mark.  |
|
|
|
Post by Deano on Dec 30, 2014 4:04:20 GMT -5
Looks great Mark , the timber effects are spot on!
|
|
|
|
Post by wbill76 on Jan 1, 2015 14:33:43 GMT -5
Nice trick in terms of them hiding your tools to force some R&R! Looks like it's a successful strategy...base is progressing nicely.  |
|
|
|
Post by wing_nut on Jan 2, 2015 9:05:33 GMT -5
%0 sheets of drywall? You better figure a way for your girl friend to forget where she put those tools. The building looks great. Not sure if the jar is code for the landing support.
|
|
reserve
Senior Member
   
Member since: July 2012
Si vis pacem para bellum
Posts: 2,372
Jul 11, 2012 9:11:45 GMT -5
Jul 11, 2012 9:11:45 GMT -5
|
Post by reserve on Jan 5, 2015 14:10:06 GMT -5
Thanks Gents Wingy, I've already hung, finished, and trimmed seven rooms in this place so what's another 50 sheets? I figure we've saved twenty grand or so by my getting my hands dirty and what the hey it reminds me of the good old days. Makes me glad I have an RN license as well as the A class driver's license too. So after things creeping along for the last week I finally have some measurable progress 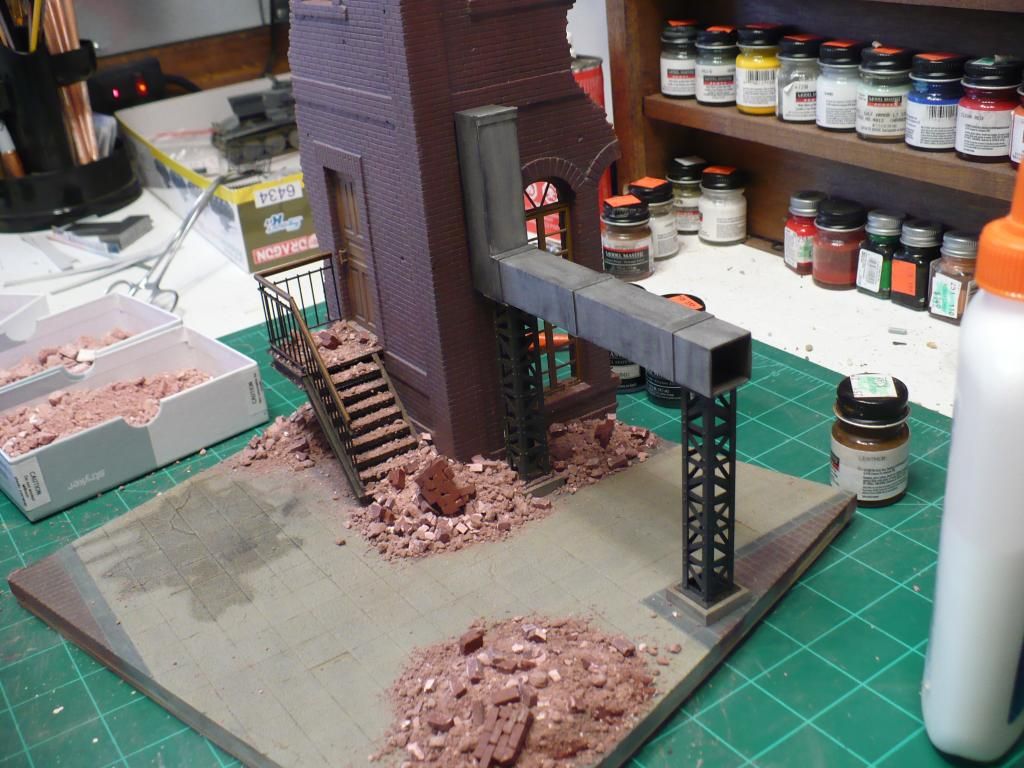 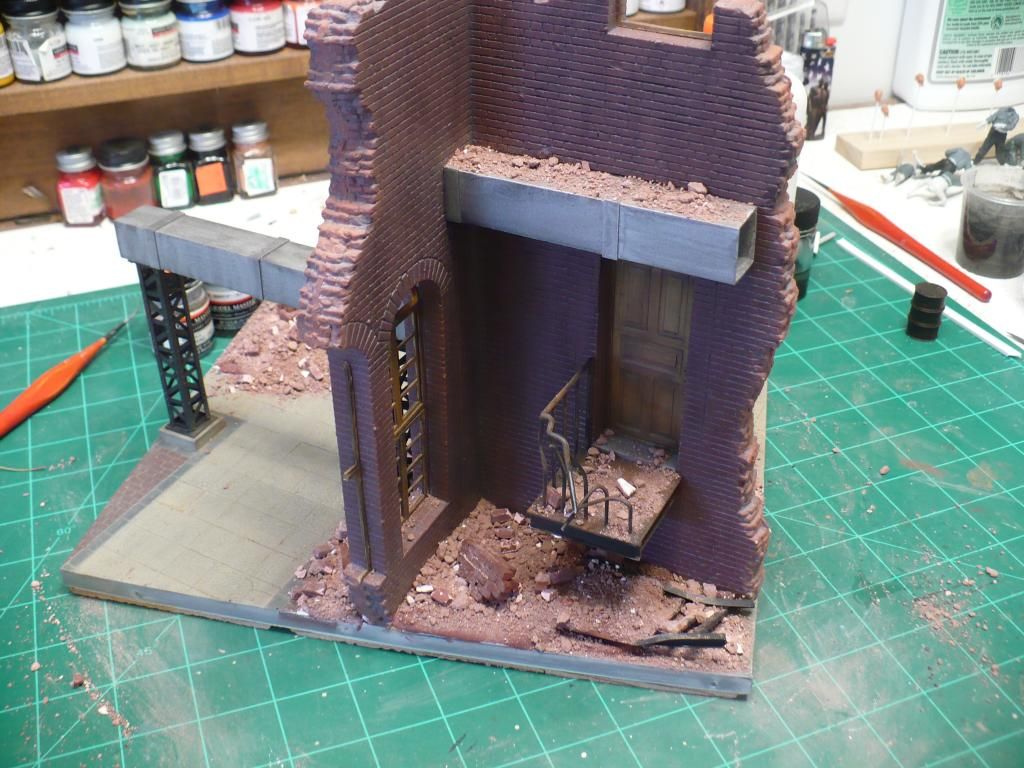 I'll spend the next couple of hours wetting down the piles with diluted white glue and adjust as needed, thanks for stoppin' by Regards, Mark |
|
|
|
Post by TRM on Jan 5, 2015 14:41:52 GMT -5
Looking sweet Mark!! The debris is making this one come alive!! Any tricks to you mix my friend?  |
|
|
|
Post by Leon on Jan 5, 2015 16:31:30 GMT -5
Nice work on the debris piles Mark.The dio is shaping up nicely.  |
|
reserve
Senior Member
   
Member since: July 2012
Si vis pacem para bellum
Posts: 2,372
Jul 11, 2012 9:11:45 GMT -5
Jul 11, 2012 9:11:45 GMT -5
|
Post by reserve on Jan 5, 2015 16:45:43 GMT -5
Thanks T and Leon
T I got some lightweight quick dry plaster, mixed it up in two batches, and added different amounts of Model Master water base paint to the mixes for shade variation. I used Red Oxide but I guess any similar color would do. Then I poured the mixes into square trays about 3/8" deep. Once dry I double bagged each casting in Ziploc freezer bags and whaled them with a hammer, and presto, brick debris.
I also got some Verlinden individual bricks but was not impressed with them as they all seem to be different sizes and come in an awful pink color. I did use some of them as can be seen but henceforth I'll cast my own if needed.
Regards,
Mark
|
|
|
|
Post by Leon on Jan 5, 2015 17:05:06 GMT -5
Great SBS on the debris making Mark  ! Bookmarked for future ref.  |
|
|
|
Post by deafpanzer on Jan 6, 2015 2:05:39 GMT -5
Man, it looks fantastic... you nailed it with the debris around the building!
|
|
406 Silverado
Global Administrator     
Member since: November 2011
Posts: 10,241
Member is Online
MSC Staff
|
Post by 406 Silverado on Jan 6, 2015 10:34:35 GMT -5
Mark that looks freakin awesome. I love the debris, really adds to the realism.
|
|
reserve
Senior Member
   
Member since: July 2012
Si vis pacem para bellum
Posts: 2,372
Jul 11, 2012 9:11:45 GMT -5
Jul 11, 2012 9:11:45 GMT -5
|
Post by reserve on Jan 13, 2015 13:19:48 GMT -5
Thank you kindly gents I was originally going to include a BMW R75 with a sidehack undergoing maintenance in this, but multiple positioning attempts just did not look good to me. Therefore, I now have room for this 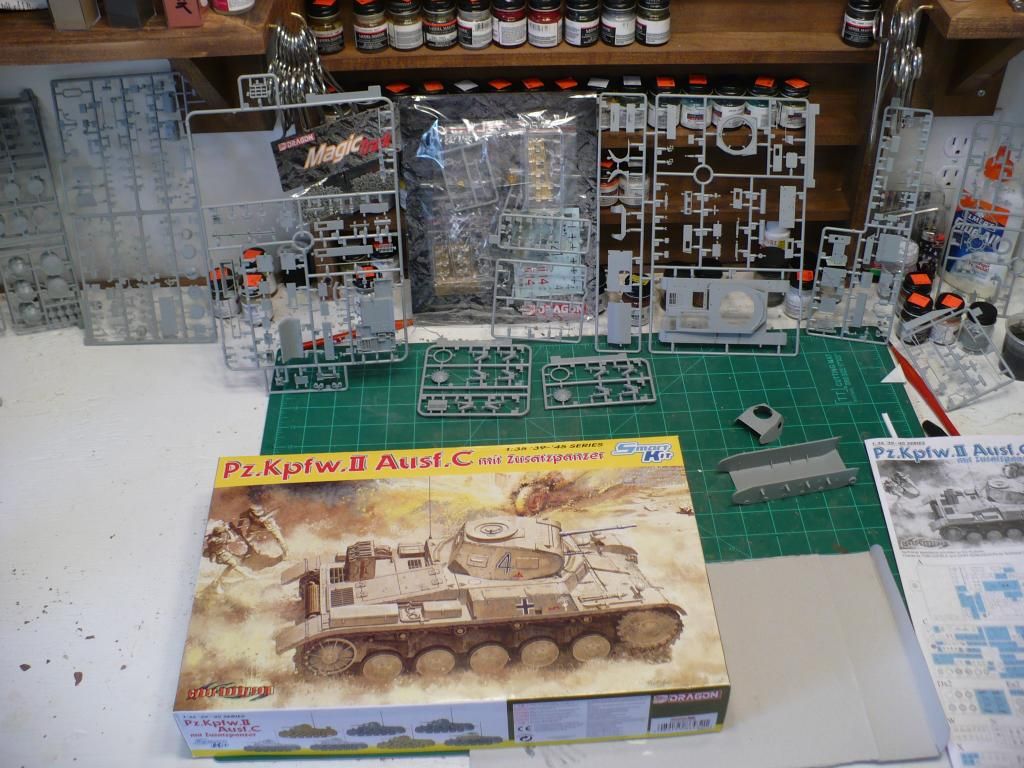 which is small enough to fit and of the same era. It sez Cyberhobby but as all know it's Dragon to the bone; this should be an interesting set of Magic Tracks to tangle with to be sure Regards, Mark |
|
reserve
Senior Member
   
Member since: July 2012
Si vis pacem para bellum
Posts: 2,372
Jul 11, 2012 9:11:45 GMT -5
Jul 11, 2012 9:11:45 GMT -5
|
Post by reserve on Jan 14, 2015 13:13:09 GMT -5
Another wee devil kit this one but cool in spite of this. Doing a bit of extra detail, just what'll be seen thru the hatch, and am not concerned with pinpoint accuracy. Come to think of it, I never am that'd be too much like work... 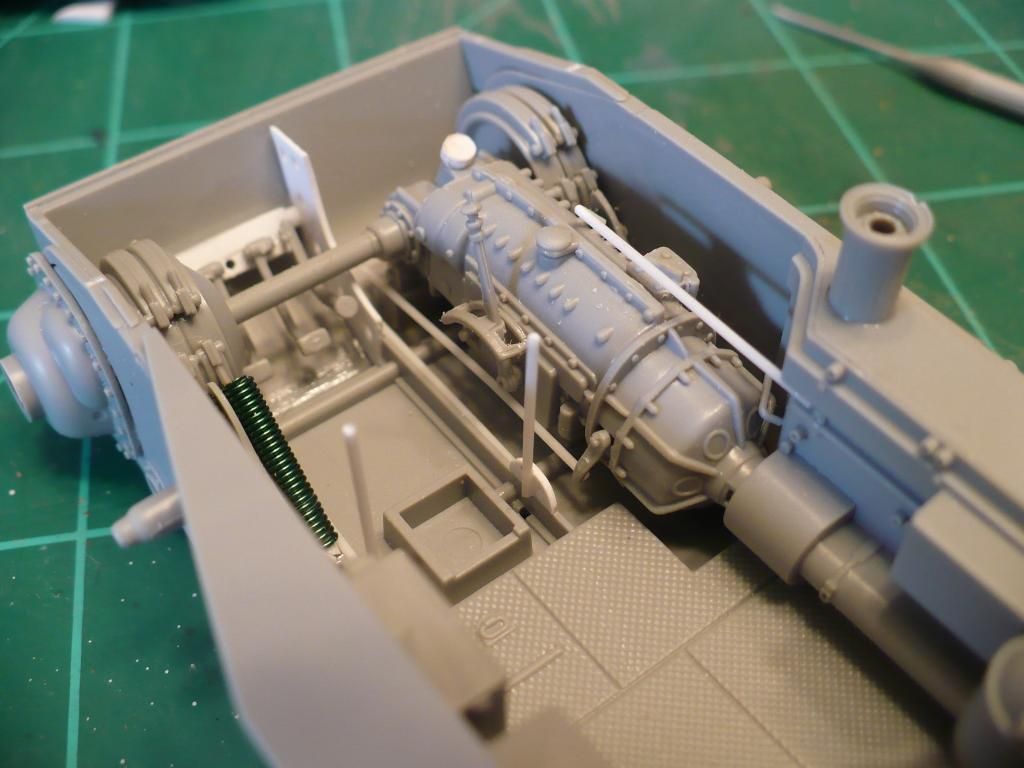 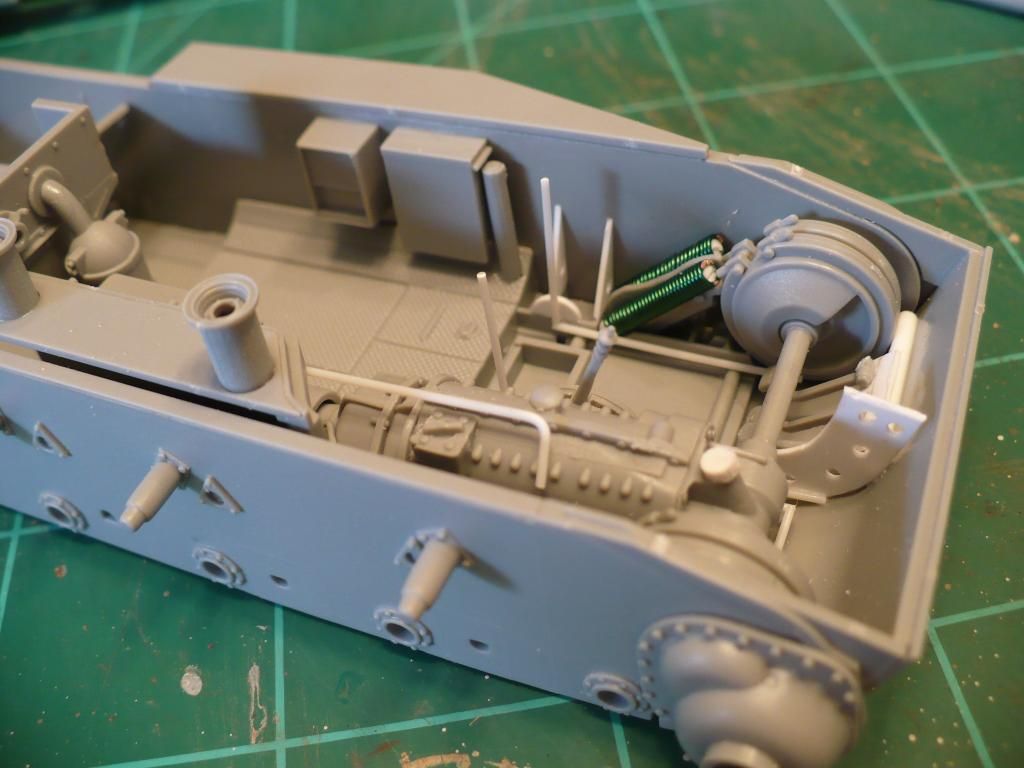 Later Regards, Mark |
|
desertrat
Full Member
  
Member since: October 2013
Posts: 934 
|
Post by desertrat on Jan 14, 2015 14:28:23 GMT -5
like where your going with this, spot on !!
|
|
|
|
Post by deafpanzer on Jan 14, 2015 14:39:21 GMT -5
Always wanted that kit... but I got Pz II Ausf F instead. One day maybe! You have my attention of course... nice improvements for the interior by the way!
|
|
|
|
Post by wbill76 on Jan 15, 2015 14:12:07 GMT -5
Nice choice of companion there Mark and off to a good start with it.
|
|
reserve
Senior Member
   
Member since: July 2012
Si vis pacem para bellum
Posts: 2,372
Jul 11, 2012 9:11:45 GMT -5
Jul 11, 2012 9:11:45 GMT -5
|
Post by reserve on Jan 15, 2015 14:46:33 GMT -5
Thanks guys I'll not go so far as to describe this as a beastly molding, but there are a few things that have made me shake my head 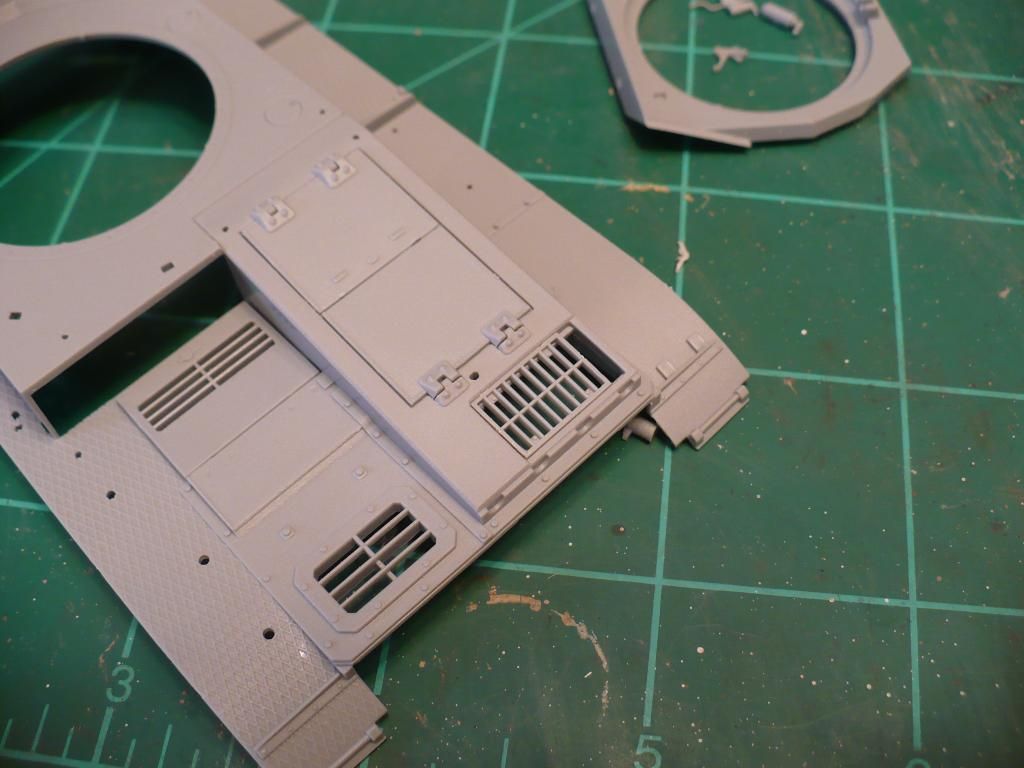 Grate failure 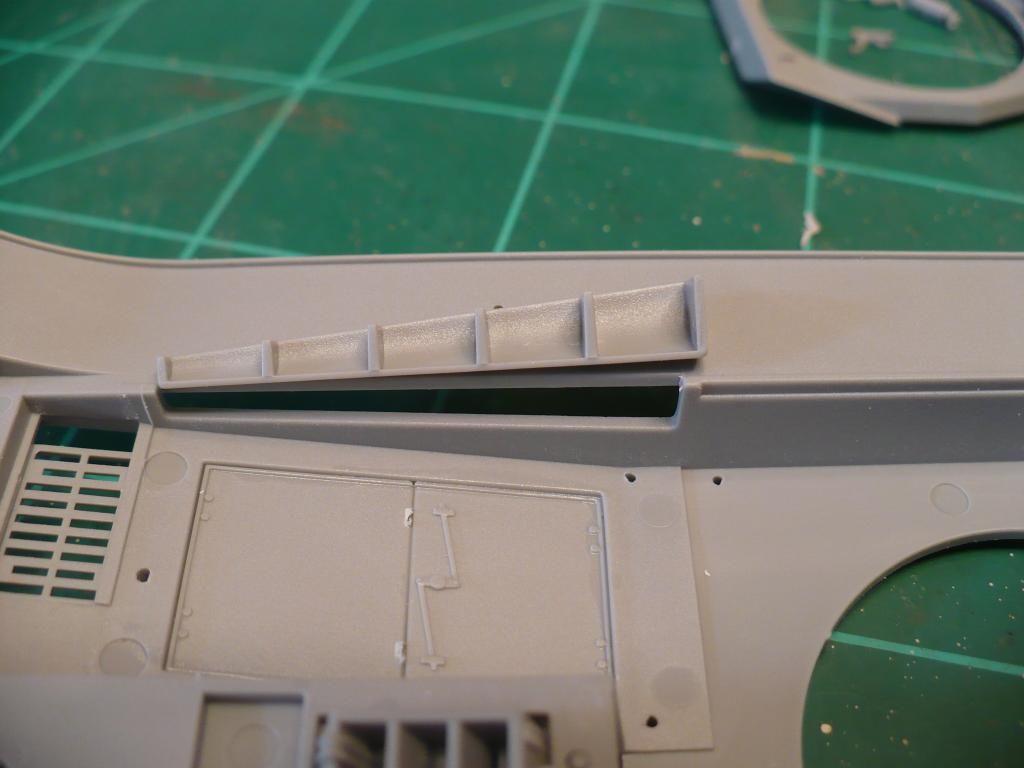 Length failure 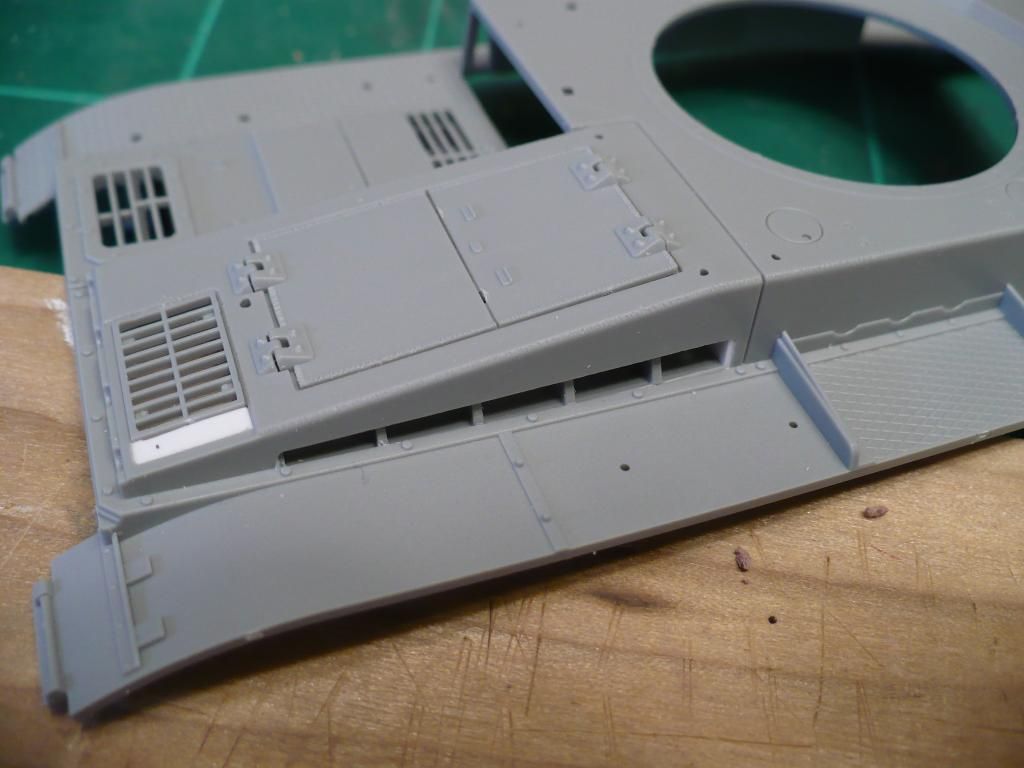 Easily repaired however The instructions are bad as usual. An important error is the transposition of the front fender braces as these position the lower glacis. The internals for the armored visors are molded in clear plastic; why they did that is beyond me. The sides of the upper hull do not fit too well; I had to melt them in place with LPC and will cut and file the globs to shape once dry. Don't usually care for using that technique but I sort of got in a snit. 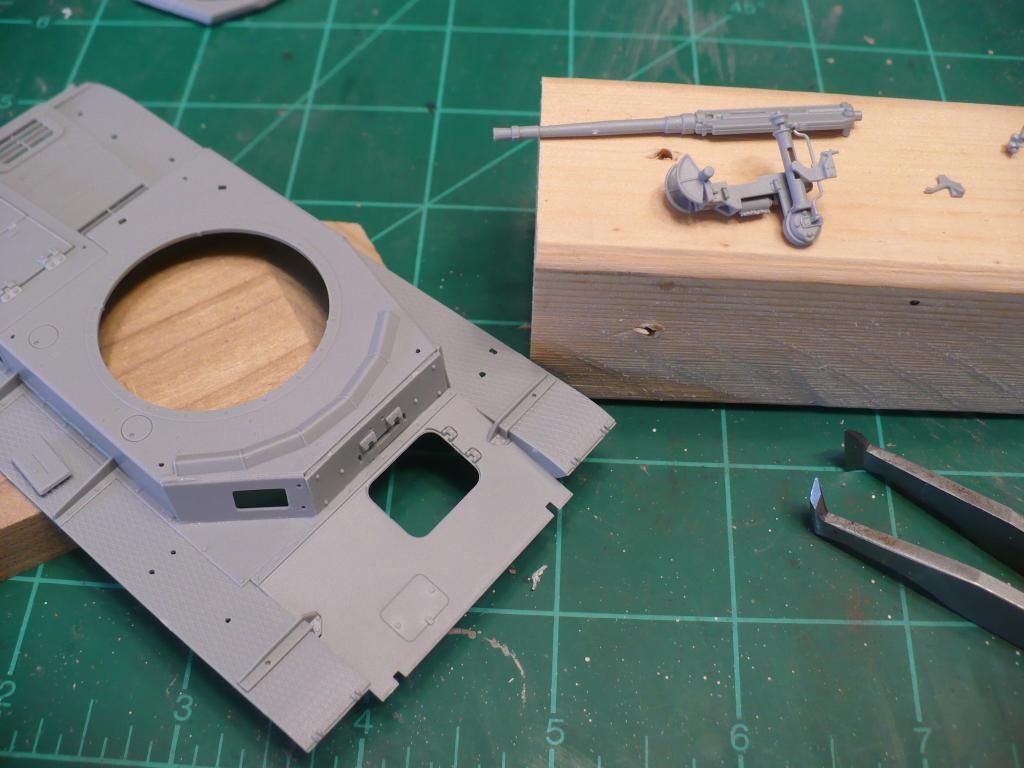 Guess it's hard to see the globs here but trust me they are there. The 20mm mount is a delicate, lovely, and difficult construct made even more difficult by blurred and ambiguous directions, whoda thunkit. The gun itself is rather basic. Neither will be over visible from the hatch anyway. Regards, Mark |
|
|
|
Post by Leon on Jan 15, 2015 16:20:09 GMT -5
Looking good despite the issues your having Mark.  |
|
|
|
Post by deafpanzer on Jan 16, 2015 11:31:57 GMT -5
Looks like you were able to show that little beast who's the boss... keep up with the great work.
p.s. I am coming to Wyoming in September for a conference. It will be in Jackson... is it close enough?
|
|
reserve
Senior Member
   
Member since: July 2012
Si vis pacem para bellum
Posts: 2,372
Jul 11, 2012 9:11:45 GMT -5
Jul 11, 2012 9:11:45 GMT -5
|
Post by reserve on Jan 16, 2015 12:40:20 GMT -5
Hey Andy
Thanks brother. I guess it depends on your time available...Billings is about 360 miles from Jackson, less if you go thru the park but traffic there usually precludes making good time. Know that if you wish to stop by you'd be welcome
Regards,
Mark
|
|
|
|
Post by TRM on Jan 16, 2015 13:04:50 GMT -5
Looking good there Mark! Definitely some side-stepping to be done, but you seen to be managing quite well!! Keep plugging away!
|
|
|
|
Post by wbill76 on Jan 17, 2015 18:07:49 GMT -5
Sounds about right for these kits. Looks like you're beating it into submission though!
|
|
reserve
Senior Member
   
Member since: July 2012
Si vis pacem para bellum
Posts: 2,372
Jul 11, 2012 9:11:45 GMT -5
Jul 11, 2012 9:11:45 GMT -5
|
Post by reserve on Jan 21, 2015 14:00:30 GMT -5
Thank you gents you can't go wrong with the big hammer technique A proof of life update 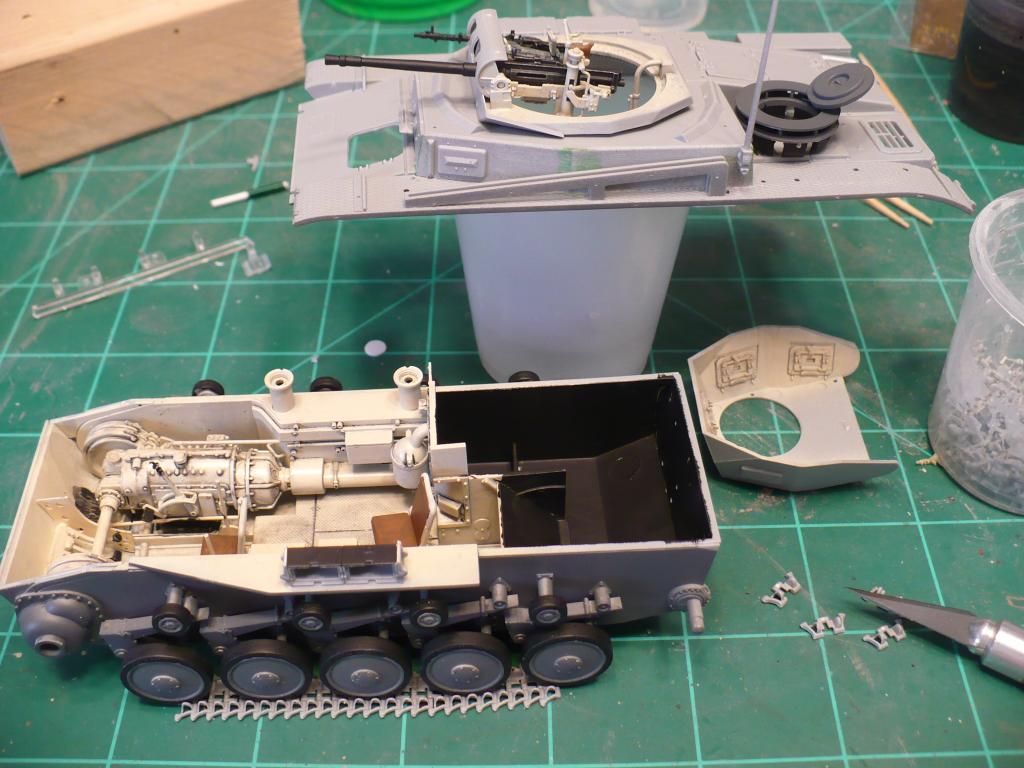 Teeny little magic track links. They're rather difficult to assemble even on tape. I see Bronco offers workable track for this vehicle and I'm seriously considering... Regards, Mark |
|
|
|
Post by deafpanzer on Jan 21, 2015 15:07:20 GMT -5
Big hammer technique or perhaps AR-15 technique works better? LOL
I remember how pain it was dealing with same track on my Marder II years ago. Hang in there buddy!
|
|
desertrat
Full Member
  
Member since: October 2013
Posts: 934 
|
Post by desertrat on Jan 21, 2015 15:44:44 GMT -5
interior looks great, have fun with them tracks!!
|
|
|
|
Post by TRM on Jan 21, 2015 16:15:46 GMT -5
Looking good Mark!! Love the interior! Looks like you are almost ready to button this up!! I hear you on the tracks! One reason why I disbanded thoughts of using them on mine!!  Plus Dupes needed and extras set...LOL!! Keep up the good work! |
|
|
|
Post by Leon on Jan 21, 2015 17:05:40 GMT -5
Interior and upper hull are looking really good Mark!  |
|