|
|
Post by deafpanzer on Feb 14, 2015 20:54:51 GMT -5
Tow cables look fantastic!
|
|
maschinenkrueger
Reviews member     Jan & Dec 2014 MoM Winner
Member since: June 2012
You want MaK with that?
Posts: 836
Jun 7, 2012 9:50:05 GMT -5
Jun 7, 2012 9:50:05 GMT -5
|
Post by maschinenkrueger on Feb 14, 2015 22:24:20 GMT -5
Thanks guys! Almost ready for primer but that seems a shame to cover up all the brass.
|
|
|
|
Post by TRM on Feb 14, 2015 23:49:55 GMT -5
Beautiful!!! Well done there Bryan!!  |
|
Deleted
Member since: January 1970
Posts: 0
Nov 23, 2024 19:48:24 GMT -5
Nov 23, 2024 19:48:24 GMT -5
|
Post by Deleted on Feb 15, 2015 3:03:12 GMT -5
Yes, Yes, that is coming along just fine. Well done, Brian
Now I am waiting to see how you are going to tackle that paint job
Eddy
|
|
|
|
Post by dierk on Feb 15, 2015 8:00:52 GMT -5
What can I say? Seriously jealous of your PE work - it's almost a shame to cover it in paint.
|
|
|
|
Post by Leon on Feb 15, 2015 8:31:40 GMT -5
Nice work on the tow cables and brackets Brian! Making really good progress.  |
|
|
|
Post by wbill76 on Feb 15, 2015 20:33:44 GMT -5
Time spent on the tow rope brackets paid off Brian. Looking forward to seeing it with paint on.  |
|
maschinenkrueger
Reviews member     Jan & Dec 2014 MoM Winner
Member since: June 2012
You want MaK with that?
Posts: 836
Jun 7, 2012 9:50:05 GMT -5
Jun 7, 2012 9:50:05 GMT -5
|
Post by maschinenkrueger on Feb 16, 2015 16:25:23 GMT -5
Thanks everyone. Glad you like it. The kit cables are very nice but symmetrical. These give it a little personality.
|
|
madairbrush
Full Member
   November 2012 MoM Winner
Member since: May 2012
Cheers!! Matt
Posts: 488
May 30, 2012 14:22:05 GMT -5
May 30, 2012 14:22:05 GMT -5
|
Post by madairbrush on Feb 28, 2015 17:48:23 GMT -5
I can`t wait to see this beauty with paint...
|
|
|
|
Post by bbd468 on Feb 28, 2015 19:51:15 GMT -5
Super build fella! Lets see some paint.  |
|
maschinenkrueger
Reviews member     Jan & Dec 2014 MoM Winner
Member since: June 2012
You want MaK with that?
Posts: 836
Jun 7, 2012 9:50:05 GMT -5
Jun 7, 2012 9:50:05 GMT -5
|
Post by maschinenkrueger on Apr 2, 2015 13:11:06 GMT -5
It's only been what, six weeks or so. Been busy the past several building the new bronco KV-85 for a review. Here is is with the basic Pz Gray paint. I've only lost one PE part, chipped paint off another, and broke off a plastic bit in the process. I'd say I'm doing pretty good. I still need to paint all the tools and details.   |
|
|
|
Post by Leon on Apr 2, 2015 13:17:02 GMT -5
Nice work on the paint Brian!  |
|
Wes
Full Member
  
Member since: November 2011
Posts: 686
Nov 16, 2011 9:34:50 GMT -5
Nov 16, 2011 9:34:50 GMT -5
|
Post by Wes on Apr 2, 2015 13:21:37 GMT -5
Wow that paint looks good.The different shades really do give it a wonderful 3d effect.
|
|
elco
Full Member
   July & Oct 2014 MoM Winner
Member since: May 2013
MOY 2014 Winner
Posts: 660 
|
Post by elco on Apr 2, 2015 15:25:13 GMT -5
Great CM!
|
|
|
|
Post by deafpanzer on Apr 2, 2015 21:45:17 GMT -5
Love the color modulation... you nailed it!
|
|
maschinenkrueger
Reviews member     Jan & Dec 2014 MoM Winner
Member since: June 2012
You want MaK with that?
Posts: 836
Jun 7, 2012 9:50:05 GMT -5
Jun 7, 2012 9:50:05 GMT -5
|
Post by maschinenkrueger on Apr 3, 2015 14:16:40 GMT -5
Thanks, the CM isn't as good as it could have been. My airbrush was acting up with sticky trigger; I got frustrated and rushed it. White wash will cover the front half and dust/front will cover the rest.
|
|
BJ---Rest In Peace
Full Member
   Oct '24 Showcased Model Awarded
Member since: July 2014
Posts: 378
Jul 24, 2014 12:31:35 GMT -5
Jul 24, 2014 12:31:35 GMT -5
|
Post by BJ---Rest In Peace on Apr 3, 2015 14:32:42 GMT -5
Looking GREAT.. Can't wait to see it "Beat Up"
|
|
|
|
Post by wbill76 on Apr 3, 2015 15:05:46 GMT -5
Looking good so far Brian. Glad to see this one getting some more bench time!
|
|
maschinenkrueger
Reviews member     Jan & Dec 2014 MoM Winner
Member since: June 2012
You want MaK with that?
Posts: 836
Jun 7, 2012 9:50:05 GMT -5
Jun 7, 2012 9:50:05 GMT -5
|
Post by maschinenkrueger on Apr 6, 2015 14:34:06 GMT -5
Thanks. Did some detail painting last night. Tracks were blackened. Hope to get the markings on soon.
|
|
|
|
Post by TRM on Apr 6, 2015 14:44:53 GMT -5
Awesome stuff Bryan!! Just catching up here....outstanding painting! Looking forward to he beating!!  |
|
maschinenkrueger
Reviews member     Jan & Dec 2014 MoM Winner
Member since: June 2012
You want MaK with that?
Posts: 836
Jun 7, 2012 9:50:05 GMT -5
Jun 7, 2012 9:50:05 GMT -5
|
Post by maschinenkrueger on Apr 7, 2015 13:27:37 GMT -5
Thanks TRM. Can anyone comment on what color the spare tracks would be? What color would these be delivered or installed in the field? They are covered in white wash but what would the base color be? I've read everything from satin oiled black to primer red to no finish was applied.  |
|
|
|
Post by wbill76 on Apr 7, 2015 14:29:02 GMT -5
Thanks TRM. Can anyone comment on what color the spare tracks would be? What color would these be delivered or installed in the field? They are covered in white wash but what would the base color be? I've read everything from satin oiled black to primer red to no finish was applied. There doesn't seem to be much consensus on this particular question out there Bryan! Considering the nature of the tracks and the fact that painting or primering them doesn't really offer much benefit once they start getting used, I've always leaned to the no paint/primer direction myself and go with a natural steel finish. Now, having said that, German steel at the time was made primarily from Swedish ore that is heavy with manganese and this in turn produces a darker end-product before oxidization, so that's where things get a little complicated.  I think you've got enough leeway here to go in any real direction you want to!  |
|
|
|
Post by wing_nut on Apr 7, 2015 14:58:19 GMT -5
Coming in late but I did finally come in on this one. And I am so glad. Looks great.
And ya gotta love a forum where you can learn so much. Swedish ore high in manganese. That's tidbit of the day.
|
|
maschinenkrueger
Reviews member     Jan & Dec 2014 MoM Winner
Member since: June 2012
You want MaK with that?
Posts: 836
Jun 7, 2012 9:50:05 GMT -5
Jun 7, 2012 9:50:05 GMT -5
|
Post by maschinenkrueger on Apr 7, 2015 15:29:29 GMT -5
|
|
|
|
Post by wbill76 on Apr 8, 2015 13:06:34 GMT -5
I would be willing to bet if you had them in your hands and looking at them up close you'd see that they were actually a dark chocolate brown with some deep brown/red oxidation tones in places depending. Have to remember these were heavy cast steel links and that, combined with the manganese element, would make them naturally dark to begin with. They remind me of similar heavy cast iron or steel objects that you often find in antique stores...right down to the heavy pitting on some of the links.  That's a pretty cool collection he's got for sure! |
|
maschinenkrueger
Reviews member     Jan & Dec 2014 MoM Winner
Member since: June 2012
You want MaK with that?
Posts: 836
Jun 7, 2012 9:50:05 GMT -5
Jun 7, 2012 9:50:05 GMT -5
|
Post by maschinenkrueger on Apr 20, 2015 14:18:22 GMT -5
|
|
|
|
Post by deafpanzer on Apr 20, 2015 18:22:39 GMT -5
I have to say Panzer Grey is one of my favorite colors... yours look GREAT!
|
|
|
|
Post by wbill76 on Apr 20, 2015 19:06:25 GMT -5
Looking good Bryan! Got to love the little details you've added as well like the chipped rubber on some of those road wheels.  |
|
maschinenkrueger
Reviews member     Jan & Dec 2014 MoM Winner
Member since: June 2012
You want MaK with that?
Posts: 836
Jun 7, 2012 9:50:05 GMT -5
Jun 7, 2012 9:50:05 GMT -5
|
Post by maschinenkrueger on Apr 21, 2015 9:38:52 GMT -5
Thanks Andy and Bill. Appreciate it. I agree DP, Pz Gray is a great color for weathering.
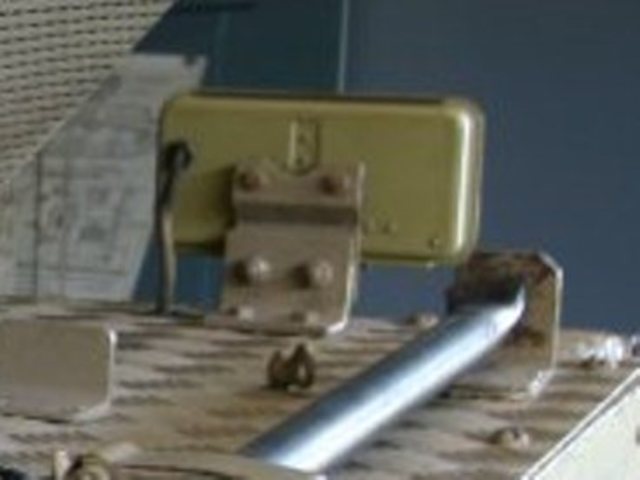
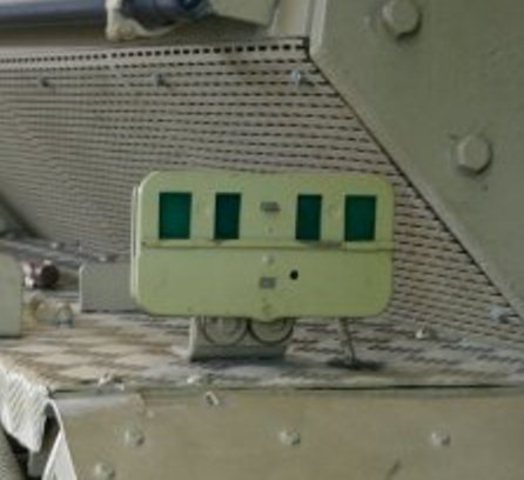
Anybody know about the wiring config for the tail lights? Under the fender, Across the fender. Where did it exit on the lights?
|
|
|
|
Post by mrt51 on Apr 21, 2015 9:52:42 GMT -5
Thanks Andy and Bill. Appreciate it. I agree DP, Pz Gray is a great color for weathering. Anybody know about the wiring config for the tail lights? Under the fender, Across the fender. Where did it exit on the lights? Maybe this will help.   |
|