|
|
Post by TRM on Mar 7, 2015 20:43:17 GMT -5
Just playing some catchup here Dave...great thought for the build and so far, impressive work!! Looks like the casting is going well!! Keep up the good work!!
|
|
Scott Fraser
Junior Member

Member since: January 2015
Posts: 70
Jan 8, 2015 8:40:14 GMT -5
Jan 8, 2015 8:40:14 GMT -5
|
Post by Scott Fraser on Mar 7, 2015 21:26:22 GMT -5
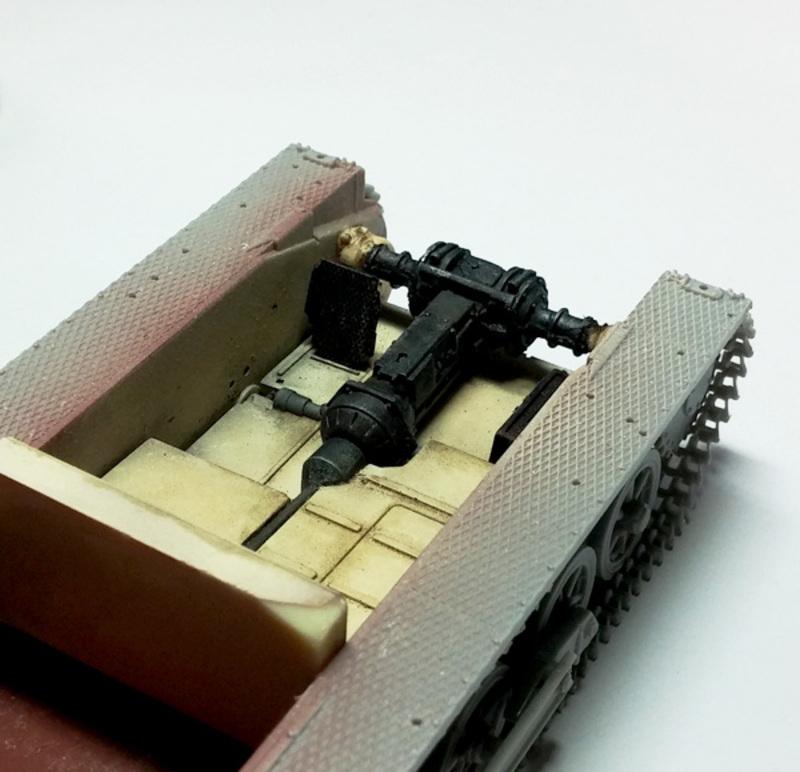
Did some marathon mold making and casting sessions the past couple days... The transmission required a two-part mold which, for a first attempt at a two-part mold, turned out perfectly. Back in the day, I cast parts for aftermarket sale. I have too much experience with this procedure, which is why I don't do it anymore. Believe it or not, the best mould release I found is Krylon spray paint or Testor's silver from a rattle can. You can use any colour, which means you can pre-paint your parts if you're clever. Use less viscous resin. It comes in all sorts of grades with a wide variety of characteristics. Smooth-On is generally available everywhere. Choose one with a longer pot life (slower curing time) if you're having issues with bubbles in the corners. Tapping the mould sometimes breaks them loose. If you're going to do a lot of this, make a vacuum chamber. Evacuate the air out or the rubber and resin once you've mixed it and if the resin is slow enough, you can put the filled mould in there to evacuate any air (trapped bubbles). My chamber is a coffee can with a hose fitted to the top, placed on a rubber pad. The hose is connected to a water-powered venturi like this one:  Mine is made from ABS plumbing fittings you can find at a hardware store. It works like a hot damn when you connect it to the tap and turn the water on full. Regards Scott Fraser |
|
daveb714
Junior Member
Member since: February 2012
Posts: 69
Feb 20, 2012 21:57:54 GMT -5
Feb 20, 2012 21:57:54 GMT -5
|
Post by daveb714 on Mar 8, 2015 10:36:34 GMT -5
Scott,
Call it beginner's luck but after the first bad casting in the two-part mold, my technique improved to the point the next four copies were bubble-free. I coated the mold with a very fine hospital grade talcum powder, poured more slowly, and tapped the mold to remove air bubbles as I poured. I like your idea of the spray paint and may give that a try.
I'm using Alumilite RC-3 resin which sets a little too quickly for my liking (and is pretty viscous as you mentioned). I have some Smooth-On "Smooth-Cast 300" (also quick setting) to try after the RC-3. I'm hoping there's a difference in viscosity and it has a bit longer working time. If not, and I continue to pursue this insanity, I'll make sure I buy a slower-setting resin and think about building a vacuum chamber per your diagram. Right now I'm just making a few copies of resin after market parts for dressing up kits for which I multiple copies. I have done some original sculpts of trees and architectural pieces that I could cast to give to friends but don't see it going any further than that.
Thanks for the information,
Dave
|
|
daveb714
Junior Member
Member since: February 2012
Posts: 69
Feb 20, 2012 21:57:54 GMT -5
Feb 20, 2012 21:57:54 GMT -5
|
Post by daveb714 on Mar 8, 2015 10:55:48 GMT -5
Thanks to Dierk I was able to locate the last Lion Roar KV-2 upgrade set in the country still being sold at its original retail price. Ha, ha, eBay. Didn't have to get gouged at more than twice the price :-) Now, I can do justice to that Trumpeter KV-2 after I finish the Pz.1. While I was at it, I picked up a Dragon figure set for a small dio I plan to do after this one's complete (hey, we have until December, right? Should be able to squeeze another one or two in.) 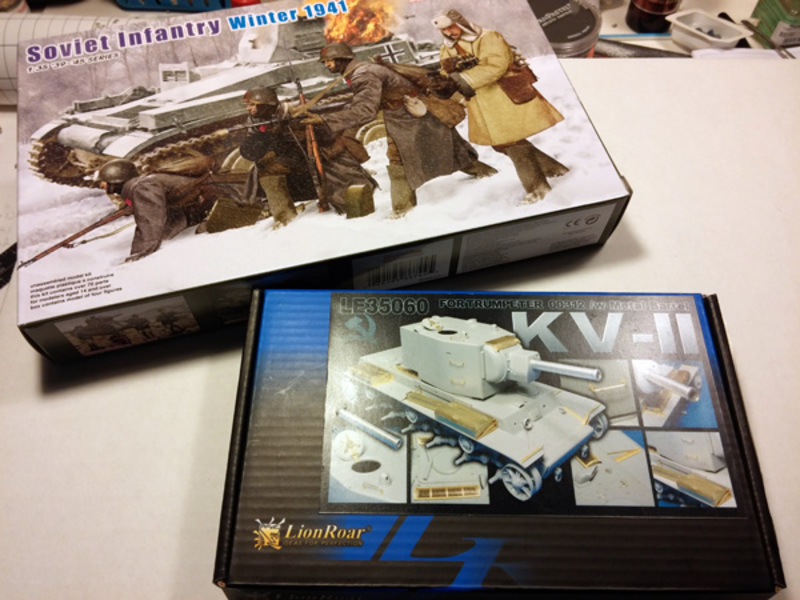 |
|
|
|
Post by deafpanzer on Mar 8, 2015 10:59:58 GMT -5
Perfect choice on Russian figures set!!!
|
|
daveb714
Junior Member
Member since: February 2012
Posts: 69
Feb 20, 2012 21:57:54 GMT -5
Feb 20, 2012 21:57:54 GMT -5
|
Post by daveb714 on Mar 8, 2015 11:36:47 GMT -5
Perfect choice on Russian figures set!!! Out-of-the-box it looks really nice...good selection of detailed weaponry, lots of parts for the spares box, and the heads aren't bad. May just use them as they are and not replace with aftermarket. The only drawback are those multiple greatcoat panels which are a pain to assemble and clean up. I might even show a lack of originality and use the boxart of a KO'd Pz.II as the basis for the diorama. I hope to find the time do three dios for the group build since it runs for over nine months: one set in the opening stages of Barbarossa, one in late fall when rasputitsa set in, and one in December with snow on the ground. |
|
daveb714
Junior Member
Member since: February 2012
Posts: 69
Feb 20, 2012 21:57:54 GMT -5
Feb 20, 2012 21:57:54 GMT -5
|
Post by daveb714 on Mar 8, 2015 17:04:28 GMT -5
I've been dreading gluing the links on this thing but can't put it off any longer. I managed to remove them from the sprue gates by trashing only three links. Haven't done indy links since an Alan Wespe build 10 years ago so should be interesting. 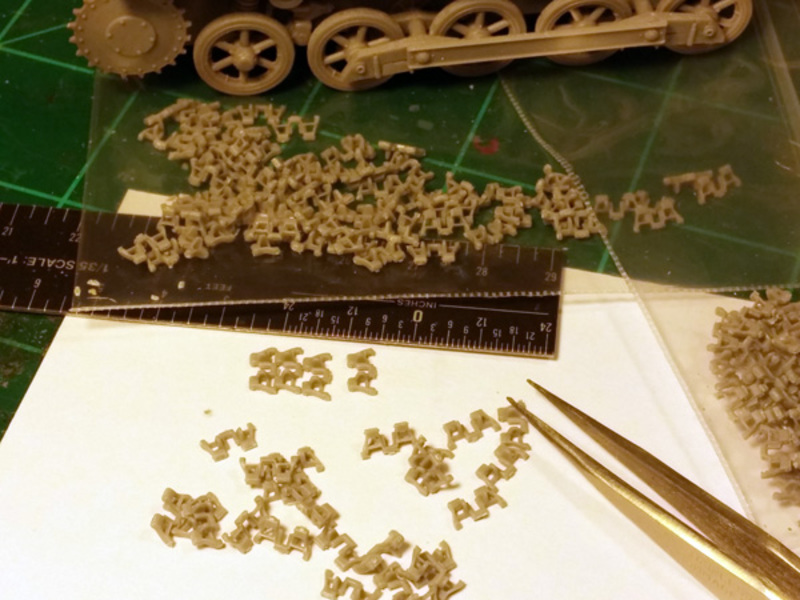 |
|
daveb714
Junior Member
Member since: February 2012
Posts: 69
Feb 20, 2012 21:57:54 GMT -5
Feb 20, 2012 21:57:54 GMT -5
|
Post by daveb714 on Mar 8, 2015 19:44:07 GMT -5
So far, so good. An easy run done on each side and the modified idlers epoxied in place after having to saw them off to make the corrections. The Dragon links are much easier to work with than I recall the Alan ones being. Think I'm going to call it a day. 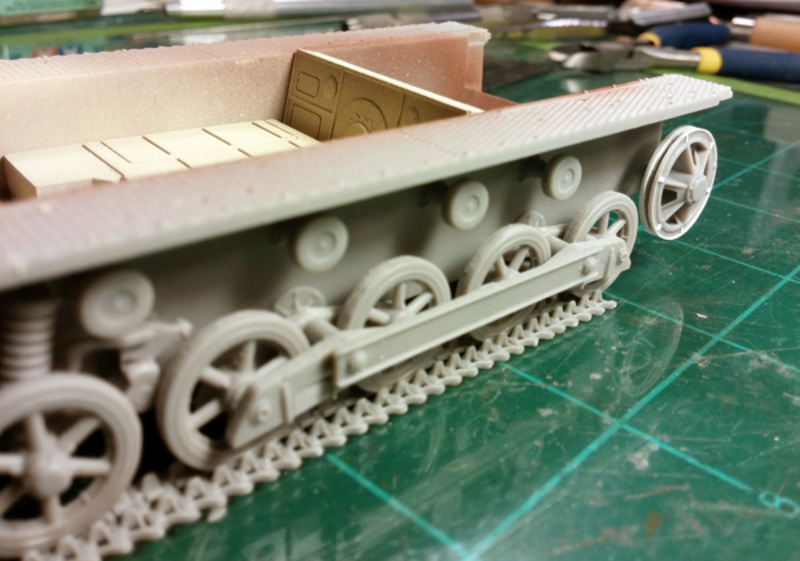 |
|
|
|
Post by TRM on Mar 8, 2015 20:01:06 GMT -5
Nice to see the tracks going together Dave! And that idler is superb!!
|
|
|
|
Post by deafpanzer on Mar 8, 2015 23:53:06 GMT -5
Great work on the tracks! I don't blame you for taking a break... I would have taken MANY breaks!
|
|
|
|
Post by dierk on Mar 9, 2015 6:52:37 GMT -5
Looking better and better.
Glad to hear you managed to score the Lion Roar set - I wish my modelling was as good as my internet search skills rofl-roll.
Tiny styrene indy links - my favourite (not)
|
|
Jelly
Junior Member
Member since: February 2015
Posts: 84 
|
Post by Jelly on Mar 9, 2015 15:41:03 GMT -5
Perfect choice on Russian figures set!!! Out-of-the-box it looks really nice...good selection of detailed weaponry, lots of parts for the spares box, and the heads aren't bad. May just use them as they are and not replace with aftermarket. The only drawback are those multiple greatcoat panels which are a pain to assemble and clean up. I might even show a lack of originality and use the boxart of a KO'd Pz.II as the basis for the diorama. I hope to find the time do three dios for the group build since it runs for over nine months: one set in the opening stages of Barbarossa, one in late fall when rasputitsa set in, and one in December with snow on the ground. Hey Dave, I agree with deaf, the figures set is goood... ...and I'm in the same pan that you with the greatcoats "panels"... but I'm sure they will end in a more than decent shape  I particularly find heads and faces are 100% OK for the price I like very much this figure set, I was even thinking in putting my hands over one... I like so much the majority of Dragons box art that I feel no shame to openly say the they can be perfectly used as guide-picture for a dio/vignette. Absolutely ! Boy, you stamina must be XXXXXL size ... three Barbarossa dios intended! wow, good luck, Dave ! Later Dave : ) Jelly |
|
daveb714
Junior Member
Member since: February 2012
Posts: 69
Feb 20, 2012 21:57:54 GMT -5
Feb 20, 2012 21:57:54 GMT -5
|
Post by daveb714 on Mar 9, 2015 20:25:04 GMT -5
Thanks guys for the recent comments. They helped me get through finishing these infernal track links. Five or six hours and a few... no, make that many, profanities later they're finished. Going to let them dry overnight, hit them with some primer in the morning and then the real fun can begin.   |
|
|
|
Post by Deano on Mar 9, 2015 20:52:46 GMT -5
Nice start on this one Dave , tracks look great ... well worth the effort!
|
|
reserve
Senior Member

Member since: July 2012
Si vis pacem para bellum
Posts: 2,349
Jul 11, 2012 9:11:45 GMT -5
Jul 11, 2012 9:11:45 GMT -5
|
Post by reserve on Mar 9, 2015 22:51:49 GMT -5
Worst part's over! Way to hang in there they look great
Regards,
Mark
|
|
Wes
Full Member

Member since: November 2011
Posts: 686
Nov 16, 2011 9:34:50 GMT -5
Nov 16, 2011 9:34:50 GMT -5
|
Post by Wes on Mar 10, 2015 1:49:03 GMT -5
Great work on the tracks dave. They look like a real patience tester.
|
|
daveb714
Junior Member
Member since: February 2012
Posts: 69
Feb 20, 2012 21:57:54 GMT -5
Feb 20, 2012 21:57:54 GMT -5
|
Post by daveb714 on Mar 10, 2015 17:51:42 GMT -5
|
|
reserve
Senior Member
Member since: July 2012
Si vis pacem para bellum
Posts: 2,349
Jul 11, 2012 9:11:45 GMT -5
Jul 11, 2012 9:11:45 GMT -5
|
Post by reserve on Mar 10, 2015 18:42:41 GMT -5
I agree, as long as you've got the big stuff in place you're golden I'd be thinking. Casting came out great
Regards,
Mark
|
|
|
|
Post by Leon on Mar 10, 2015 19:12:14 GMT -5
Wow!! Great work on the Indy links Dave!  You may have given me the inspiration to have a go at mine again. |
|


 I particularly find heads and faces are 100% OK for the price


 You may have given me the inspiration to have a go at mine again.

