BezoulaBuilds
Full Member
  
Member since: July 2013
Posts: 136 
|
Post by BezoulaBuilds on Mar 23, 2015 8:53:45 GMT -5
FW190A8. Fw Rudi Riedl. 6./KG200 Tirstrup, Denmark. Mistel 2 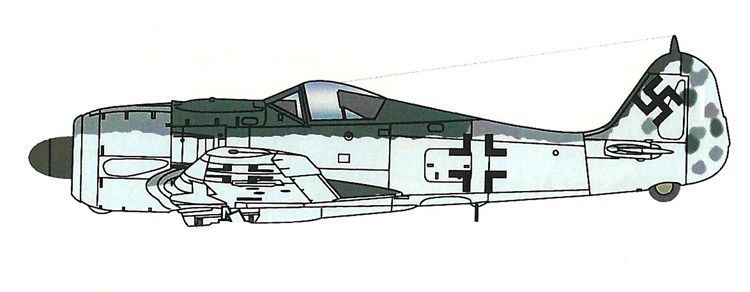 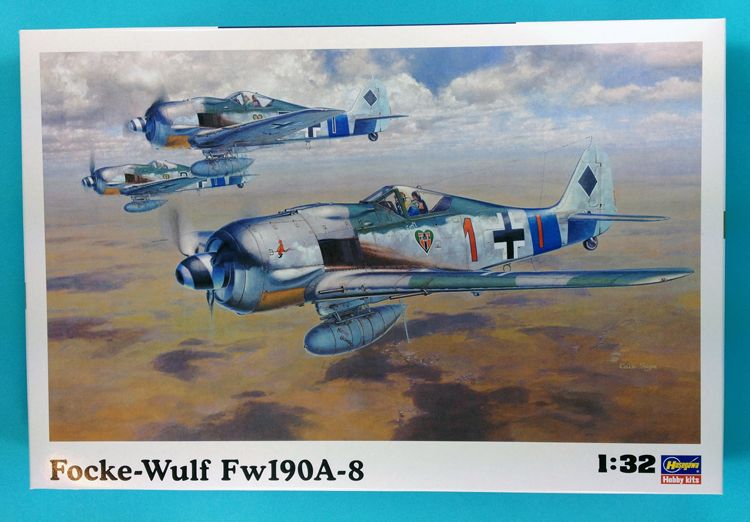 My kit will be Hasegawa's FW190A8. Perhaps one of the nicest box art renderings to date. I just love the artwork showing lead pilot focusing on what appears to be navigation while the other two pilots hold the formation. 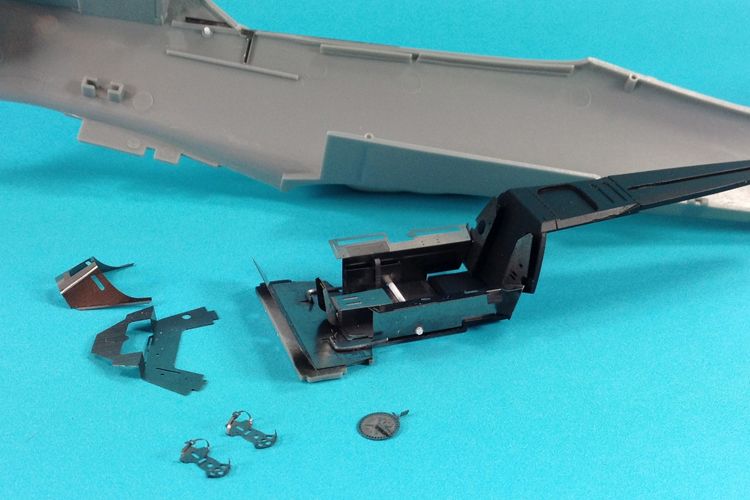 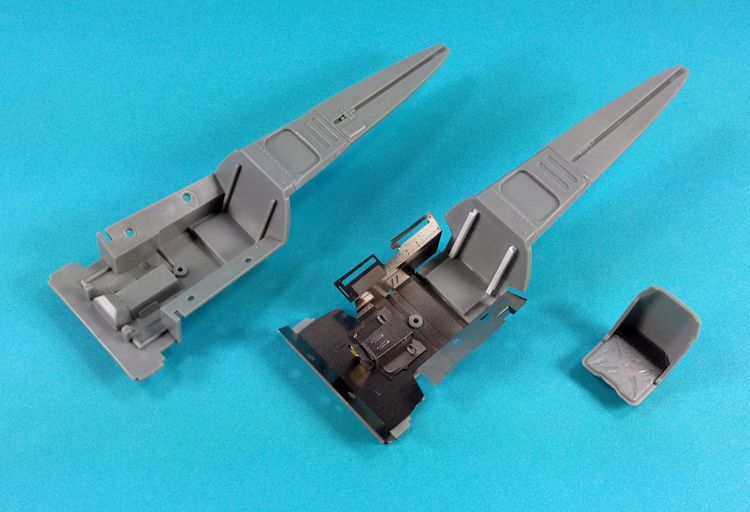 Untouched pit sits next to pit under revision for comparison. Seat back rails is styrene "I" beam, left/right and center console cut out to accept PE replacement.  Tub primed with Mr. Surfacer 1500 Black. Bulkhead panels and side panels added. More fun with PE. Shown is starboard fuselage with PE parts added. Orginal kit dash cut away, PE dash replacement shown along with IP, pedals and canopy actuator. About 4 PE parts for port side of fuselage and the dashboard surgery then I will hit with primer and RLM66. Then begin the IP and belts. 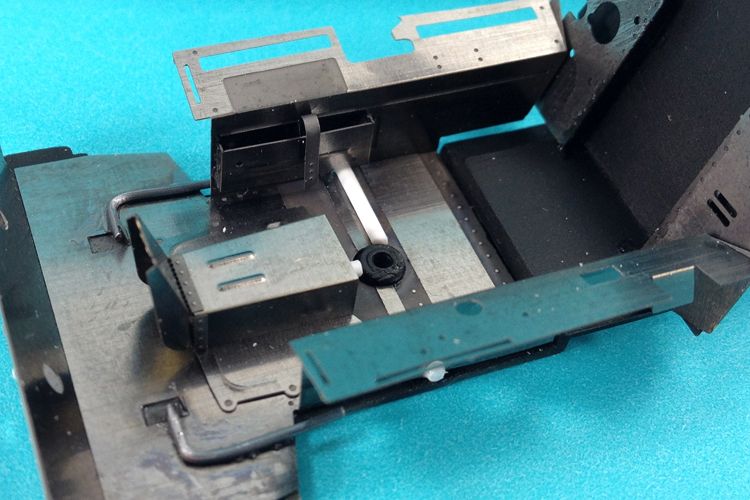 Close up show detail of map case. I added some styrene rods on transmission floor and lead wire for pedal links. Pardon all the dust. 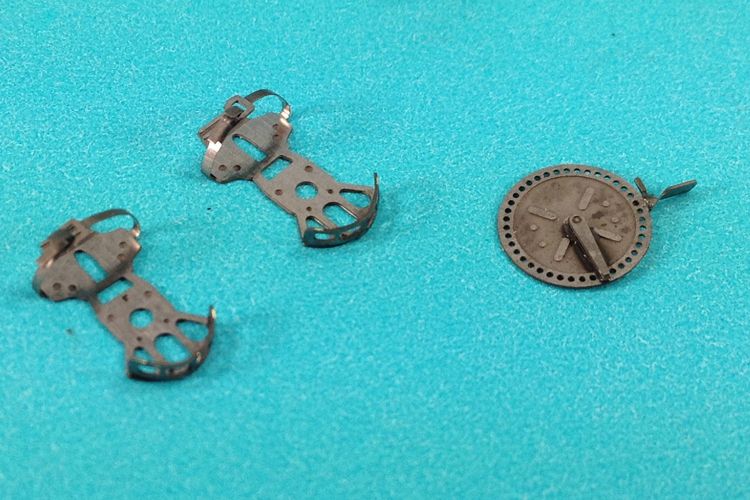 Pedals and canopy actuator wheel assembly. Will do initial painting in the tub. Mount these and continue paint. |
|
BezoulaBuilds
Full Member
  
Member since: July 2013
Posts: 136 
|
Post by BezoulaBuilds on Mar 23, 2015 9:06:36 GMT -5
Ignition wires required some drilling with a .35mm bit on the engine cylinder heads and harness. Wire is from a telephone cord. 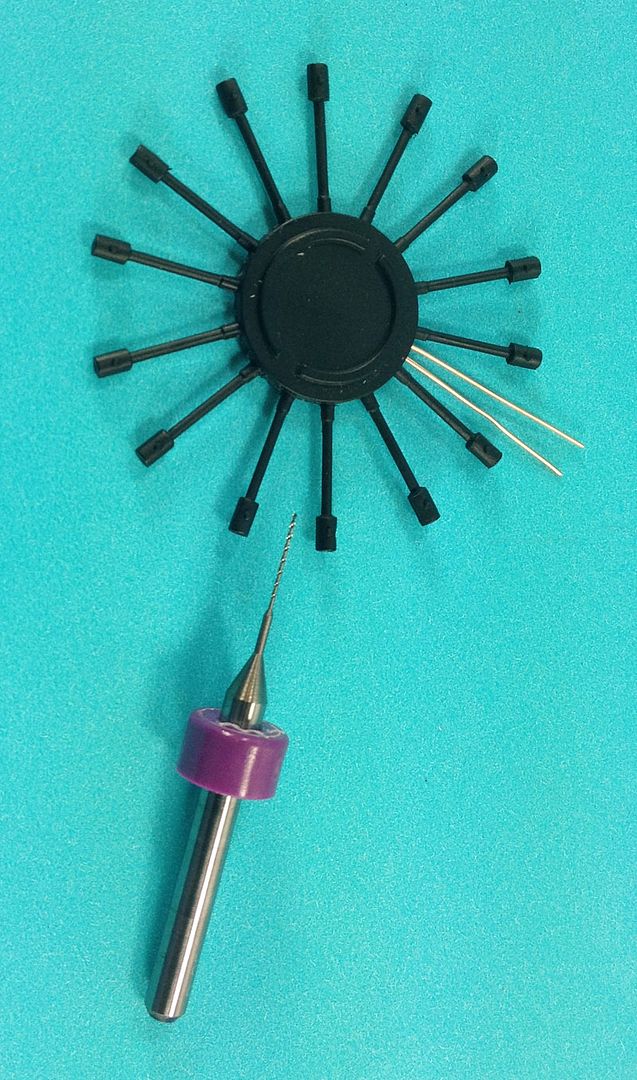 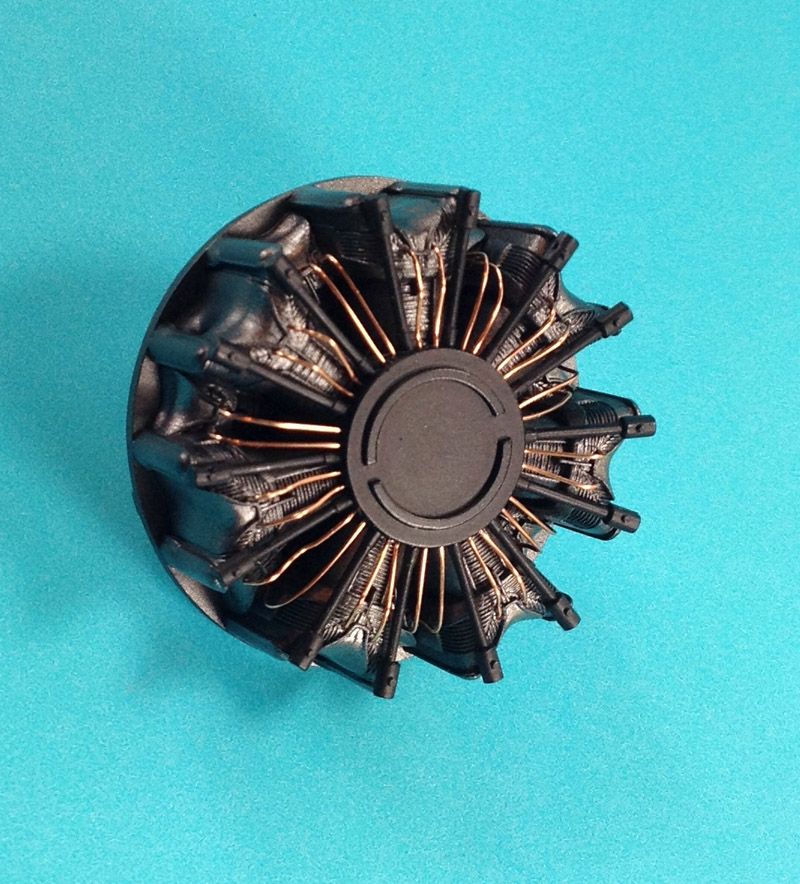 Instrument panel will be slightly modified at accept gauges and throttle for the Ju88. First step is to add a center panel for Ju88 RPM and Oil Pressure gauges. Based on photographs I'm will make it close. Enter FICE clause here. Using my Mistel Composite Aircraft book I use a photo of FW190 pit rigged for Ju88 control. Breaking out .05mm styrene sheet, Air Scale Bezels and MDC decals I measured the panel then added appropriate gauges to panel. 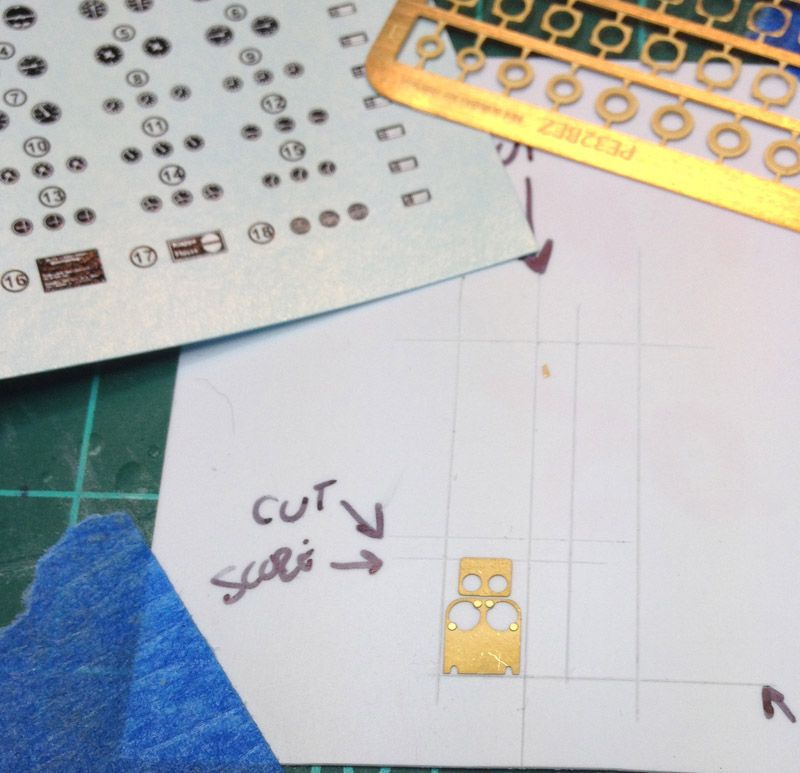 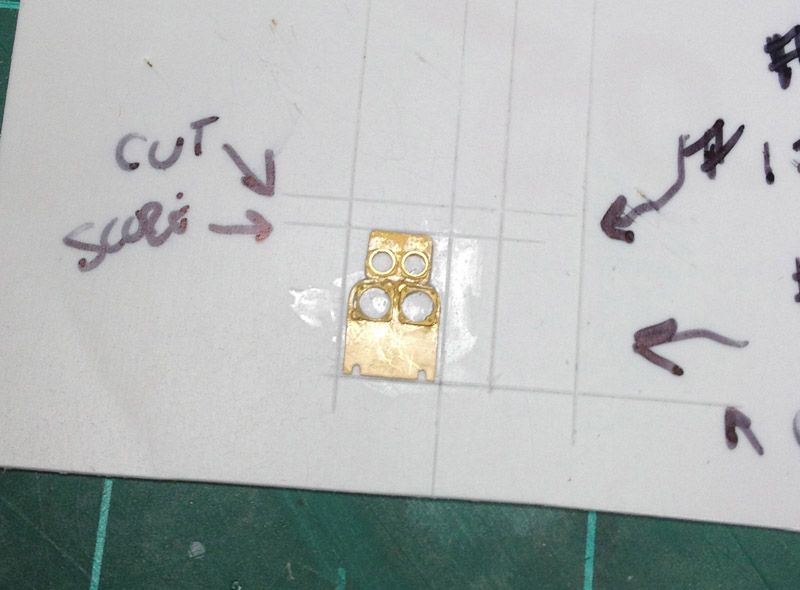 Adding the bezels was a test of will. Used Future to adhere then touched again with CA. Not sure if I like the alignment, will make judgement after a coat of paint. Ju88 throttle control will be placed on the left panel just below the FW190 throttle. I cut a thin strip of styrene and glued a scrap PE. Then using .30mm drill I drilled two holes for the throttle controls. After placing .30mm rods I trimmed then flattened with smooth pliers. Using white glue to make the knobs. 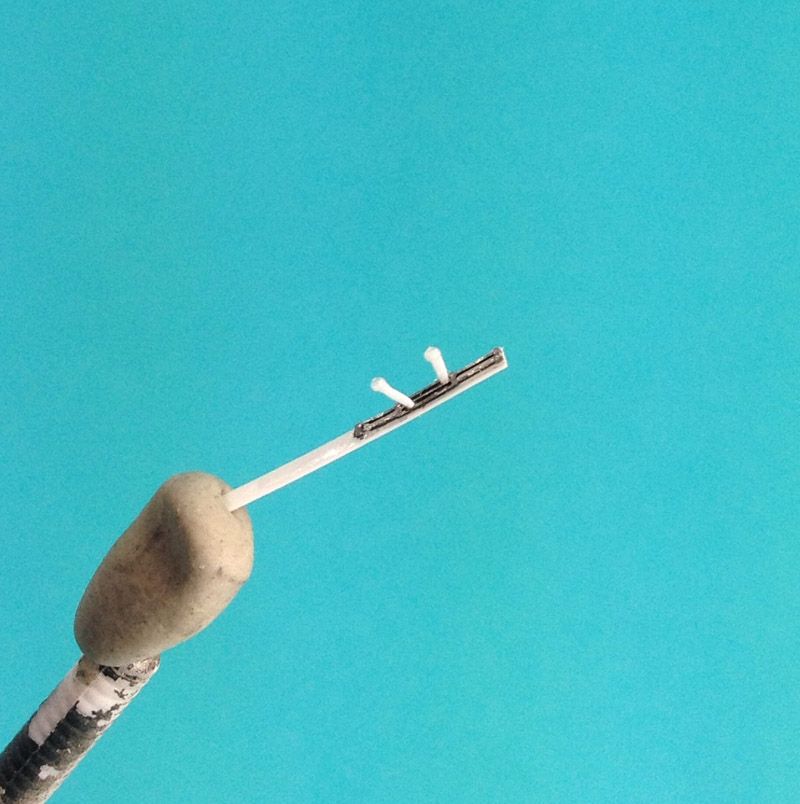 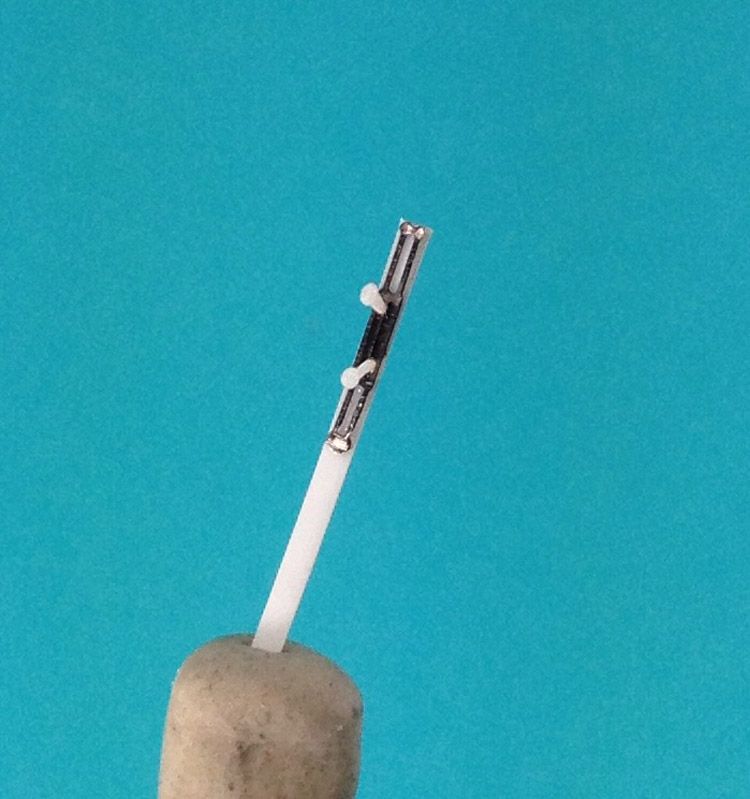 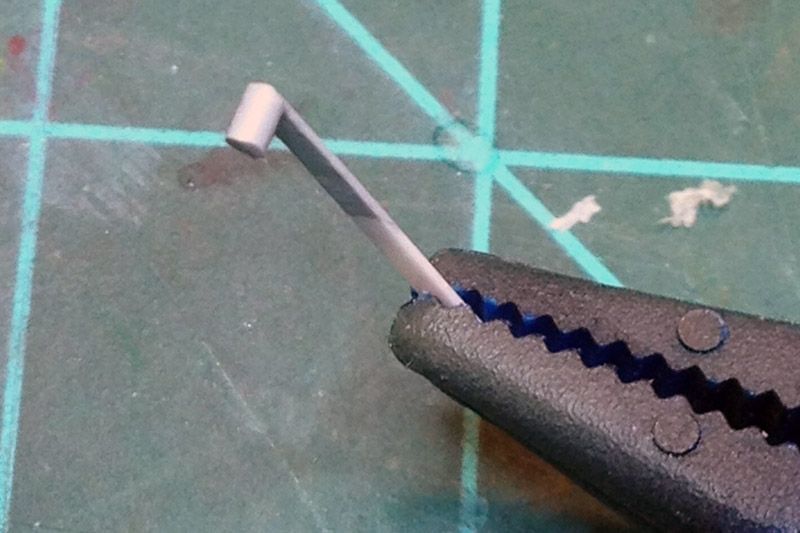 FW190 throttle made from styrene strip and rod. Primer with Mr. Surfacer 1200. 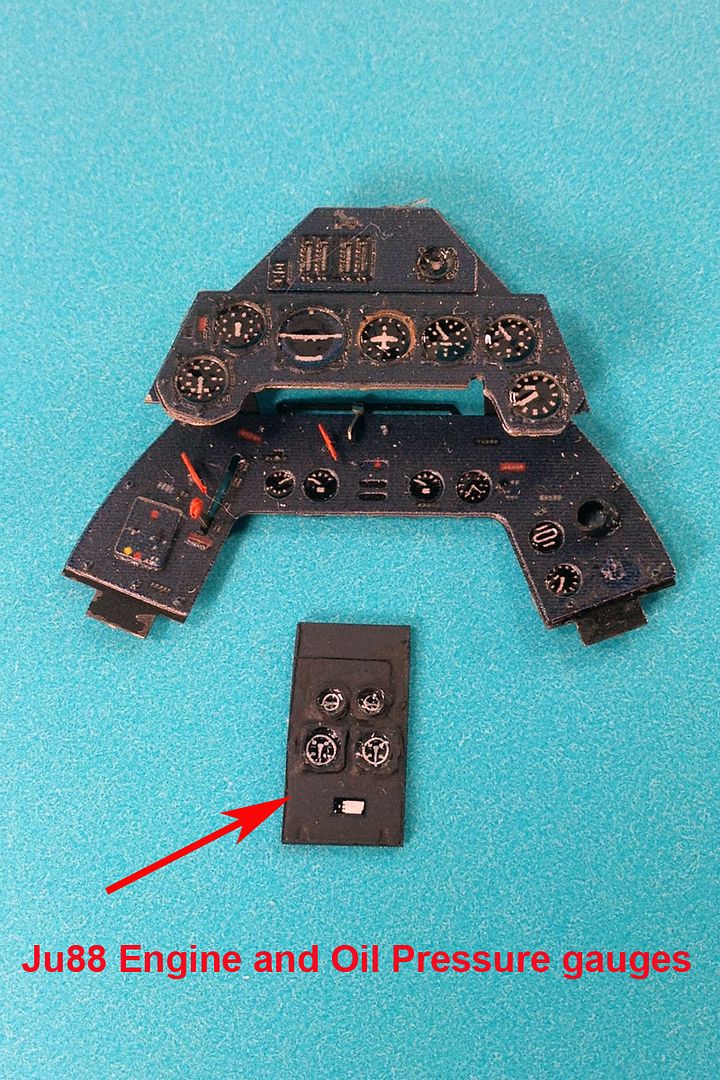 Ju88 engine RPM and Oil Pressure panel painted, instrument decals added then some Vallejo "Still Water" to dials. 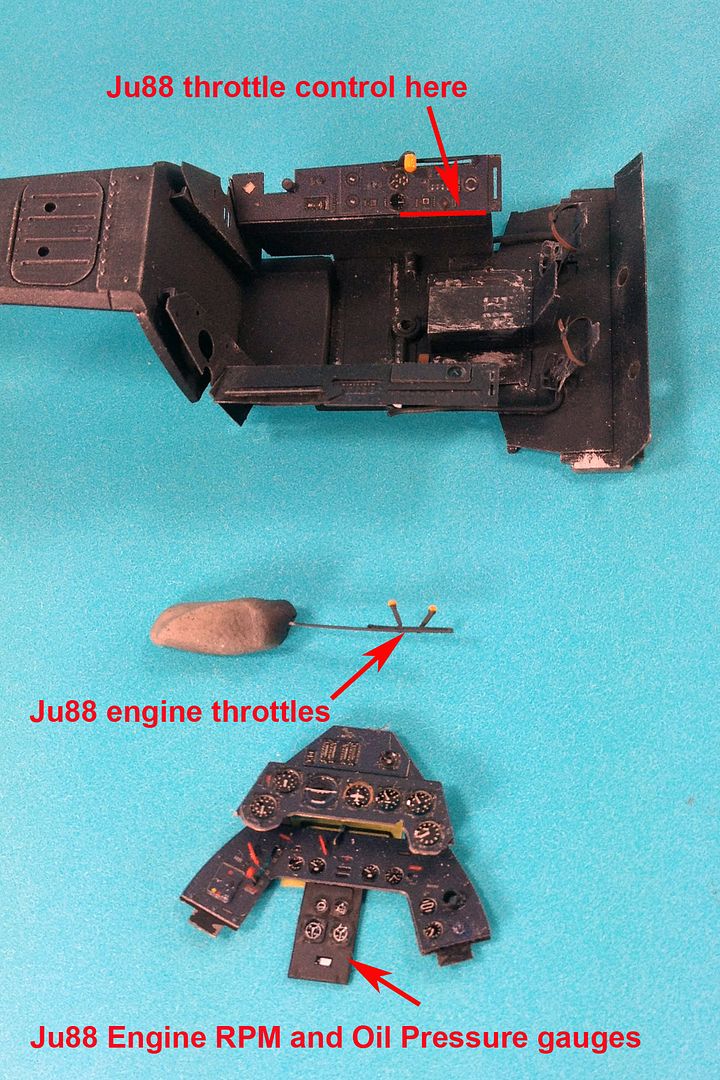 FW190 throttle control painted and glued in place. Ju88 throttle controls painted and ready to be glued on port cockpit panel. Ju88 engine RPM and Oil Pressure panel test fitted with tape. Will glue after seat/belts/control stick and wiring added. |
|
BezoulaBuilds
Full Member
  
Member since: July 2013
Posts: 136 
|
Post by BezoulaBuilds on Mar 23, 2015 9:24:05 GMT -5
At a LHS I found this in the Armour section. 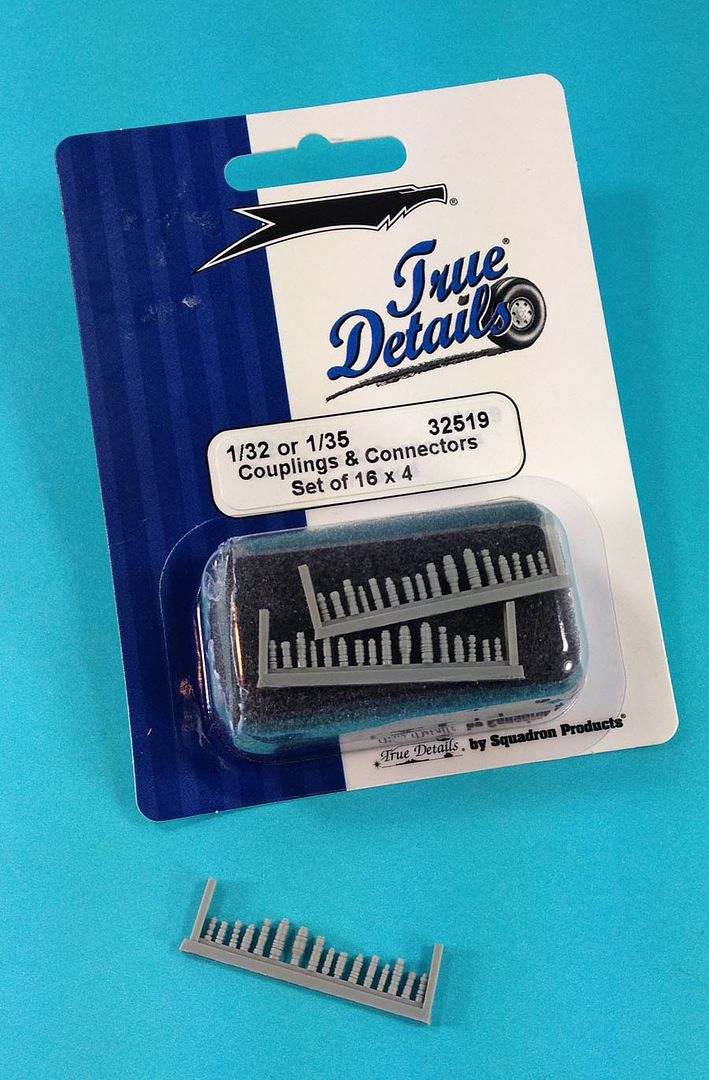 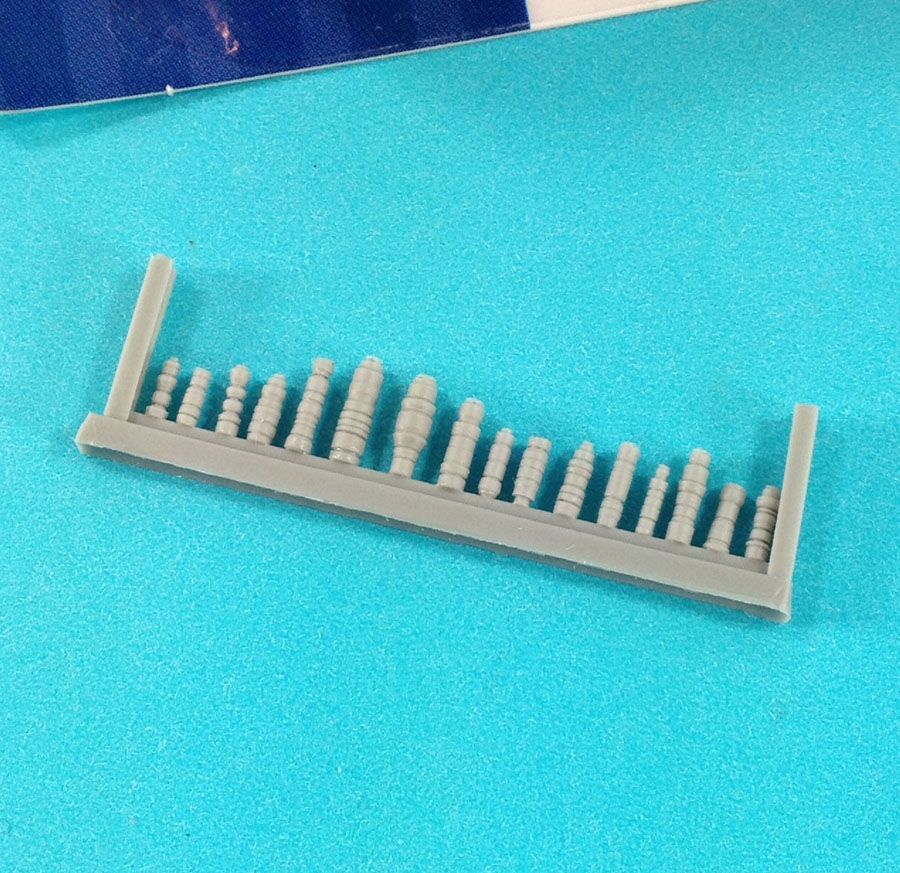 Perfect solution for the FW190 pit. This also solves fuel and electrical connector/coupling issue "FW190 to the Ju88." 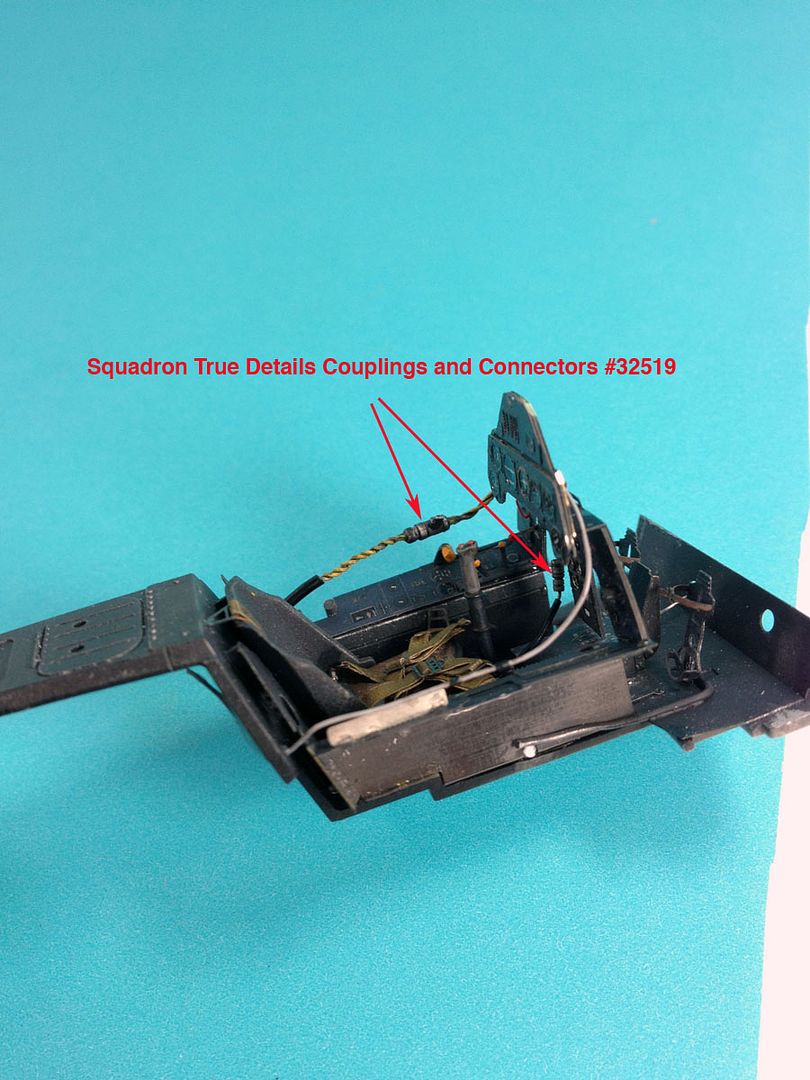 With connectors/couplings added a little paint and matt varnish. 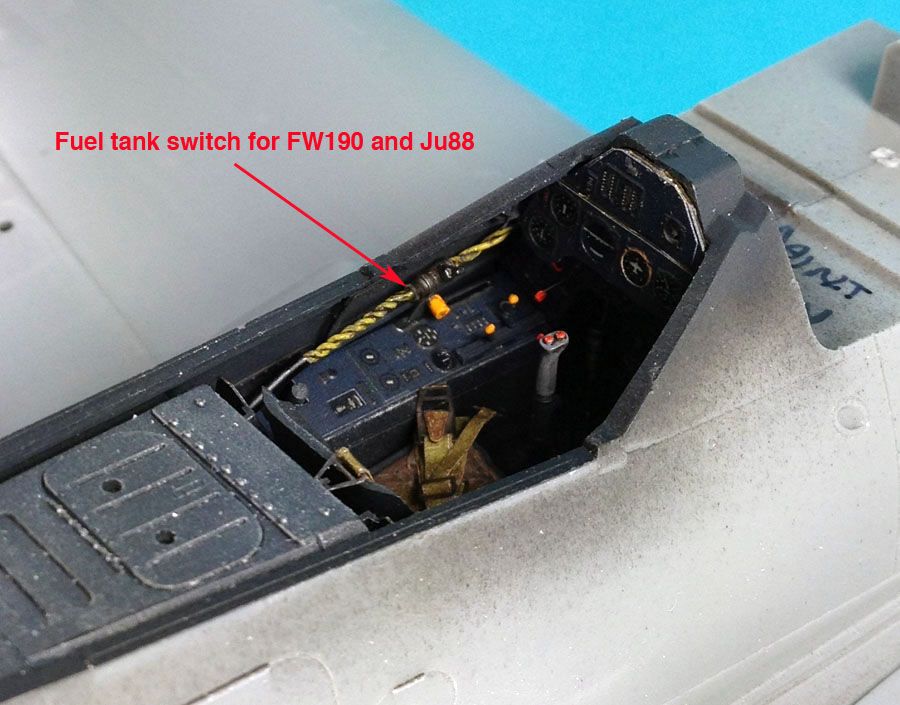 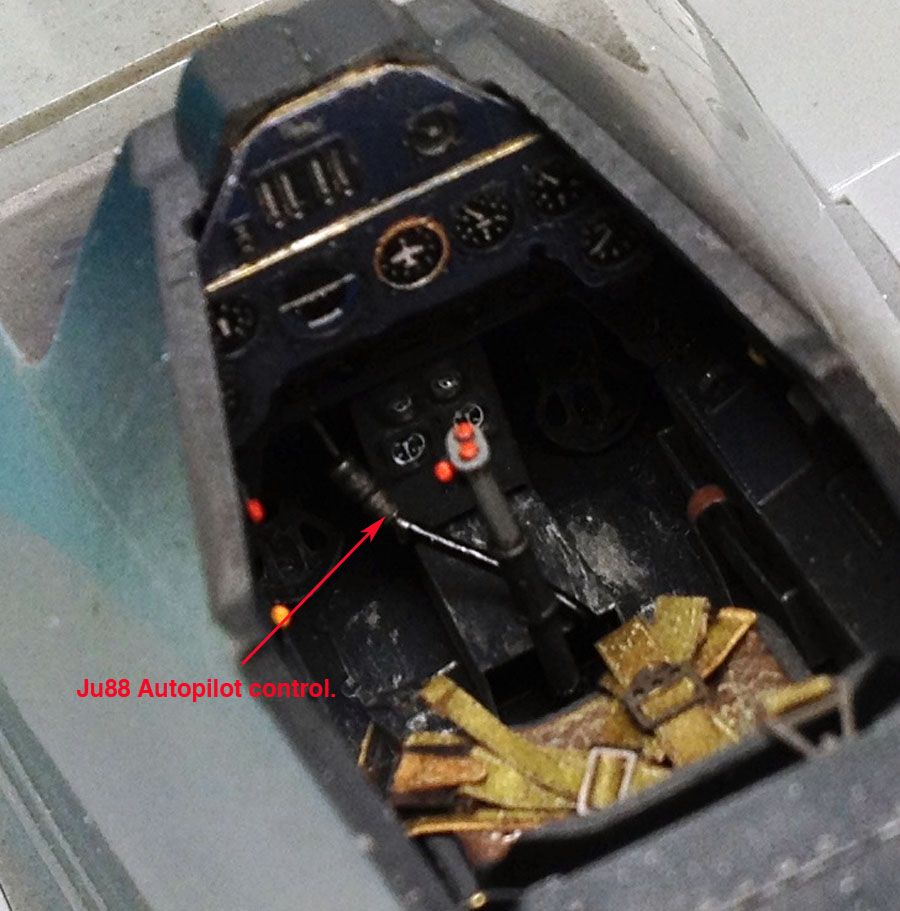 600 LITER CIGAR DROP TANK Fuel was an issue for the Mistel series. The MG 131's mounted in the cowling of the FW190 were removed for fuel tank. A larger 600l cigar drop tank was issued to the FW190 and two 900l drop tanks were issued to the Ju88. 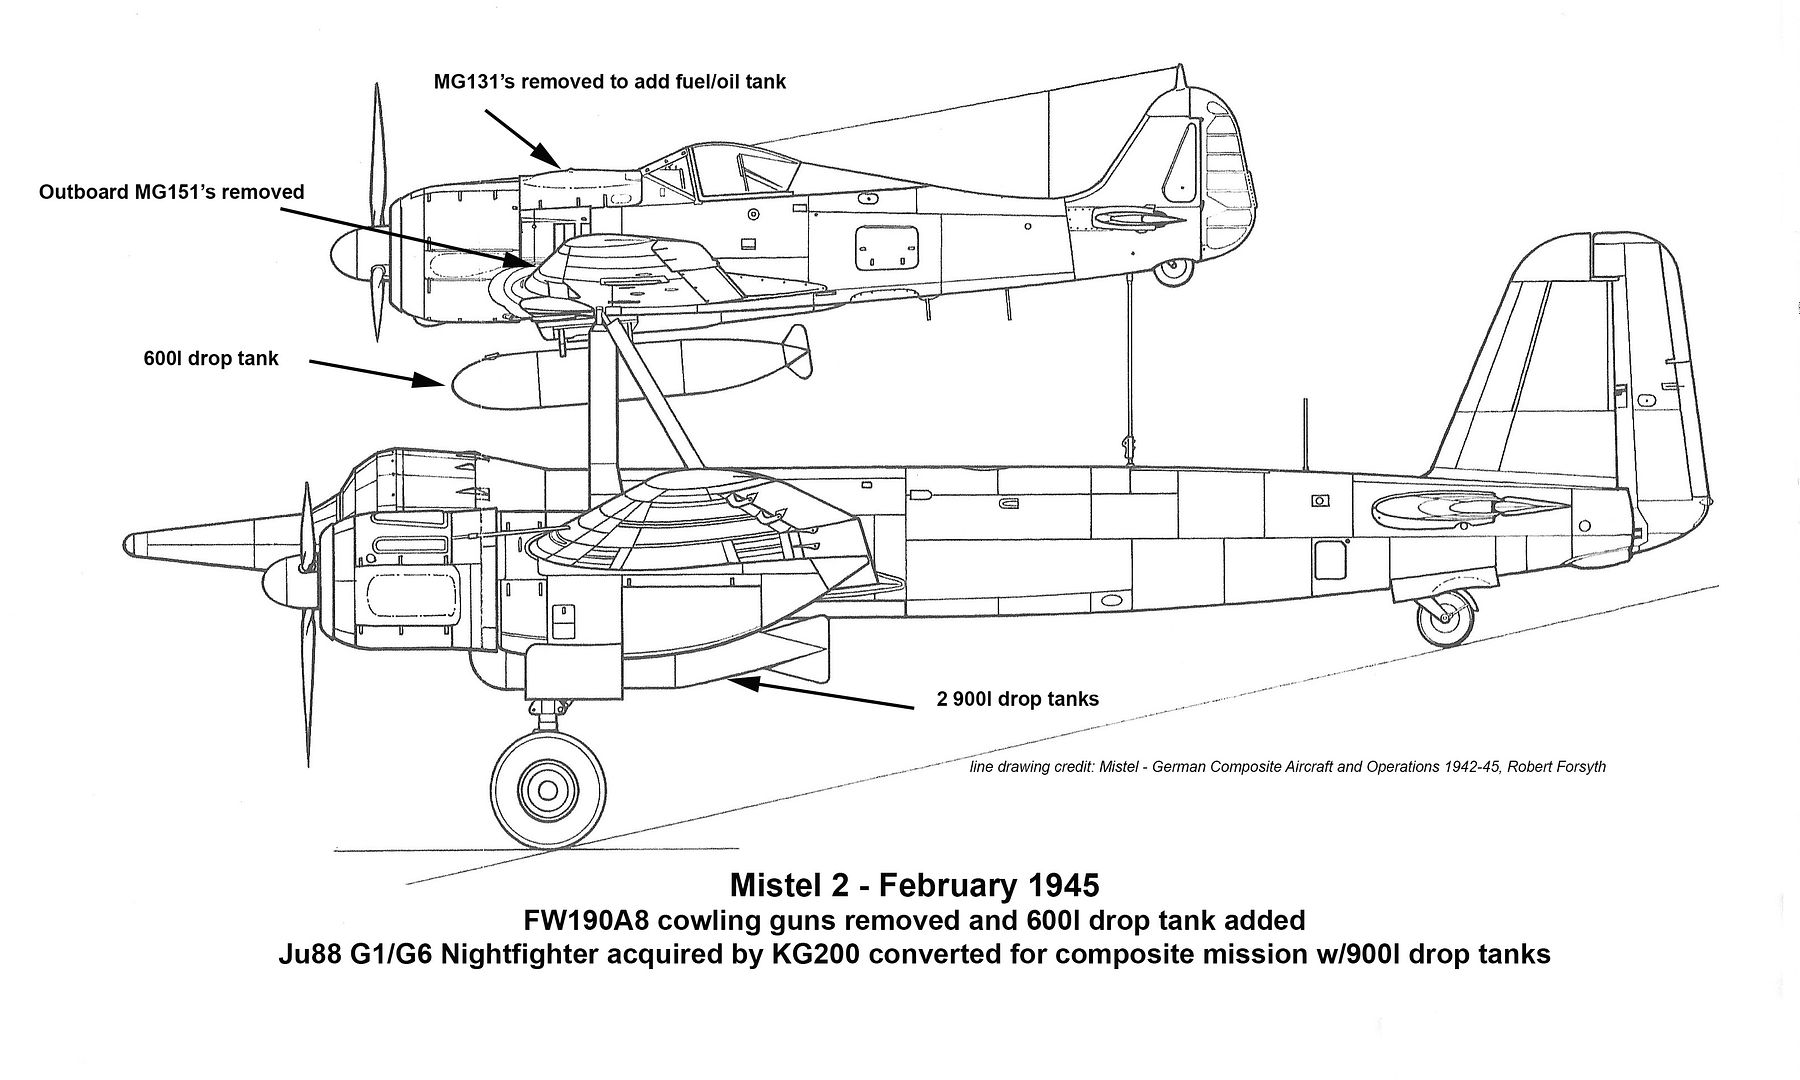 Coincidentally, CMK recently released a Luftwaffe 600l Cigar #5088 drop tank. It is a long cigar shaped tank and timing of this release could not have been better. 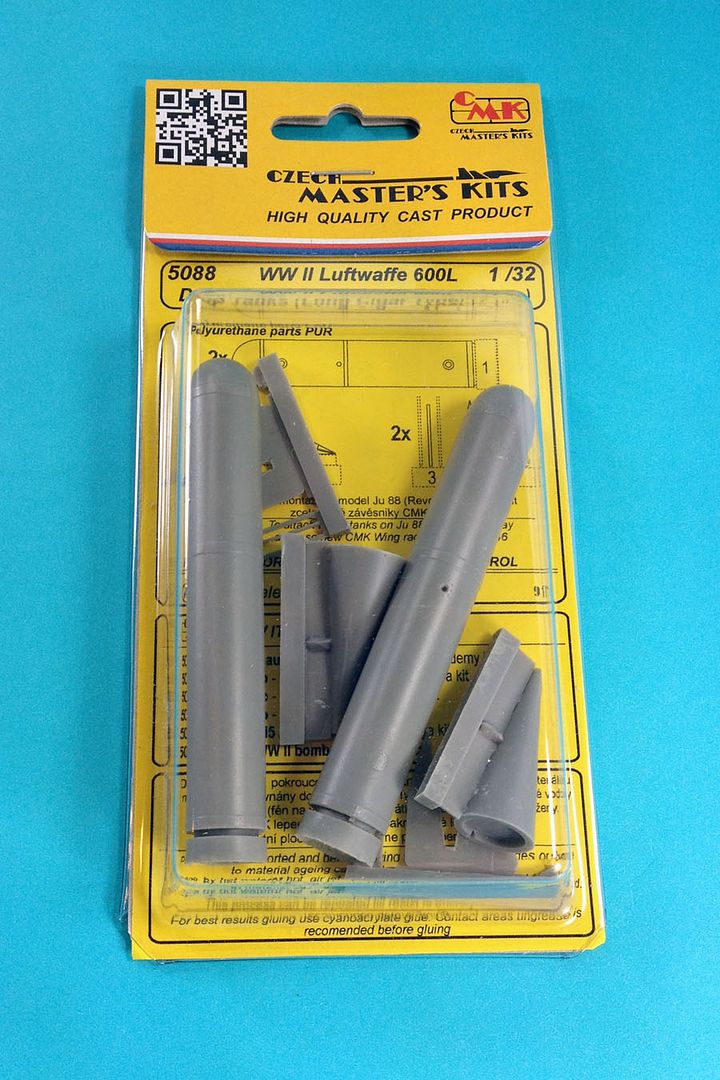 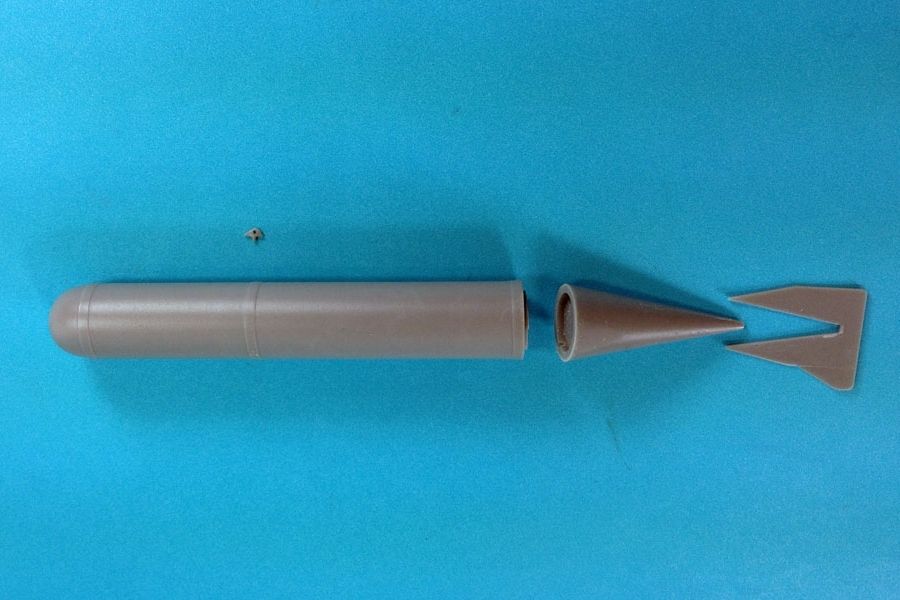 All cleaned up and ready for some CA love. After Mr. Surfacer 1500 applied I thinned Mr. Color RLM 02 added to wheel wells and flap openings then thinned Mr. Color RLM 76 and got to work. 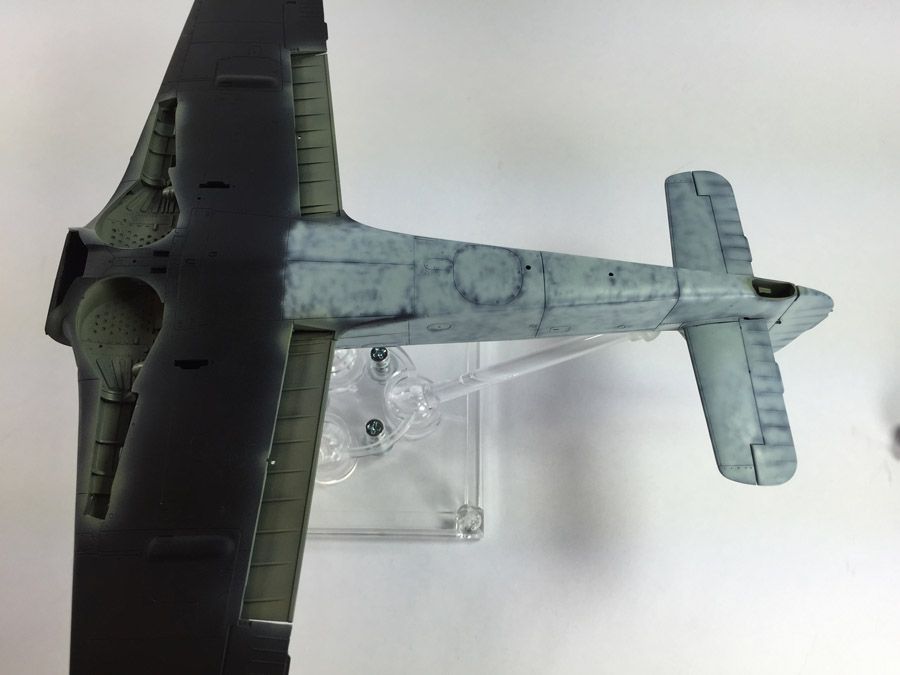 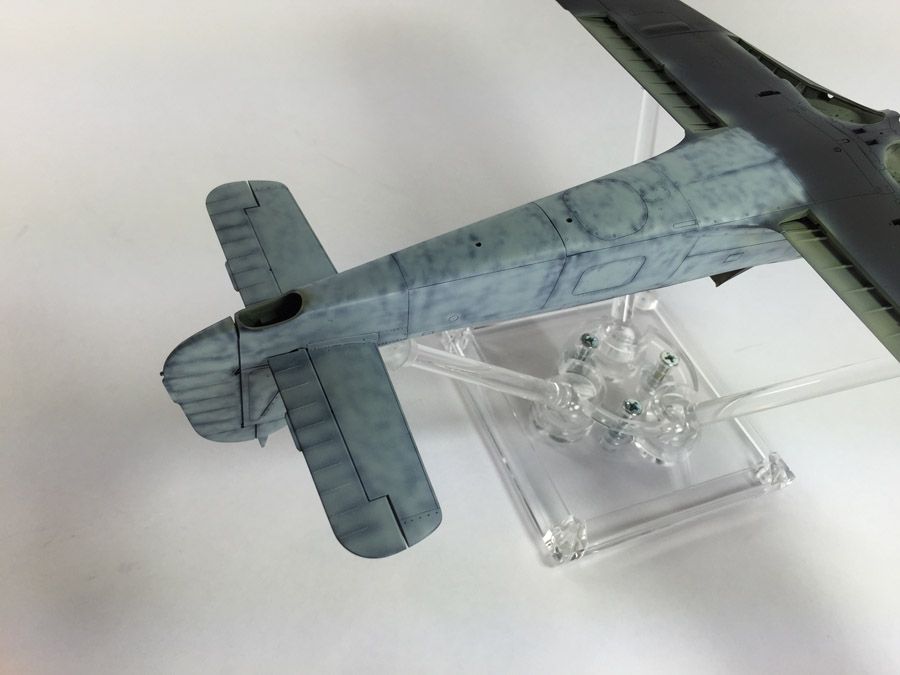 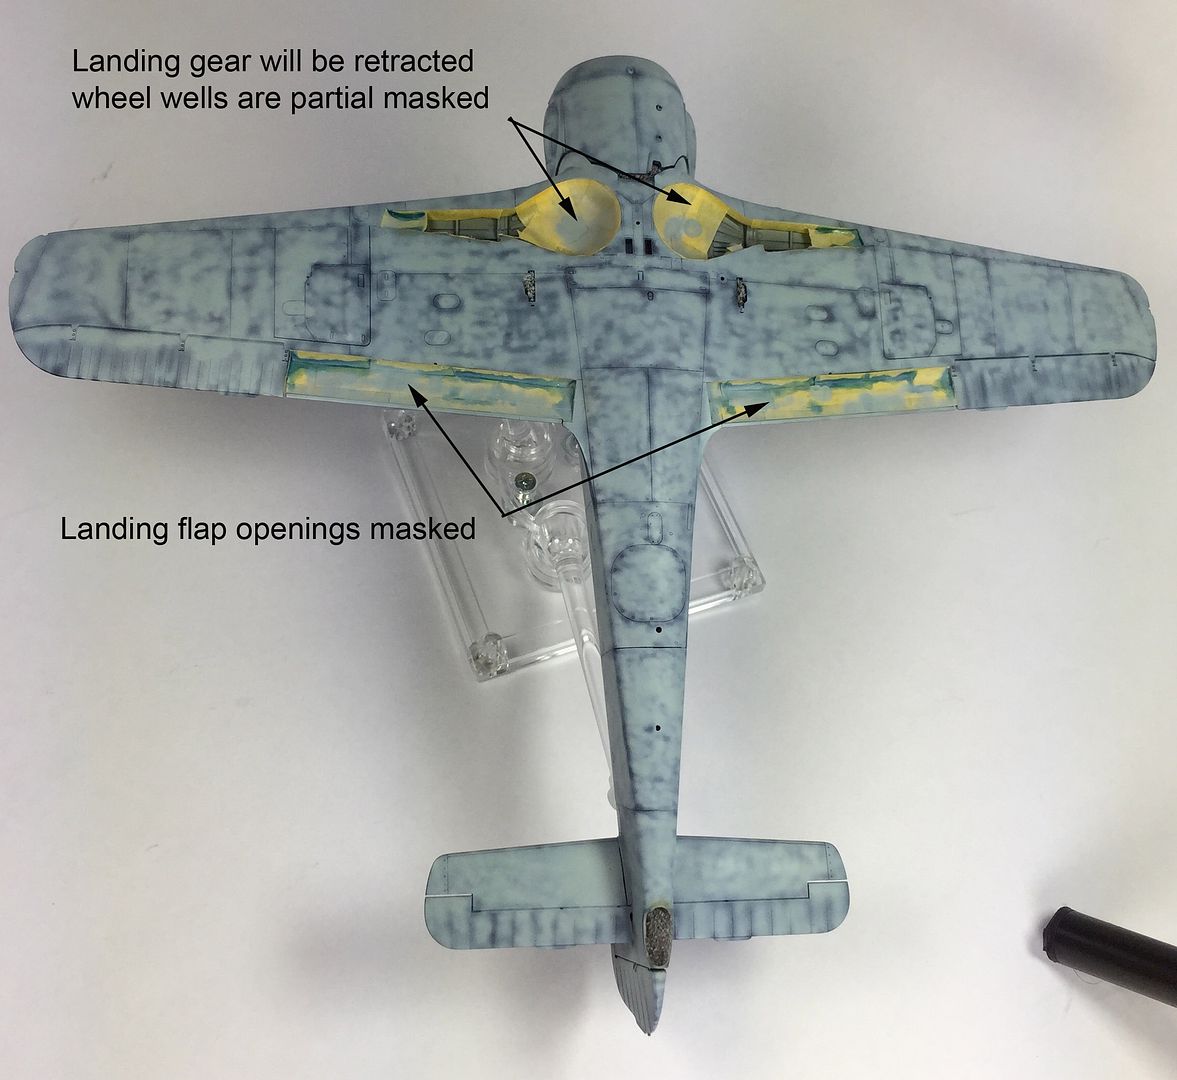 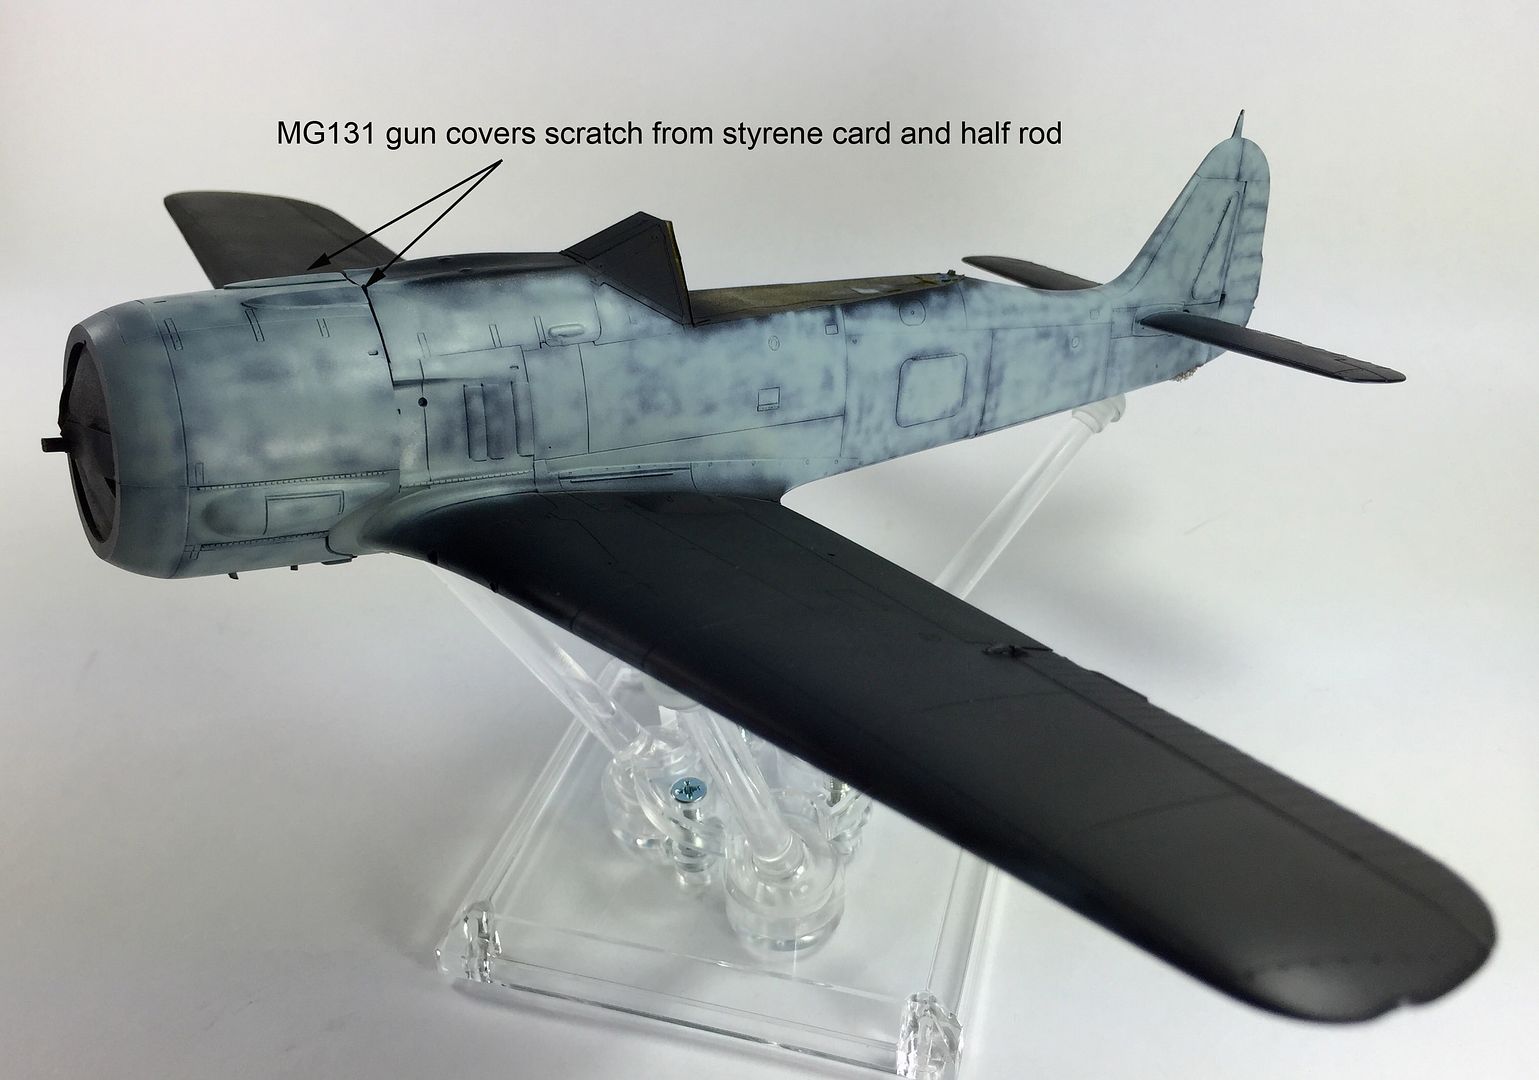 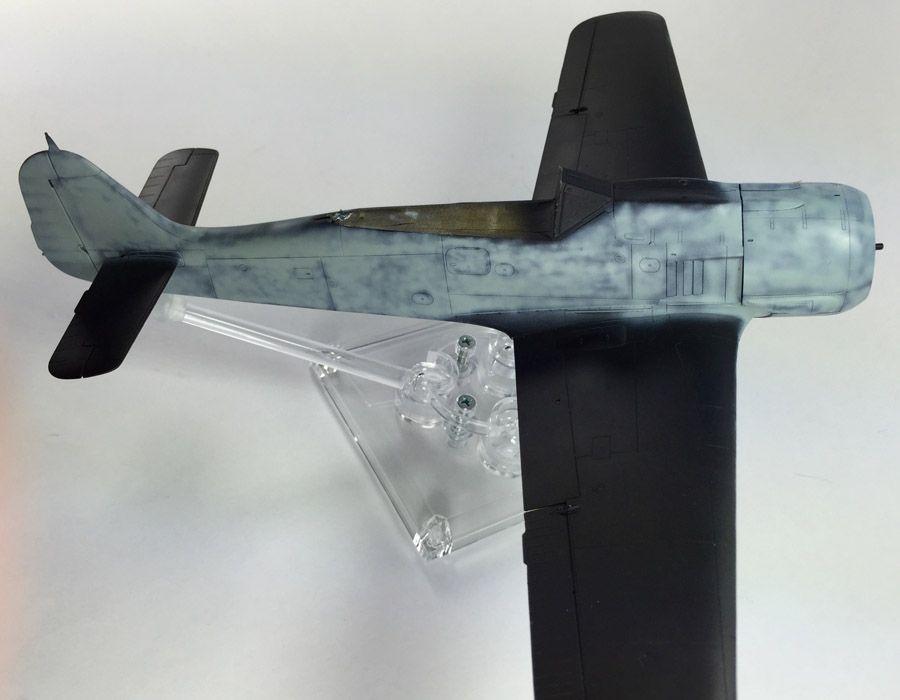 Power Egg is dry fitted. The Mistel 2 FW190A8's had the MG131's removed to add a fuel/oil tank. Gun openings were covered with field prepared panels. The outboard wing Mg151's were removed and gun openings buttoned up. A thinned wash of RLM 76 will be applied to blend. |
|
|
|
Post by wing_nut on Mar 23, 2015 10:07:49 GMT -5
WOOHOO, Looks like I'm front row center. Love what you've done on the cockpit so far. And I love the looks of the Mistels. Very cool.
|
|
BezoulaBuilds
Full Member
  
Member since: July 2013
Posts: 136 
|
Post by BezoulaBuilds on Mar 24, 2015 4:54:40 GMT -5
PAINT UPPER Using Mr. Color RLM74 and RLM75 diluted 3:1 upper camo is applied. 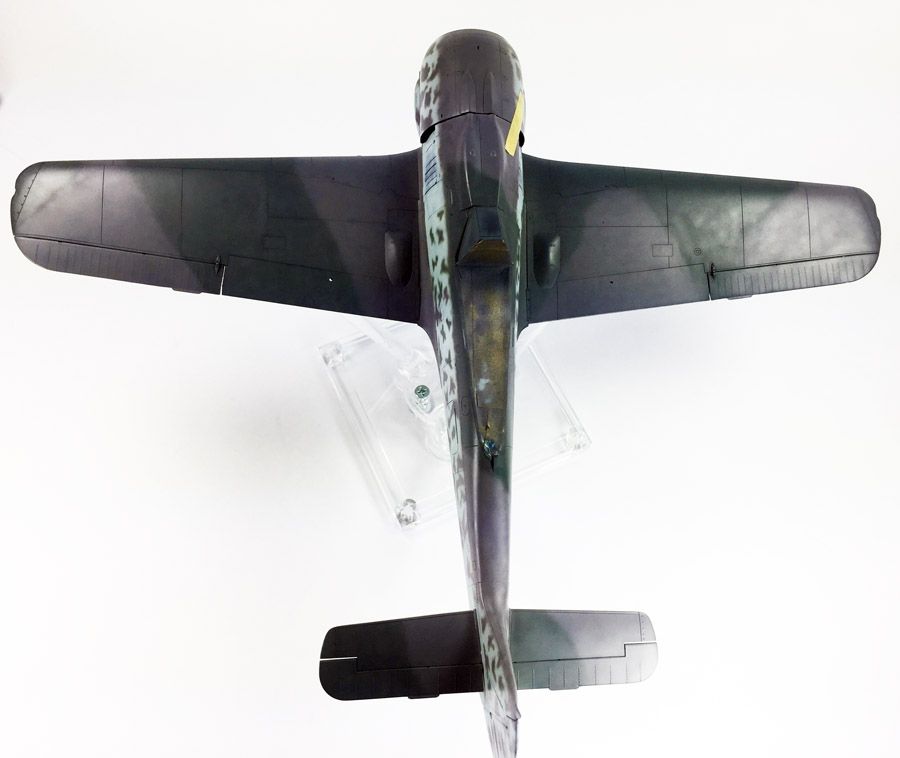 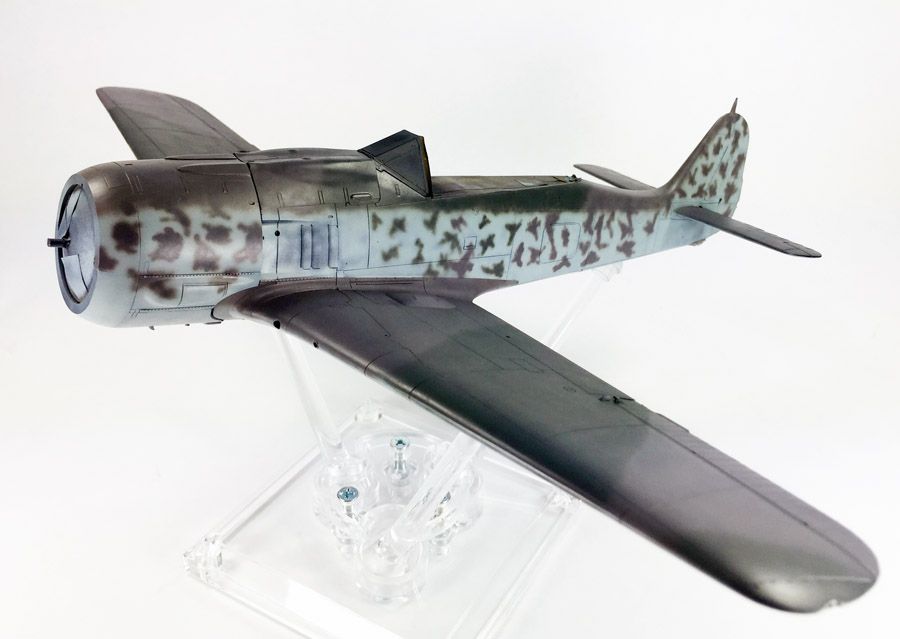 It was late...think Paint 0030. Decided to get a little creative with the mottle. Must have been the lacquer fumes or the single malt. Final results, NOPE! 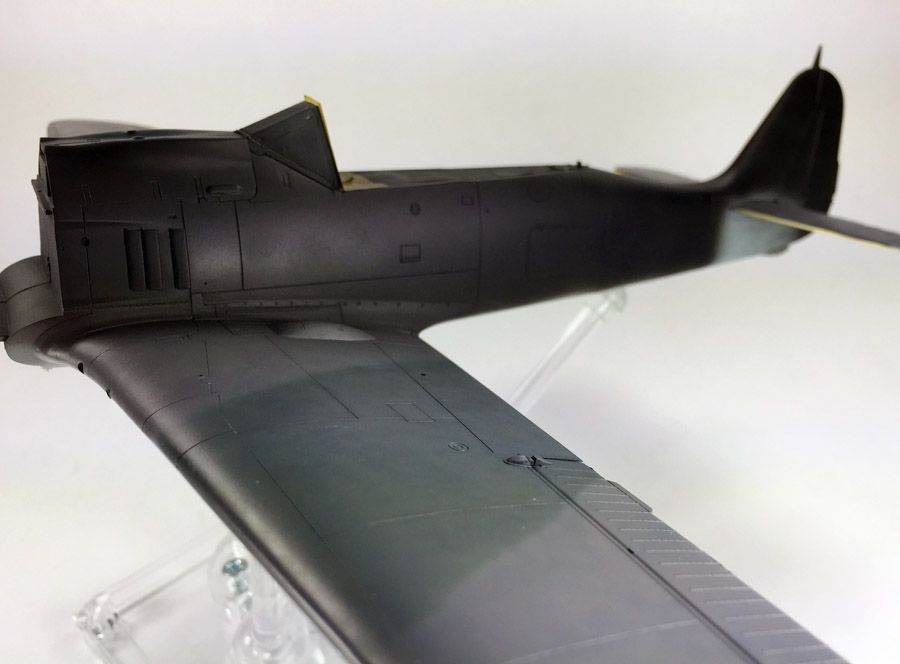 Repaint black base. 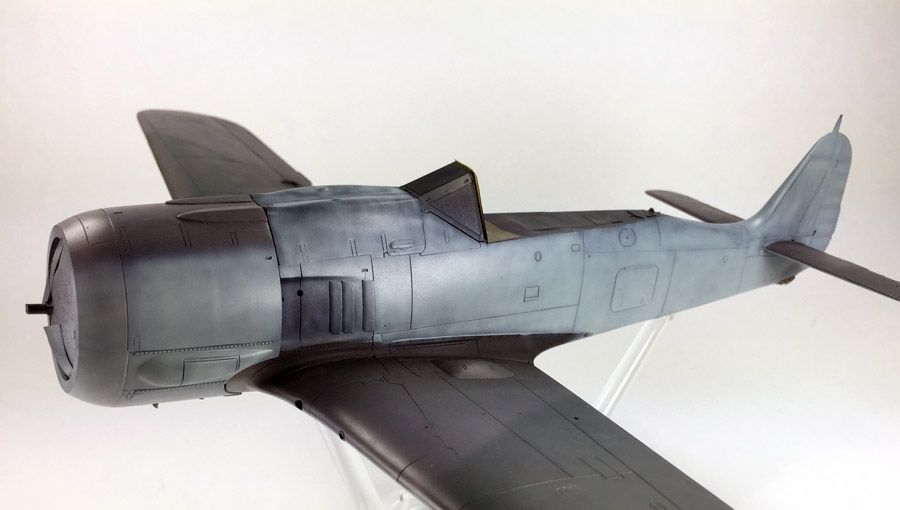 New application of RLM 76 REPAINT COMPLETE Following some coaching I thinned down Mr. Color RLM 74/75 4:1 at 18psi yielded much better results. Each mottle required several passes. Thank you Jim Hatch. Apologizes for the crummy iPhone pics.  This is the what I am trying to achieve. Added some mottle along the fuselage and cowling as the photos of actual plane showed more mottle. 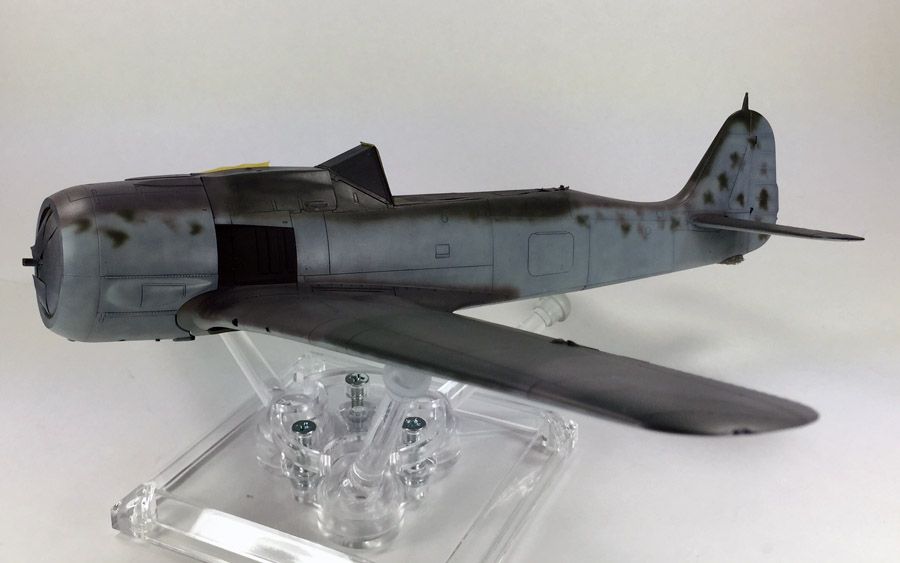 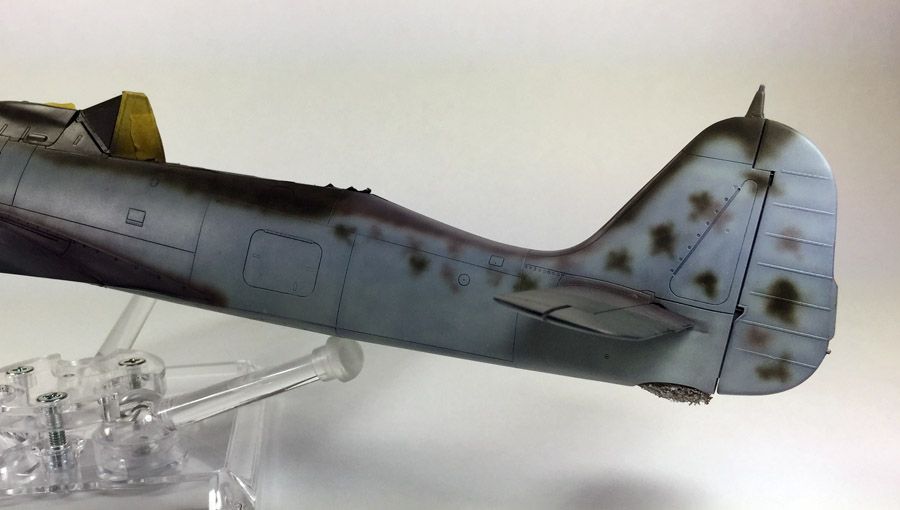 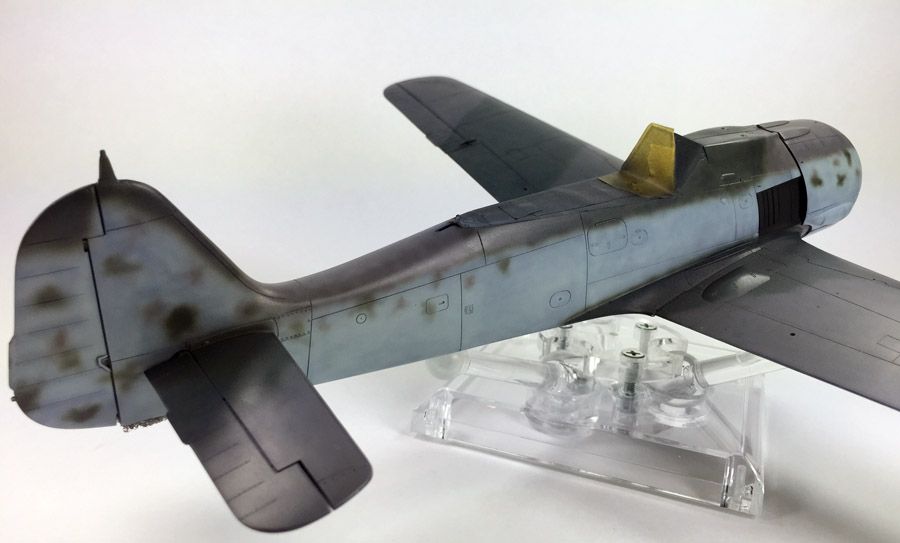 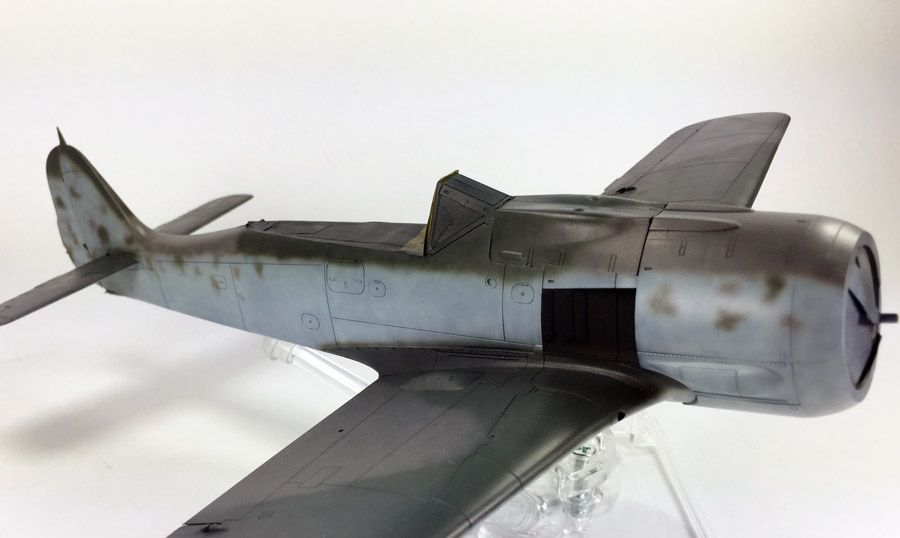 On deck is varnish, decals (HGW Wet Transfers), landing gear and drop tank. |
|
|
|
Post by deafpanzer on Mar 24, 2015 18:58:40 GMT -5
Like the mottle!!!
|
|
Rick
Full Member
  
Member since: March 2013
what to build, what to build . . . Ok THAT one!
Posts: 854 
|
Post by Rick on Mar 24, 2015 23:02:42 GMT -5
Man you are really "flying" thru this one. Office and the paintwerks on the 190 look great. Gonna have to check in more often or I'll have missed the whole build!
Rick
|
|
BezoulaBuilds
Full Member
  
Member since: July 2013
Posts: 136 
|
Post by BezoulaBuilds on Mar 26, 2015 15:29:53 GMT -5
600L DROP TANK READY 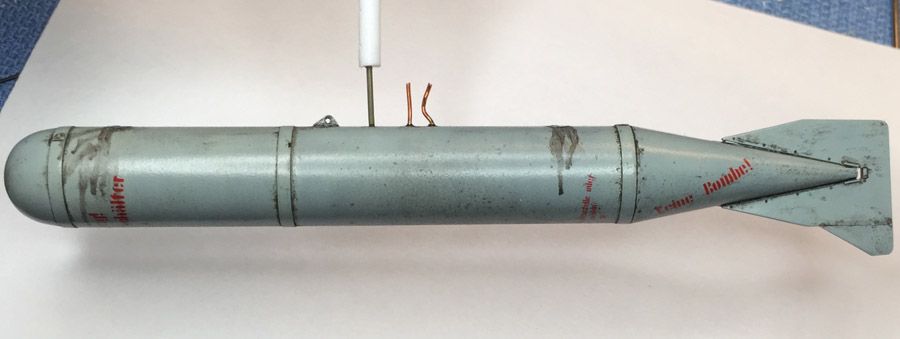 Mount bracket and fuel lines added. Some Flory's and MiG details complete. A final coat of Semmi-Matt to seal everything up. PROP WORK 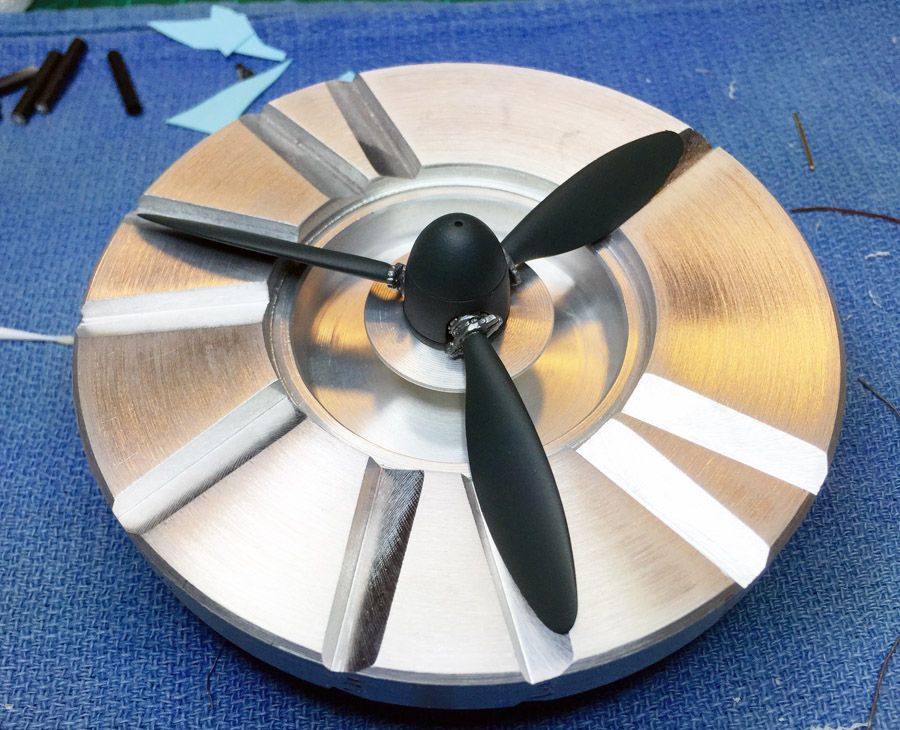 Using EagleParts 46-32 - Fw190A Spinner, prop blades w/external weights I painted then aligned the props to the prop boss with the help of UMM's PropMaster propeller jig. DECALS & WEATHERING 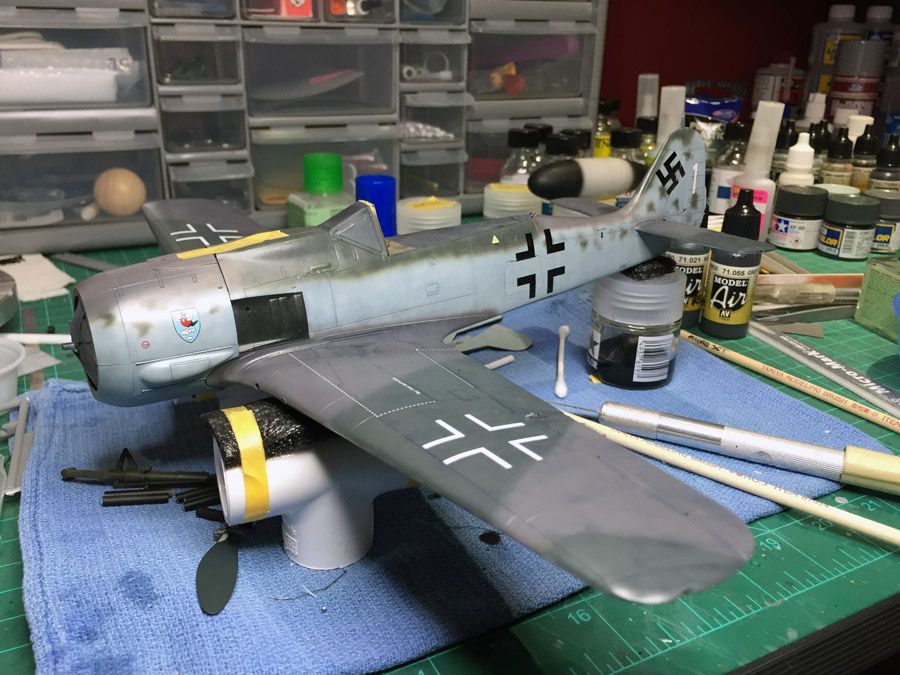 Decals on ready for gloss varnish to begin weathering. 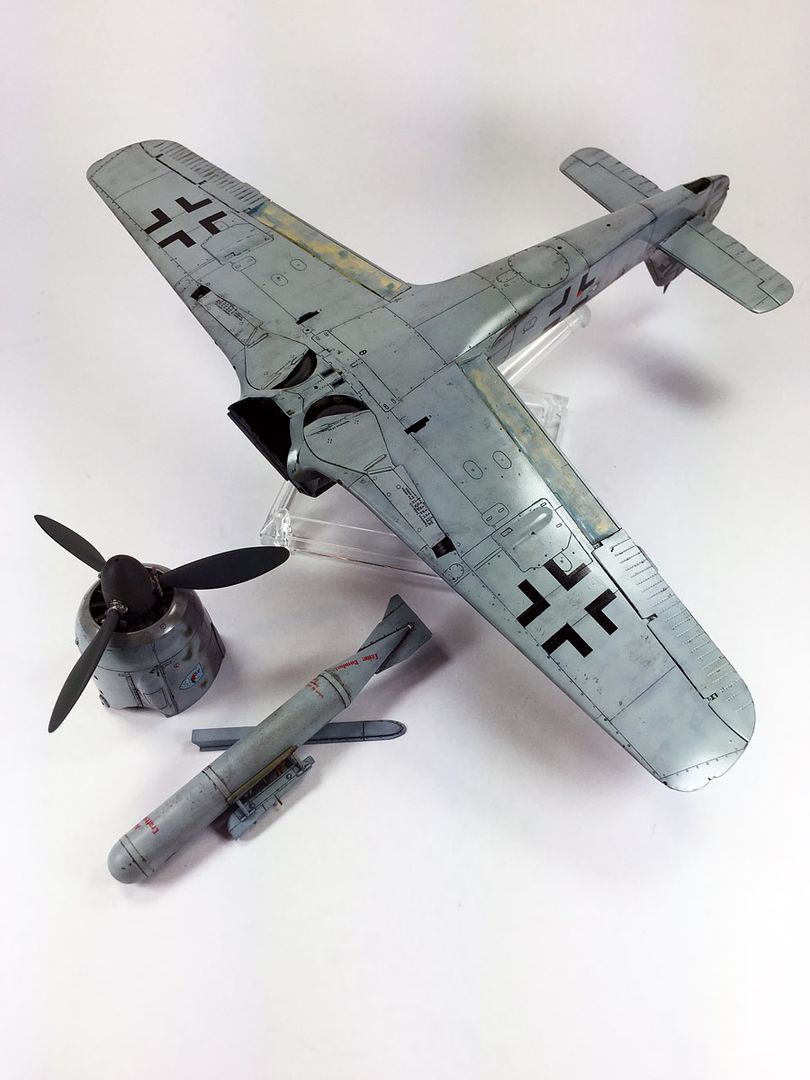 After decals a gloss varnish seals everything up in preparation for Flory's Wash. OIL SPILL 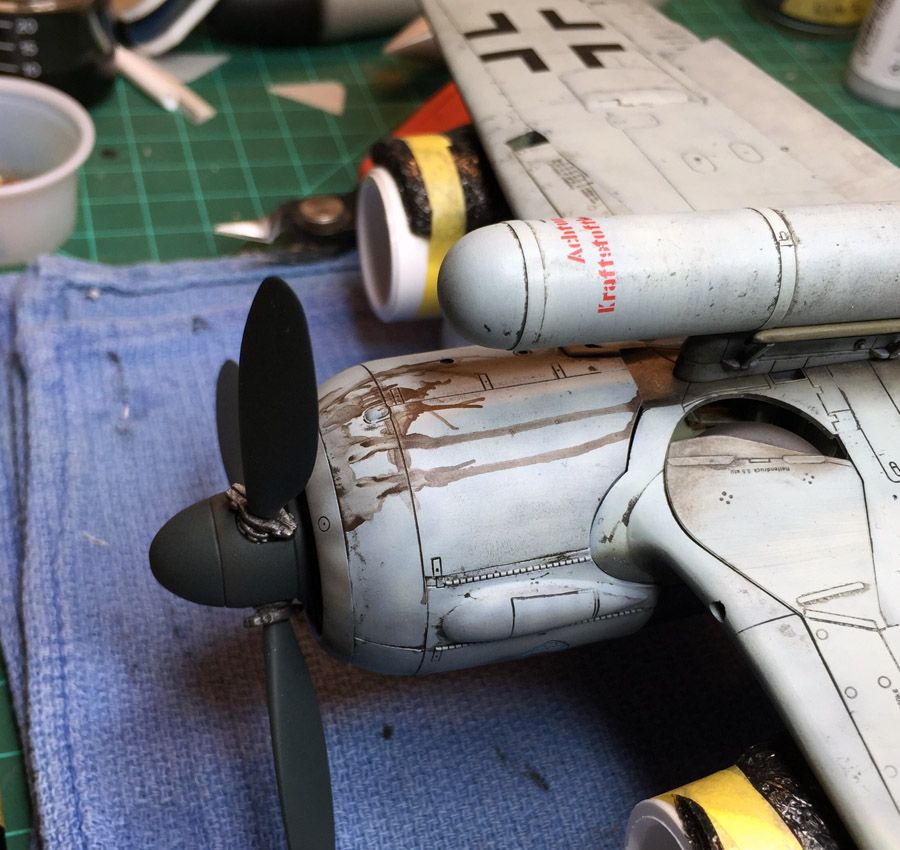 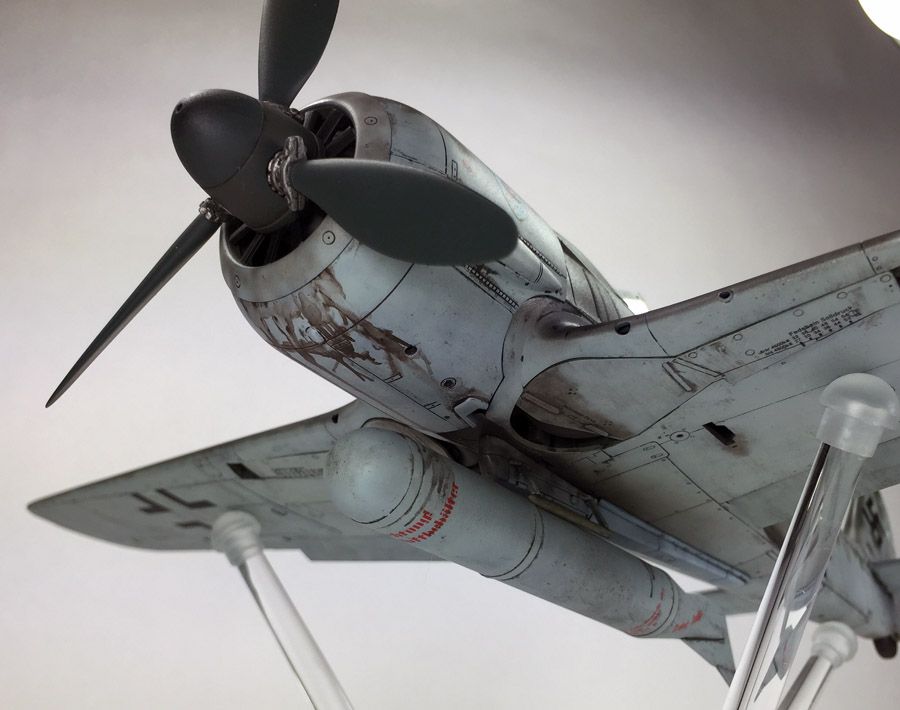 Added an oil spill with MiG wash the mounted the 600l drop tank. Exhaust stains have already been added. 6./KG200 UNIT BADGE AND EXHAUST DETAIL 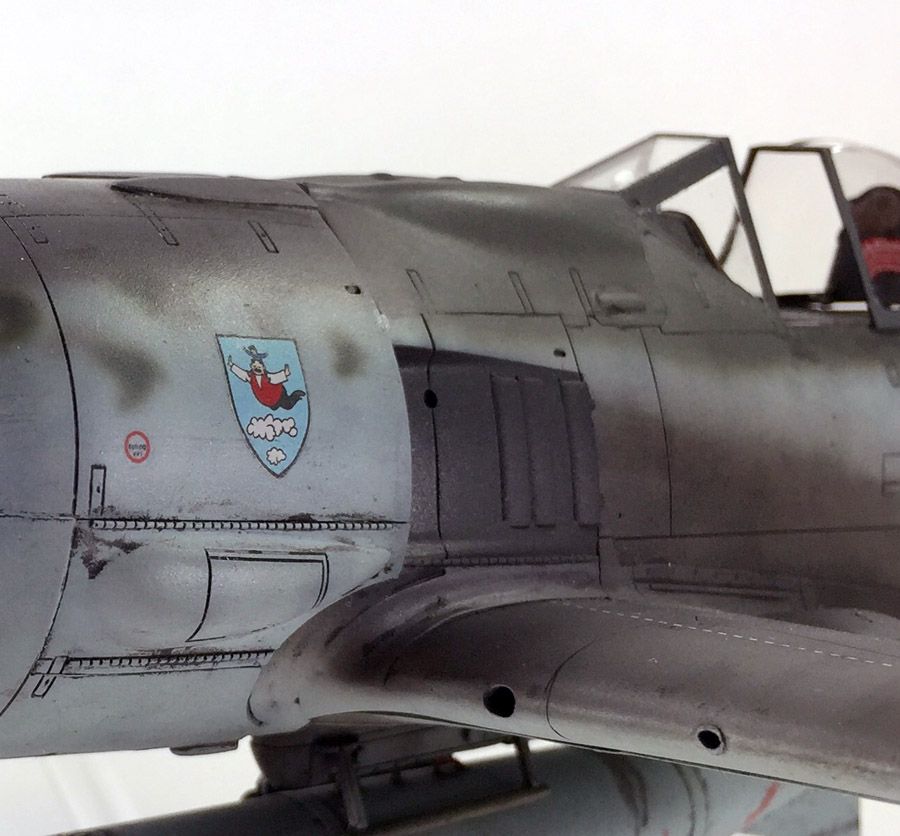 6./KG200 Mistel unit badge is a custom decal BMW801 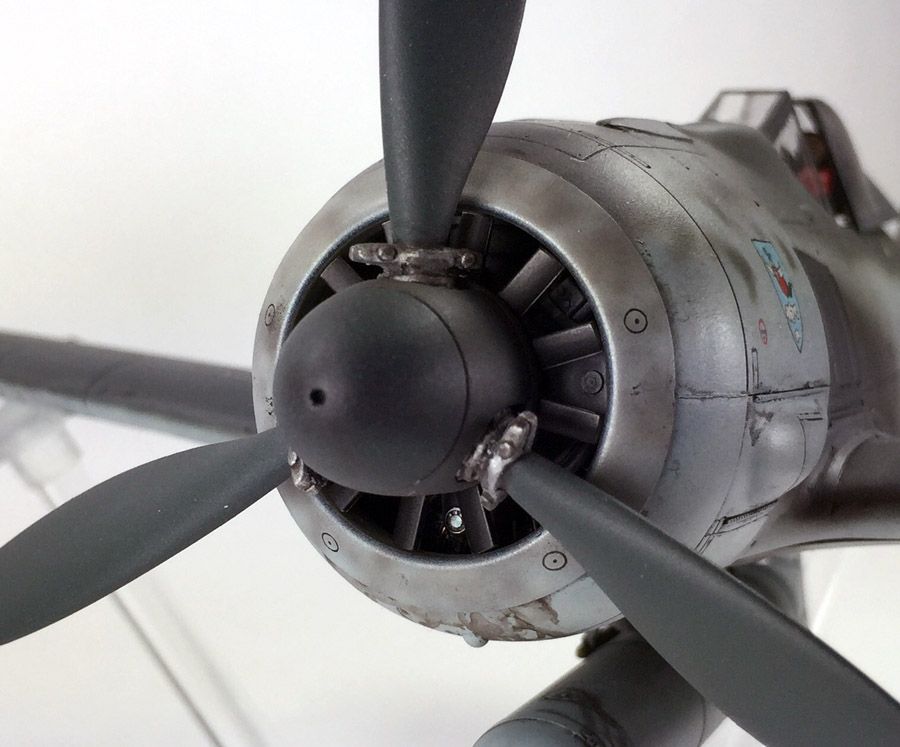 Ignition wires barely visible. At least I will know they are there. |
|
|
|
Post by deafpanzer on Mar 26, 2015 18:48:07 GMT -5
Loved the last photos... it is really looking good!
|
|
george
Full Member
  
Member since: February 2014
Posts: 278 
|
Post by george on Mar 26, 2015 18:51:07 GMT -5
Outstanding!
|
|
S e r z h--Rest In Peace
Full Member
  
Member since: November 2014
RIP- December 2023
Posts: 650 
|
Post by S e r z h--Rest In Peace on Mar 27, 2015 11:47:09 GMT -5
Nice work! Nice to look at the process and the result.
|
|
|
|
Post by wbill76 on Mar 27, 2015 15:18:26 GMT -5
Whoever came up with that unit badge had a certain sense of humor!  Nice progress on this one. |
|
BezoulaBuilds
Full Member
  
Member since: July 2013
Posts: 136 
|
Post by BezoulaBuilds on Mar 28, 2015 3:38:51 GMT -5
Loved the last photos... it is really looking good! Thanks DP. |
|
BezoulaBuilds
Full Member
  
Member since: July 2013
Posts: 136 
|
Post by BezoulaBuilds on Mar 28, 2015 3:39:47 GMT -5
Nice work! Nice to look at the process and the result. Thanks Serzh. |
|
BezoulaBuilds
Full Member
  
Member since: July 2013
Posts: 136 
|
Post by BezoulaBuilds on Mar 28, 2015 4:24:31 GMT -5
Whoever came up with that unit badge had a certain sense of humor!  Nice progress on this one. Thanks Bill. An interesting history on the cartoon characters "Vater und Sohn" and the creator artist Erich Ohser using pseudonym E.O. Plauen. These characters (Father and Son) were published as regular strips in a Berlin magazine in the mid to late 30's. The Mistel program became known as "Vater un Sohn". Therefore the "Vater und Sohn" Staffelwappen was adopted by 6./KG 200. 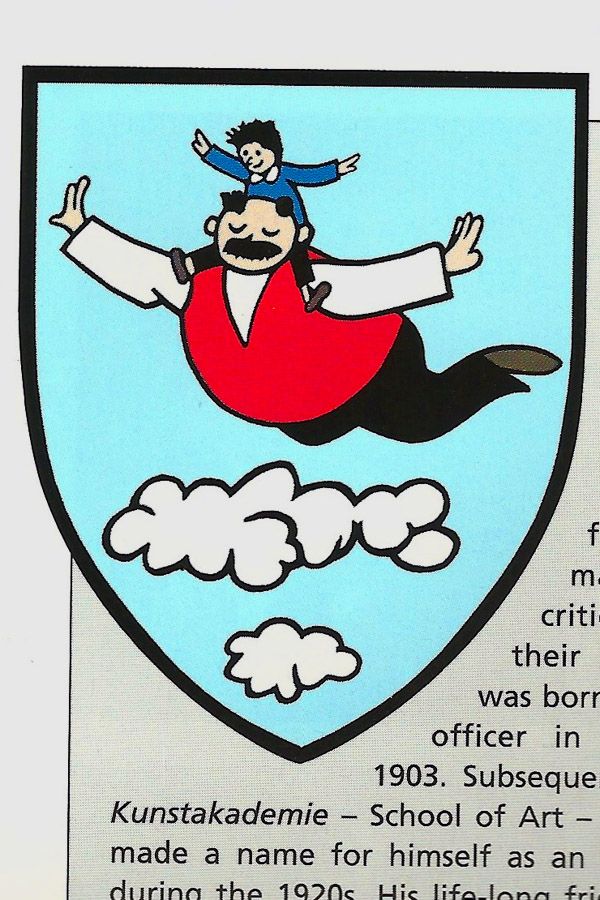 Image credit: Mistel, German Composite Aircraft and Operations 1942-1945 - Robert Forsyth Image credit: Mistel, German Composite Aircraft and Operations 1942-1945 - Robert ForsythIronically the artist began to criticize the Nazi party with defeatist comments and was arrested by Gestapo in 1944. Goebbels personally handled this case. His fate obvious, Ohser committed suicide the day before his trial. The Vater und Sohn strips appear today in several German publications. For me, one of the many joys of this hobby is the immersion of the unique history of each subject. 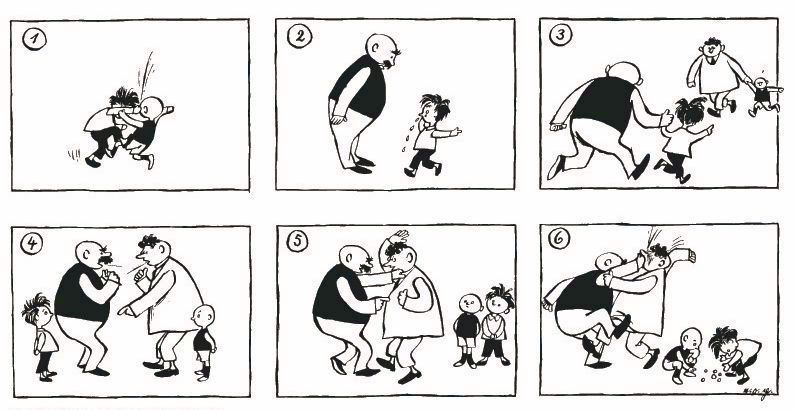 Image credit: Google Image credit: Google
|
|
|
|
Post by Leon on Mar 28, 2015 4:33:13 GMT -5
That is some awesome looking work!
|
|
BezoulaBuilds
Full Member
  
Member since: July 2013
Posts: 136 
|
Post by BezoulaBuilds on Mar 28, 2015 4:40:46 GMT -5
Alclad Semi-Matte varnish applied overall. Left harness, aerial, MG's, antennas, pitot and nav lights need to be added then finished 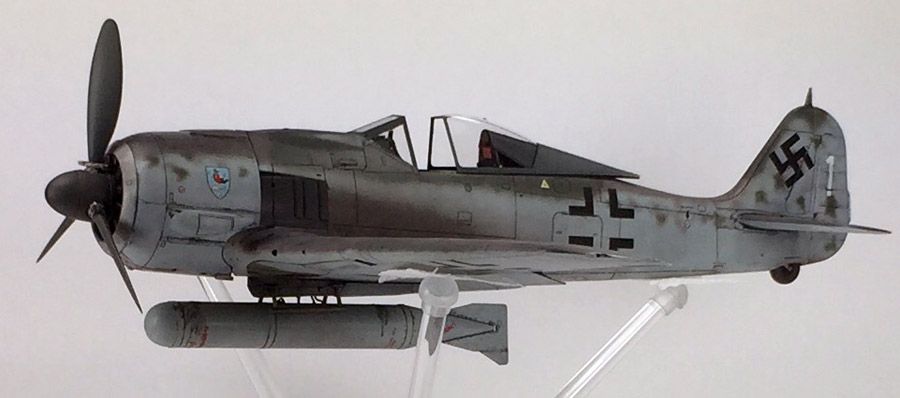 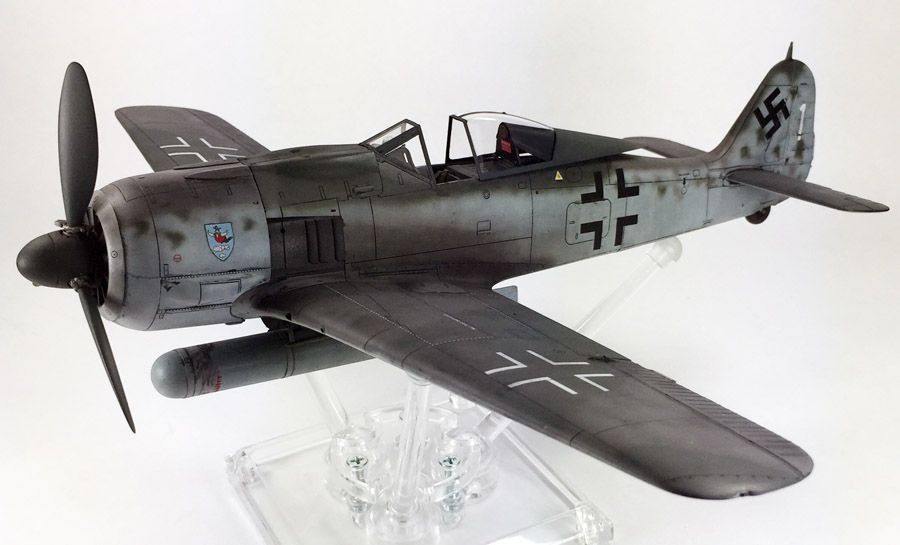 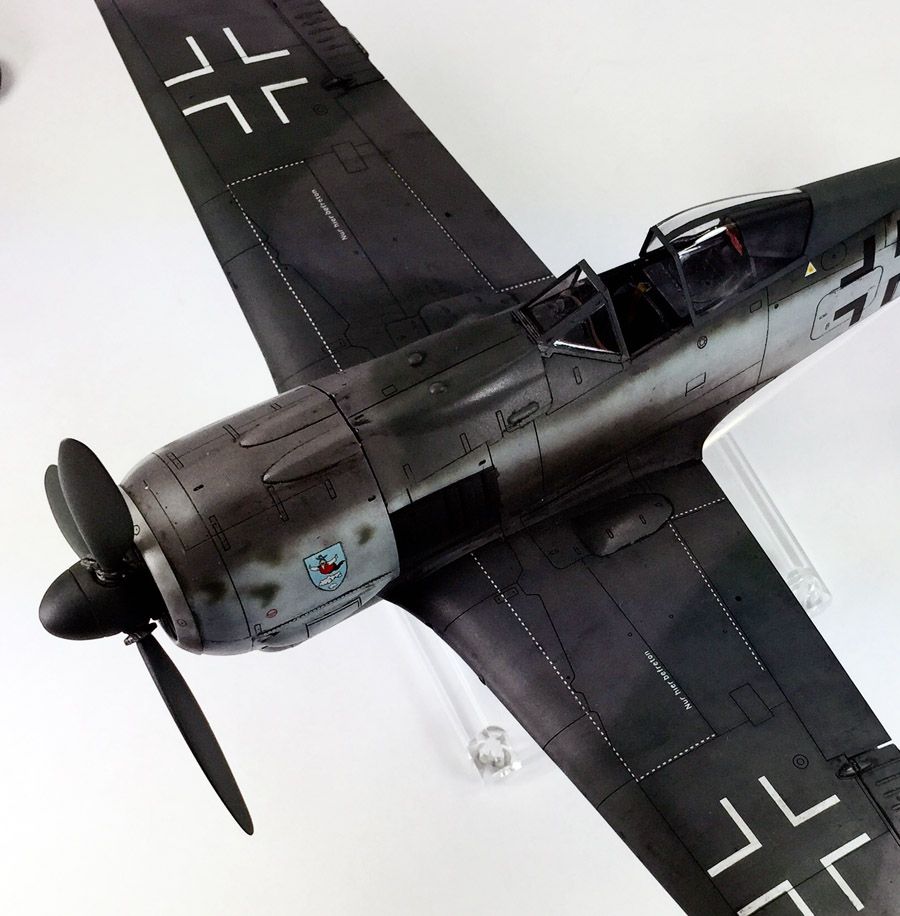 Non iPhone pics to come with finished build...soon. |
|
BezoulaBuilds
Full Member
  
Member since: July 2013
Posts: 136 
|
Post by BezoulaBuilds on Mar 28, 2015 4:41:19 GMT -5
That is some awesome looking work! Thanks Leon, almost finsihed... |
|
Marcel du Long
Full Member
  
Member since: August 2013
Posts: 331
Aug 22, 2013 13:25:03 GMT -5
Aug 22, 2013 13:25:03 GMT -5
|
Post by Marcel du Long on Mar 28, 2015 7:45:32 GMT -5
Looking very nice!
Sweet pics as wel.
Perhaps adding some lightwashes in dark spots?
Could be nice to enhance dark spots.
Good job anyway.
Marcel.
|
|
|
|
Post by wbill76 on Mar 29, 2015 12:00:25 GMT -5
It's always neat to see/hear about historical connections like that...cartoons played such a huge cultural role in the years up to, during, and even after WW2. Cool!
|
|
BezoulaBuilds
Full Member
  
Member since: July 2013
Posts: 136 
|
Post by BezoulaBuilds on Apr 10, 2015 15:52:30 GMT -5
Looking very nice! Sweet pics as wel. Perhaps adding some lightwashes in dark spots? Could be nice to enhance dark spots. Good job anyway. Marcel. Thanks for the coaching Marcel. For those dark spots think: crummy photography.  I enjoyed mining your site, really nice work. |
|
BezoulaBuilds
Full Member
  
Member since: July 2013
Posts: 136 
|
Post by BezoulaBuilds on Apr 10, 2015 16:47:42 GMT -5
MISTLE 190 DISPLAY STAND Mk.I (M190DS Mk.I) The problem arose when I was thinking how to display when not mounted on my Ju88. I decided to scratch build a display stand, call it a prototype. My Plastistruct inventory took a hit and I put together a base with square tubes, half circle rods and rods. The mounts were carefully copied after the AIMS supplied mounts which will be used on the completed Ju88. Lots of measuring, test fitting. The 95% final result yielded several things: A display stand for the Mistel 2 FW190A8 A prototype for the struts on the Ju88 I learned and will apply several short cuts and important construction guidelines when I begin M190DS Mk.II I need to add the strut for the tail support. I used some of my son's Lego pieces for the photo shoot. When complete, I will prime and paint. Colors will be RLM76 and RLM 75. 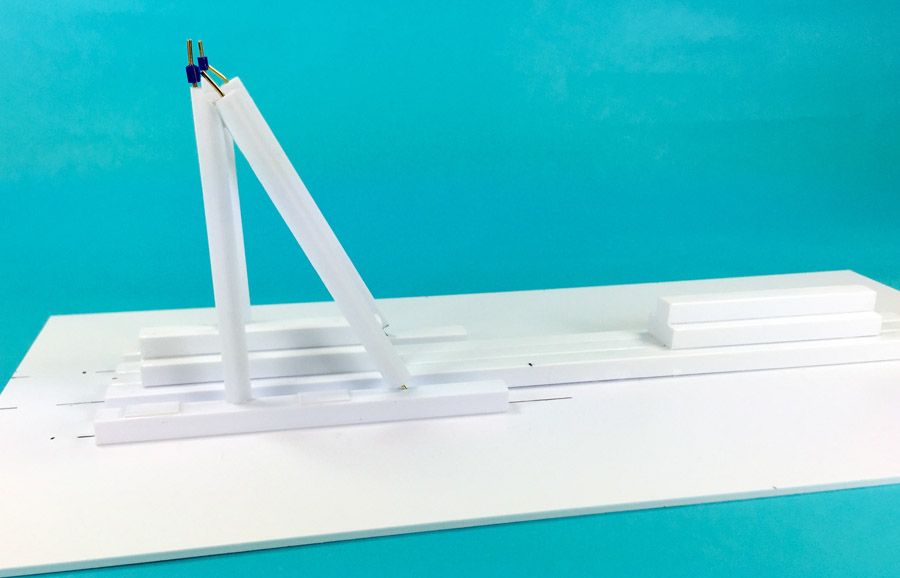 I taped the fuselage of Revell's Ju88 together in order to get precise measures for the main struts, rear strut and exact location. What I build here will be duplicated in scope and scale when I build the struts on the Ju88. Brass wire was drilled in both ends of each main strut. I may take a different approach on the M190DS Mk.II build. 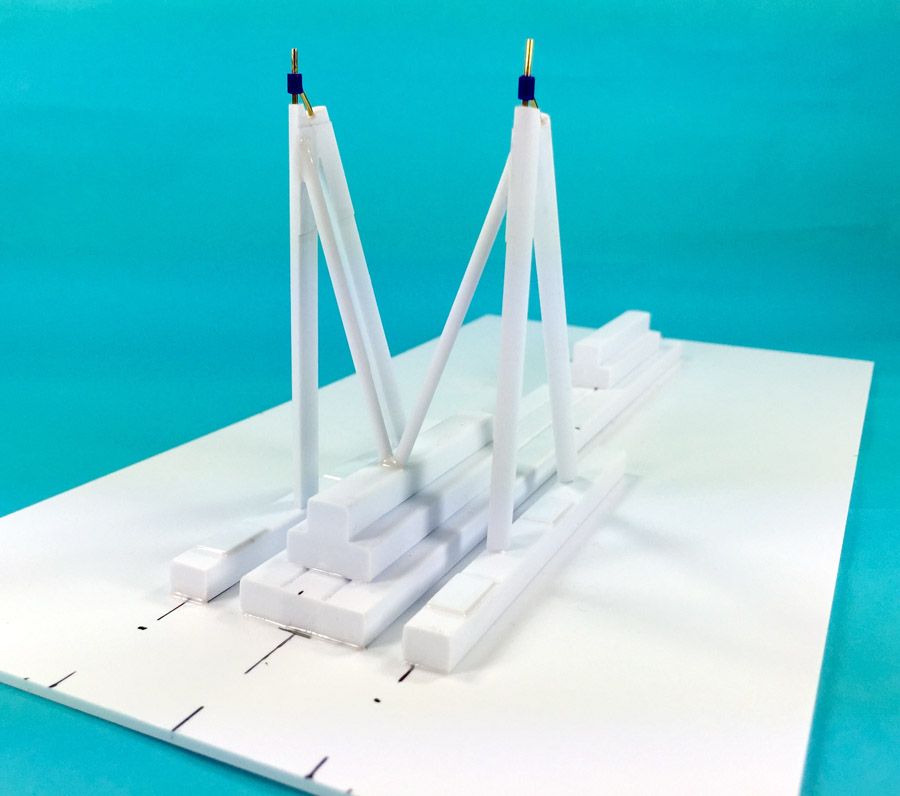 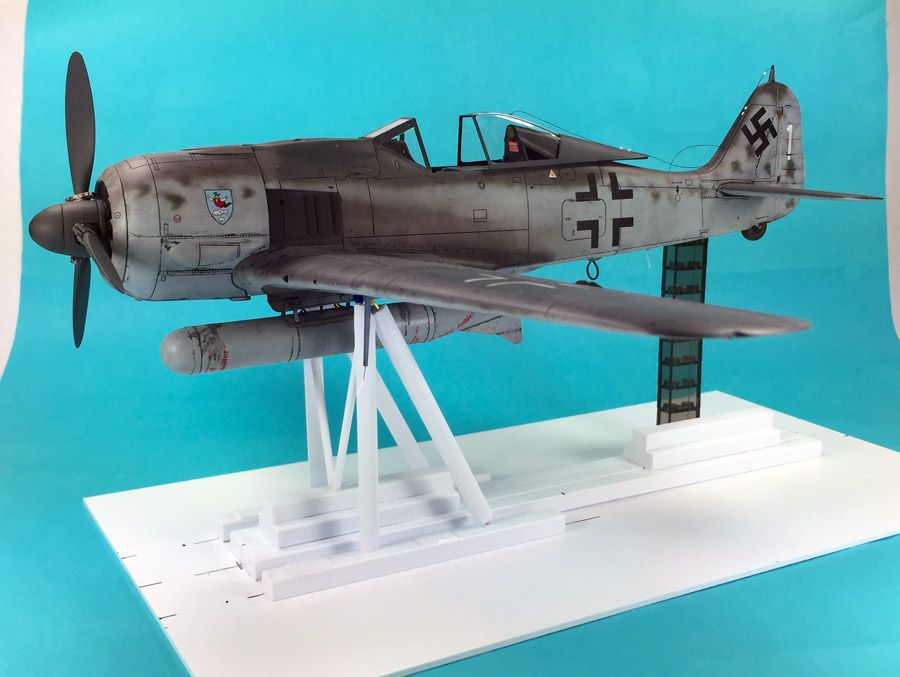 The FW190 is 99.9% done. Some minor cleaning and finishing yet to do. 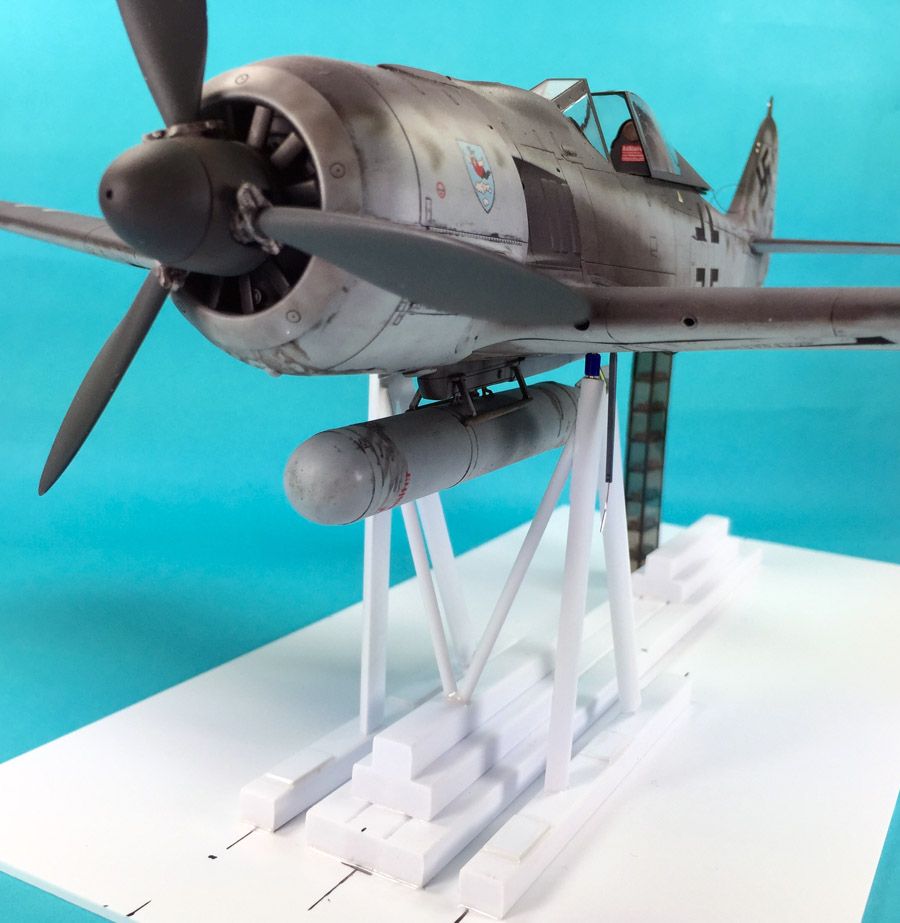 It's pretty crowded and the fit is tight. |
|
|
|
Post by TRM on Apr 10, 2015 20:12:18 GMT -5
Some great stuff here Rick!! Looking really sharp!! Keep up the good work!!
|
|
|
|
Post by wing_nut on Apr 10, 2015 20:26:04 GMT -5
Oh yeah that's sweet looking.
|
|
|
|
Post by dupes on Apr 10, 2015 20:27:48 GMT -5
Great work man! I really dig the stand you scratched up...I want to make something like that to use on in-progress builds.
|
|
Rick
Full Member
  
Member since: March 2013
what to build, what to build . . . Ok THAT one!
Posts: 854 
|
Post by Rick on Apr 10, 2015 21:53:32 GMT -5
Wow! Amazing detail and paint.
Rick
|
|
sabre
Full Member
  
Member since: September 2013
Posts: 414 
|
Post by sabre on Apr 11, 2015 0:51:55 GMT -5
 What a jaw dropping finish on the Butcher Bird there Bezoula, it looks great. I see those Propeller jigs are on sale at UMM-USA in case anyone is interested. |
|
BezoulaBuilds
Full Member
  
Member since: July 2013
Posts: 136 
|
Post by BezoulaBuilds on Apr 15, 2015 14:10:36 GMT -5
Thanks for the kudos guys. DISPLAY STAND READY TO PAINT Easter Break and Spring Break chaos out of the way. Finally some bench time. The stand build is now complete. Off to the paint shop tonight. A few FW190 preview shots included. 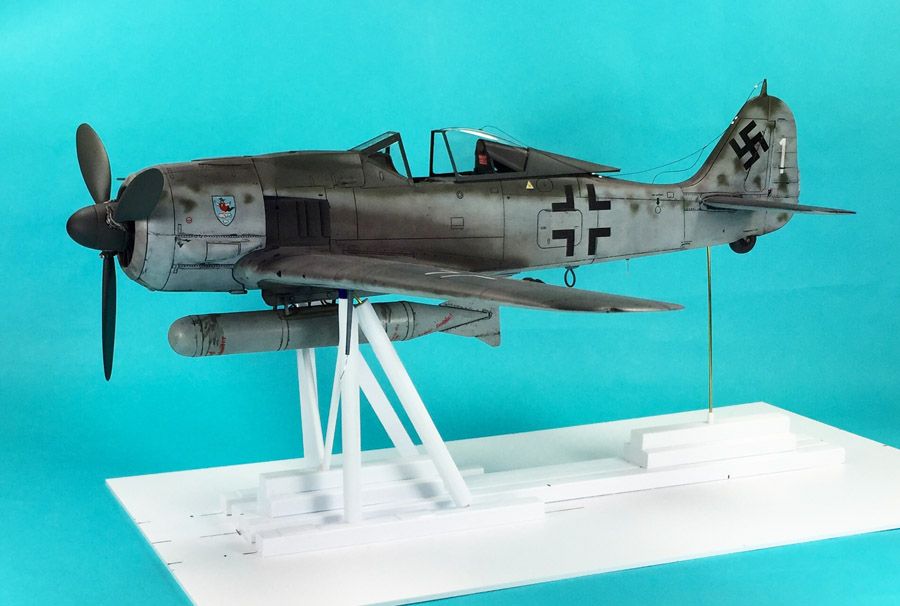 Will scratch build a ladder which will rest on leading port wing edge. 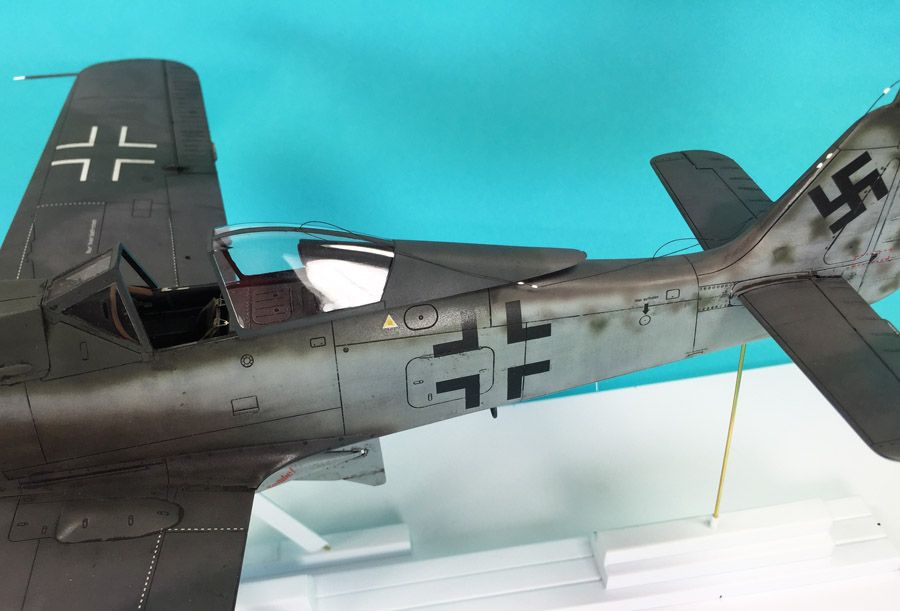 Antenna wire is EZ line with white glue blobs for resistors, then painted white. This weighs down the EZ Line just right. 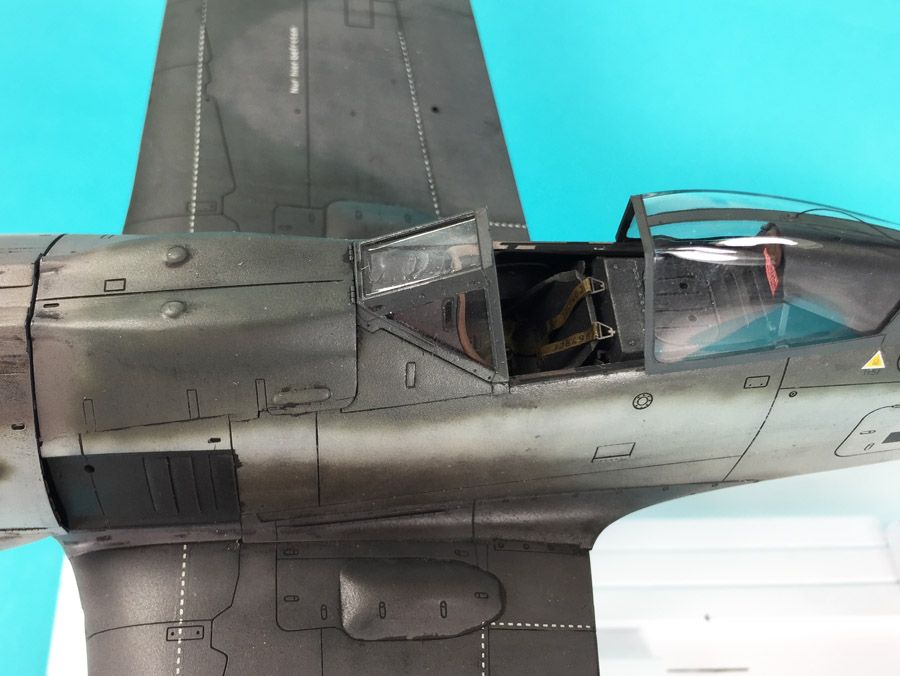 Not sure if I am going to sling the port harness over the cockpit edge. |
|
|
|
Post by deafpanzer on Apr 16, 2015 19:28:09 GMT -5
It is really looking great... I look forward to see it done!
|
|
|
|
Post by wing_nut on Apr 19, 2015 18:28:04 GMT -5
I think I've fallen in love
|
|