Deleted
Member since: January 1970
Posts: 0
Nov 25, 2024 17:52:58 GMT -5
Nov 25, 2024 17:52:58 GMT -5
|
Post by Deleted on Jul 29, 2015 10:39:29 GMT -5
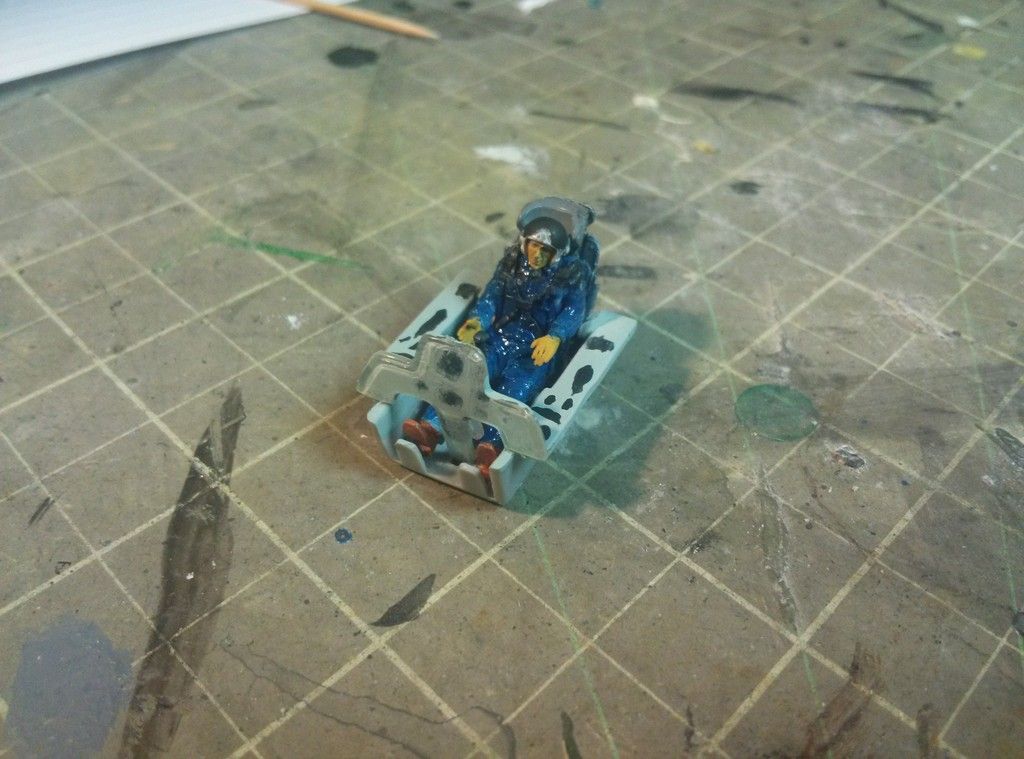
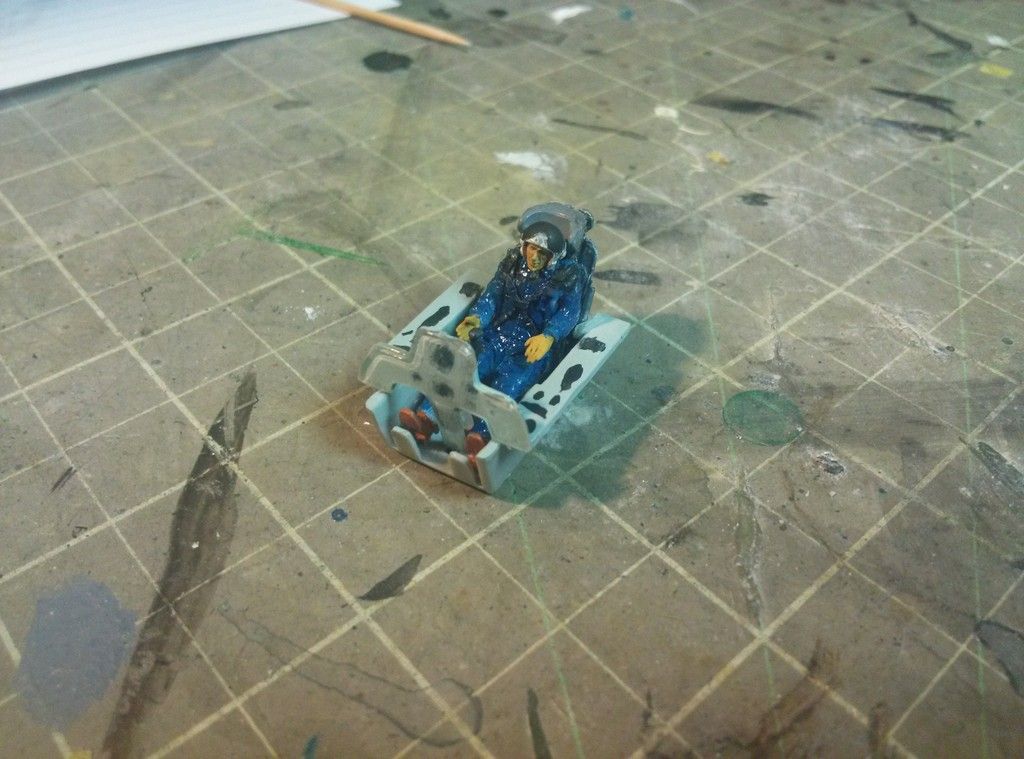
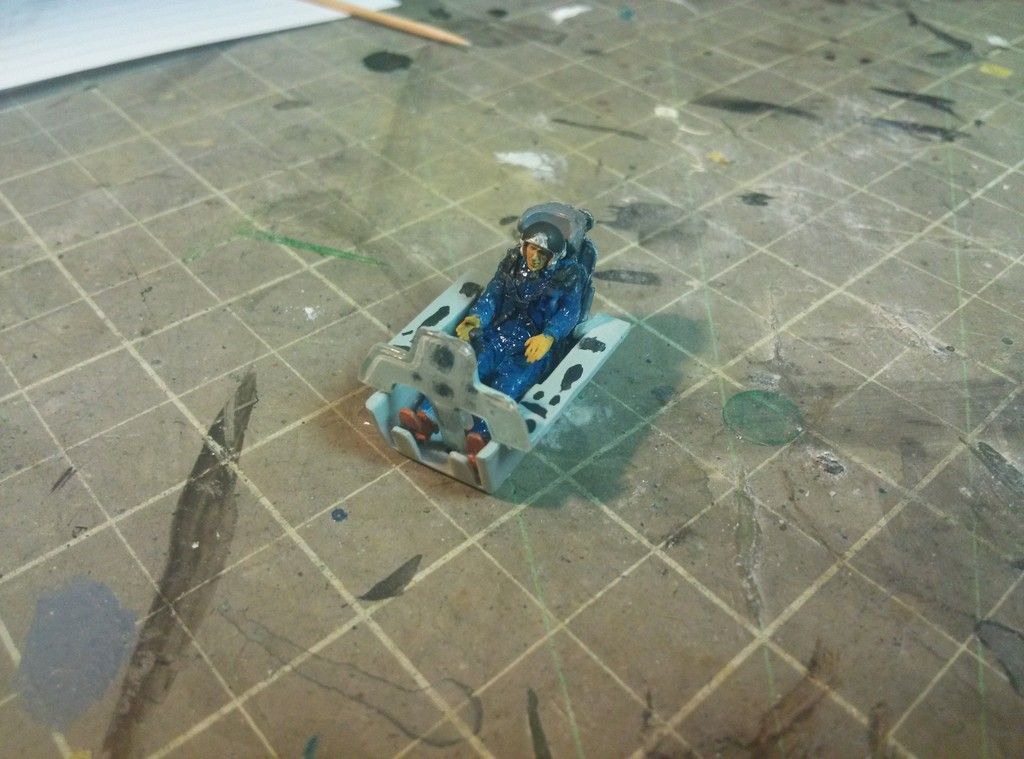
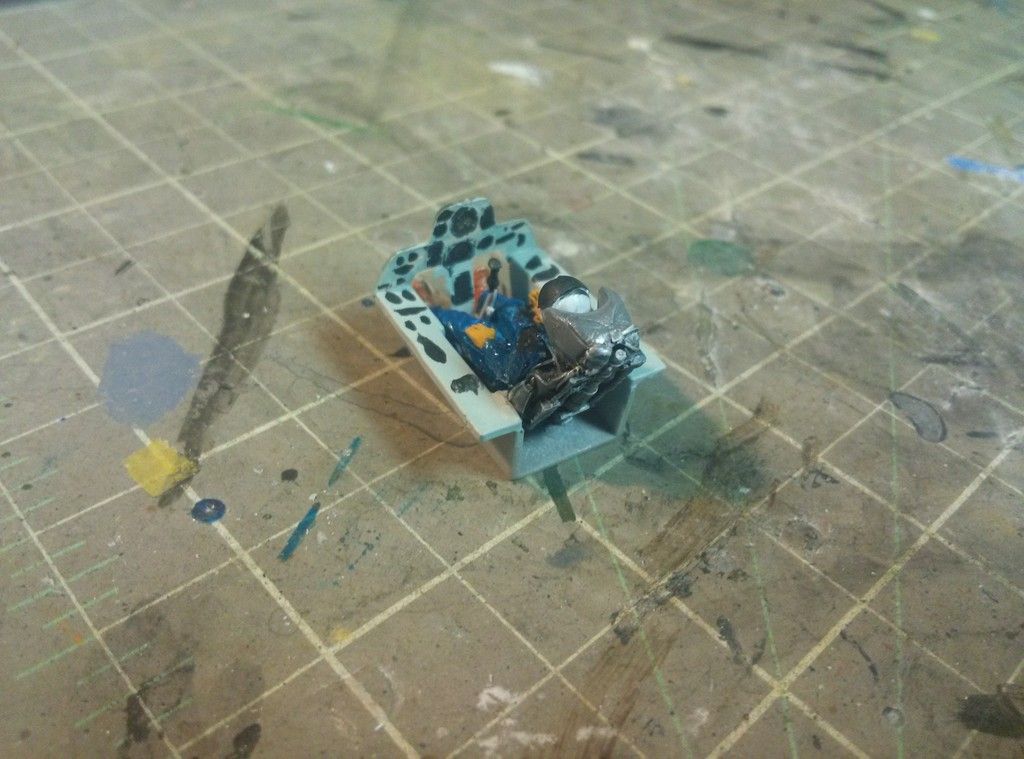
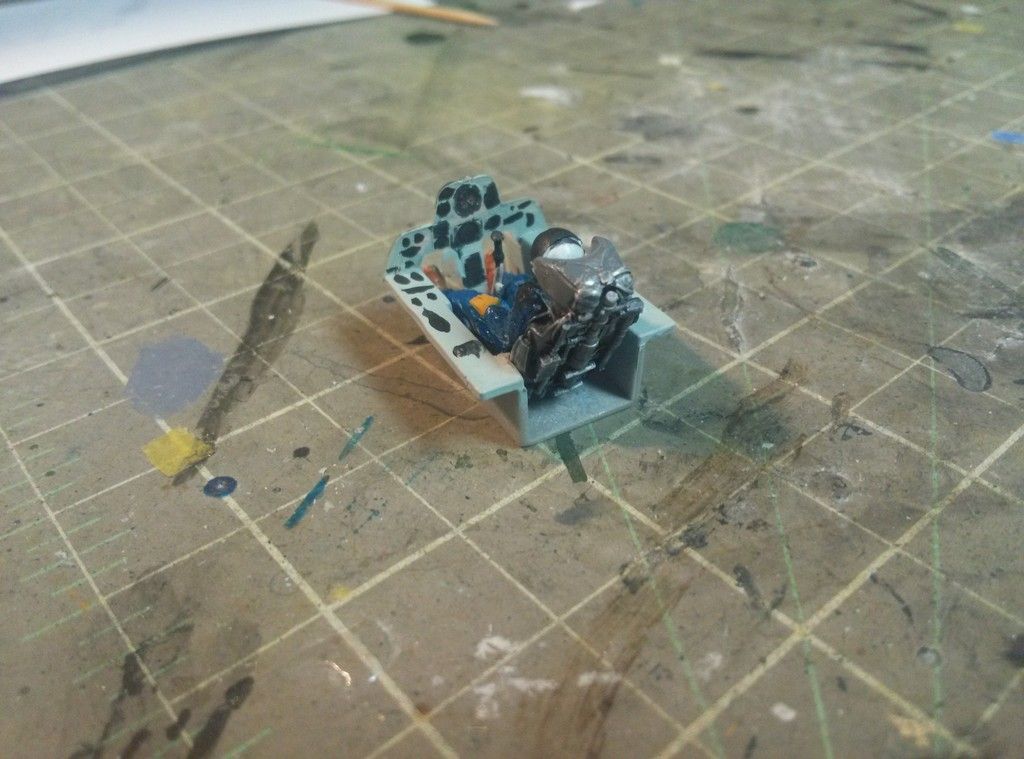
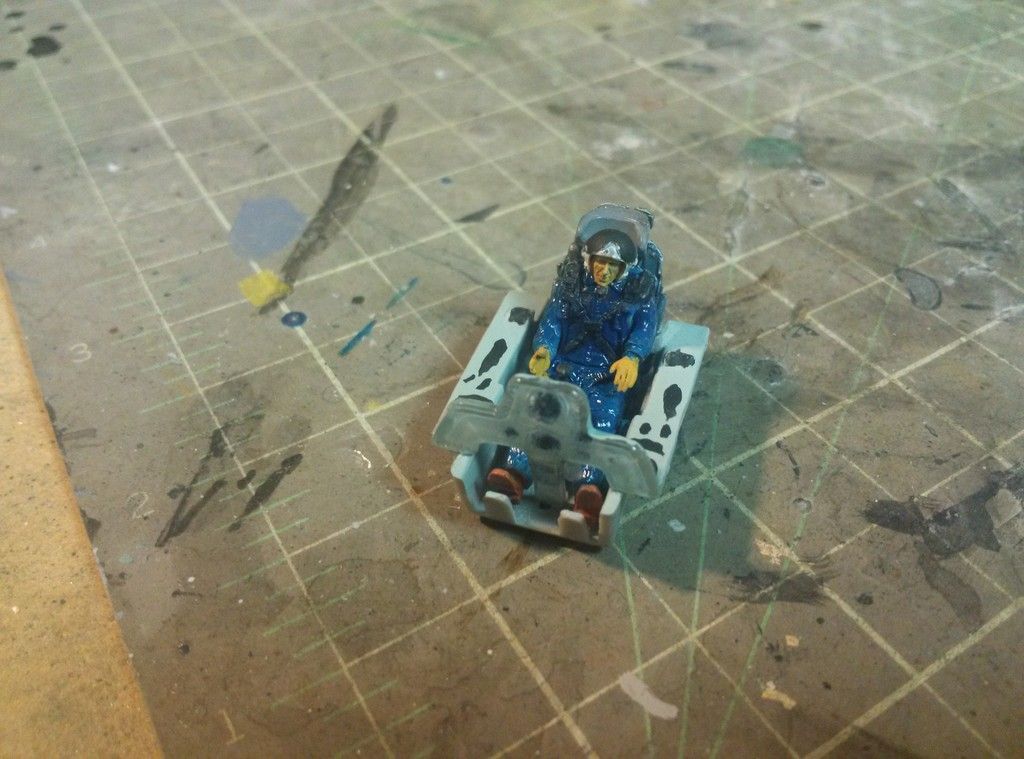
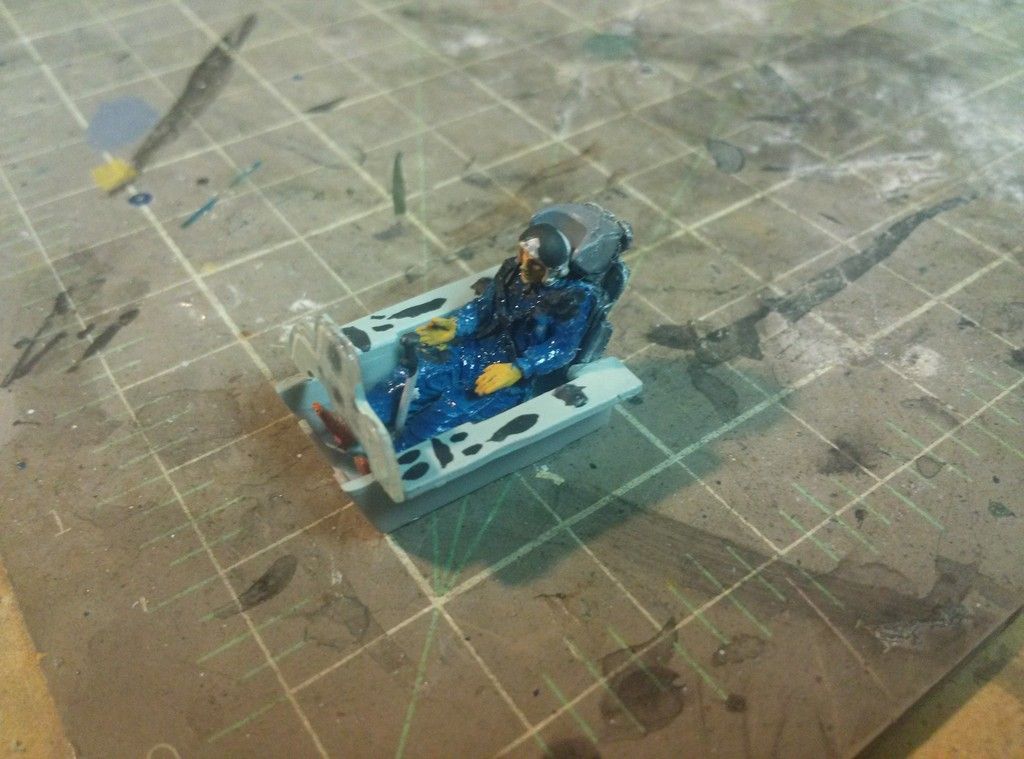
So I am building this interesting jet as part of a work contest. I have to complete it by end of September. So I started by getting an aftermarket pilot, which has a seat for a Mig-21PFM Minor issue, but so far it is coming along. Plan is to build it NMF, yet uncertain as to which tail fin to go with and what number to use. The kit comes with he Bort(I belive this is correct) number in Yellow, but I haven't seen any Soviet Mig-21PF's in NMF with Yellow numbers. Enough talk, enjoy the pictures! Since the cockpit is going to be closed and displayed in flight, I might go back and redo the side consoles, but I doubt it will be very noticeable once closed up.
|
|
Deleted
Member since: January 1970
Posts: 0
Nov 25, 2024 17:52:58 GMT -5
Nov 25, 2024 17:52:58 GMT -5
|
Post by Deleted on Aug 3, 2015 14:29:31 GMT -5
|
|
|
|
Post by wbill76 on Aug 3, 2015 15:02:38 GMT -5
Not a whole lot to the kit for sure...should make it a quick build if nothing else.  |
|
Deleted
Member since: January 1970
Posts: 0
Nov 25, 2024 17:52:58 GMT -5
Nov 25, 2024 17:52:58 GMT -5
|
Post by Deleted on Aug 3, 2015 15:53:23 GMT -5
I swear I am going to spend more time spackling putty to the gaps than I am building it.  |
|
Deleted
Member since: January 1970
Posts: 0
Nov 25, 2024 17:52:58 GMT -5
Nov 25, 2024 17:52:58 GMT -5
|
Post by Deleted on Aug 4, 2015 15:47:05 GMT -5
Since I've seen these images of a PF with a wide chord tail, which looks better of the two? narrow or wide? Mig-21 Osprey book 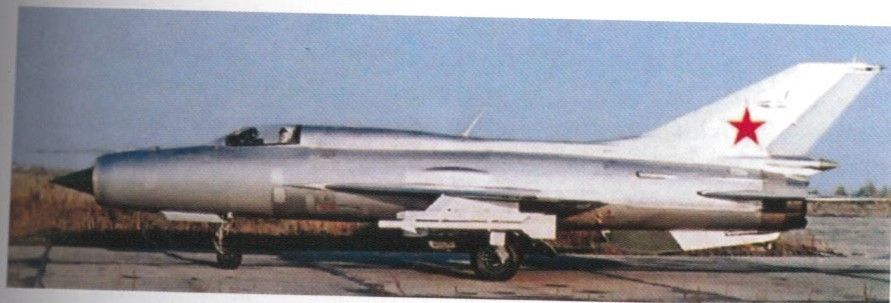 Mig-21 Walkaround Part 1, Squadron Signal. 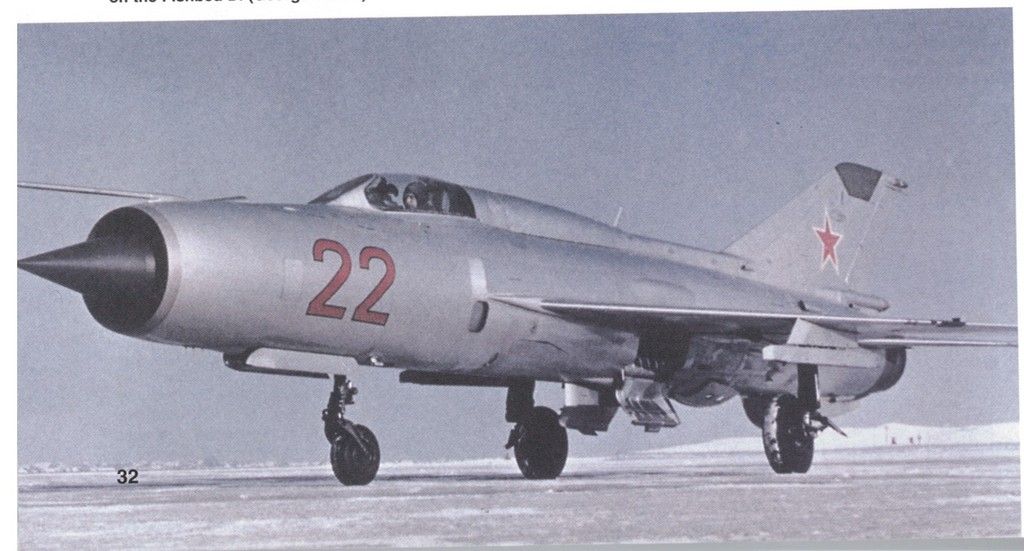 |
|
|
|
Post by tigrazor on Aug 5, 2015 7:16:40 GMT -5
A MiG 21 is always looking good - no matter which version.  |
|
|
|
Post by wbill76 on Aug 6, 2015 18:28:25 GMT -5
Man that's a tough choice, I'm with Lucas...either one would look good!
|
|
|
|
Post by dupes on Aug 6, 2015 18:30:39 GMT -5
Strangely enough, an ex-Polish MiG-21 just appeared a little ways down the street from me in the parking lot of one of the more serious gun shops. Talk about serious ordinance!
|
|
|
|
Post by tigrazor on Aug 7, 2015 5:19:18 GMT -5
Pictures or it didnt happen!  |
|
Deleted
Member since: January 1970
Posts: 0
Nov 25, 2024 17:52:58 GMT -5
Nov 25, 2024 17:52:58 GMT -5
|
Post by Deleted on Aug 7, 2015 8:16:05 GMT -5
|
|
|
|
Post by deafpanzer on Aug 7, 2015 13:46:24 GMT -5
Your Mig looking good!!! Looking forward to see updates...
|
|
Deleted
Member since: January 1970
Posts: 0
Nov 25, 2024 17:52:58 GMT -5
Nov 25, 2024 17:52:58 GMT -5
|
Post by Deleted on Aug 13, 2015 7:35:36 GMT -5
|
|
|
|
Post by wbill76 on Aug 14, 2015 15:45:34 GMT -5
Looks like a lot of putty practice on this airframe! If you hammer on it hard enough you can beat it into submission.  |
|
Deleted
Member since: January 1970
Posts: 0
Nov 25, 2024 17:52:58 GMT -5
Nov 25, 2024 17:52:58 GMT -5
|
Post by Deleted on Aug 19, 2015 14:52:10 GMT -5
Update but no pictures for today. Almost done with the sanding of the putty and evening out the seams. not to bad, just amazed at how small the plane is. using guitar wire as support for the missiles since they have different attachment points than what came with the kit supplied missiles.
Only big question is the type of paint to use for the NMF. Currently looking at using Airframe Aluminum and Aluminum for the colors. Thanks all for the help.
|
|
Deleted
Member since: January 1970
Posts: 0
Nov 25, 2024 17:52:58 GMT -5
Nov 25, 2024 17:52:58 GMT -5
|
Post by Deleted on Nov 2, 2015 12:12:38 GMT -5
|
|
|
|
Post by deafpanzer on Nov 4, 2015 9:28:01 GMT -5
Looking good!!!
|
|
Deleted
Member since: January 1970
Posts: 0
Nov 25, 2024 17:52:58 GMT -5
Nov 25, 2024 17:52:58 GMT -5
|
Post by Deleted on Nov 10, 2015 9:24:59 GMT -5
Did some sanding down on where the primer puddled on the wings, fixed up canopy which I did not catch was flush with the body. So I will be prepping soon for the NMF. Planning to use Airframe Aluminum for the main body and Aluminum for certain panels like the leading edge. Trying to determine how best to handle the main boom (or is it a pitot tube) on the front of the aircraft. I will have to mask to do some parts on the nose. Just trying to determine the order of things. Hopefully some pictures by end of the week.
|
|
Deleted
Member since: January 1970
Posts: 0
Nov 25, 2024 17:52:58 GMT -5
Nov 25, 2024 17:52:58 GMT -5
|
Post by Deleted on Nov 19, 2015 8:32:46 GMT -5
|
|
|
|
Post by wing_nut on Nov 19, 2015 9:23:51 GMT -5
Looks good. What green did you use? I like it better than the one I used I think.
|
|
Deleted
Member since: January 1970
Posts: 0
Nov 25, 2024 17:52:58 GMT -5
Nov 25, 2024 17:52:58 GMT -5
|
Post by Deleted on Nov 19, 2015 9:30:27 GMT -5
Testor's Enamel Med. Green if I recall correctly. The small clear bottle. I am actually pretty happy with it, somewhat surprised by it. |
|
|
|
Post by wing_nut on Nov 19, 2015 15:08:21 GMT -5
Thanks, I think I might have that.
|
|
Deleted
Member since: January 1970
Posts: 0
Nov 25, 2024 17:52:58 GMT -5
Nov 25, 2024 17:52:58 GMT -5
|
Post by Deleted on Nov 19, 2015 15:42:44 GMT -5
I asked a question earlier on what color to use for the NMF. JimD helped me out since I did plan on going with Airframe Aluminum and Aluminum. he pointed out that airframe aluminum is too shiny. Was going to get a darker aluminum to use and then I remembered my wife would kill me if I buy anymore models and/or supplies right now. So I am going to painting it airframe aluminum and aluminum.  |
|
|
|
Post by wbill76 on Nov 20, 2015 12:55:53 GMT -5
It's a delicate time of year for the maintenance of domestic harmony, got to keep the peace with the better half for sure!  |
|
Deleted
Member since: January 1970
Posts: 0
Nov 25, 2024 17:52:58 GMT -5
Nov 25, 2024 17:52:58 GMT -5
|
Post by Deleted on Nov 20, 2015 13:24:18 GMT -5
...and she's a lawyer too. Haven't won an argument... ever!
On a work note, glued the pitot tube last night and sanded down some of the spots I didn't catch where the primer pooled. Hopefully will be spraying the black undercoat this weekend and the metallic next weekend. |
|
Deleted
Member since: January 1970
Posts: 0
Nov 25, 2024 17:52:58 GMT -5
Nov 25, 2024 17:52:58 GMT -5
|
Post by Deleted on Nov 22, 2015 17:27:52 GMT -5
|
|
Deleted
Member since: January 1970
Posts: 0
Nov 25, 2024 17:52:58 GMT -5
Nov 25, 2024 17:52:58 GMT -5
|
Post by Deleted on Nov 24, 2015 8:51:10 GMT -5
Fixed the spots where there were bubbles and runs. Also forgot that this kit is old and the panels are raised, not engraved! So I "accidentially" sanded some of the panel lines down so I may need to go for broke and sand hem all down and engrave them. Enough talk, here are the pics: Sanded down 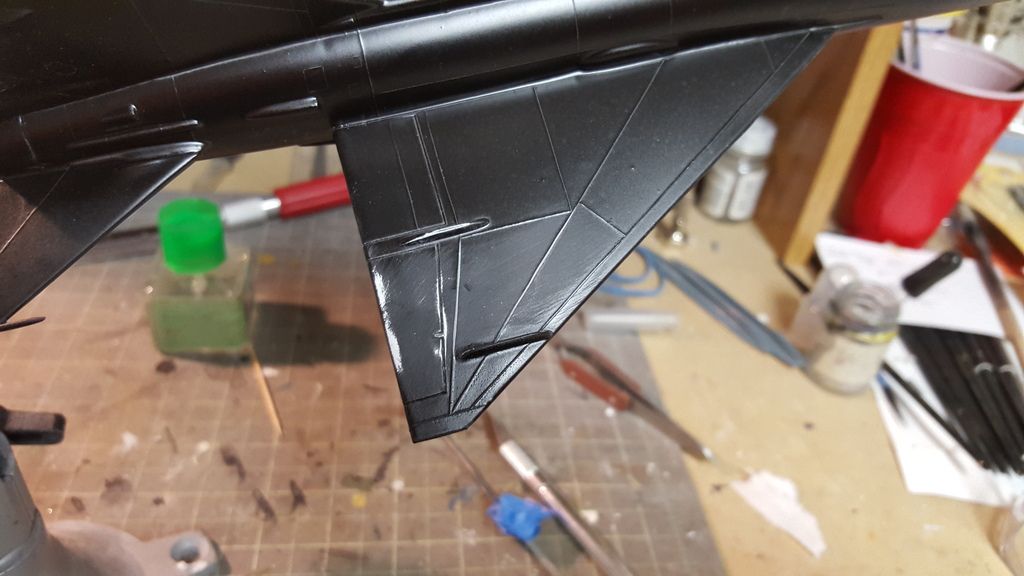 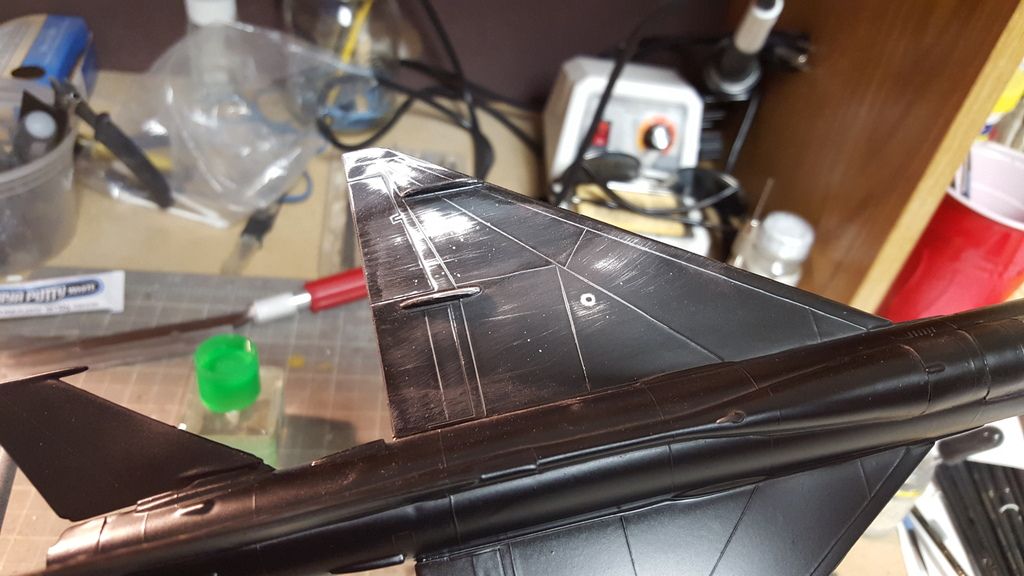 Resprayed, will have to buff out the minor scratches that I can see in the picture, not easily seen in person.: 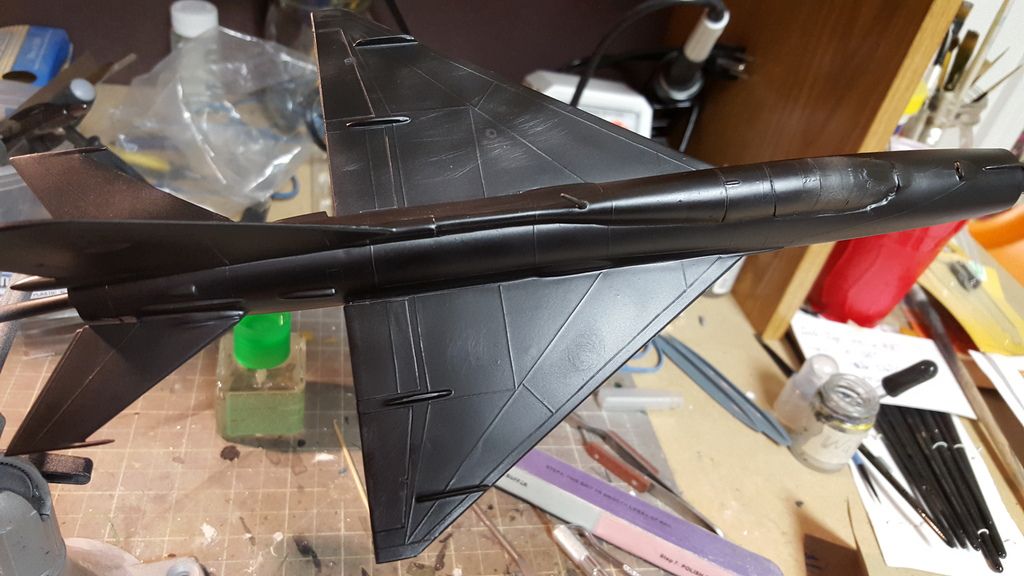 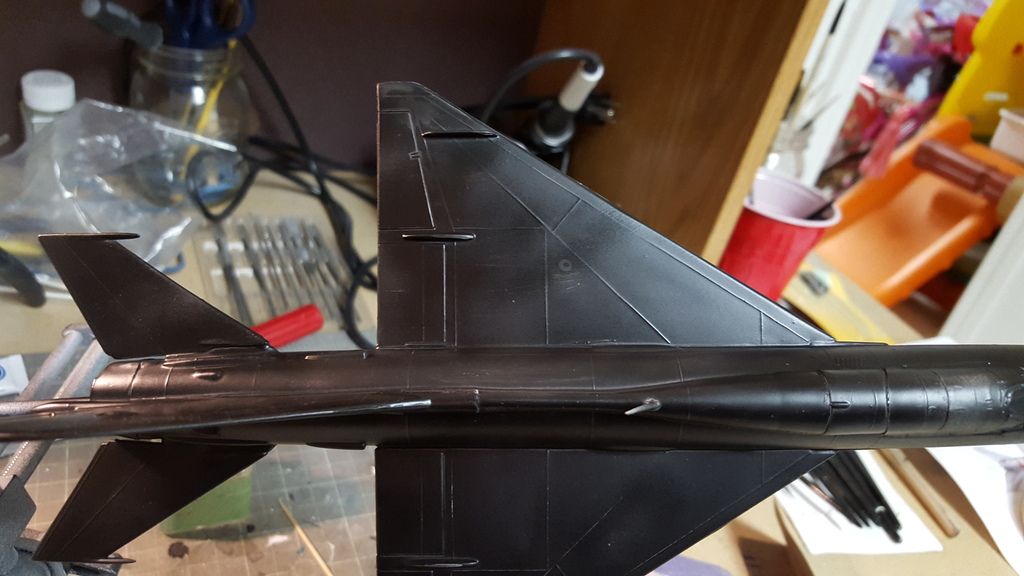 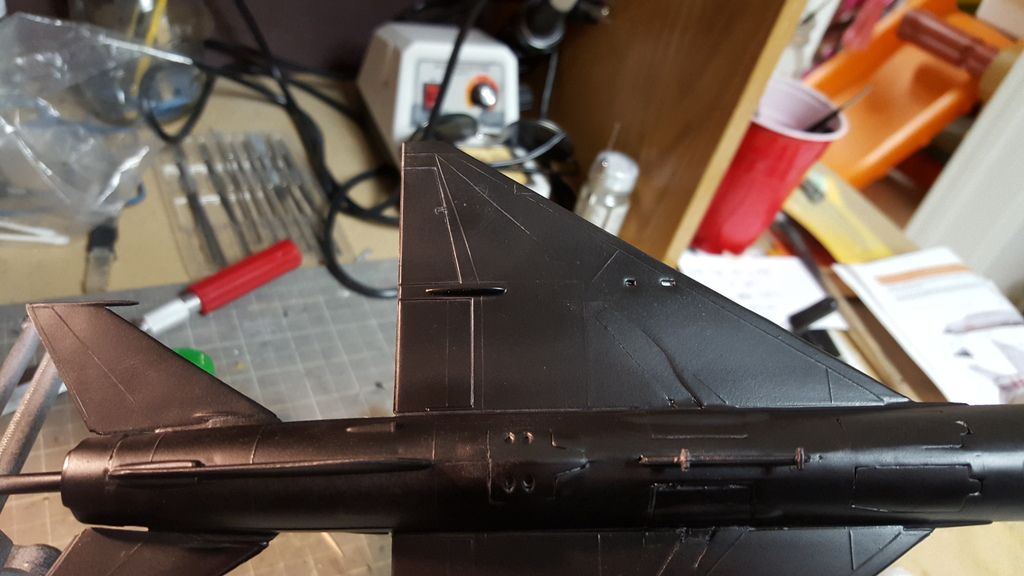 Missing panel line: 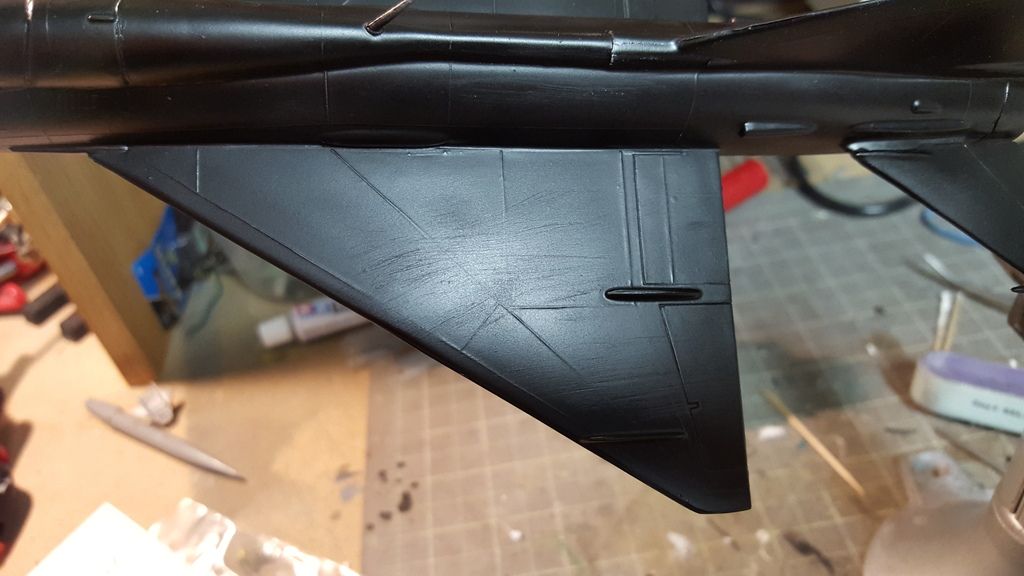 |
|
|
|
Post by wbill76 on Nov 24, 2015 12:44:20 GMT -5
Looks like you're beating this one into submission slowly but surely! Just out of curiosity, are you using rattlecan for paint? You've mentioned a couple times about having to sand out runs/rough spots so I assume that's down to using cans vs. an airbrush for example.  |
|
Deleted
Member since: January 1970
Posts: 0
Nov 25, 2024 17:52:58 GMT -5
Nov 25, 2024 17:52:58 GMT -5
|
Post by Deleted on Nov 24, 2015 12:50:42 GMT -5
Rattle can for the white primer, which was Tamiya's White primer. The black was through my airbrush using Model master's enamel flat black. Since I was using a new needle and tip for my airbrush, pushed more paint out than I was expecting on the first couple of passes.
|
|
|
|
Post by wbill76 on Nov 25, 2015 21:48:42 GMT -5
Ah yes, the age-old battle between the three legs of the stool when airbrushing..paint/thinner ratio, PSI, and needle/tip diameter! Looks like you're getting the hang of it though.
|
|
Deleted
Member since: January 1970
Posts: 0
Nov 25, 2024 17:52:58 GMT -5
Nov 25, 2024 17:52:58 GMT -5
|
Post by Deleted on Dec 1, 2015 10:14:36 GMT -5
|
|