coro69
Full Member

Member since: January 2015
Posts: 351 
|
Post by coro69 on Aug 23, 2015 8:52:25 GMT -5
|
|
|
|
Post by Leon on Aug 23, 2015 10:27:22 GMT -5
Your experiment looks good Coro! Really waiting to see what you have planed for us with the paint.   |
|
coro69
Full Member
Member since: January 2015
Posts: 351
|
Post by coro69 on Aug 23, 2015 10:52:50 GMT -5
yap, abrams as far is finished... now i have to have the guts to realize what i plan... ;-) but first wash it with water and dish soap and iso alcohol... ;-)
|
|
|
|
Post by wbill76 on Aug 23, 2015 17:26:07 GMT -5
Now this is really starting to get interesting! |
|
coro69
Full Member
Member since: January 2015
Posts: 351
|
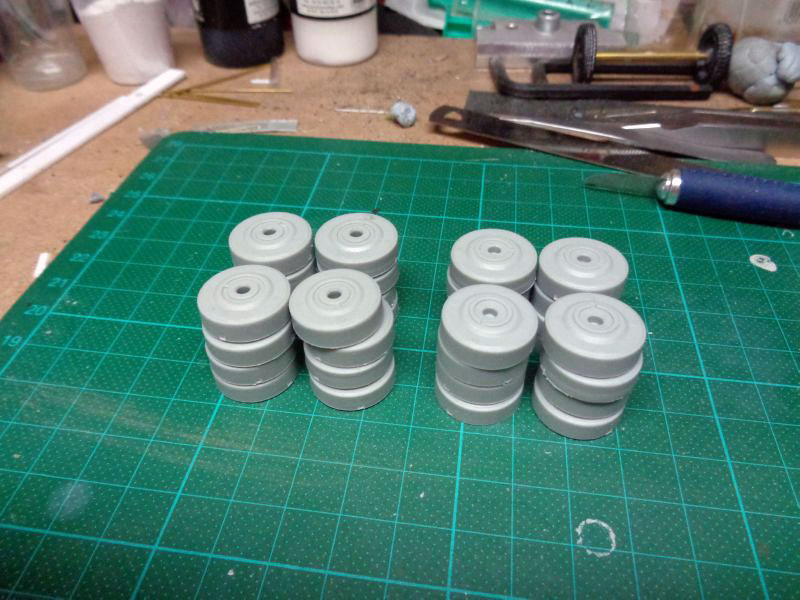
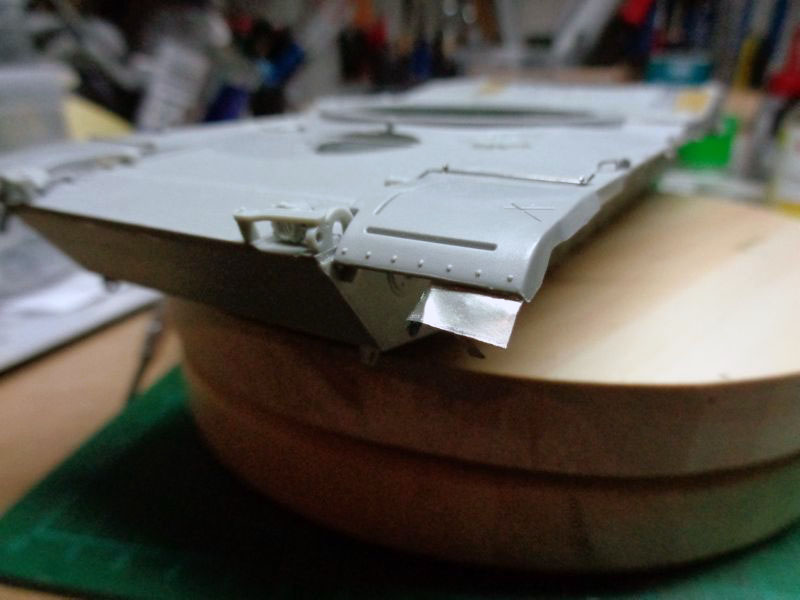
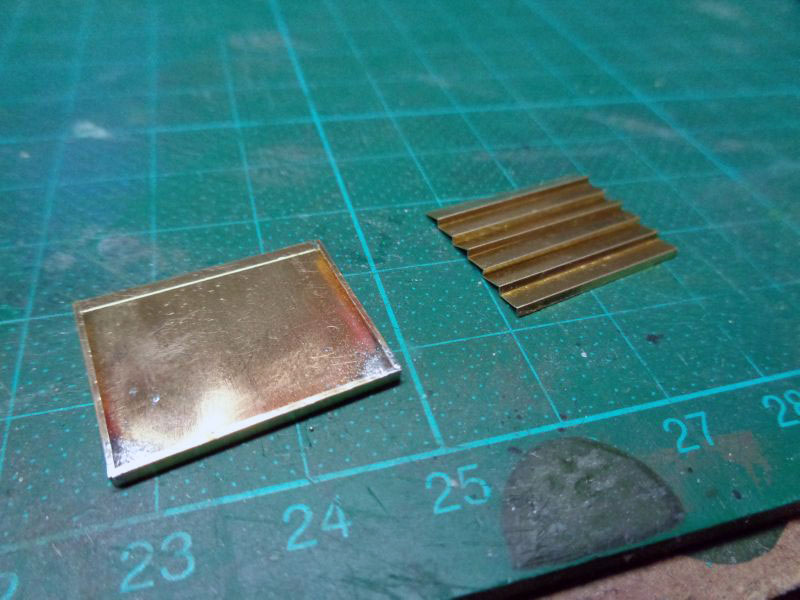
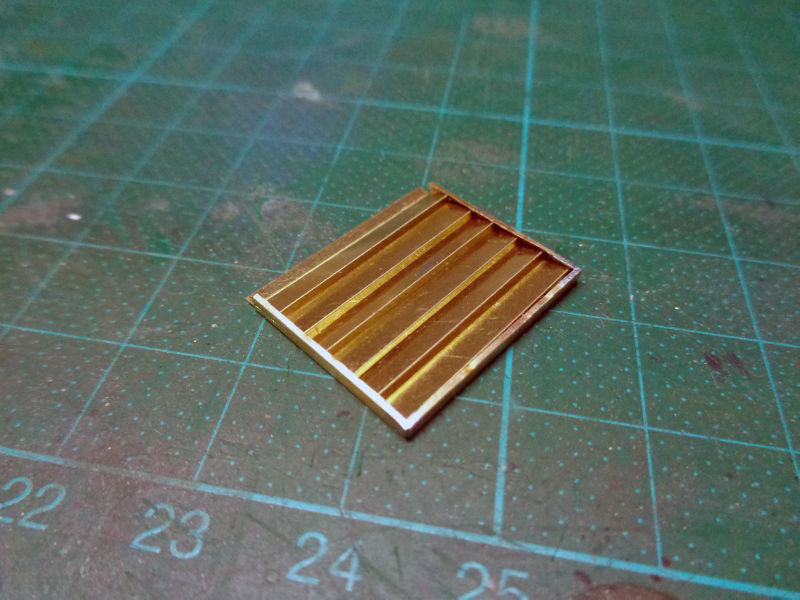
Post by coro69 on Sept 4, 2015 18:57:43 GMT -5
|
|
fhvn4d
Full Member
Member since: October 2012
Posts: 439
Oct 1, 2012 6:30:09 GMT -5
Oct 1, 2012 6:30:09 GMT -5
|
Post by fhvn4d on Sept 4, 2015 19:15:56 GMT -5
[/quote]
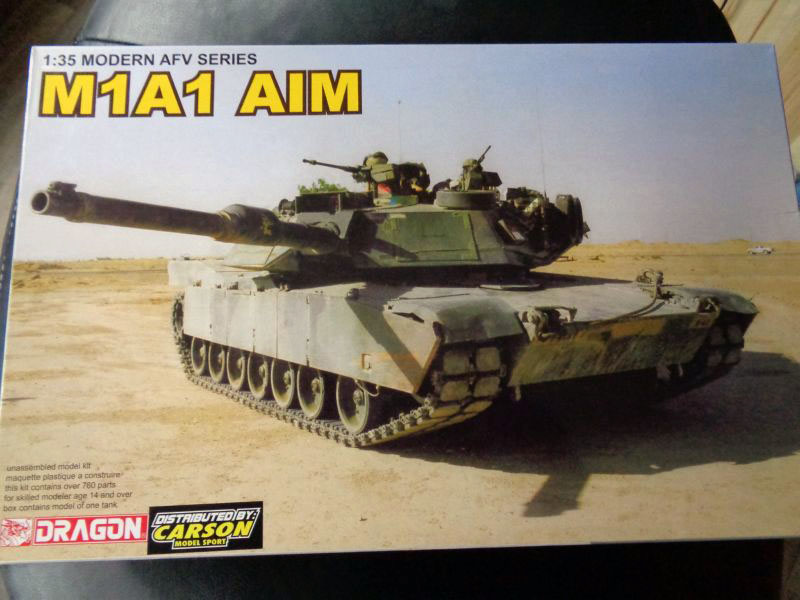
if there is some abrams specialist: these tubes atop the main barrel are just for a "training" version of the tank? am i right? in a battle commissioned tank it would be removed?
[/quote]
The thing on top of the barrel is a discharge simulator for the tank so they dont have to actually fire a round. They are generally only used at the National Training Center at FT Irwin or some other very large scale land warfare training center I believe. They would not be on a tank in battle.
|
|
coro69
Full Member
Member since: January 2015
Posts: 351
|
Post by coro69 on Sept 5, 2015 6:30:36 GMT -5
thanks fhvn4d... some research on google and showed me the same information... but only on a german leopard 2... ;-) but they looked similar... anyway in the dragon kit this part is completely missing... though i could not make the same mistake again... may i bother you again with abrams specific questions, if they arise?
|
|
|
|
Post by wbill76 on Sept 5, 2015 14:23:52 GMT -5
Off to a good start on the Dragon version. Could be a worse fate for the Trumpeter kit...you could turn it into a range target.  |
|
coro69
Full Member
Member since: January 2015
Posts: 351
|
Post by coro69 on Sept 5, 2015 17:36:50 GMT -5
ohhh... range target... (the trumpeter abrams ducks deep out of sight in the kit cardbox) :-) so the decision about contained figure was made... it will be a verlinden bedouin... 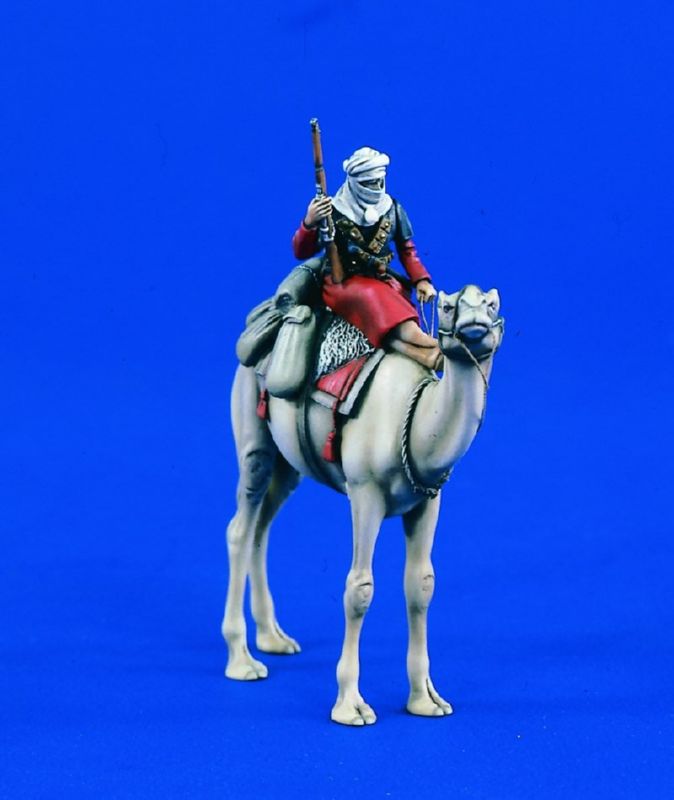 it is already on its way into my stash... :-) |
|
coro69
Full Member
Member since: January 2015
Posts: 351
|
Post by coro69 on Sept 5, 2015 20:17:10 GMT -5
Question: should i paint the clear parts for the commanders hatch as a whole or just paint the edges and the clear parts look red through light refraction??? i have some ak clear red, this is probably too red. should i mix it with some ak clear orange?
whats your opinion???
|
|
fhvn4d
Full Member
Member since: October 2012
Posts: 439
Oct 1, 2012 6:30:09 GMT -5
Oct 1, 2012 6:30:09 GMT -5
|
Post by fhvn4d on Sept 6, 2015 11:23:58 GMT -5
any time!!! I am not an absolute authority on them but I have a friend whos a tank commander in one and I have had a couple of close up meetings with them. As for the vision blocks, they really do look rainbow colorish when viewed from about 10 feet away. The anti laser coating they have is what I was told makes the refraction. they are all housed in metal on 3 sides that should be the color of the vehicle. Found on another forum that I frequent.... great images of the blocks and why they are the color they are... www.armorama.com/modules.php?op=modload&name=SquawkBox&file=index&req=viewtopic&topic_id=105400&ord=0&page=7 |
|
coro69
Full Member
Member since: January 2015
Posts: 351
|
Post by coro69 on Sept 8, 2015 2:38:58 GMT -5
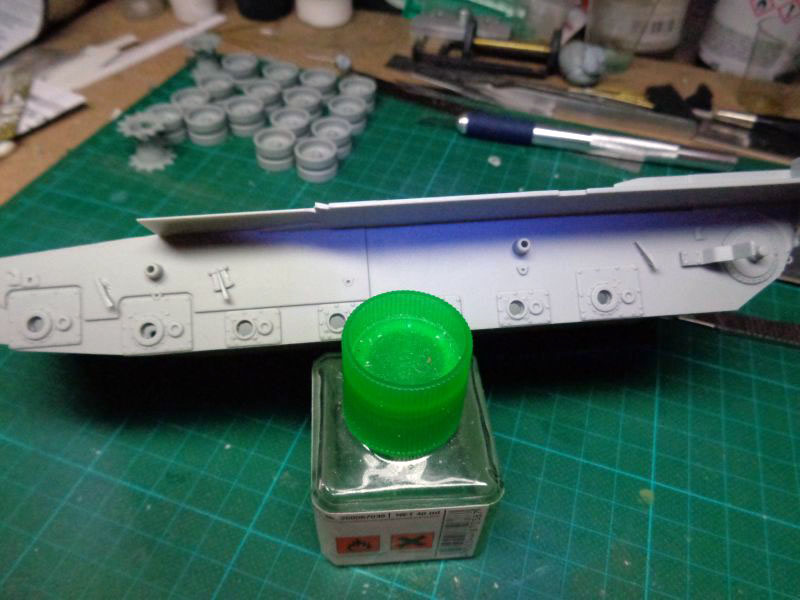
oh a lovely link you gave me there... a really nice and inspiring build this guy has done... last night i experimented with some old clear spare parts... you have to thin the ak clear color with some nitro thinner... but this does no good to the clear parts.... they got frosted... :-( now i ran out of unused clear parts... i think first i will cover the clear parts with acrylic clear color to prevent the nitro thinned clear color to attack and frost the clear parts... everyday i learn in the modelling business... :-)
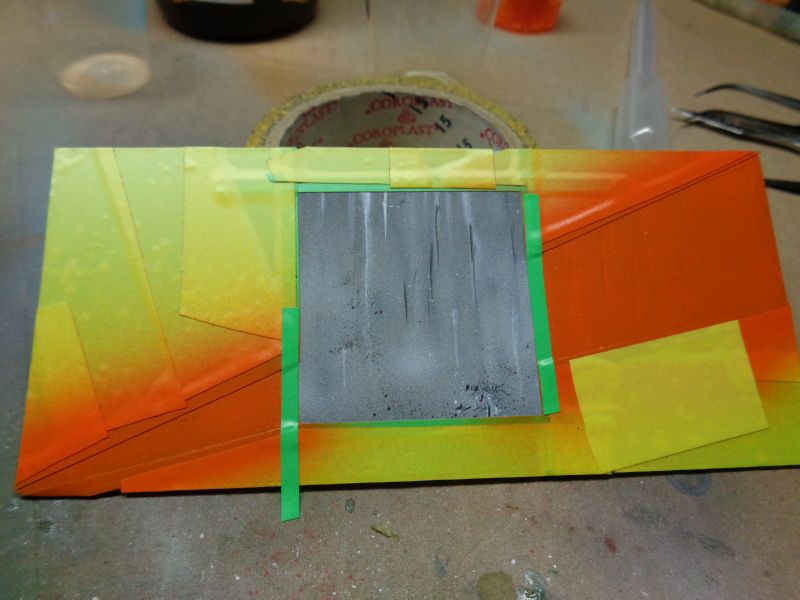
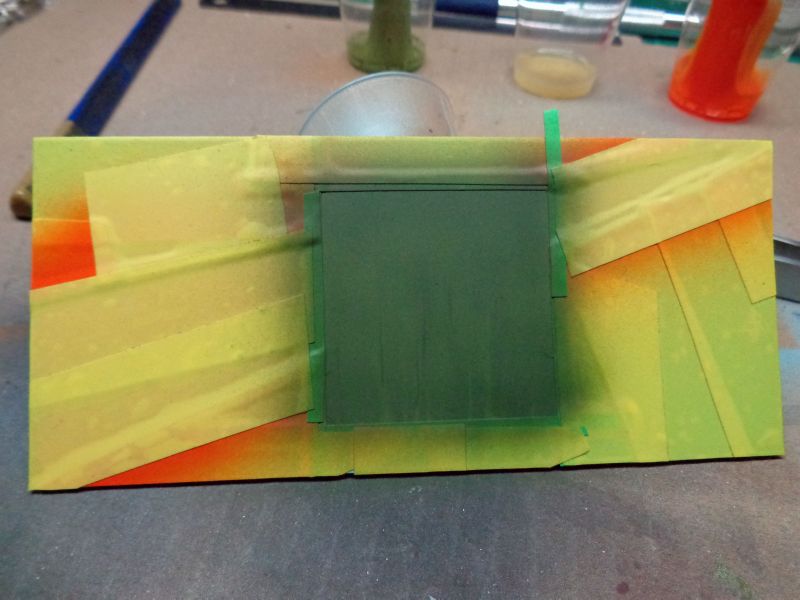
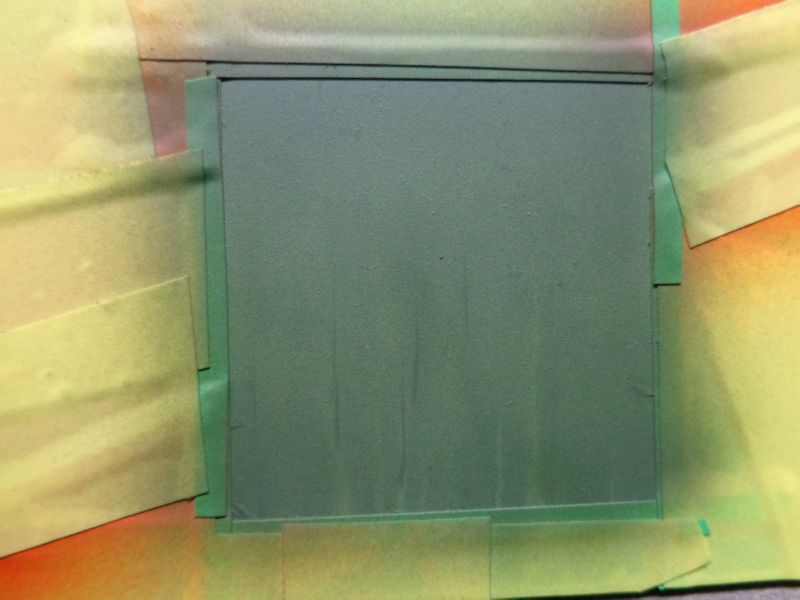
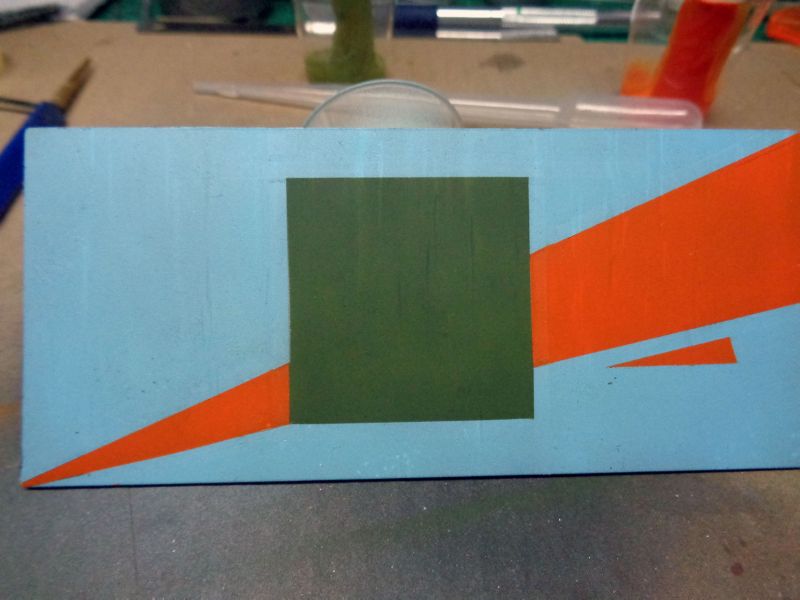
i tried to achieve this rainbow colorish look, covering the clear parts with different layers of transparent green, red and orange... it looks interesting so far... ;-) i keep the experiments up...
|
|
|
|
Post by deafpanzer on Sept 9, 2015 9:57:05 GMT -5
Looking good... nice addition of details. Am looking forward to see you tackle that figure and camel!
|
|
coro69
Full Member
Member since: January 2015
Posts: 351
|
Post by coro69 on Sept 9, 2015 16:13:21 GMT -5
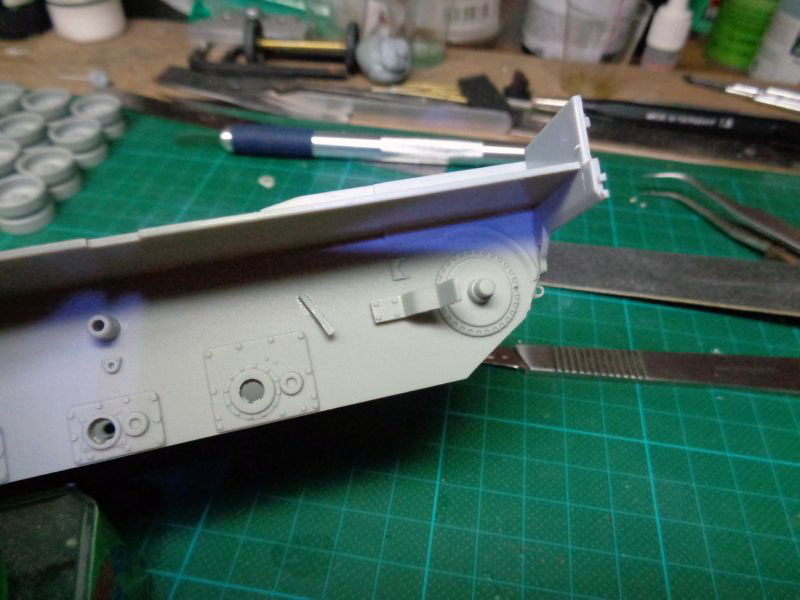
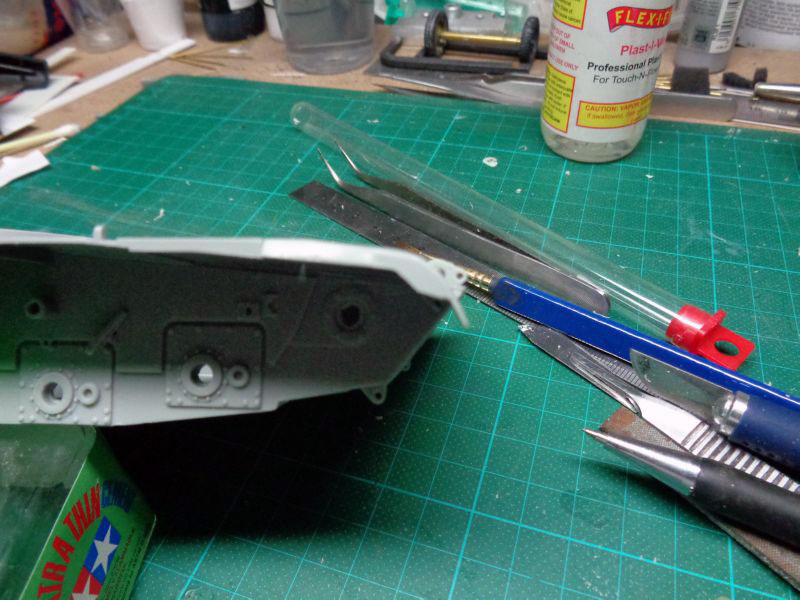
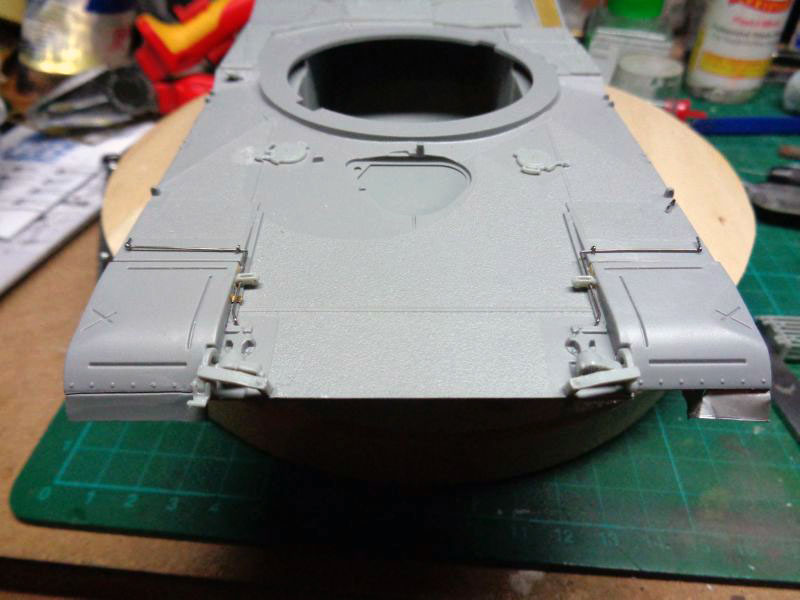
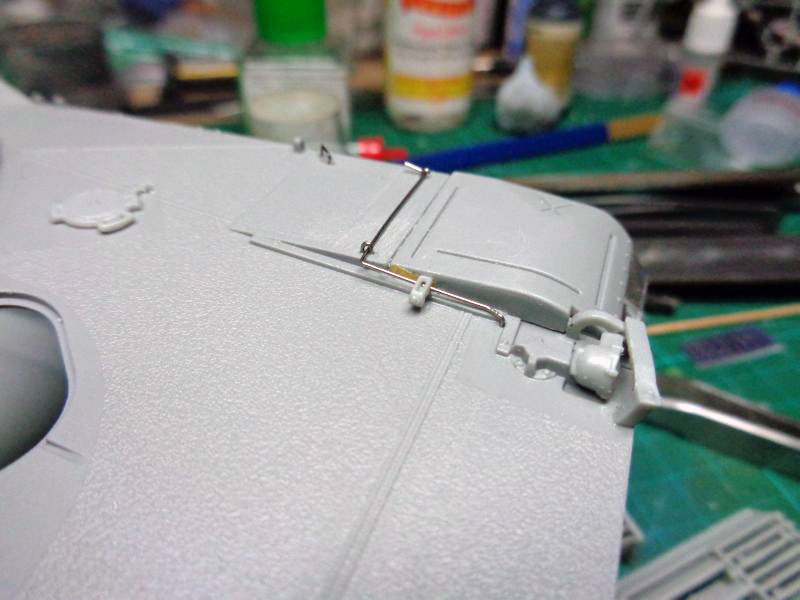
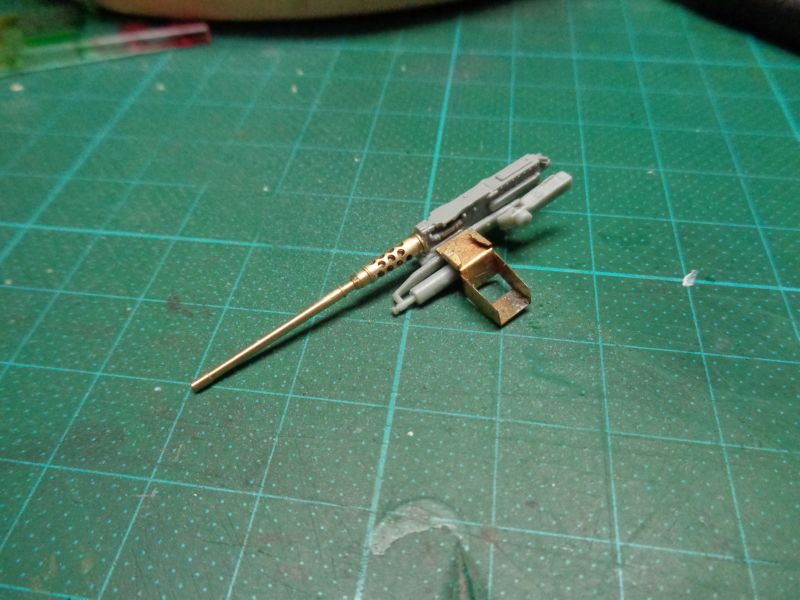
deafpanzer yap i am also curious how i will perform with the bedouin and his camel... i think someone could make a really nice figure out of it... first i was tempted to exchange the m1a1 plastic barrel with the aluminium barrel from my m1a2 sep kit, but after building the plastic barrel i chose to use it. as it is really nice i think--- 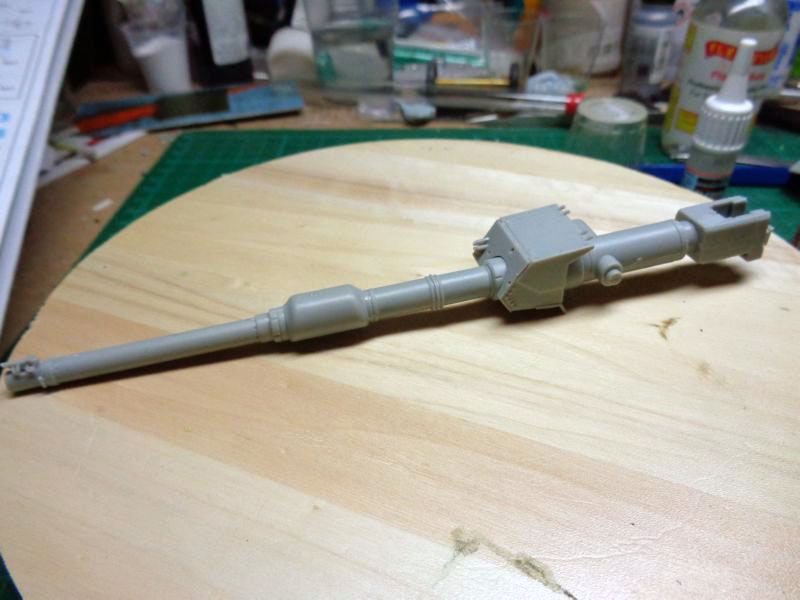 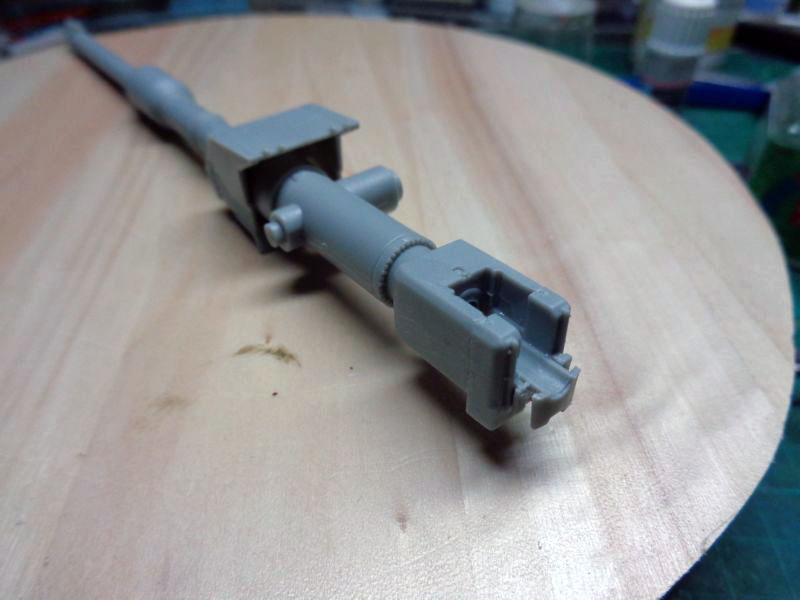 who finds the mistake? ok ok ok, after looking at some images on google i also realized it and corrected it right away... ;-) 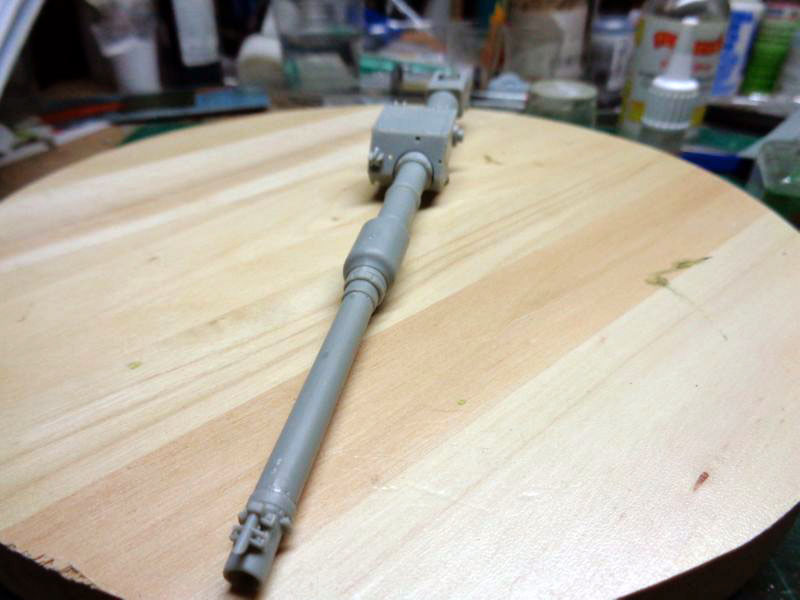  the details of the dragon kit in contrast to the trumpeter are really nice and it already paid off in my opinion... 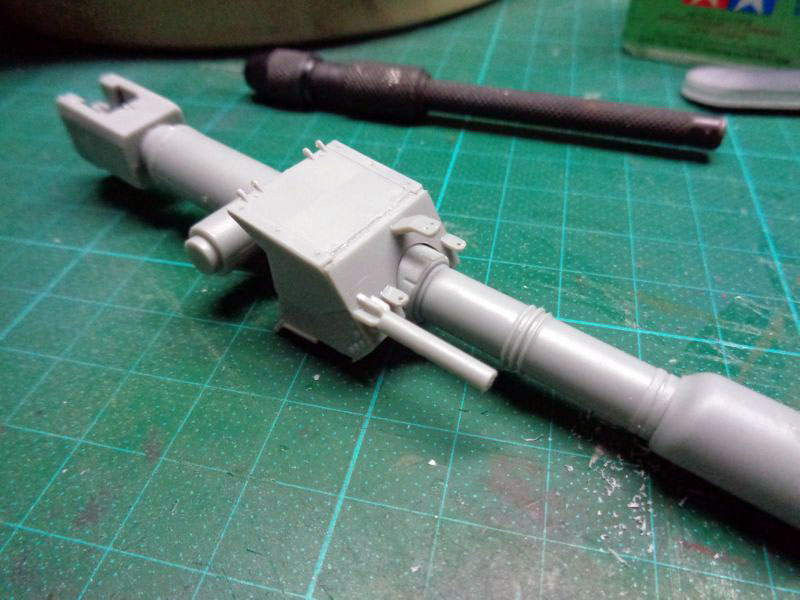 slowly it is getting together...  today arrived some more nice additions, but these tracks look like a real PITA... 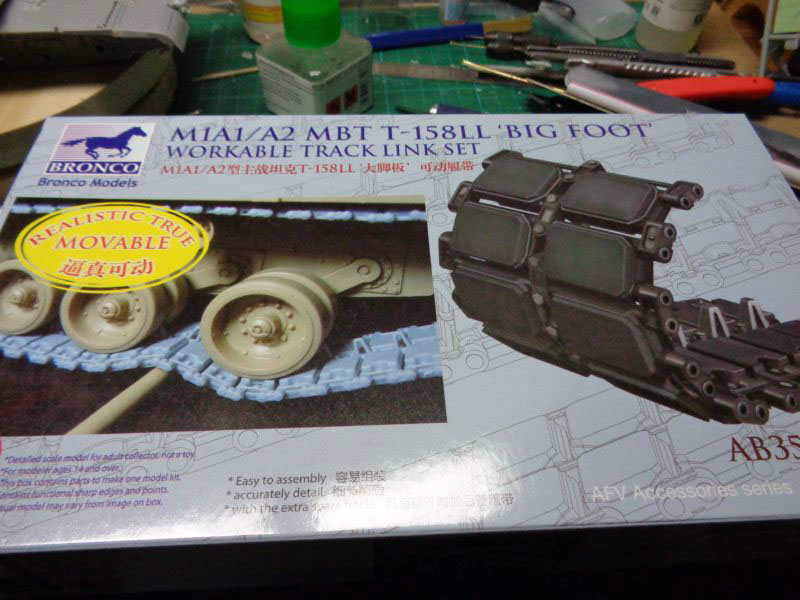  and yes.. these tracks are a PITA... never ever again... a nice barrel from rb models. it really looks damn better as the kits browning barrel 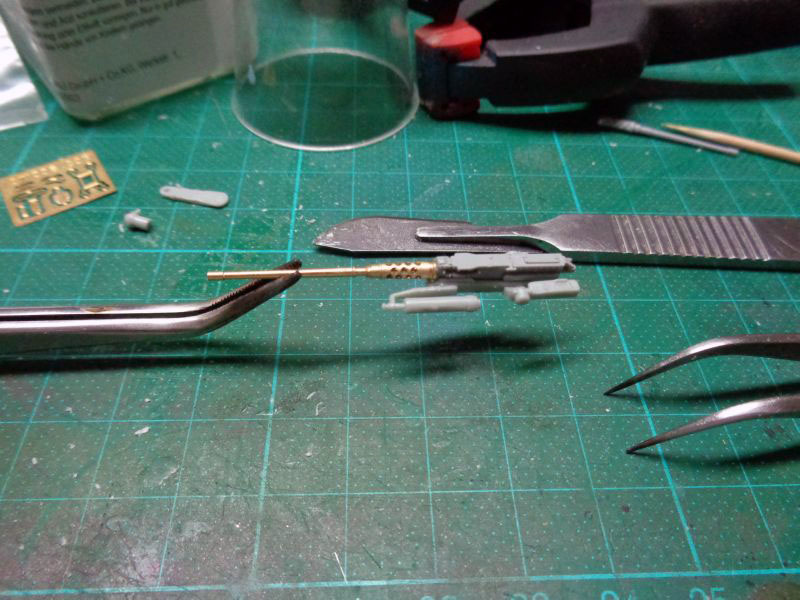 soldering some of the pe parts 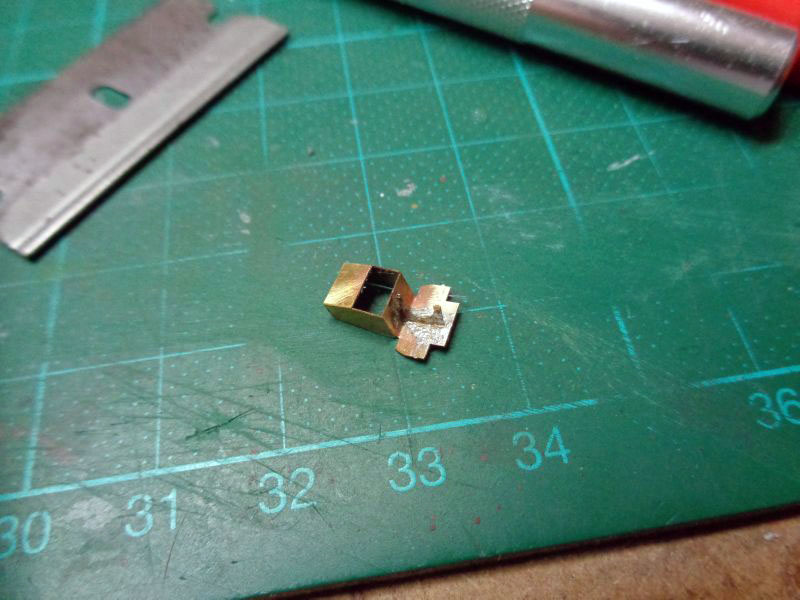 so far my progress...
|
|
|
|
Post by Leon on Sept 9, 2015 19:01:53 GMT -5
Nice progress Coro! The brass barrel looks great. |
|
coro69
Full Member
Member since: January 2015
Posts: 351
|
Post by coro69 on Sept 9, 2015 20:19:05 GMT -5
yes the brass barrel is a great improvement.
|
|
John Everett
Full Member
Member since: January 2012
July, 2016 MoM Winner
Posts: 1,278
Jan 17, 2012 0:53:48 GMT -5
Jan 17, 2012 0:53:48 GMT -5
|
Post by John Everett on Sept 9, 2015 21:02:01 GMT -5
Great brass work there!
|
|
coro69
Full Member
Member since: January 2015
Posts: 351
|
Post by coro69 on Sept 10, 2015 11:19:39 GMT -5
|
|
|
|
Post by deafpanzer on Sept 10, 2015 11:53:54 GMT -5
Aftermarket MG barrel is a huge improvement for sure! Great PE work there!
|
|
|
|
Post by wbill76 on Sept 10, 2015 11:57:31 GMT -5
Dressing this one up nicely in the details department!
|
|
coro69
Full Member
Member since: January 2015
Posts: 351
|
Post by coro69 on Sept 11, 2015 8:04:40 GMT -5
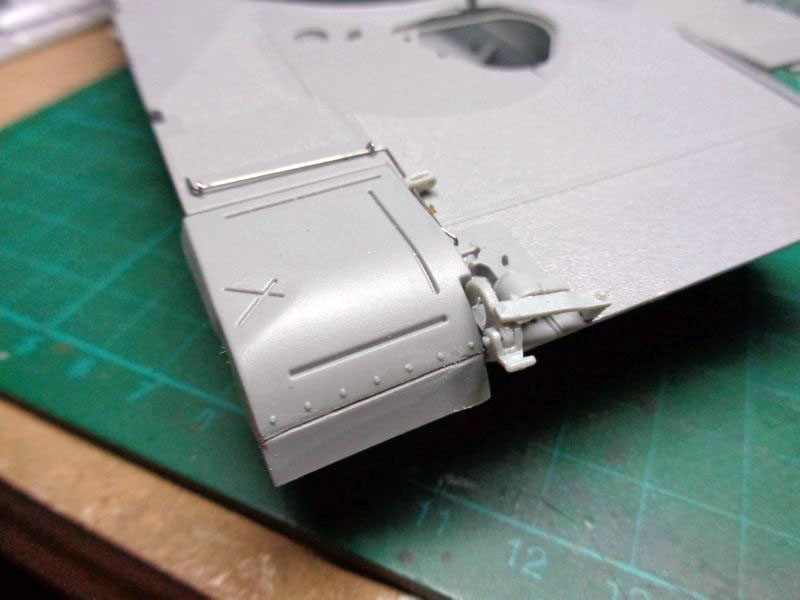
at the aftmost basket at the turret are some small frames with some gratings in it... these frames come in 2 parts. the frame and the grating. 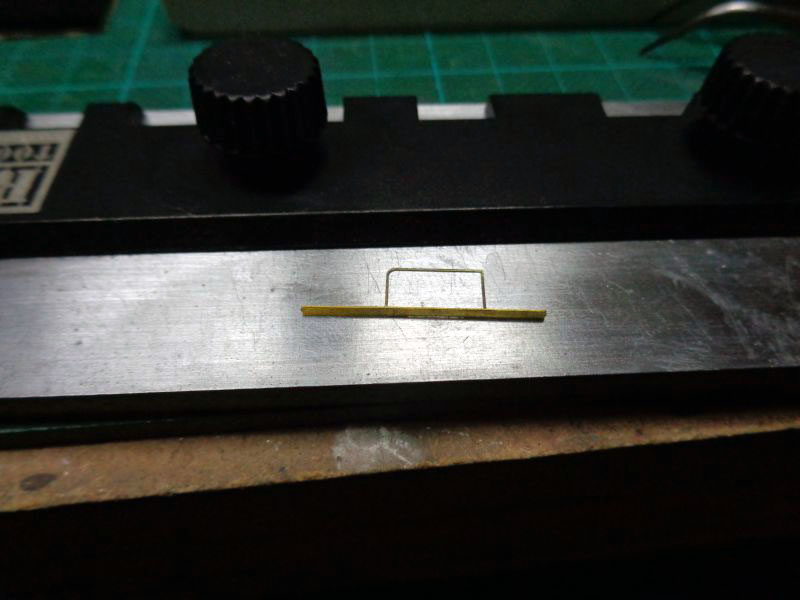 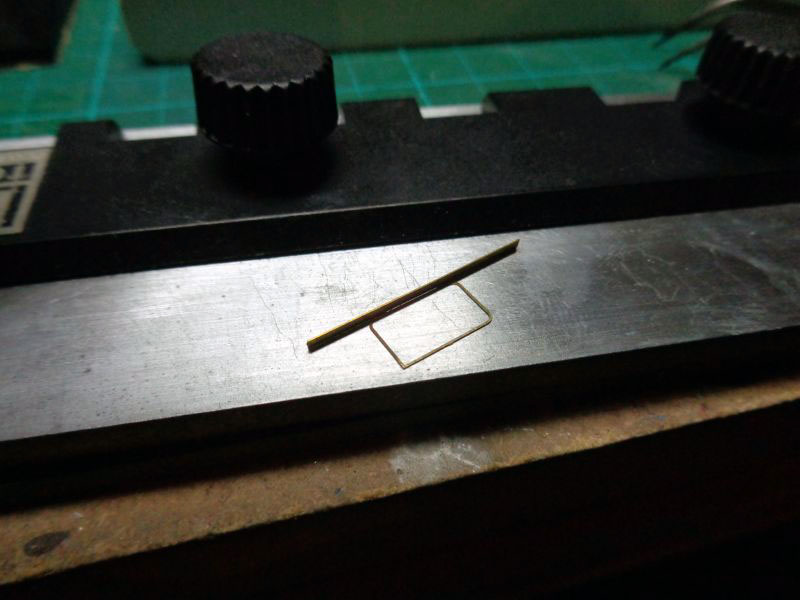 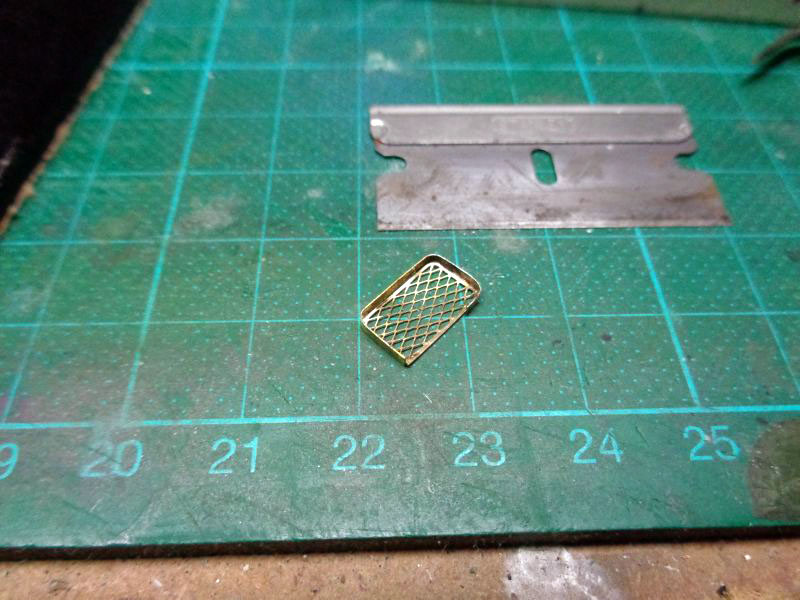 the first one i bend the frame around the attached really tiny, i call it, frame template... that was a really delicate task... after i bend i soldered the frame to the frame template and then i tried to insert the grating into the now formed frame... as you all could imagine the frame was to narrow... :-( so i had to press the grating into the frame with some force... you do not really see it in the image, but the frame and grating is twisted a little bit... 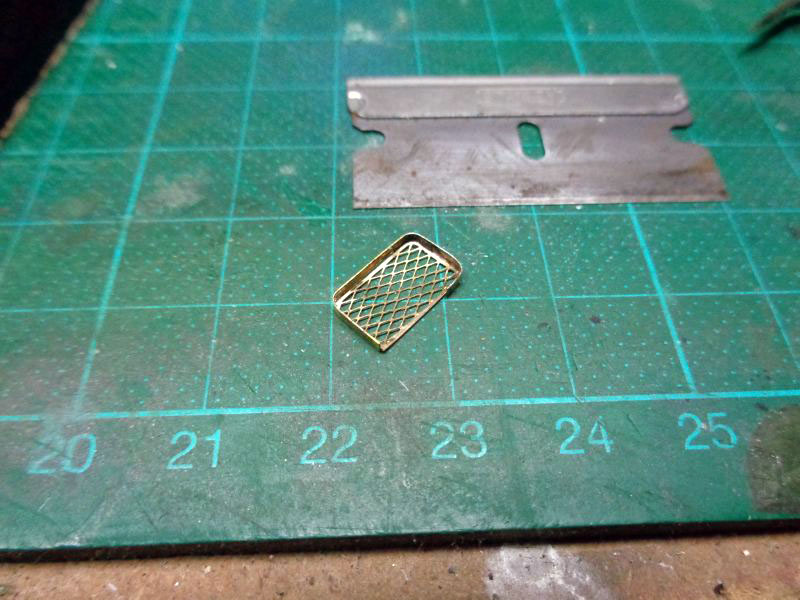 so with the next one i wanted to do it better. so first i soldered the grating onto the tiny frame template and bend afterwards the frame around it... first it seemed to work better this way. bending went fine but soldering was then the problem... ;-) soldering the frame just cracked the grating frame template solder... but at the end i managed it to solder the frame and grating as a whole again...  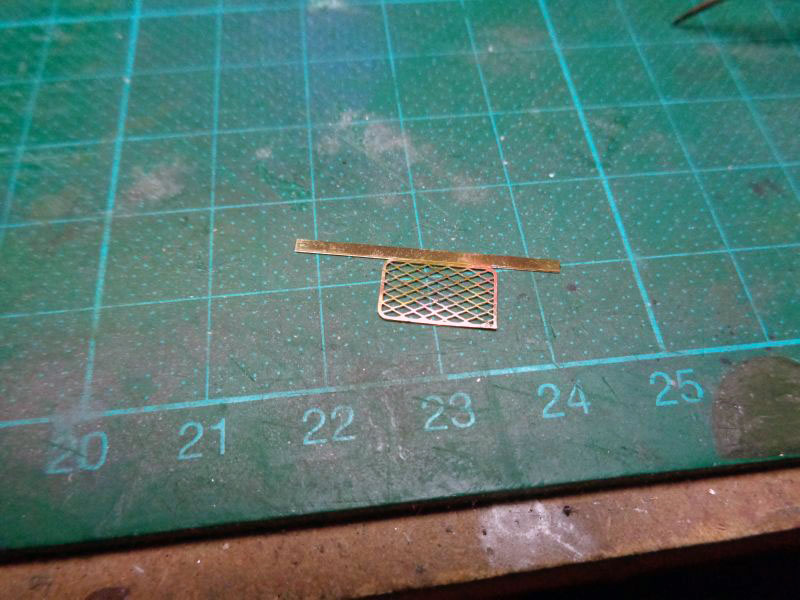  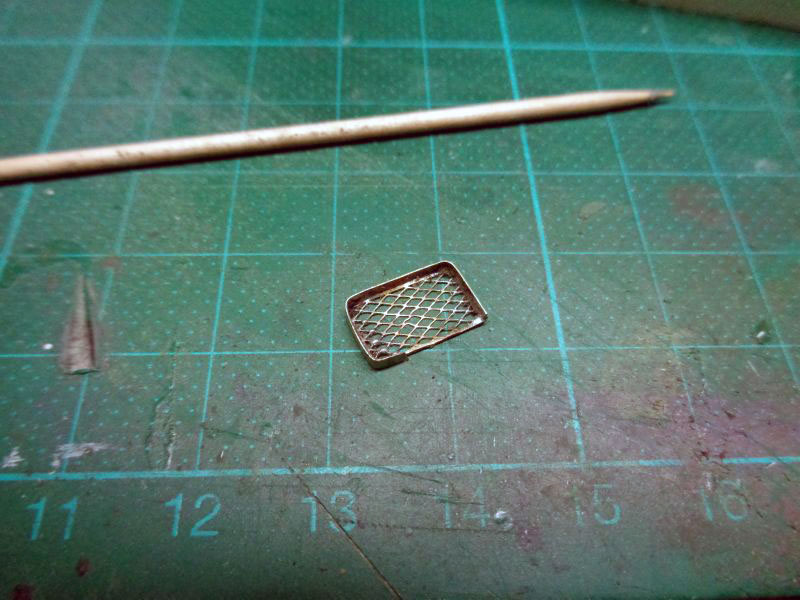 next up the aftmost basket, as it looks as the easiest of them all... but there templates for bending have to be cut and filed by myself... pe work is... hmmm, what should i say... really challenging... i am a woods guy, learned cabinetmaker in the past and not soldering... :-) |
|
coro69
Full Member
Member since: January 2015
Posts: 351
|
Post by coro69 on Sept 12, 2015 19:15:26 GMT -5
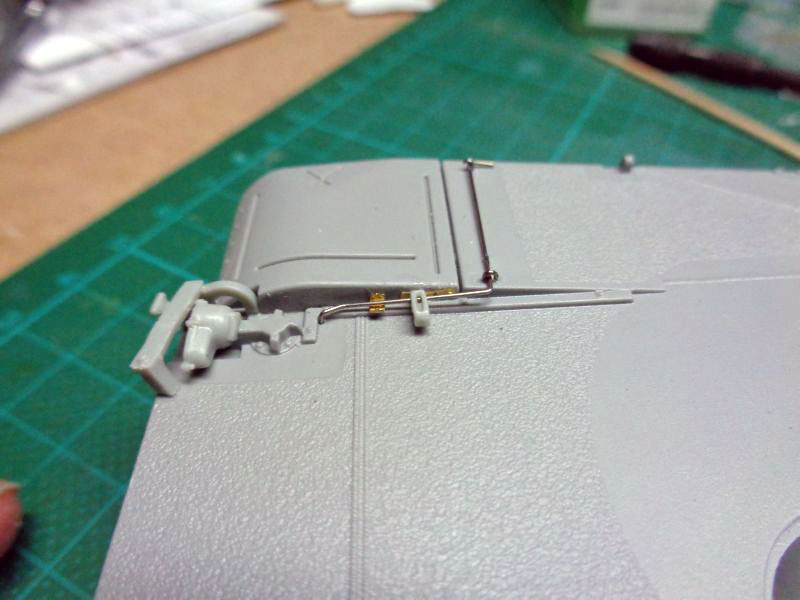
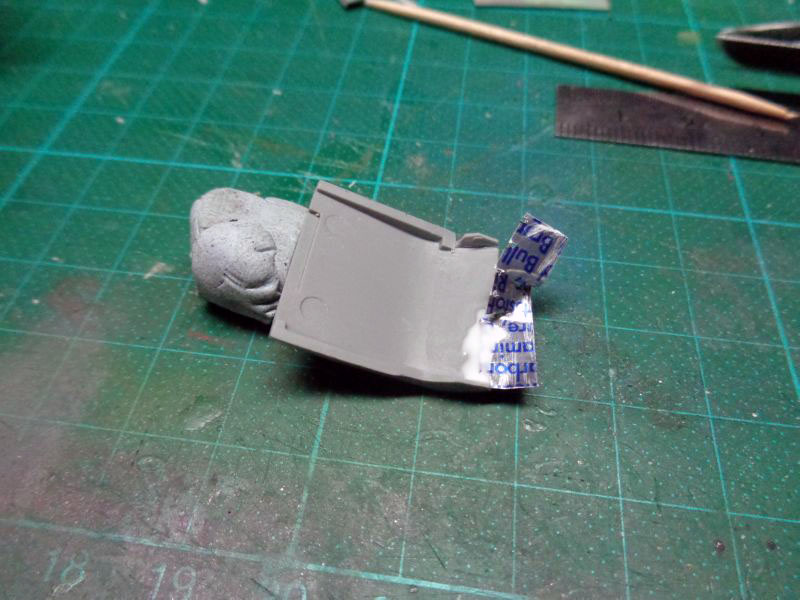
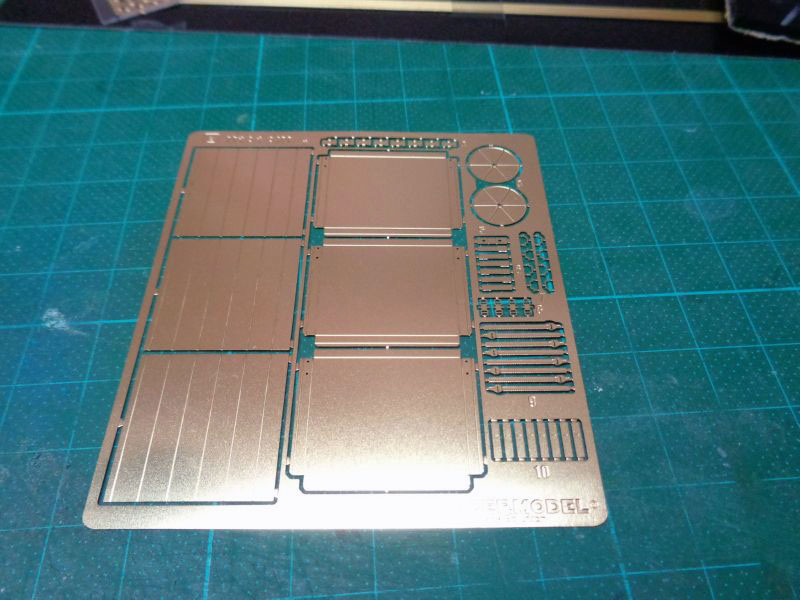
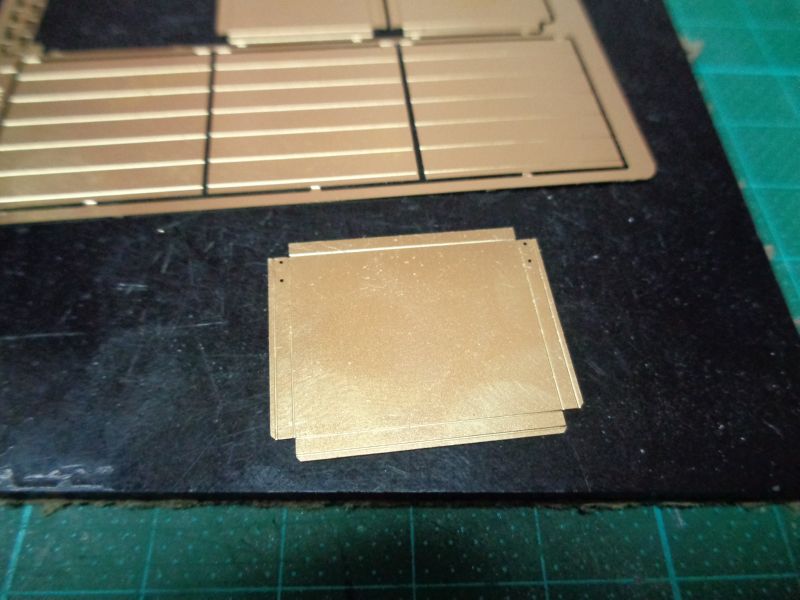
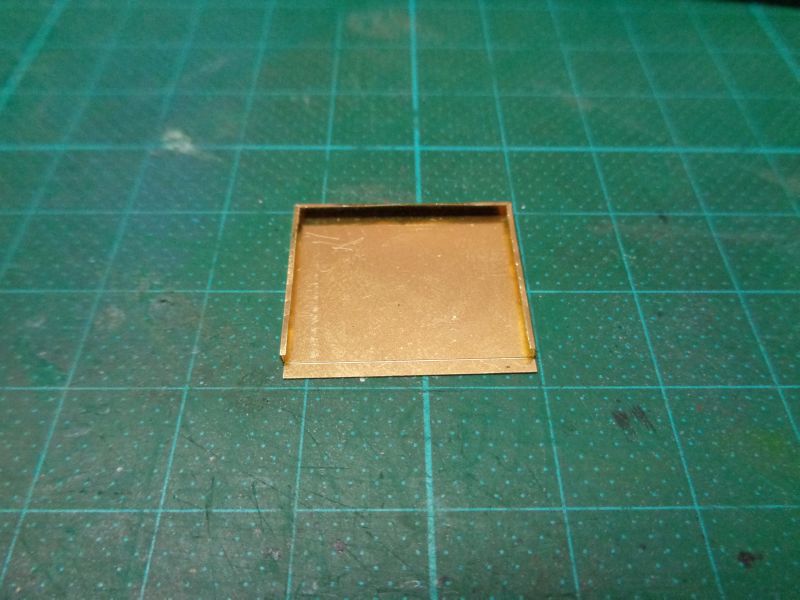
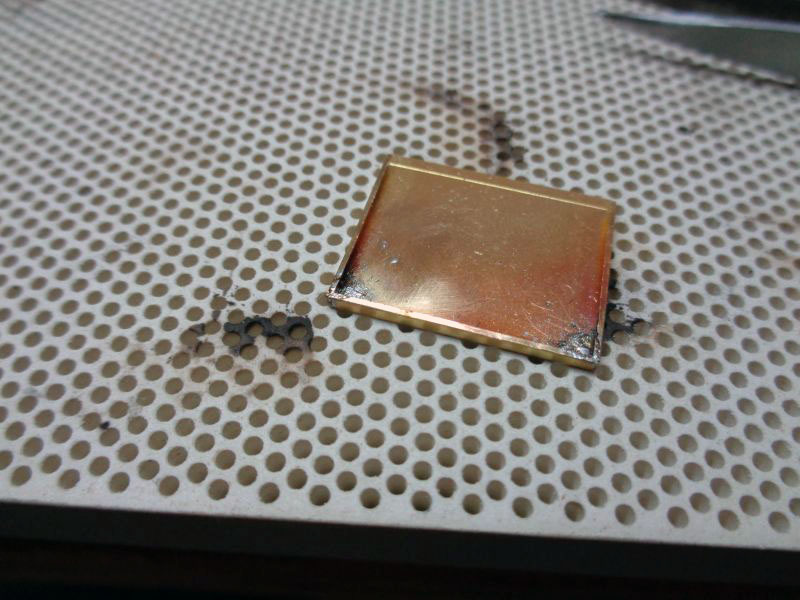
starting with the aftmost basket frame... aligning the parts and first gluing the pieces with superglue before i put the heat on it and solder the parts. 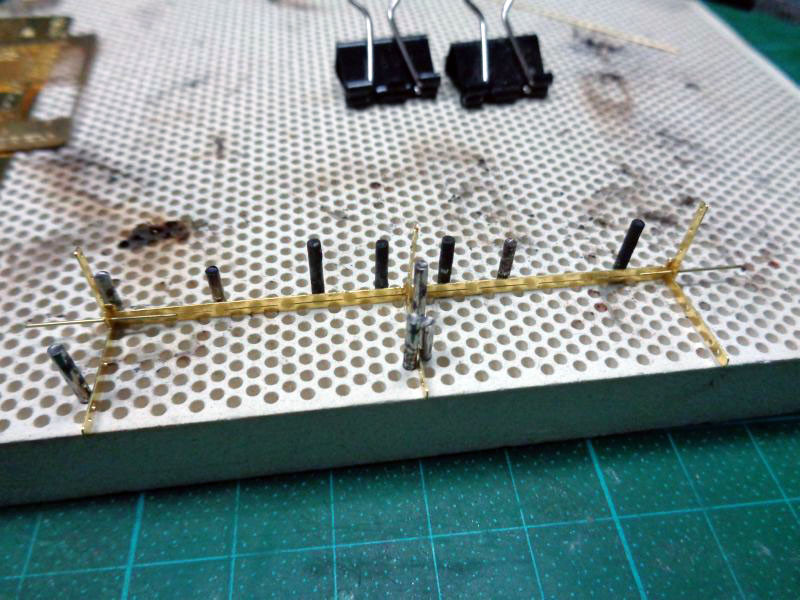 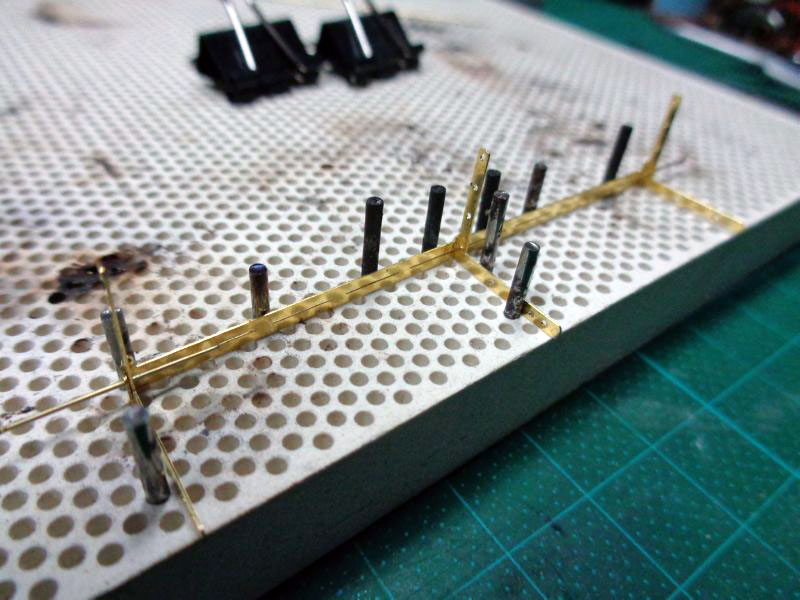 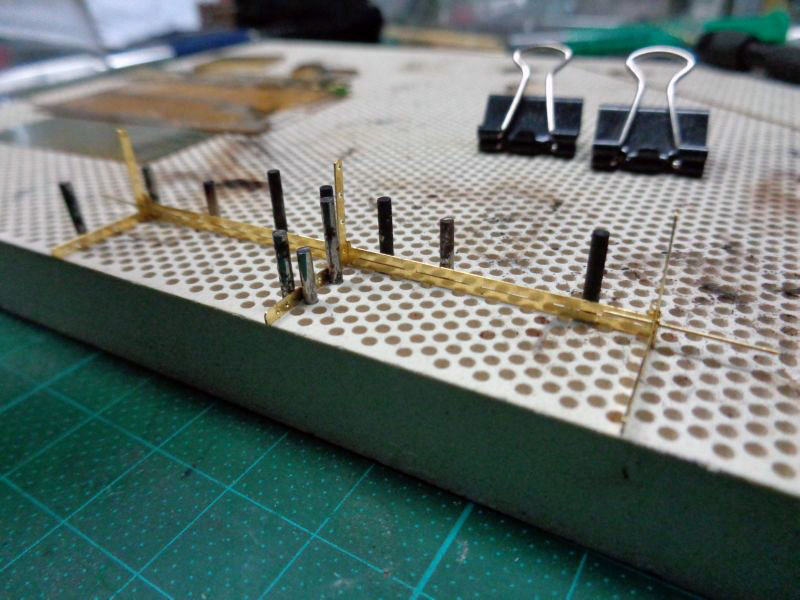 completely aligned and superglued... 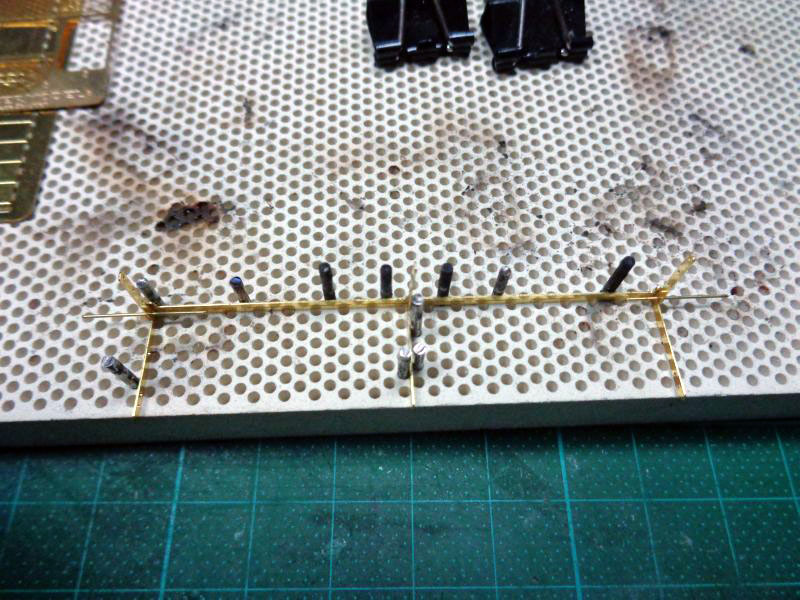 for the inner frames i have to make me some bending template, that the 2 inner frames get the same form and the right radius in the corners... as template i take the grating that will ne the floor of the basket. 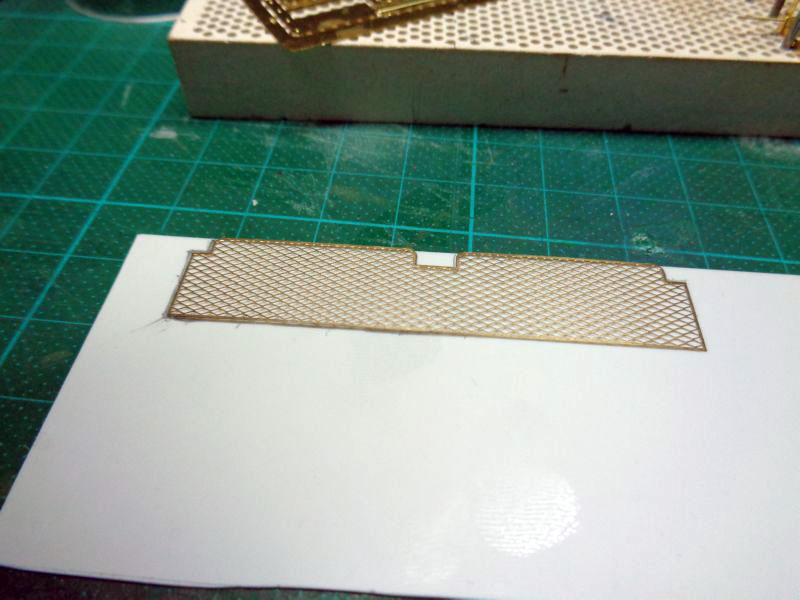 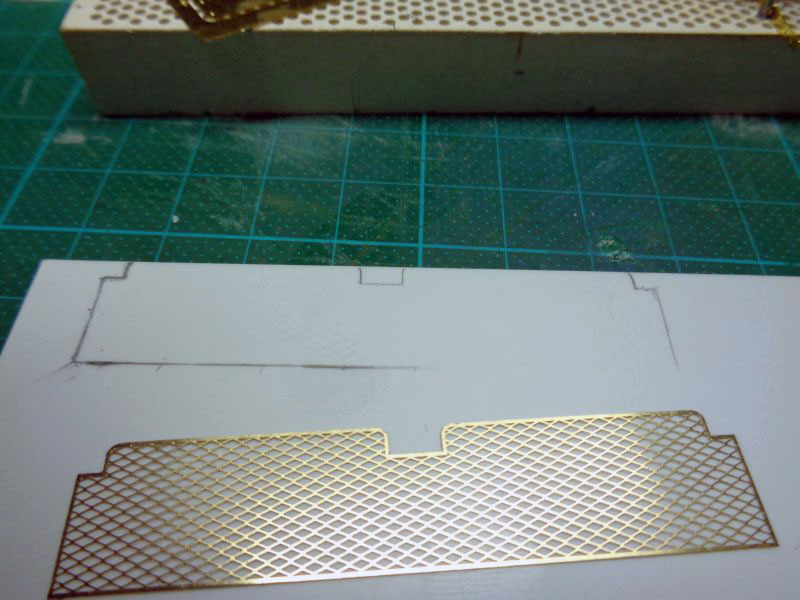 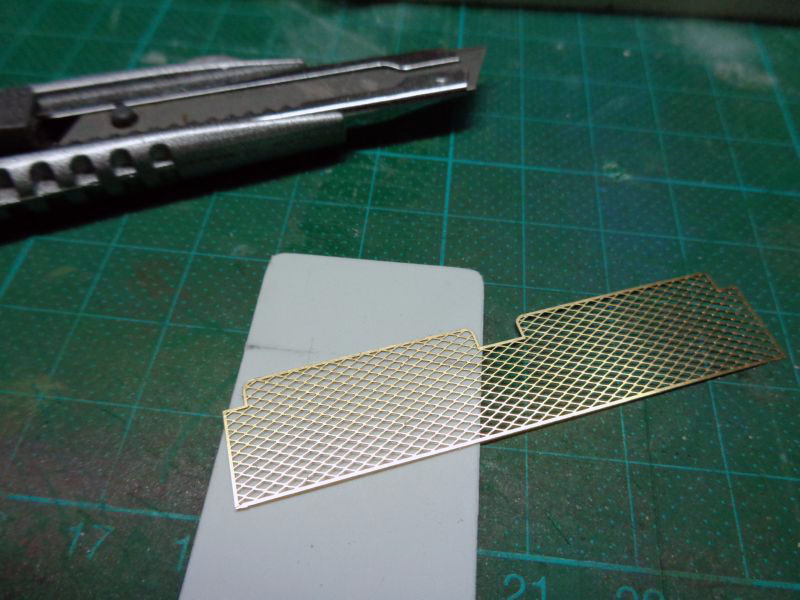 the first inner frame is bent, now the second...  additional frame parts soldered onto the frame  soldering the outer basket frame... cooling the already soldered joints with water soaked tissues... so the already soldered joints will stay soldered... 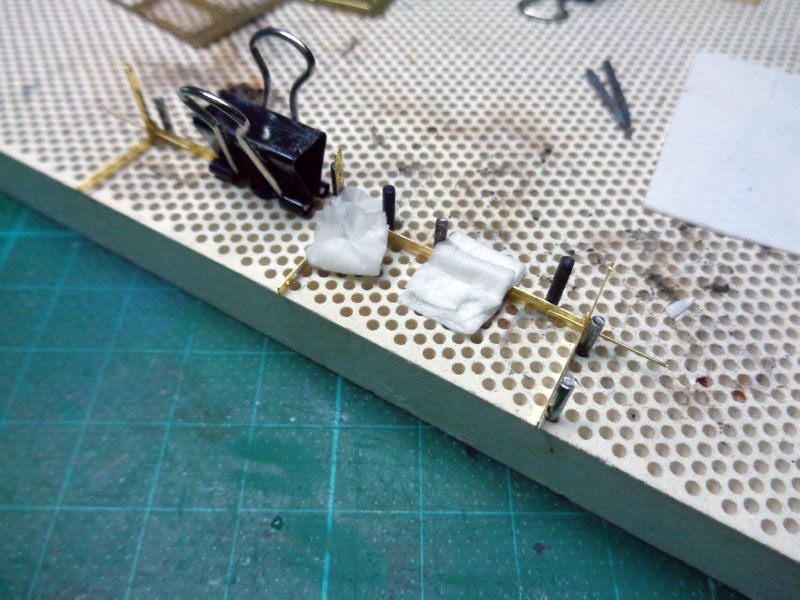  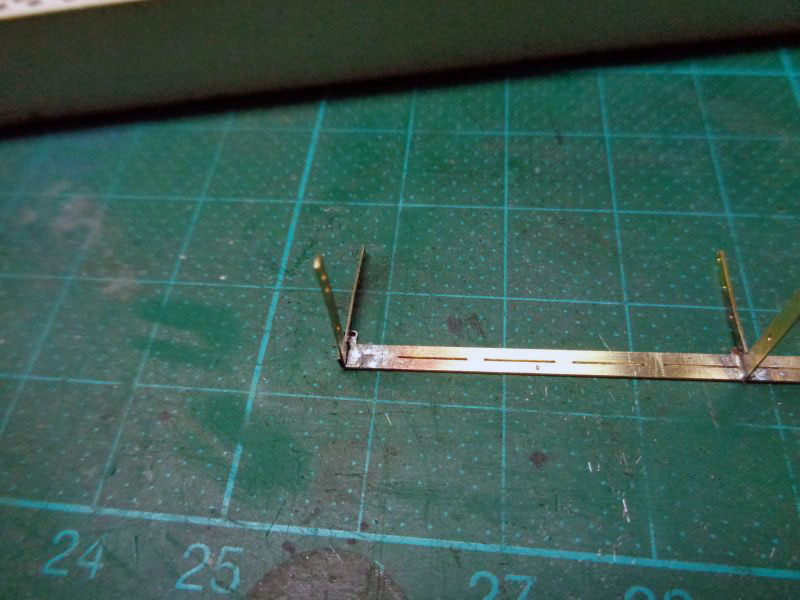 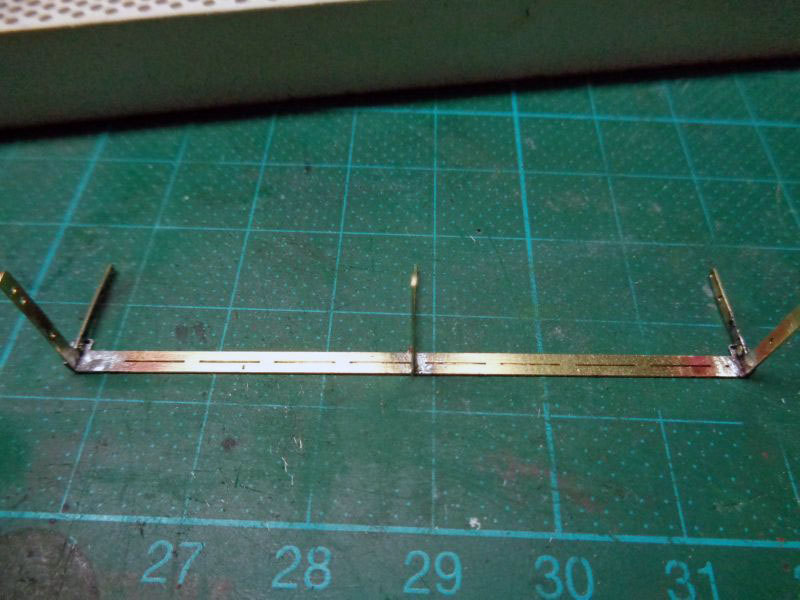 putting the 2 inner frames on their places... 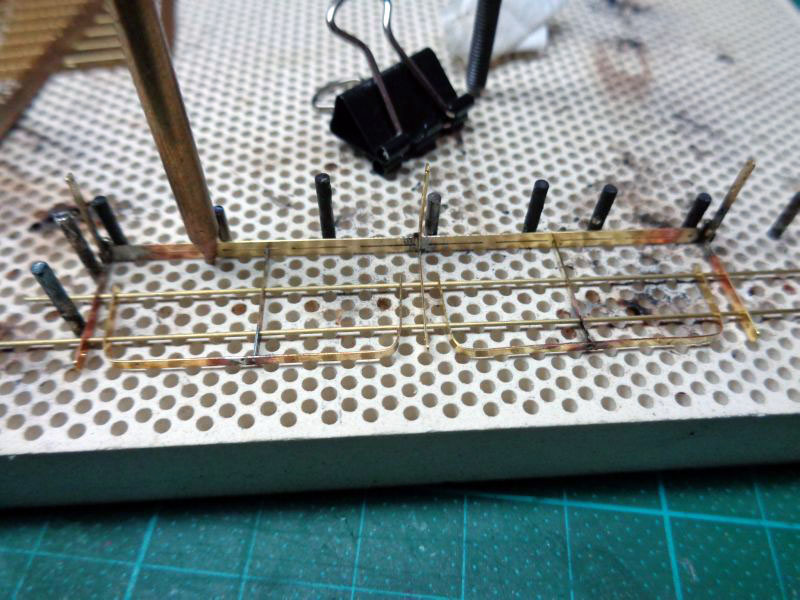 finding their final positions...  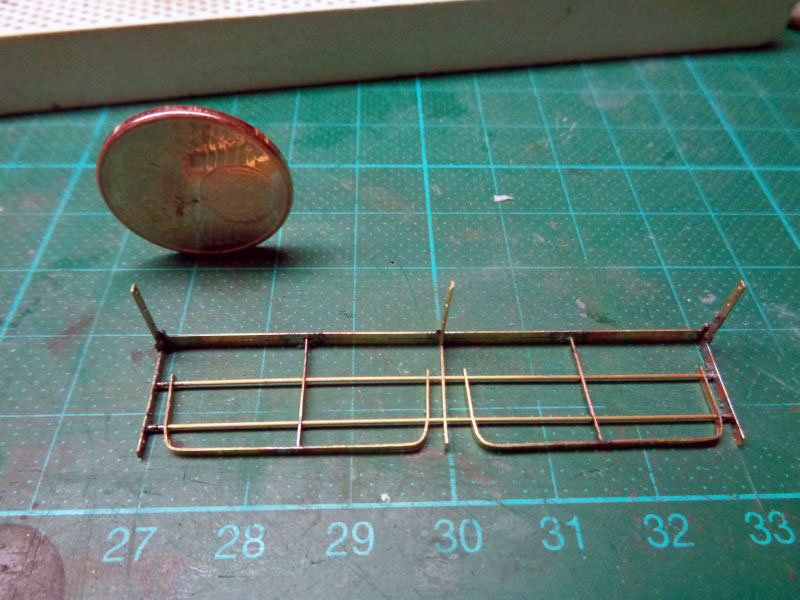 and soldered at their final positions...  now the madness gets really insane. parts are getting smaller and smaller... soldering here is not possibel anymore for me... so i switch to superglue... 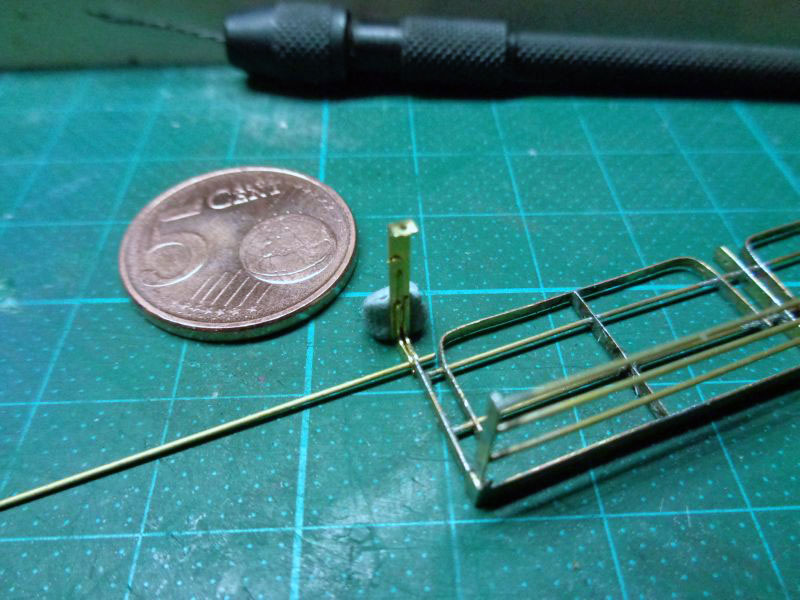 after the first of the 3 upright frame parts was finished, i needed some relief for my fingers and my eyes. so i took one of the side bins and soldered it... same procedure as with the basket frame... soldering one joint after another and cooling the already soldered joints with water soaked tissues... where the already soldered joint meets the to be soldered joint i use some cooling gel... the finished and already cleaned up bin... next working hinges, lid and handles... when this is done, i think i am ready again for theses damn tiny tiny tiny parts of the aftmost basket again... :-) pe work is really challenging and adds a tremendous amount of difficulty to the model... and the time needed for the pe work already tops the time invested into plastic work... ;-) but also it adds a lot of fun... trying to get all these small parts correctly and neat together... 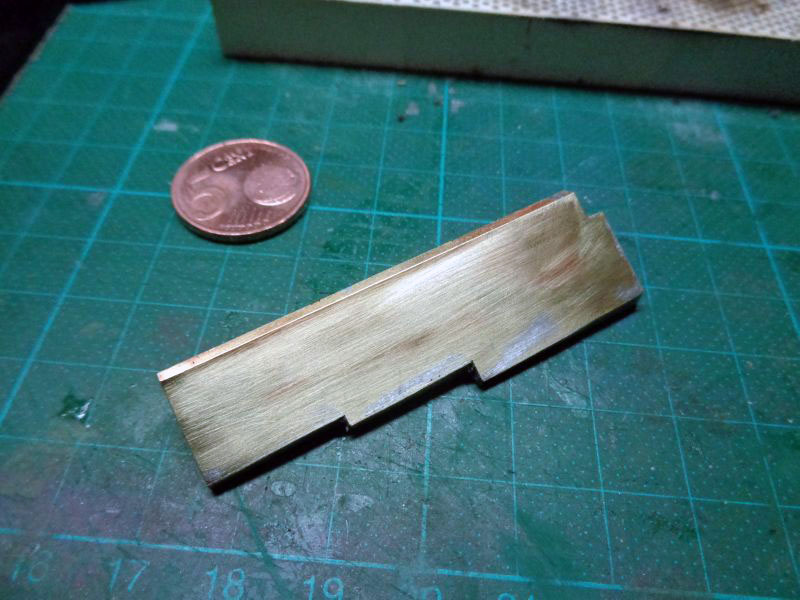 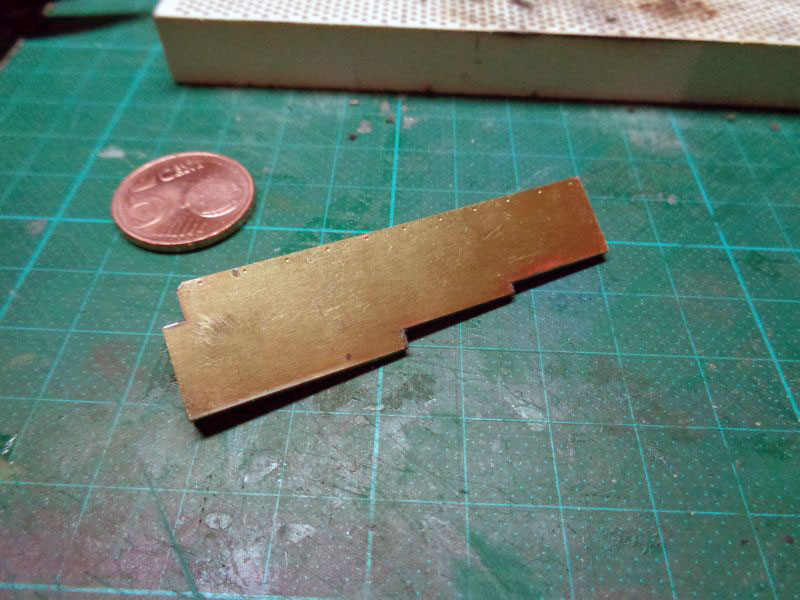 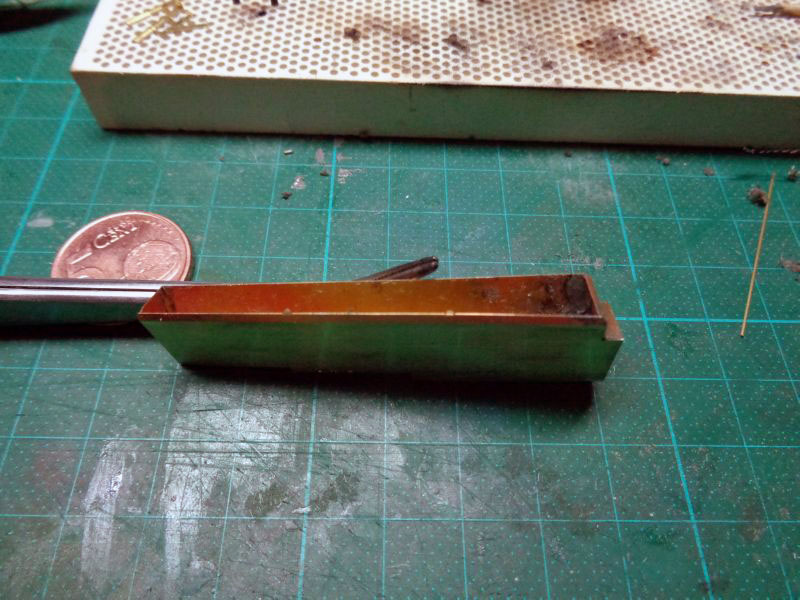 sorry for the heavy image posts again... |
|
|
|
Post by wbill76 on Sept 13, 2015 11:42:40 GMT -5
Now that's some serious PE work going on. Nice!
|
|
|
|
Post by deafpanzer on Sept 16, 2015 10:30:00 GMT -5
AMAZING PE work!
|
|
|
|
Post by tigrazor on Sept 16, 2015 17:19:20 GMT -5
Wow... thats incredible! Where did you get the big holder from?
|
|
|
|
Post by Leon on Sept 16, 2015 17:34:42 GMT -5
That is some great PE work Coro! Nice job on the soldering. |
|
coro69
Full Member
Member since: January 2015
Posts: 351
|
Post by coro69 on Sept 17, 2015 18:54:07 GMT -5
|
|
|
|
Post by tigrazor on Sept 17, 2015 23:41:10 GMT -5
Yep, exactly that block Looks quite useful.And they even have brass mesh. |
|
John Everett
Full Member
Member since: January 2012
July, 2016 MoM Winner
Posts: 1,278
Jan 17, 2012 0:53:48 GMT -5
Jan 17, 2012 0:53:48 GMT -5
|
Post by John Everett on Sept 17, 2015 23:44:34 GMT -5
What the others have said, beautiful solder work!
|
|
coro69
Full Member
Member since: January 2015
Posts: 351
|
Post by coro69 on Sept 18, 2015 2:12:50 GMT -5
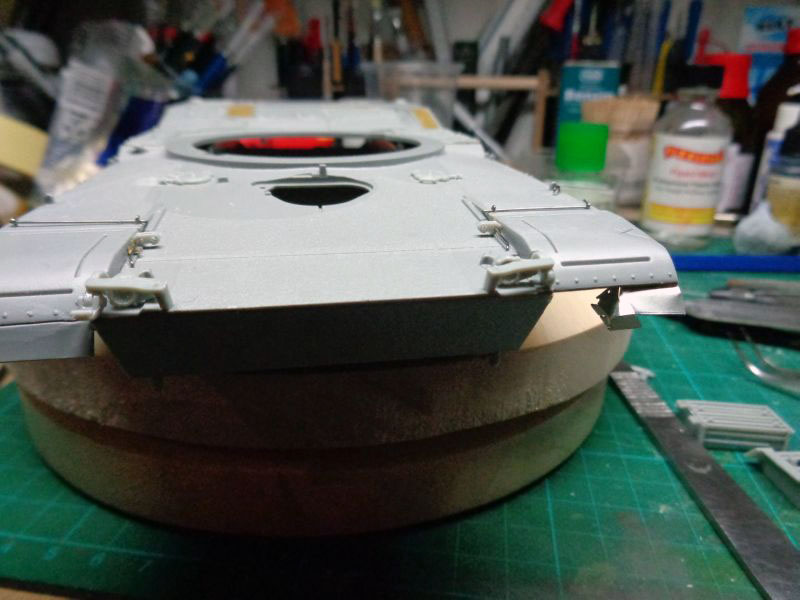
thanks for the compliments, guys... keeps me going through the top fencing of the rear basket... there i switched to superglue, cause there all the parts get so tiny, i fear to loose all the small details with too much solder... but i hate superglue... the benefit of using a open flame while soldering, not too touch the parts, is lost again with supergluing... there you have to touch the parts in some way or another... either you apply the superglue first and then try to place the small parts on the right spot. but then you have so much superglue on... or you first place and position your parts to glue, but then you have to touch it again, to hope to let the capillary effect do his work... but what do i tell you all.. you all know the game... the smallest parts i have to use right now, are just roughly 1x1 mm... they are f....g my eyes and old tattering fingers... yesterday i was tempted to apply solderpaste to all the smallest superglued parts and try to solder it... but i am afraid of ruining all my present work done... |
|