|
|
Post by wbill76 on Sept 14, 2015 18:49:59 GMT -5
Nice to see you got the gap issue sorted Bill!  Me too, it wasn't looking too good when I tried to use only hand squeeze pressure the first time around to see how it all fit together. Thank goodness for Harbor Freight!  |
|
DeafStuG
Full Member
  
Member since: May 2013
..
Posts: 1,283 
|
Post by DeafStuG on Sept 14, 2015 19:26:58 GMT -5
Good job. why not is rubber band with propeller? lol  |
|
|
|
Post by dupes on Sept 15, 2015 8:14:58 GMT -5
Did you say 10 HOURS of sanding?
|
|
|
|
Post by wbill76 on Sept 15, 2015 10:44:27 GMT -5
Thanks Jeremy! You've been doing too much time with your Spitfires!  Did you say 10 HOURS of sanding? Yep. Maybe closer to 12 if you throw in the scribing. All because of those massively out of scale weld lines. Makes dealing with road wheels seem like a walk in the park.  |
|
|
|
Post by dupes on Sept 15, 2015 10:54:55 GMT -5
I would have boxed the kit back up and thrown it in the "sale" pile...but that's just me.  |
|
|
|
Post by wbill76 on Sept 15, 2015 12:17:23 GMT -5
I would have boxed the kit back up and thrown it in the "sale" pile...but that's just me.  You're not alone. A lot of ship guys are unhappy that Trumpeter didn't fix it after getting panned on it with the USS New York. I knew what to expect from the reviews. You've got 3 choices really. Leave it as is, remove them completely, or sand to scale. I chose to sand but it takes the most time of the 3 obviously.  I seriously considered going for #2 but decided to take a stab at the sanding to see what could be salvaged. |
|
|
|
Post by dupes on Sept 15, 2015 14:31:37 GMT -5
I mean, seriously. I build entire models in 12 hours!
Do you think that you were able to achieve the look the Trumpeter SHOULD have gotten?
|
|
|
|
Post by wbill76 on Sept 15, 2015 16:45:28 GMT -5
I mean, seriously. I build entire models in 12 hours! Do you think that you were able to achieve the look the Trumpeter SHOULD have gotten? I think so...but won't be sure until I get some paint on it.  |
|
|
|
Post by wbill76 on Sept 15, 2015 17:23:25 GMT -5
Removed the clamps and bands and everything held together as expected. Just a small amount of sanding and putty work here and there ensured a solid join all around. I also added the stabilizers as called for in Step 3. Step 2 calls for the main decks to be installed, but I'm not ready to do that just yet. 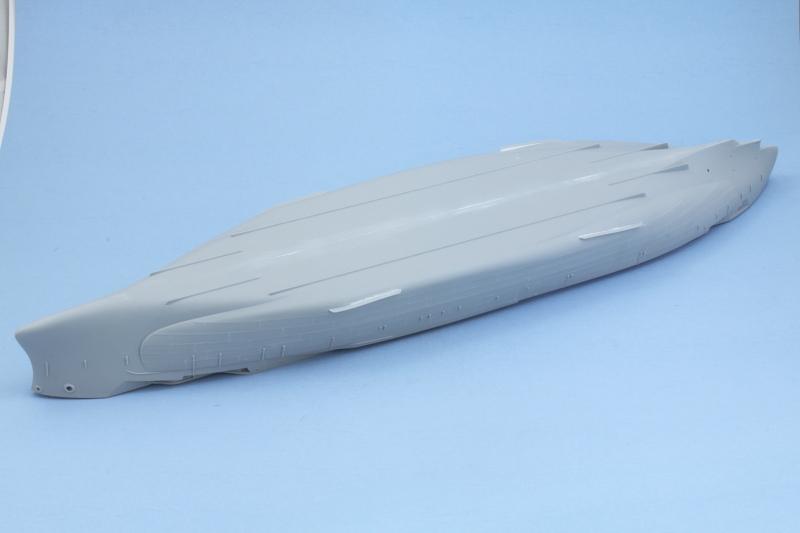 The rest of Step 3 deals with the installation of the prop shafts and the rudder. The base mount includes the long shaft but, unfortunately, the diameter fit with the shaft supports is a little too tight...and I ended up horribly mangling one shaft during the test fit attempts to slide the supports into place. Out came the brass rod for replacement. Clipped off the mangled rod, drilled out a hole in the base part before its install on the hull, and fed the rod through to the right length, then clipped it so there was enough to support the propellers later on. I didn't glue the shafts in place as that makes life just a touch easier for painting and detailing later on. The attachment points molded into the hull are larger than the parts themselves, so a little putty work was needed to correct that too. Step 3 also calls for the assembly of a whole bunch of detail parts like the AA guns and ladders, but that will be tackled much later on. It's worth noting at this stage though that they repeated the diagram count from the USS New York for the 40mm guns and 10 are needed instead of the 8 called out. 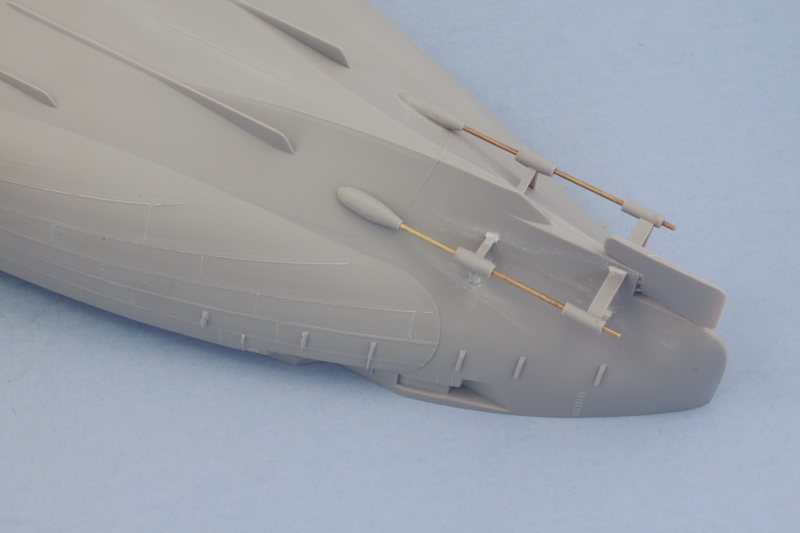 Next up will be getting some paint on the hull! |
|
DeafStuG
Full Member
  
Member since: May 2013
..
Posts: 1,283 
|
Post by DeafStuG on Sept 15, 2015 19:37:06 GMT -5
Good quailty the hull surface and nice strength prop shafts no break more.
I just wondering - Are the AA guns and ladders come with some parts add on from aftermarket P.E. / Resin or standard PE from the kit?
|
|
|
|
Post by wbill76 on Sept 15, 2015 19:41:45 GMT -5
Good quailty the hull surface and nice strength prop shafts no break more. I just wondering - Are the AA guns and ladders come with some parts add on from aftermarket P.E. / Resin or standard PE from the kit? The kit includes PE for the 20mm and 40mm Guns. The Master barrel set only has barrels for the 3" and 5" secondary Guns in addition to the 14" main battery. |
|
DeafStuG
Full Member
  
Member since: May 2013
..
Posts: 1,283 
|
Post by DeafStuG on Sept 15, 2015 19:50:37 GMT -5
Good quailty the hull surface and nice strength prop shafts no break more. I just wondering - Are the AA guns and ladders come with some parts add on from aftermarket P.E. / Resin or standard PE from the kit? The kit includes PE for the 20mm and 40mm Guns. The Master barrel set only has barrels for the 3" and 5" secondary Guns in addition to the 14" main battery. Cool, very nice. |
|
|
|
Post by deafpanzer on Sept 16, 2015 12:22:48 GMT -5
Did it pass the bath test? Sorry I have to make sure... looking forward to many more updates!
|
|
|
|
Post by wbill76 on Sept 16, 2015 12:36:03 GMT -5
Did it pass the bath test? Sorry I have to make sure... looking forward to many more updates! Watertight in all respects Andy!  |
|
|
|
Post by Leon on Sept 16, 2015 15:17:40 GMT -5
Nice save on the prop shafts Bill! Hull looks really good.  |
|
|
|
Post by wbill76 on Sept 16, 2015 19:25:25 GMT -5
Thanks Leon! Never know when a good piece of brass rod will come in handy.  |
|
|
|
Post by JimD on Sept 16, 2015 20:32:27 GMT -5
Chugging right along. Real shame about the overdone moldings. Dealing with that could very well suck the mojo of a build right out of me. Of course your efforts have paid off. Good show.
|
|
|
|
Post by dierk on Sept 17, 2015 2:52:37 GMT -5
Jolly good show indeed. Honstly though, this sort of kit could put me off floaty thingies for life.
|
|
|
|
Post by wbill76 on Sept 17, 2015 11:44:25 GMT -5
Dierk, ships are kind of their own beast when it comes to stuff like this I think but when the manufacturer makes life even harder than usual, you can only shake your head at it! I mean all it would take is one look at the hull test shot to know that they had made a mistake...but by then it may have been too late to change the tooling on the moulds. Oh well, that's why it's called 'building' and not just 'assembling'!  Chugging right along. Real shame about the overdone moldings. Dealing with that could very well suck the mojo of a build right out of me. Of course your efforts have paid off. Good show. Thank goodness for football season starting!  I've always found having an NFL game on helps a lot with doing tedious, repetitive stuff like this. You're right though, it can be a real mojo-sapper depending on the circumstances. 
|
|
|
|
Post by wbill76 on Sept 17, 2015 16:06:57 GMT -5
As I was checking whether or not I could add the little side sponsons that make up the elevated 5" gun mounts (parts E29 and E31 in Step 5) and attach to the hull before painting, I discovered 2 things. The first is no, I couldn't add them since the main decks have to be in place first. The second is that the top edges of the hull now that they are joined were just a little too narrow for the decks to slot in properly and needed to be spread slightly to avoid putting too much tension on the decks and causing fit problems. The solution to the 2nd problem is fairly straightforward, I needed to put in some braces at strategic points to spread the top edge just enough to eliminate the tension but not too much to create gap issues. Fortunately, the sprue runner that held the hull halves had some sturdy lengths of sprue that would do the trick nicely. It also helped that the diameter of that sprue is larger than any of the others but is the same diameter as the ejector pins that were used on that mold. All but one of the places I needed to spread the top were at the ejector pin locations...a happy coincidence perhaps? Lengths were cut and sanded down to provide the right tension and voila! One spreader was needed for the bow half, three spreaders for the stern. 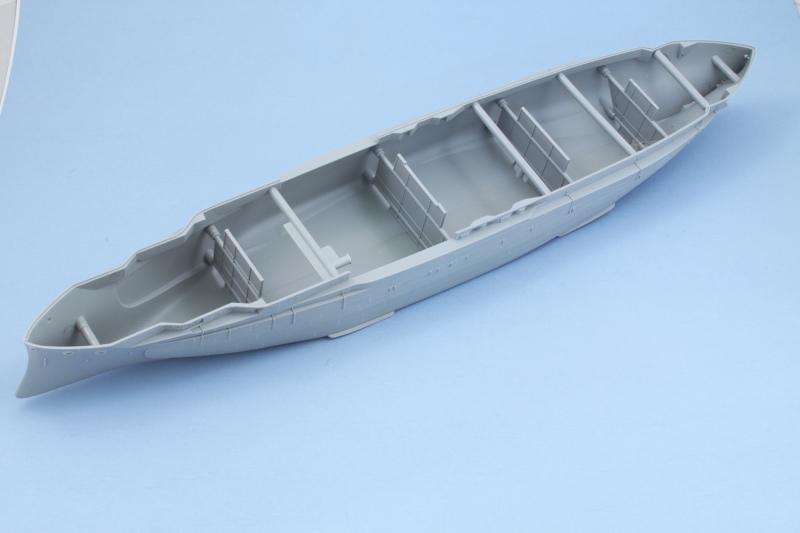 That meant I could proceed with the hull painting, so a trip into the spray booth and an airbrushed primer coat of MM Flat Black was laid down in short order. This will do triple duty...primer, pre-shade, and create the boot stripe without having to mask it individually. 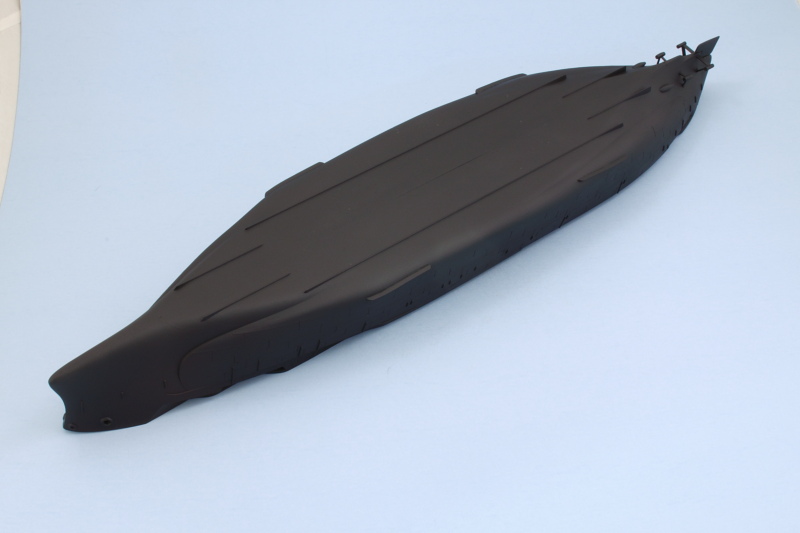 The sanding work done earlier looks good under paint, just the right effect in my opinion, so that's a relief! After it's set, I'll work on the hull red section next. |
|
|
|
Post by Leon on Sept 17, 2015 16:42:24 GMT -5
Nice fix on the hull tension Bill! Primer is looking good.  |
|
|
|
Post by Deano on Sept 17, 2015 18:22:13 GMT -5
Wild Bill building the Texas , that makes perfect sense . Great work already mate  |
|
|
|
Post by wbill76 on Sept 17, 2015 18:34:41 GMT -5
Thanks Leon! Had to resist the temptation to paint the hull red today but I know better about letting the first coat cure a little before doing masking for a big job like this.  Tomorrow is always there! Wild Bill building the Texas , that makes perfect sense . Great work already mate  I admit to there being a little 'local pride' involved in this project...which is ironic too considering I've never been to the actual ship itself. Something about it being about a 20-hour drive away even though it's still in the same state! I've enjoyed reading about her operational history as part of my usual research, it's got some fascinating moments. |
|
|
|
Post by Deano on Sept 17, 2015 18:39:17 GMT -5
Cant say I blame you mate , 20 hours driving is just a lil bit too much lol
|
|
|
|
Post by wbill76 on Sept 18, 2015 16:15:56 GMT -5
More time spent with the airbrush today, this time on the hull red portion. I used blue painter's tape to mask off the lower edge of the boot stripe and applied MM enamel Insignia Red in very light thin passes to build up the red and allow for some shading/variation to show through. Having the rudder attached makes it virtually impossible to set the hull on any kind of level surface, so it's being handled separately to avoid having problems with it as the build progresses.  The moment of truth...the tape was removed and did its job beautifully. No touchups required! 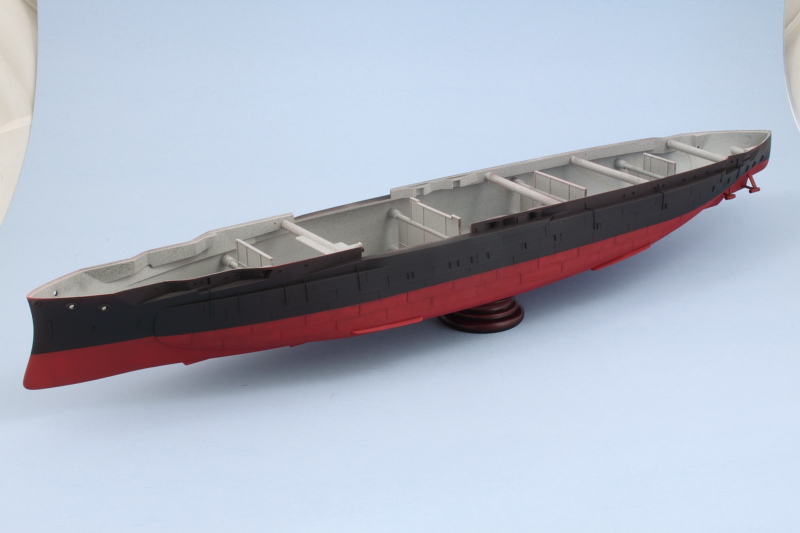 Next up will be masking the top edge of the stripe and adding the 5-N Navy Blue portion of the Measure 22 scheme. |
|
DeafStuG
Full Member
  
Member since: May 2013
..
Posts: 1,283 
|
Post by DeafStuG on Sept 18, 2015 17:13:45 GMT -5
Looking good.
|
|
afvfan
Senior Member
   
Member since: December 2012
Bob
Posts: 1,772
Dec 10, 2012 17:32:38 GMT -5
Dec 10, 2012 17:32:38 GMT -5
|
Post by afvfan on Sept 19, 2015 0:01:02 GMT -5
Coming along nicely there, Bill, though it seems like it's definitely making you work for it!
|
|
|
|
Post by Leon on Sept 19, 2015 5:29:48 GMT -5
Nice work on the hull painting Bill! Looking really good.  |
|
|
|
Post by wbill76 on Sept 19, 2015 10:48:16 GMT -5
Thanks Leon and Jeremy! Coming along nicely there, Bill, though it seems like it's definitely making you work for it! True enough Bob but that's what keeps things interesting. It's a fine line though that drives much of the insanity of the hobby!  |
|
|
|
Post by armorguy on Sept 19, 2015 13:13:34 GMT -5
Great progress, the tape did its job perfectly !
|
|