|
|
Post by wing_nut on Sept 25, 2015 7:47:52 GMT -5
Nice work on the hull Bill. Starting to take shape. We need to trade light tents. The set I bought came with a 12" and 36". The 36" is so freaking huge. Too big to leave up since the only place it fits is the dining room table. I need something in the middle.
|
|
|
|
Post by wbill76 on Sept 25, 2015 9:58:13 GMT -5
Thanks Dierk, don't want to interfere with your own projects for sure!  Nice work on the hull Bill. Starting to take shape. We need to trade light tents. The set I bought came with a 12" and 36". The 36" is so freaking huge. Too big to leave up since the only place it fits is the dining room table. I need something in the middle. You could always make your own. Google DIY Light box, there's a great tutorial out there that shows how to do one cheap and easy! The one I have is a 26w x 35h collapsible tent that I leave up all the time. Got it years ago from a photography place online via Amazon. |
|
|
|
Post by wbill76 on Sept 25, 2015 16:42:33 GMT -5
The Master barrel set includes turned brass replacement barrels for the 5-inch guns and initially I thought there was some mistake as they are substantially longer than the kit parts. However, once I placed the kit parts and then compared the barrel protrusion length to the reference photos, it was obvious that the kit parts are both too short and too thick. So out came the sprue cutters to remove the kit barrels. I used a #76 drill bit and CA gel to fit the brass barrel after some careful sanding and trimming to preserve the recoil housing detail. 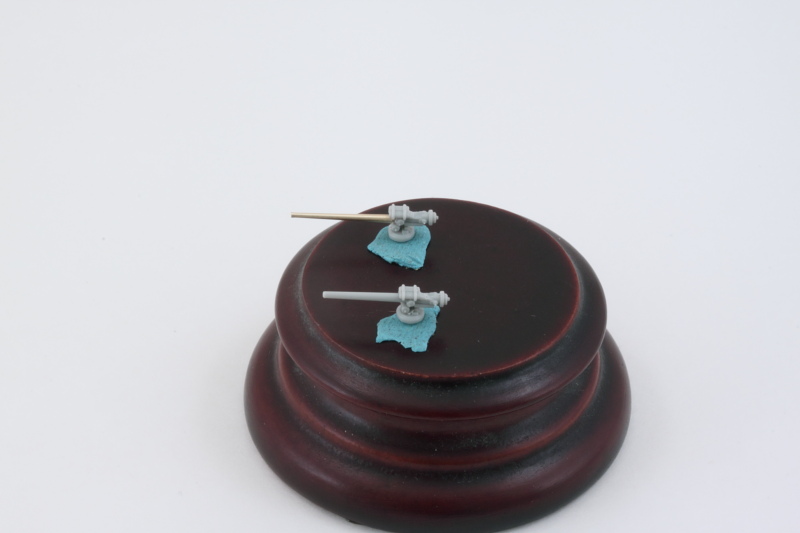 As I worked on each gun, I checked their fit and angle alignment on the gun deck. The angles needed are slightly different in the three different mounts so that they will properly clear the edge of the bulge. 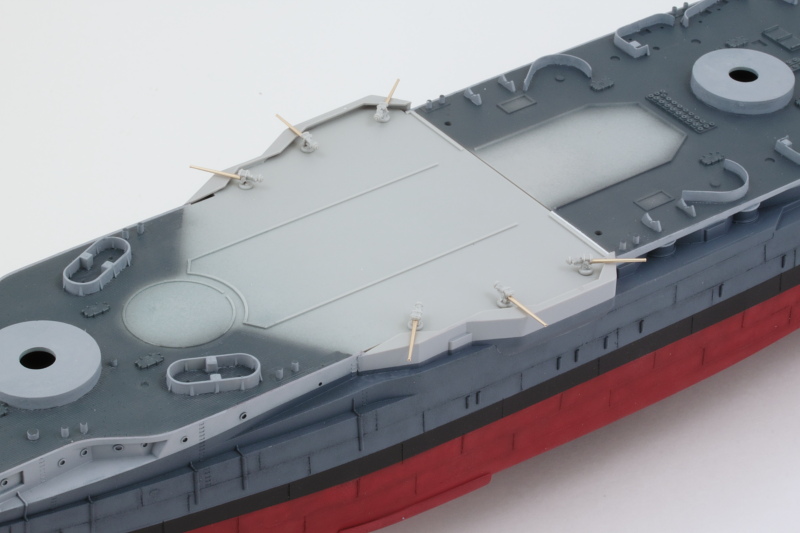 The first step in getting the 02 deck level ready for installation involved airbrushing the Deck Blue where needed. Since I had cleaned up the 03 deck to see what areas it would cover, I went ahead and airbrushed it at the same time. 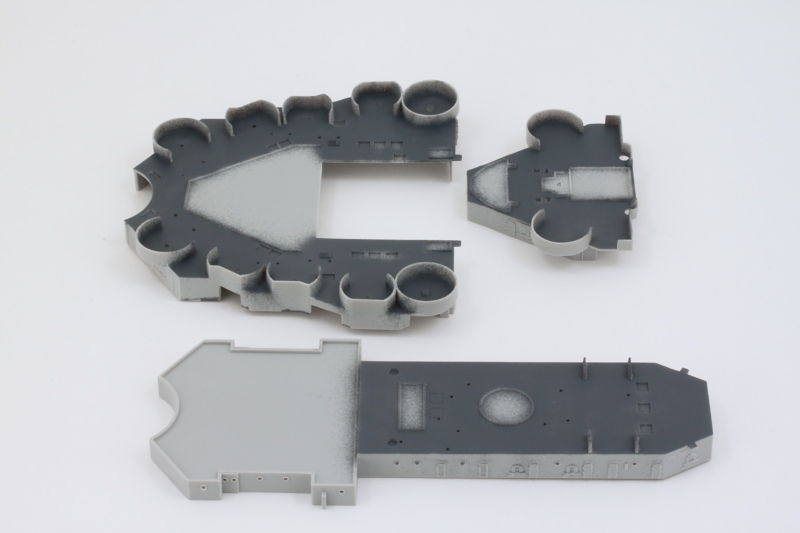 Next up will be getting the Haze Gray on so I can go ahead with the 02 deck install along with the 5-inch guns. |
|
|
|
Post by dierk on Sept 26, 2015 1:33:11 GMT -5
Brass barrels look pot on and a vast improvement over the kit parts! Thumbs Up!
|
|
|
|
Post by wbill76 on Sept 26, 2015 10:17:04 GMT -5
Brass barrels look pot on and a vast improvement over the kit parts! Thumbs Up! Thanks Dierk! It always amazes me how something like that can make such a difference. The 3-inch barrels are even smaller and there are 12 of them! I've seen super detail sets that go even further with replacement 40mm and 20mm barrels for the AA Guns. Now that's a little crazy if you ask me.  |
|
|
|
Post by dupes on Sept 26, 2015 11:01:21 GMT -5
Dang. You're moving right along on this one Bill!
|
|
|
|
Post by wing_nut on Sept 26, 2015 11:33:43 GMT -5
Now that's a little crazy if you ask me.Something crazy small? OK... I'll build it! 
|
|
|
|
Post by wbill76 on Sept 26, 2015 12:11:01 GMT -5
Dupes, doing my best to keep a steady pace. Hard to believe I've been working on it for 2+ weeks now and only have made it through the first 4 steps on the instructions.  Now that's a little crazy if you ask me.Something crazy small? OK... I'll build it!  Check with Todd, I'm sure he's got some insane 1/700 stuff you could go crazy with. 
|
|
|
|
Post by wing_nut on Sept 26, 2015 19:25:46 GMT -5
1/700 scares even me  |
|
|
|
Post by JimD on Sept 26, 2015 20:15:27 GMT -5
The Master barrels are a great improvement. This one seems to be moving pretty quickly too. Looking great.
|
|
|
|
Post by wbill76 on Sept 26, 2015 20:43:56 GMT -5
The Master barrels are a great improvement. This one seems to be moving pretty quickly too. Looking great. It's all deceptive...there's sooo much little bitty detail to come, I haven't even started on those things yet.  I agree on the Master barrels...the 3-inch guns also get replacements and they are tinier. That's going to be an exercise in patience as there are 12 of them vs. only 6 for the bigger 5-inch guns.  |
|
|
|
Post by wbill76 on Sept 26, 2015 20:44:13 GMT -5
Some days the progress is measured in terms of inches. Today was one of those days, mostly due to all the masking that was needed for the gun tubs on the 02 and 03 deck levels. Following up from yesterday's Deck Blue session, today was all about the Haze Gray. I spent more time masking than I did actually painting, that's the way of it for this kind of paint scheme! While I was at it, the B turret barbette and the 5-inch guns also got their turn with the airbrush. 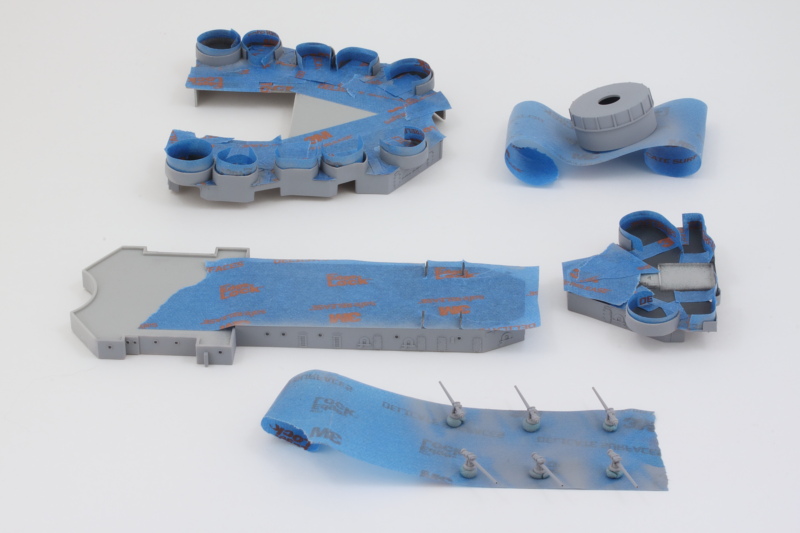 Once all the masking was removed, some small touch-ups were needed with the Deck Blue. Easily taken care of courtesy of the Optivisor and a pointed 10/0 brush. 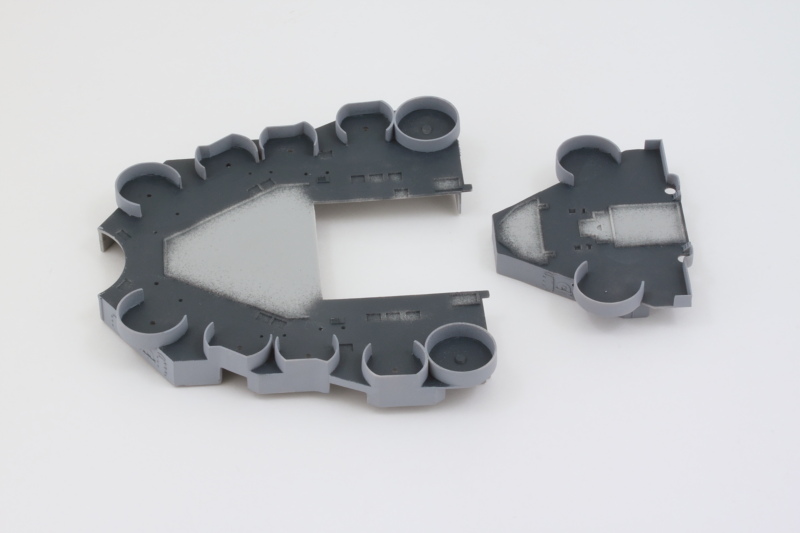 Next up will be the actual installation of the 5-inch guns and the 02 deck. |
|
|
|
Post by Leon on Sept 26, 2015 20:54:55 GMT -5
Nice progress Bill, looking really good.
|
|
|
|
Post by dierk on Sept 27, 2015 2:49:41 GMT -5
I'll leave the pot in the place reserved for pots and call it 'spot on' this time LOL
|
|
|
|
Post by wbill76 on Sept 27, 2015 10:26:18 GMT -5
Thanks Leon ! I probably spent a good 2+ hours masking in 2 different sessions vs only about 15 minutes actually painting with the airbrush.  I'll leave the pot in the place reserved for pots and call it 'spot on' this time LOL That will make for a more orderly work bench for sure Dierk!  |
|
|
|
Post by wbill76 on Sept 27, 2015 19:08:17 GMT -5
Focus for today was getting the 02 level deck installed. I had airbrushed some Haze Gray in the recessed areas as a precaution even though very little of it is actually visible once the deck is in place. Exposed portions of the bulge top were painted Deck Blue and the 5-inch guns installed at the desired angles. The base of the 02 level was also glued into place first so I would have a solid foundation to work from to correct the warp issue mentioned earlier. 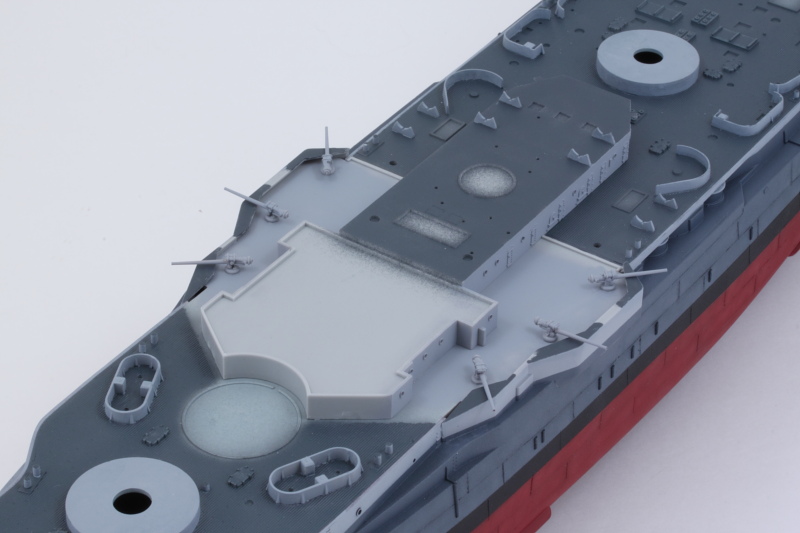 The actual 02 deck is a tight fit with the hull bulge so that helps correct some of the warp but not all of it. I used regular glue to give me plenty of work time and pressed the deck in place starting at the rear and working towards the bow. A rubber band and a pair of compression clamps helped things along as well. Once the glue had grabbed a bit, I added the B turret barbette to help hold things in place. 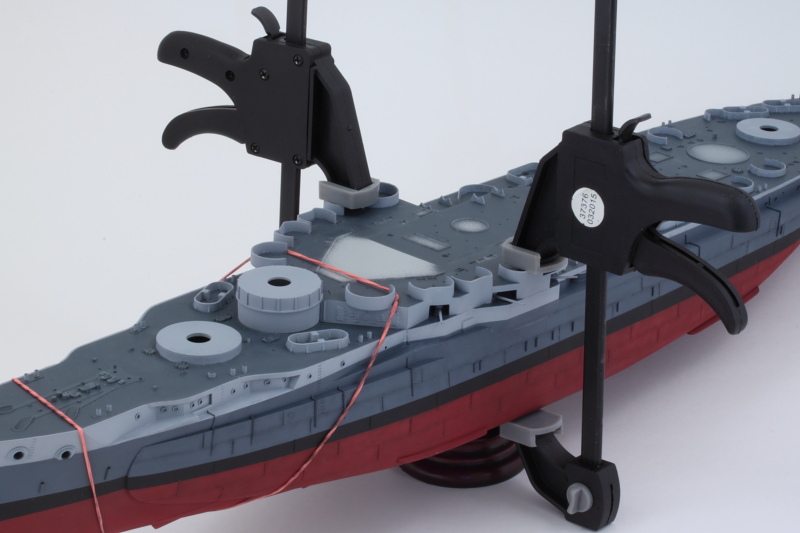 After the clamps were removed, I decided that I wanted to do something besides use the kit-supplied base to display Texas when she's built. A quick trip to Lowe's and I found some excellent copper knobs that are perfect. That meant I needed to drill some holes in the hull to take their mounting screws. As a result of the drilling, the hull separated a little, so I dosed it with some liquid glue and the clamp once more to solve that little problem. 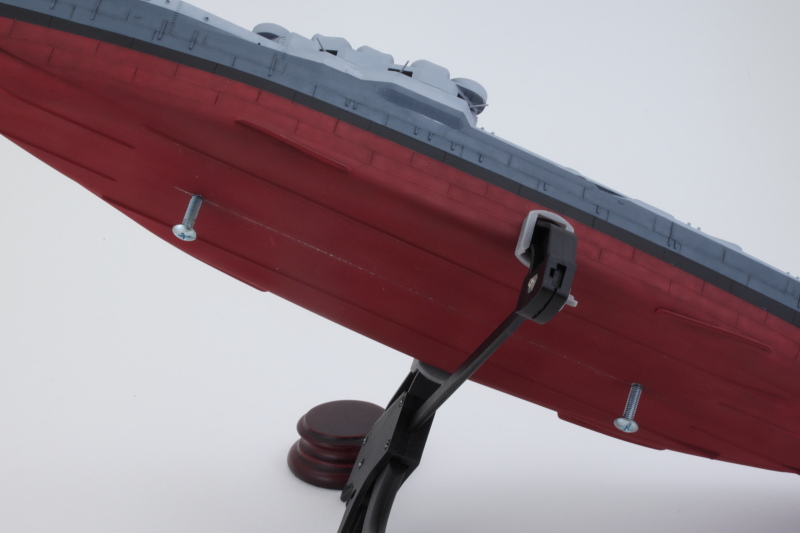 After a couple of touchups in some spots, the 02 deck is now on. That completes Step 5...out of 37...still a long way to go!  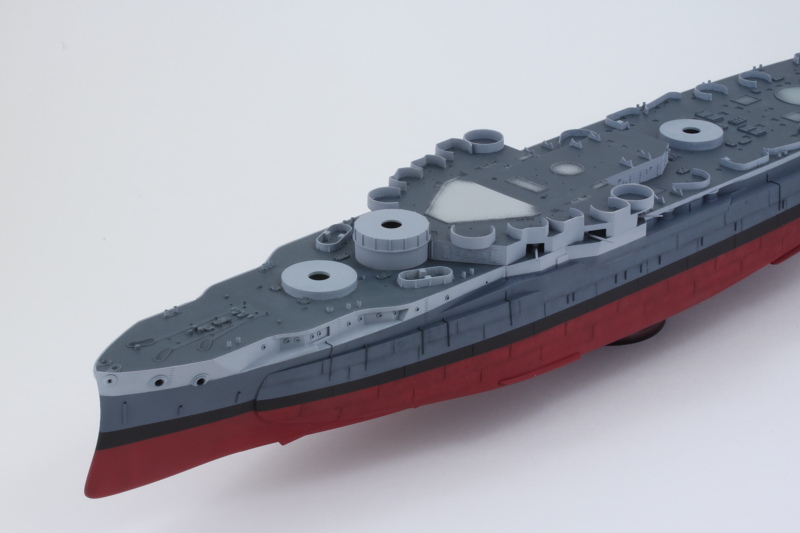 |
|
|
|
Post by Leon on Sept 27, 2015 19:22:22 GMT -5
WOW....Coming together nicely Bill!  |
|
|
|
Post by dierk on Sept 28, 2015 2:43:43 GMT -5
Looking betterer and betterer! Only 32 steps to go? At your current speed you'll be done by the end of next week LOL
|
|
|
|
Post by wbill76 on Sept 28, 2015 12:55:10 GMT -5
Thanks Leon! Clamps are a ship builder's best friend.  Looking betterer and betterer! Only 32 steps to go? At your current speed you'll be done by the end of next week LOL The trouble with the remaining 32 steps is that all the big stuff is now essentially done...it's the details that take up all the rest!  That means slow work as a lot of it is tiny and includes PE, the bane of speedy builds everywhere.  |
|
|
|
Post by dierk on Sept 29, 2015 1:53:30 GMT -5
Tiny PE - yay! My favourite  ... well, actually my CM's favourite  |
|
mrversatile
Full Member
   July '23 Showcased Build Awarded
Member since: January 2013
Posts: 682
Jan 20, 2013 10:52:24 GMT -5
Jan 20, 2013 10:52:24 GMT -5
|
Post by mrversatile on Sept 29, 2015 10:00:11 GMT -5
Wow Bill, looking great. I am jealous of your progress vs my destroyer. Looks like you might complete a battlewagon quicker than I can complete my destroyer, and such high quality as well. I am enjoying the project. Keep up the good work.
|
|
|
|
Post by wbill76 on Sept 29, 2015 10:29:52 GMT -5
Mine too Dierk! CM loves the little stuff.  Wow Bill, looking great. I am jealous of your progress vs my destroyer. Looks like you might complete a battlewagon quicker than I can complete my destroyer, and such high quality as well. I am enjoying the project. Keep up the good work. Glad to have you along! I've had a couple of weeks off in between teaching university classes so that has made for more than the usual bench time. Next class starts up again on Tuesday so that will slow things down a bit as a result.  |
|
|
|
Post by wbill76 on Sept 29, 2015 17:19:02 GMT -5
Steps 6 through 9 deal with the superstructure elements that build up from the 02 deck and around the forward tripod mast. Most of the day was spent cleaning them up and dealing with various seams, ejector marks, and checking the fit relative to each other to ensure everything played nice. I did find one small problem, the hole in part M15 that is the last element that the main forward leg of the tripod passes through before contacting the 02 deck wasn't big enough for the tripod leg to pass through. It needed to be slightly wider, so a quick session with a round needle file did the trick. It would've been extremely difficult to fix if I had already attached it per the instructions in Step 6, so glad I caught it early. I also checked all the other openings that the different legs have to pass through and none of them had any issues. I left off the different PE bits that attach in delicate spots for the time being since I need to handle them quite a bit still for painting and something would be sure to get knocked off and lost in the process. Just the law of averages with that kind of thing! I did attach the two small side platforms that go on the conning tower even though they aren't mentioned until Step 11. It just makes more sense to have them on now for painting vs. adding later. 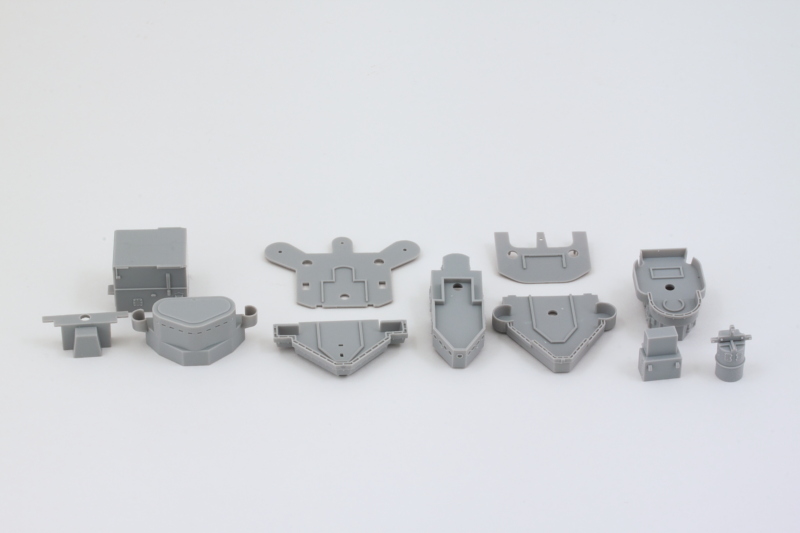 Not all of the areas in the superstructure have Deck Blue areas, so after checking the reference photos, the appropriate ones were singled out and given a dose courtesy of the airbrush. 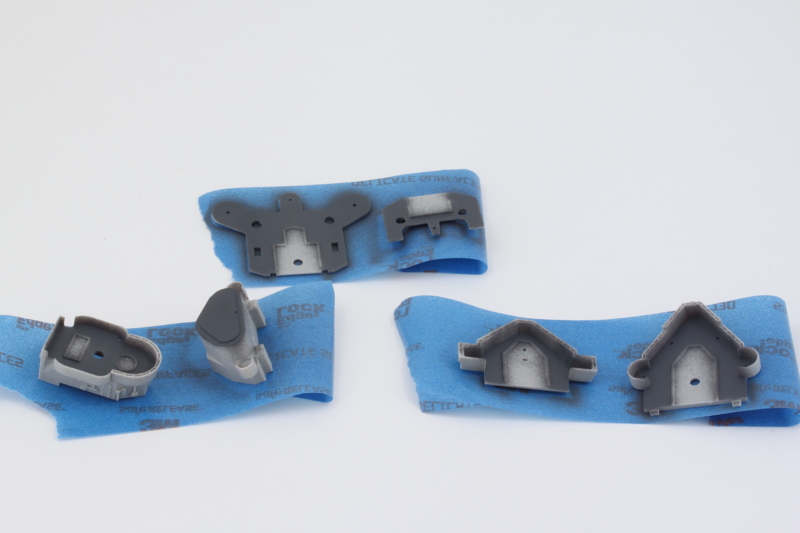 That means as you might have guessed, more fun with masking tape to come!  |
|
|
|
Post by Leon on Sept 29, 2015 17:37:11 GMT -5
Nice days progress Bill! Try not to have to much fun with the masking.  |
|
|
|
Post by wbill76 on Sept 29, 2015 17:41:01 GMT -5
Nice days progress Bill! Try not to have to much fun with the masking.  I'll be the Lone Ranger by the end.  |
|
|
|
Post by dierk on Sept 30, 2015 2:23:09 GMT -5
Nice days progress Bill! Try not to have to much fun with the masking.  I'll be the Lone Ranger by the end.  You'll have run out of masking tape by the end...  Nice save on the hole that was too small - following instructions is over-rated anyway, and won't get you off when push comes to shove (obscure Nuremberg reference in case you were wondering  ) I may have found a solution to PE bits getting knocked off during handling: got some slow-curing MXBON 401 CA glue - until it goes off it doesn't stick at all (I had sort of expected a gradual increase in adhesion) but when it does, the bond is so strong you'd need a saw to separate the pieces. Works great for resin too. |
|
|
|
Post by wbill76 on Sept 30, 2015 10:12:30 GMT -5
You'll have run out of masking tape by the end...  Nice save on the hole that was too small - following instructions is over-rated anyway, and won't get you off when push comes to shove (obscure Nuremberg reference in case you were wondering  ) I may have found a solution to PE bits getting knocked off during handling: got some slow-curing MXBON 401 CA glue - until it goes off it doesn't stick at all (I had sort of expected a gradual increase in adhesion) but when it does, the bond is so strong you'd need a saw to separate the pieces. Works great for resin too. You're right about the problem with a Nuremberg defense build Dierk!  I've got plenty of tape on hand fortunately. The wide 3" stuff that I cut down as needed with the cancer causing cutting mat!  Makes a little bit go a long way. Your slow cure CA sounds like it's pretty strong, the trick is keeping the part in place long enough for it to set? Or use an accelerant/kicker? |
|
|
|
Post by dierk on Sept 30, 2015 10:40:49 GMT -5
Accelerant would work, but I haven't got any, so it's a case of hold still and count to 10. It can also be slightly unpredictable: when using very little it can go off much quicker than anticipated - caught me out a couple of times...now I'm more generous with it and soak up the excess with tissue.
|
|
|
|
Post by wbill76 on Sept 30, 2015 20:30:31 GMT -5
After masking off yesterday's Deck Blue effort, I airbrushed the Haze Gray on all the different superstructure components. Once that had dried, I set to work getting the three different levels together. The instructions would have you install the conning tower level to the 02 deck in Step 7 but it's a lot easier to add its details and check the fit with the upper superstructure if it's left free standing, so I held off on that for now. I did go ahead and assemble the conning tower deck components together as called for in Step 6 and added the railings and ladders from Step 9 as well. I'm using something new for these delicate PE parts, Gator Grip Thin Blend, and so far I'm pretty happy with the results. 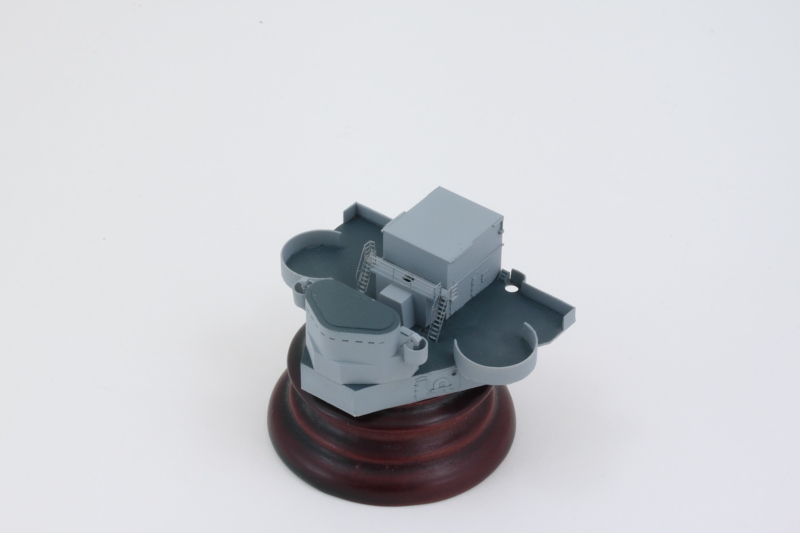 The upper superstructure components were assembled next as directed in Step 8 with the exception of adding the support legs for the level directly above the conning tower. Since there's a lot of complex railing that goes around the back edge, I wanted to be able to work with it as a relatively flat structure first to shape them correctly. Those aren't called out until Step 14 so it definitely pays to be looking ahead on all these areas. Rounding out the day's efforts, I added all the little tiny detail bits called for in Step 11. Again, it's a lot easier to do that now with the decks loose vs. when they are all stacked together and installed, so I took advantage of the opportunity. 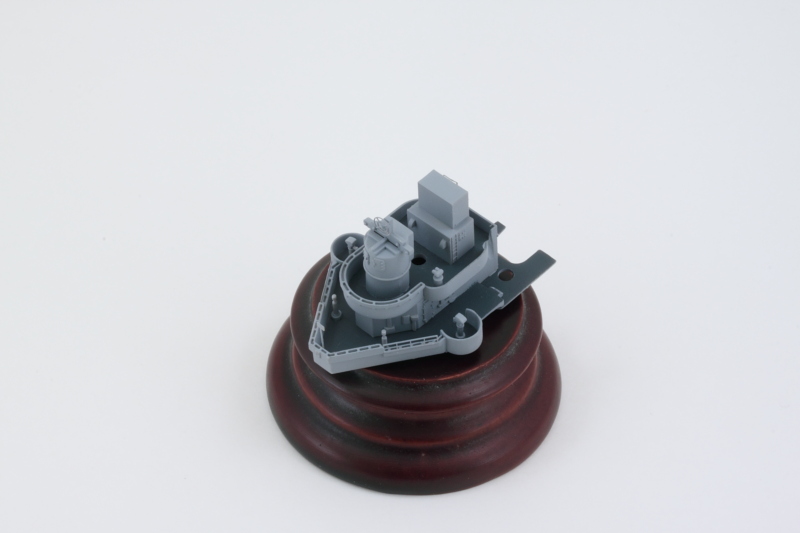 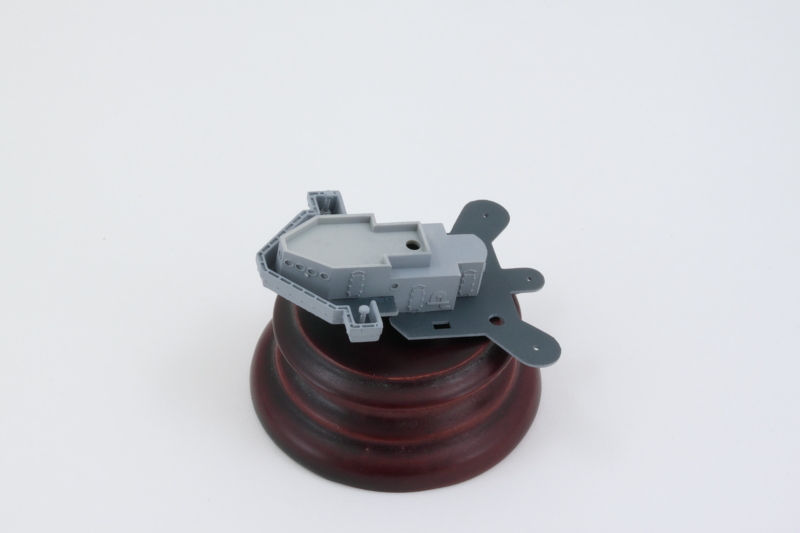 Next up will be spending a lot of time with the railings to get them into shape before stacking up the superstructure. |
|
|
|
Post by dupes on Sept 30, 2015 20:33:51 GMT -5
I really like the look of those big clamps you've got up there - I'm going to need to round some of those up. Do you recall where you found them?
|
|