|
|
Post by wbill76 on Sept 19, 2015 15:05:05 GMT -5
Thanks Guy!  |
|
|
|
Post by wbill76 on Sept 19, 2015 15:13:22 GMT -5
Round 2 in the masking and painting department is complete. This time, the top of the boot stripe was masked and an airbrushed coat of MM enamel 5-N Navy Blue applied. I went ahead and sprayed it over all the exposed areas even though some of it is going to be painted over with the 5-H Haze Gray for the final component of the Measure 22 scheme. It just makes life easier since there's going to be some complicated masking involved to add that final color. 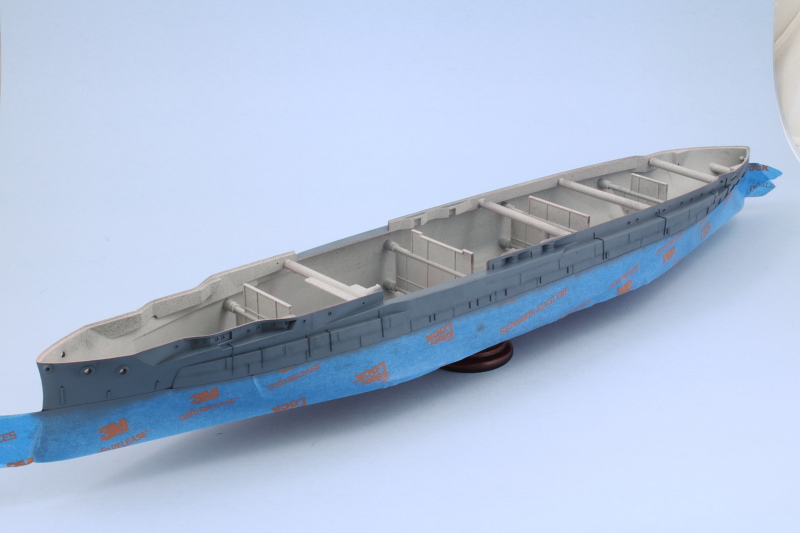 After the paint had touch dried, the tape came off once more. Voila! Boot stripe.  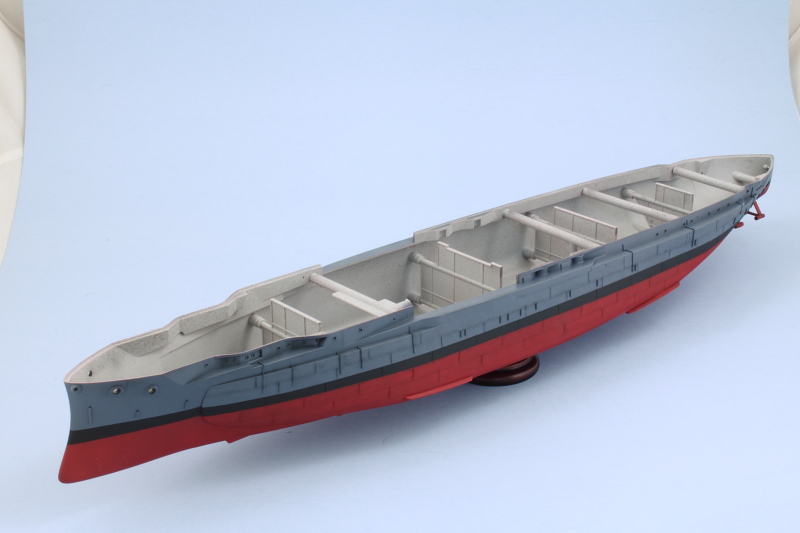 One more round of masking and painting to go before the hull is done. |
|
|
|
Post by JimD on Sept 19, 2015 15:30:09 GMT -5
Chugging right along. The hull is looking the part. She's going to look great in this scheme. I assume you've done some test fitting with the deck and it's all looking good as far as fit?
|
|
|
|
Post by wbill76 on Sept 19, 2015 15:50:33 GMT -5
Chugging right along. The hull is looking the part. She's going to look great in this scheme. I assume you've done some test fitting with the deck and it's all looking good as far as fit? Thanks Jimmy! It's all looking good now for fit, but only after I added the spreaders. Prior to that, the top edges were just about 1mm too narrow in several spots. That could be an end result of the clamping and rubber bands necessary to close the gap on the hull bottom when I joined the halves, so I can't say it's a 'flaw' in the kit per se. Just something that I had to deal with to be sure the decks would fit properly. |
|
|
|
Post by Leon on Sept 19, 2015 15:57:01 GMT -5
Nice progress on the painting Bill!  |
|
|
|
Post by wbill76 on Sept 19, 2015 15:59:07 GMT -5
Nice progress on the painting Bill!  Thanks Leon! Trigger finger's getting quite the workout the last few days.  |
|
|
|
Post by wbill76 on Sept 20, 2015 16:20:21 GMT -5
Got the final round of masking work done today. This time, I used thin cut strips of masking tape to create the demarcation line between the 5-N and 5-H. There are some complex curves/areas to deal with, so using the thinner strips helped a lot in that regard. Airbrushed MM enamel 5-H Haze Gray as the third color in the Measure 22 scheme. 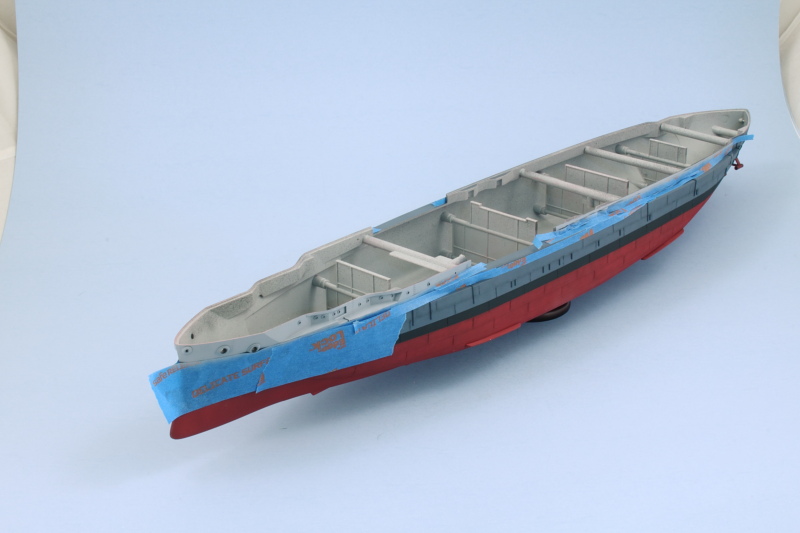 I also airbrushed the side bulges that have to stay separate until the main decks are installed. These were airbrushed with the 5-H first then masked to line up with the rest of the hull and the 5-N airbrushed for the areas that overlap onto the lower hull. It's a little ironic in that the 5-H is almost an exact color match to the kit's bare plastic, so that will make things possibly more interesting as I start working on all the little details going forward. Masking tape was removed and voila! Measure 22 is in place. 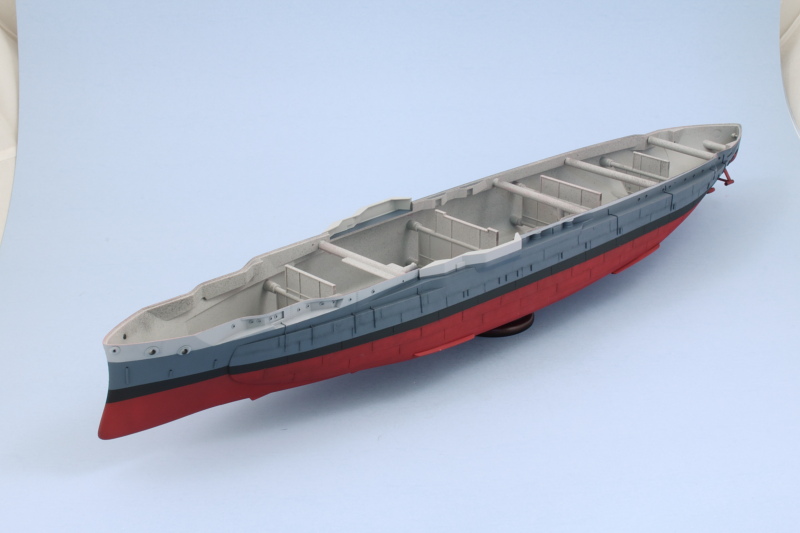 Next up will be getting the 20-B Deck Blue on the main decks. |
|
|
|
Post by Leon on Sept 20, 2015 17:54:57 GMT -5
That is looking really sharp Bill!  |
|
|
|
Post by wbill76 on Sept 21, 2015 13:26:02 GMT -5
Thanks Leon! This round was the trickiest to pull off but well worth the time and attention vs. the plain old full-hull 5-N scheme which was my other option.
|
|
ogrejohn
Full Member
   Oct '23 Showcased Model Awarded
Member since: June 2012
Go away or I shall taunt you a second time!
Posts: 1,302
Jun 1, 2012 17:33:59 GMT -5
Jun 1, 2012 17:33:59 GMT -5
|
Post by ogrejohn on Sept 21, 2015 15:42:06 GMT -5
Very nice Bill! Even though I lived in Texas for a couple of years I never got to tour the ship. Drove past it a couple of times making deliveries. I lived in Freeport just south of Houston.
|
|
|
|
Post by wbill76 on Sept 21, 2015 16:49:17 GMT -5
Very nice Bill! Even though I lived in Texas for a couple of years I never got to tour the ship. Drove past it a couple of times making deliveries. I lived in Freeport just south of Houston. Thanks John! It's kind of one of those 'local' things...when it's there all the time, it's not as special I guess.  There are a lot of important historical sites/landmarks here in my area as well that I've never got around to visiting even though I've lived here for more than 30 years!  |
|
|
|
Post by wbill76 on Sept 21, 2015 16:50:03 GMT -5
I was playing around in the photo booth today and decided to shoot the hull again on a white backdrop to see how much of a difference it would make with the color scheme. In the previous shots, the 5-N was showing more of a gray tone than blue...something I attribute to the light blue background, so here it is with the white. I'll probably stick with the white from here on out as it seems to be giving a much more accurate representation of the tonal variations achieved so far. 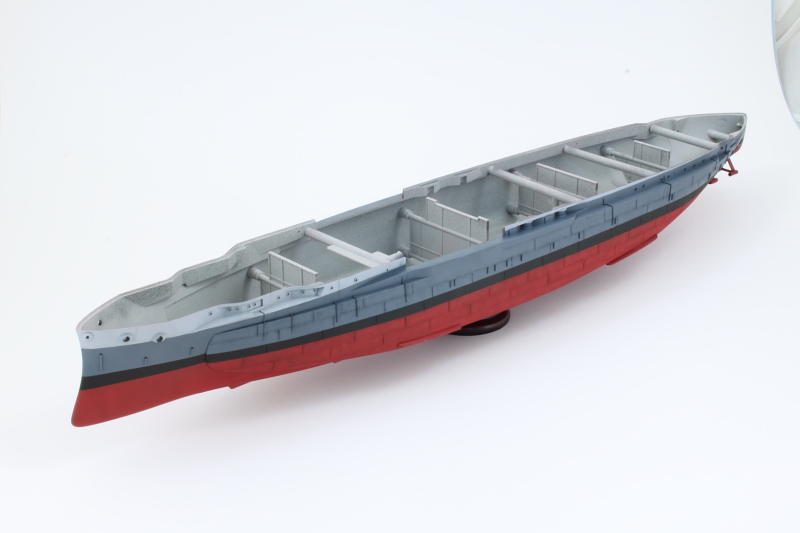 Speaking of tonal variations...more time with the airbrush got the 20-B Deck Blue sprayed on the main decks. All three of the MM enamels I've been using for the Measure 22 scheme are listed as semi-gloss, but the 20-B is probably the only one that's actually been behaving that way. It's much thinner straight out of the bottle vs the other two which makes it a little more challenging to spray consistently. It's also a grey-blue combination but darker than the 5-N. Once I get the details picked out, I might see about giving it a blue filter treatment similar to dealing with Panzer Gray to give it more of a nudge towards the blue side of the spectrum. 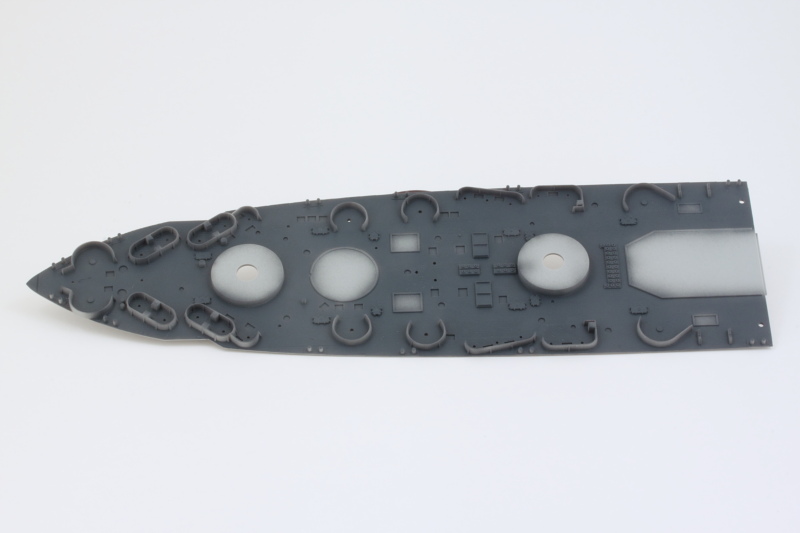 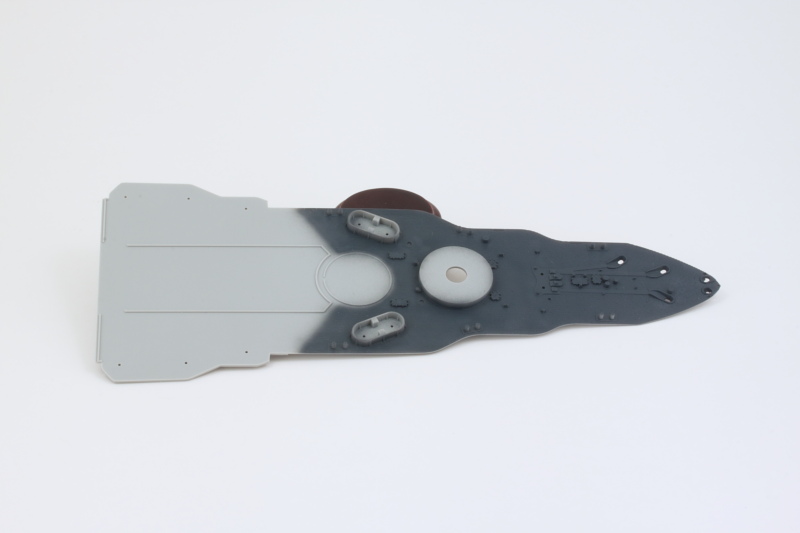 Next up will be doing a lot of hand painting on the details to restore the haze gray appearance to all those gun tubs and other features. In looking at the reference photos of Texas in this scheme, it's interesting that not all of the raised details were painted haze gray. Some were left in deck blue, others were given a combination treatment where the tops were deck blue and the vertical stuff haze gray, and others just all haze gray. Definitely going to make life fun and it's a much easier prospect to deal with that with the decks separate before they are installed. |
|
|
|
Post by Leon on Sept 21, 2015 17:25:45 GMT -5
Decks are looking good Bill!  |
|
|
|
Post by wbill76 on Sept 21, 2015 17:32:22 GMT -5
Decks are looking good Bill!  Thanks Leon! I'm glad to be done with the airbrush for a little while at least for sure. Been a marathon week!  |
|
|
|
Post by dierk on Sept 22, 2015 11:39:02 GMT -5
Looking spiffifing Bill. Your AB has earned its well-deserved break. But don't you be slacking off - we want to see more  |
|
|
|
Post by mrt51 on Sept 22, 2015 11:50:35 GMT -5
Looks great so far Bill!
Terry
|
|
|
|
Post by wbill76 on Sept 22, 2015 13:26:18 GMT -5
Thanks Terry! Looking spiffifing Bill. Your AB has earned its well-deserved break. But don't you be slacking off - we want to see more  Never fear there Dierk, there's plenty on this big girl to keep me busy!  |
|
|
|
Post by deafpanzer on Sept 22, 2015 14:22:45 GMT -5
I have to say that those weld seams on the hull are pretty eye catchy... it catches my attention every time I look!
|
|
|
|
Post by wbill76 on Sept 22, 2015 14:36:30 GMT -5
I have to say that those weld seams on the hull are pretty eye catchy... it catches my attention every time I look! Well we all know how much your eyes can wander at times, right?  Glad the effects are doing their job, it certainly absorbed a lot of time and effort to reduce them from the waffle iron state they originally came in.  |
|
|
|
Post by wbill76 on Sept 22, 2015 20:08:14 GMT -5
So after doubting the look of the 20-B yesterday, I did a little digging and came across this handy little color chart over on Cybermodeler. www.cybermodeler.com/color/usn_matrix.shtml Now I know that digital color matching is always a kind of fool's errand, but I compared what it had on my monitor with how the Testors 20-B looks on the deck and it's a pretty close match. I decided to give it a small nudge in the blue direction using Ammo's Blue Filter for Dark Grey. I sprayed it as a mist coat through the airbrush and it altered it just enough to match I think. 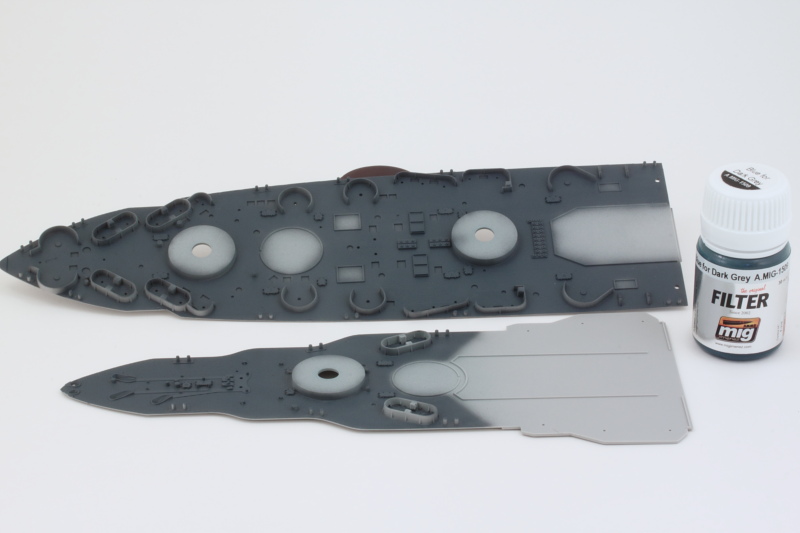 With that out of the way, I settled in for a long session with the Optivisor and the detail brushes to apply the haze gray to all the gun tubs and other details that needed it by hand. 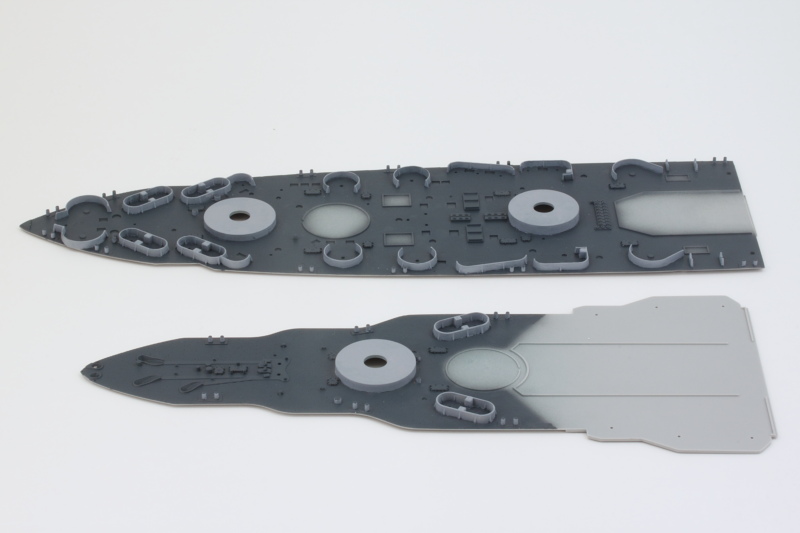 Next up will be installing the decks to the hull and then the fun of dealing with the upper decks and superstructure can commence. |
|
|
|
Post by Leon on Sept 22, 2015 20:19:12 GMT -5
I like how it's looking Bill! Waiting to see the decks go on.  |
|
|
|
Post by dierk on Sept 23, 2015 4:01:20 GMT -5
Looking forward to seeing this develop.
|
|
|
|
Post by wbill76 on Sept 23, 2015 17:47:19 GMT -5
Thanks Leon and Dierk! Glad to have you along for the ride, slowly but surely!  |
|
|
|
Post by dierk on Sept 24, 2015 3:14:37 GMT -5
(impatiently foot-tapping) How about 'quickly but surely'?  |
|
|
|
Post by wbill76 on Sept 24, 2015 11:03:09 GMT -5
(impatiently foot-tapping) How about 'quickly but surely'?  By most ship builder's standards, I'm already moving at warp speed!  |
|
|
|
Post by wbill76 on Sept 24, 2015 17:31:06 GMT -5
Major step forward today as I returned to Step 2 in the instructions. I got the main decks installed but before I did that, I did one last little step to help bring out the detail. I dry-brushed some medium gray that I keep around for this kind of thing to the various hatches and other bits that got the deck blue treatment to help add just a little bit more depth to the deck. I started with the stern deck first since it has a little support ledge that the bow deck sits on. No rubber bands needed since I had worked with the spreaders earlier to get just the right fit for both decks. Careful application of some Mr. Cement liquid glue and both decks are now a permanent part of the hull. Once they had set up, the bulges that create the elevated 5-inch mounts was added next. 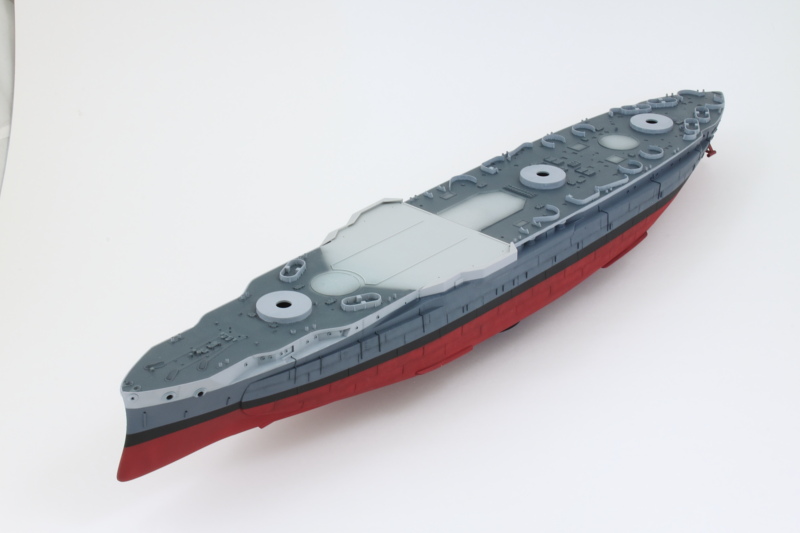 That allowed me to move on to Step 5 and start work on the 02 Deck level. As instructed, I removed some molded on detail that isn't needed and also opened up the required mount holes for some details that will get installed later. I did make one small mistake as the diagram pointing out which holes to open up is small and I accidentally opened up one hole that wasn't needed. Filled it back up with putty and moved on. The area with all the gun tubs needed a lot of sanding attention to remove mold seams that show the limitation of the molding technology used I guess. They weren't huge but were in some tight spots. Sanding twigs and sharp knife point had to work together to get rid of them. 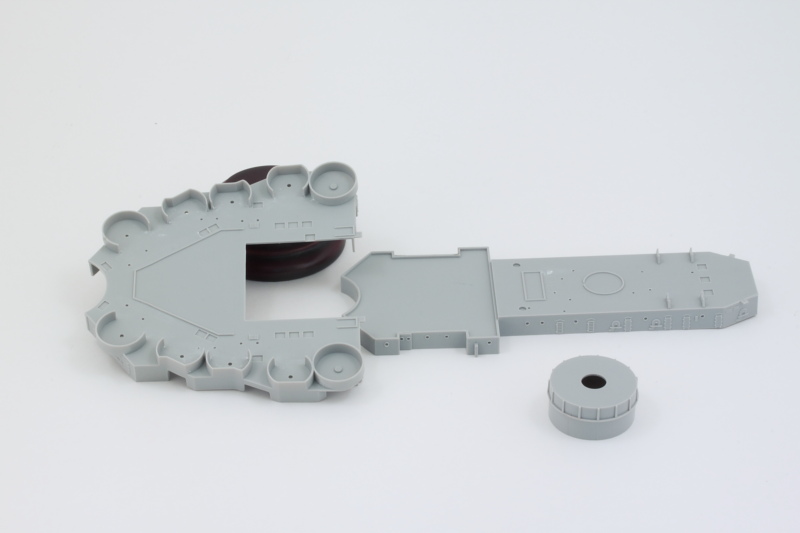 The instructions show the two deck components plus the B turret barbette all going in as a single module. That would probably work but when I test-fitted them, the gun tub part has a slight warp/flex to it that is going to require some special attention when I attach it so that it lines up properly. That plus the elevated nature of the barbette means it's going to be easier to paint the different haze gray and deck blue areas if I keep the three parts separate for now. 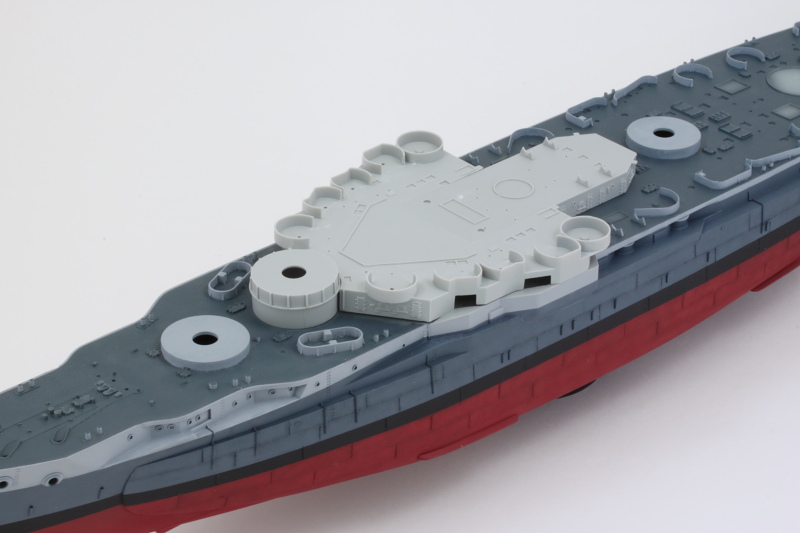 Next up will be getting the 5-inch guns done and fitted with their brass barrels before I sling some more paint on the 02 level. |
|
DeafStuG
Full Member
  
Member since: May 2013
..
Posts: 1,283 
|
Post by DeafStuG on Sept 24, 2015 18:12:11 GMT -5
Nice progress.
|
|
|
|
Post by Leon on Sept 24, 2015 18:21:18 GMT -5
Nice progress Bill! The old girl looks good with the decks on.  |
|
|
|
Post by wbill76 on Sept 24, 2015 18:38:44 GMT -5
Thanks Jeremy and Leon!
|
|
|
|
Post by dierk on Sept 25, 2015 2:50:35 GMT -5
OK Bill, you can slow down now - otherwise I won't get any modelling done myself  |
|