|
|
Post by Leon on Nov 20, 2015 19:38:45 GMT -5
Engine looks fantastic Dave!  |
|
|
|
Post by dierk on Nov 21, 2015 5:00:03 GMT -5
Looking enginetastic!
Pretty sure those hoses were intended to prevent the dreaded 'carb-icing' - something a lot of Japanese four-cylinder bikes suffered from in the 90's.
|
|
|
|
Post by deafpanzer on Nov 22, 2015 11:12:08 GMT -5
I am with the guys... engine look great!
|
|
adt70hk
Forum Moderator     
Member since: November 2015
Currently attempting to build something decent!!! ;)
Posts: 2,831 
MSC Staff
|
Post by adt70hk on Nov 23, 2015 16:13:37 GMT -5
The engine alone looks great! I can't wait to see hoow it turns out.
Following on from the mini-debate on parts counts, do you know how many parts will be used in the total build?
Thanks for sharing.
Andrew
|
|
totalize
Full Member
  
Member since: February 2013
Don't take yourself too seriously. It's just plastic.
Posts: 260 
|
Post by totalize on Nov 25, 2015 11:50:30 GMT -5
Thanks for having a look folks. Much appreciated.
Andrew, your question is a good one. However, I'm afraid I don't know the answer. What I will do though is head down to my hobby room and bench area in the basement and and have a look and see if I can come up with a fairly accurate parts count.
Cheers for now.
Dave.
|
|
totalize
Full Member
  
Member since: February 2013
Don't take yourself too seriously. It's just plastic.
Posts: 260 
|
Post by totalize on Nov 28, 2015 12:25:39 GMT -5
Another update on the build. The frame is essentially done now and ready for paint. The last steps here were the steering wheel and its associated linkage as well the front end steering linkage which is free moving left and right. If you look closely you can see the steering linkage to the front end is disconnected. The instructions say not to glue it here. It disconnected when i was taking the pictures. As you can see I still have the fuel tank off and the tow cable needs to be terminated but that can be done after paint. The reason I didn't secure the fuel tank at this stage is I want to paint the gear box the same colour as the engine. Can't really do this to my satisfaction with the tank sitting over the gear box. In terms of parts used I counted 145 parts for the frame. I am not sure how many are in the kit in total as i am not using the Flak gun or the trailer parts of the kit. The frame looks to have the most parts. The engine was 32 parts including PE. Here are a few pics. 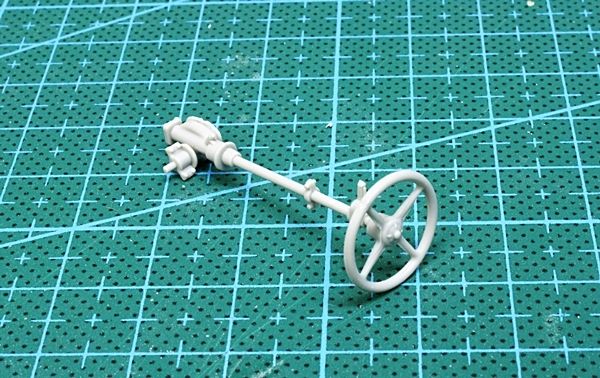 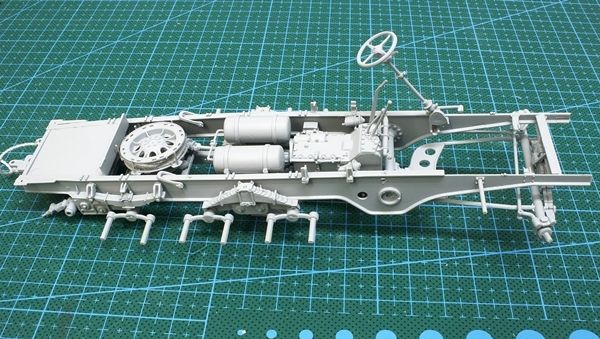 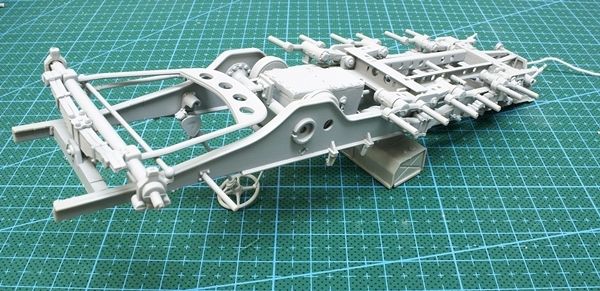 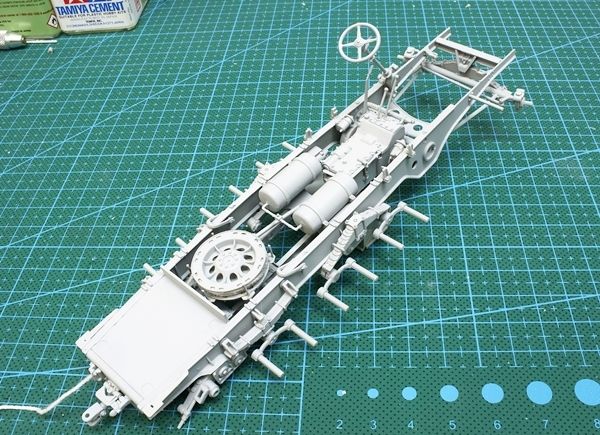 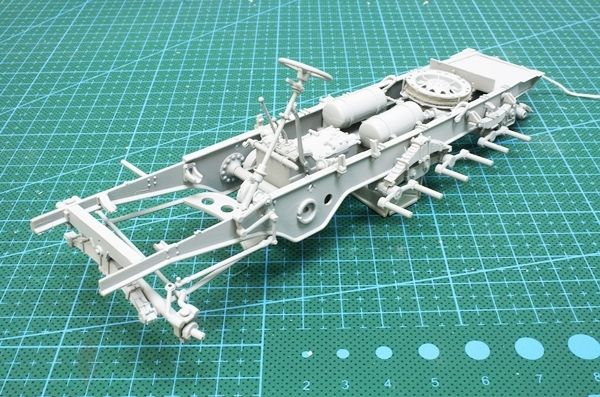 |
|
|
|
Post by Leon on Nov 28, 2015 18:14:12 GMT -5
Nice progress on the frame Dave!  Looking forward to seeing some paint.  |
|
|
|
Post by dierk on Nov 29, 2015 5:55:11 GMT -5
I agree with Leon - frame looks the biz!
|
|
totalize
Full Member
  
Member since: February 2013
Don't take yourself too seriously. It's just plastic.
Posts: 260 
|
Post by totalize on Nov 29, 2015 7:20:08 GMT -5
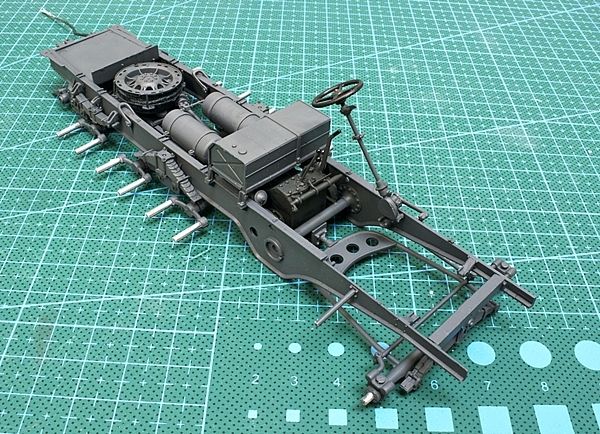
Thanks guys, Got some paint on the frame. For this I used Vallejo Air panzer grey mixed with a touch of white. The gearbox was painted with a mixture of black, grey and blue and given a general dry brush to bring out the highlights. the steering wheel was done in a mixture of gloss black and panzer uniform highlight black to give it a satin finish. The knobs on the gear shifters was done in gloss black. As expected with all the handling I snapped off one of the shifters.... Oh shades of snapping off tail wheels on my model aircraft builds. I managed glued it back on with some CA glue. Once I get the engine mounted this part of the build will involve ~200 parts. The front steering control works and moves left and right freely. The fuel tank has not been mounted as yet. Also, I dry fitted the suspension arms. They just snapped in place (thanks Trumpeter) and can move up and down with a bit of a nudge. This should help when I mount the wheels and do the tracks. Overall i am impressed with the detail thus far. Up next the engine mounting. 
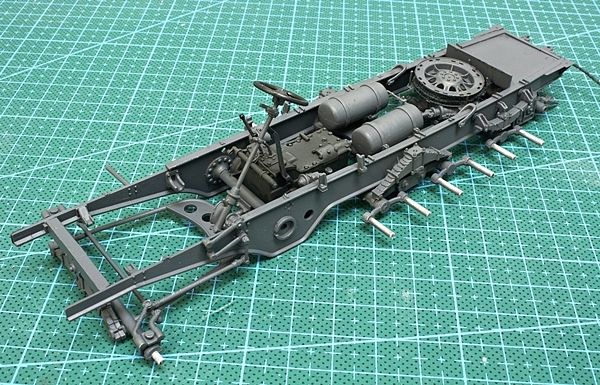
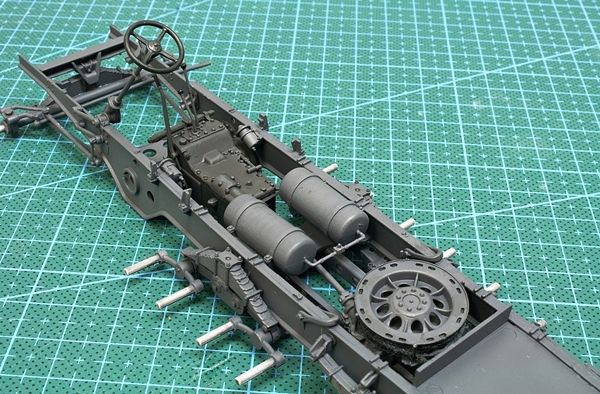
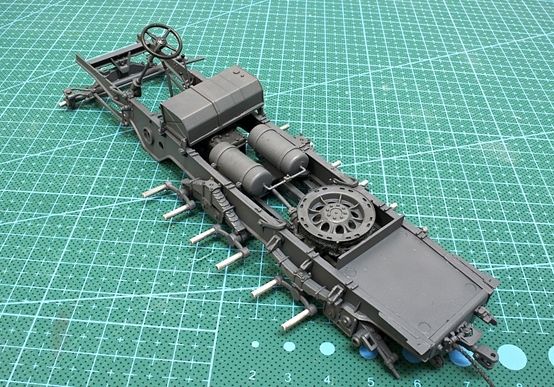
|
|
|
|
Post by Leon on Nov 29, 2015 8:19:45 GMT -5
Paint work looks good Dave!  |
|
|
|
Post by wbill76 on Nov 29, 2015 18:57:26 GMT -5
Well worth the effort Dave, looking good so far.
|
|
vindicareassassin
Full Member
  
Member since: May 2015
Posts: 569 
|
Post by vindicareassassin on Nov 30, 2015 5:11:01 GMT -5
I'm following this with some interest as I have a 1/72 scale Revell version of this made up to its chassis sat in my WIP box, I maybe using some of these pics to enable detailing of my chassis in the future.
I'm loving the chassis so far.
|
|
|
|
Post by deafpanzer on Nov 30, 2015 23:31:44 GMT -5
Looking real good!
|
|
totalize
Full Member
  
Member since: February 2013
Don't take yourself too seriously. It's just plastic.
Posts: 260 
|
Post by totalize on Dec 11, 2015 18:49:49 GMT -5
Cheers guys, Engine now mounted to the frame.  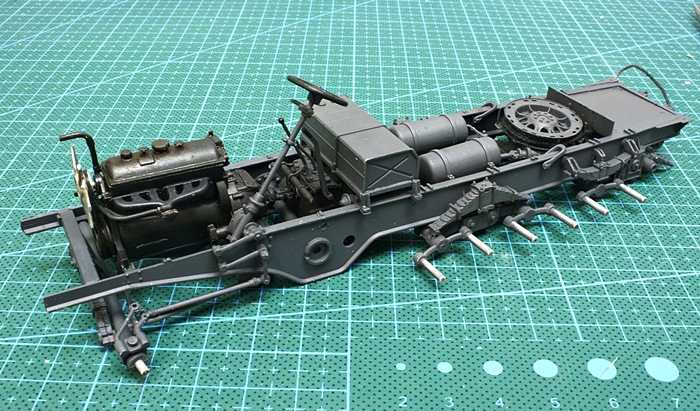 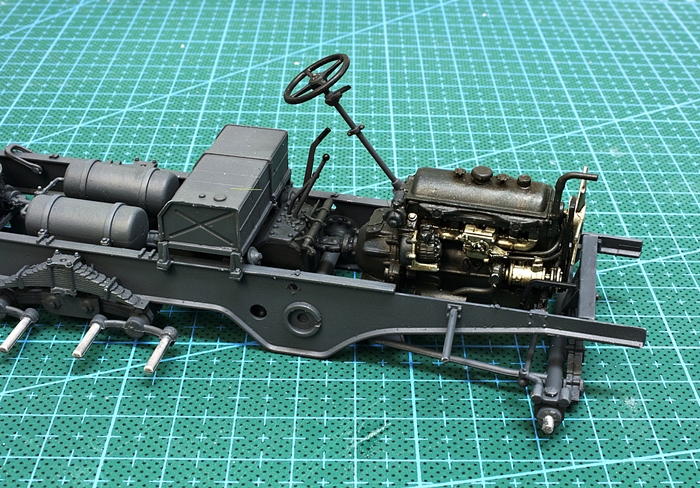 |
|
|
|
Post by Leon on Dec 11, 2015 19:13:32 GMT -5
Looking really good Dave!  |
|
|
|
Post by wbill76 on Dec 11, 2015 19:30:40 GMT -5
Engine looks right at home Dave.
|
|
pt109
Full Member
  
Member since: April 2013
Stop staring at me! heheheh
Posts: 491 
|
Post by pt109 on Dec 12, 2015 0:45:27 GMT -5
Wonderful job Dave, love the paint work......
Just a question, how do the shifters come through the driver's area? Is there a floor plate with holes in it?
They look so close to the engine.
Paul
|
|
totalize
Full Member
  
Member since: February 2013
Don't take yourself too seriously. It's just plastic.
Posts: 260 
|
Post by totalize on Dec 12, 2015 5:19:10 GMT -5
Bill, Leon, Paul,
Thanks for having a look in on the build and posting your comments.
Paul, yes the shifters look kind of close to the engine however, the kit does have a floor plate with holes for the shifters to pass through.I am hoping this part of the build will go okay i.e. I have the shifters located properly but not sure yet. I am going to give it a dry fit this weekend. If they don't fit well, I might just have to snap them off and glue them in after the floor plate is on. I will try and post some pics of this effort.
Next up in the build is the multitude of track wheels to be mounted.
|
|
|
|
Post by dierk on Dec 12, 2015 9:49:00 GMT -5
Looking excellent Dave! Hope you don't have to perform 'vectisplasty' on the levers, and good luck fitting all those wheels.
|
|
totalize
Full Member
  
Member since: February 2013
Don't take yourself too seriously. It's just plastic.
Posts: 260 
|
Post by totalize on Jan 6, 2016 16:57:18 GMT -5
Hey Dierk, Yes, could be interesting when I go to fit the body on the frame. Hmmm...we shall see. Well, Here's another update. I got the Fruils out and put the main drive wheels together. I wanted to post a picture of the difference between the kit part and the Fruil wheel. As you can see the Kit part is totally inaccurate. I don't know where Trumpy came up with the idea for this one. The only similar wheel I have seen was on one of the pre-war intial half small half tracks like perhaps the German 10/xx series but not totally sure. I am not HT rivet counter. At any rate Fruil to the rescue and the darn things even has the tread pattern around the hub. Nice!!  |
|
totalize
Full Member
  
Member since: February 2013
Don't take yourself too seriously. It's just plastic.
Posts: 260 
|
Post by totalize on Jan 6, 2016 17:01:19 GMT -5
And the backside of the drive wheel. The Trumpy part fits like a glove or should I say the Fruil wheel fits the trumpy wheel cover like a glove. Just a minor sanding on the kit part and they dropped right in.  |
|
totalize
Full Member
  
Member since: February 2013
Don't take yourself too seriously. It's just plastic.
Posts: 260 
|
Post by totalize on Jan 6, 2016 17:03:06 GMT -5
Here's the right side of the vehicle with all the wheels dry-fitted to the frame. Starting to get somewhere with this one. Minor progress but still some progress. Still waiting for my new compressor to arrive from the great state of FLA. Won't be doing any spray bombing of parts until she arrives... BTW I took all pictures from this update with my cellphone instead of my EOS Rebel. Thought I would give it a try. 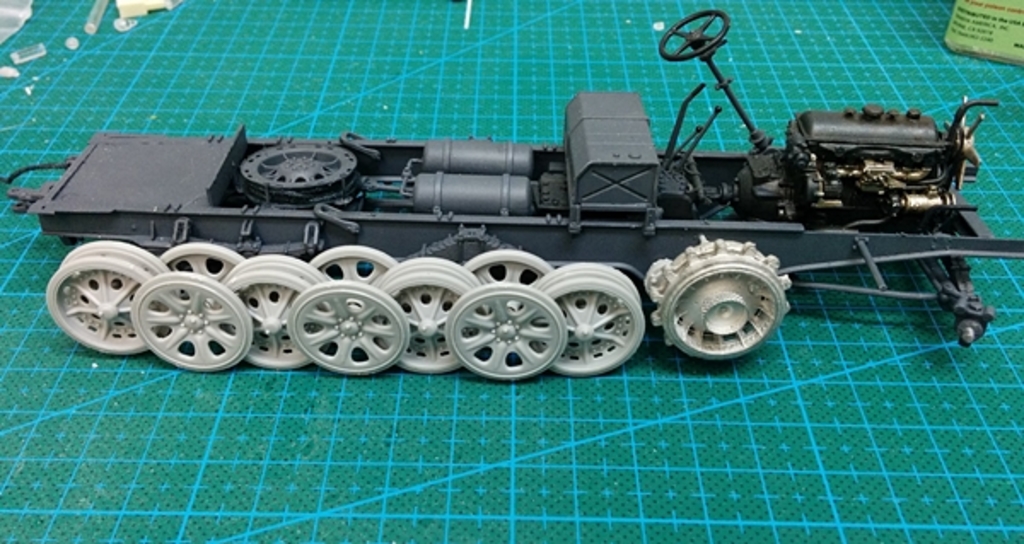 |
|
|
|
Post by wbill76 on Jan 7, 2016 14:17:53 GMT -5
Definitely an improvement with the Fruil sprocket. Always nice to get all those wheels on and have then sit level.  |
|
BJ---Rest In Peace
Full Member
   Oct '24 Showcased Model Awarded
Member since: July 2014
Posts: 378
Jul 24, 2014 12:31:35 GMT -5
Jul 24, 2014 12:31:35 GMT -5
|
Post by BJ---Rest In Peace on Jan 7, 2016 14:53:26 GMT -5
Looking Awesome. Did the Fruili's also correct the roller guide offset. I know trumpys were completely in the wrong spot. I was planning on modifying one from dragon then casting me up a bunch as I have the 6 different Trumpy kits that are all wrong  But knowing me I will have to put in the correct needle bearings and make the rollers work with grease zerts.  |
|
totalize
Full Member
  
Member since: February 2013
Don't take yourself too seriously. It's just plastic.
Posts: 260 
|
Post by totalize on Jan 8, 2016 16:48:44 GMT -5
Bill,
Yes, I am trusting we should have a good fit going forward on the running gear.
Billiejean,
Yes, The Fruil part is suppose to correct the offset issue with the drive wheel. Keeping my fingers crossed.
Dave.
|
|
totalize
Full Member
  
Member since: February 2013
Don't take yourself too seriously. It's just plastic.
Posts: 260 
|
Post by totalize on Jul 23, 2016 7:57:43 GMT -5
Hi Guys, Haven't been around for a long long time but I am slowly getting back on the bench and trying to work on some current projects and start a new one. For the Sd.Kfz. 7/1 mit Flakvierling 38 I got the road wheels and front tires done and mounted to the frame. The rims on the front tires don't fit well. If you assemble the rims (which are two parts) as is they bulge out quite far from the tires. The edge of the rims do slightly sit proud of the tire itself but in this case it was way too much. I had to sand them down to get a better appearance. Just as and FYI there are resin versions of these tires available if you decide to build this kit and don't like the look of the rubber tires that came with it. Next up will be breaking out the Fruil track to give them a go. Here are some pics. 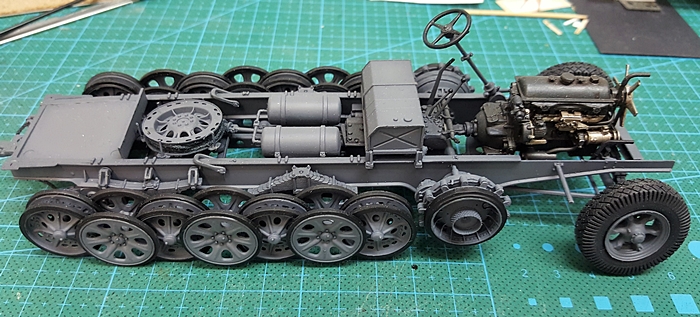 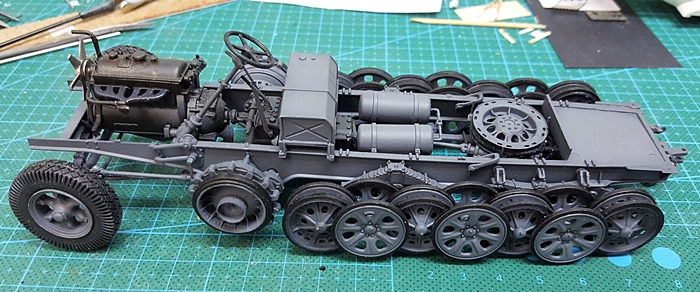 |
|
totalize
Full Member
  
Member since: February 2013
Don't take yourself too seriously. It's just plastic.
Posts: 260 
|
Post by totalize on Jul 23, 2016 8:15:31 GMT -5
As I progress with this build I am thinking about the kind of look I want to achieve with this build. Casting about on the net I found this picture of an abandoned Sd.Kfz 7/1 Flak 38 which I have decided I am going to do. What I find cool about this vehicle is that its an early version like mine but has some interesting features. First it has a field built armor plate on the front and the vehicle itself looks to have been partially re-painted in Dark Yellow from the Original Panzer Grey although the cab and fenders look to have remained in Panzer grey. Also, its Flak 38 is not painted in Dark yellow either but also remains in its original colour of Panzer grey as does the whole rear deck and gun bed. The canvas camo cover strewn across the front of the vehicle adds some nice visual interest.  |
|
|
|
Post by panzerjager2 on Jul 23, 2016 9:32:33 GMT -5
This is what I like to call "double cool". Translation.......Cool subject, ( I really like this vehicle). And REALLY COOL WORK
|
|
|
|
Post by Leon on Jul 23, 2016 14:21:25 GMT -5
Making nice progress Dave! I like your idea of the abandoned HT.
|
|
totalize
Full Member
  
Member since: February 2013
Don't take yourself too seriously. It's just plastic.
Posts: 260 
|
Post by totalize on Jul 24, 2016 9:07:19 GMT -5
Thanks guys, I purchased the very nice AK Interactive Book Panzer Colors 1945 and they have a profile of this vehicle in the book. It's not as accurate color wise when you compare it to the actual vehicle but It can serve as another reference. Interestingly, they show the Dark yellow (DG III) over RAL 6011B (reseda green) over red brown RAL 8012 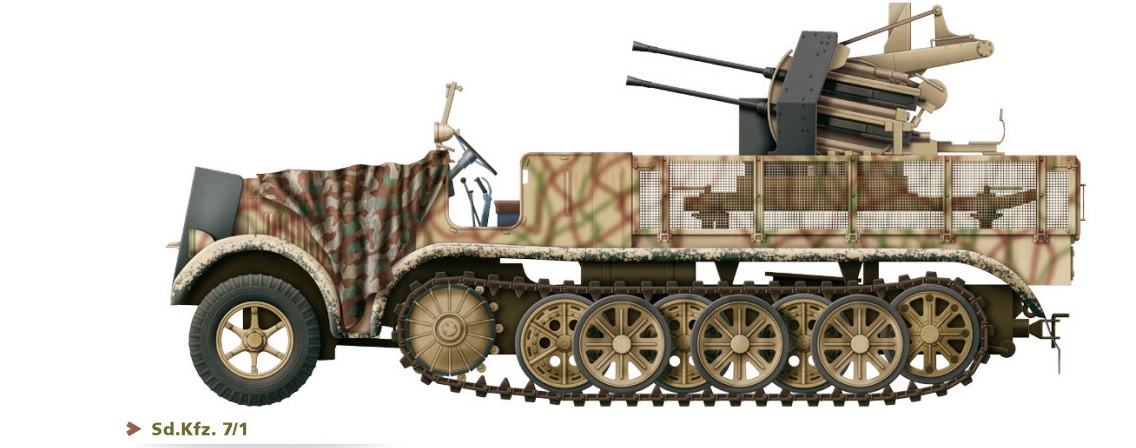 |
|