|
|
Post by dierk on Sept 16, 2016 4:34:05 GMT -5
As they used to say in L'pool: that's boss la!
|
|
totalize
Full Member
  
Member since: February 2013
Don't take yourself too seriously. It's just plastic.
Posts: 260 
|
Post by totalize on Sept 20, 2016 9:55:22 GMT -5
Thanks Guys, I have been working on the cab for the vehicle and had to deal with some unsightly and inaccurate seats for vehicle. I have no idea where trumpeter got the idea for these seats but they are nothing like the ones that are suppose to be in the vehicle. The Trumpeter seats. Just horrendous. 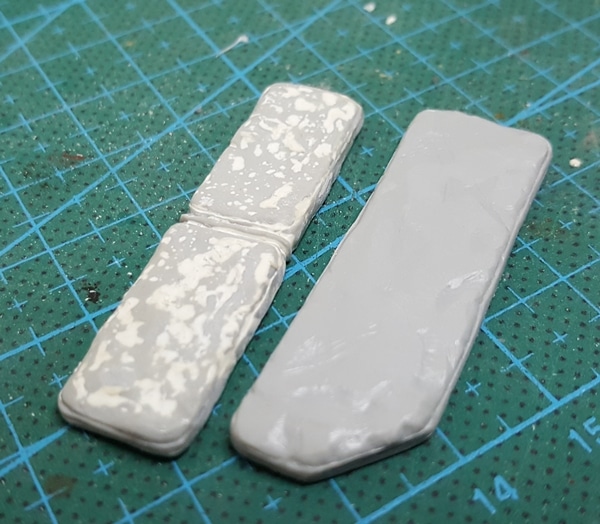 The Actual Seats. Dragon got them right here more or less. 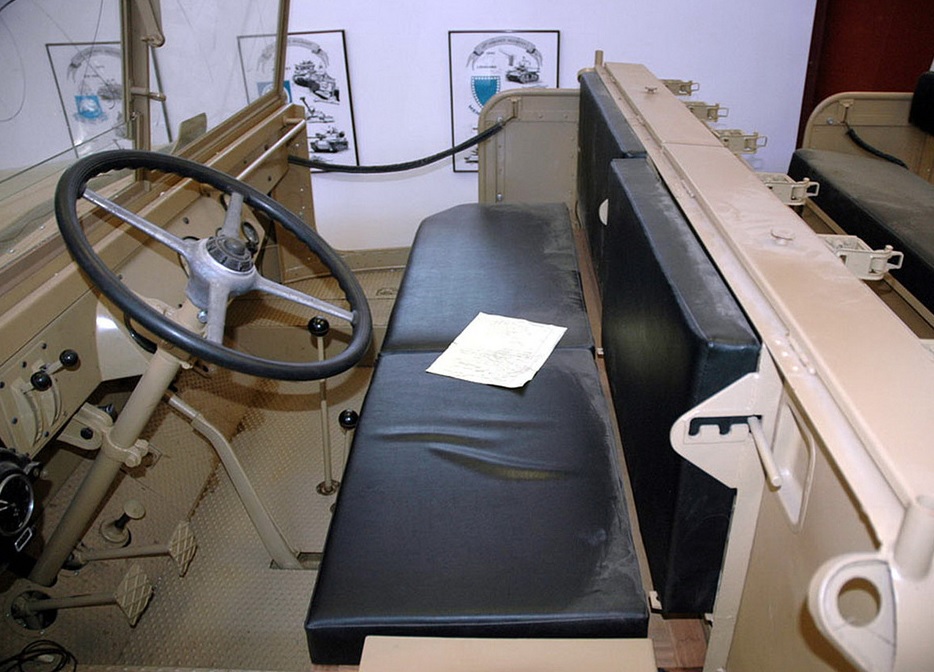
And my attempts to fix them with filler, epoxy putty and plastic card. Also, I decided to re-do the battery area. In the kit they are exposed but in the Maquette walk around they are in a wooden battery box with a metal cover. Not sure if this is completely accurate but it would make sense to have the batteries covered since the area was typically exposed to the elements and a potential electrical hazard. You can see the edge of the battery box in the picture above. 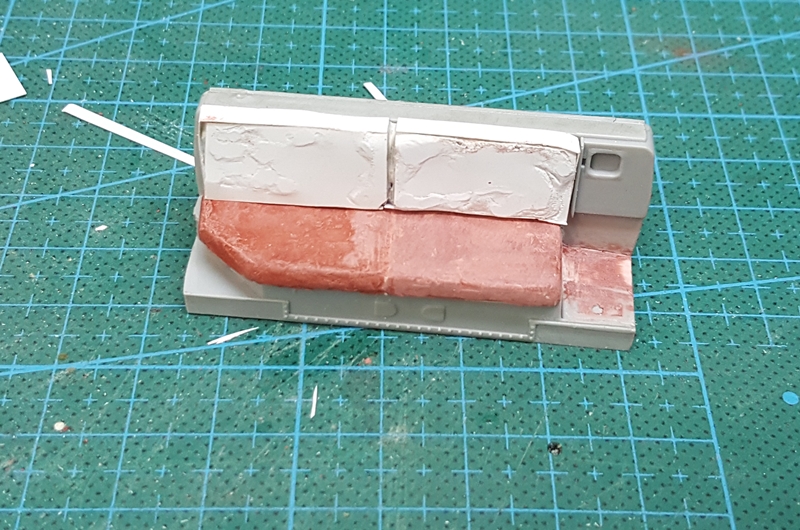
The kit batteries:  |
|
|
|
Post by dierk on Sept 20, 2016 11:56:00 GMT -5
Both Trumpeter and Hobby Boss can be very sloppy in their research - I get the impression they pick the first link they get on google and then stick with it. They don't seem to do any double-checking at all, so you can end up with kits that are dimensionally atrocious, like their NKL-26, or not quite right, like their T-35s. Or you can end up with something based on a museum 'restauration' that incorporates details from several versions, so you end up with a BA-10 with mudguard-mounted fuel tanks from a BA-10M (I'm assuming that's what happened with your 7/1: missing bits, like the battery box and a well-meant seat replacement). Or the T-18 model 1927 that never made it to production, based on a scale drawing in a Russian book. Nice work on the corrections BTW!  |
|
totalize
Full Member
  
Member since: February 2013
Don't take yourself too seriously. It's just plastic.
Posts: 260 
|
Post by totalize on Sept 20, 2016 17:20:12 GMT -5
Thanks Dierk, I hear ya. Not sure what Trumpy was thinking, or not on that one. The front seats had a sheet of wood underneath them.. I added this to the area and scratched my own battery box which I believe is suppose to be part of the actual vehicle. You can see the edge of it in the Maquette walk around of the 7/1 photo above. The kit parts are 2 exposed batteries. Don't think they would leave these open to the elements. Can you imagine a crew accidentally stepping on them in the pouring rain? 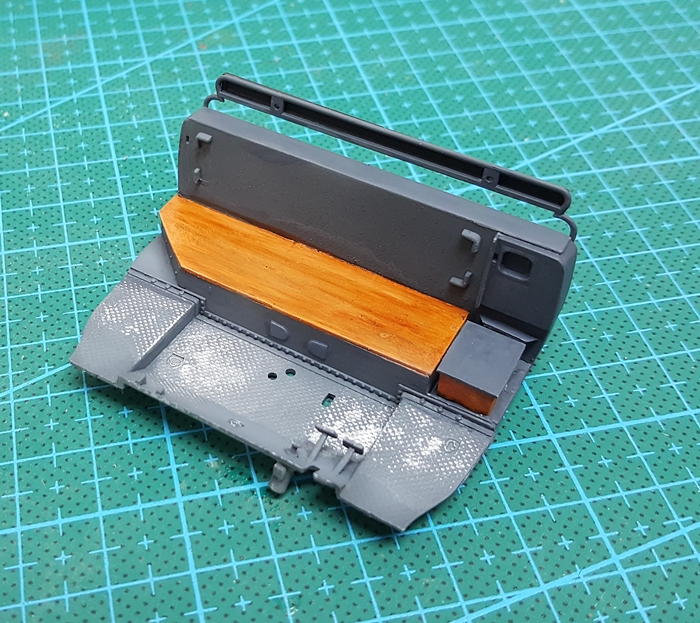 And the seats attached and the cab attached to the vehicle. I still have to add the hinges on the driver left side and middle of the seat. 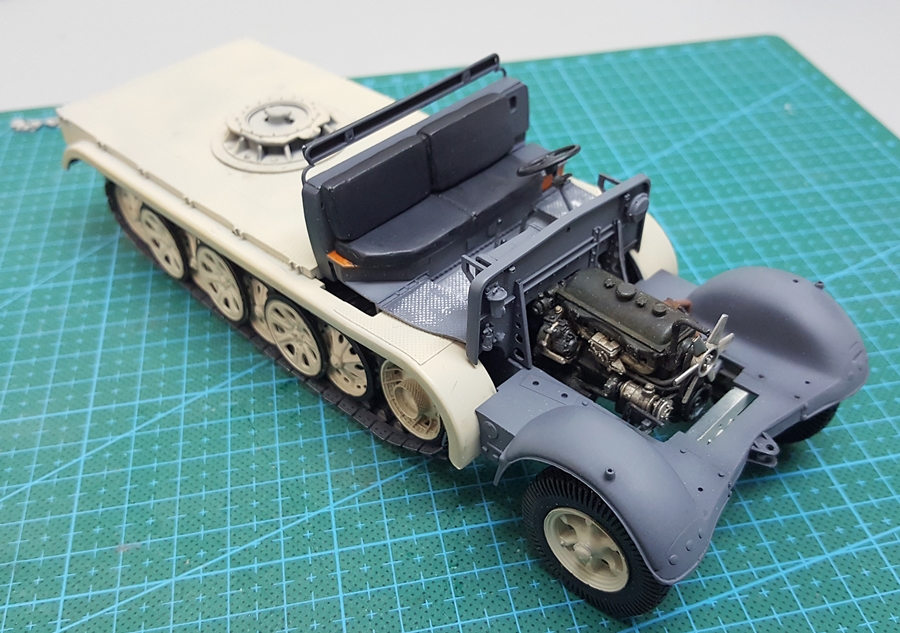 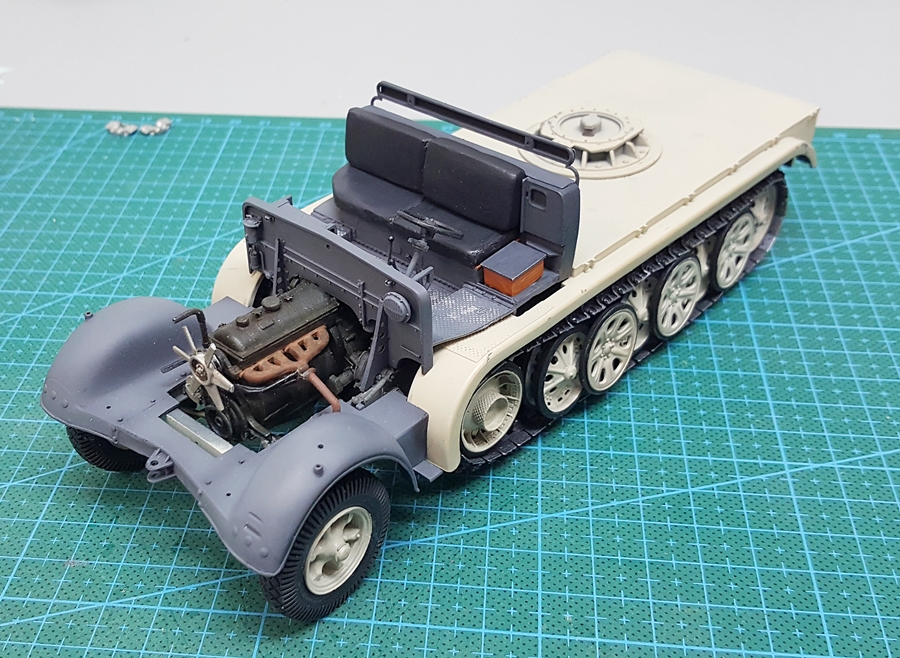 |
|
totalize
Full Member
  
Member since: February 2013
Don't take yourself too seriously. It's just plastic.
Posts: 260 
|
Post by totalize on Sept 20, 2016 17:21:57 GMT -5
test fit.  |
|
|
|
Post by Leon on Sept 20, 2016 17:47:28 GMT -5
Nice rework on the seats and battery box Dave!  |
|
totalize
Full Member
  
Member since: February 2013
Don't take yourself too seriously. It's just plastic.
Posts: 260 
|
Post by totalize on Sept 23, 2016 9:31:49 GMT -5
Thanks Leon.
|
|
|
|
Post by tonylee-Rest In Peace on Sept 23, 2016 23:09:12 GMT -5
N I C E
Tony lee
|
|
totalize
Full Member
  
Member since: February 2013
Don't take yourself too seriously. It's just plastic.
Posts: 260 
|
Post by totalize on Sept 24, 2016 9:26:45 GMT -5
Thanks a bunch Tony.
|
|
totalize
Full Member
  
Member since: February 2013
Don't take yourself too seriously. It's just plastic.
Posts: 260 
|
Post by totalize on Mar 21, 2018 16:32:42 GMT -5
Guys,
Sorry I have been away from this build for so long but I intend to get back to it very soon. She's been a shelf queen for too long. Updates coming soon.
|
|
|
|
Post by 406 Silverado on Mar 21, 2018 17:26:40 GMT -5
She's looking good so far. Hoping someday to build mine lol
|
|
pt109
Full Member
  
Member since: April 2013
Stop staring at me! heheheh
Posts: 491 
|
Post by pt109 on Mar 28, 2018 22:01:11 GMT -5
I'm a bit late to this party but looks very nice.....I have their 7/2 kit with the Flak 43 and I agree with your accessment of their kits in general. I just started this kit a few days ago and I thought the frame assembly sucked, you have to lock the transmission between the frames and a couple of braces.
Just a heads up....when you have to add the cab, those shifters are gonna get in the way so watch that one. Trumpeter have you pass the shifters through the floor board.....yikes! Bizarre assembly if you ask me......
Thanks for posting.....Cheers Paul
Edit: I see you already added the cab, my bad....good job on this one!
|
|
totalize
Full Member
  
Member since: February 2013
Don't take yourself too seriously. It's just plastic.
Posts: 260 
|
Post by totalize on Jan 4, 2019 19:06:29 GMT -5
Thanks Guys, I have not posted my work on this build in a verrrry loooong time. I have it mind to get this shelf queen done so I started back on it over the holidays. Paul, yes the shifters are passed through the cab. Very dumb but oh well. I added the Griffon models barrels and started on the Dragon Flak vierling 38. Here are a couple of shots. the second barrel from the bottom has one of the cooling vents on the flash suppressor misplaced. You can make it out when you compare it to the others. I have since fixed that. BTW the Dragon instructions are brutally bad on this kit. They show for instance one picture indicating to add the mag holders on the left side (with an arrow) but no arrow pointing to the right side. For the flak unit itself I have it painted in Tamiya Flat Black. The platform slats were made from wood AFIAK so I might repaint them and do a wood effect there. References for these Flak pieces are scarce. It's not complete still need to add a few pieces but I wanted to show a progress shot. Used Mr. Color Leveling thinner and my beat up but still good .2mm Badger Dual action AB.   |
|
totalize
Full Member
  
Member since: February 2013
Don't take yourself too seriously. It's just plastic.
Posts: 260 
|
Post by totalize on Jan 4, 2019 19:19:19 GMT -5
I also decided not to do the flak wagon in my original post. Now going to do a Herman Goring HT stationed at the Straits of Messina providing AA cover for the retreating German units from Sicily. Not based on an actual photo but something like this. I plan to still paint it out in a mix of Dark Yellow, Red Brown, Dark Green (Maybe) and German Grey. Still going to add the trailer and Luftwaffe Flak Crew.  |
|