|
|
Post by wbill76 on Jul 24, 2016 13:47:19 GMT -5
Nice to see you back at work on this one, that's a cool scheme/profile, go for it!  |
|
totalize
Full Member
  
Member since: February 2013
Don't take yourself too seriously. It's just plastic.
Posts: 260 
|
Post by totalize on Jul 29, 2016 21:26:55 GMT -5
Thanks Bill.I would really like to get the Fruils done fairly quickly. I also want to repaint the running gear to match the picture I posted previously.
|
|
|
|
Post by dierk on Jul 30, 2016 3:23:36 GMT -5
Glad to see you're getting some bench-time again. Looking forward to more.
|
|
totalize
Full Member
  
Member since: February 2013
Don't take yourself too seriously. It's just plastic.
Posts: 260 
|
Post by totalize on Jul 30, 2016 16:37:56 GMT -5
Thanks Dierk, I have been working on the fruil tracks and got one side done. Here's shot of the tracks dry fitted to the running gear. I need to make a few minor adjustments but it's coming along. When I started the process it was slow but once I got going things moved a bit faster. I also have to re-paint the running gear and wheels in Dunkelgelb and will do this before fitting the tracks. 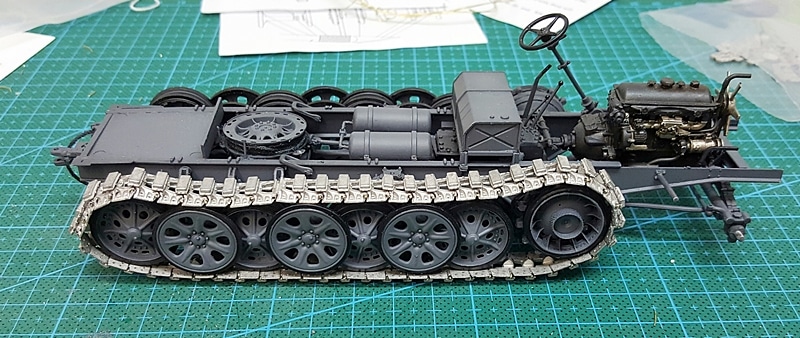 |
|
|
|
Post by Leon on Jul 30, 2016 17:25:14 GMT -5
Nice start on the tracks Dave! Nothing like a good set of Fruils to make a build look better.  |
|
totalize
Full Member
  
Member since: February 2013
Don't take yourself too seriously. It's just plastic.
Posts: 260 
|
Post by totalize on Aug 2, 2016 17:31:55 GMT -5
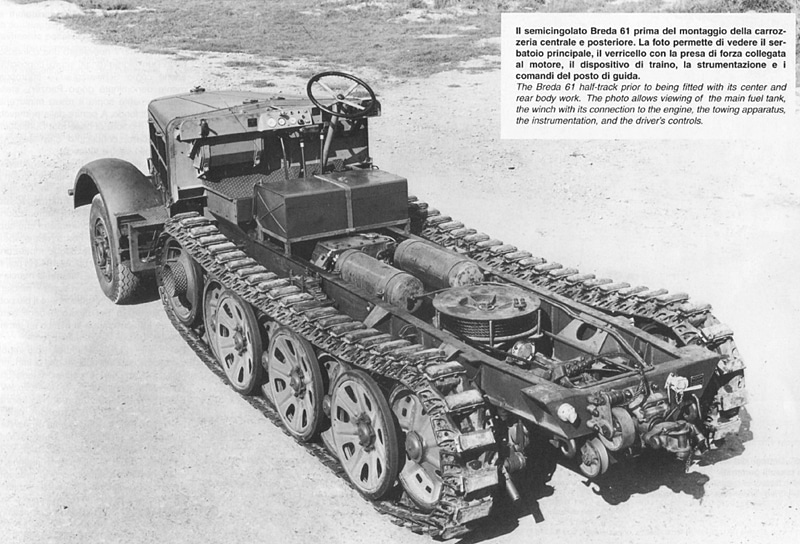
Thanks Leon, I am liking these Fruils, Sure they took some time but it was not difficult to do and they just look so good. I painted off the running gear and road wheels in Dark yellow. I wanted to try and get close to the colours in the photo I posted earlier. For this I used Tamiya XF60, XF15(Flesh) and XF57 Buff. No specific ratios here just mixed everyting up till I got the colour I was satisfied with and sprayed away. Because this is a field re-paint of an original panzer grey vehicle I just painted the main areas that look close to what you see in the photo. The tracks are just dry fitted. I don't have any of that burnishing liquid for the tracks but I do have some tamiya metal primer. So for the sake of moving the build along I will give them an undercoat of the metal primer then spray the tracks in a black/gun metal/ silver base colour and weather them from there. I included a pic of a breda HT vehicle without its body to give you a comparison of the tracks and how nicely the fruils replicate the real thing. Disclaimer: Pics taken with my Cellphone so depth of field is a bit off in some shots. 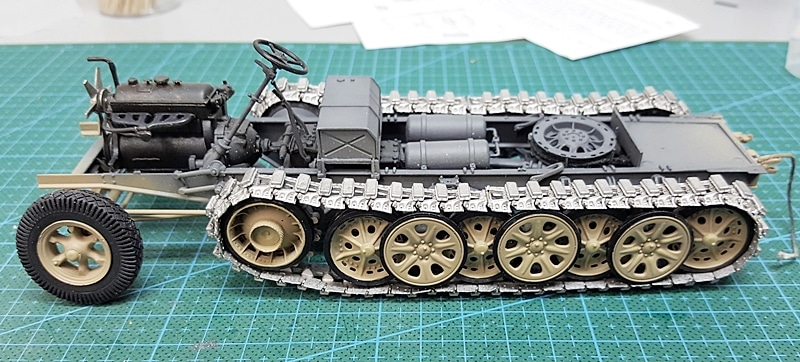 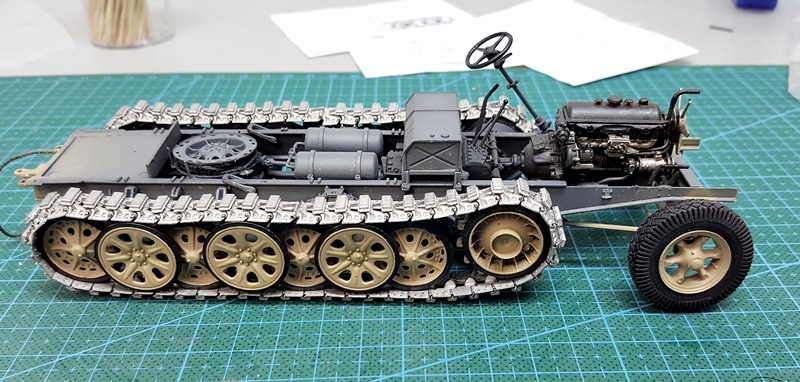 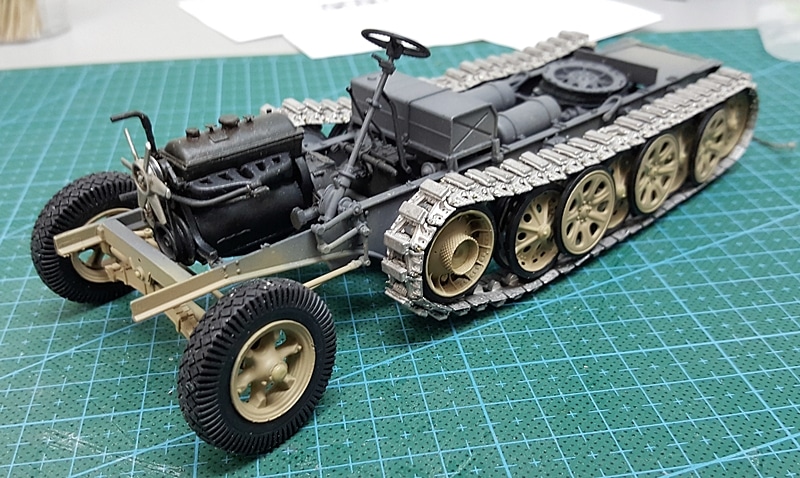 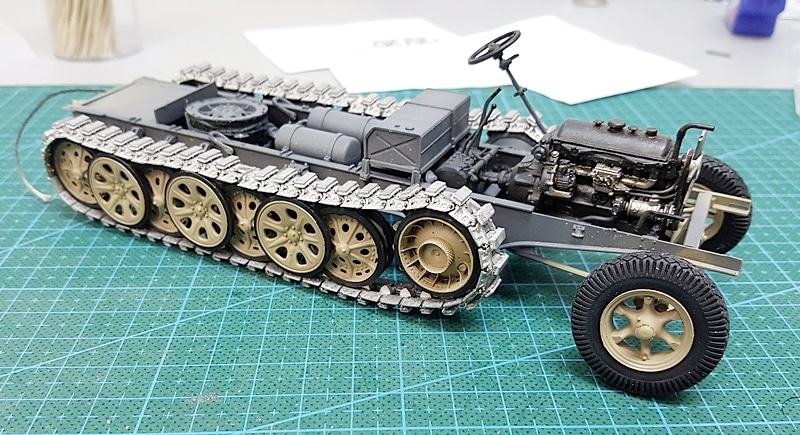 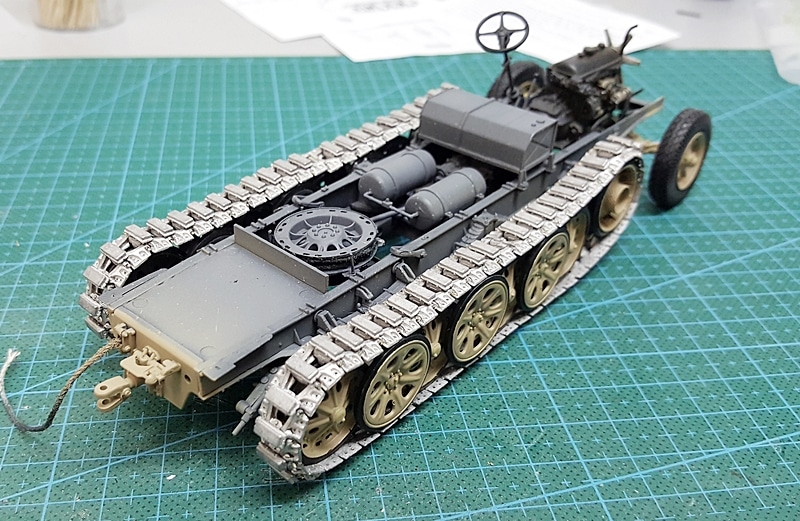
 |
|
|
|
Post by Leon on Aug 2, 2016 18:09:28 GMT -5
The tracks looks great Dave!  |
|
flmlm
Full Member
  
Member since: March 2016
Crack open that kit and smell the build ????
Posts: 170 
|
Post by flmlm on Aug 2, 2016 19:05:05 GMT -5
Tracks look great!
Regards
Mike
|
|
|
|
Post by dierk on Aug 3, 2016 10:25:54 GMT -5
Trackificent!
|
|
totalize
Full Member
  
Member since: February 2013
Don't take yourself too seriously. It's just plastic.
Posts: 260 
|
Post by totalize on Aug 6, 2016 7:55:41 GMT -5
Thanks guys, I was just looking at the photo of the so called abandoned Sd.Kfz. 7/1 more closely and I noticed a couple of things. Firstly, I don't think its abandoned. If you zoom in closely you can see a figure who appears to be sitting on the bench which is directly behind the drivers seat. He appears to be looking down and is wearing the reversible white/mouse grey or white/camo winter uniform. Secondly, I couldn't make out what was behind the vehicle but upon closer inspection its looks like its towing an Sd.Ah 52 trailer. This is good news for me as I was planning to use the trailer in my build. 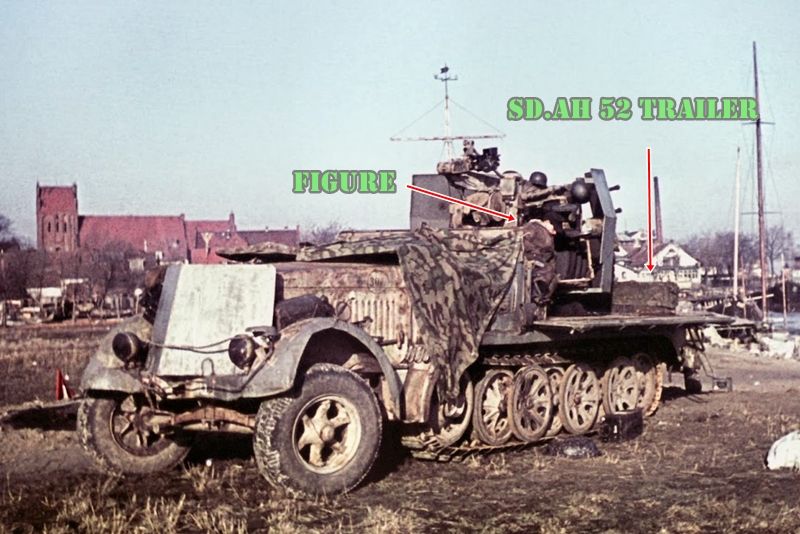 |
|
pt109
Full Member
  
Member since: April 2013
Stop staring at me! heheheh
Posts: 491 
|
Post by pt109 on Aug 7, 2016 18:40:23 GMT -5
I think the vehicle is abandoned....
Really nice looking halftrack, to me it looks like it's towing a gun, you can see the spade on the right side and what looks to be the right tire to the left of the gun, this is what you see over the back of the halftrack since the side panels are lowered...just my thoughts. Of course, it could be just an ammo box on the rear deck?
The figure looks like he is dead, he has his head down....there's also a tarp over the driver's position, maybe to cover a dead comrade?
|
|
totalize
Full Member
  
Member since: February 2013
Don't take yourself too seriously. It's just plastic.
Posts: 260 
|
Post by totalize on Aug 14, 2016 7:12:47 GMT -5
For sure. Lots of possibilities on this one and I have never seen it modeled So, recently I received some of MiG AMMO's new Dunkelgelb paints, ie Mid War, DGI and DGIII. The DGIII looks very close to the color in the picture and my AK book says the vehicle was painted in late War DGIII. Thus I decided to re-paint the track wheels and tires in DGIII. This was my first time using MIG AMMO paints and I thought the paint took too long to dry. The bottle says allow 24 hours to dry but even after 24 hours it was a bit tacky. It also dries in a satin finish. This doesn't bother me because weathering should take this away but has anyone else had this experience with the Mig AMMO paints??? 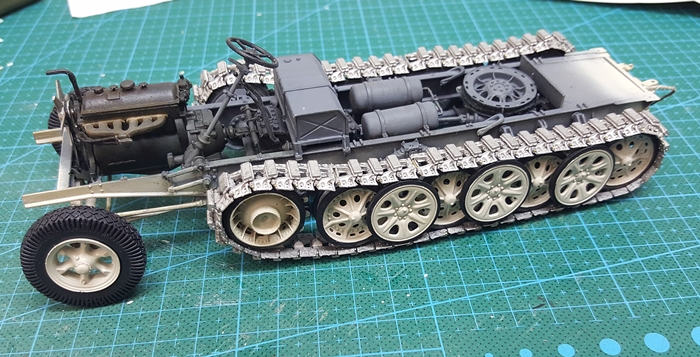 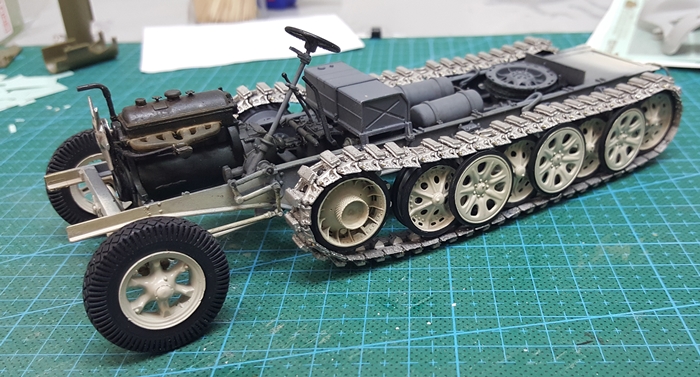 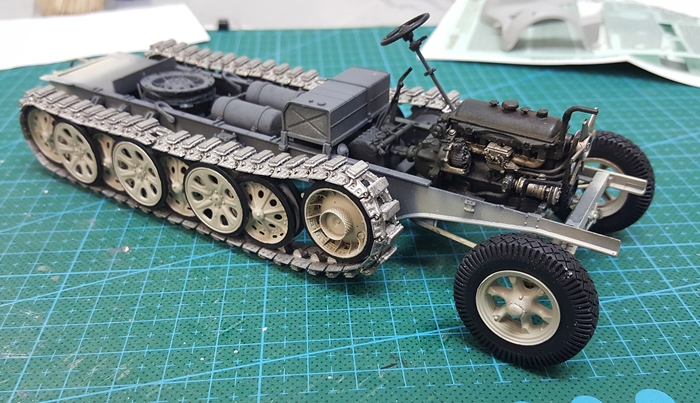 |
|
|
|
Post by Leon on Aug 14, 2016 7:36:45 GMT -5
Wheels look great with the repaint Dave!  |
|
|
|
Post by dierk on Aug 14, 2016 9:44:24 GMT -5
Looking good!
Yep, same experience with Ammo, I much prefer Vallejo, but sometimes needs must.
|
|
|
|
Post by wbill76 on Aug 15, 2016 9:07:51 GMT -5
Looking good with the chassis painted.
|
|
|
|
Post by deafpanzer on Aug 23, 2016 12:44:28 GMT -5
I am with the guys... wheels and tracks look great! Hope to see more...
|
|
totalize
Full Member
  
Member since: February 2013
Don't take yourself too seriously. It's just plastic.
Posts: 260 
|
Post by totalize on Aug 29, 2016 11:06:37 GMT -5
Cheers Guys, Just enjoying the dog days of summer before the fall arrives and things get busy with kids and school etc. I worked on the tracks this past weekend. I primed them with Tamiya metal primer then painted them in a mix of humbrol black and gun metal enamel buffable metalizers (what a mouthful), buffed them up with a Q-tip and paper towel then painted the rubber blocks on top of the tracks black. Here are some pics.  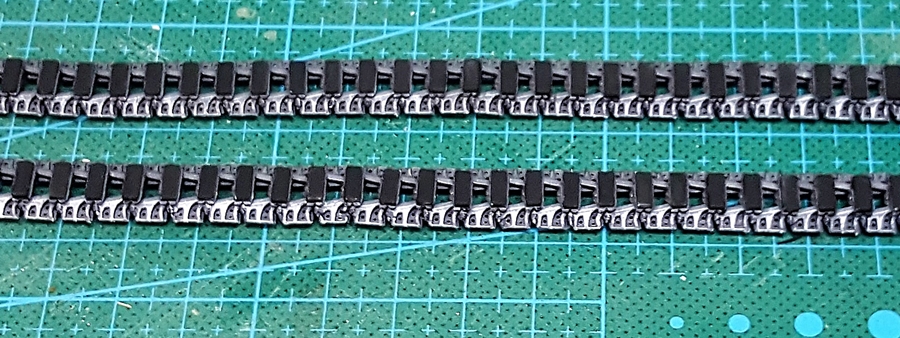 |
|
totalize
Full Member
  
Member since: February 2013
Don't take yourself too seriously. It's just plastic.
Posts: 260 
|
Post by totalize on Aug 31, 2016 15:05:56 GMT -5
|
|
|
|
Post by dierk on Sept 1, 2016 3:44:23 GMT -5
Tracktastic!  |
|
totalize
Full Member
  
Member since: February 2013
Don't take yourself too seriously. It's just plastic.
Posts: 260 
|
Post by totalize on Sept 3, 2016 14:18:42 GMT -5
|
|
|
|
Post by Leon on Sept 3, 2016 17:29:05 GMT -5
Nice progress Dave! Looking better and better.  |
|
totalize
Full Member
  
Member since: February 2013
Don't take yourself too seriously. It's just plastic.
Posts: 260 
|
Post by totalize on Sept 6, 2016 14:35:53 GMT -5
More work on the front fenders. The front fenders have some inaccuracies which were mentioned by Terry Ashley on PMMS and confirmed by Photos of the actual vehicle. So, I did some minor scatchbuilding to make it more accurate. First I removed the nuts on the front and top of the fender section then used some thin plastic card to extend the raised section of the fenders in the front and top of the vehicle to bring it closer to the radiator per the actual vehicle. I then filled and sanded the area, added back the nuts using some Masterclub hex nuts.I also added some stretched sprue to the fender lip in the front to highlight this detail. I then primed using Tamiya surface primer. Finally I gave it coat of XF63 Panzer gray. Check it. Actual vehicle. 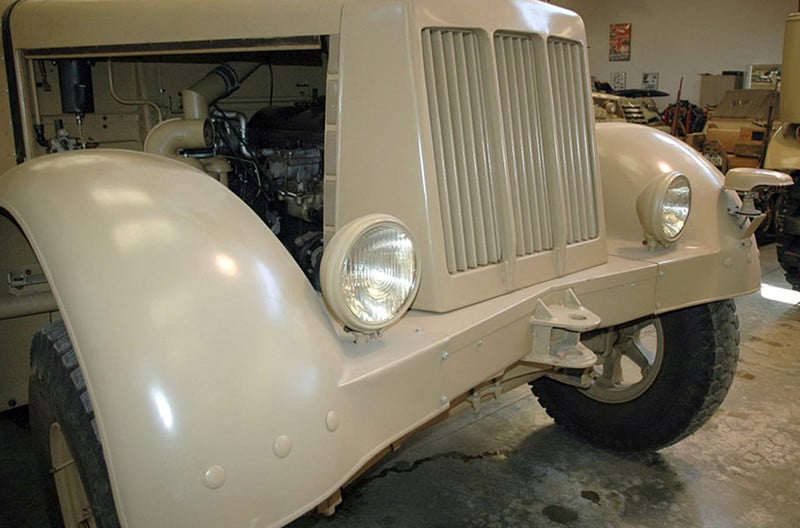 PMMS pic showing the issue. 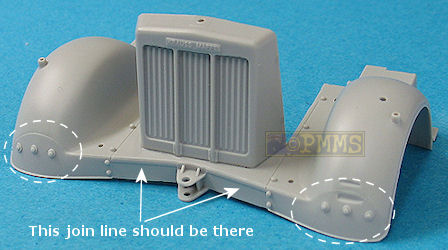 Completed. 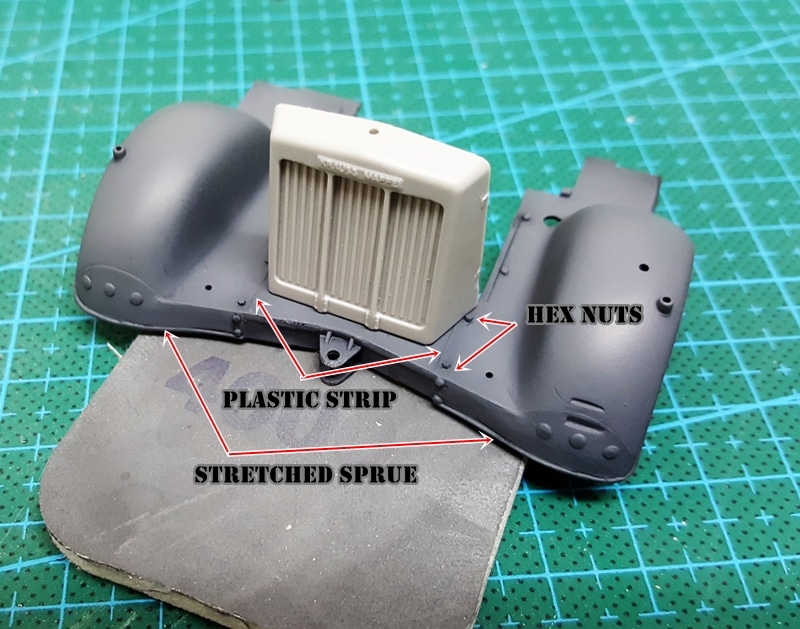 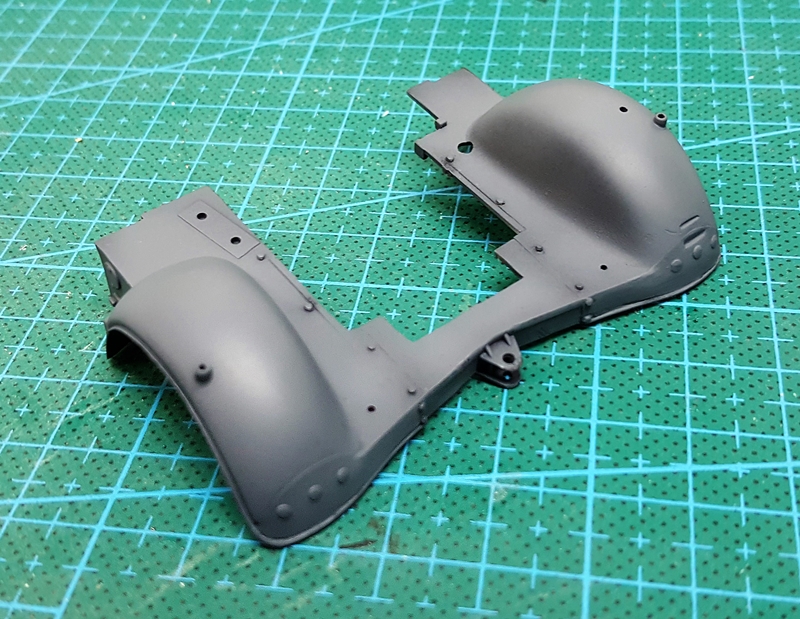 |
|
|
|
Post by Leon on Sept 6, 2016 15:47:18 GMT -5
Nice rework on the fenders Dave! Primer looks good.  |
|
totalize
Full Member
  
Member since: February 2013
Don't take yourself too seriously. It's just plastic.
Posts: 260 
|
Post by totalize on Sept 10, 2016 13:37:58 GMT -5
thanks leon. Work continues on the trumpy 8 ton HT with flakvierling. Firewall built up and primed as well as the Flak mount and exhaust/muffler section. I also got a got of Late war Dunkel Gelb over the Panzer gray rear bed. Almost ready for chipping. 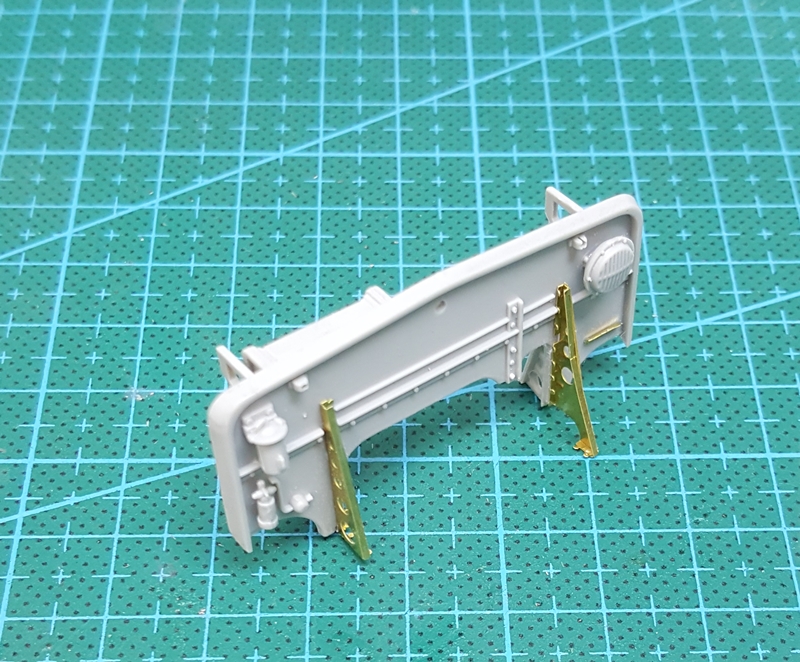 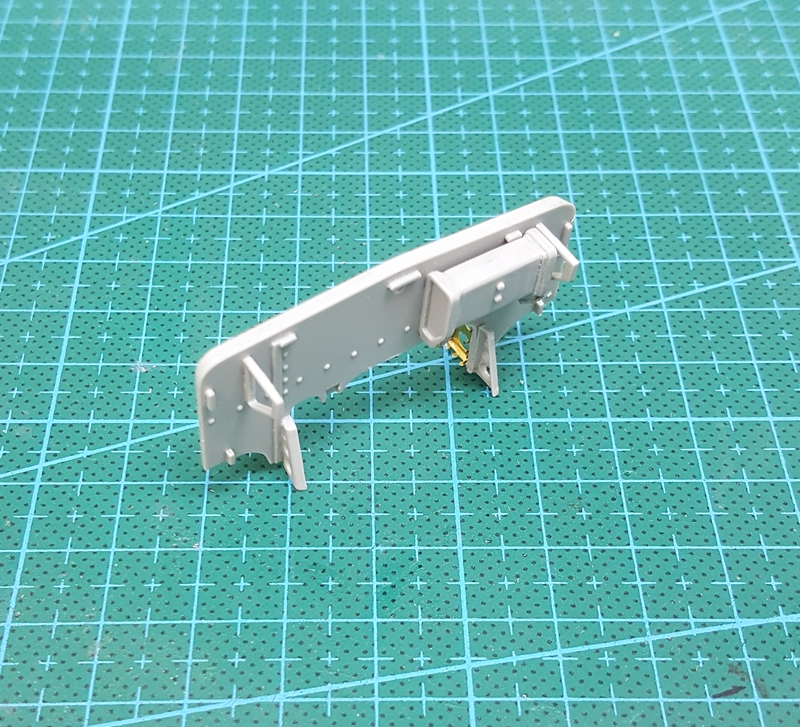 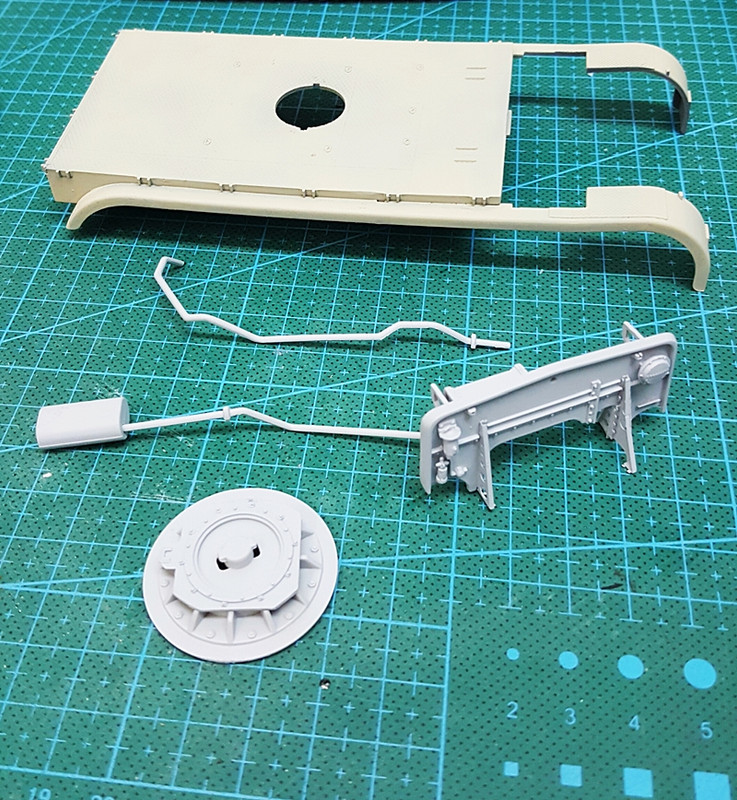 |
|
|
|
Post by Leon on Sept 10, 2016 17:50:28 GMT -5
Nice progress Dave!
|
|
totalize
Full Member
  
Member since: February 2013
Don't take yourself too seriously. It's just plastic.
Posts: 260 
|
Post by totalize on Sept 12, 2016 18:28:27 GMT -5
Thanks leon. More work. Painting and weathering the exhausts to make give them a worn rusty look. 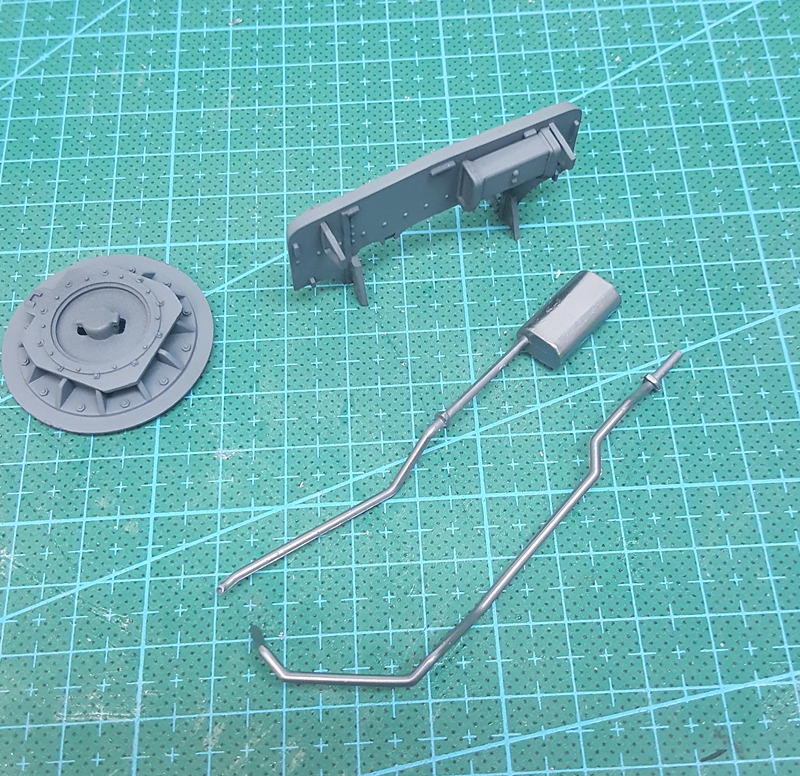 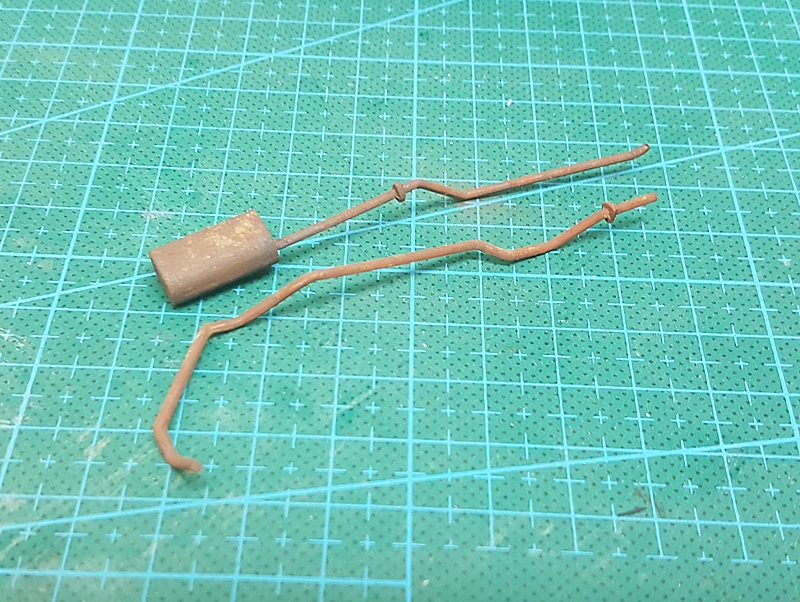 |
|
|
|
Post by dierk on Sept 13, 2016 7:36:53 GMT -5
Coming along nicely!
|
|
Wes
Full Member
  
Member since: November 2011
Posts: 686
Nov 16, 2011 9:34:50 GMT -5
Nov 16, 2011 9:34:50 GMT -5
|
Post by Wes on Sept 13, 2016 9:20:52 GMT -5
Awesome work on the exhaust Dave.
What process did you use?
|
|
totalize
Full Member
  
Member since: February 2013
Don't take yourself too seriously. It's just plastic.
Posts: 260 
|
Post by totalize on Sept 15, 2016 6:42:38 GMT -5
Wes. I used AK interactive dark streaking grime, rust, dark wash, mig rust pigments, mig desert sand pigment.
|
|
totalize
Full Member
  
Member since: February 2013
Don't take yourself too seriously. It's just plastic.
Posts: 260 
|
Post by totalize on Sept 15, 2016 6:46:33 GMT -5
|
|